Introduction
Animating text along a spiral path is a creative way to add motion and visual interest to your design. In After Effects, you can quickly achieve this effect using built-in text animation presets and then customize the look to match your style. In this tutorial, you’ll learn how to create and refine spiral text animation step by step.
Step 1: Create a New Composition
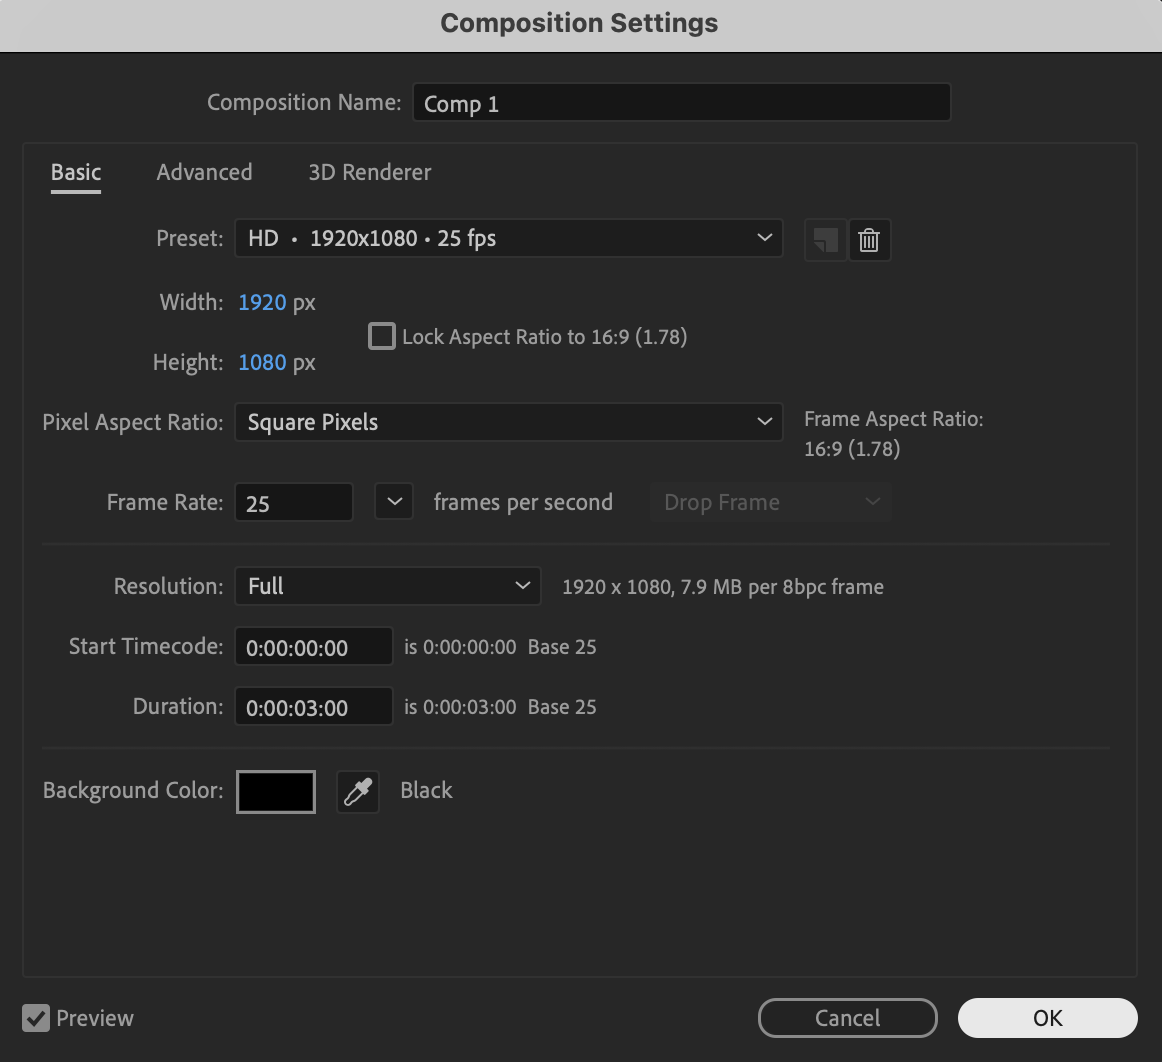
Click New Composition, choose your desired resolution and frame rate, and press OK to create your working timeline.
 Step 2: Create a Text Layer
Select the Type Tool (Ctrl/Cmd + T) and click inside the Composition panel to create a new text layer, then use the Align panel to center it horizontally and vertically.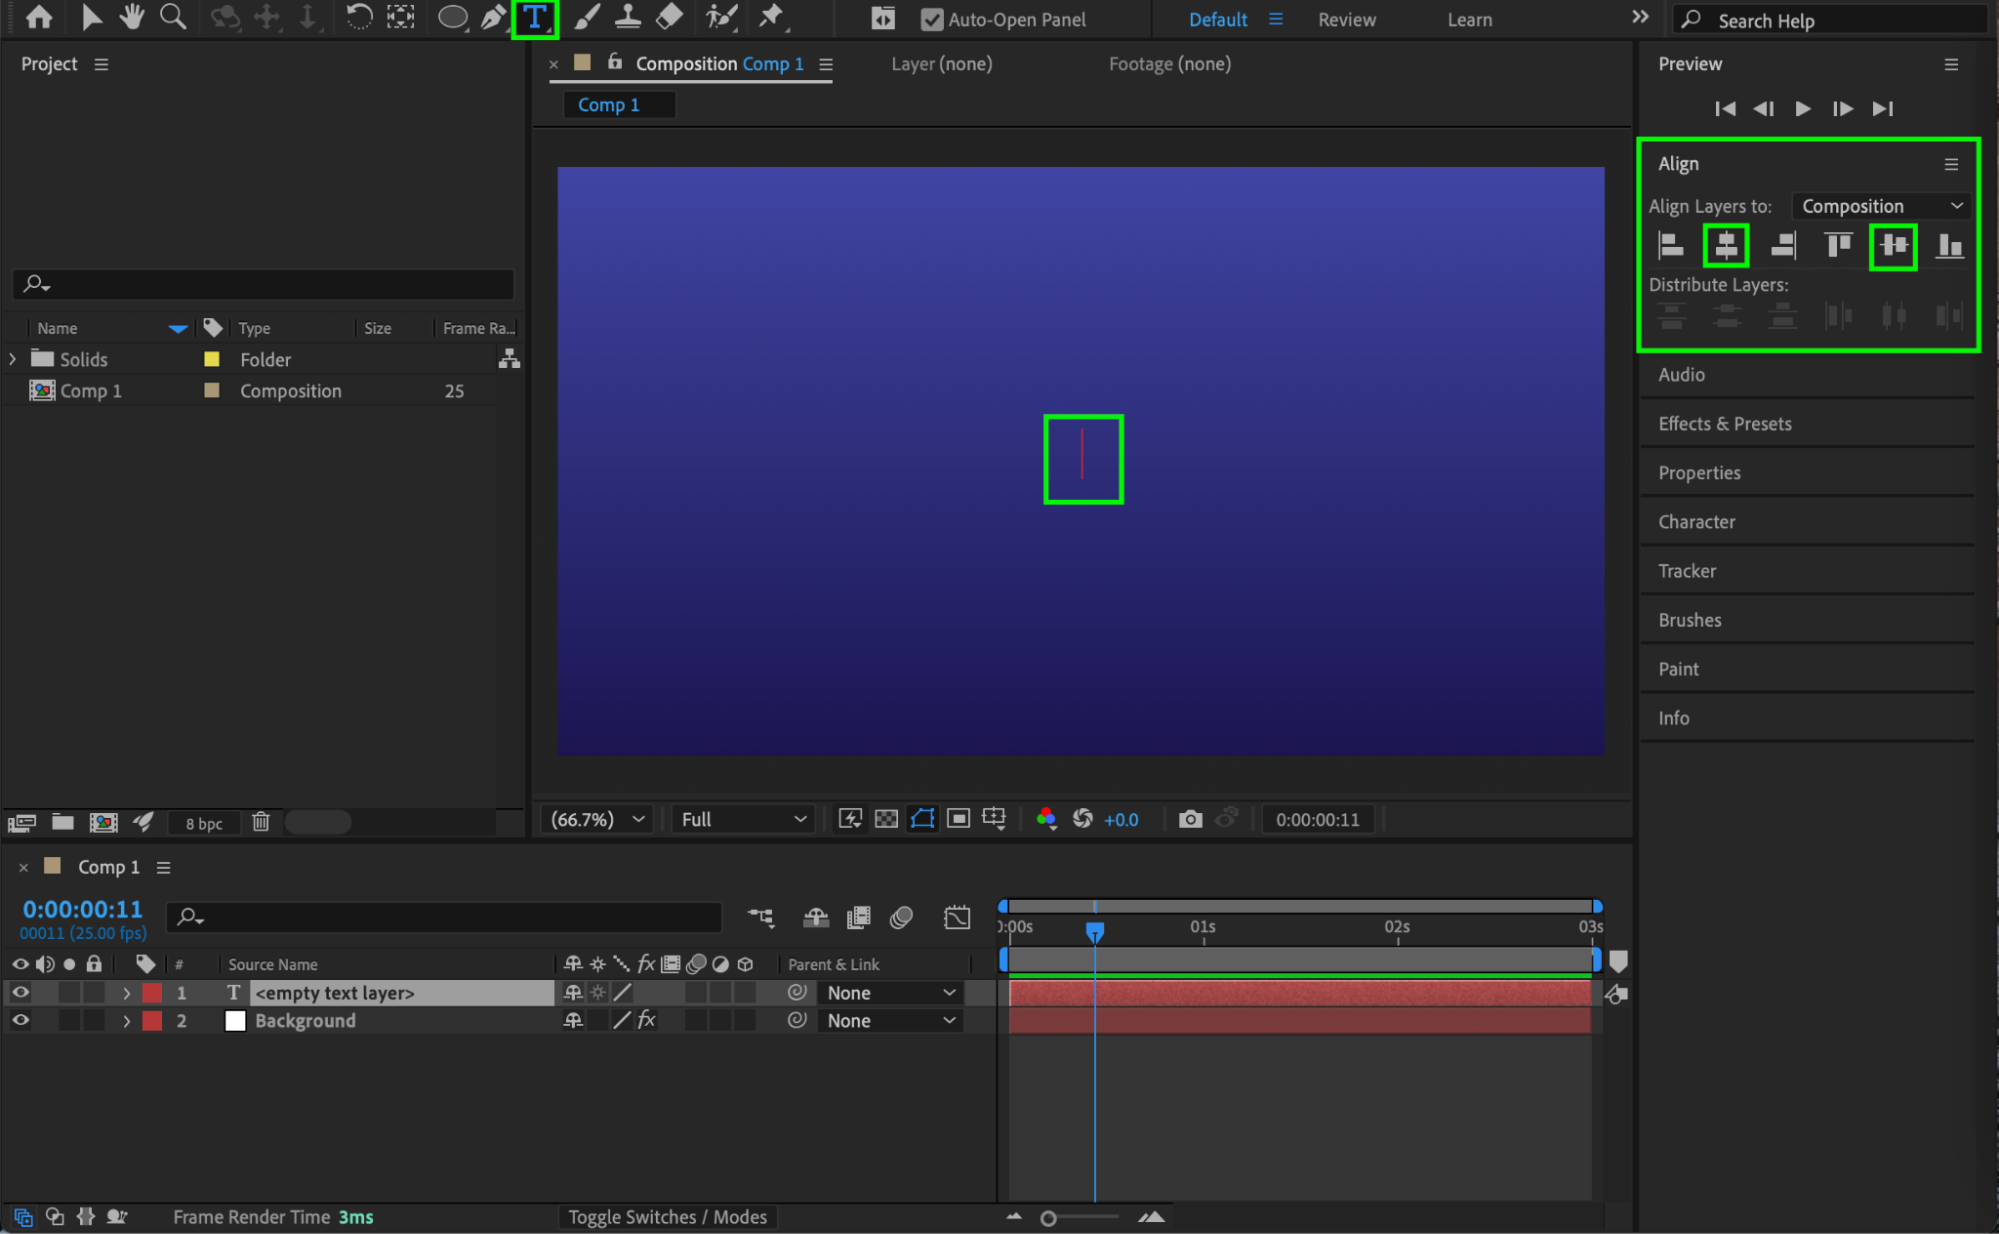
Get 10% off when you subscribe to our newsletter

Step 3: Apply the Spiral Animation Preset
Open the Effects & Presets panel, search for Spiral Long, and drag the preset onto your text layer to automatically apply the spiral animation effect.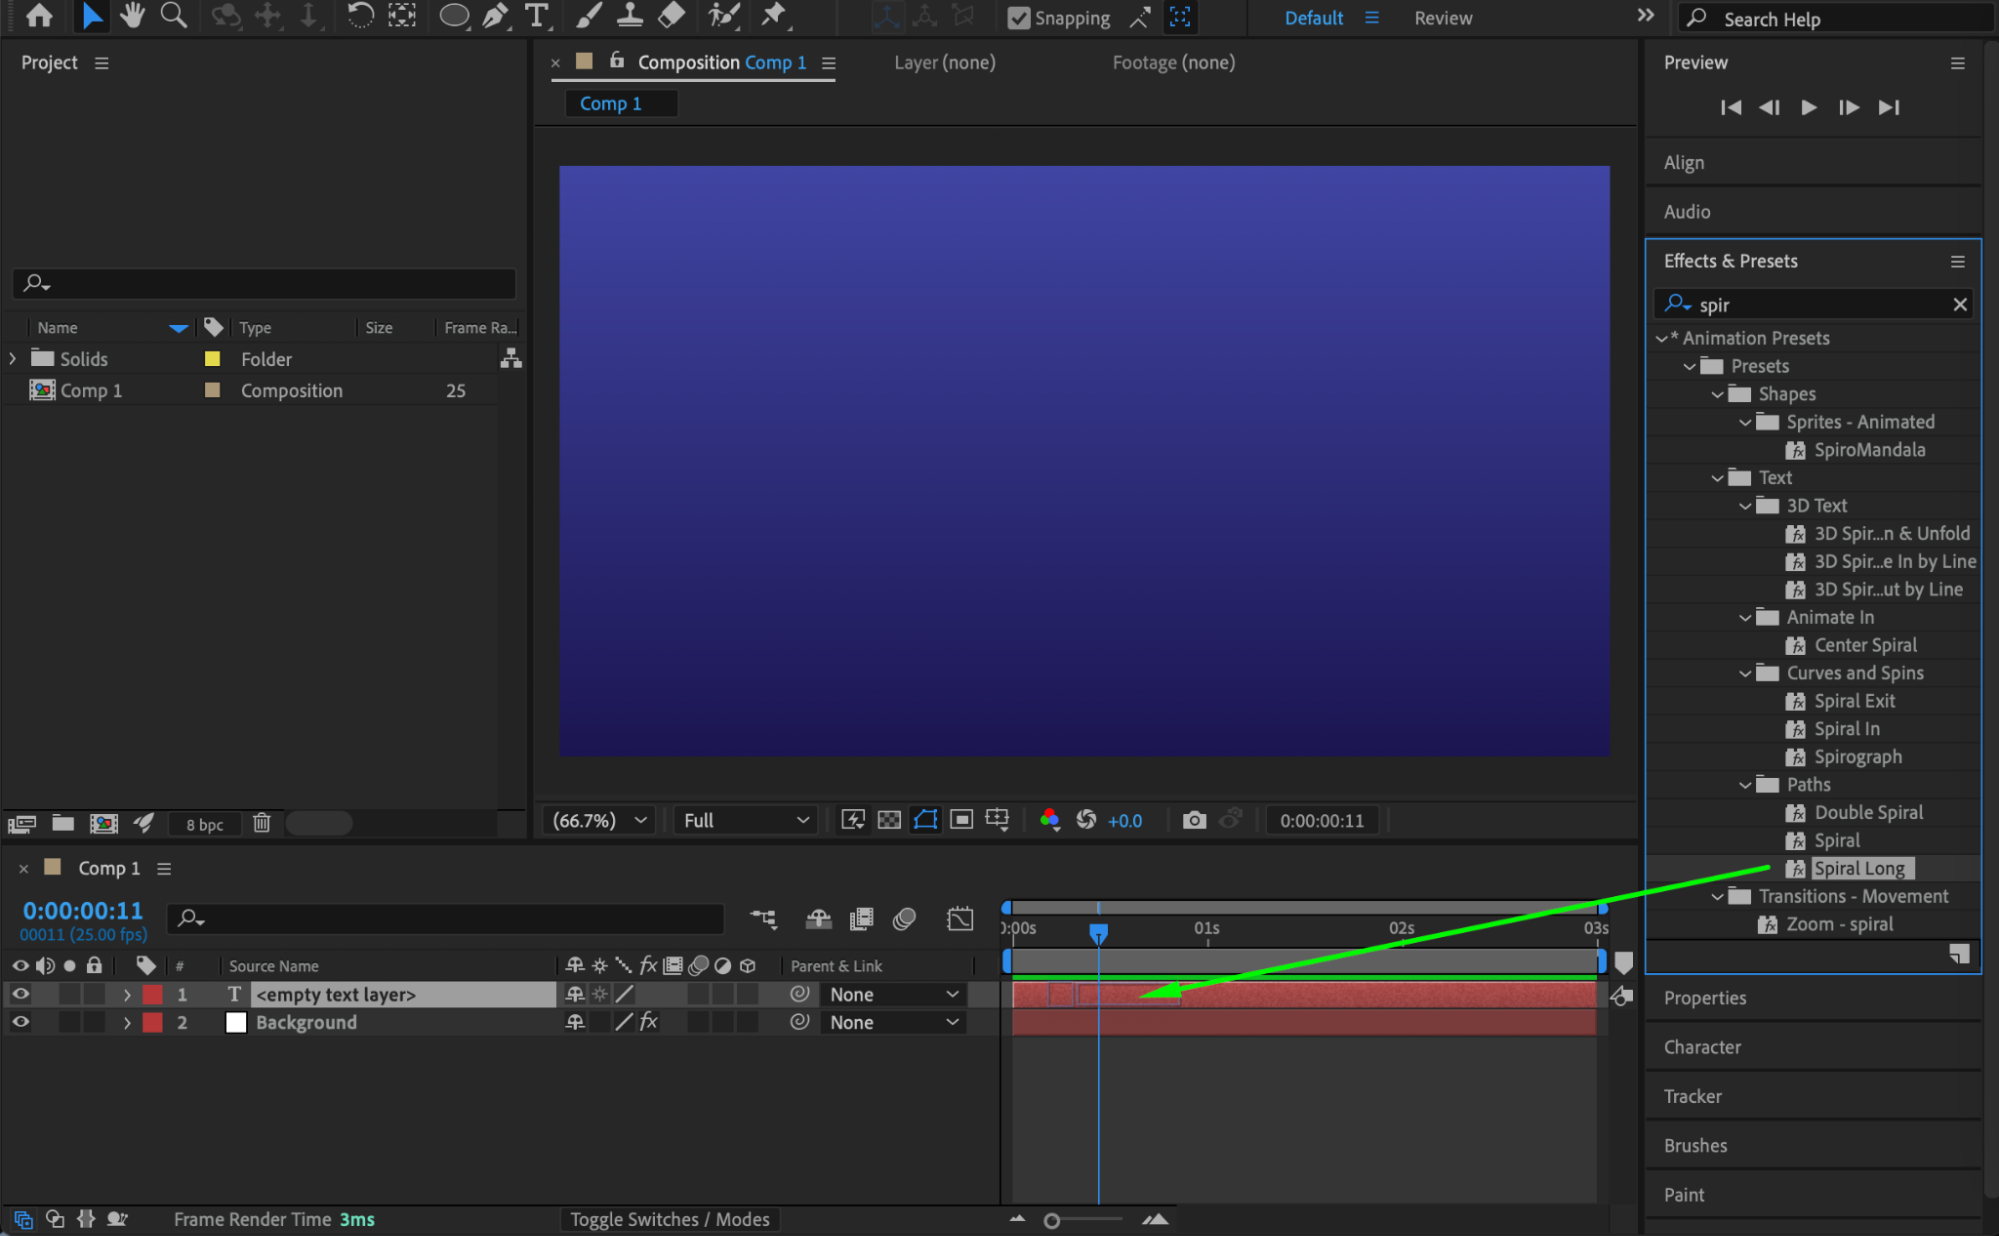
Step 4: Adjust Scale and Position
Select the text layer and modify its Scale (S) and, if necessary, its Position (P) values to properly fit the spiral within your composition.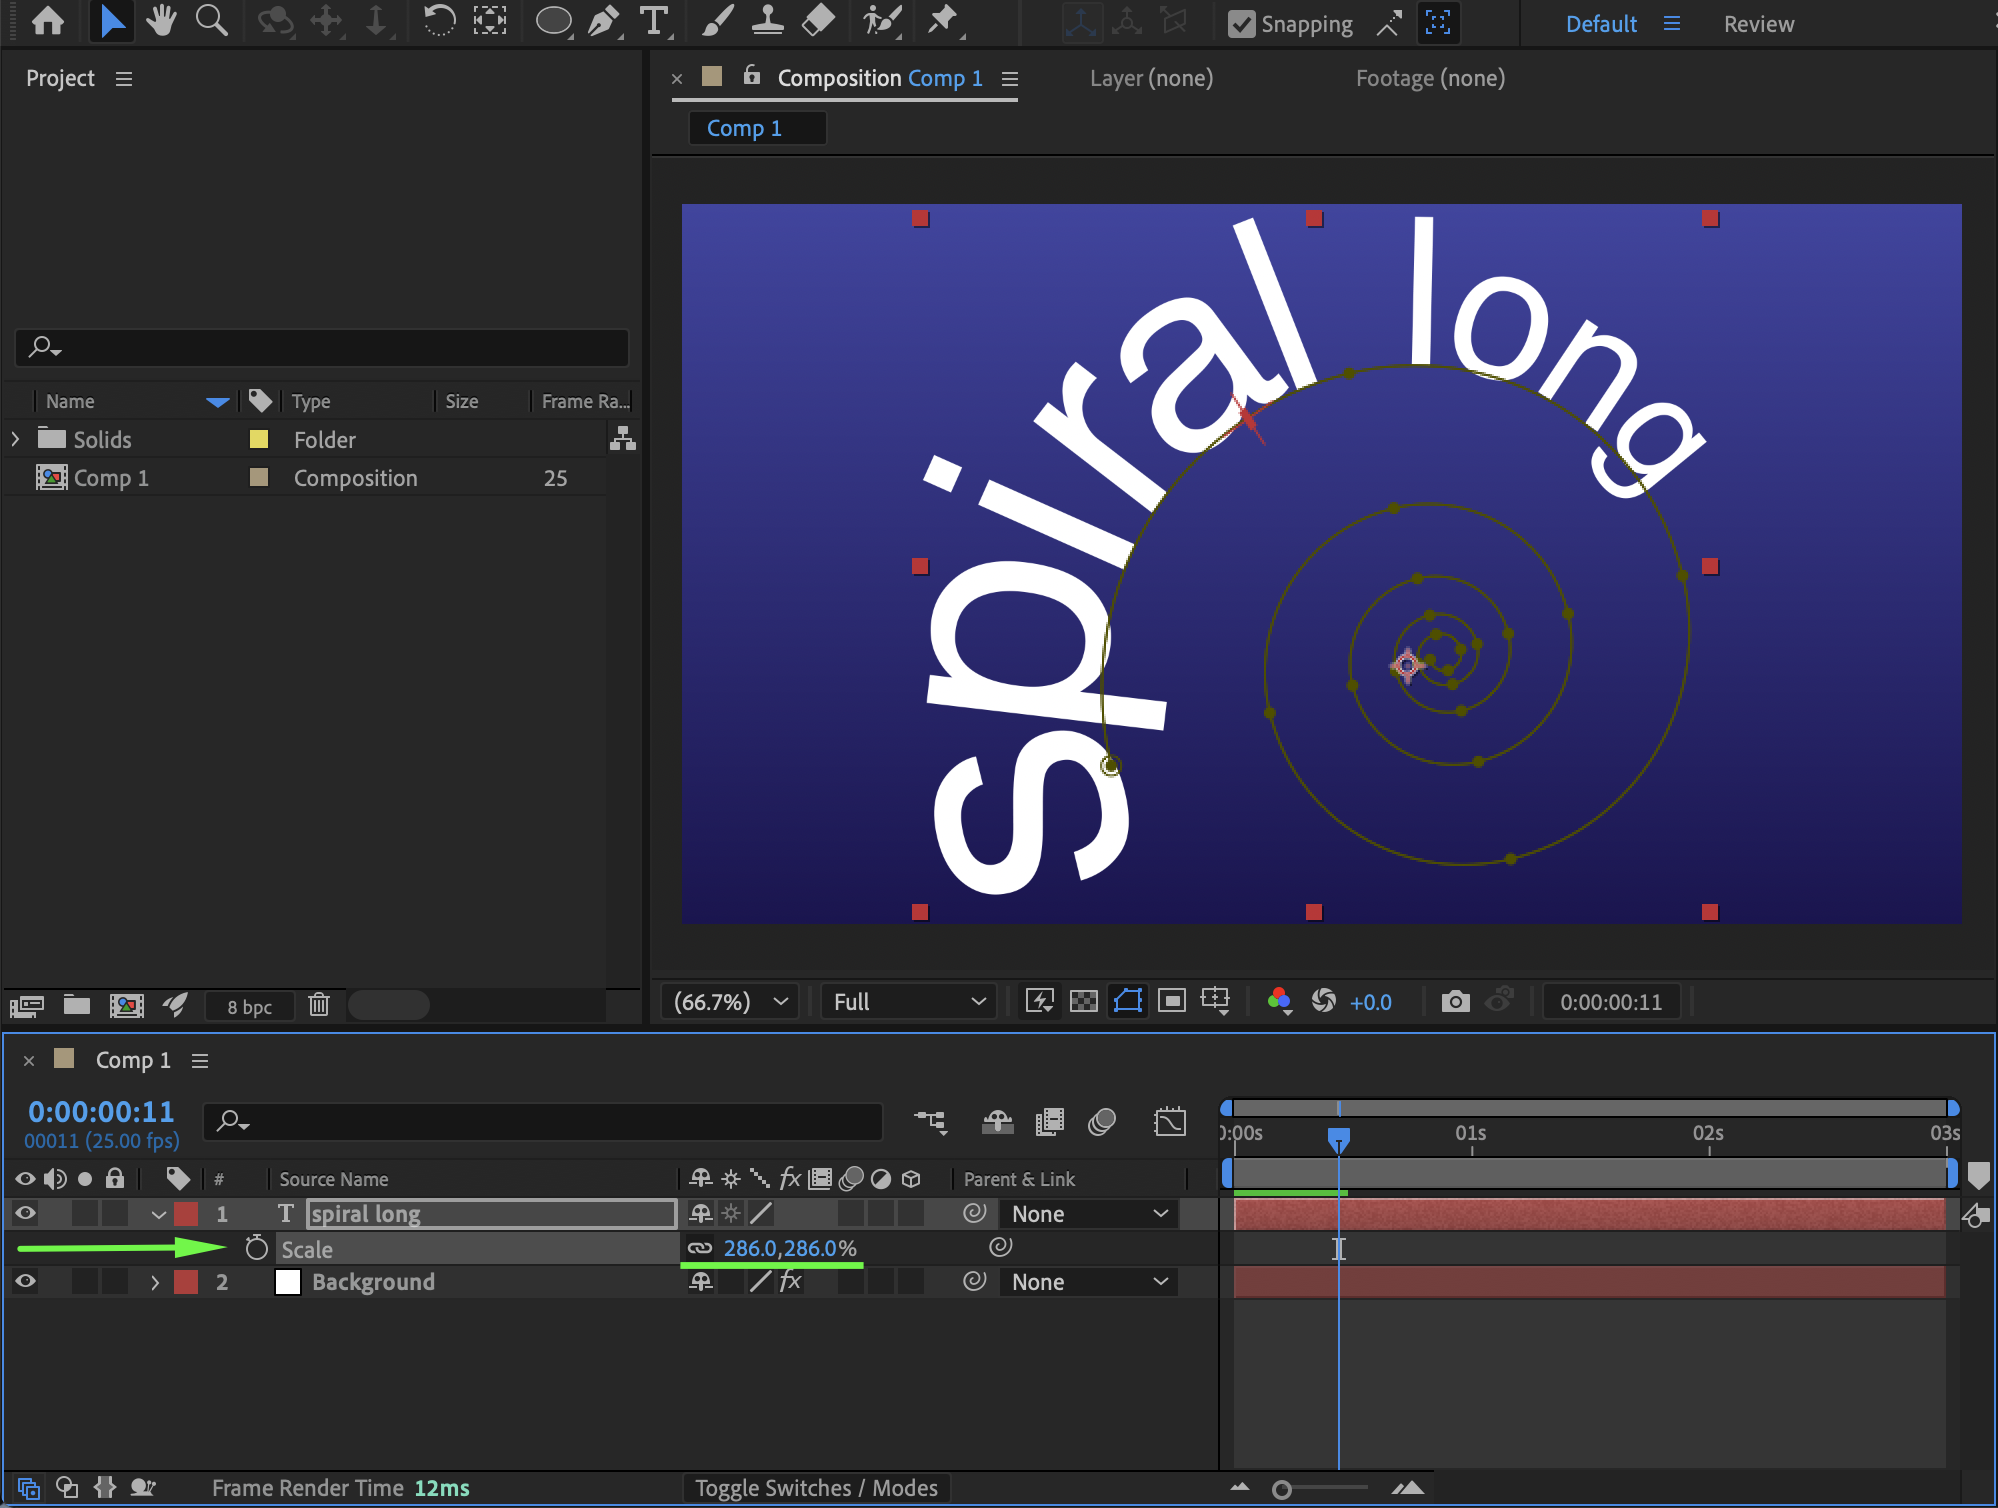 Step 5: Customize the Text, Font, and Color
Double-click the text layer in the Composition panel to highlight the default “Spiral Long” text, replace it with your own text, and then open the Character panel to adjust the font, size, color, and other typographic settings as needed.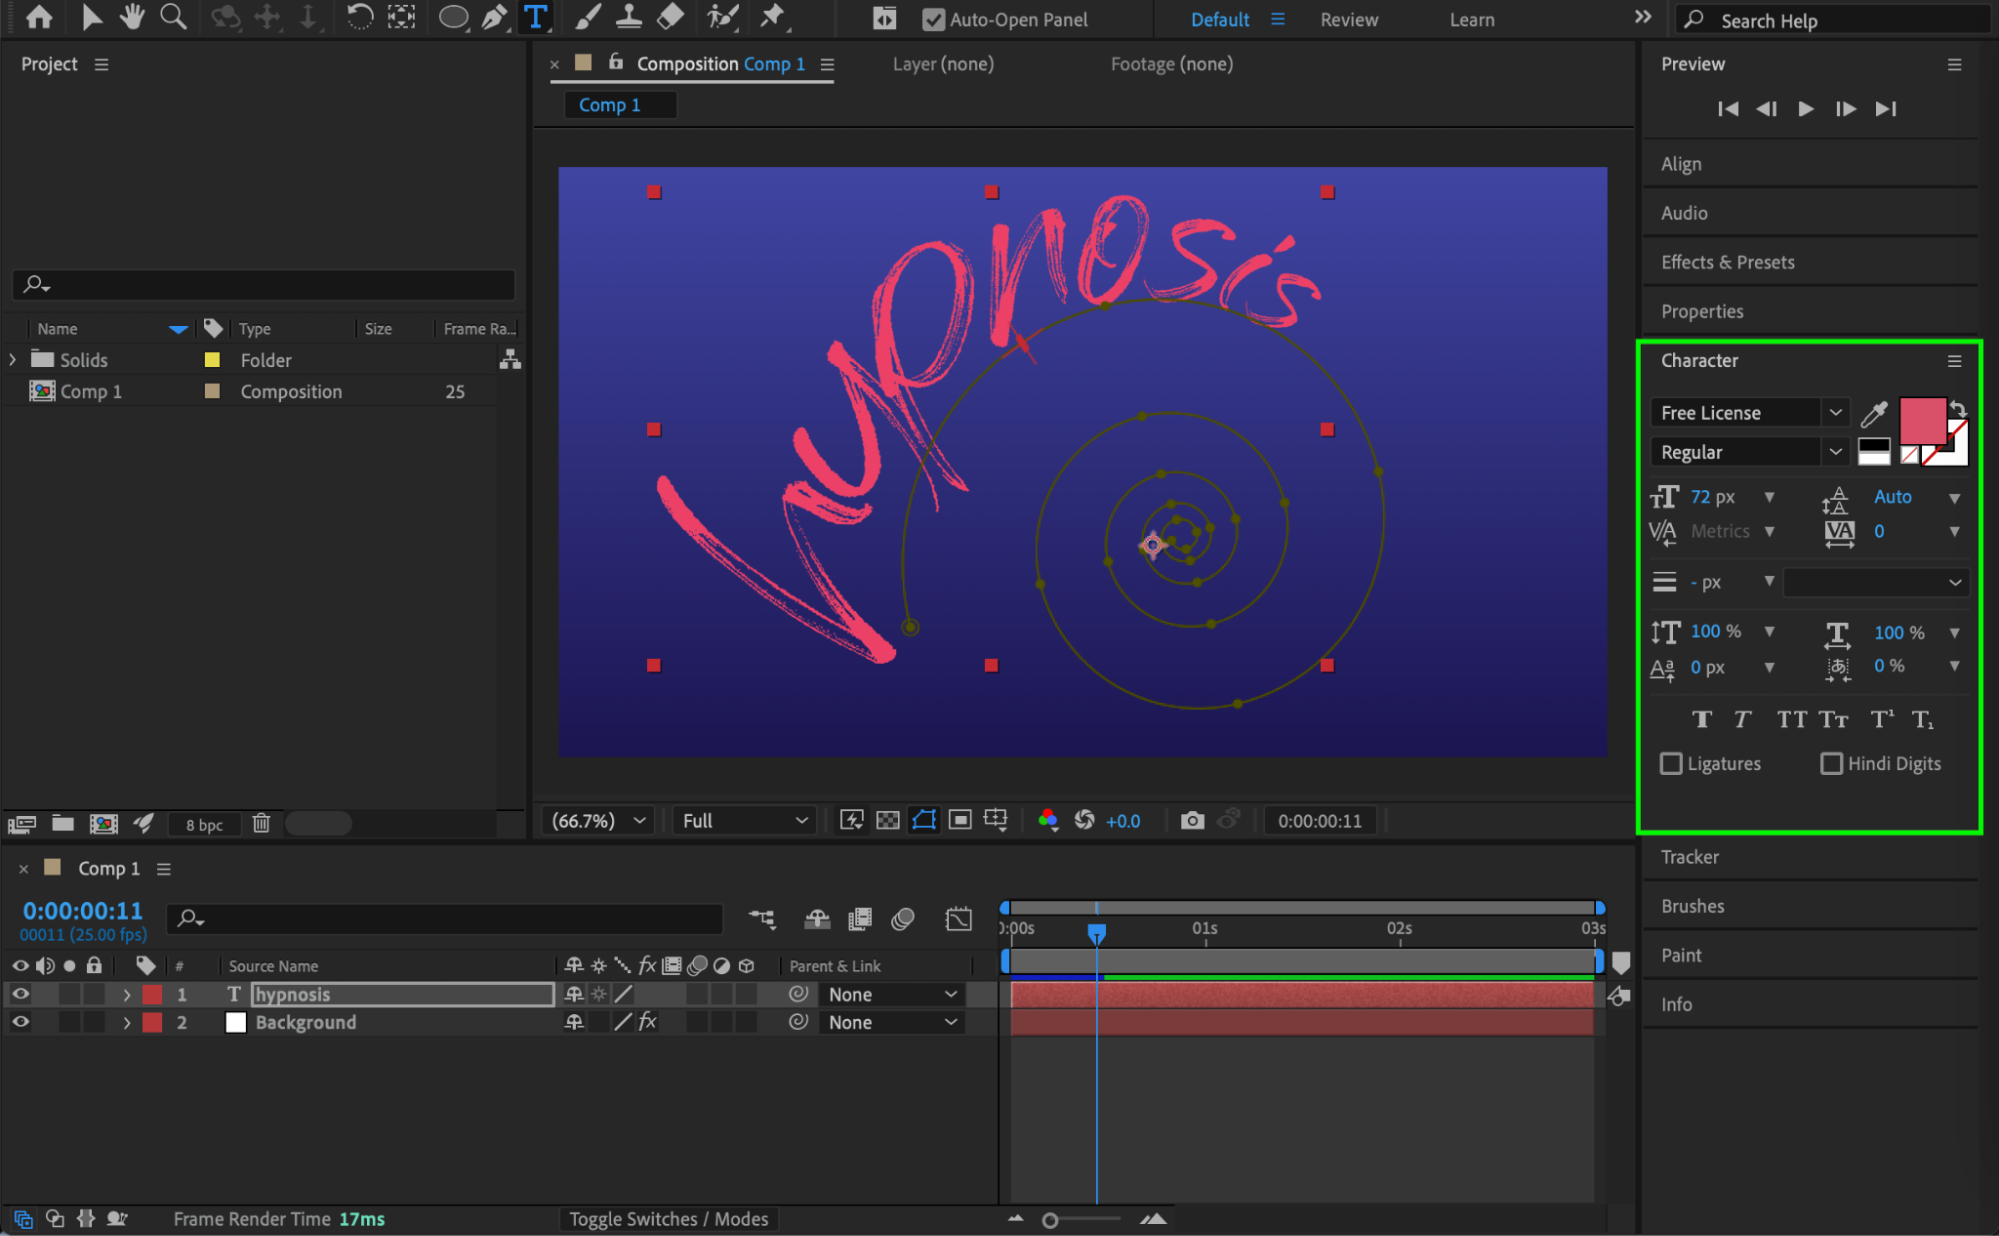
Step 6: Fine-Tune the Animation Settings
Expand the text layer properties in the Timeline to access the applied preset controls, where you can customize parameters such as Scale per Character, Tracking Type, Tracking Amount, and other animation settings.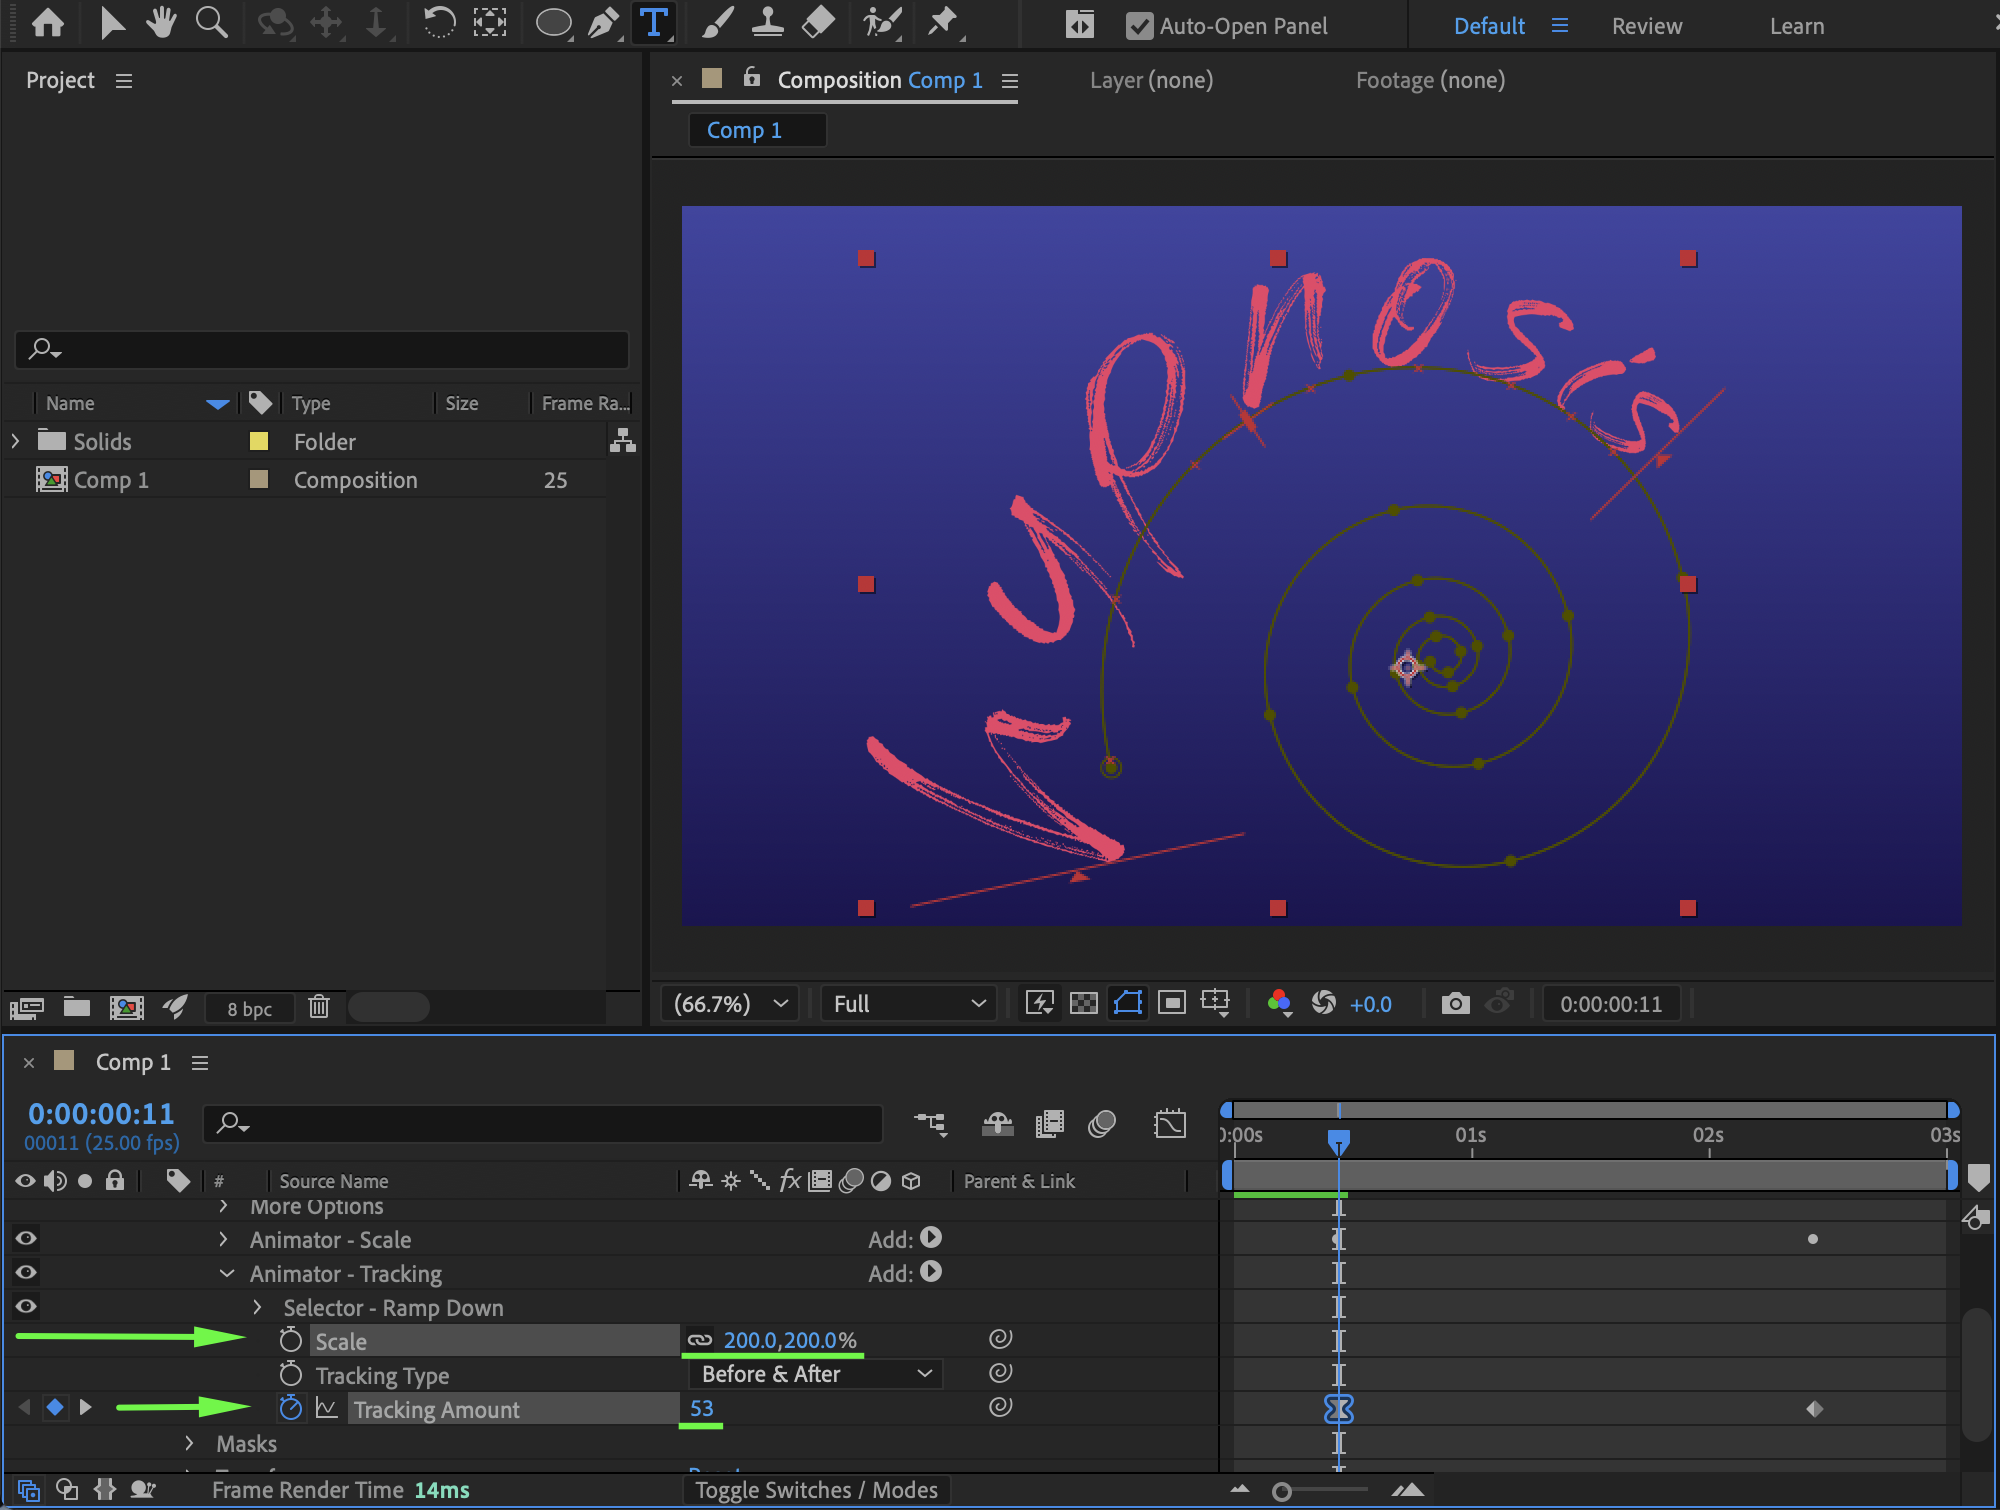 Step 7: Preview the Animation
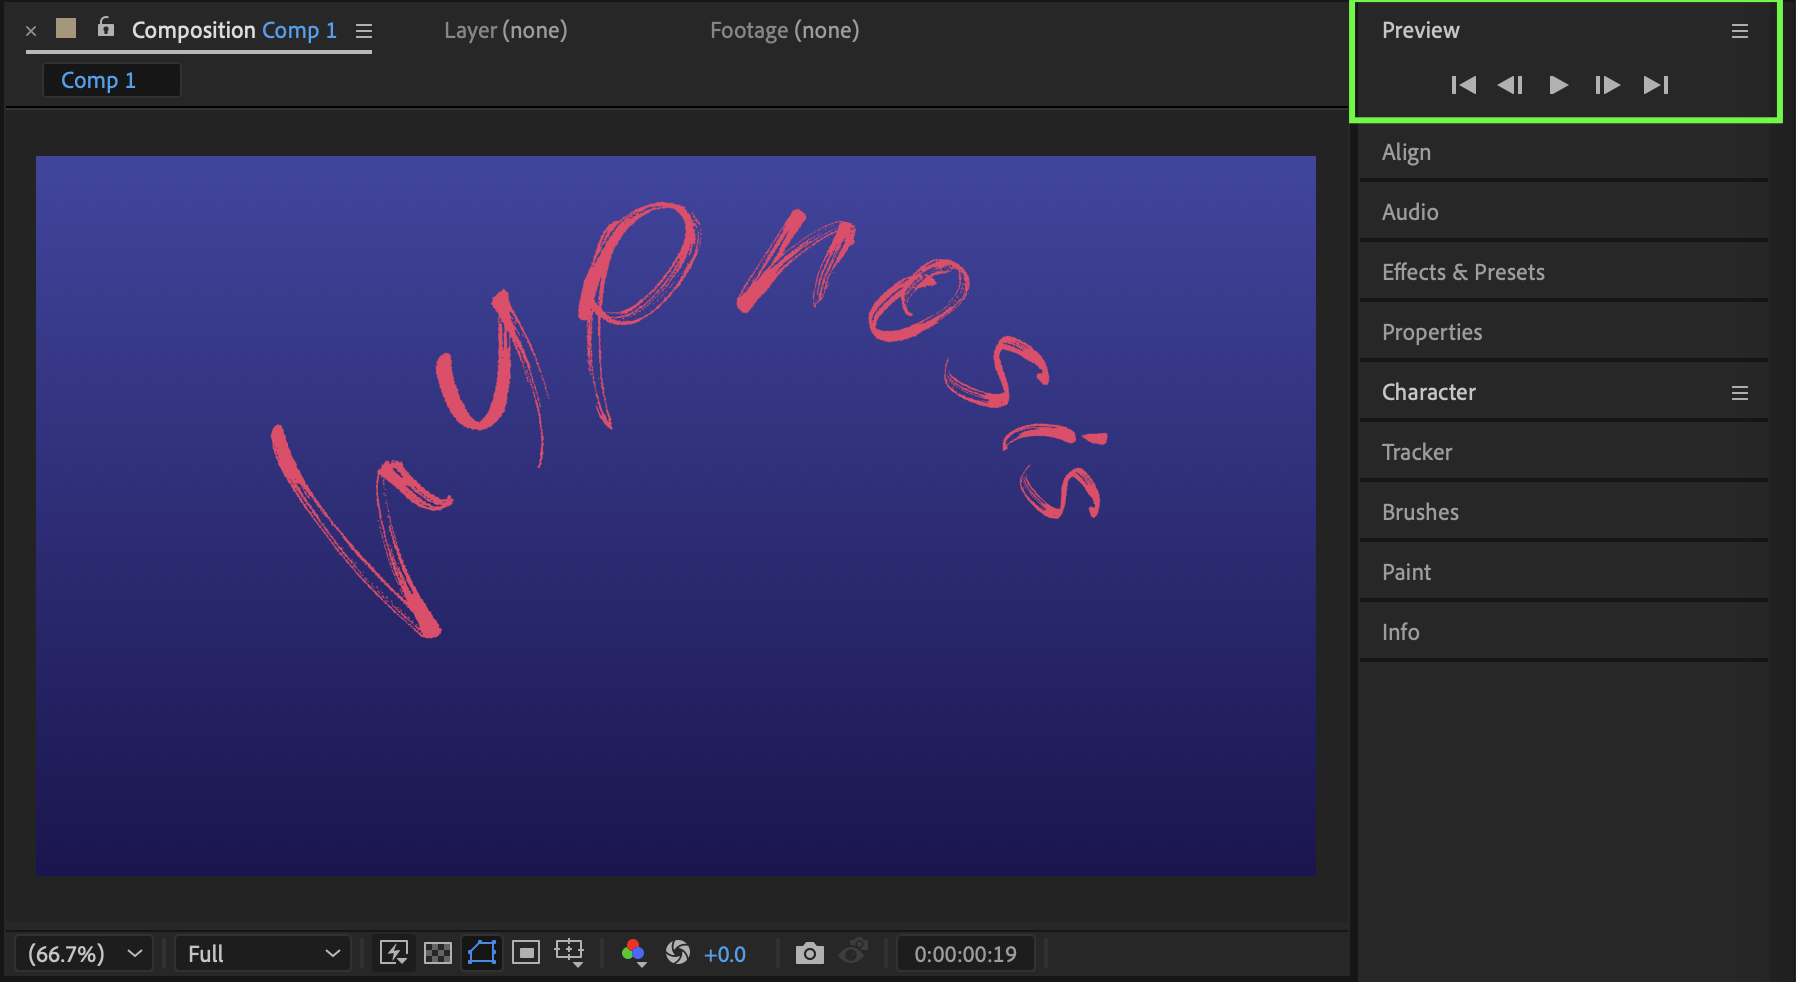
Press Spacebar or use RAM Preview to review the spiral animation and make final adjustments if needed.
Conclusion
By creating a text layer, applying the Spiral Long preset, and customizing typography and animation settings, you can quickly build an engaging spiral text animation in After Effects. With further refinement, you can adapt this effect to suit intros, titles, or creative motion graphics projects.
Our Bestsellers
Our Bestsellers

