Introduction
Creating an animated spiral effect in After Effects can add depth and motion to backgrounds, transitions, or abstract compositions. In this tutorial, you will learn how to build a spiral-style animation using a shape path, Wave Warp distortion, blur effects, and layer styles for a polished result.
Step 1: Create a New Composition
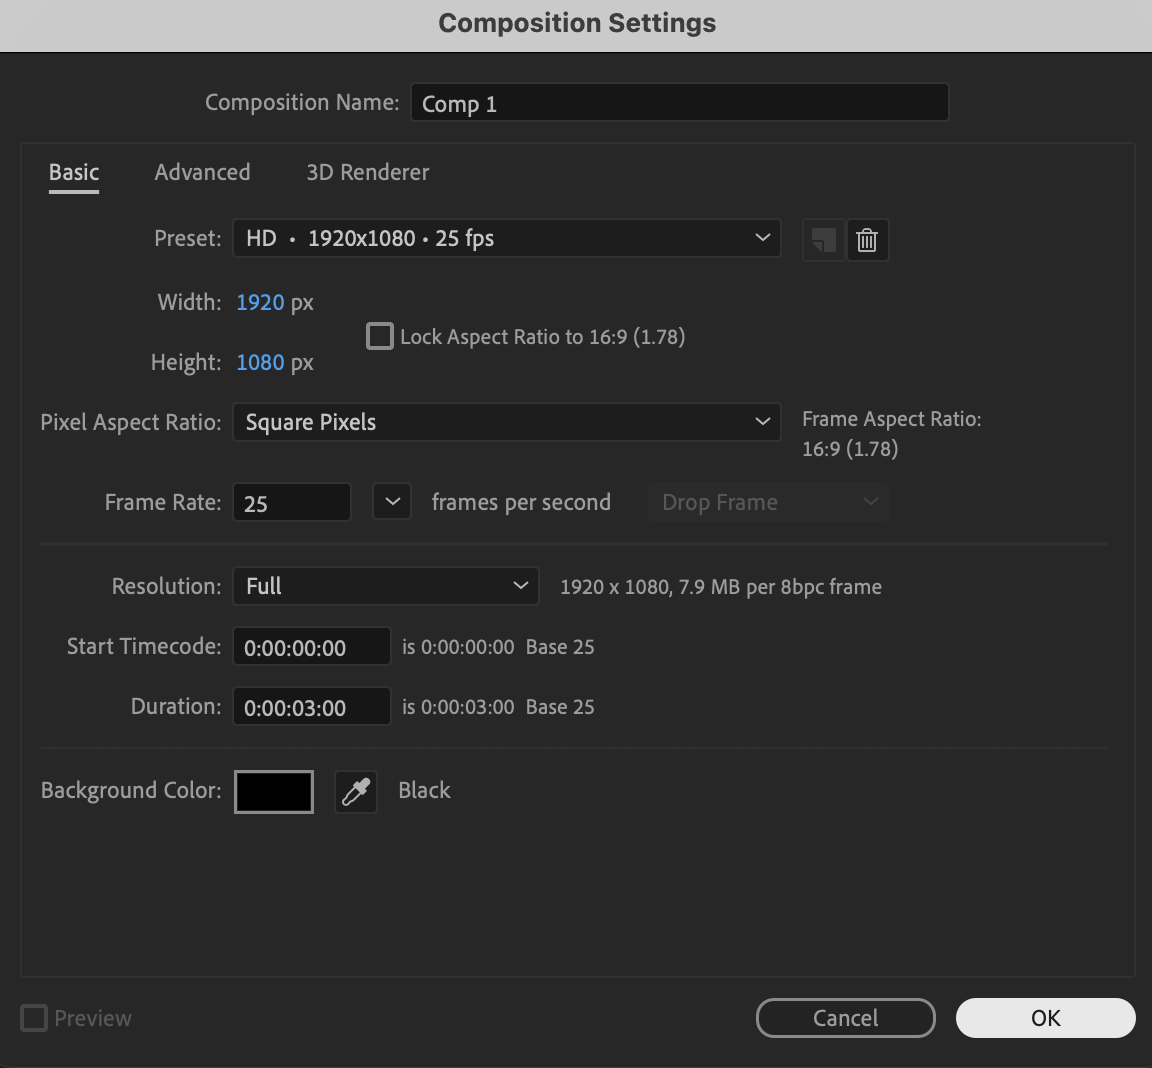
Click New Composition, choose your desired resolution and frame rate, and press OK to create your working timeline.
 Step 2: Create the Base Line
Select the Pen Tool (G) and draw a vertical line that starts in the center of the composition and extends downward beyond the bottom of the frame; set Fill to None, choose a Stroke color of your choice with a Stroke Width of 23, then expand the layer properties and set Line Cap to Round Cap for smoother edges.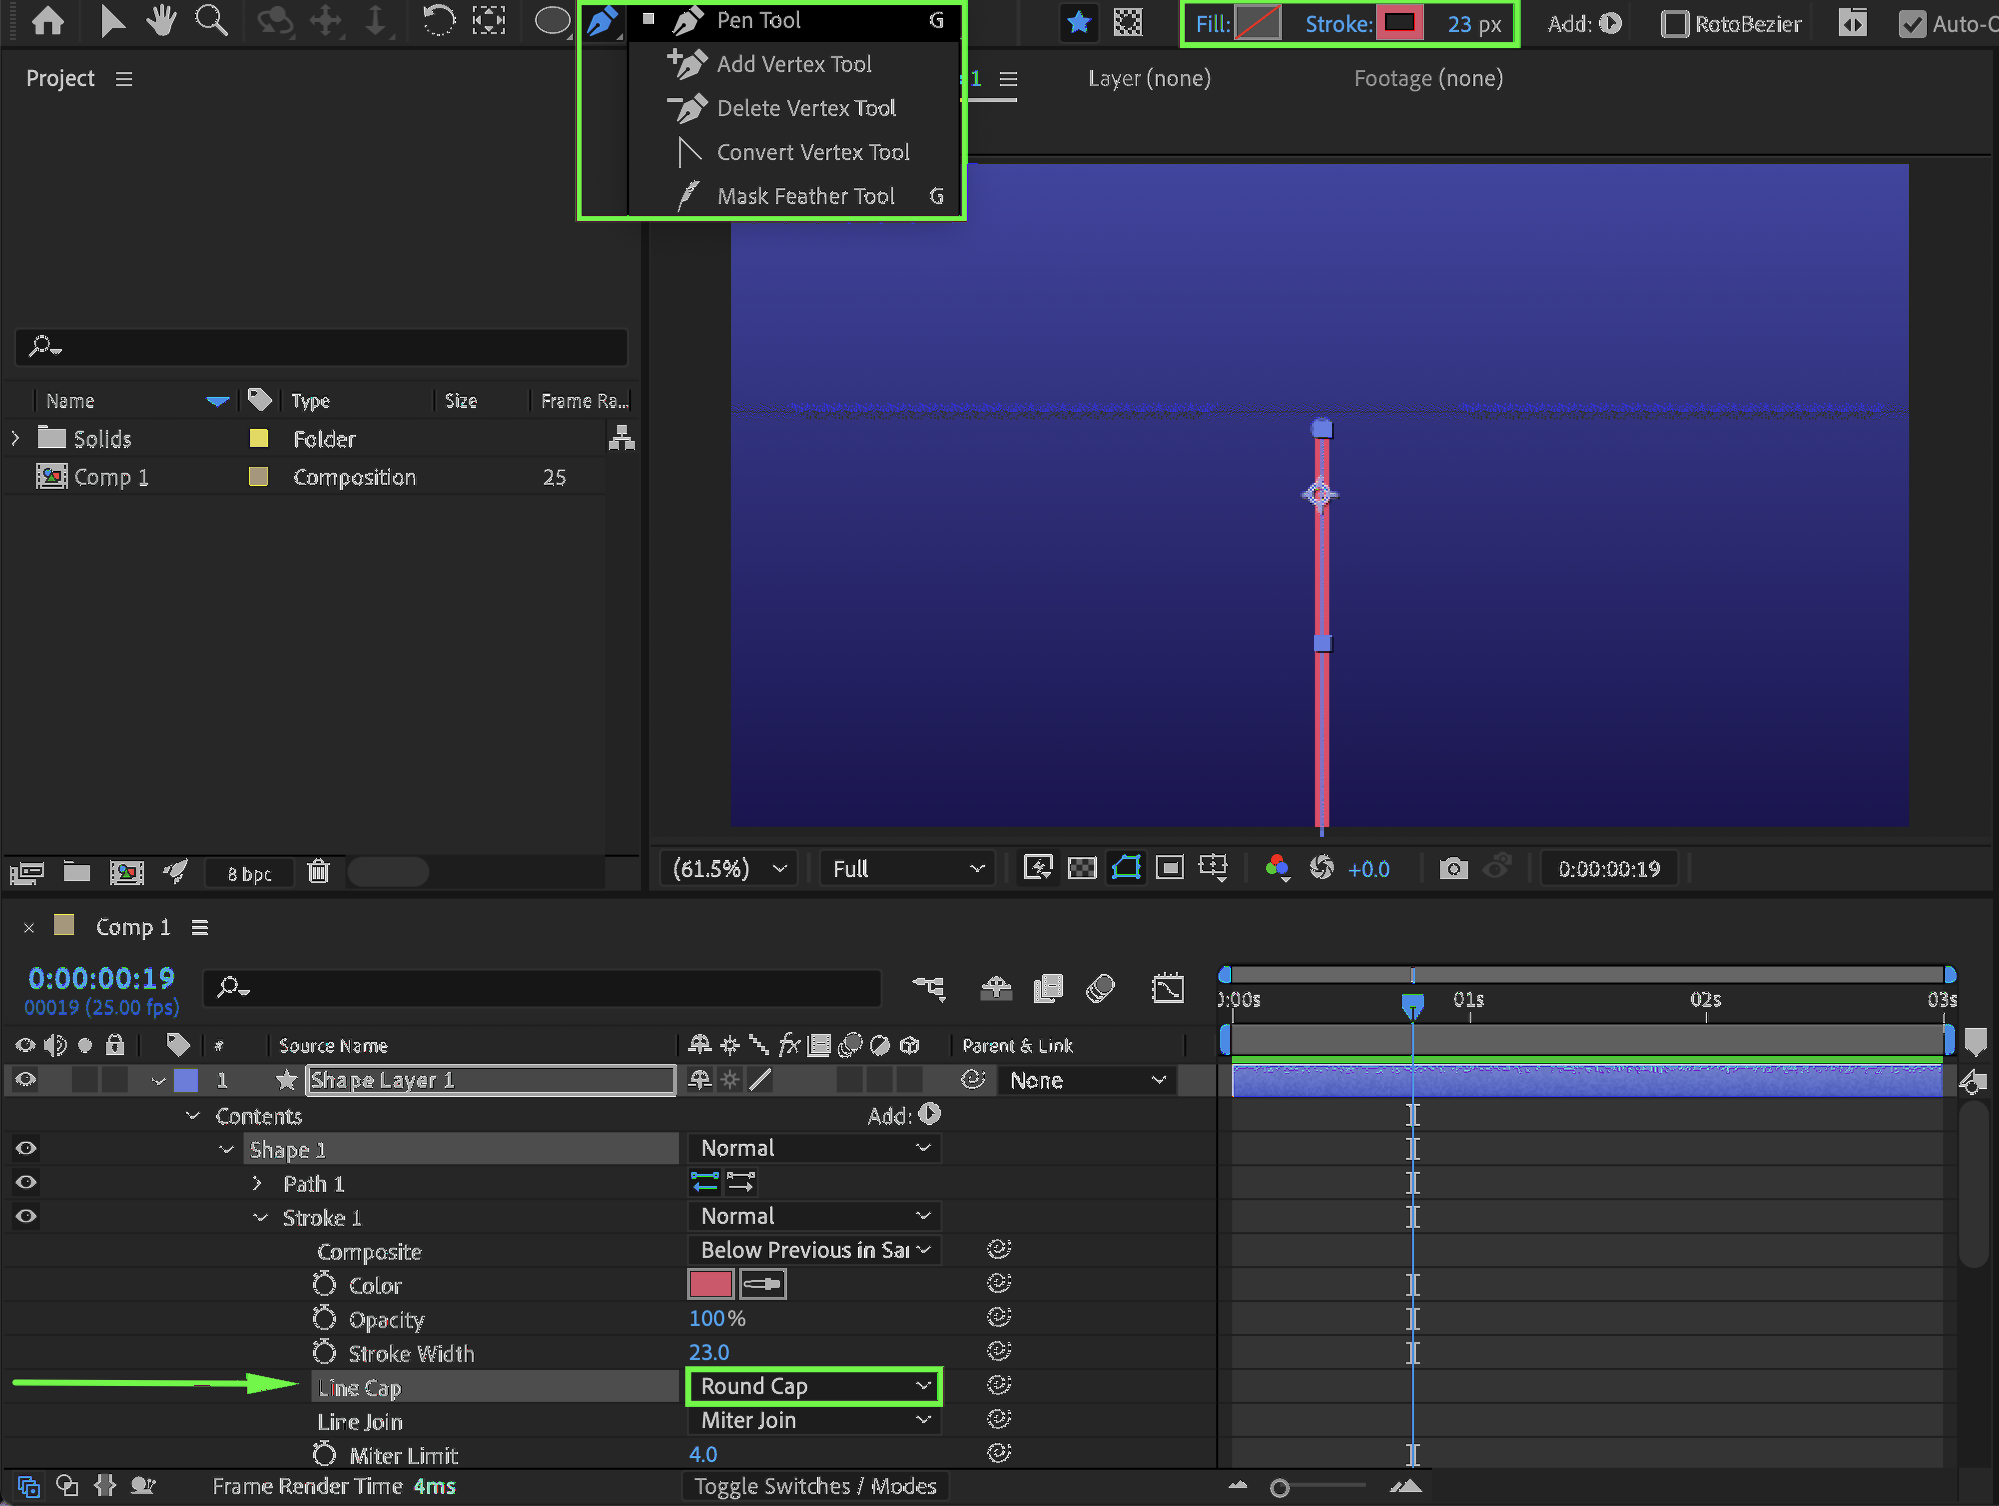 Step 3: Apply the Wave Warp Effect
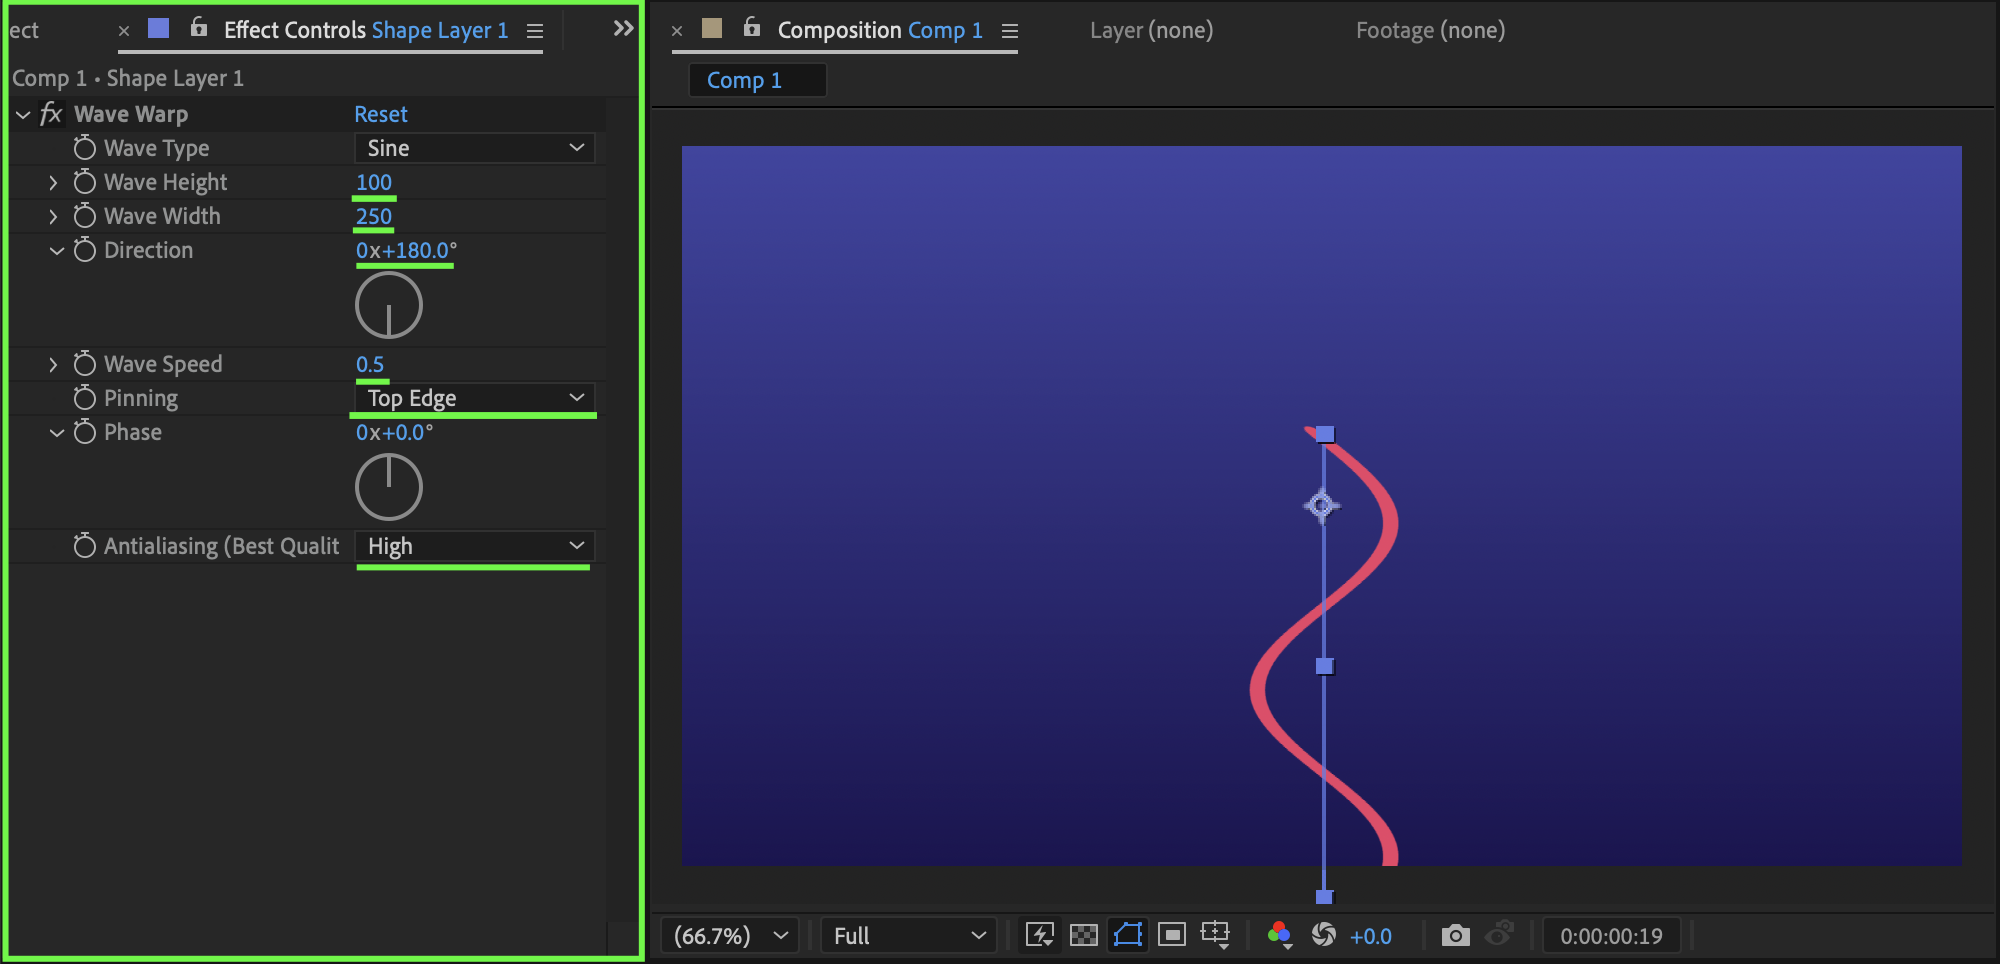
Go to the Effects & Presets panel, search for Wave Warp, and apply it to the layer, then set Wave Height to 100, Wave Width to 250, Direction to 180°, Wave Speed to 0.5, Pinning to Top Edges, and Antialiasing to High to create a flowing spiral motion.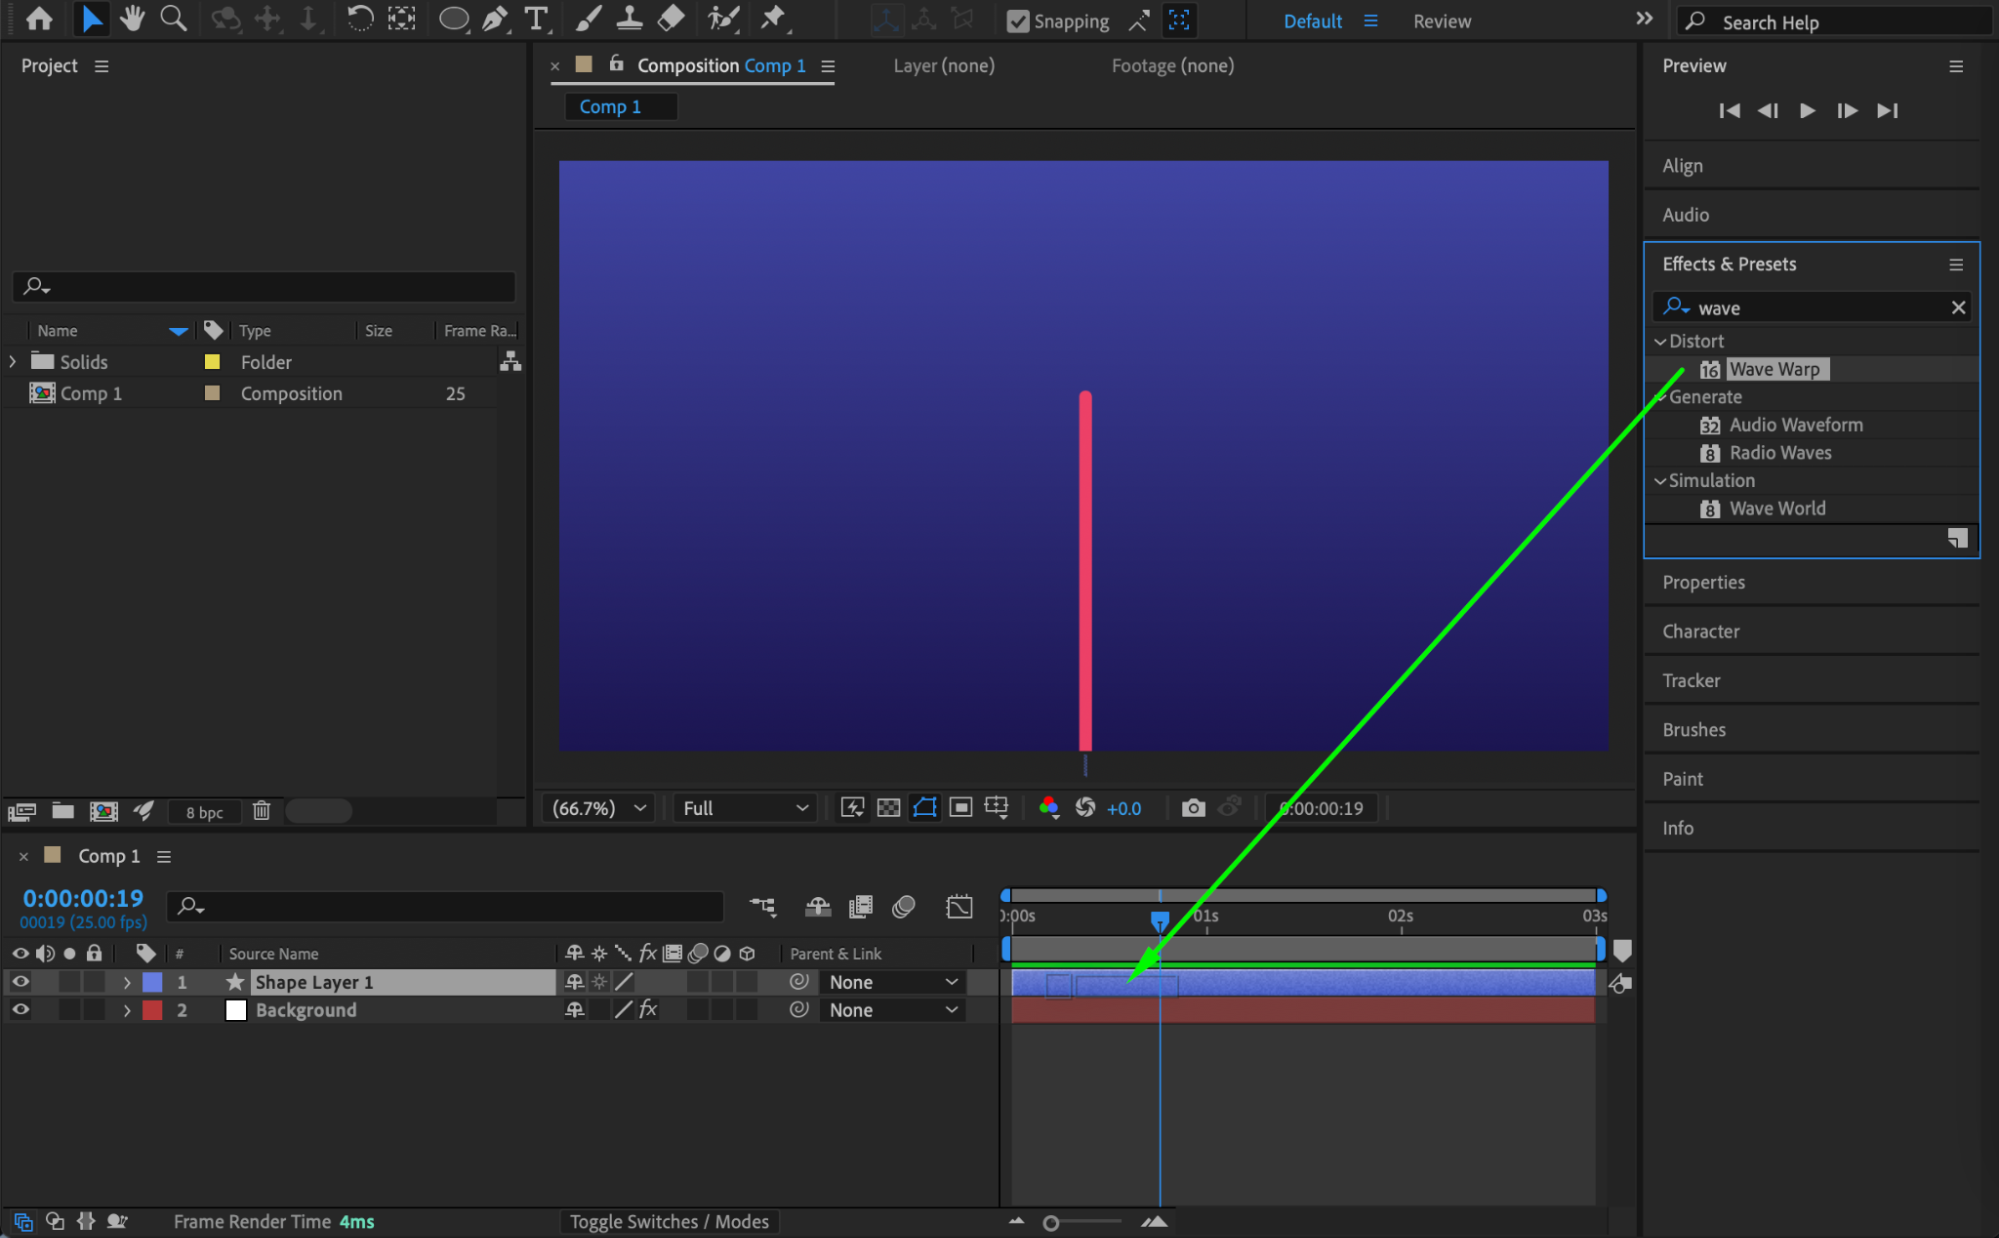
Get 10% off when you subscribe to our newsletter

Step 4: Add CC Radial Fast Blur
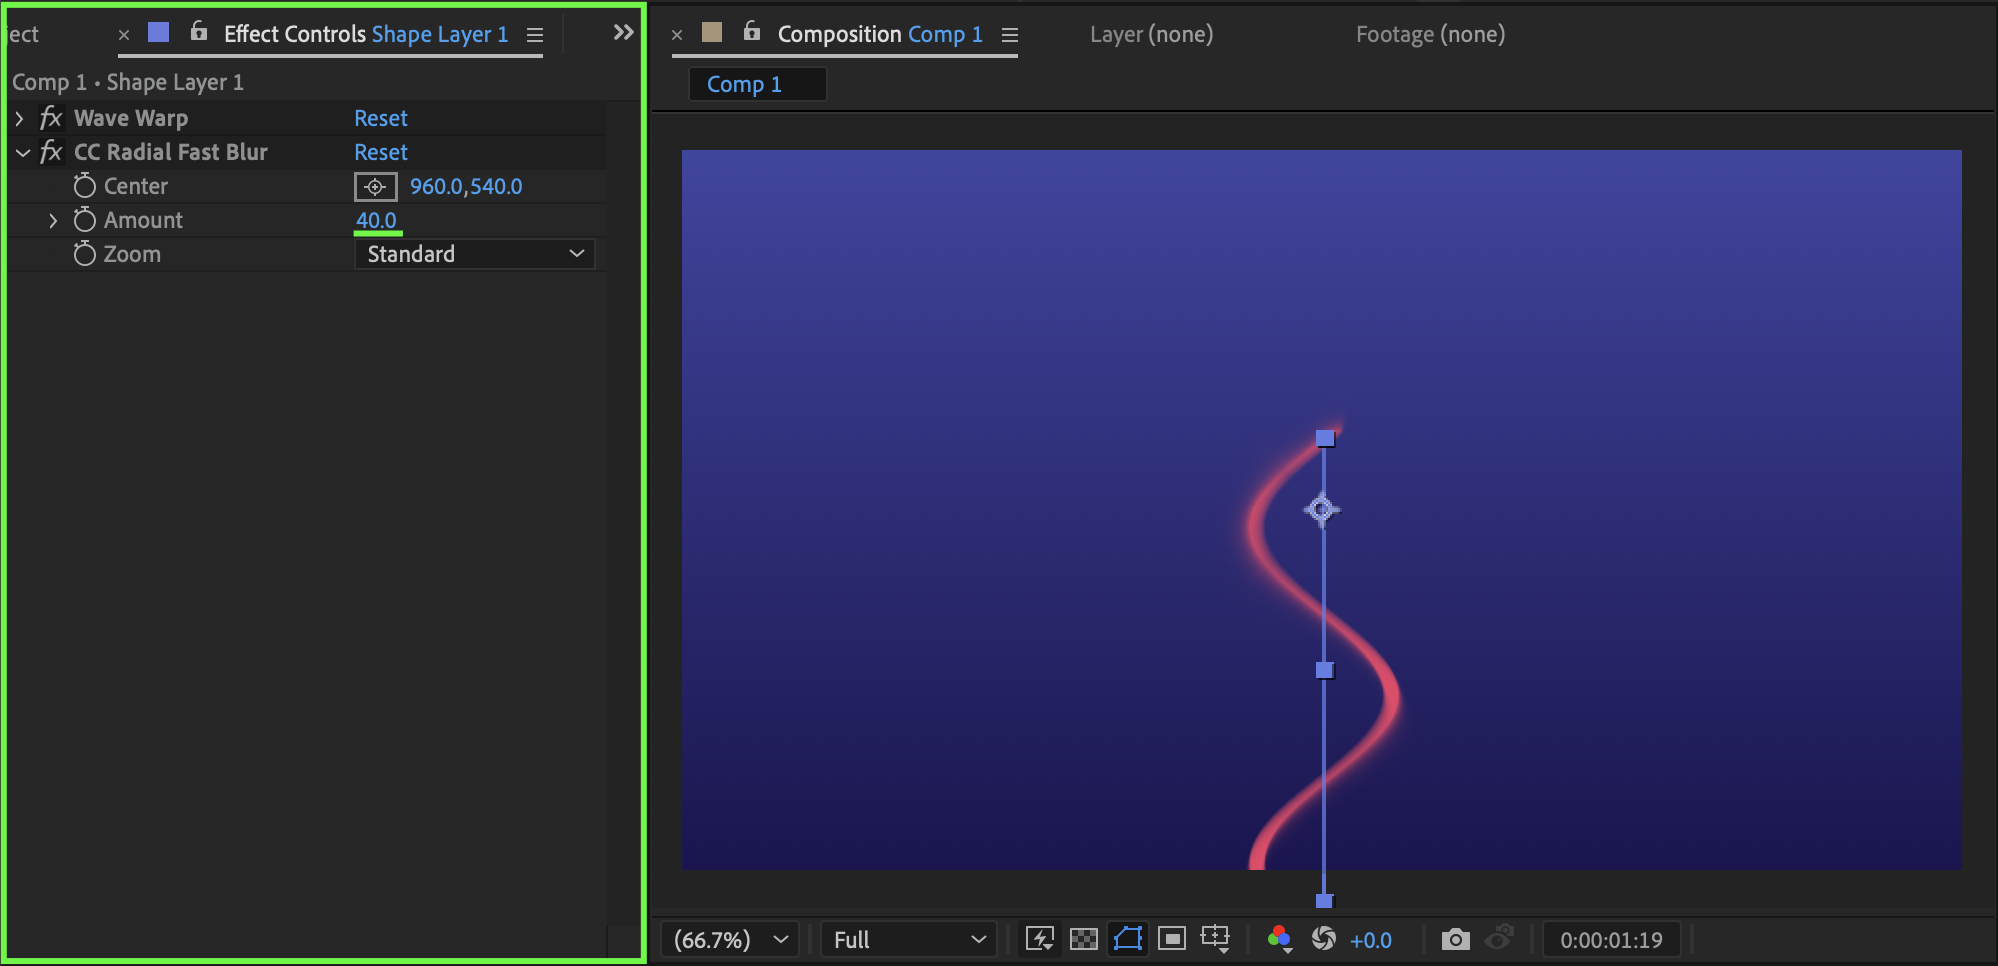
From the Effects & Presets panel, apply CC Radial Fast Blur and set the Amount to 40 to enhance the depth and rotational feel of the spiral.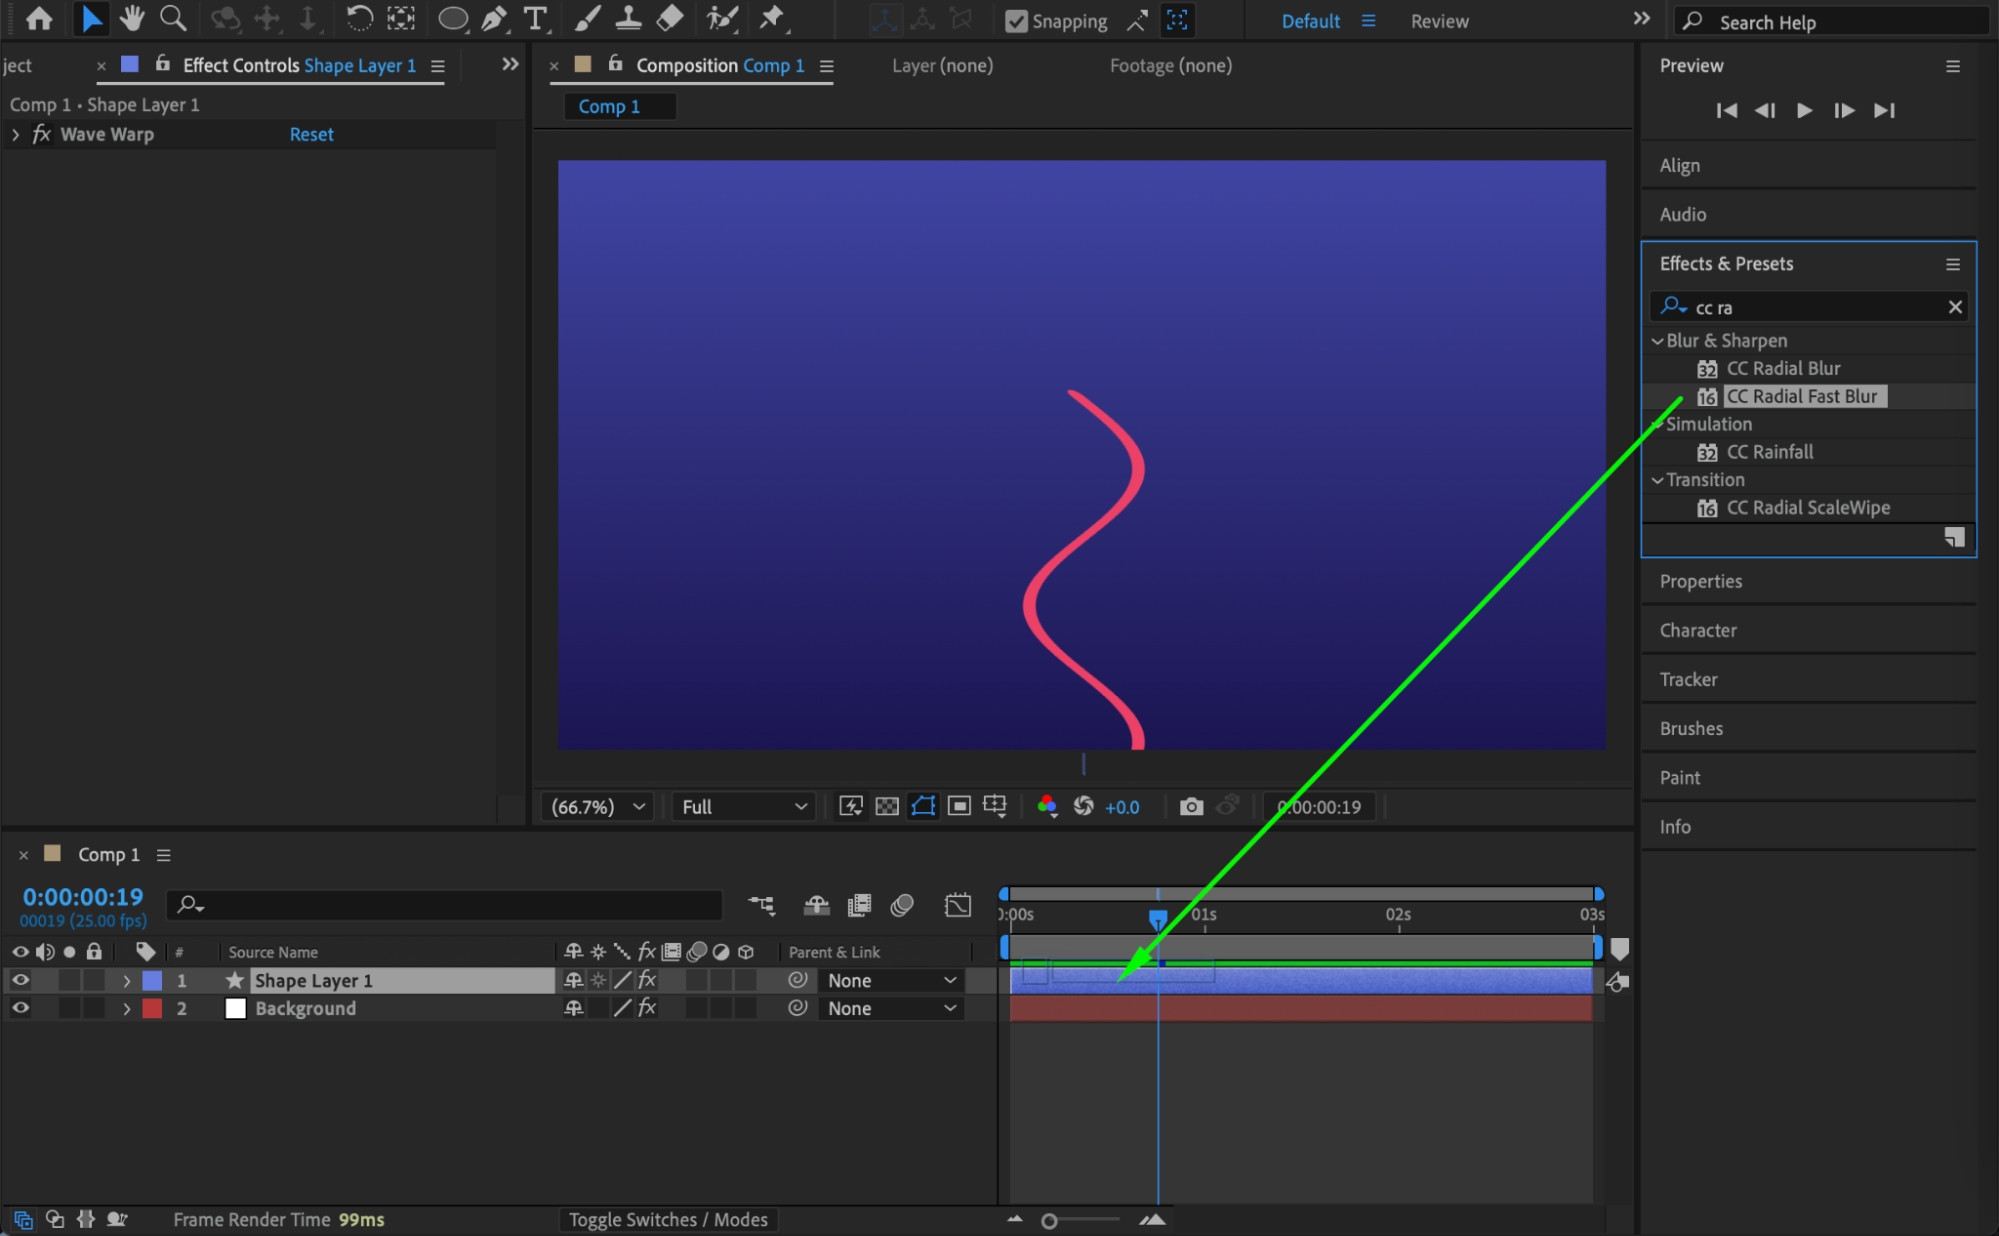
 Step 5: Duplicate the Layer
Select the layer and press Ctrl/Cmd + D to duplicate it, which will allow you to add additional styling effects.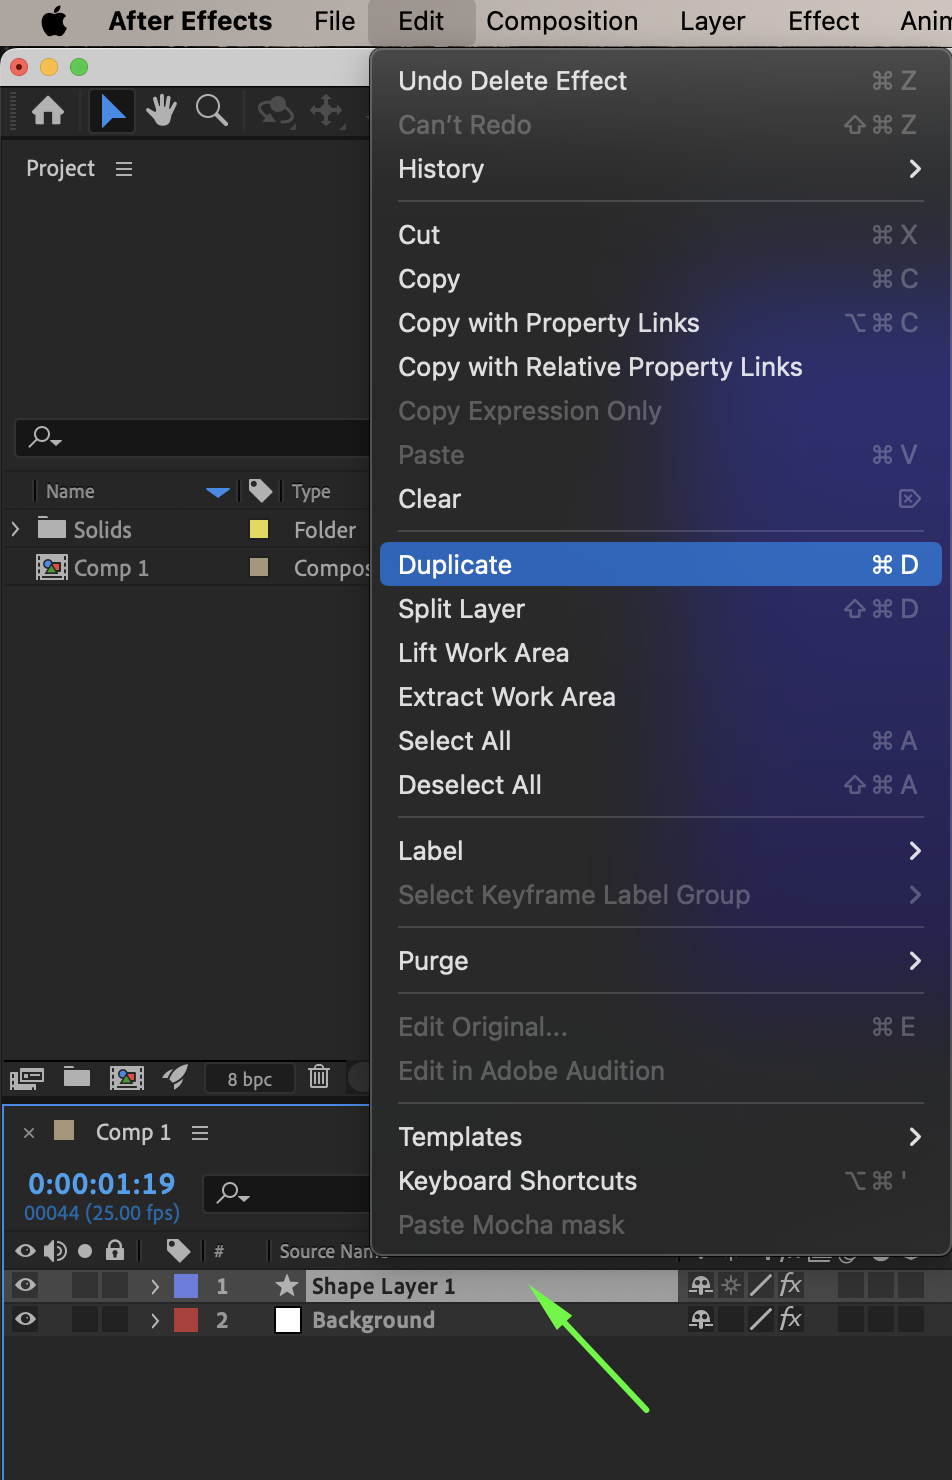 Step 6: Add Inner Shadow to the Duplicate
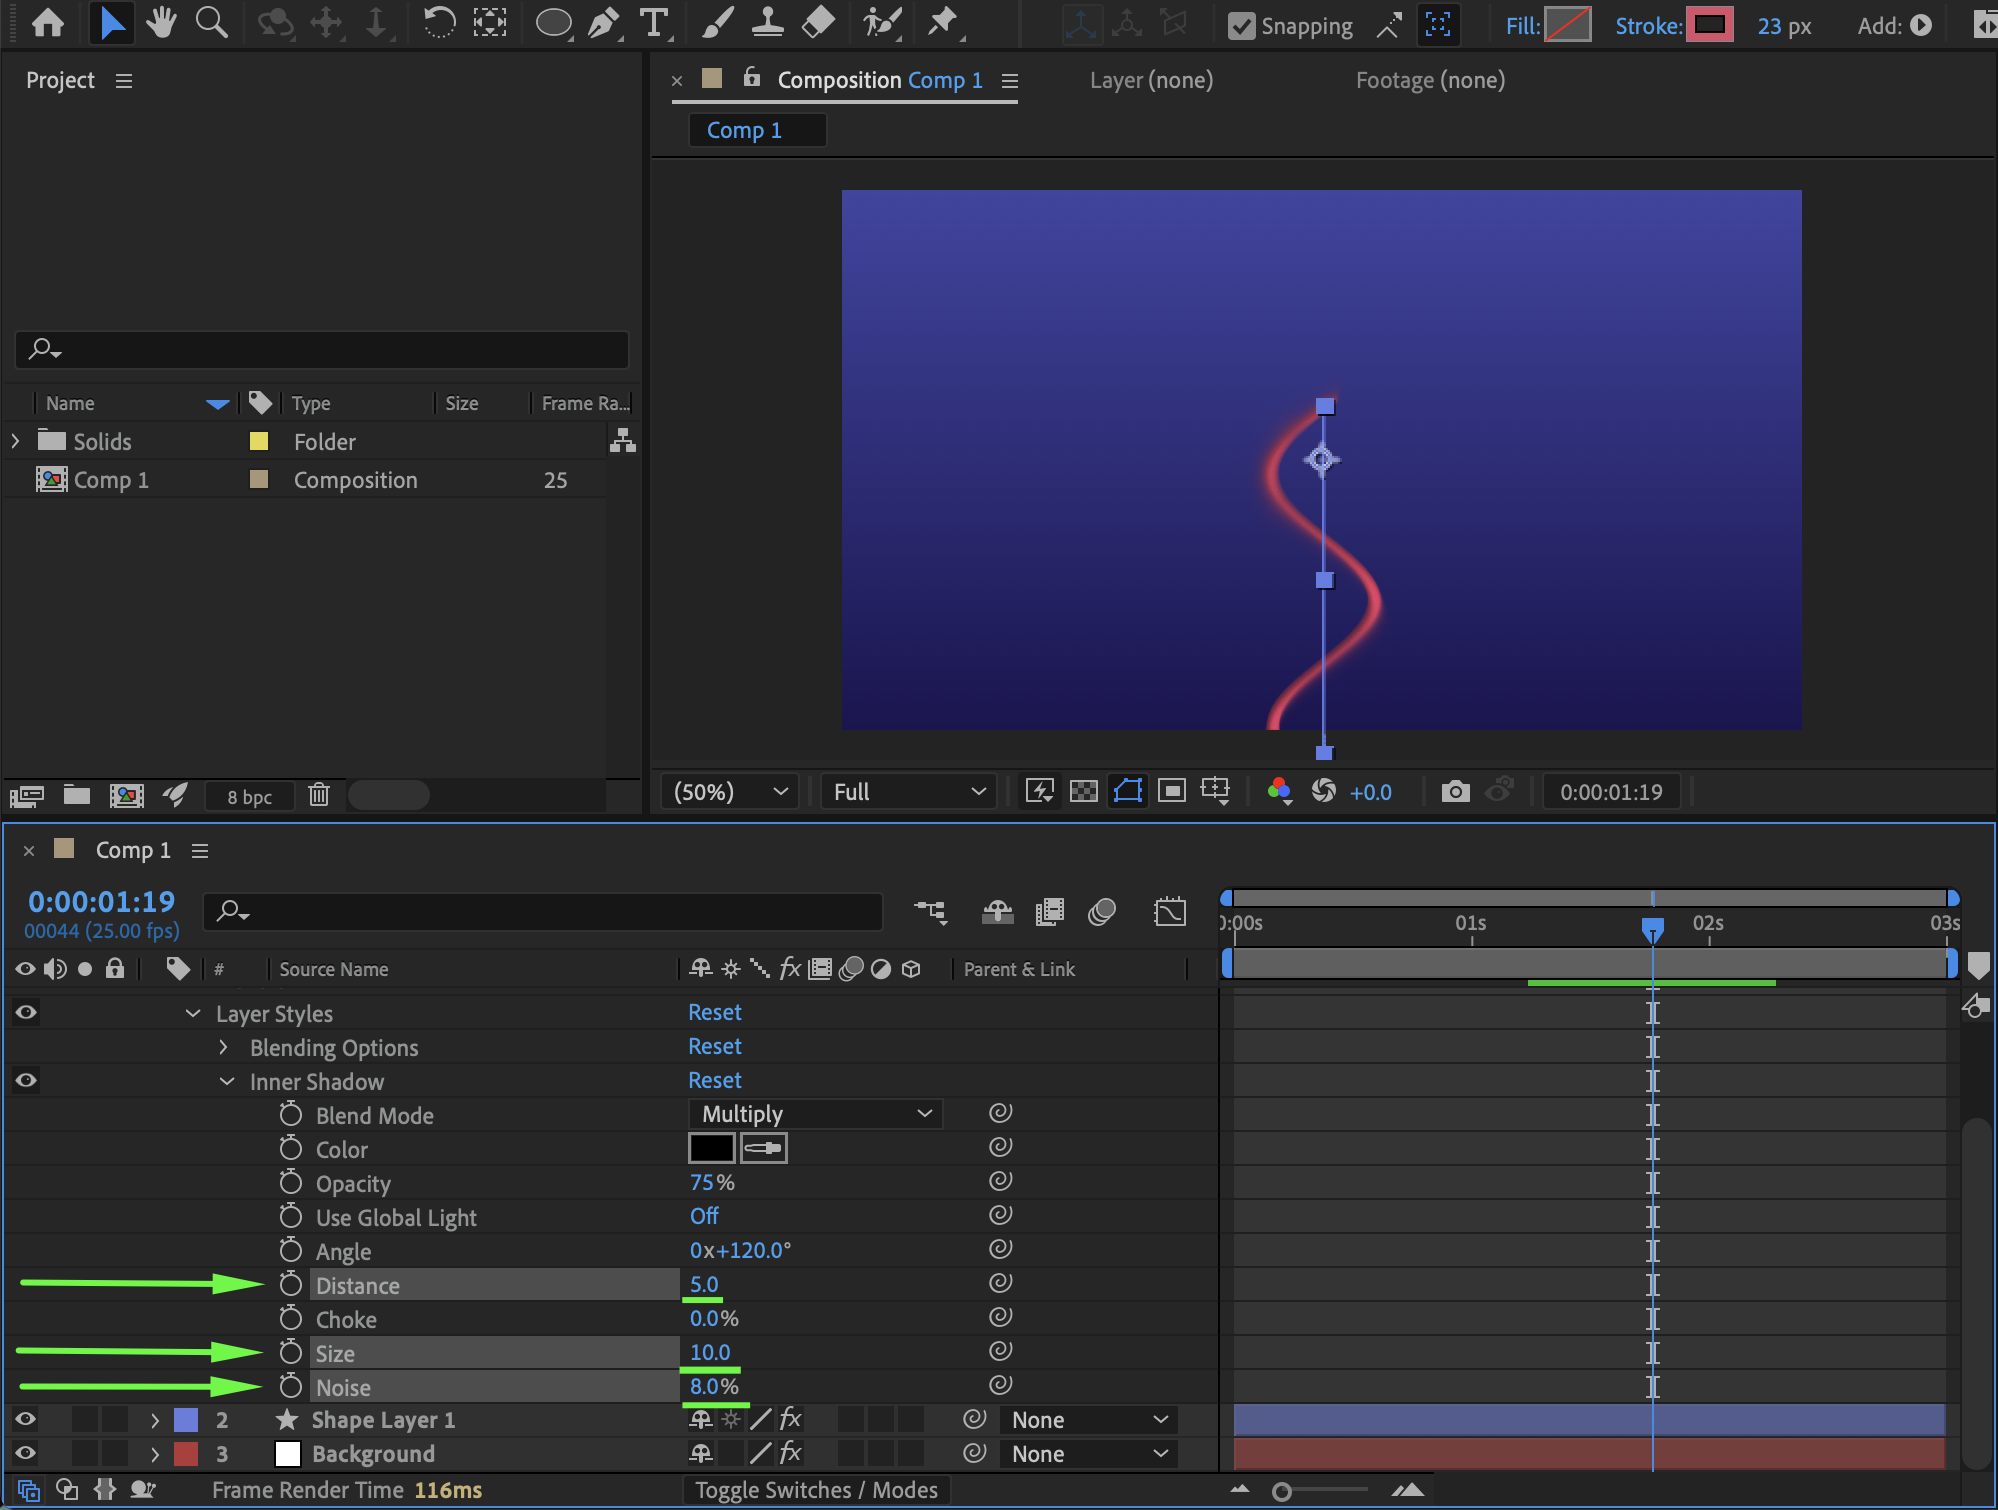
Right-click the duplicated layer, choose Layer Styles → Inner Shadow, then set Distance to 5, Size to 10, and Noise to 8 to add subtle internal depth.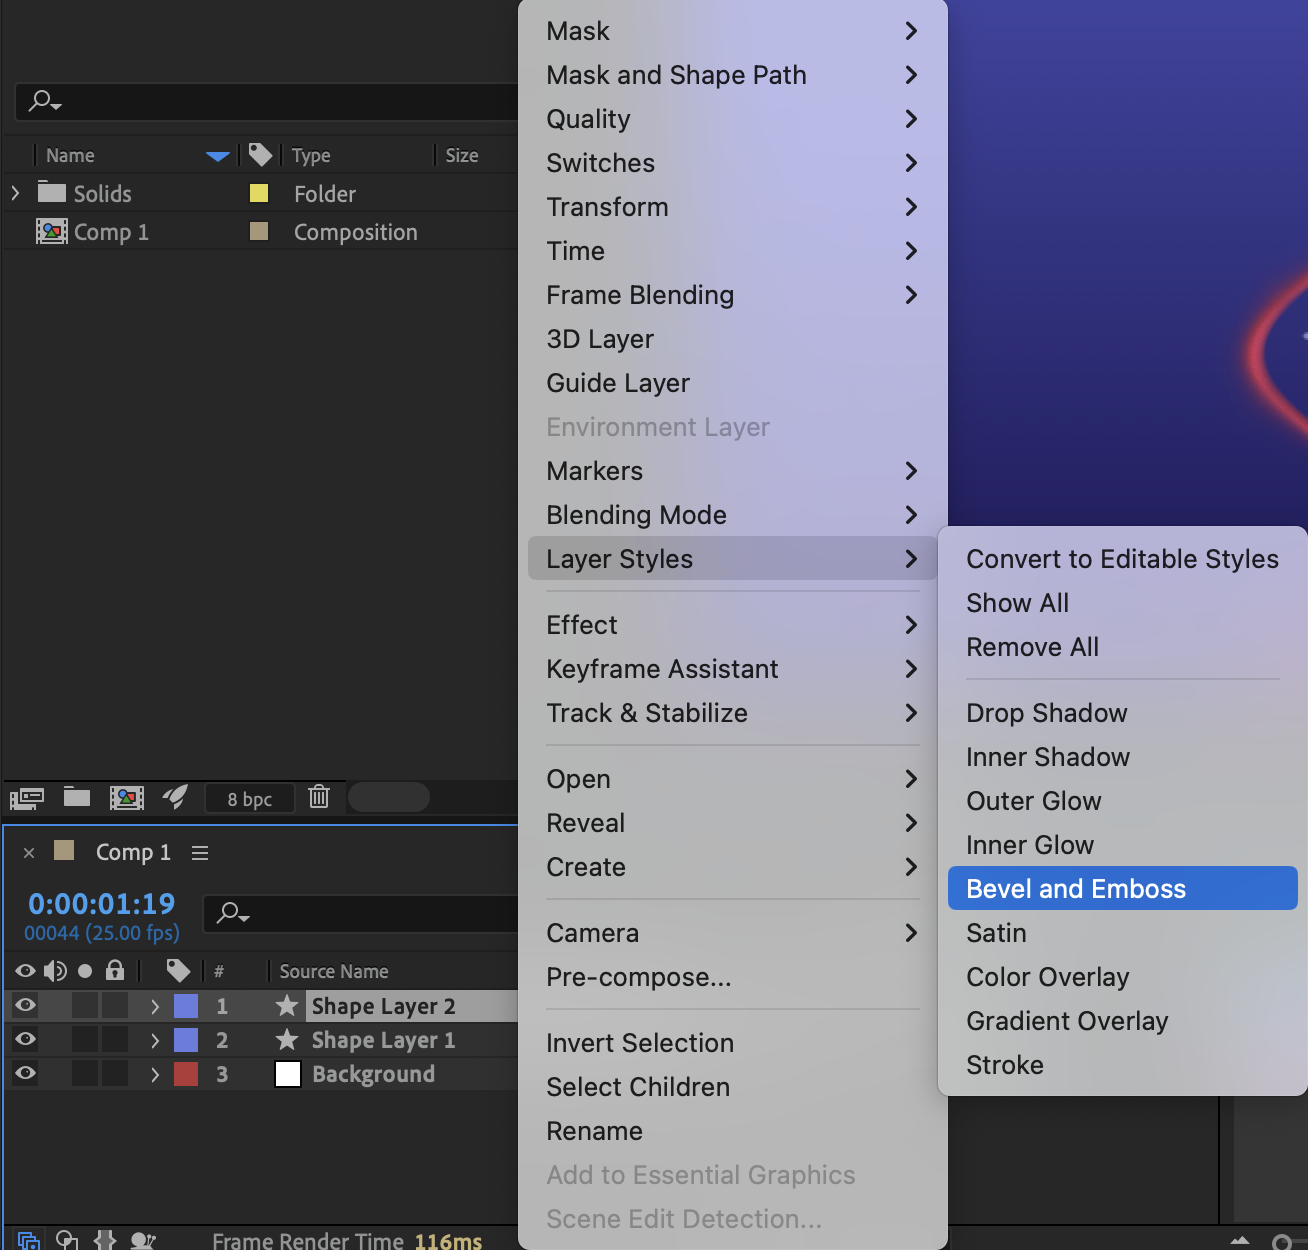
Step 7: Add Bevel and Emboss
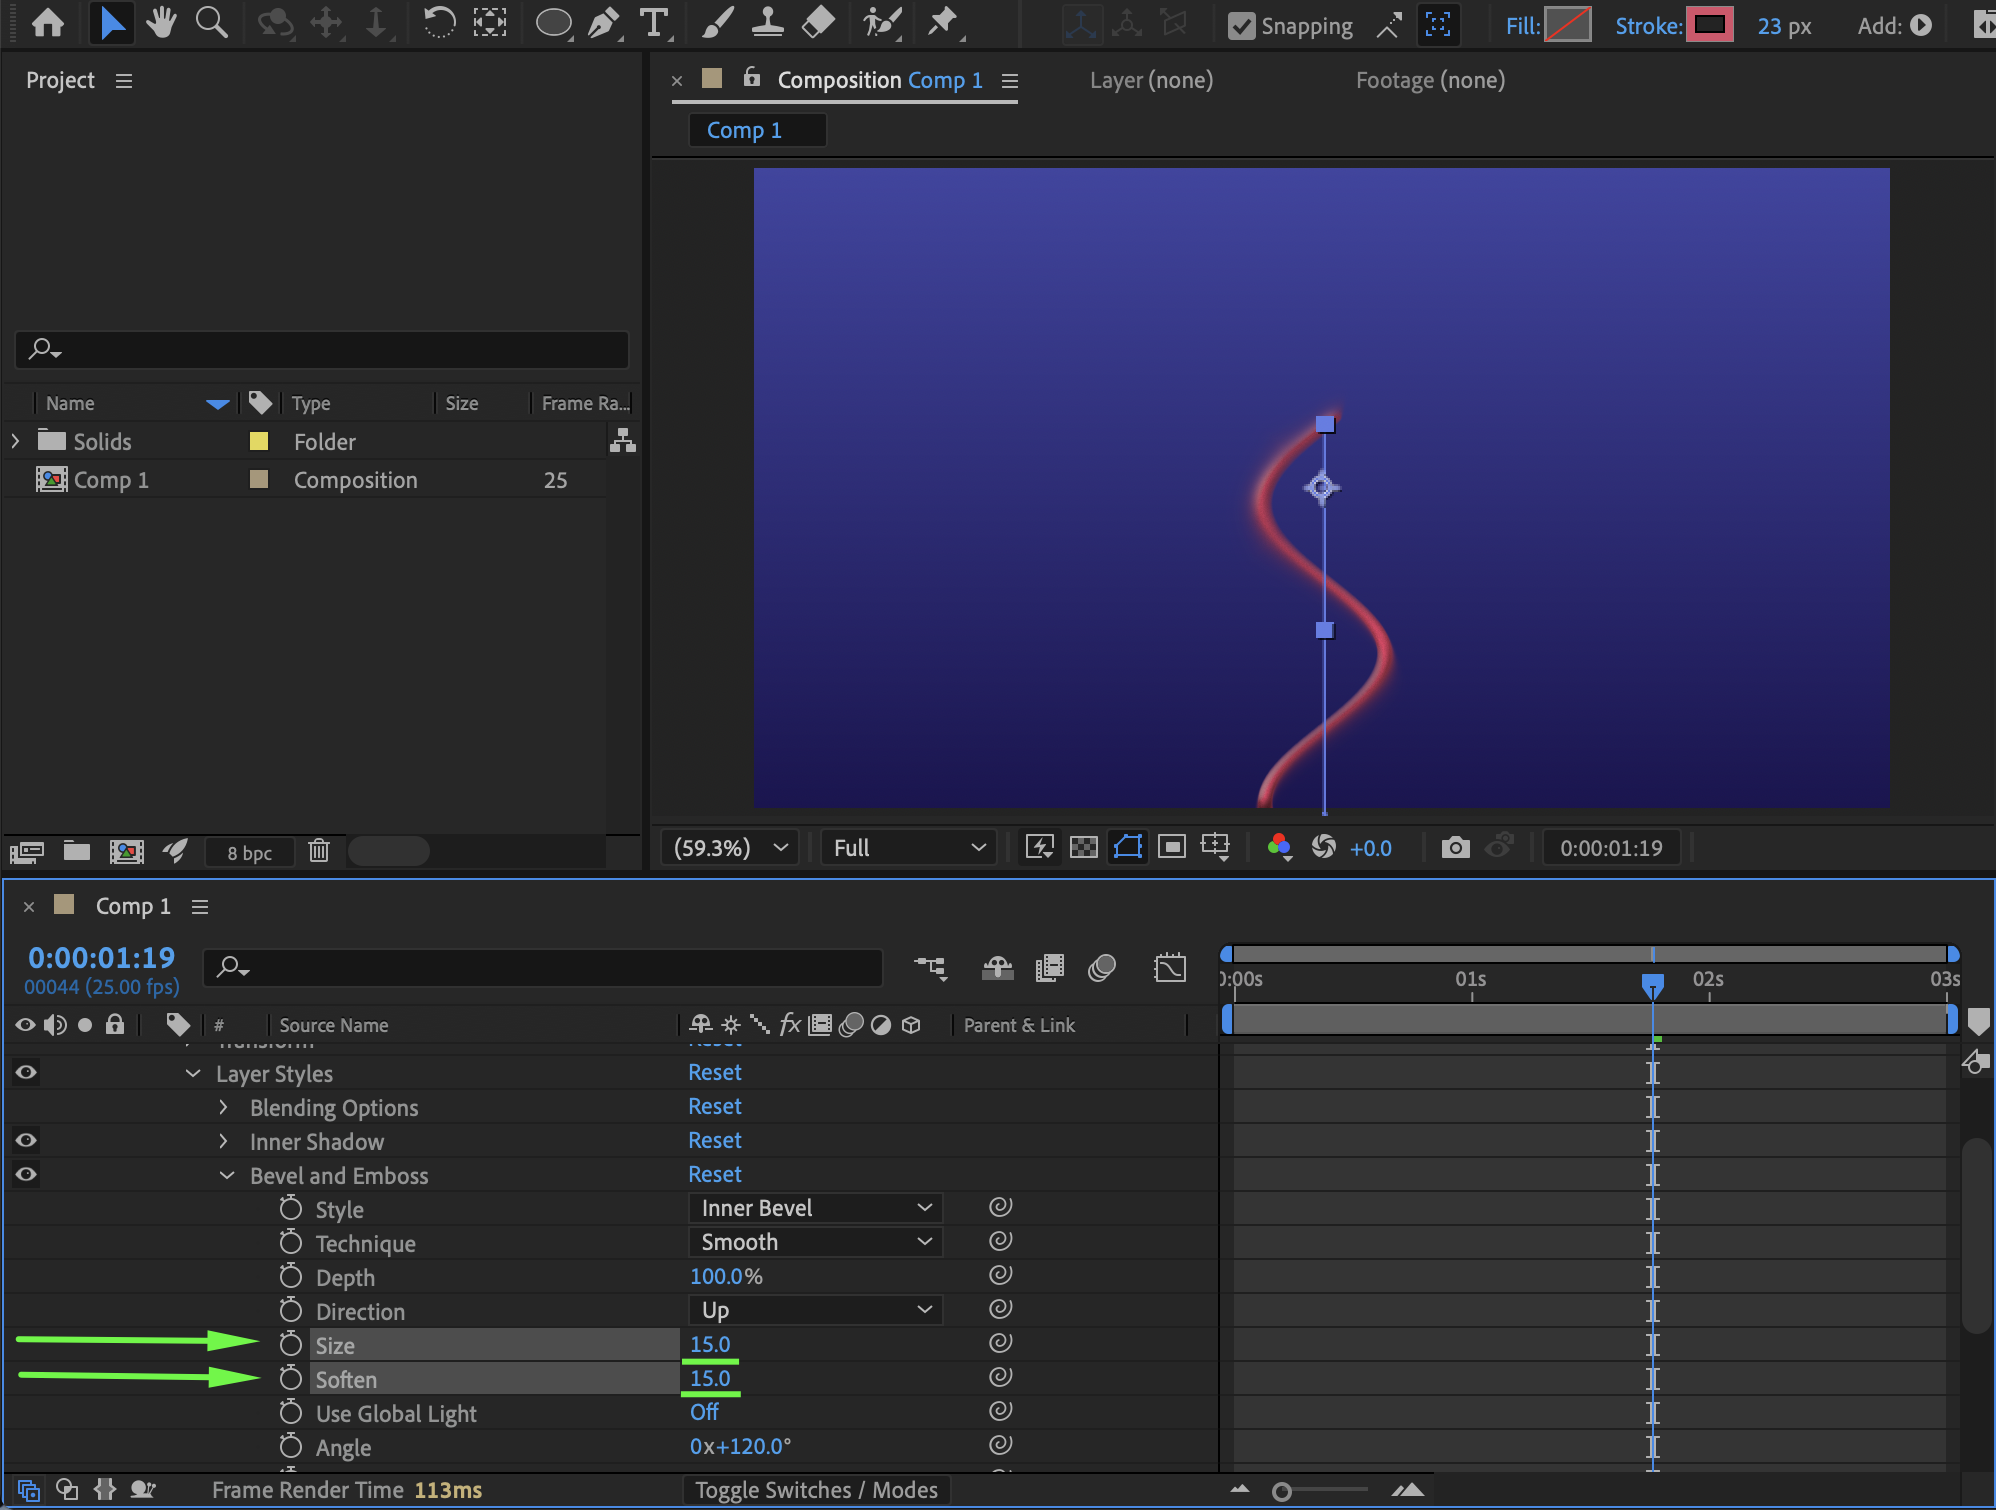
Right-click the duplicated layer again, choose Layer Styles → Bevel and Emboss, and set Size to 15 and Soften to 15 to create a dimensional, raised effect.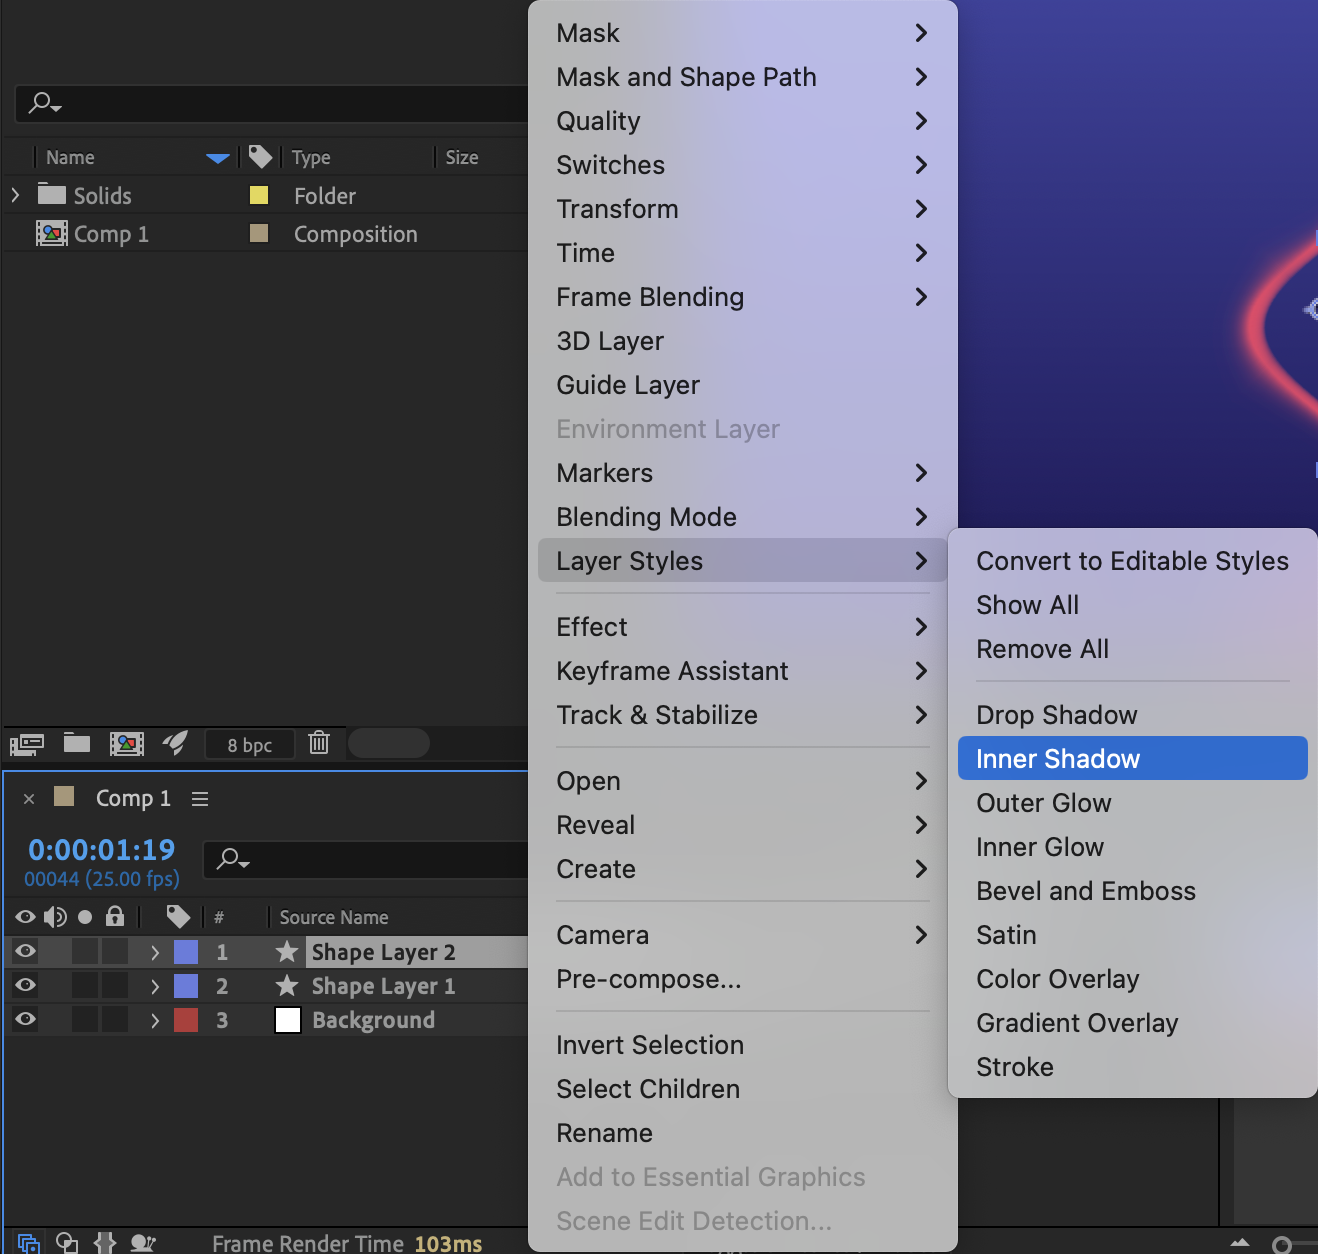
 Step 8: Add a Glow Effect
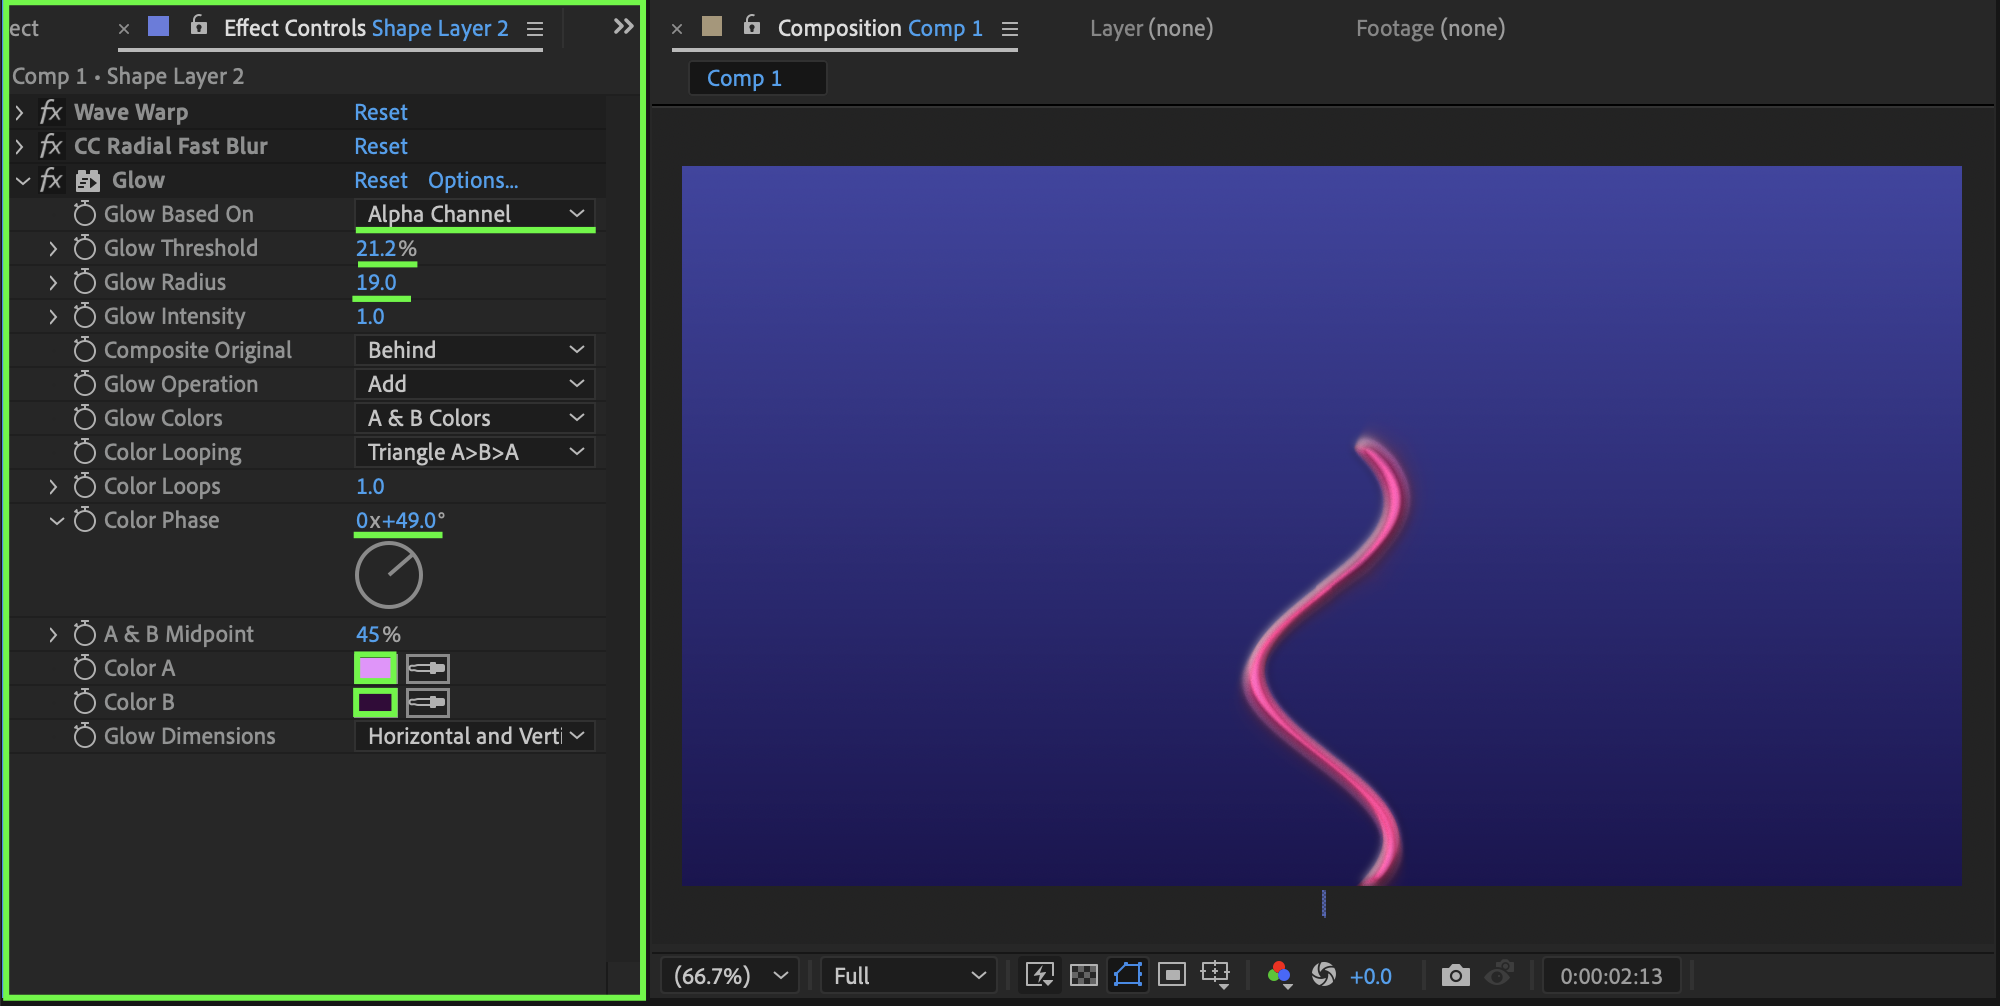
Apply the Glow effect, set Glow Based On to Alpha Channel, adjust Glow Threshold to 21, Glow Radius to 19, and Color Phase to 45, then choose Glow Color A as a lighter shade of your stroke color and Glow Color B as a darker shade of the same color.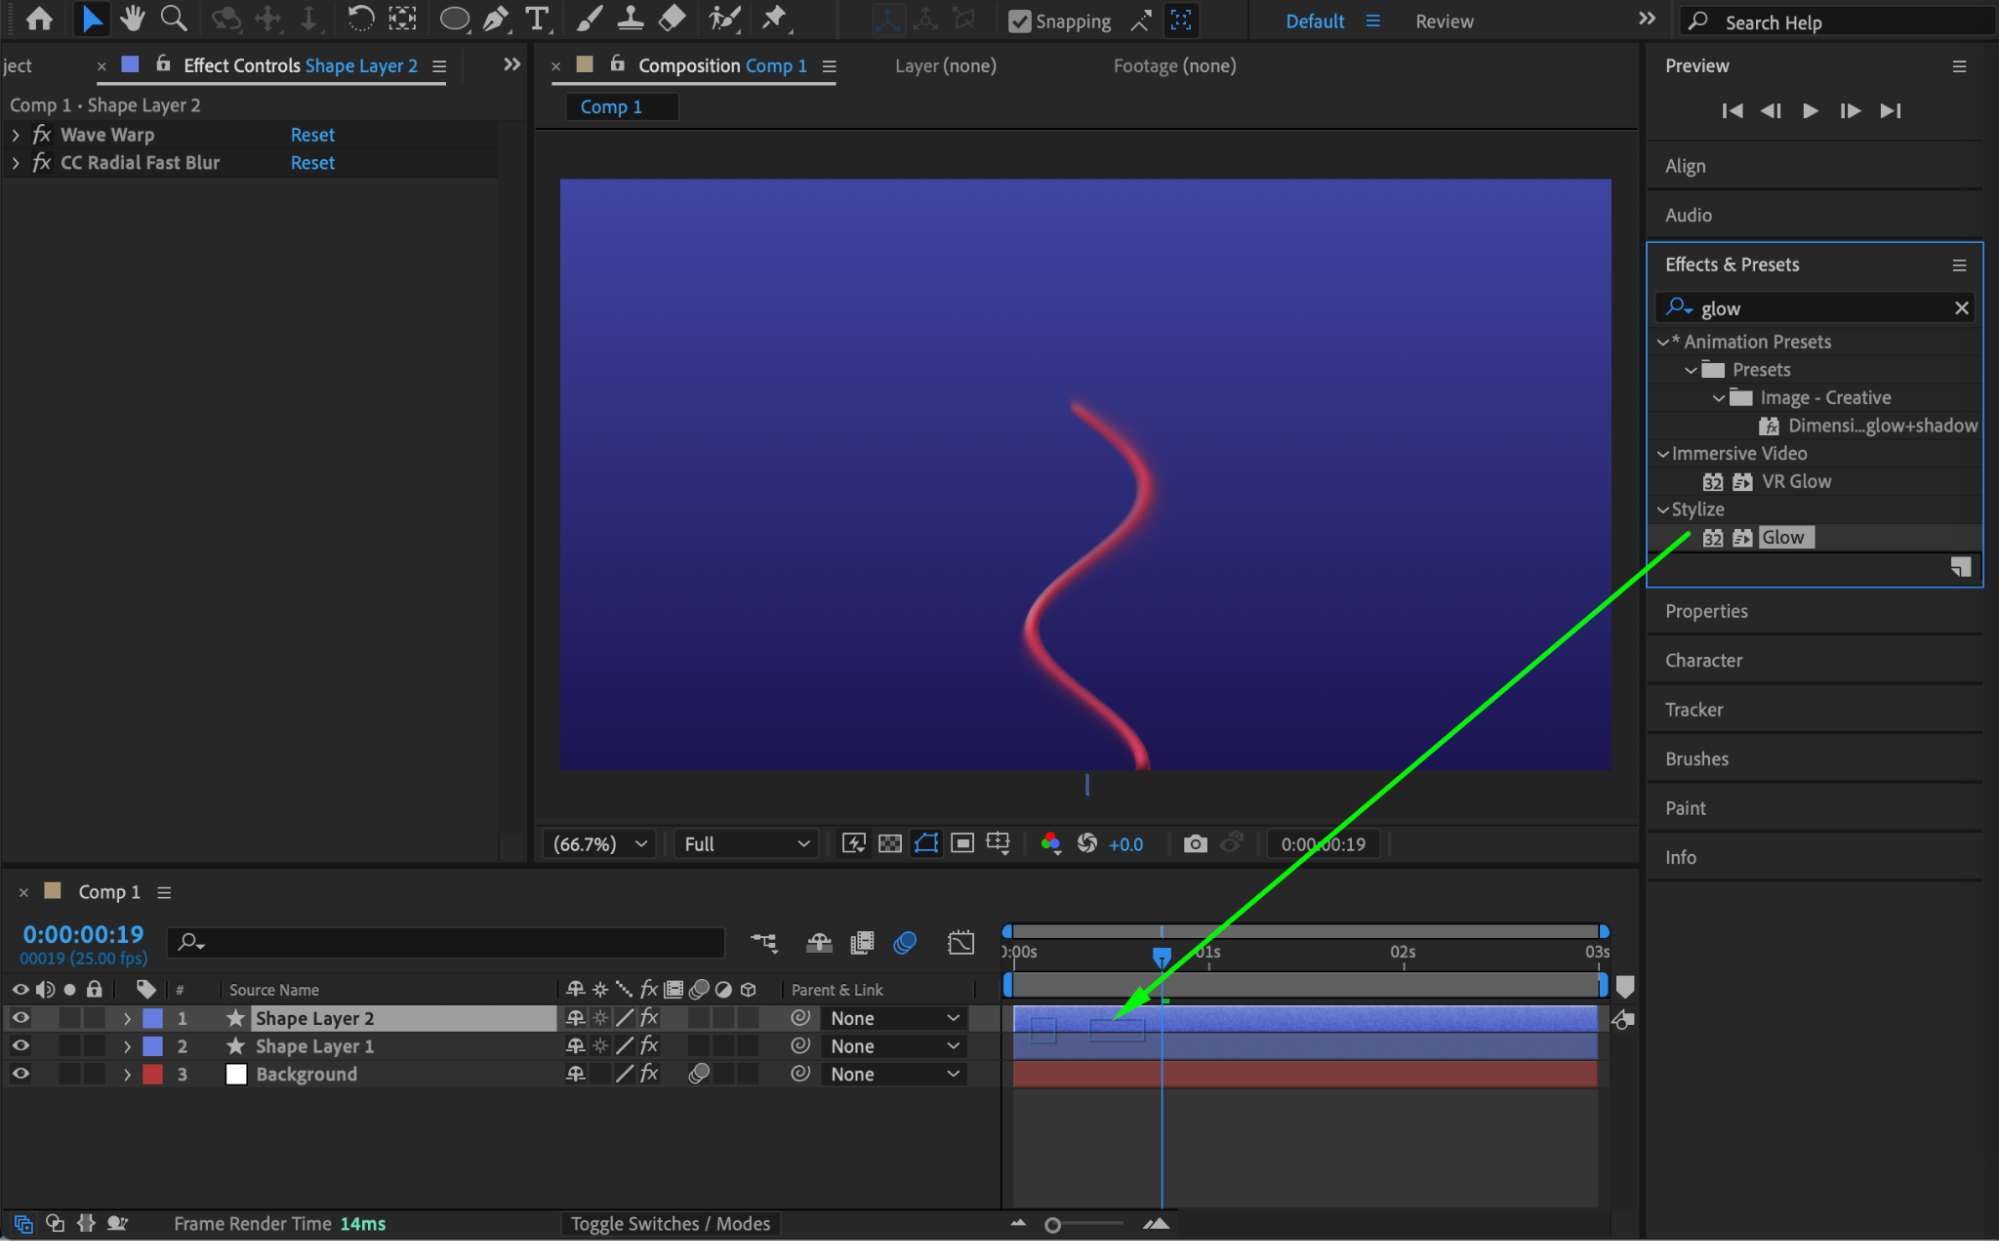
 Step 9: Preview the Animation
Press Spacebar or use RAM Preview to review the spiral animation and fine-tune any effect settings for a smoother and more dynamic result.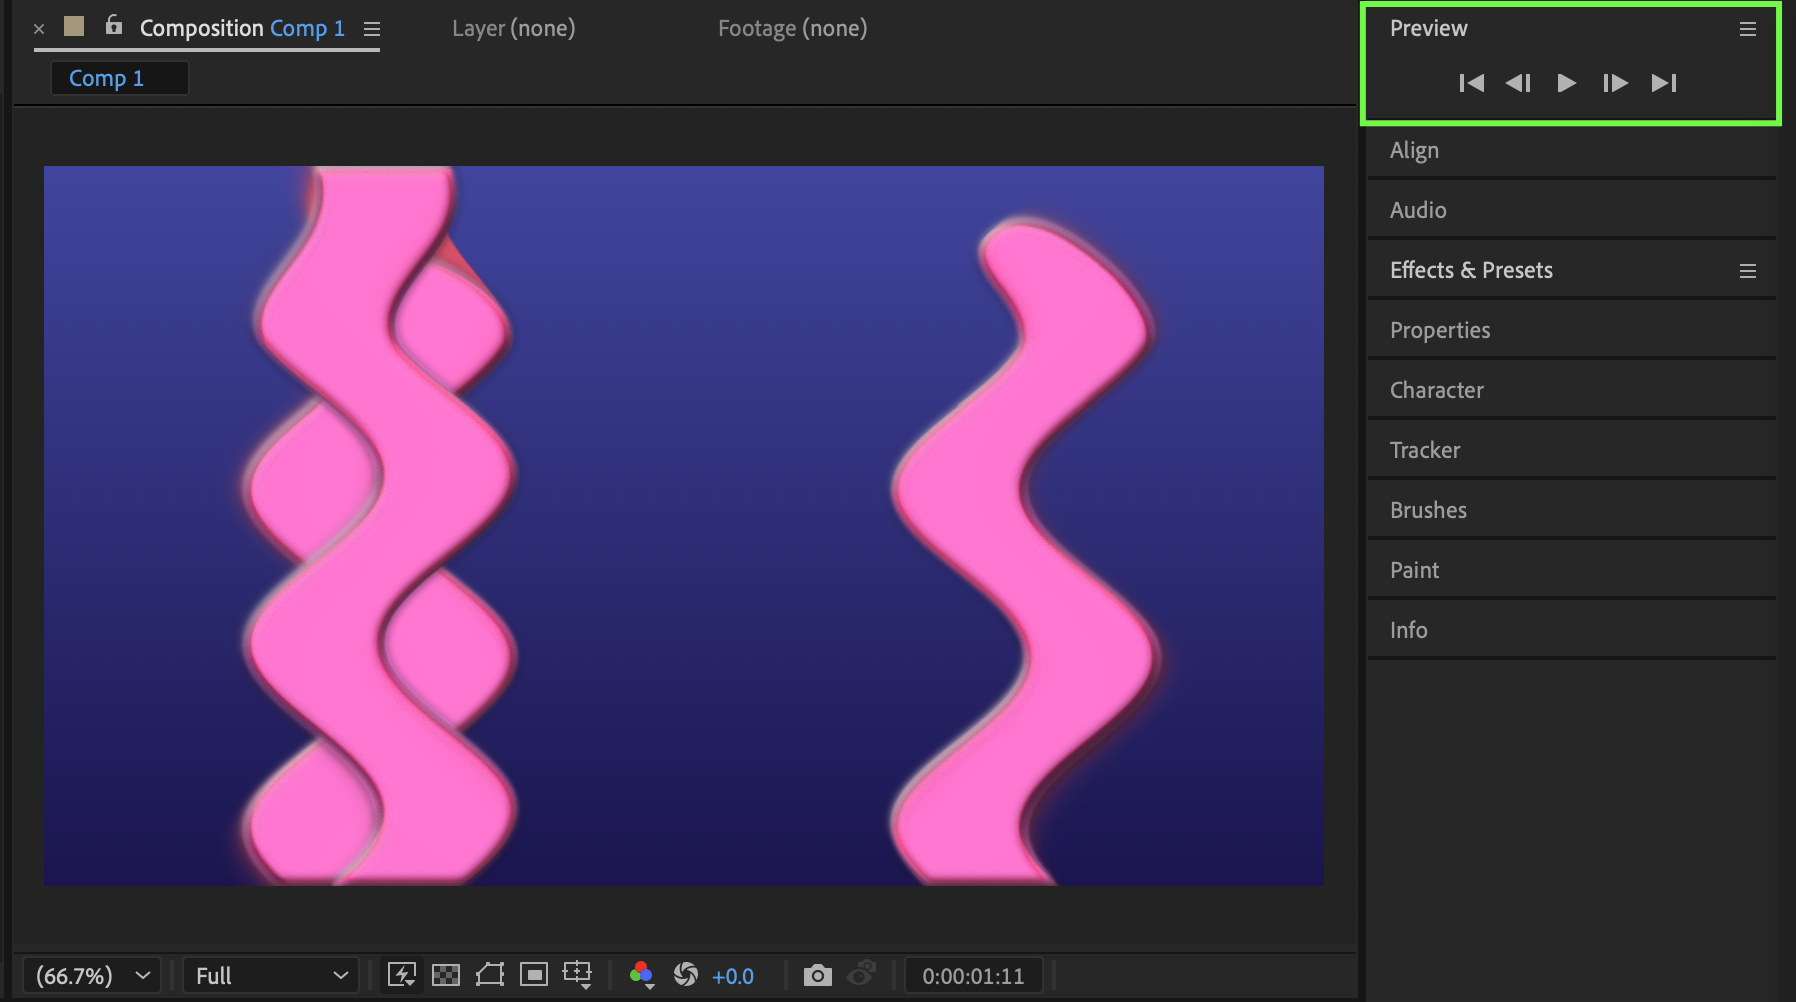
Conclusion
By combining a simple shape line with Wave Warp distortion, radial blur, layer styles, and glow effects, you can create a visually rich animated spiral in After Effects. This technique is flexible and can be customized further to match different motion design styles or color themes.
Our Bestsellers
Our Bestsellers

