Introduction
A radial logo reveal is a clean and professional way to introduce a brand in motion graphics. By using the Radial Wipe transition and enhancing it with motion blur, you can create a smooth and dynamic logo animation. In this tutorial, you’ll learn how to build this reveal step by step.
Step 1: Import Your Logo
Go to File → Import → File and select your logo file to bring it into the Project panel.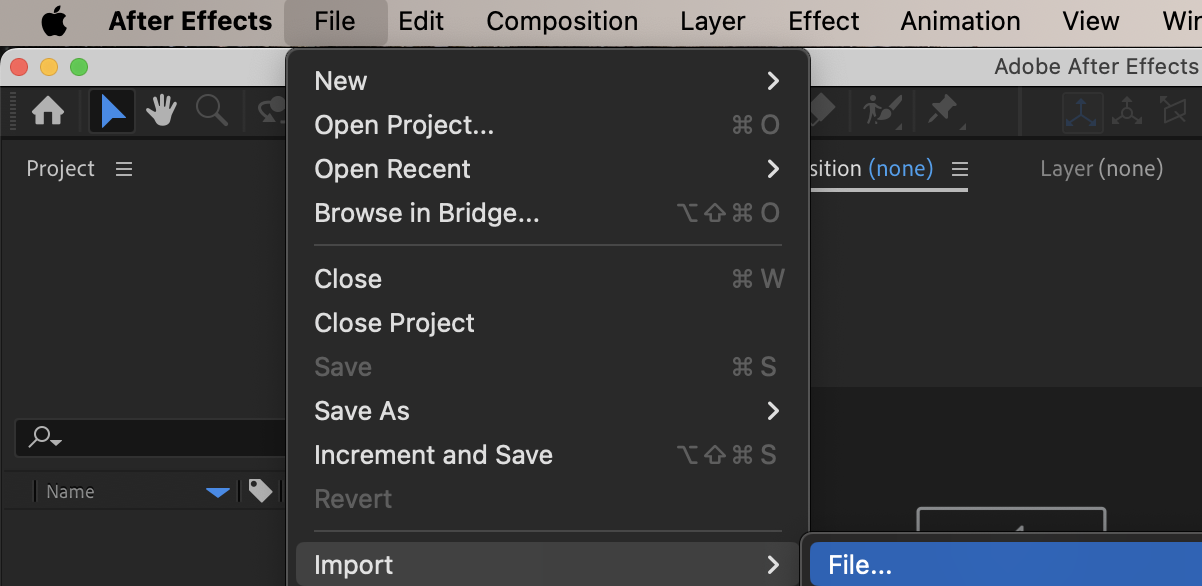
Step 2: Create a New Composition
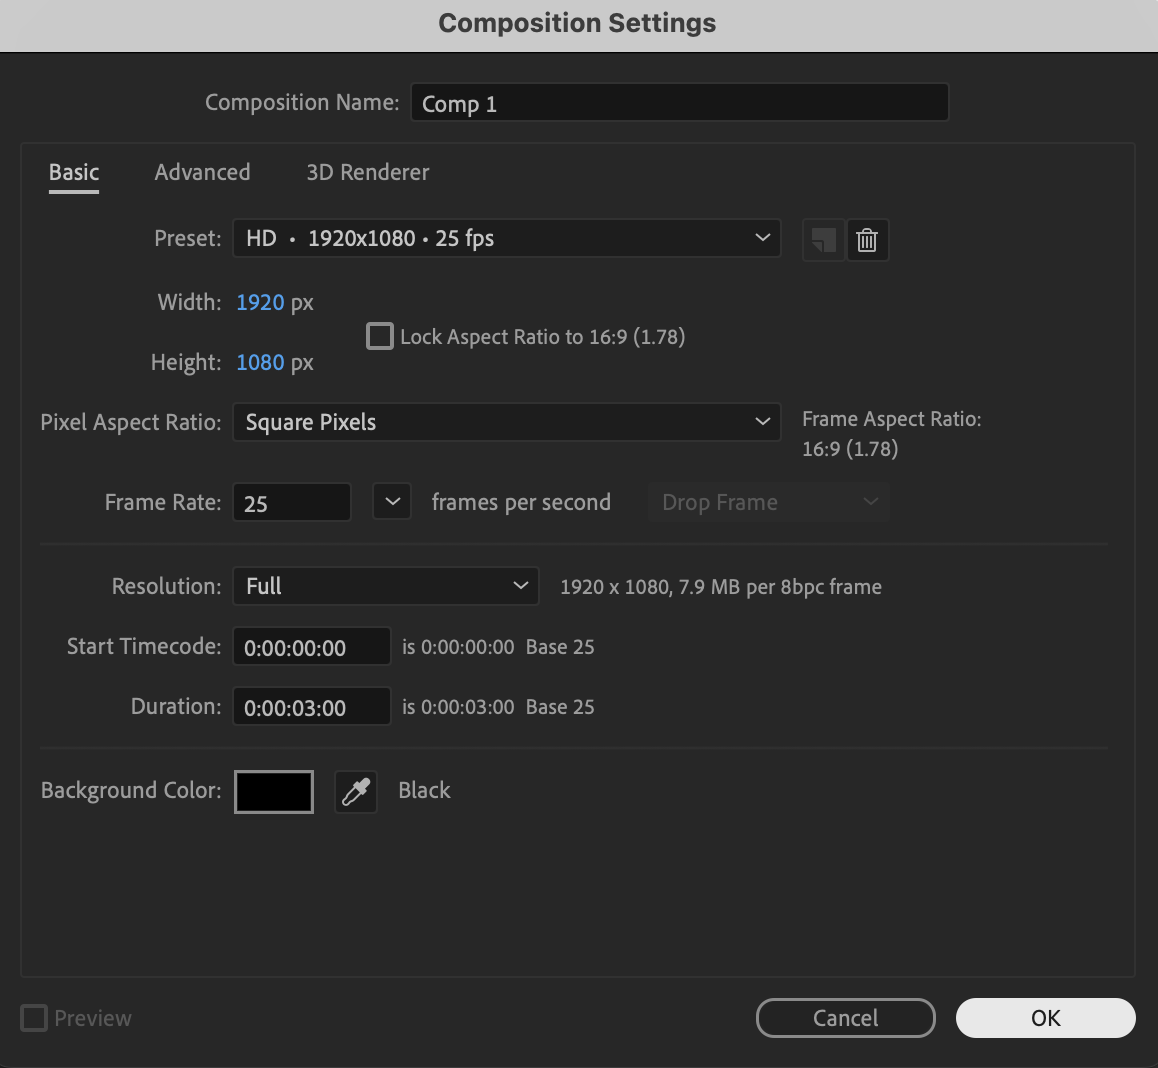
Click New Composition, choose your desired resolution and frame rate, and press OK to create your working timeline.
Get 10% off when you subscribe to our newsletter

Step 3: Add the Logo to the Timeline
Drag your logo from the Project panel into the Timeline panel so it appears inside the composition.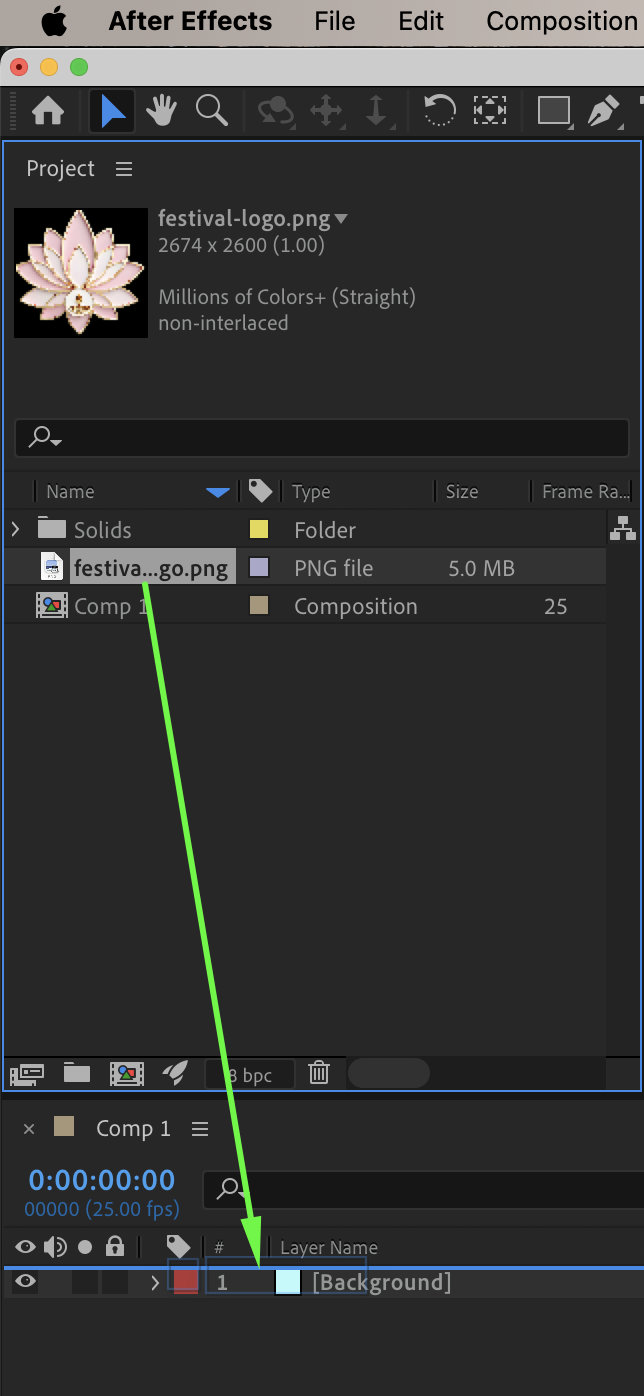 Step 4: Apply and Animate Radial Wipe
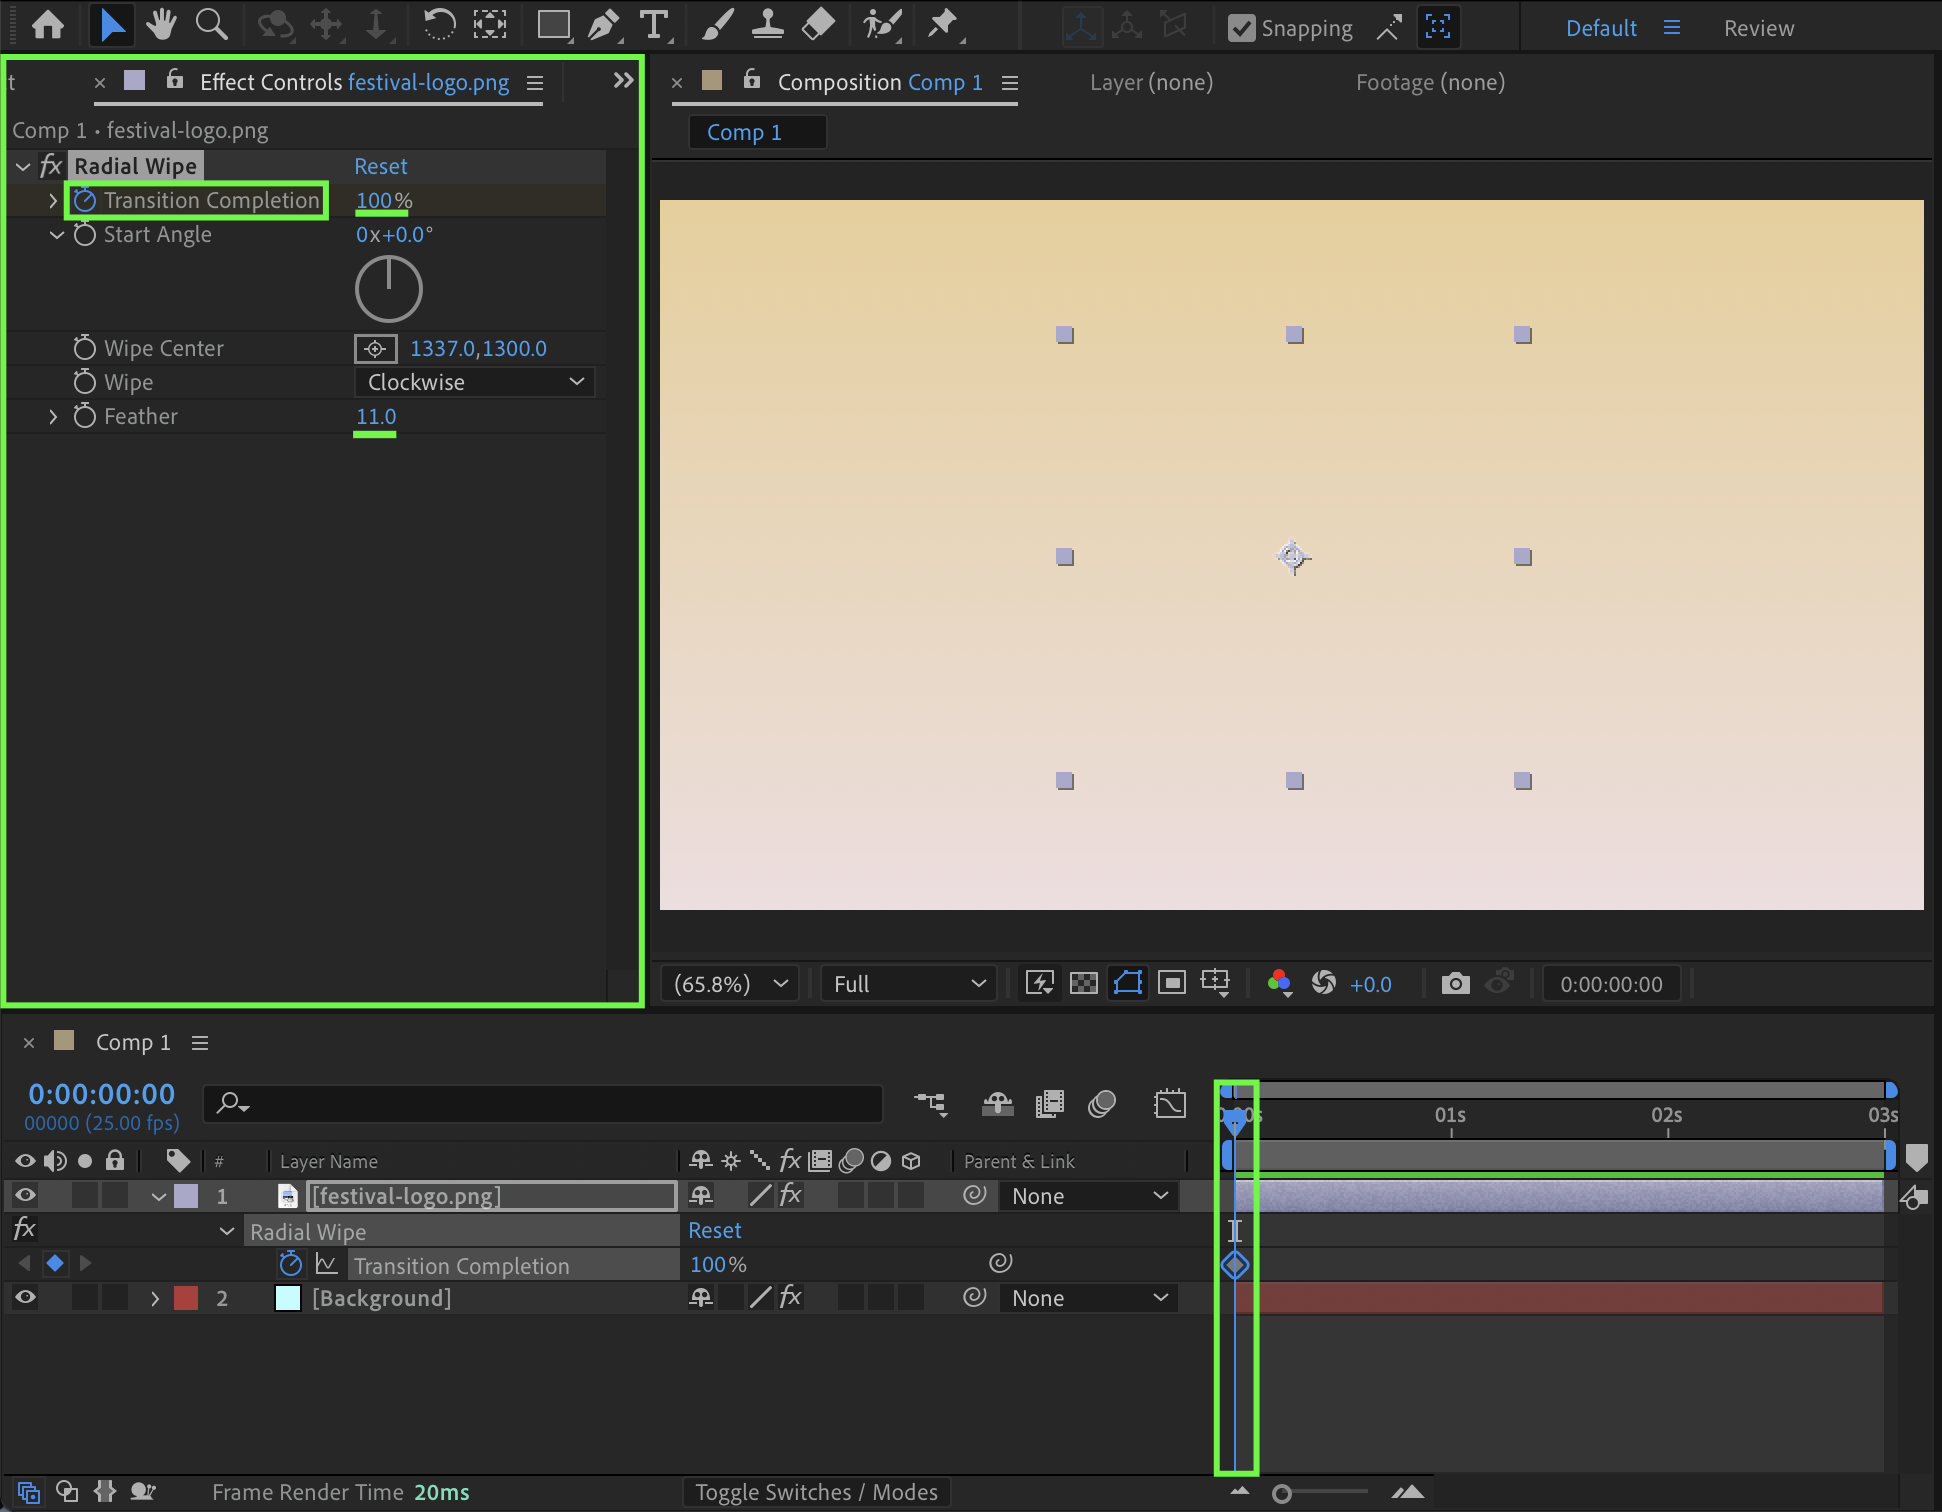
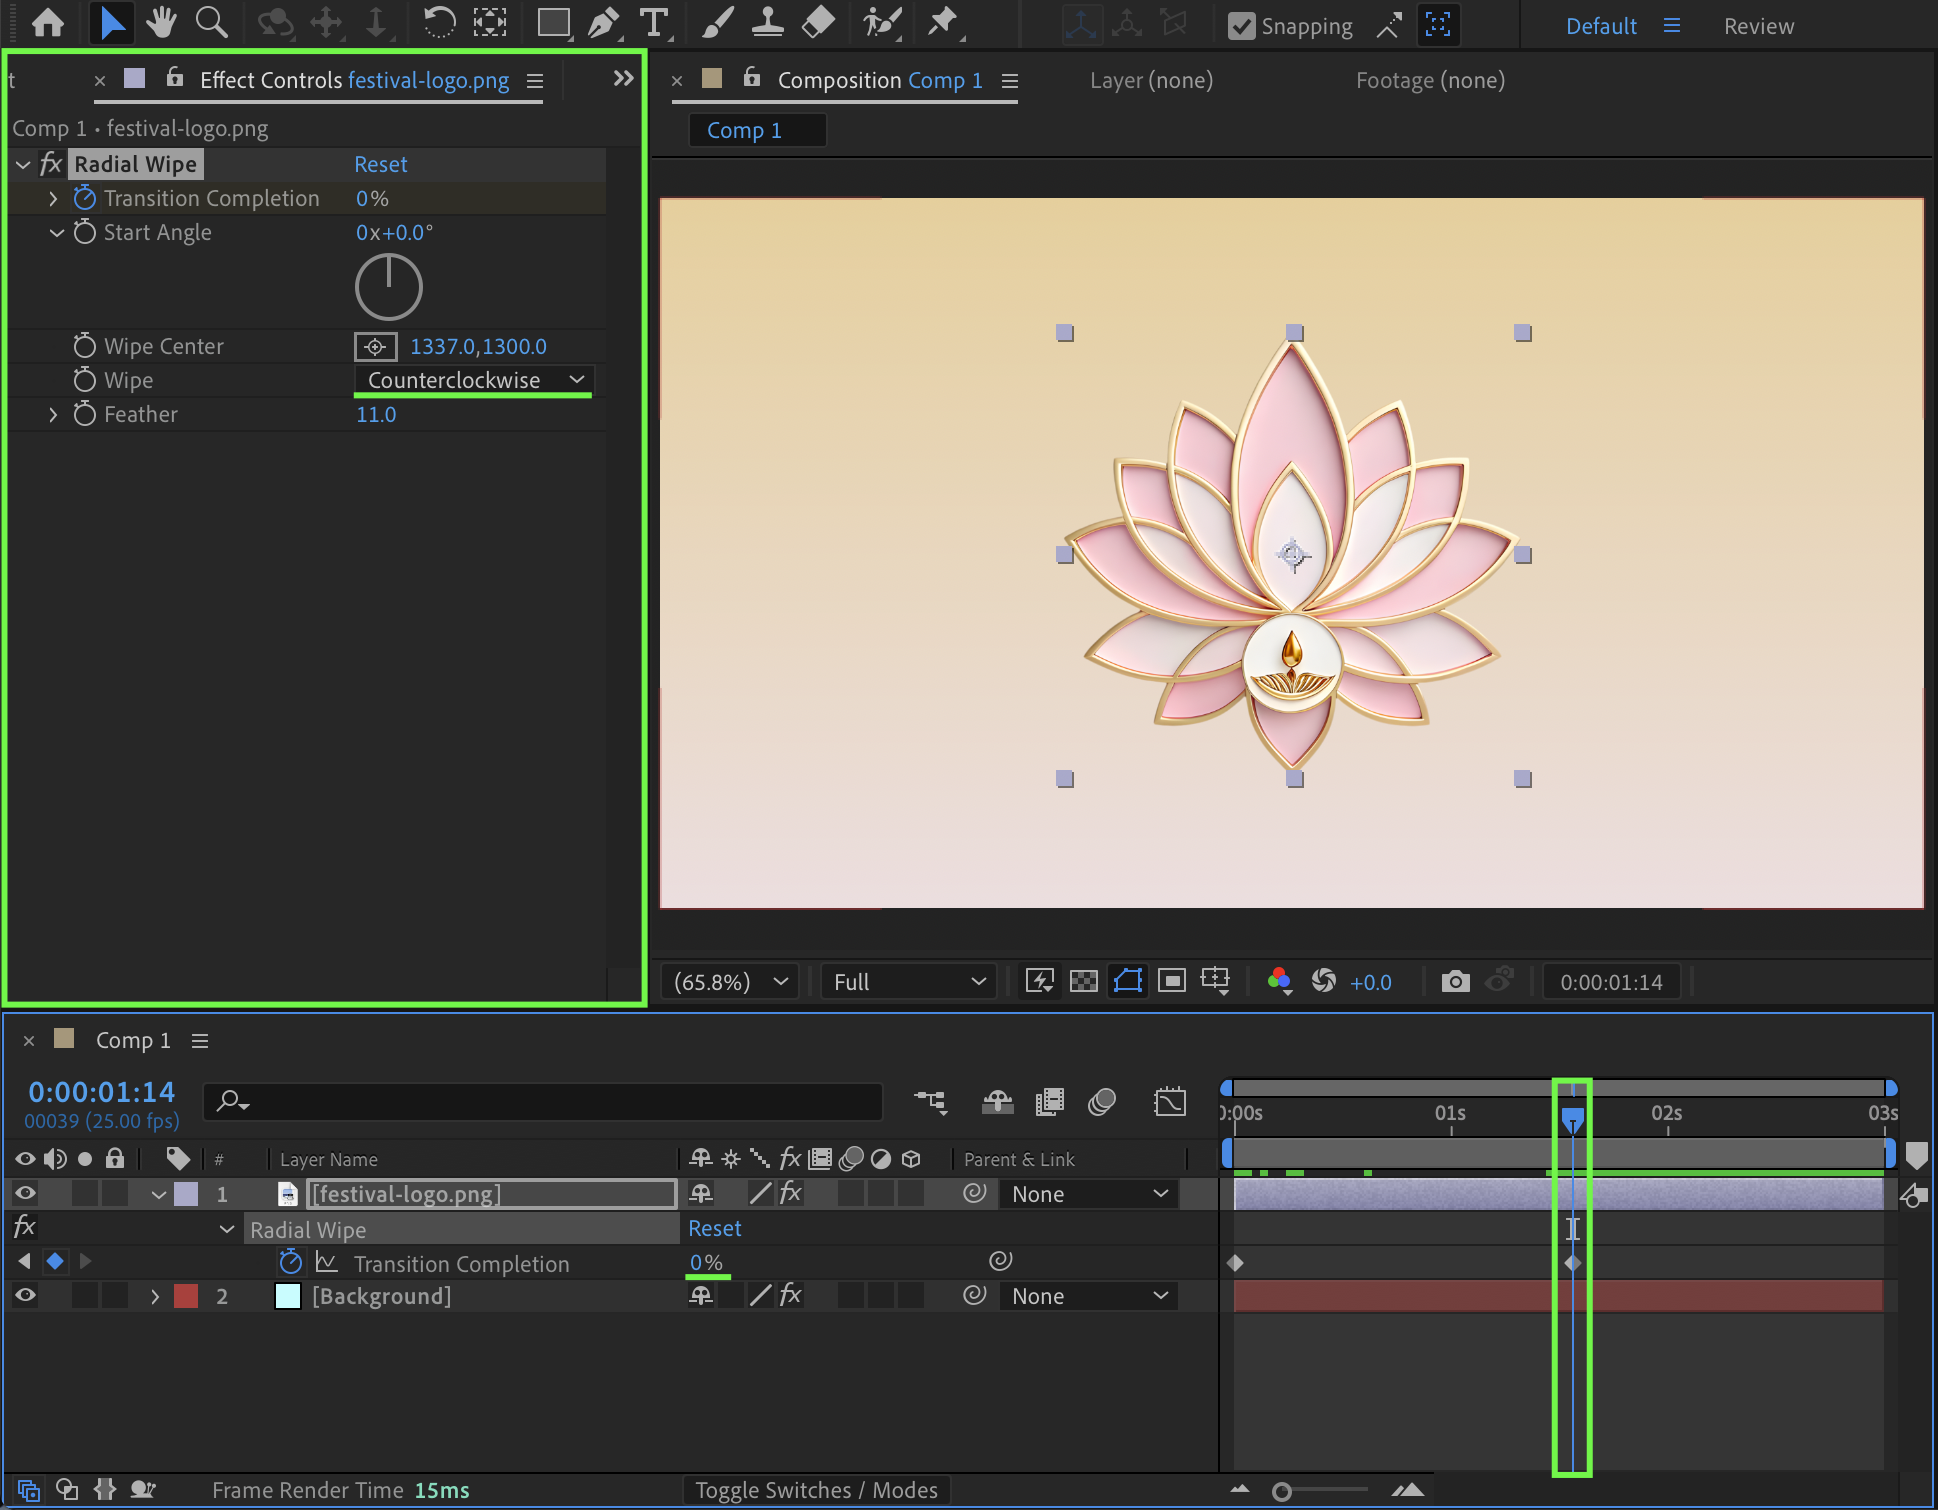
Open the Effects & Presets panel, apply Radial Wipe to the logo layer, set Feather to 11, choose Wipe to Counterclockwise, then animate Transition Completion by setting it to 100% at the beginning of the composition and 0% in the middle of the composition to reveal the logo.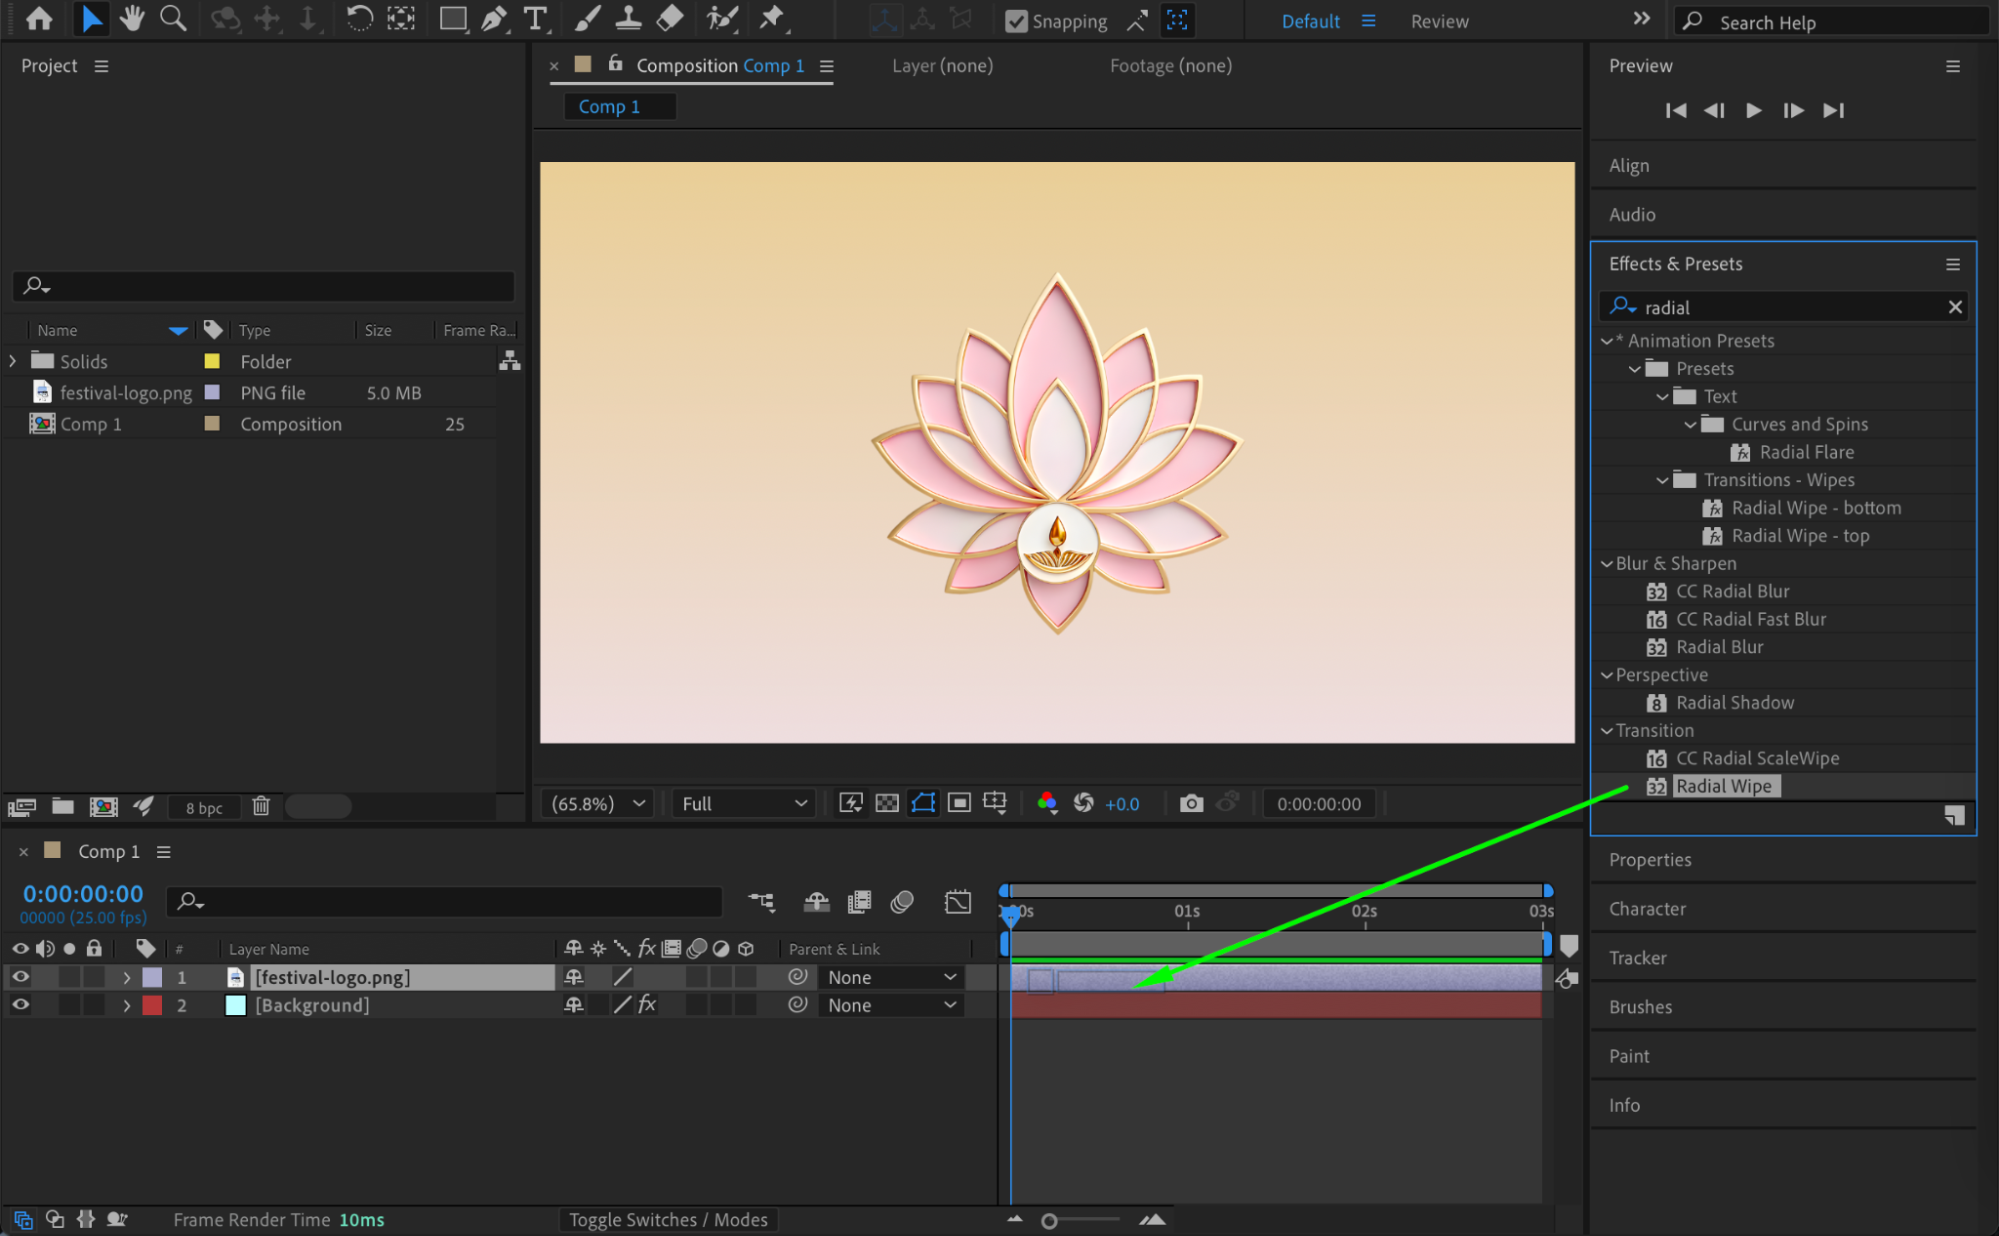
Step 5: Apply Easy Ease and Refine in Graph Editor
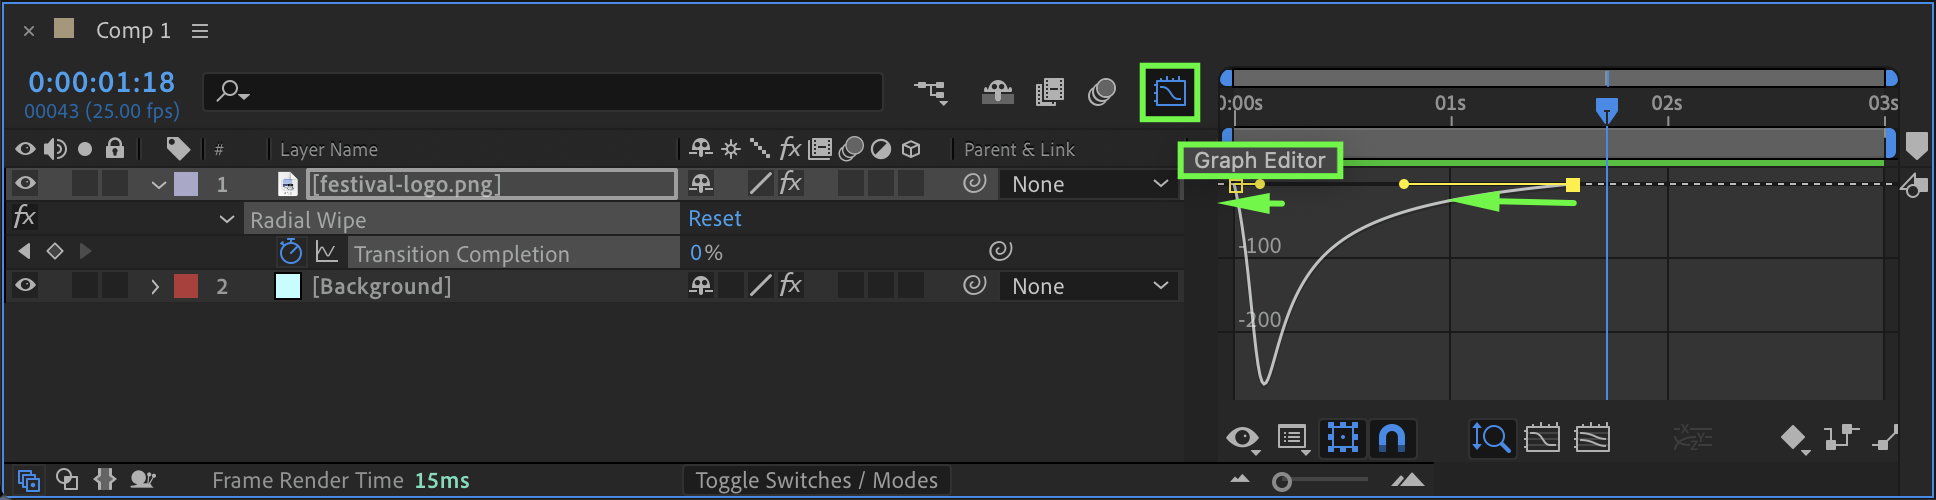
Select the Transition Completion keyframes and press F9 to apply Easy Ease, then open the Graph Editor to smooth and refine the animation curve for a more natural reveal.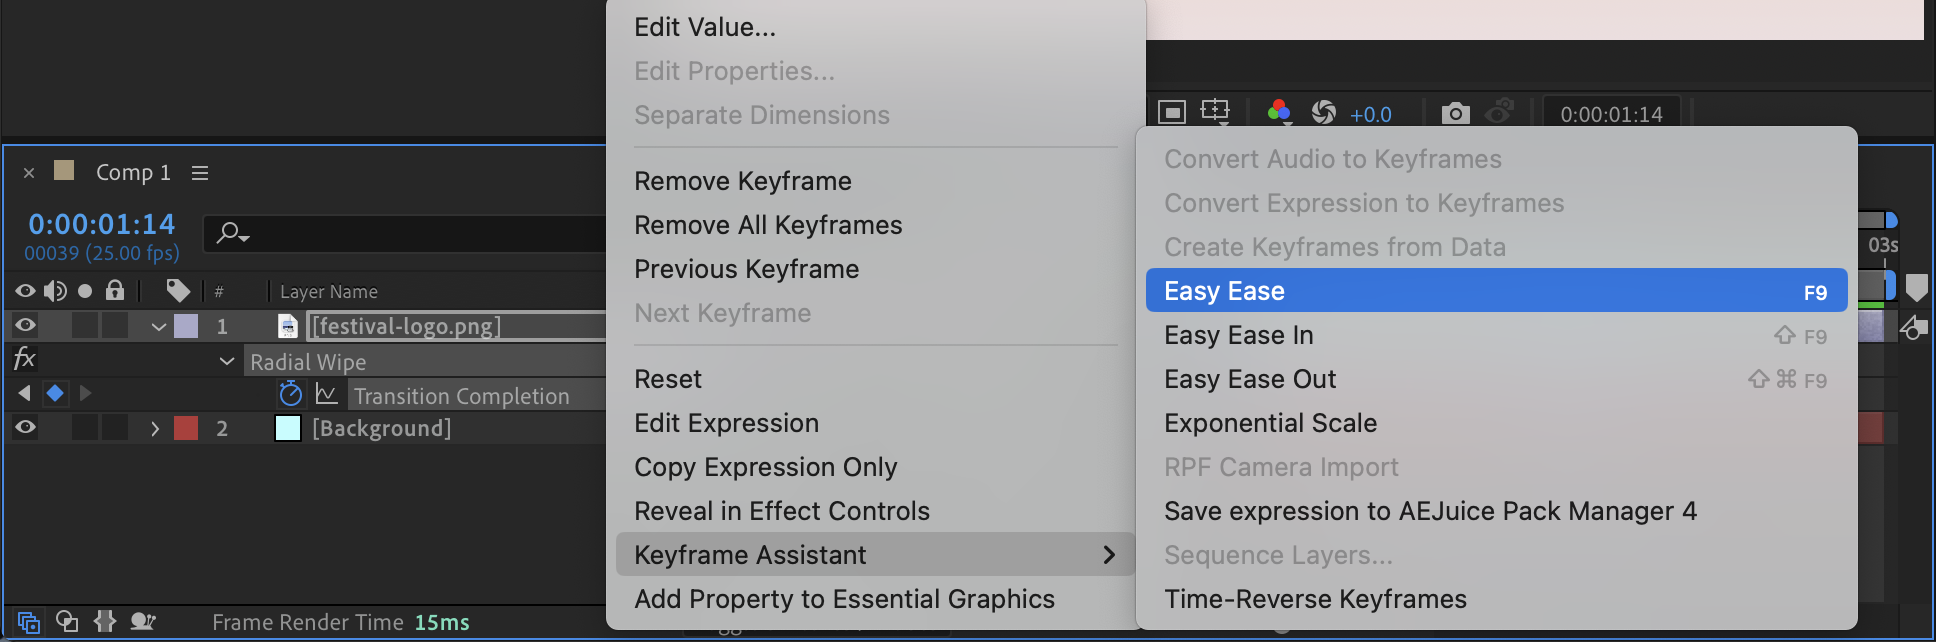
 Step 6: Add CC Force Motion Blur
Apply CC Force Motion Blur from the Effects & Presets panel, then set Motion Blur Samples to 255 and Shutter Phase to 10 to create a smoother and more dynamic reveal effect.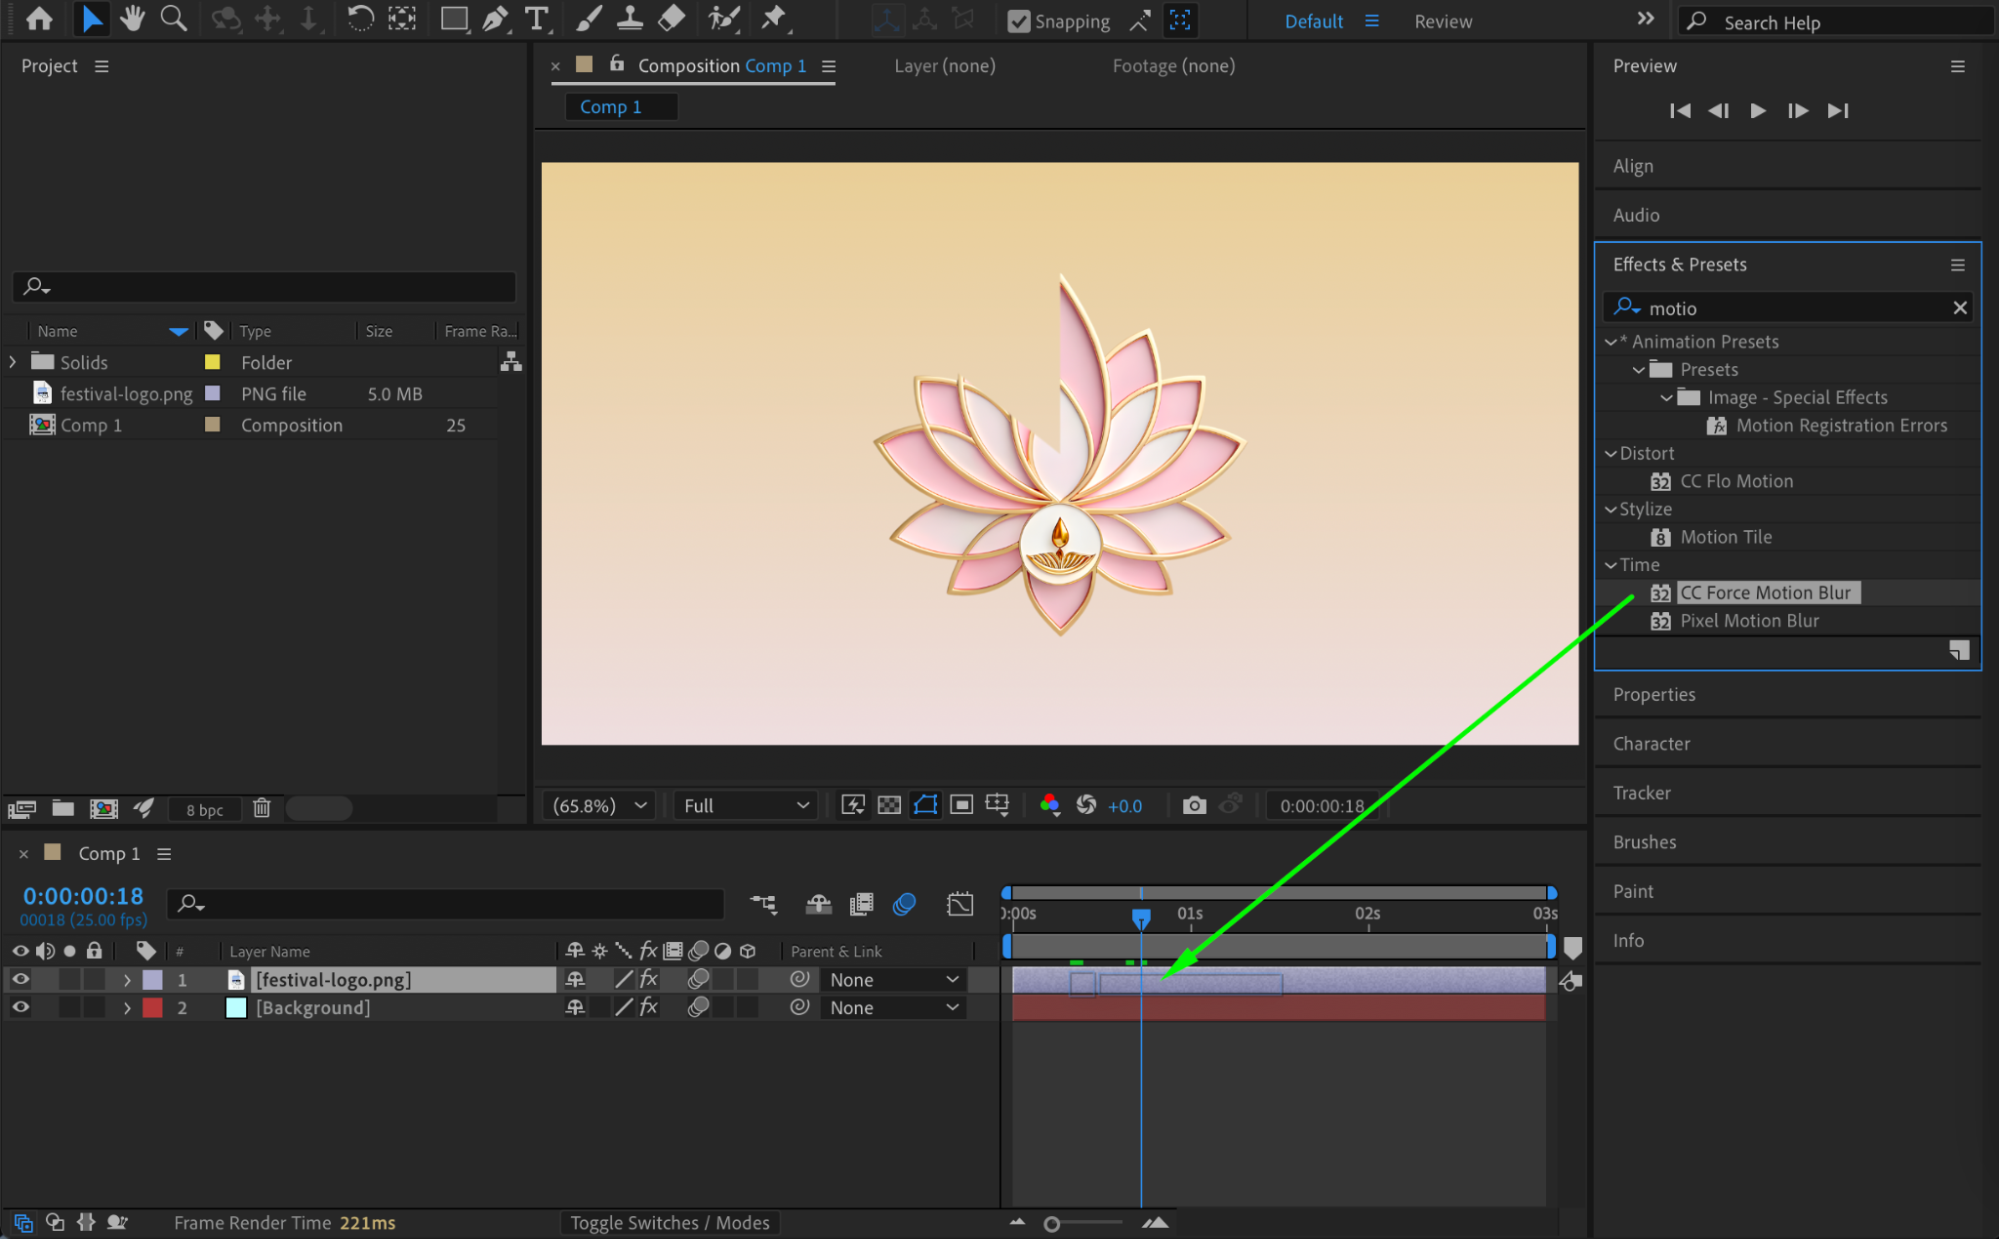
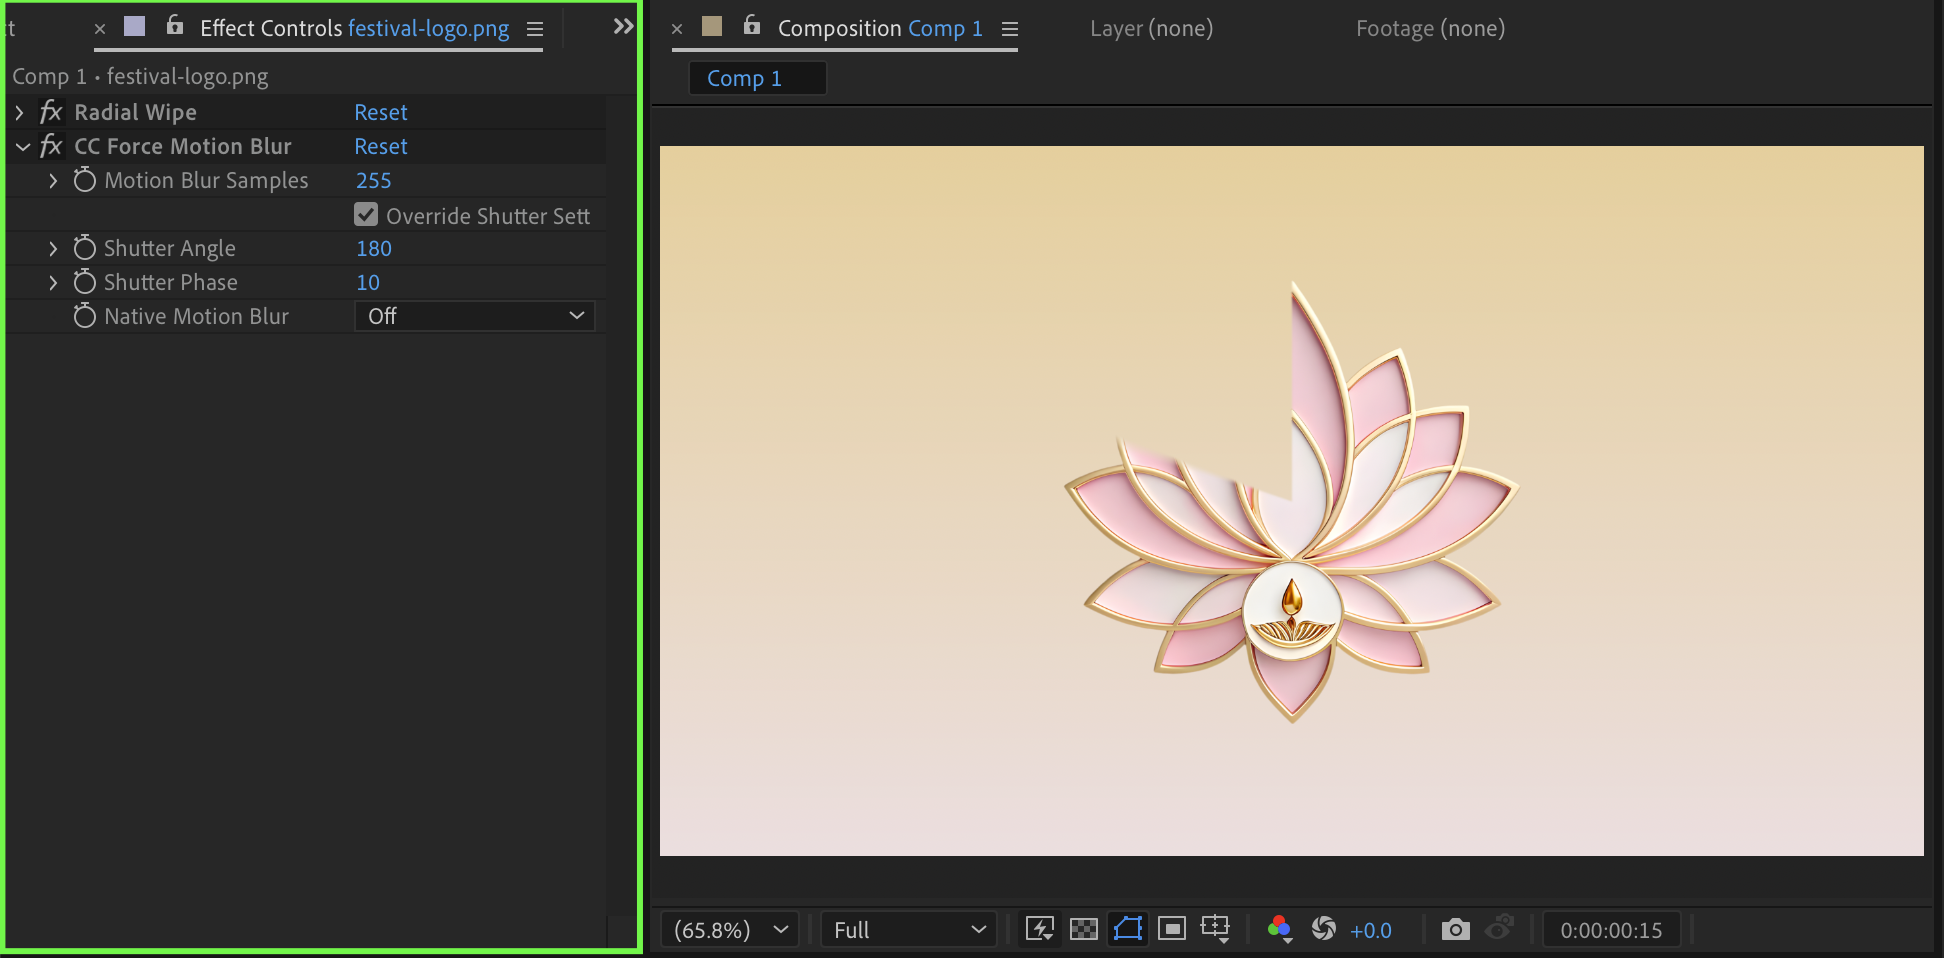 Step 7: Preview the Animation
Press Spacebar or use RAM Preview to play the animation and adjust timing or blur settings if needed.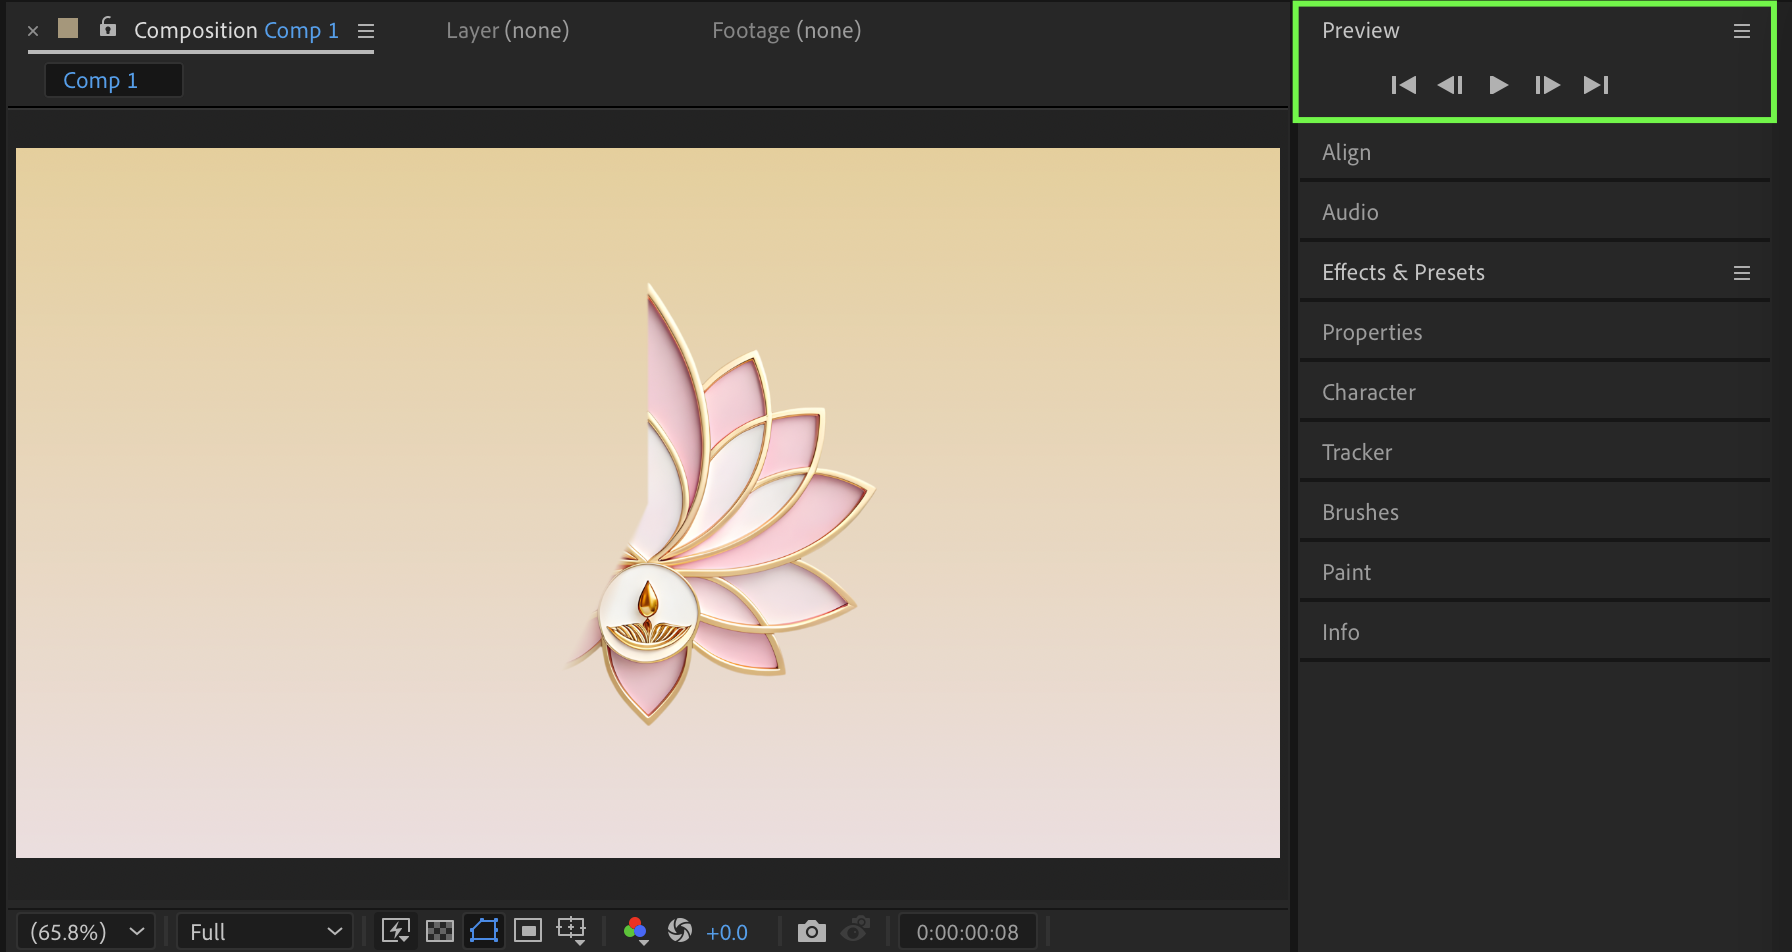 Conclusion
By animating the Radial Wipe effect and enhancing it with Easy Ease, Graph Editor adjustments, and CC Force Motion Blur, you can create a clean and professional logo reveal process in After Effects. This technique is perfect for branding intros, presentations, and promotional videos.
Our Bestsellers
Our Bestsellers

