Introduction
Adding a colored tint can give your video a stylized look, enhance mood, or unify colors across a scene. In this tutorial, you’ll learn how to use the Tint effect in After Effects to apply custom color mapping and fine-tune your video’s look.
Step 1: Import Your Video
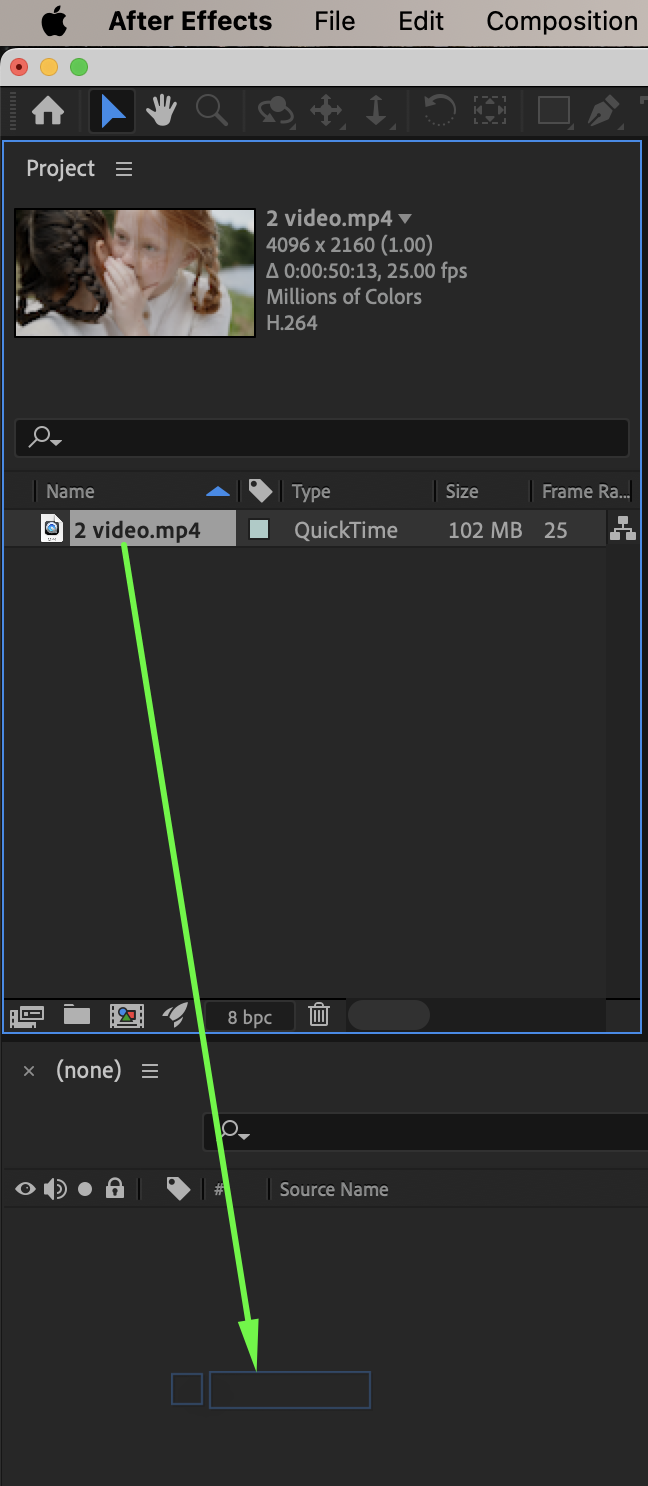
Go to File → Import → File and import your video. Drag it onto the timeline.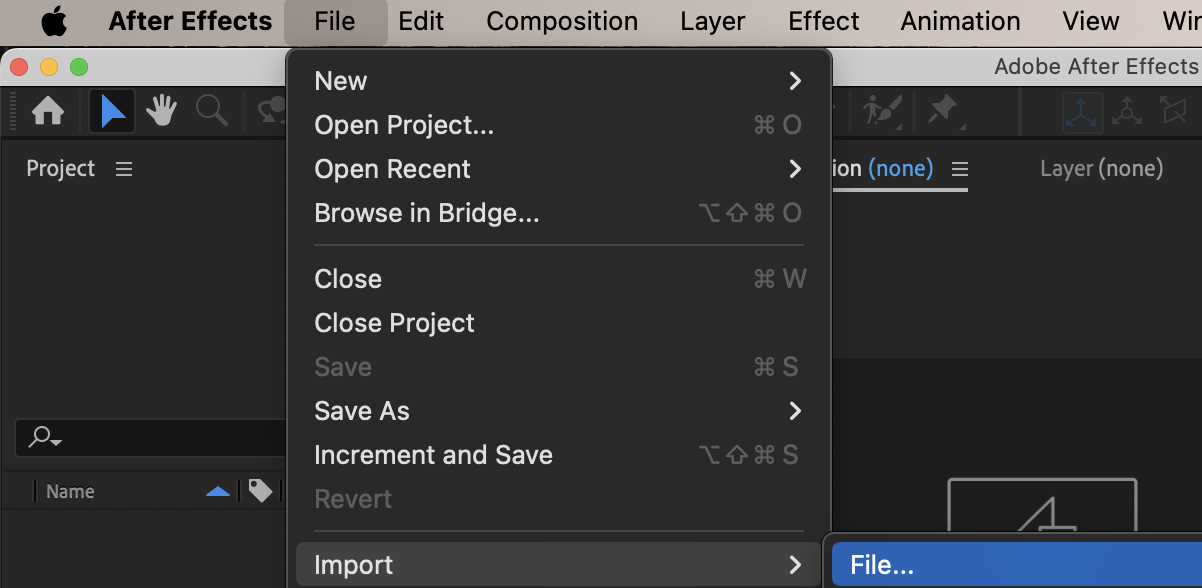
 Step 2: Apply the Tint Effect
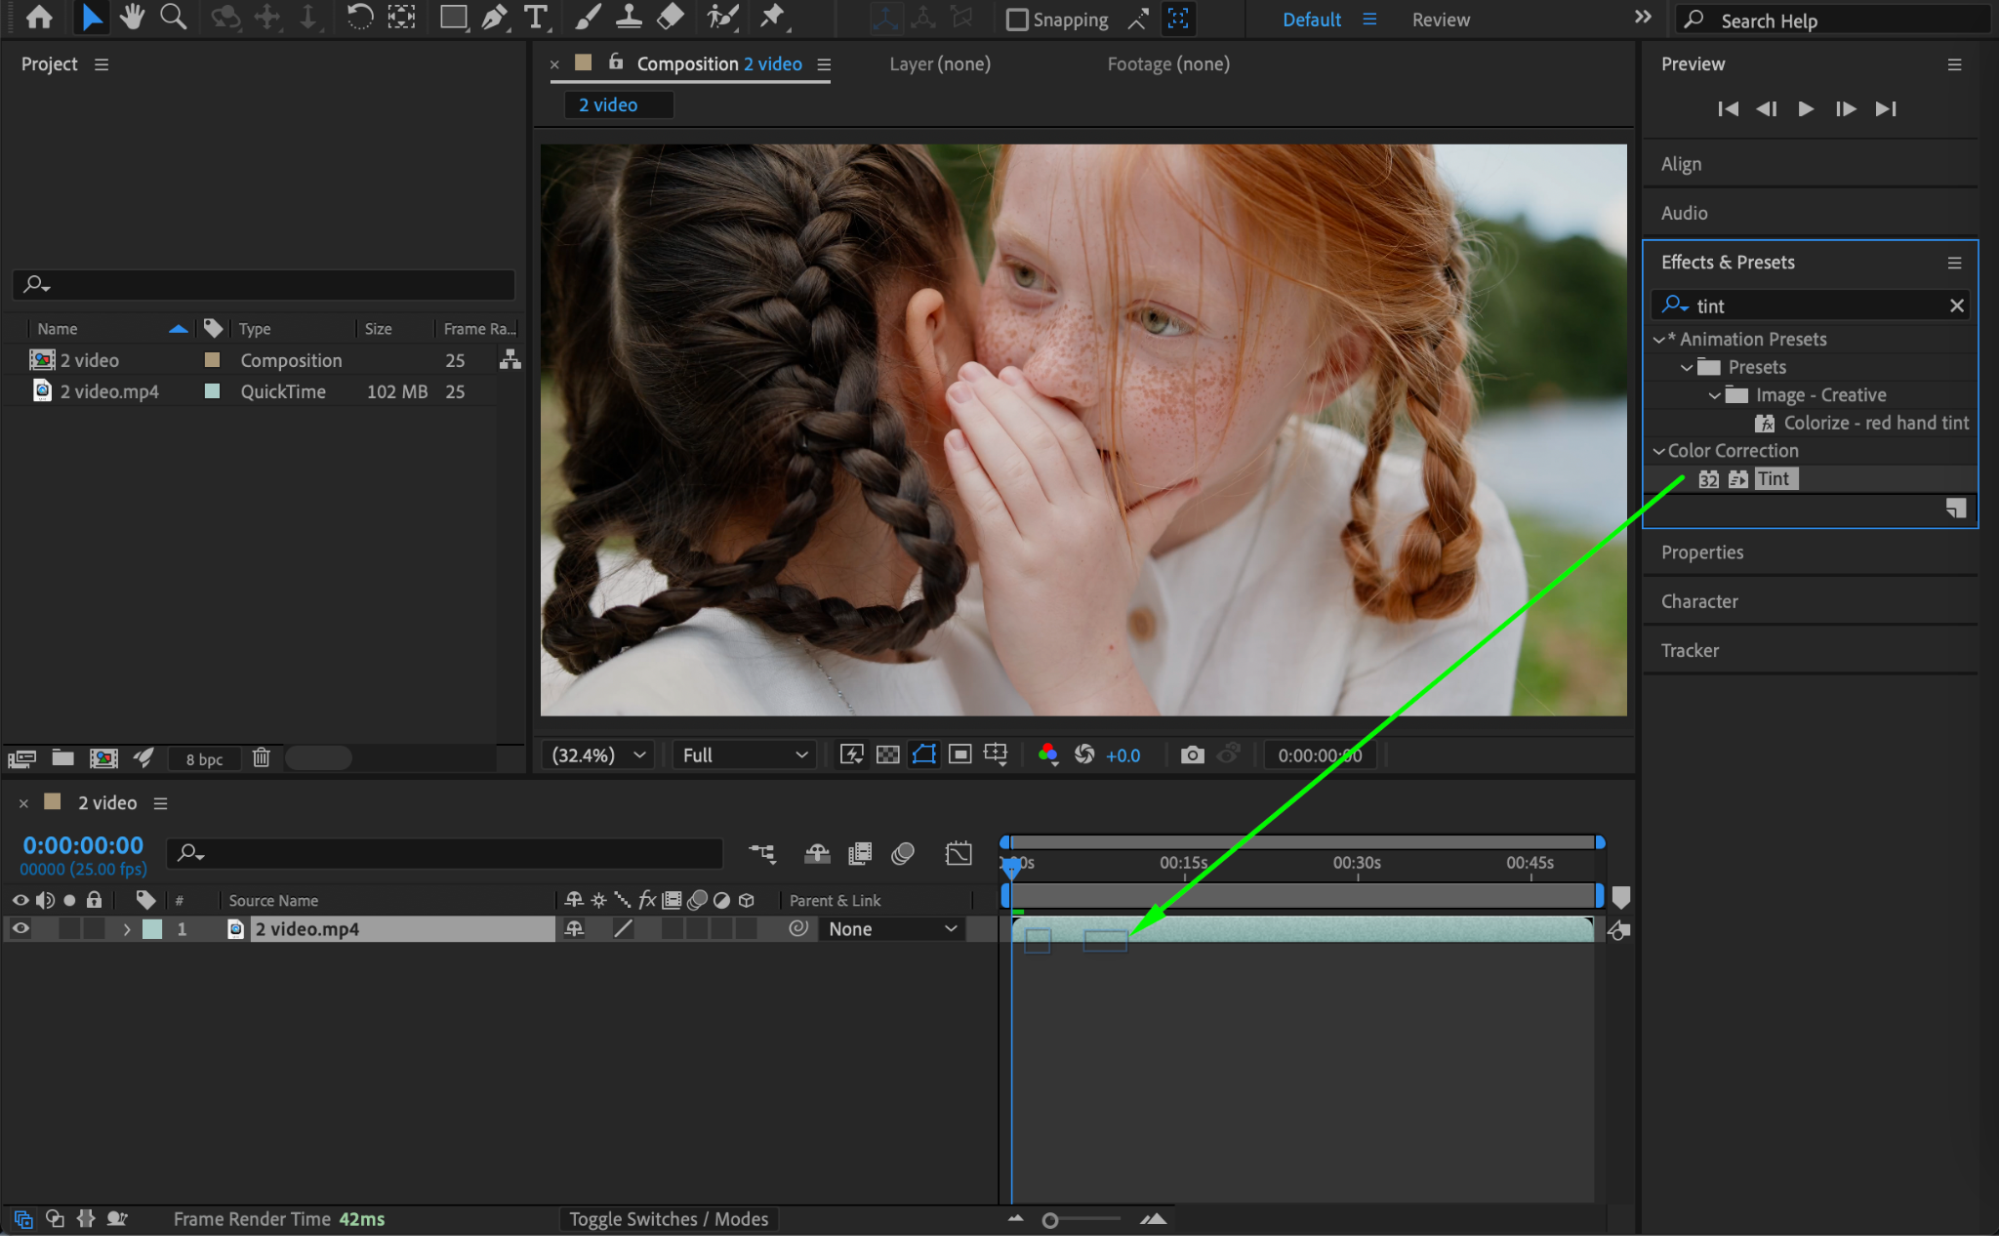
Select your video layer. From the Effects & Presets panel, drag Tint onto the video layer.
Get 10% off when you subscribe to our newsletter

Step 3: Adjust Tint Settings
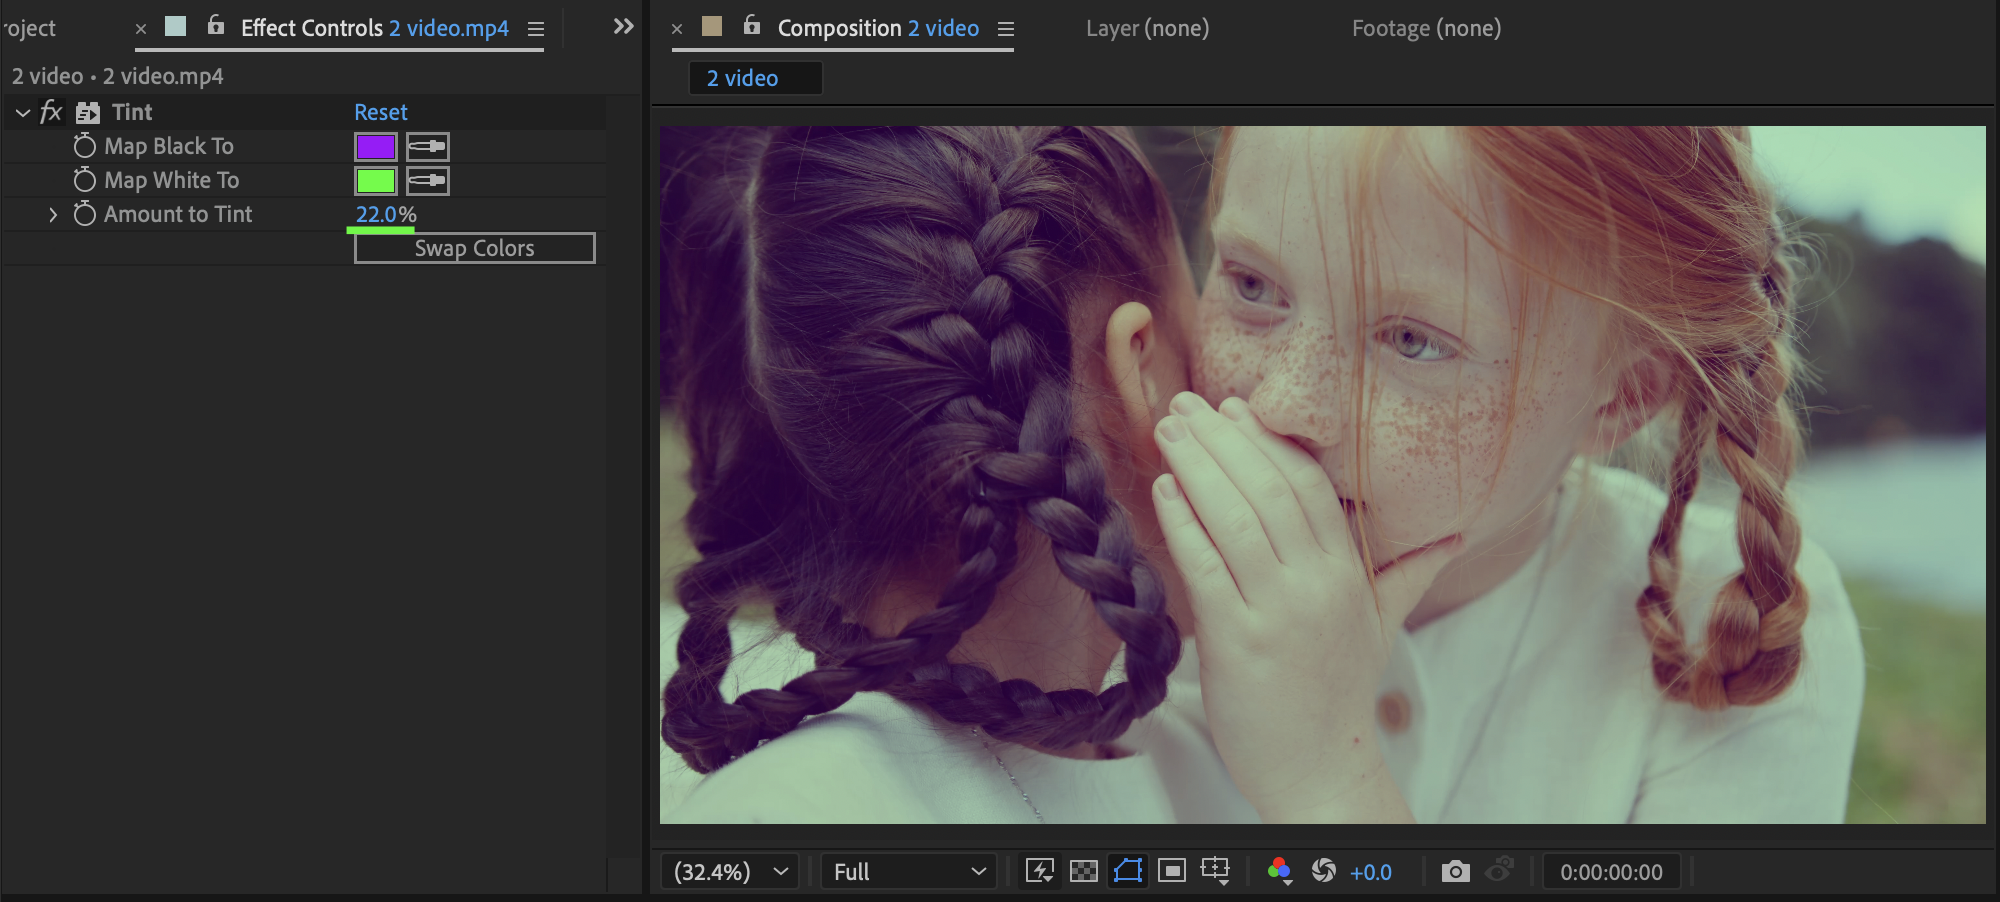
In the Effect Controls panel:
Map Black To: Choose a color for the darker areas of your video (for example, Violet).
Map White To: Choose a color for the brighter areas of your video (for example, Green).
Amount to Tint: Adjust this value to control the strength of the color tint (for example, 20).
This creates a smooth color mapping across your video.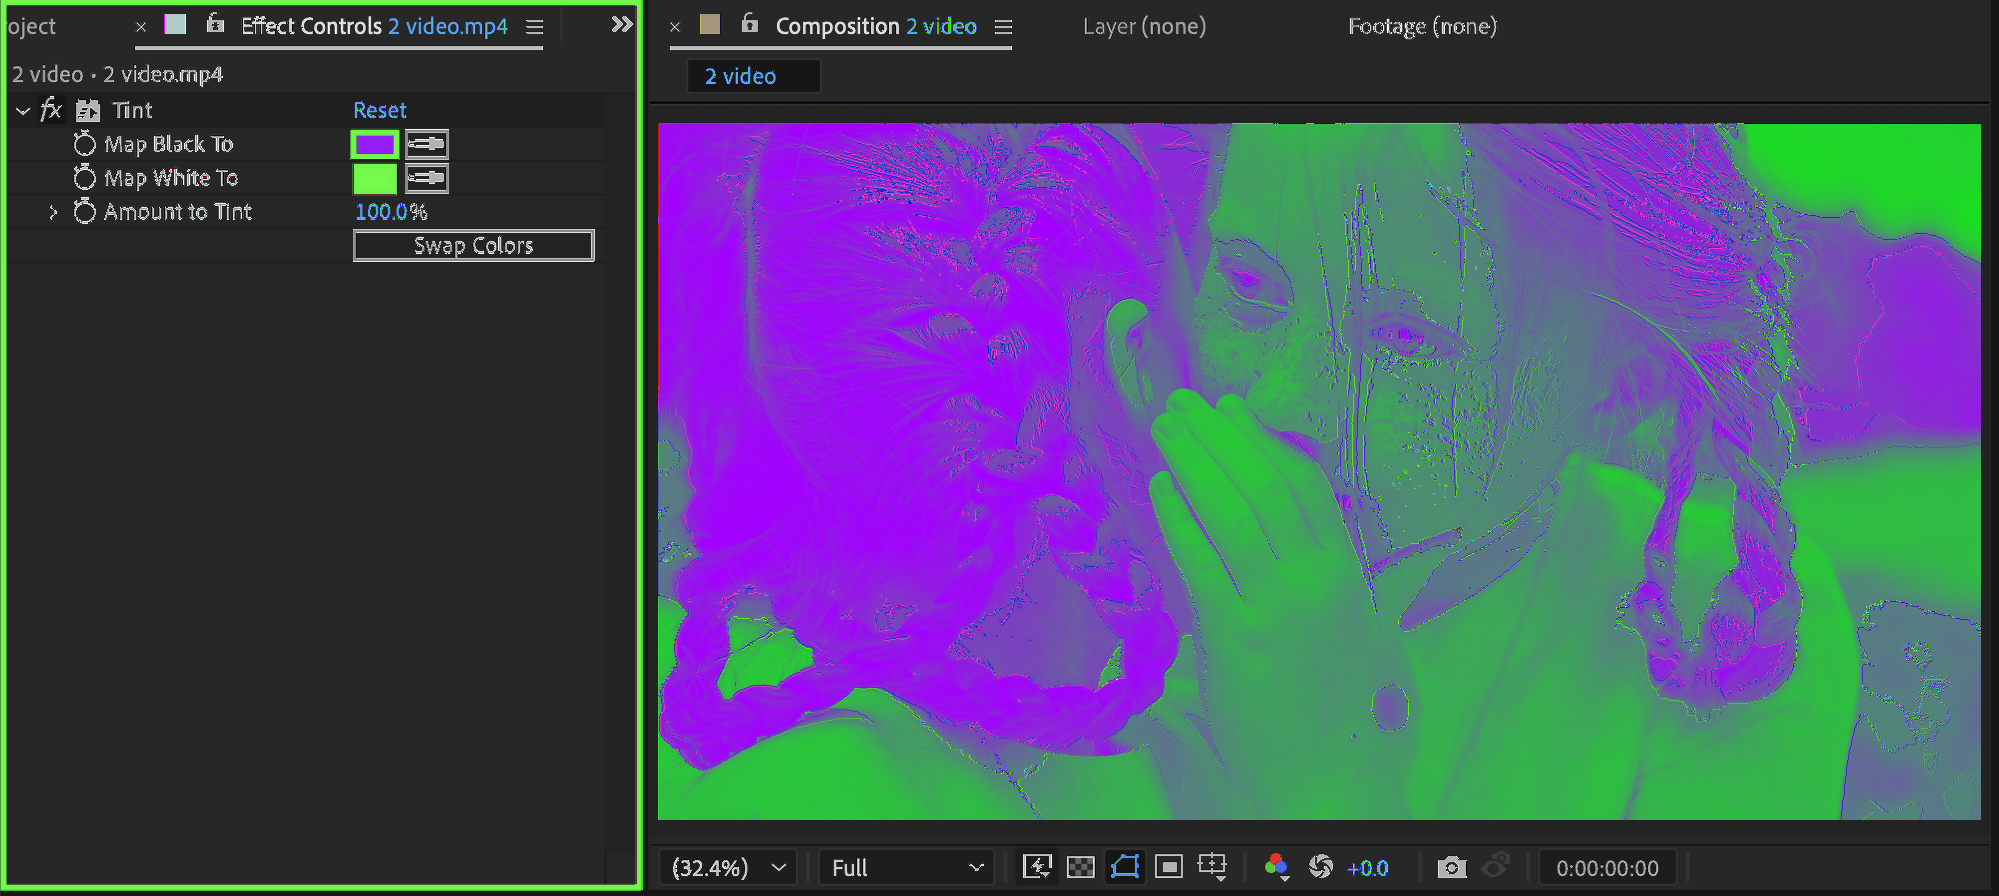
 Step 4: Optional – Adjust Brightness & Contrast
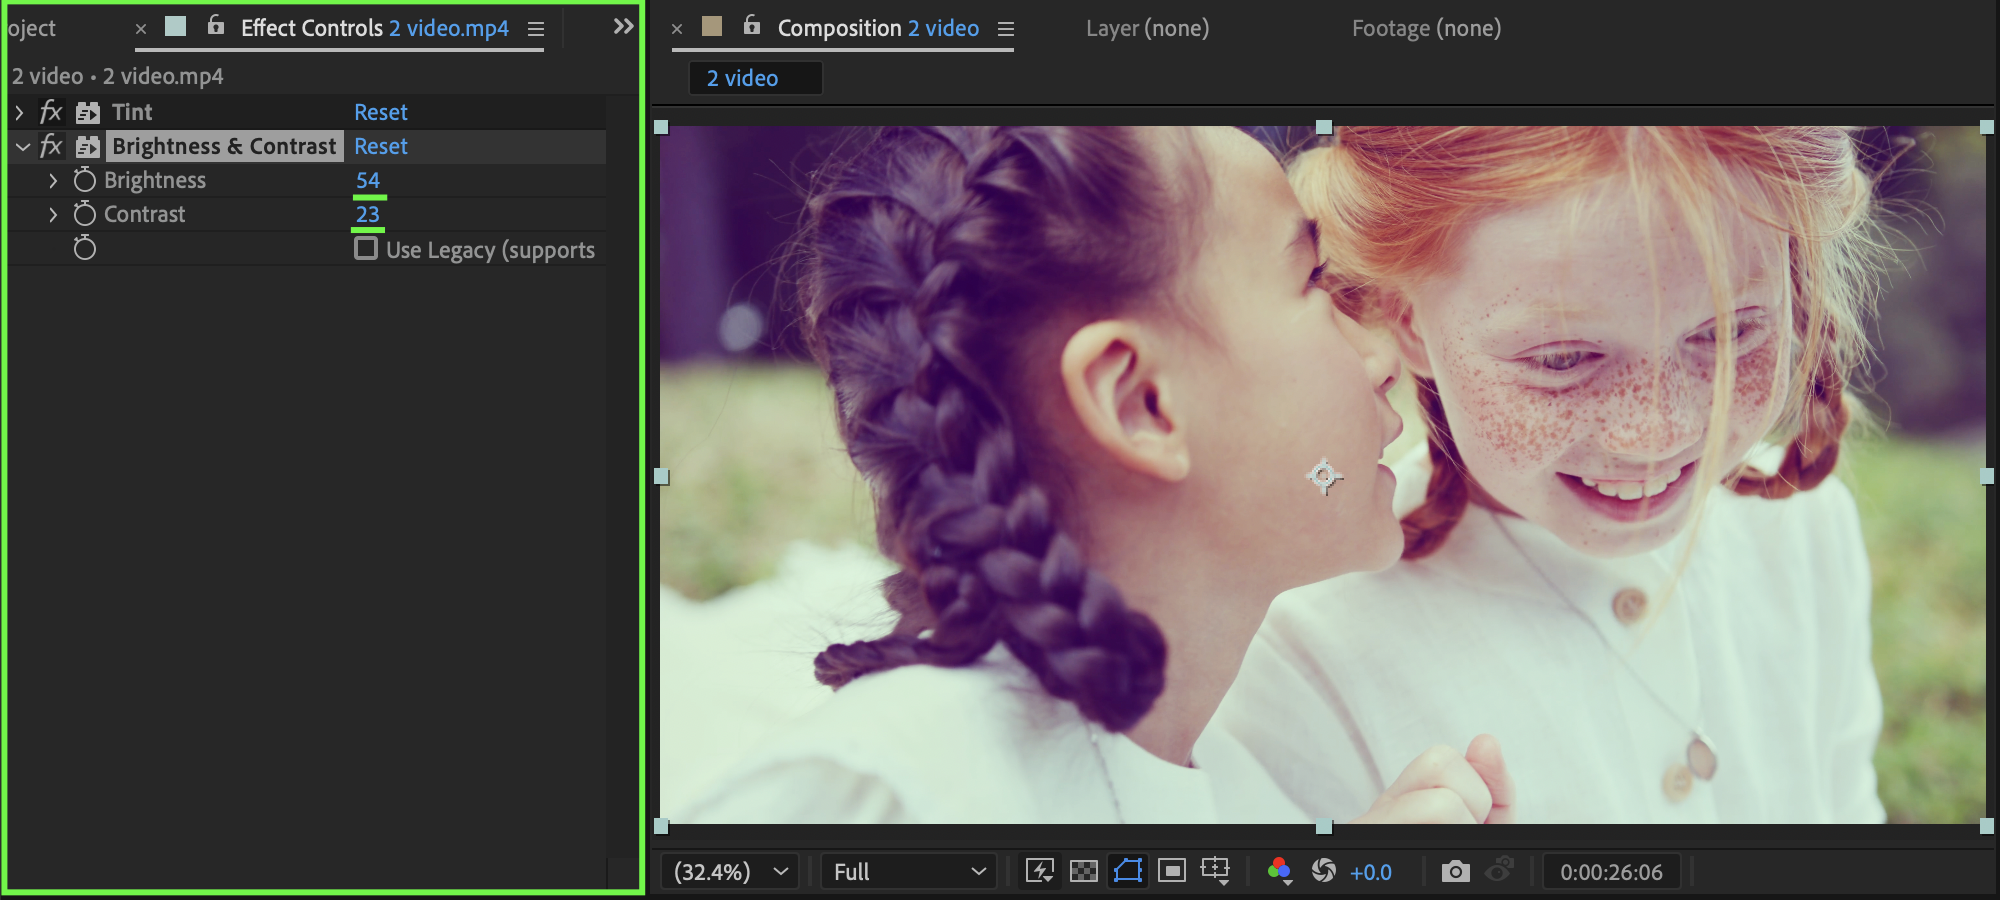
For additional fine-tuning, you can apply the Brightness & Contrast effect:
Adjust Brightness to lighten or darken the image.
Adjust Contrast to enhance the difference between dark and light areas.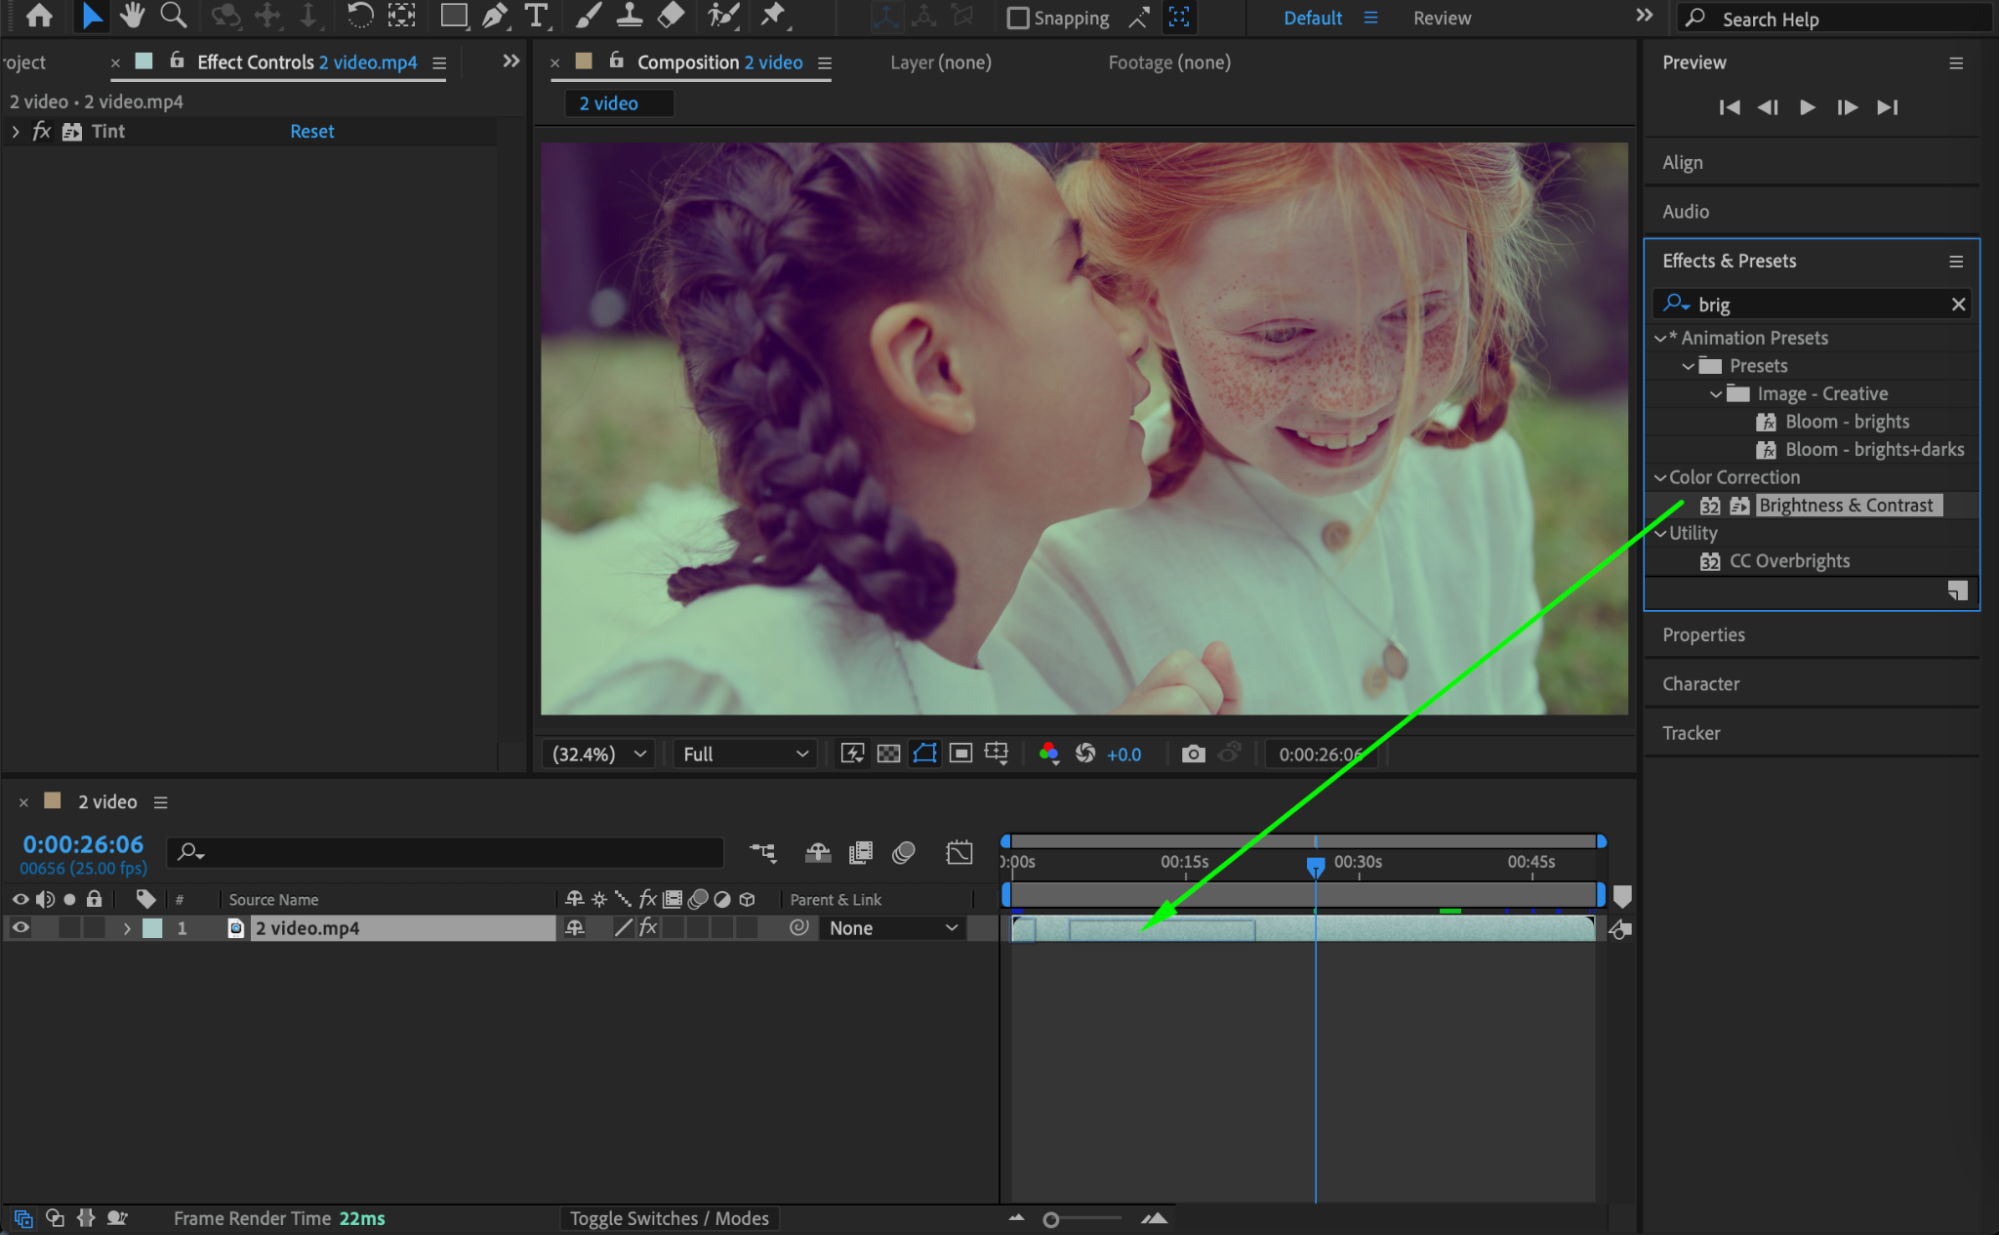
Step 5: Preview the Result
Play the composition and adjust the tint and brightness/contrast settings as needed to achieve the desired look.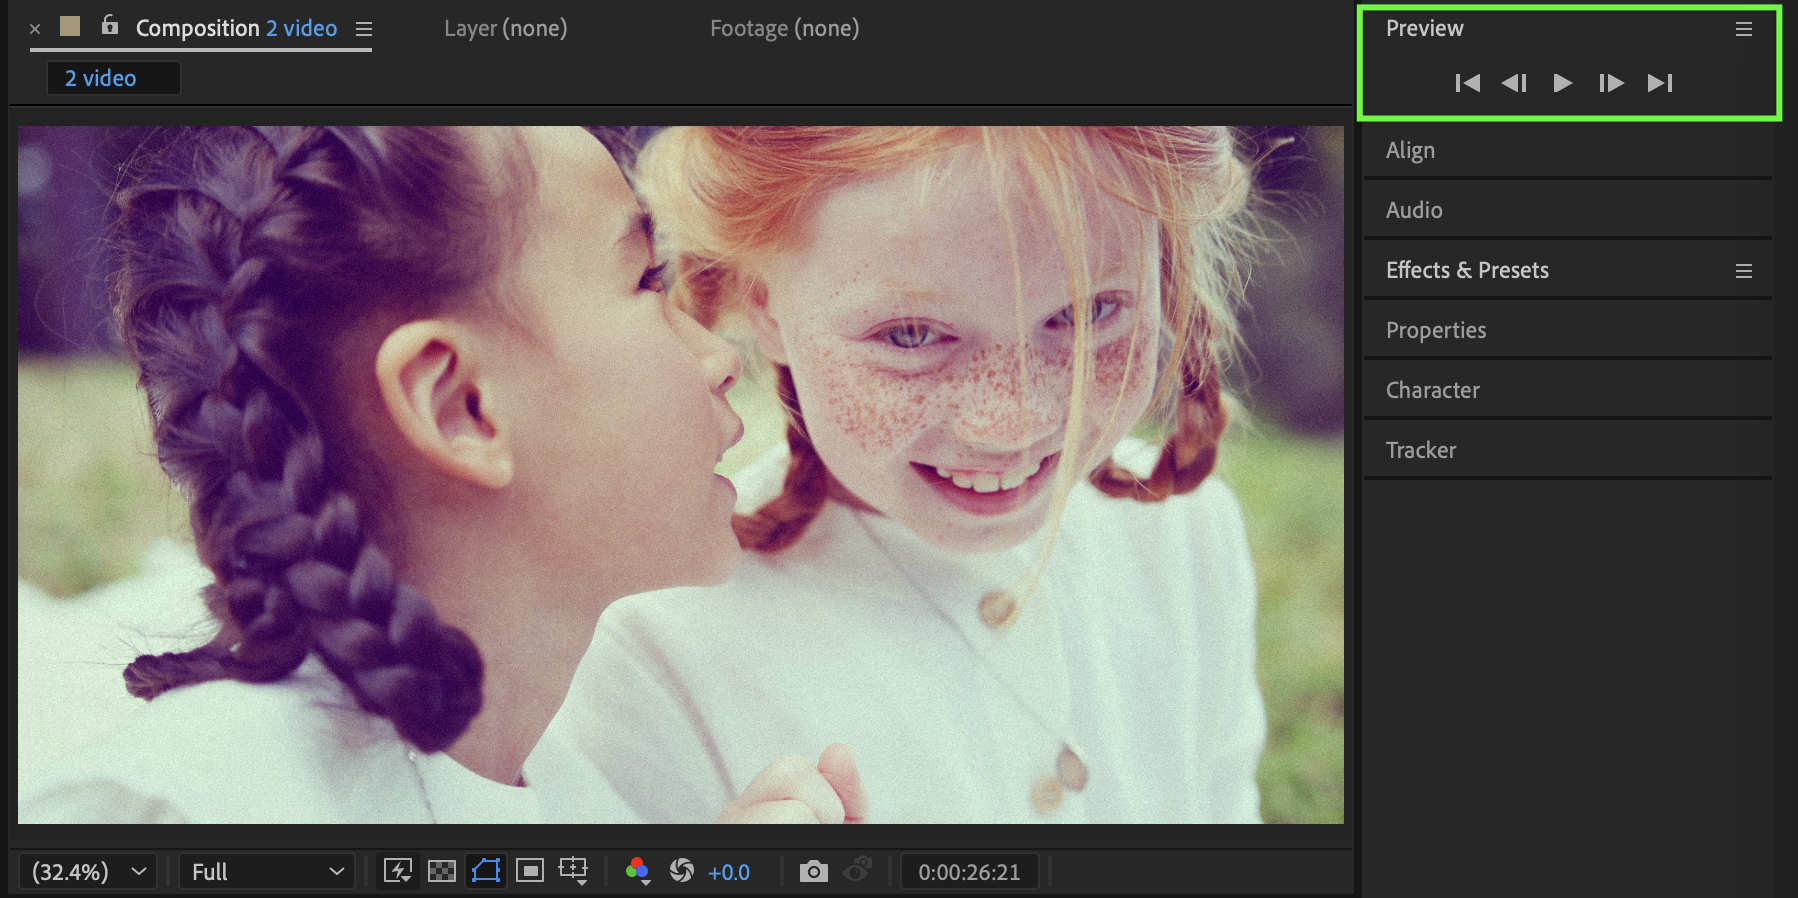
Conclusion
Using the Tint effect in After Effects allows you to quickly add a custom color grading to your videos. Combined with optional Brightness & Contrast adjustments, you can create visually appealing and stylistically unified footage.
Our Bestsellers
Our Bestsellers

