Introduction
A CRT (Cathode Ray Tube) filter gives your video a retro, old-school TV look. In this tutorial, you’ll learn how to apply multiple effects on an adjustment layer to simulate the CRT style, including grid lines, noise, glitch distortions, and color adjustments.
Step 1: Import Your Video
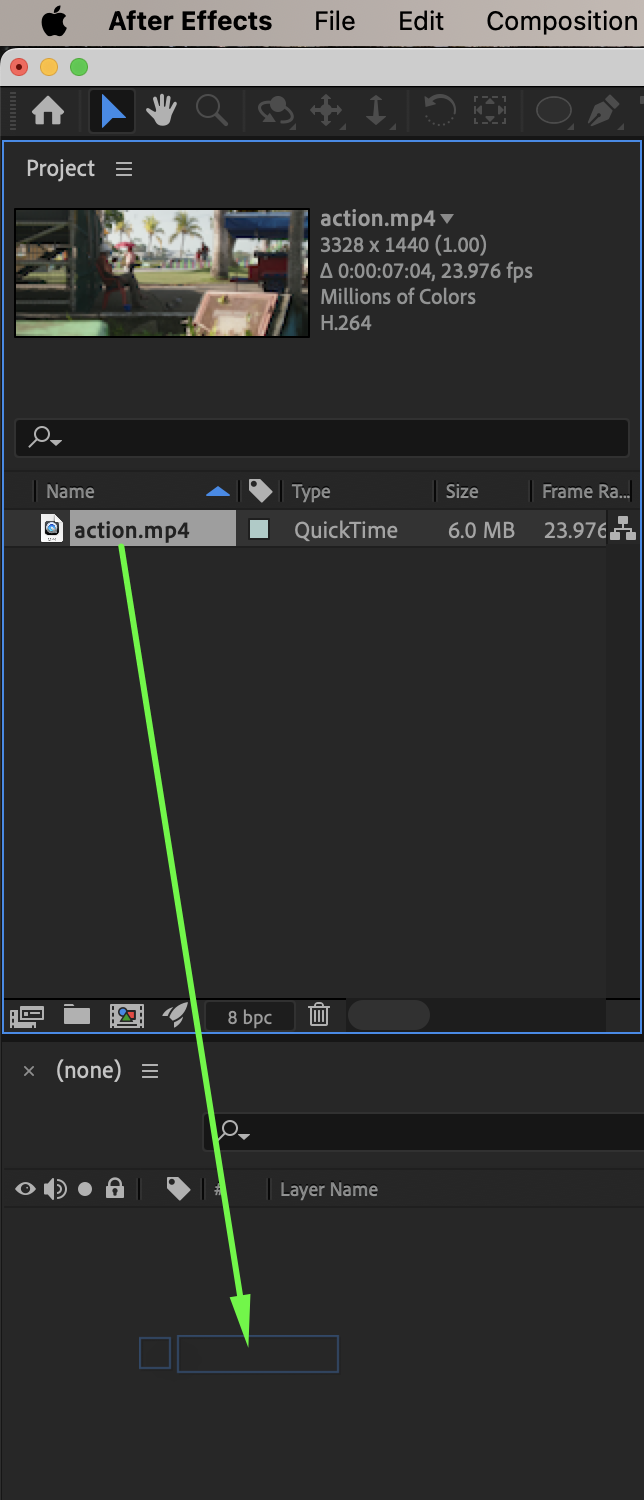
Go to File → Import → File and import your video. Drag it onto the timeline.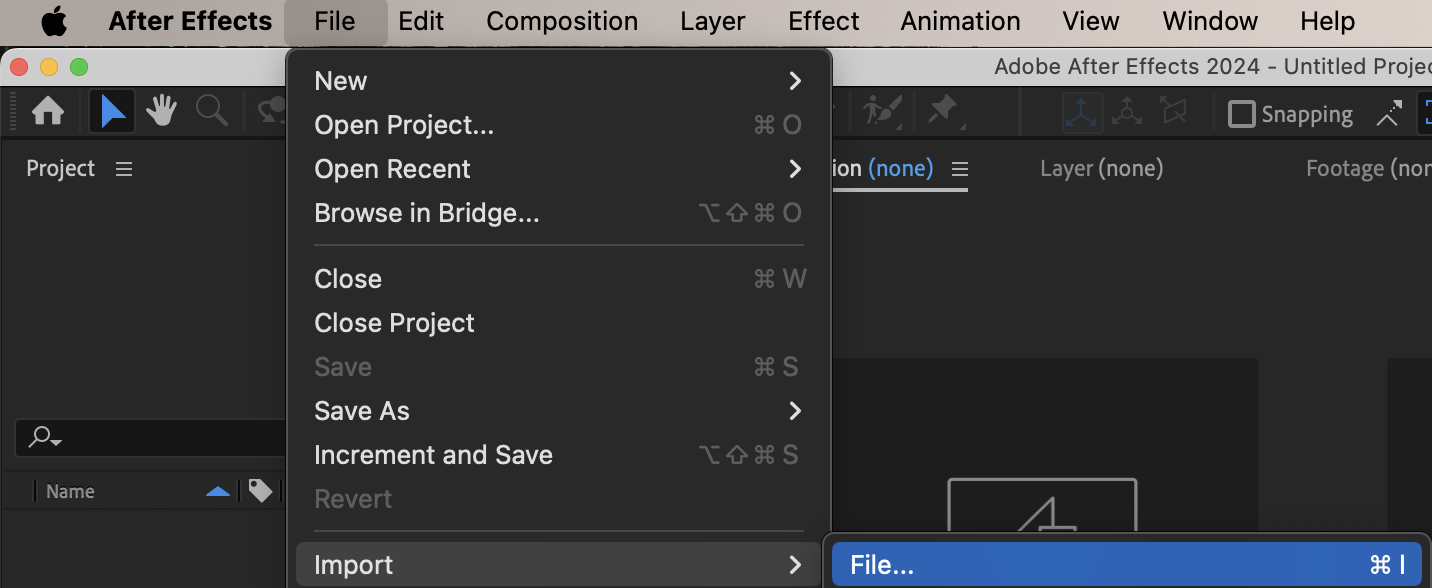
 Step 2: Create an Adjustment Layer
Go to Layer → New → Adjustment Layer. This layer will hold all the CRT effects.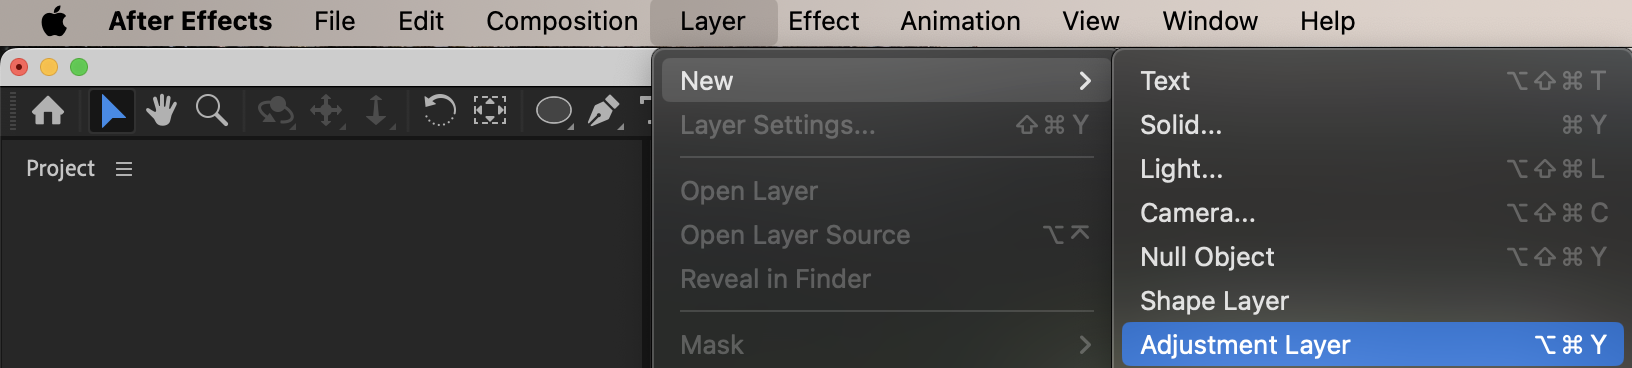 Step 3: Add the Grid Effect
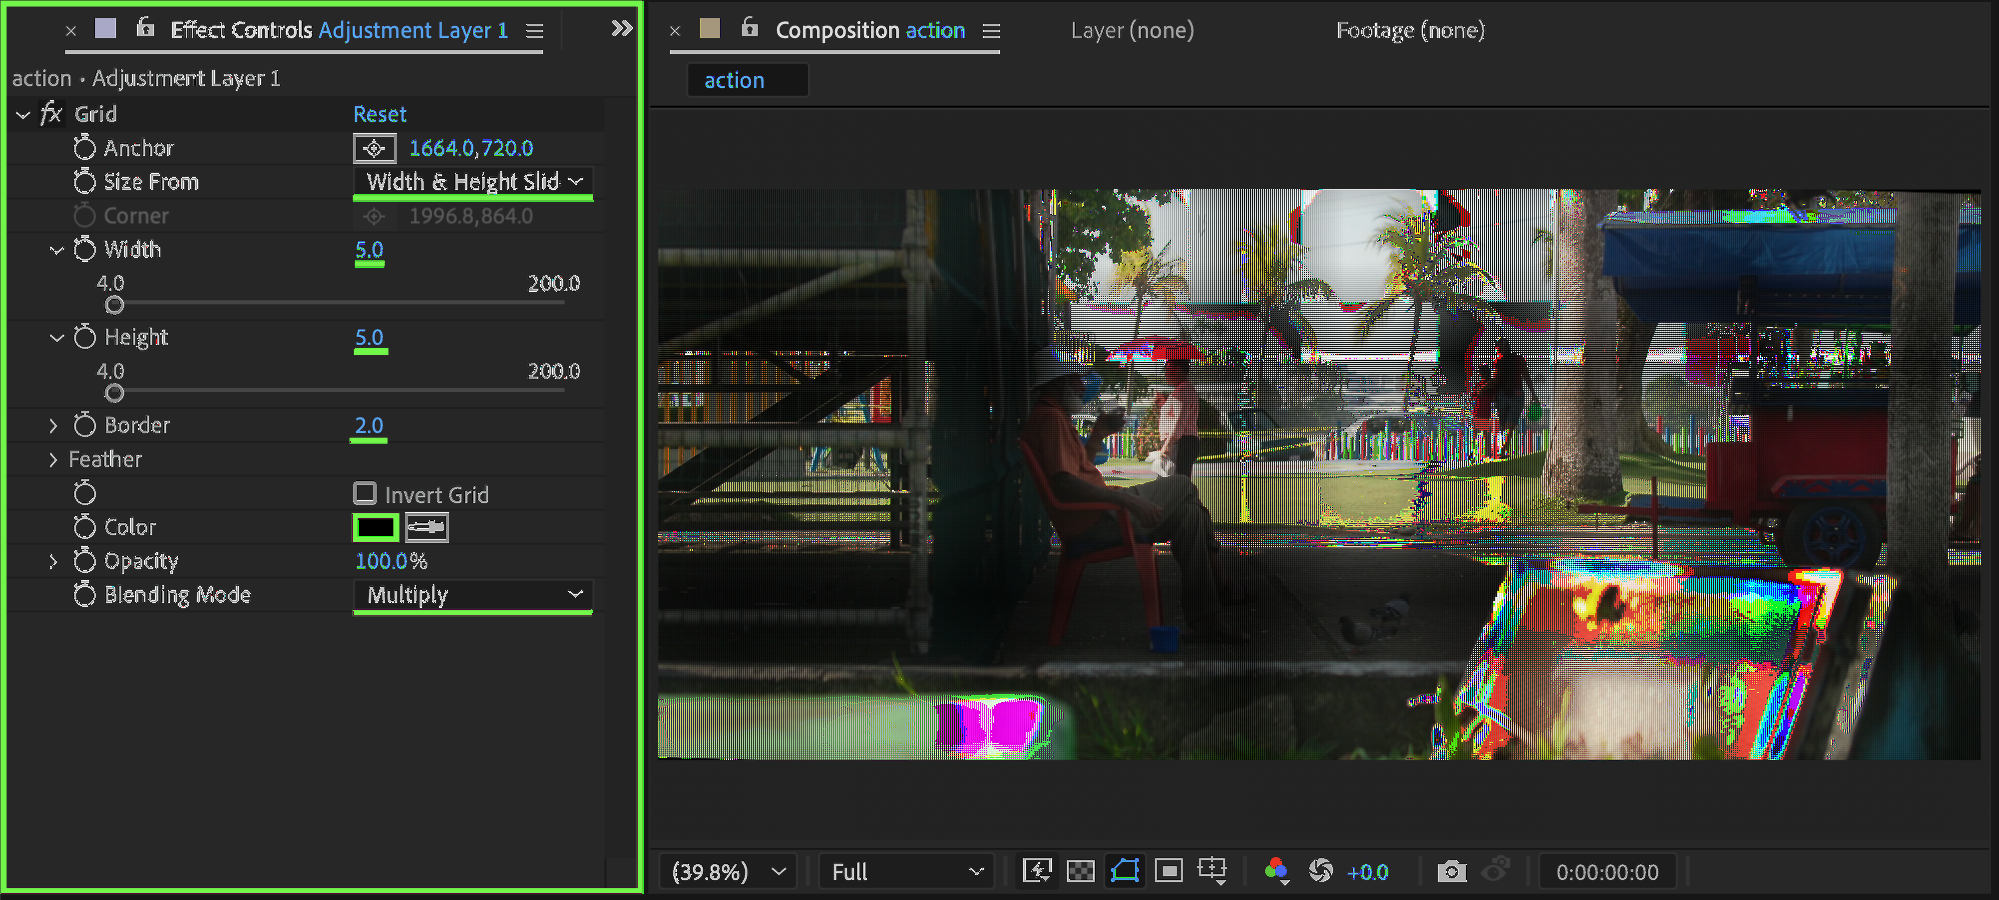
Apply Grid from the Effects & Presets panel to the adjustment layer. Set:
Size From: Width & Height Sliders
Width: 5
Height: 5
Border: 2
Color: Black
Blending Mode: Multiply
This creates the scanlines typical of CRT displays.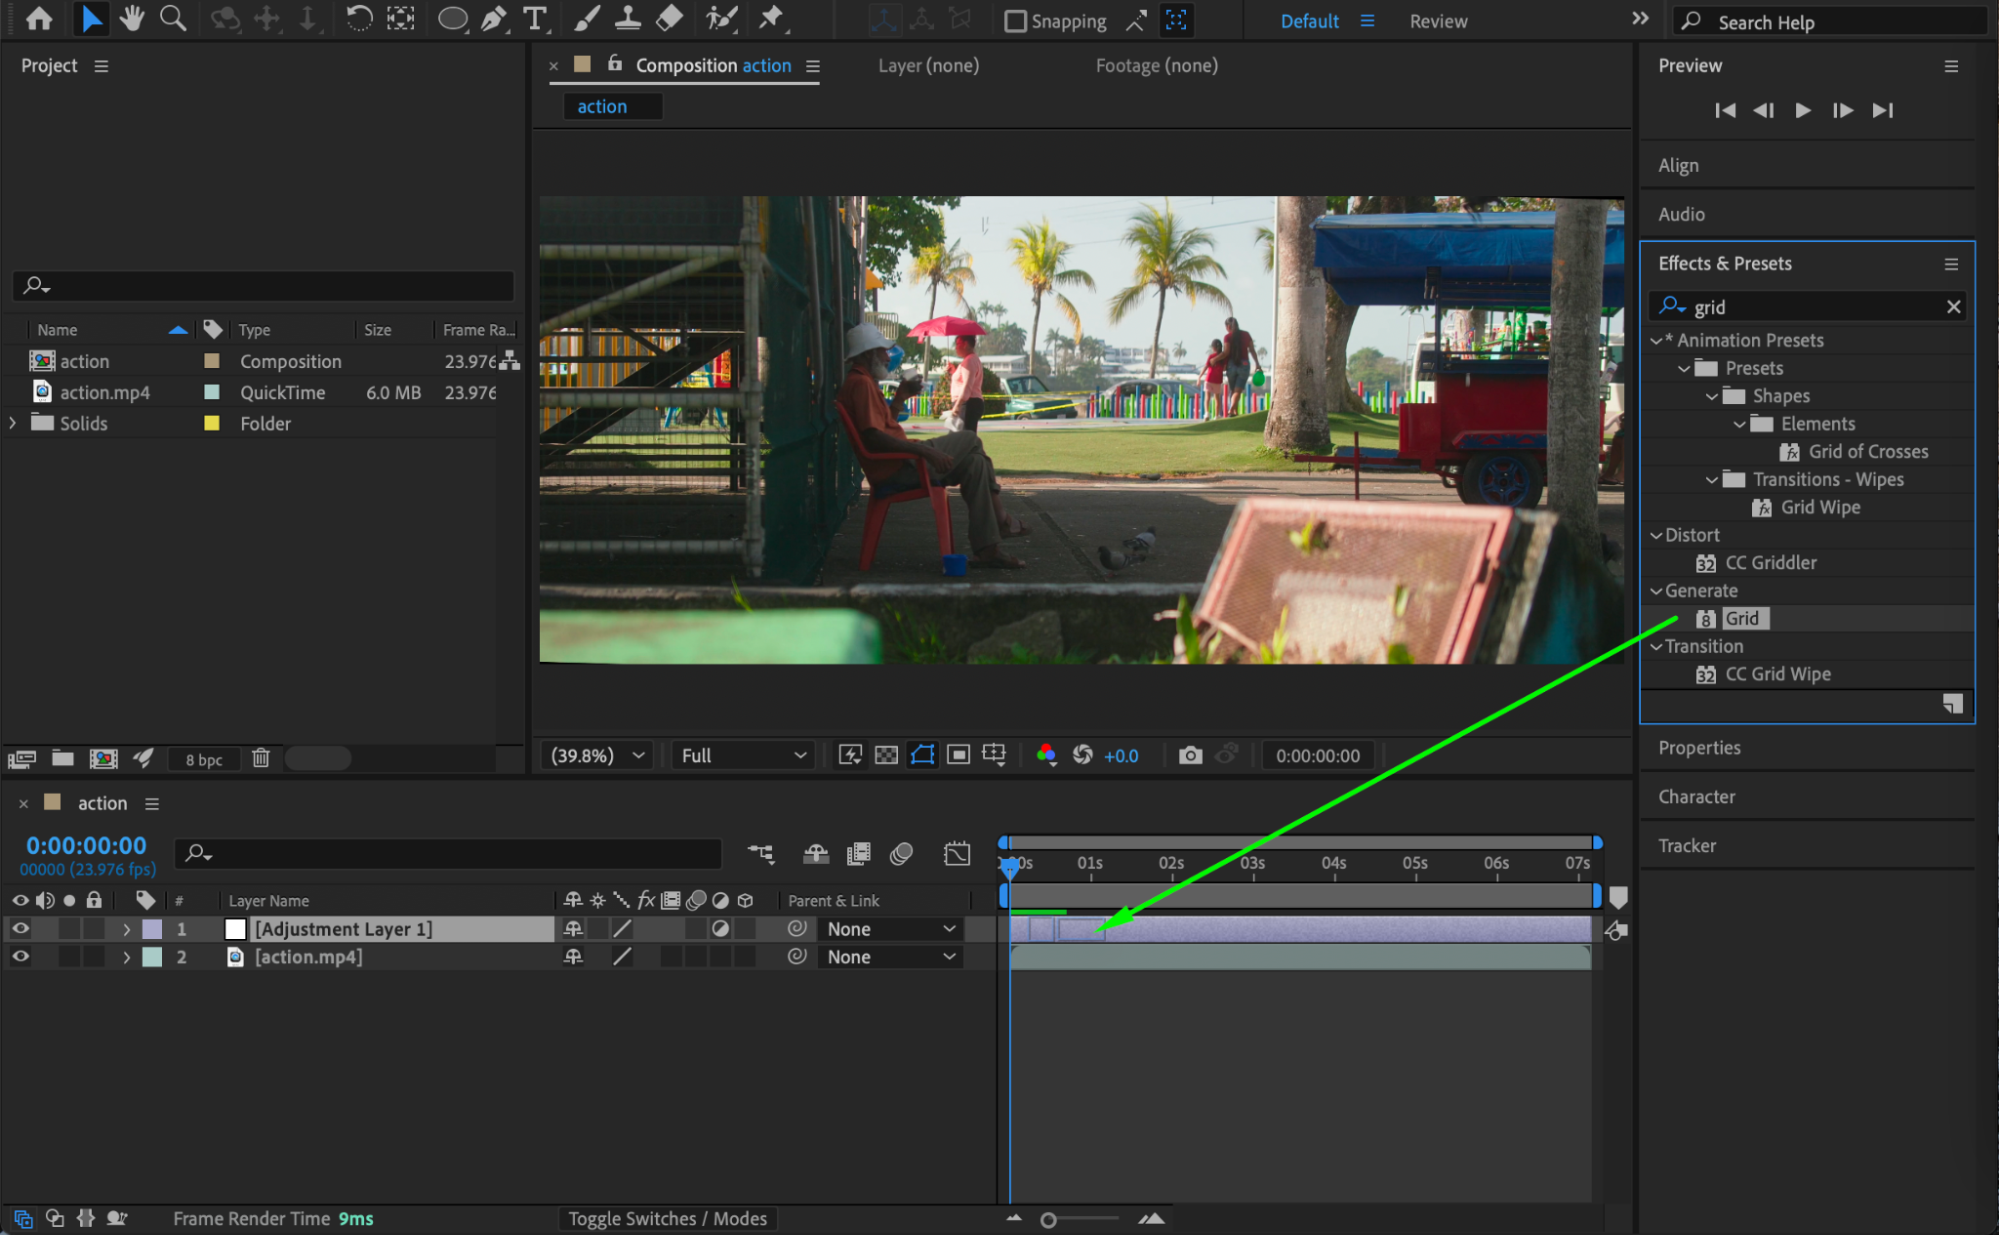
 Step 4: Add Noise
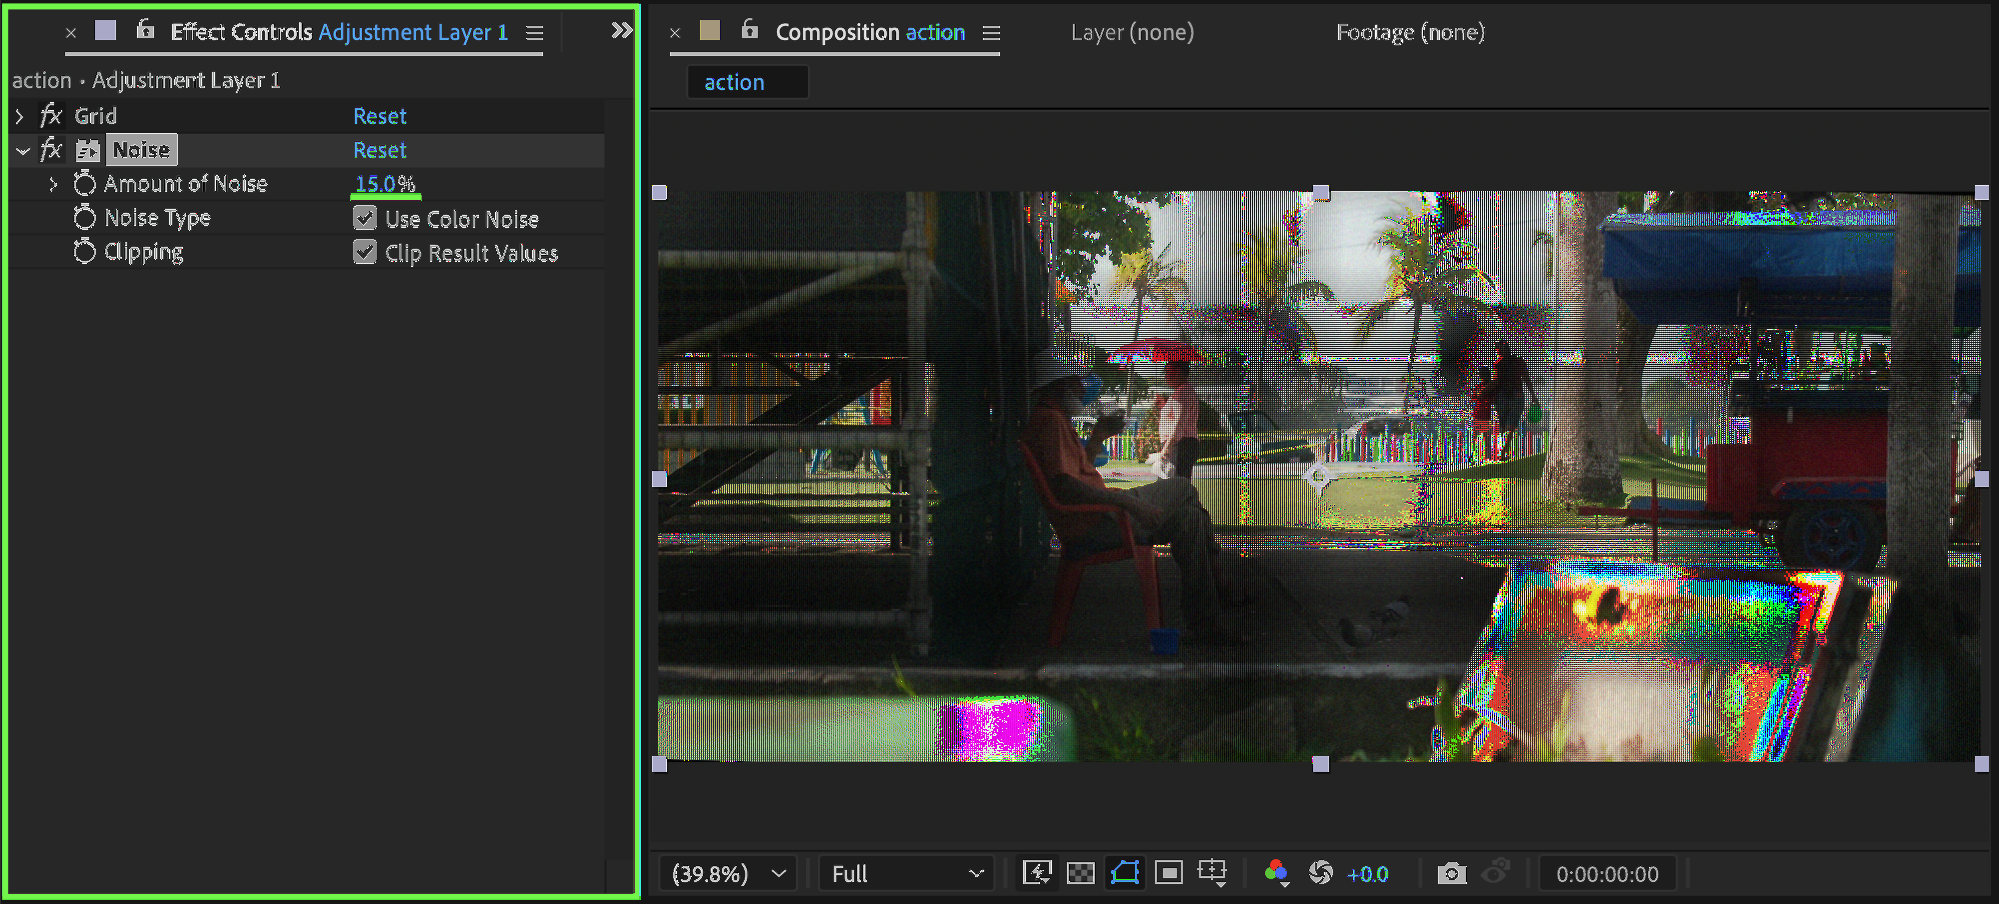
Apply Noise to the adjustment layer. Set:
Amount of Noise: 15
This simulates TV static and signal imperfections.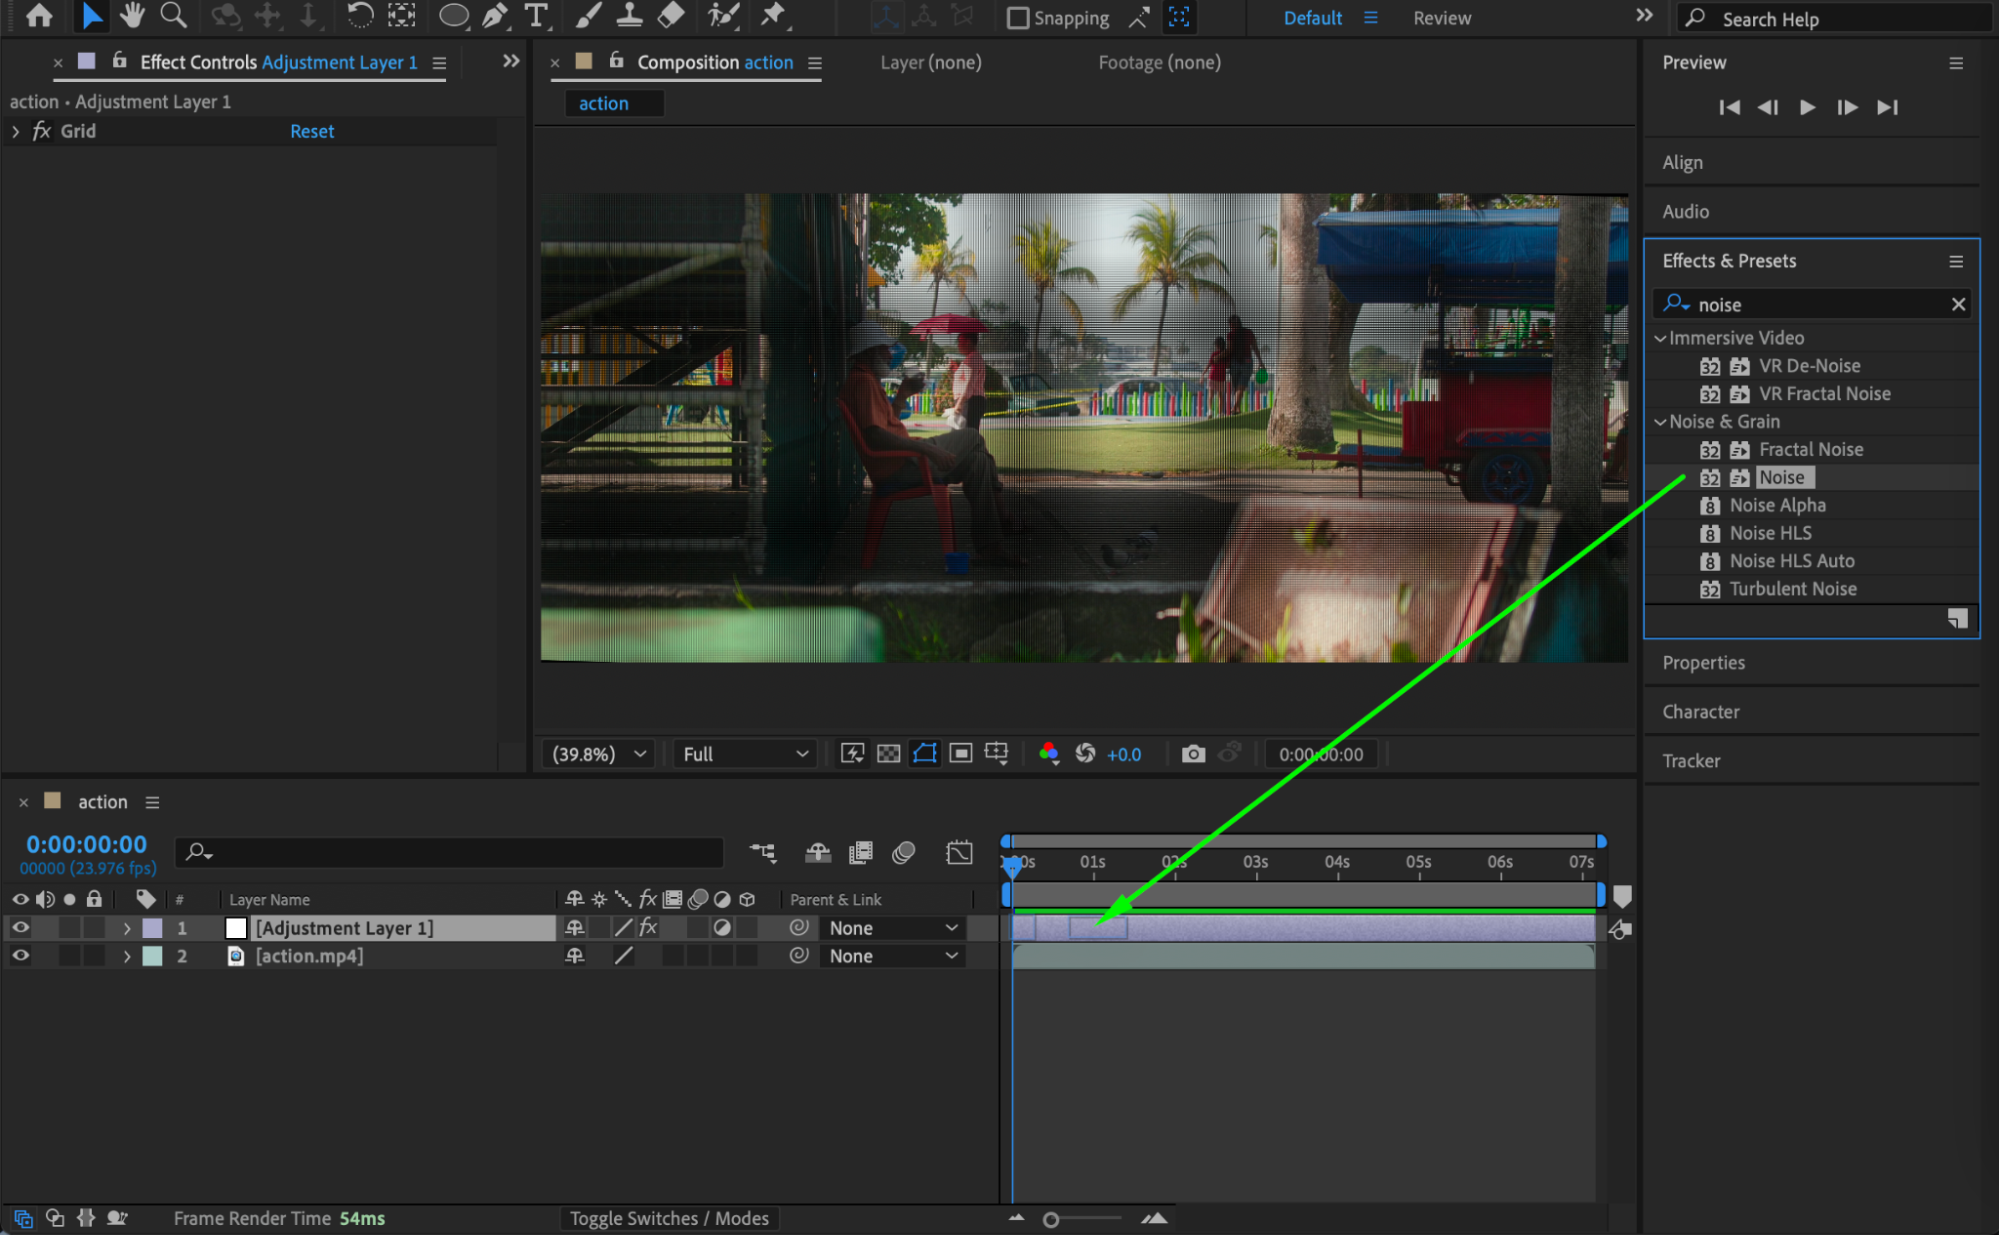
Get 10% off when you subscribe to our newsletter

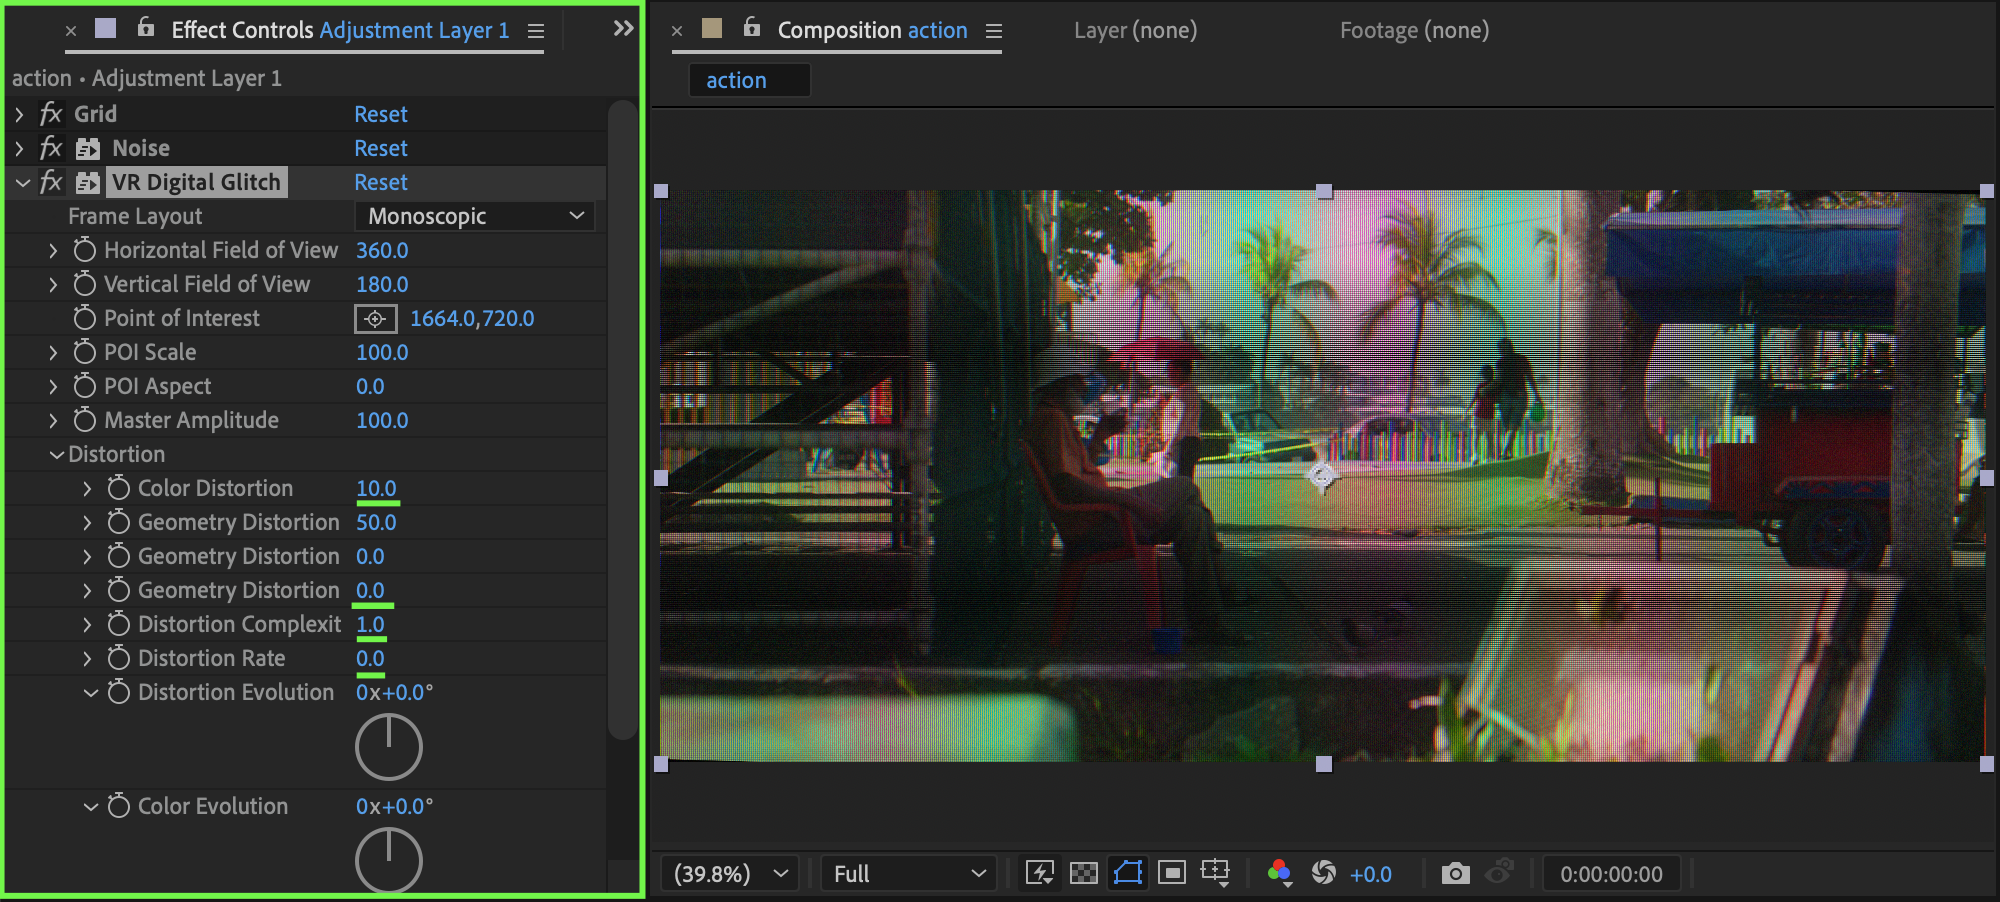
Step 5: Add VR Digital Glitch
Apply VR Digital Glitch to the adjustment layer. Set:
Color Distortion: 10
Geometry Distortion: 0
Distortion Complexity: 1
Distortion Rate: 0
This adds subtle glitching and digital artifacts.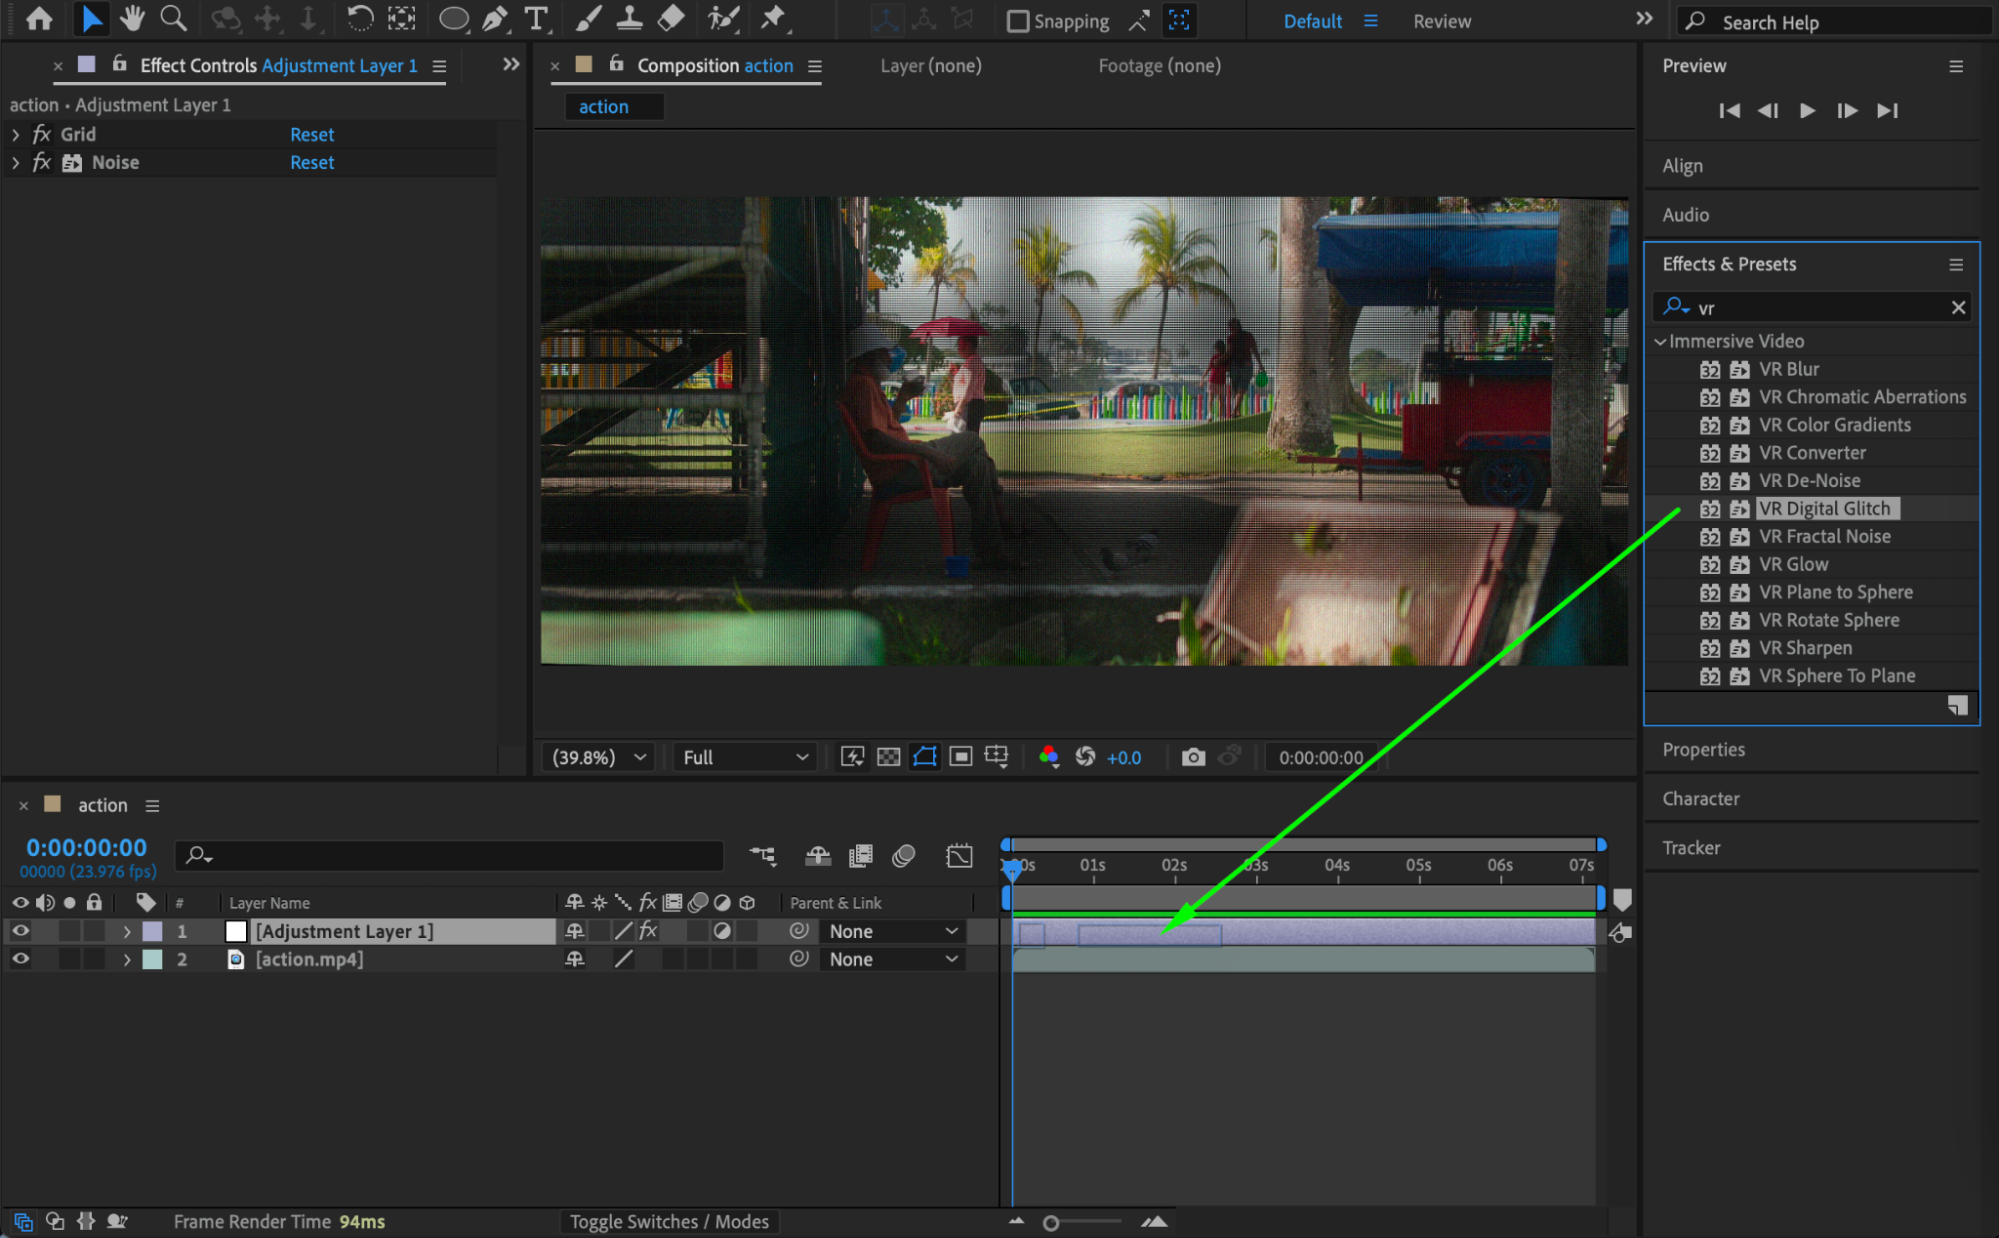
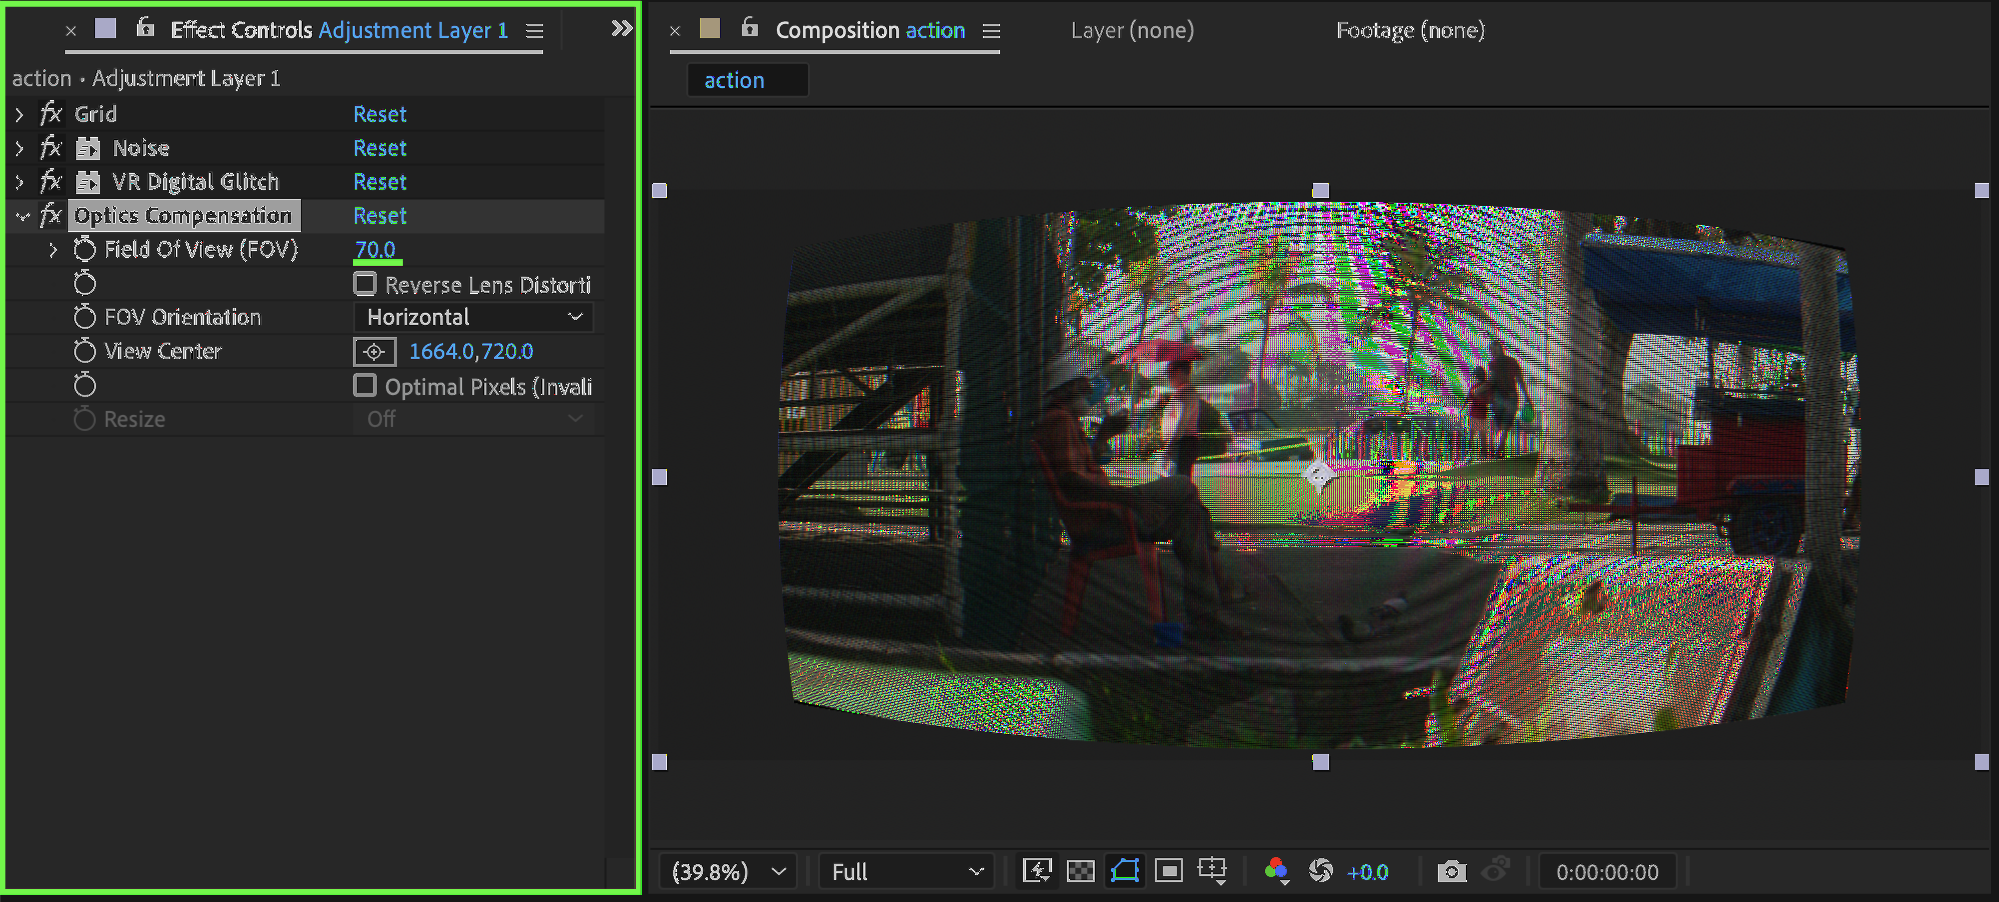
 Step 6: Apply Optics Compensation
Apply Optics Compensation to the adjustment layer. Set:
Field of View (FOV): 70
This slightly bends the video edges for a retro CRT curvature.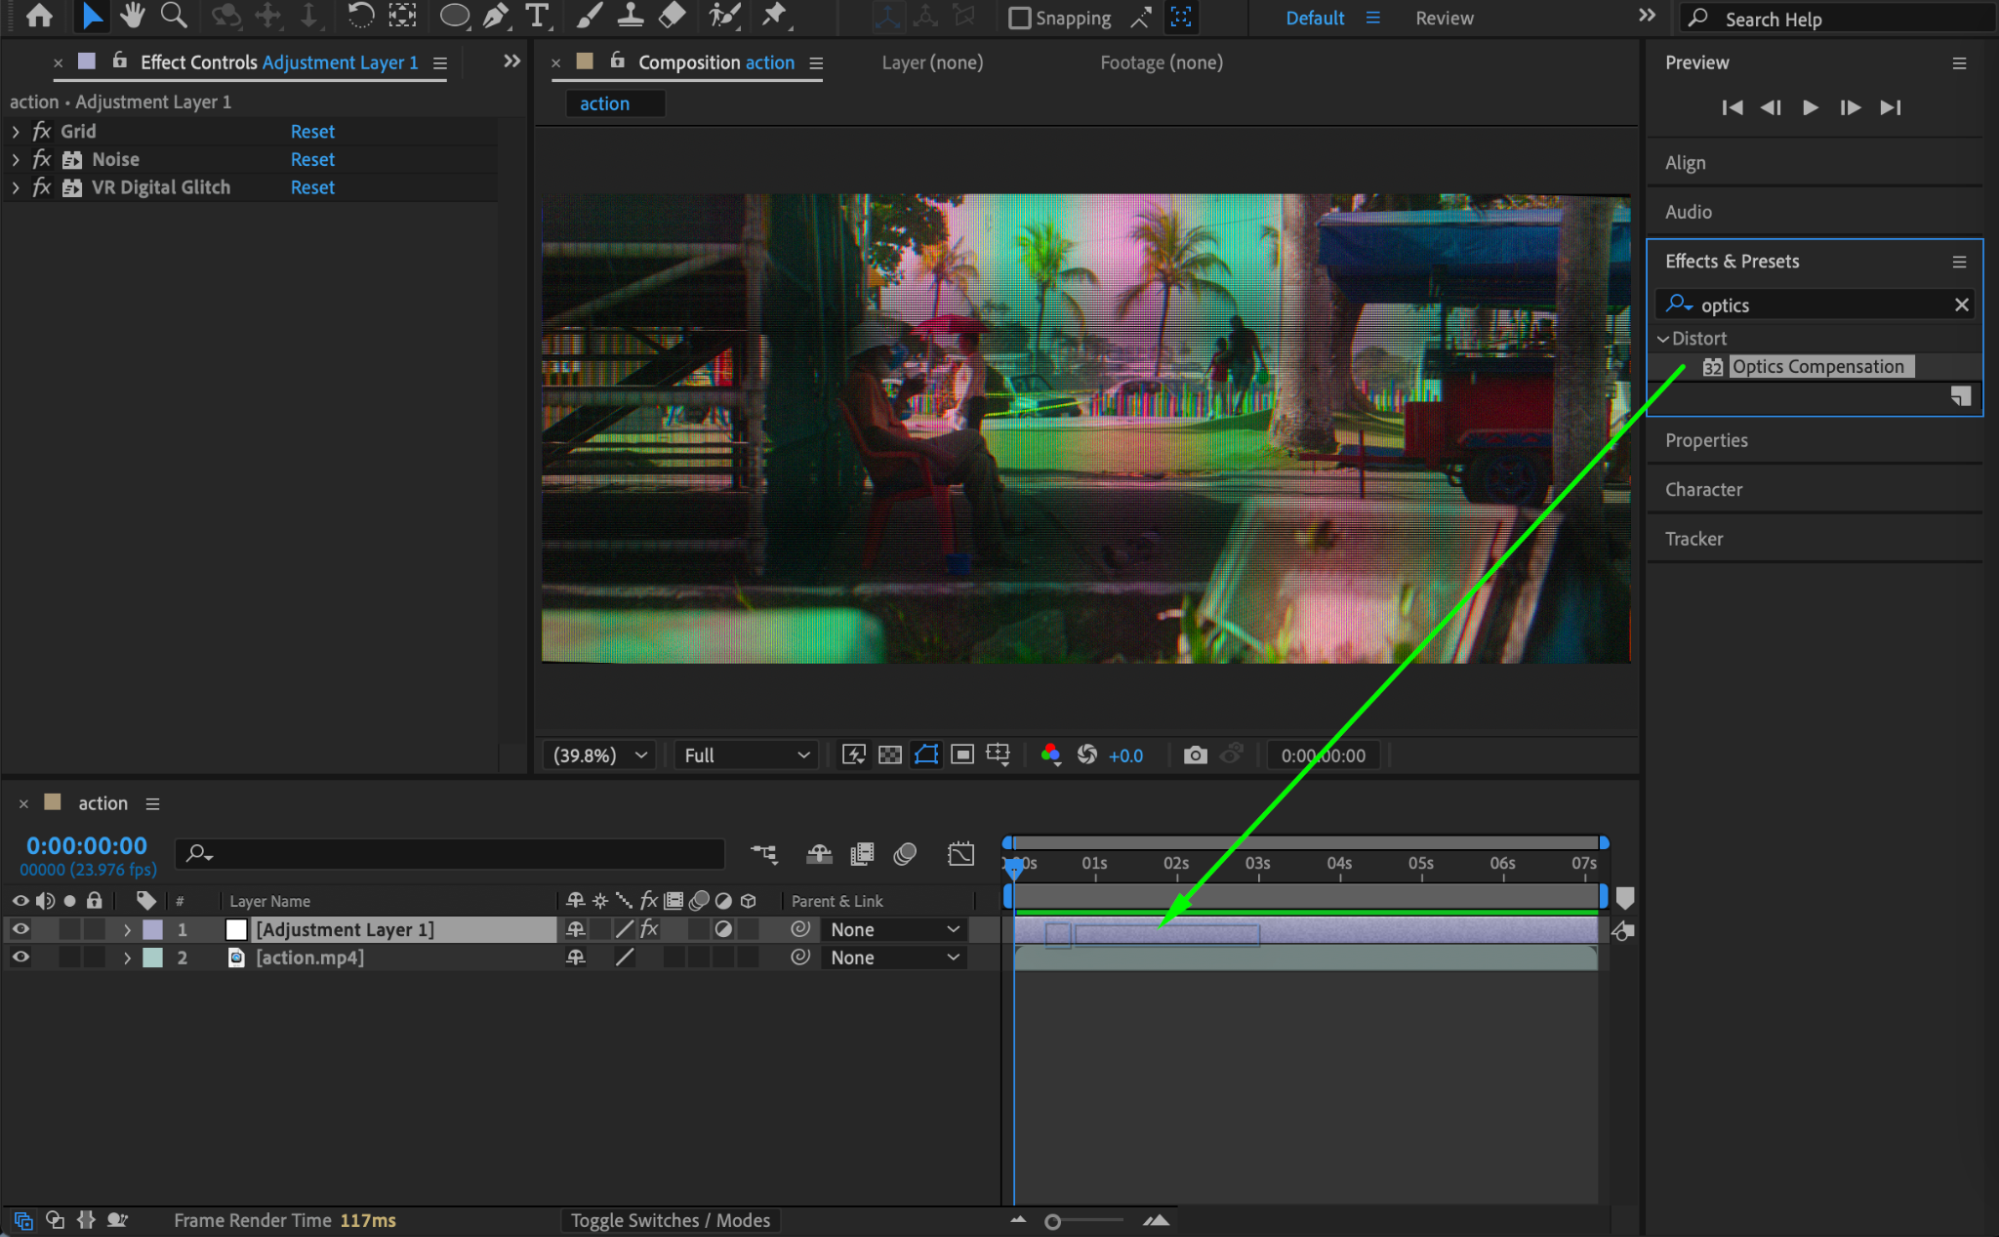
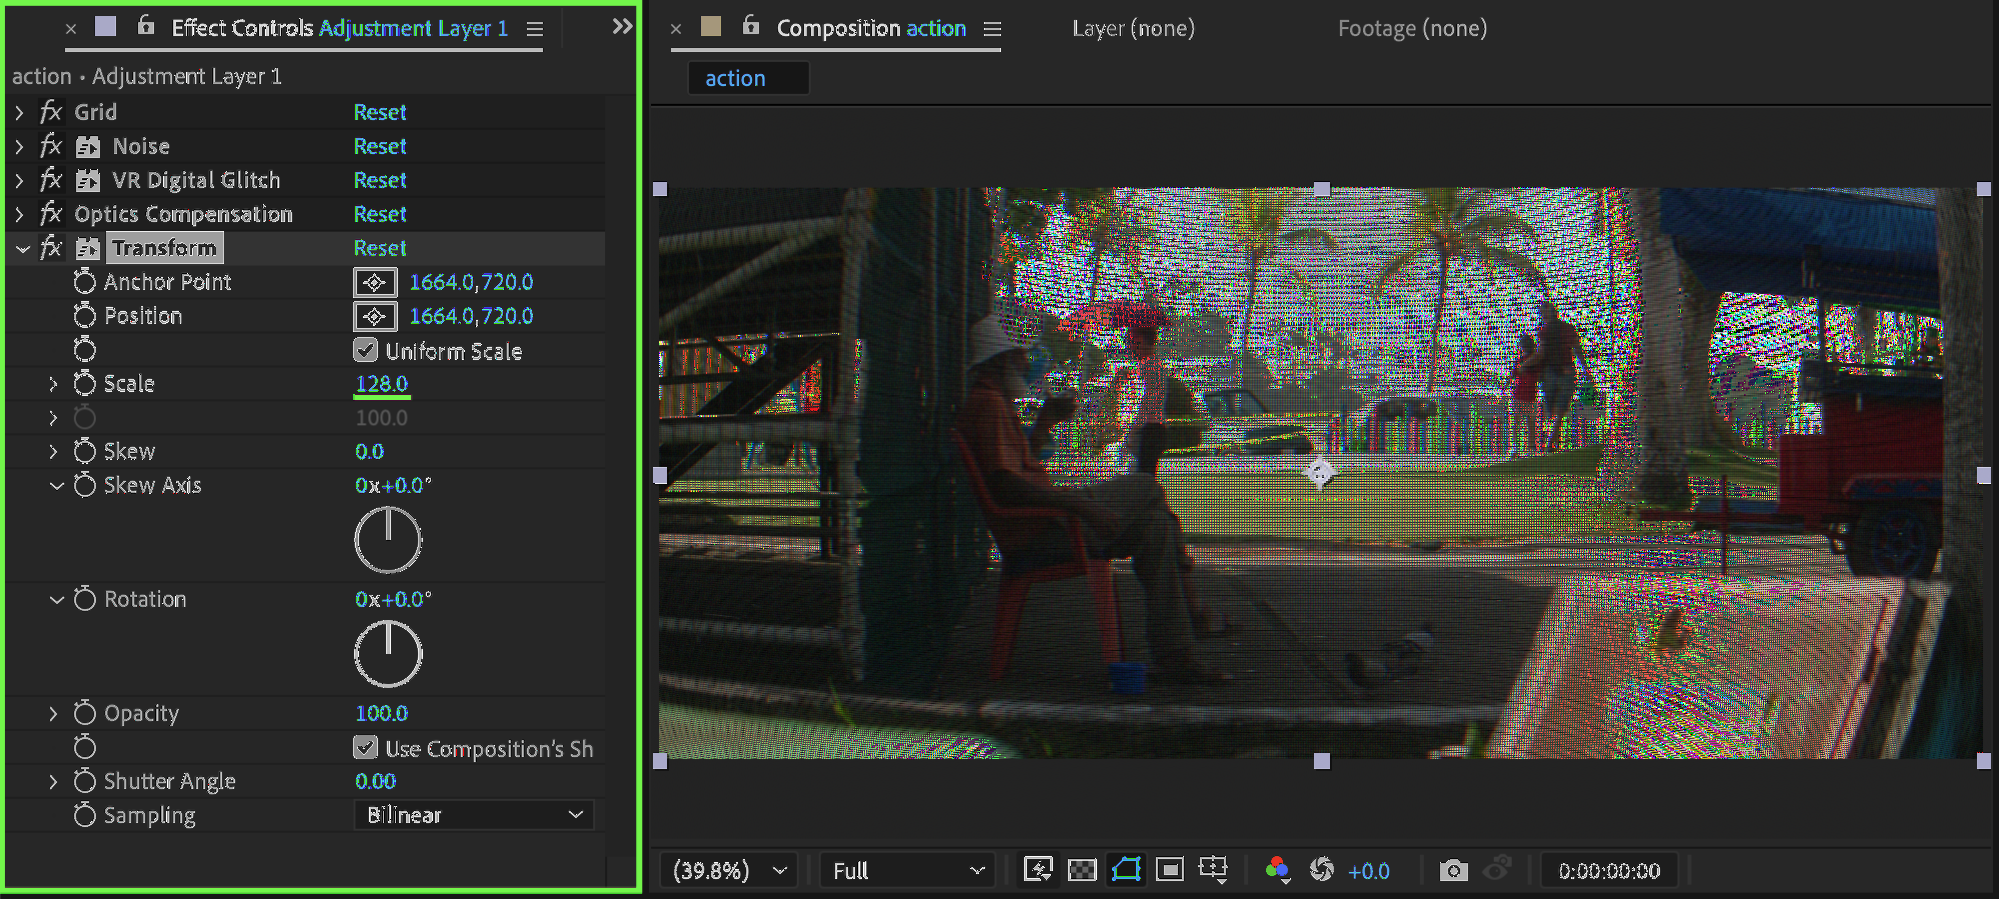
 Step 7: Apply Transform
Apply Transform to the adjustment layer. Set:
Scale: 128
This helps adjust the final composition size for CRT distortion.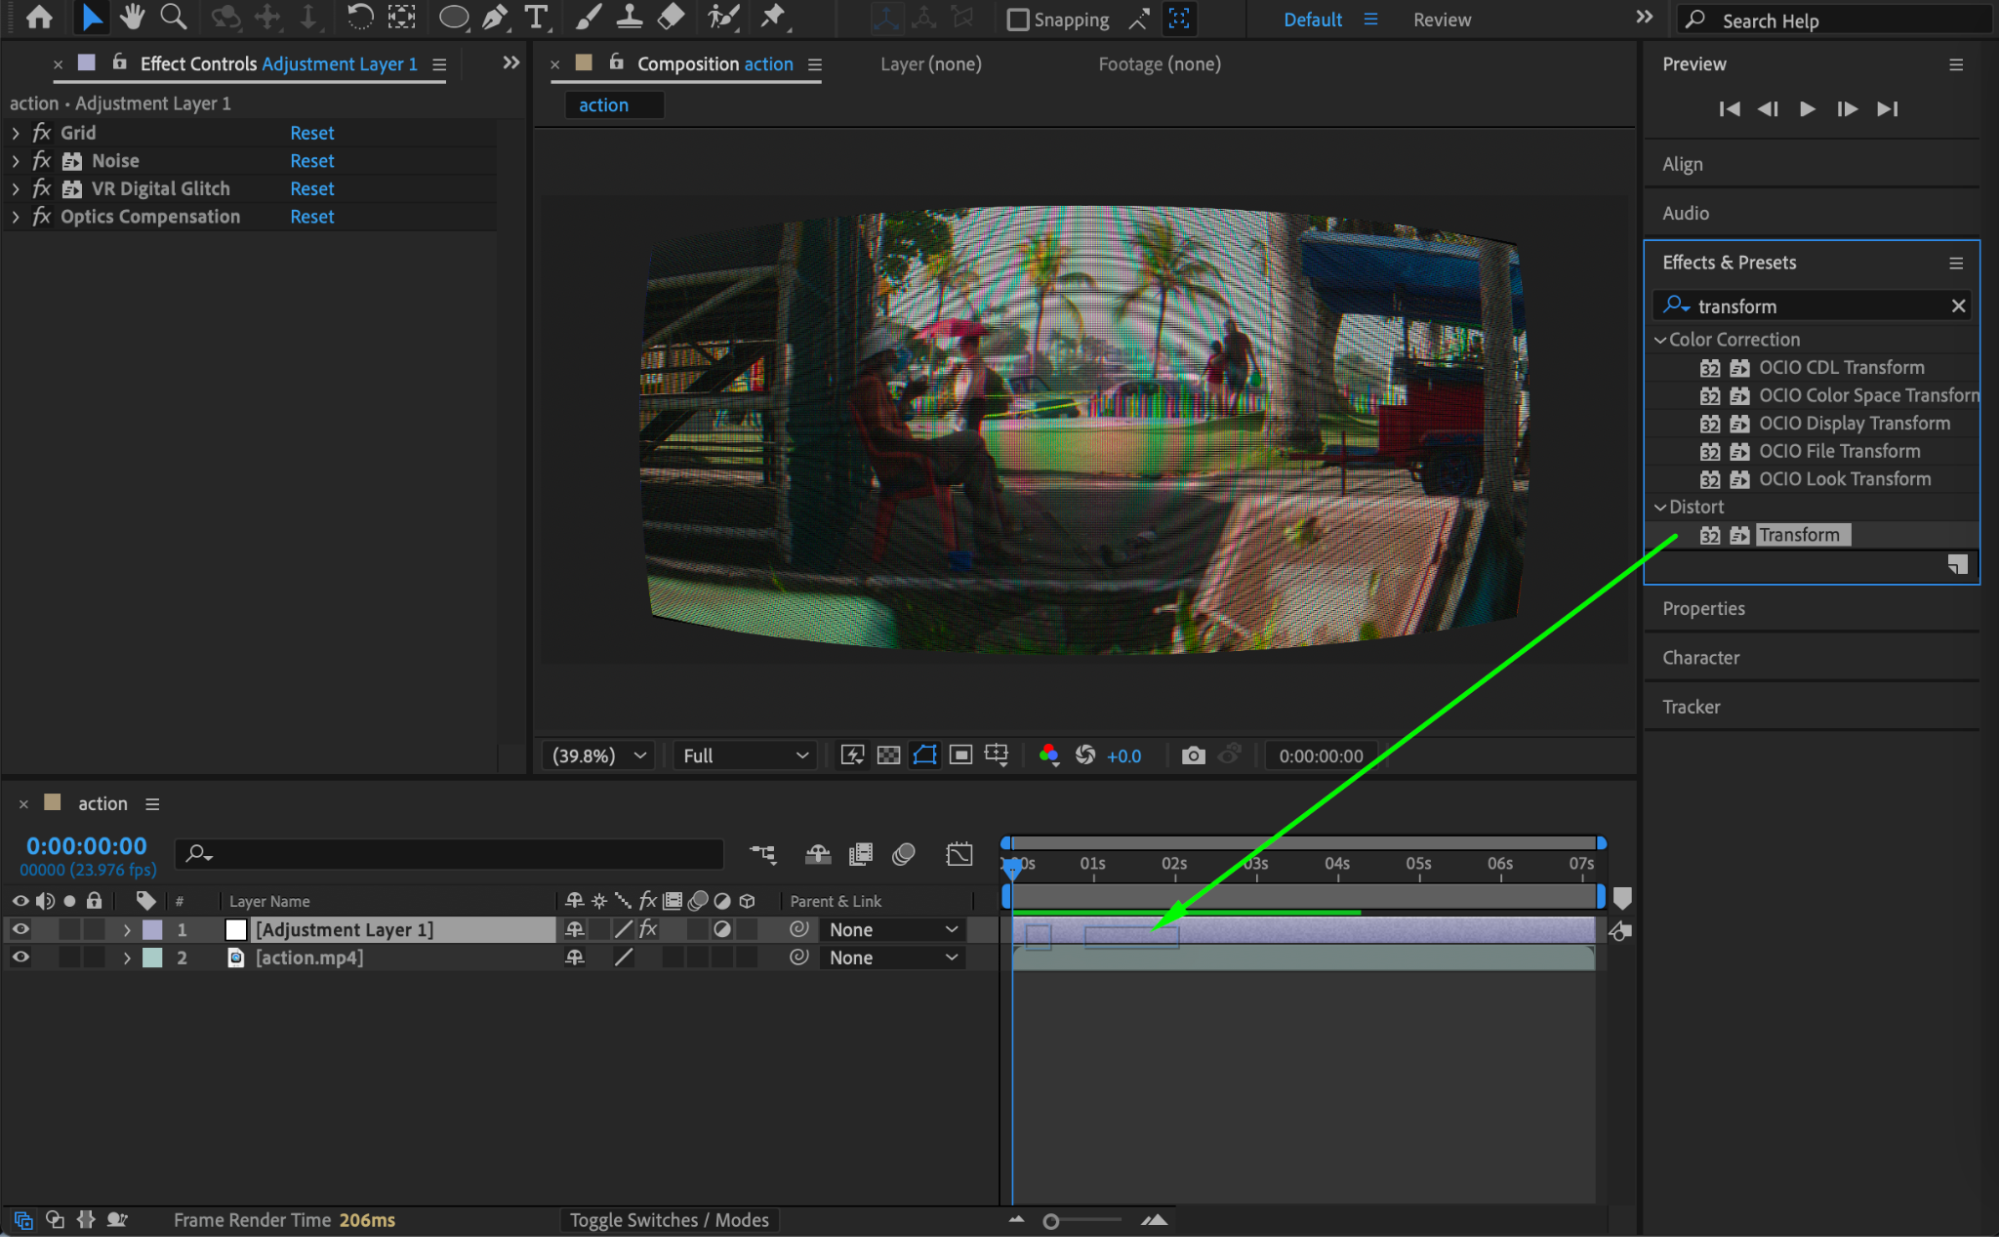
 Step 8: Add Gaussian Blur
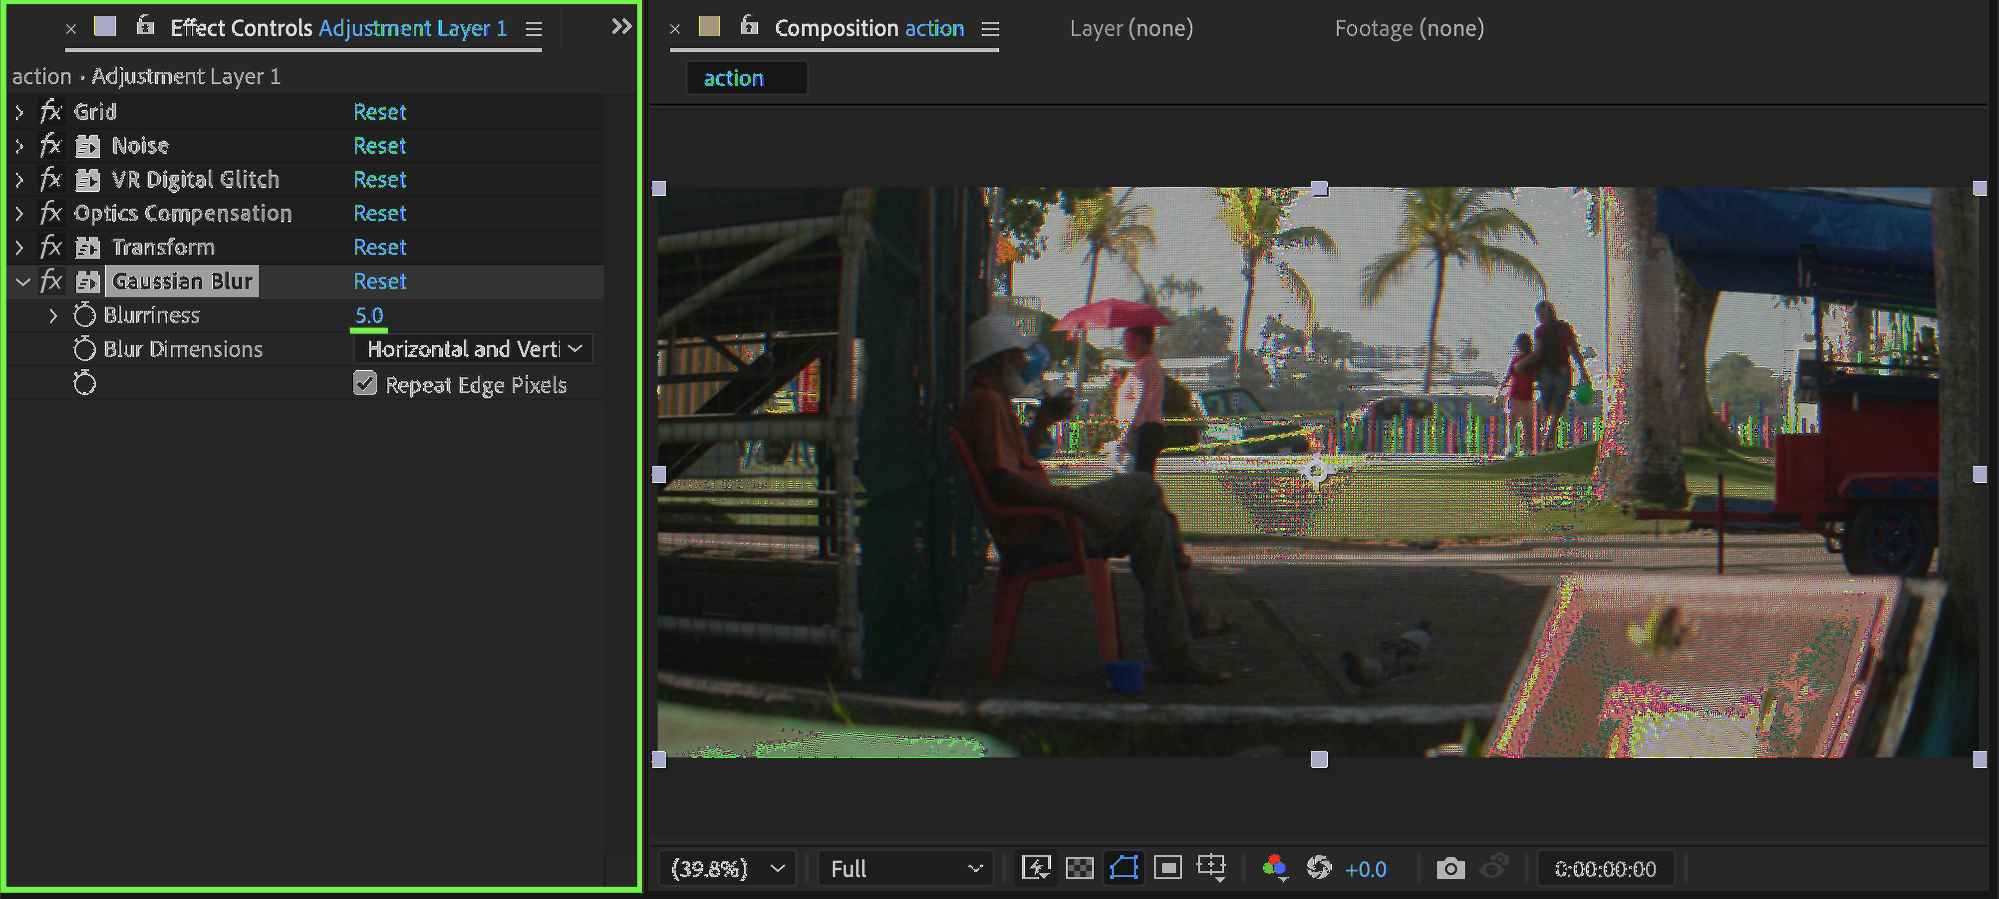
Apply Gaussian Blur to the adjustment layer. Set:
Blurriness: 5
This softens the video slightly to mimic CRT screen softness.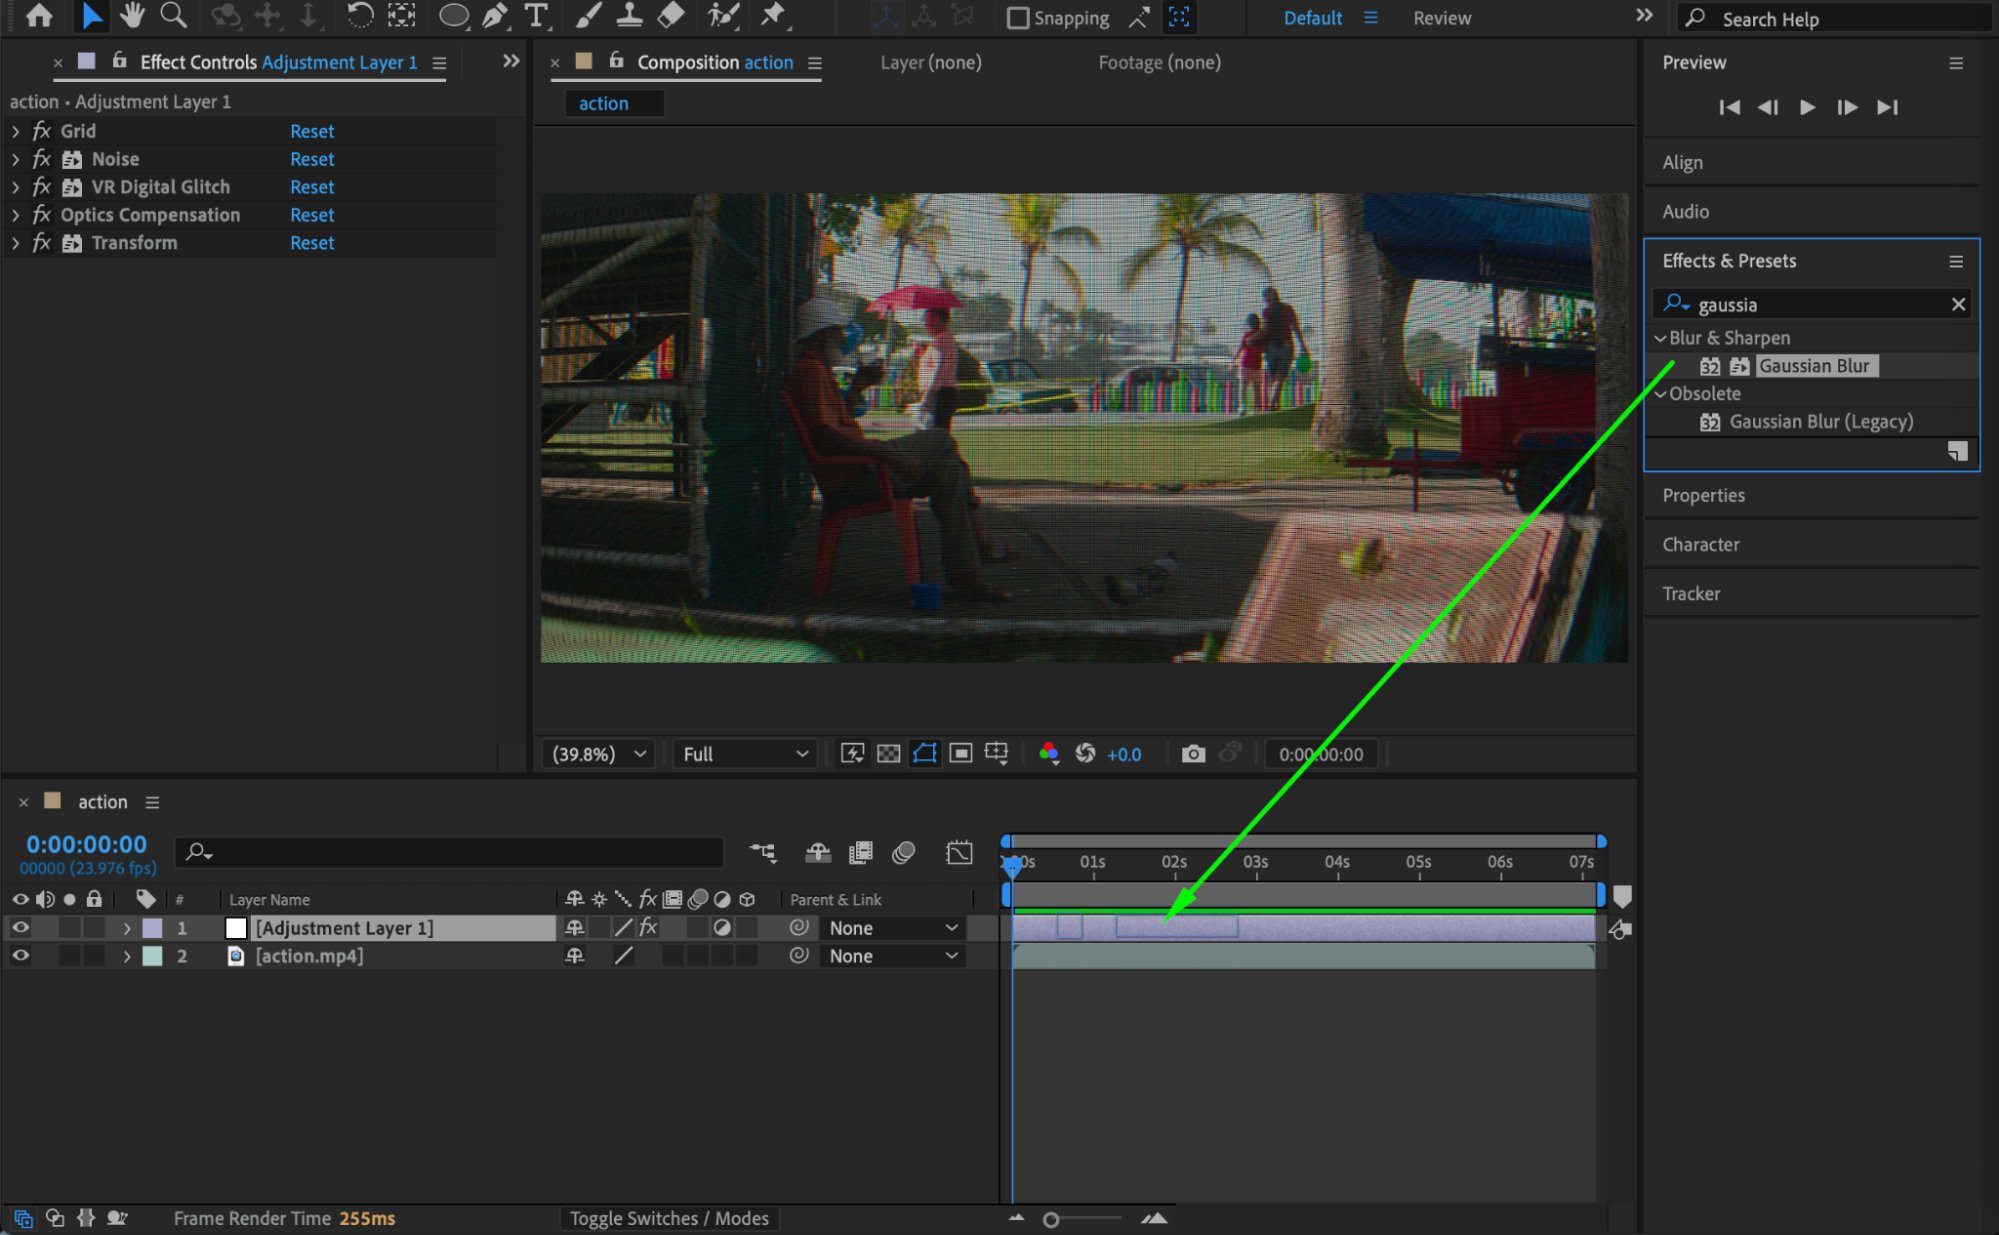
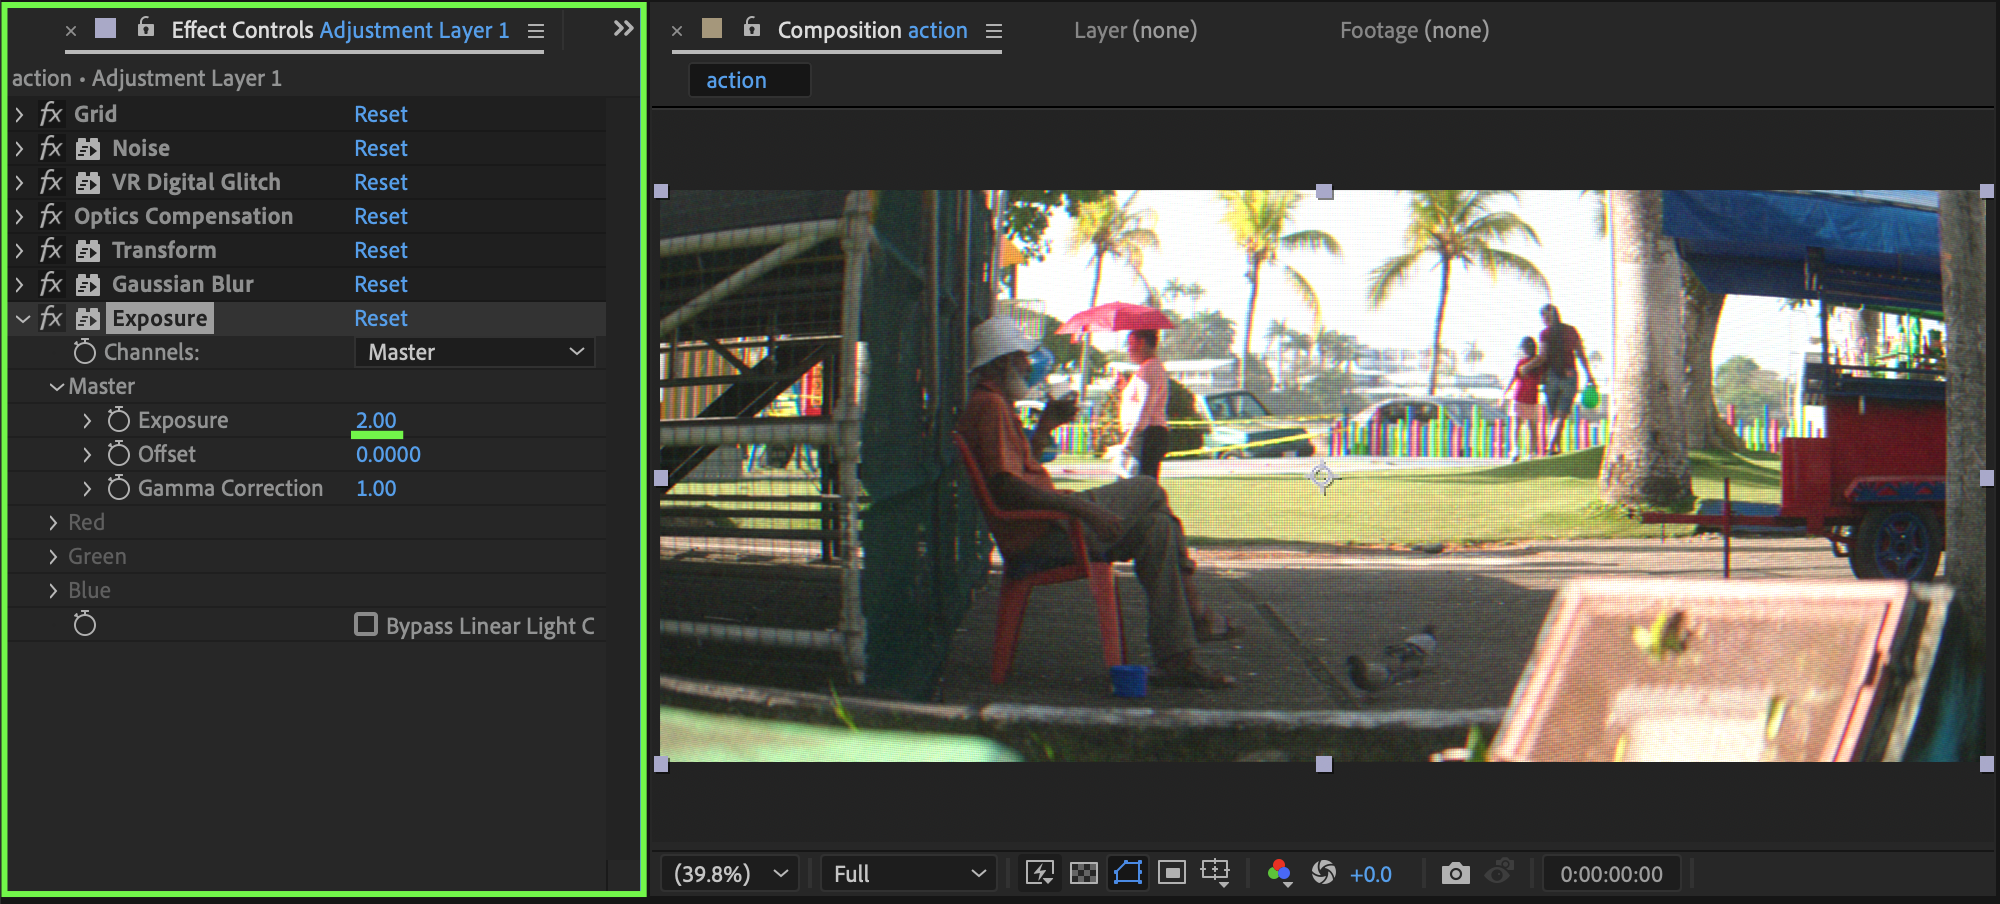
Step 9: Adjust Exposure
Apply Exposure to the adjustment layer. Set:
Exposure: 2
This brightens highlights and enhances the retro effect.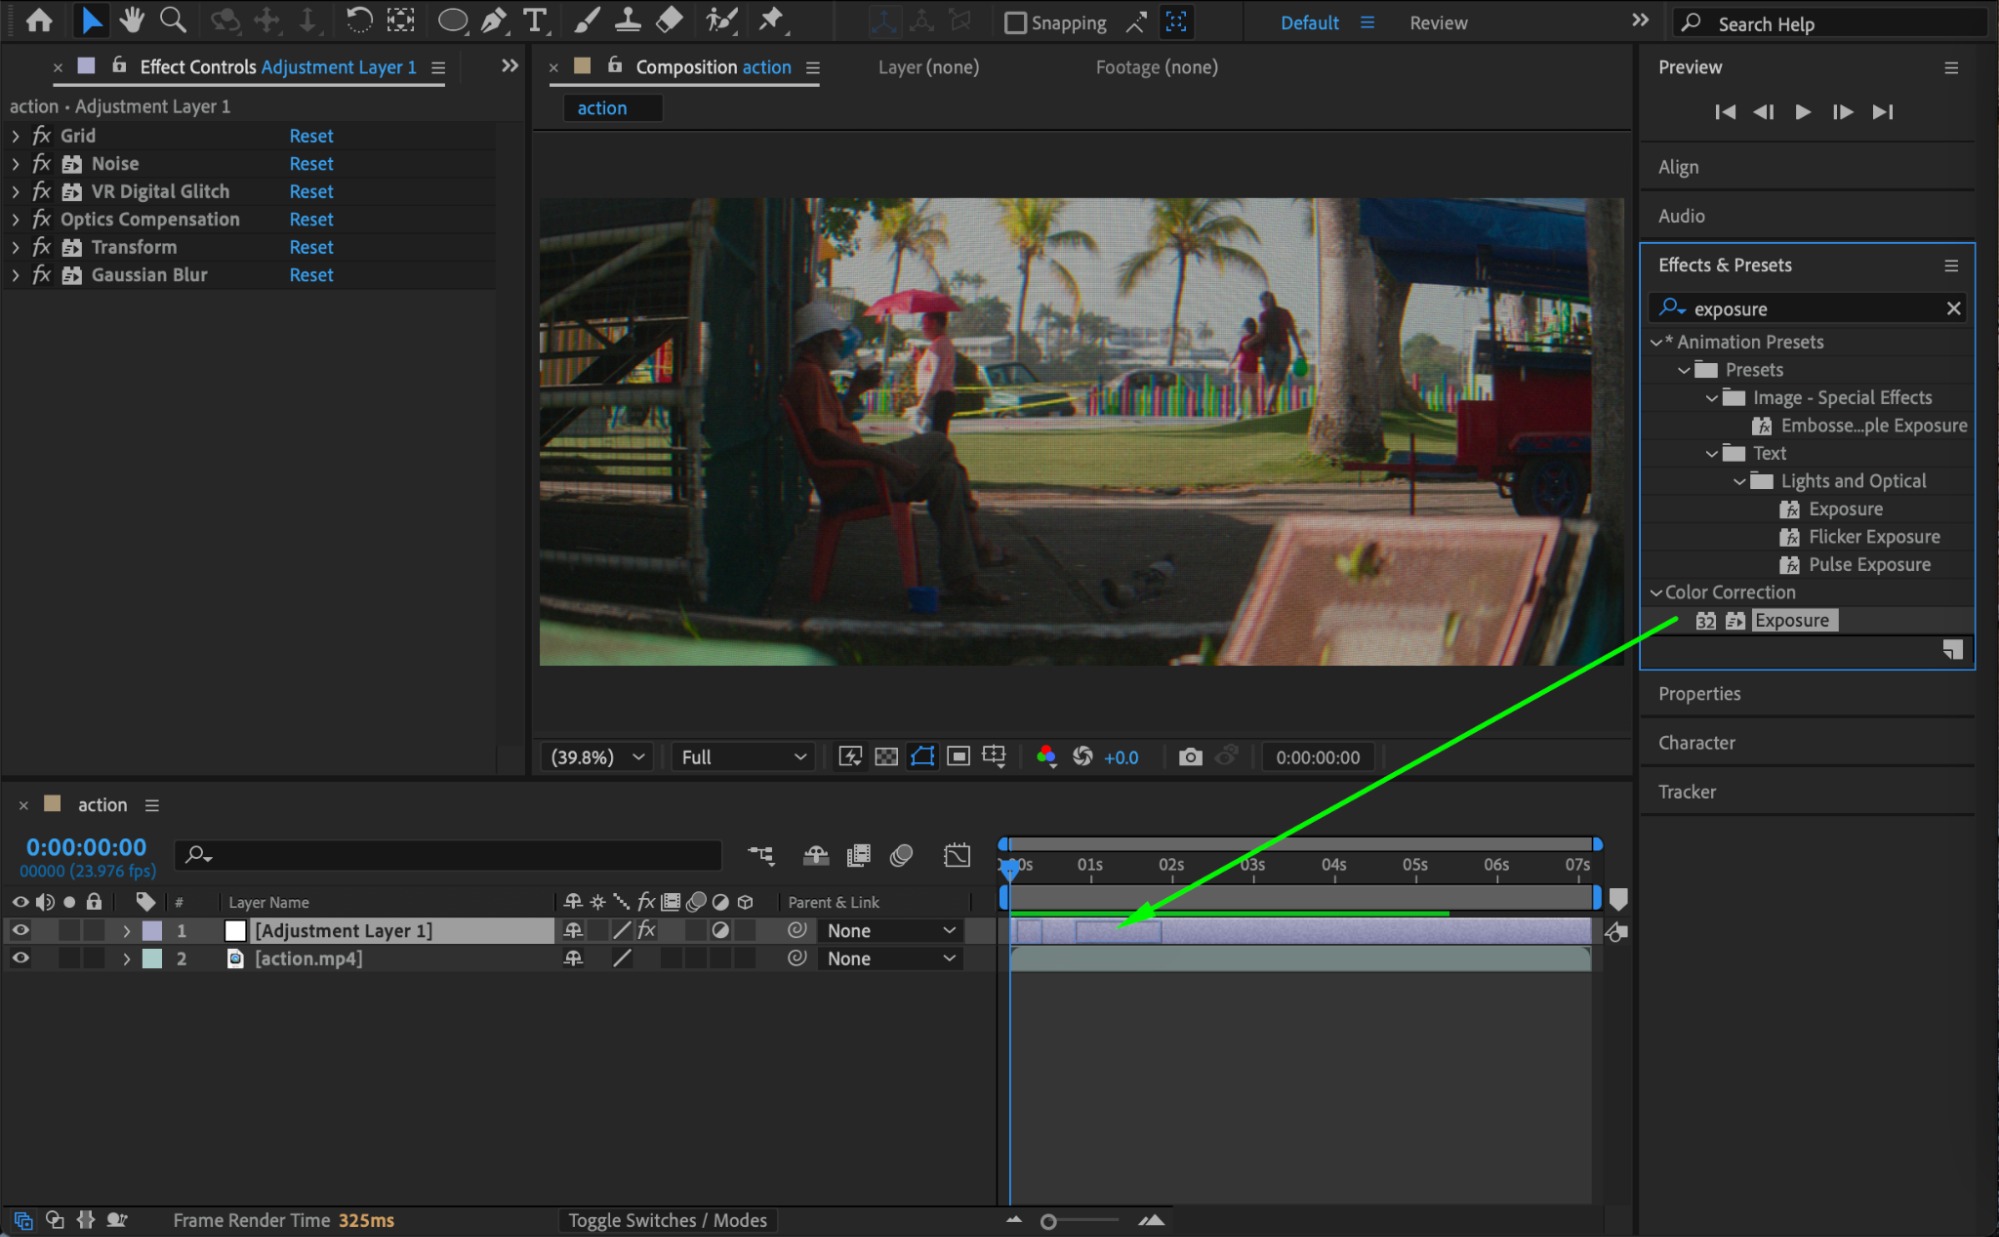
 Step 10: Apply Curves
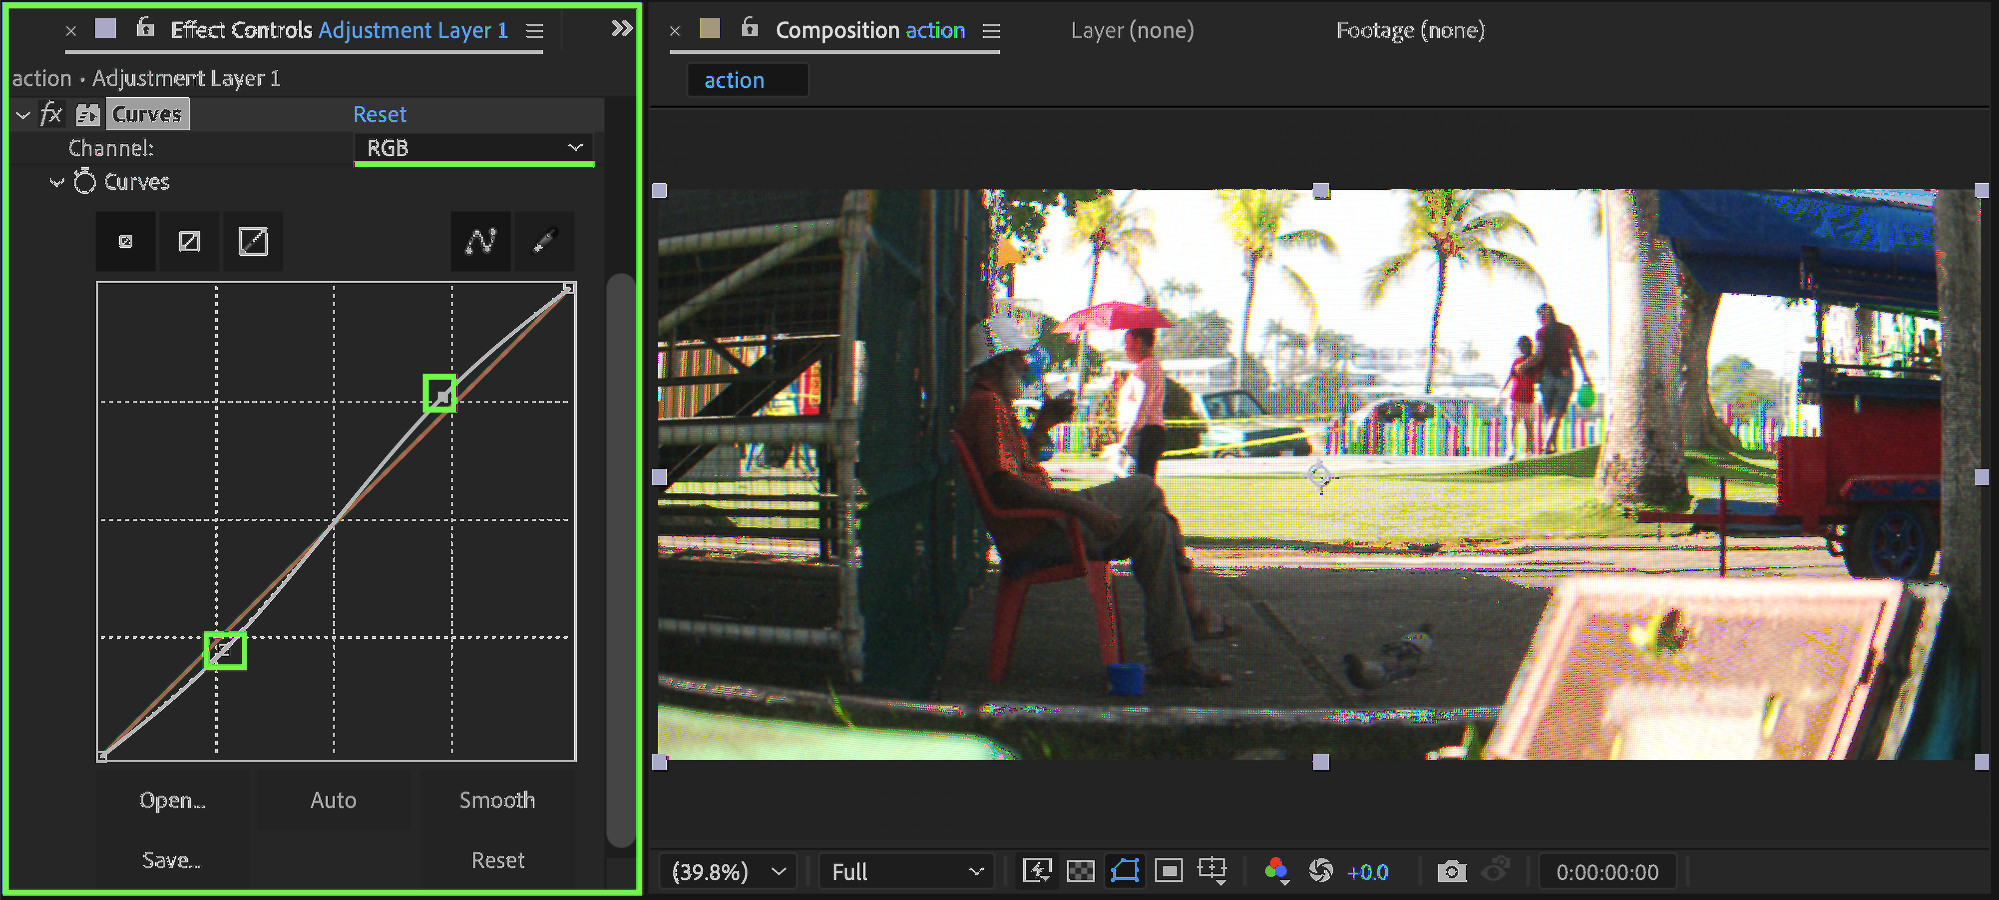
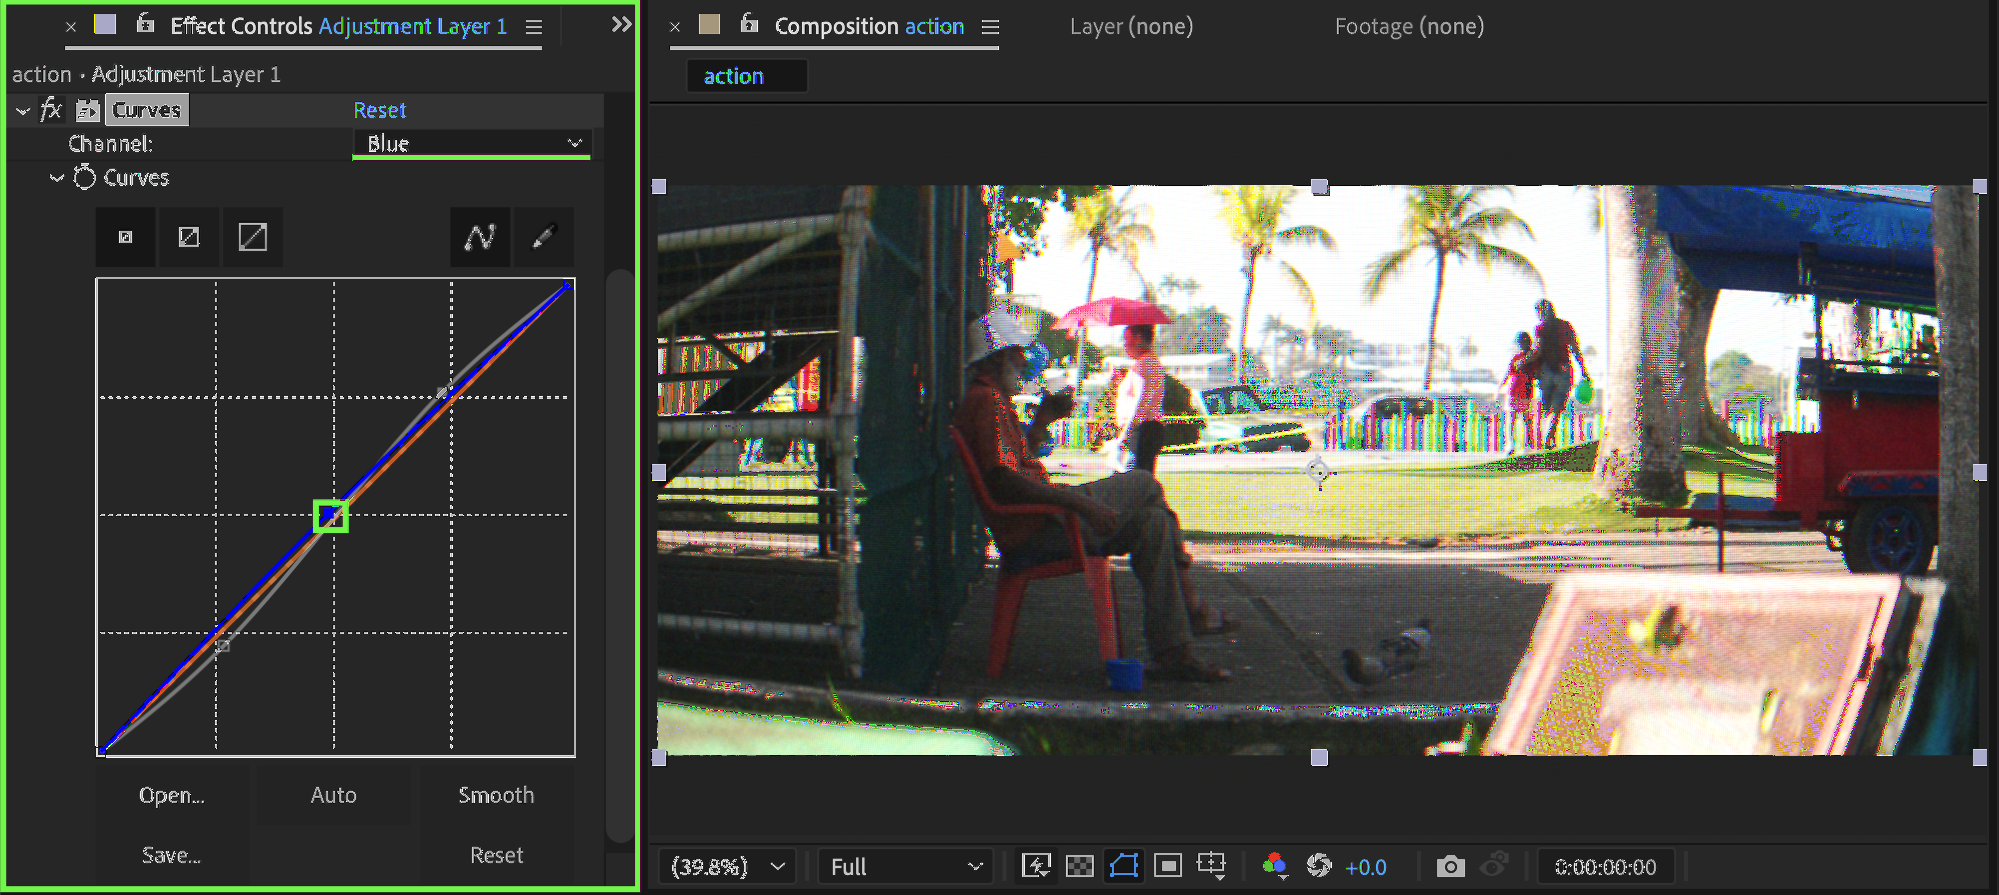
Apply Curves to the adjustment layer. Adjust the RGB curves to fine-tune contrast and color, giving the video an authentic CRT look.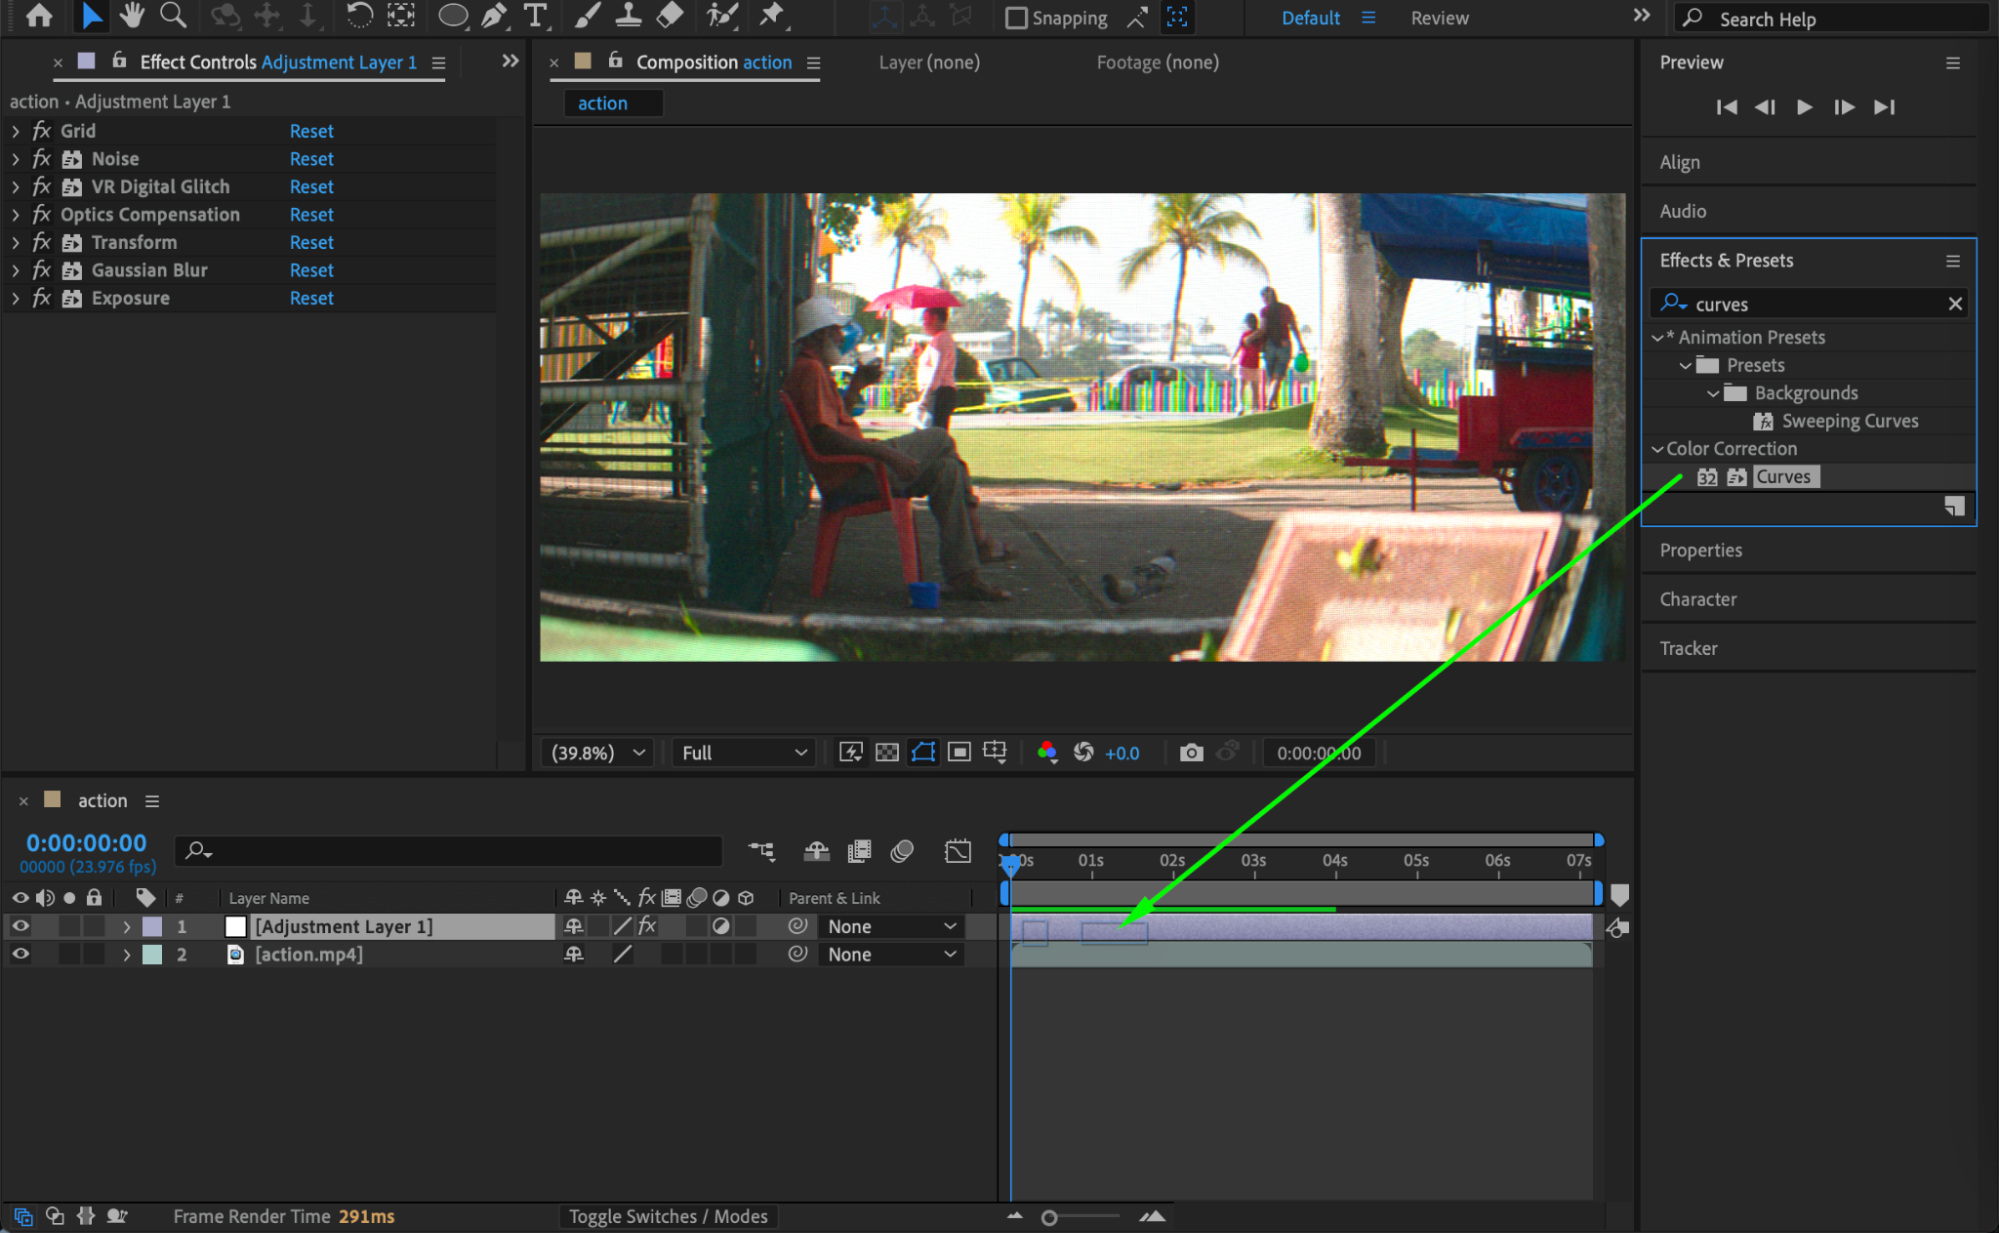
 Step 11: Save as Animation Preset (Optional)
Select all the effects on the adjustment layer. Go to Animation → Save Animation Preset… and name it CRT Filter. This allows you to apply the effect quickly to other projects in the future.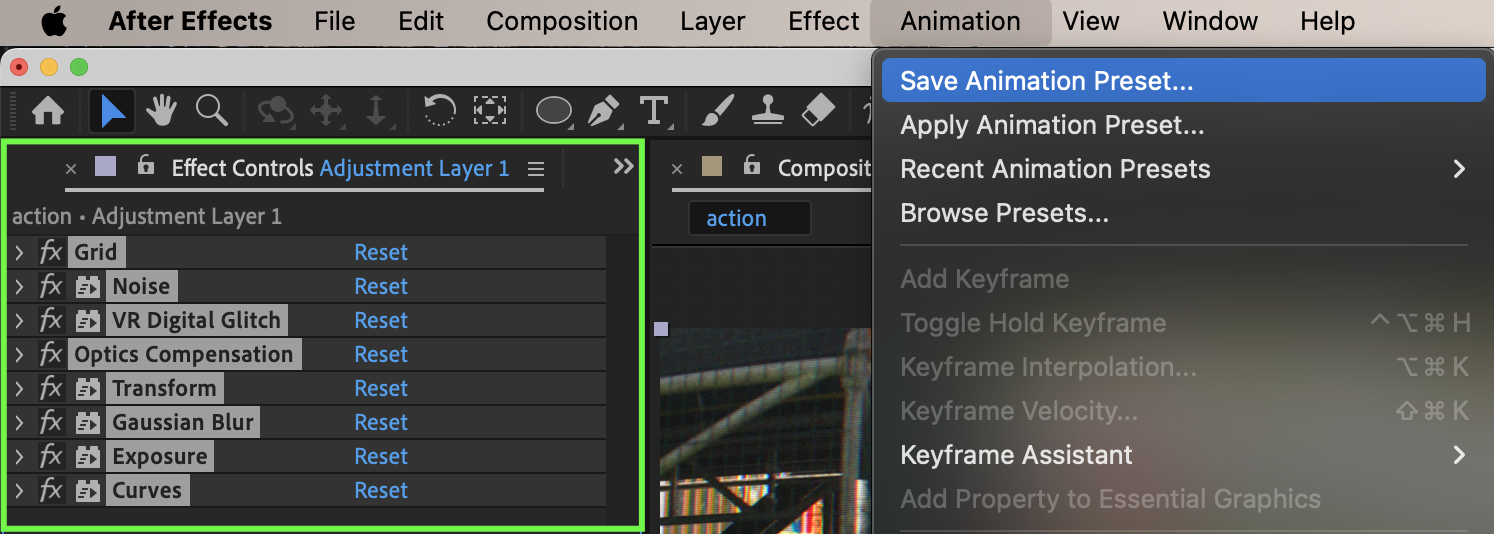 Step 12: Preview the Result
Preview your composition to ensure all effects combine properly and achieve the desired retro CRT look. Adjust individual effect settings if necessary.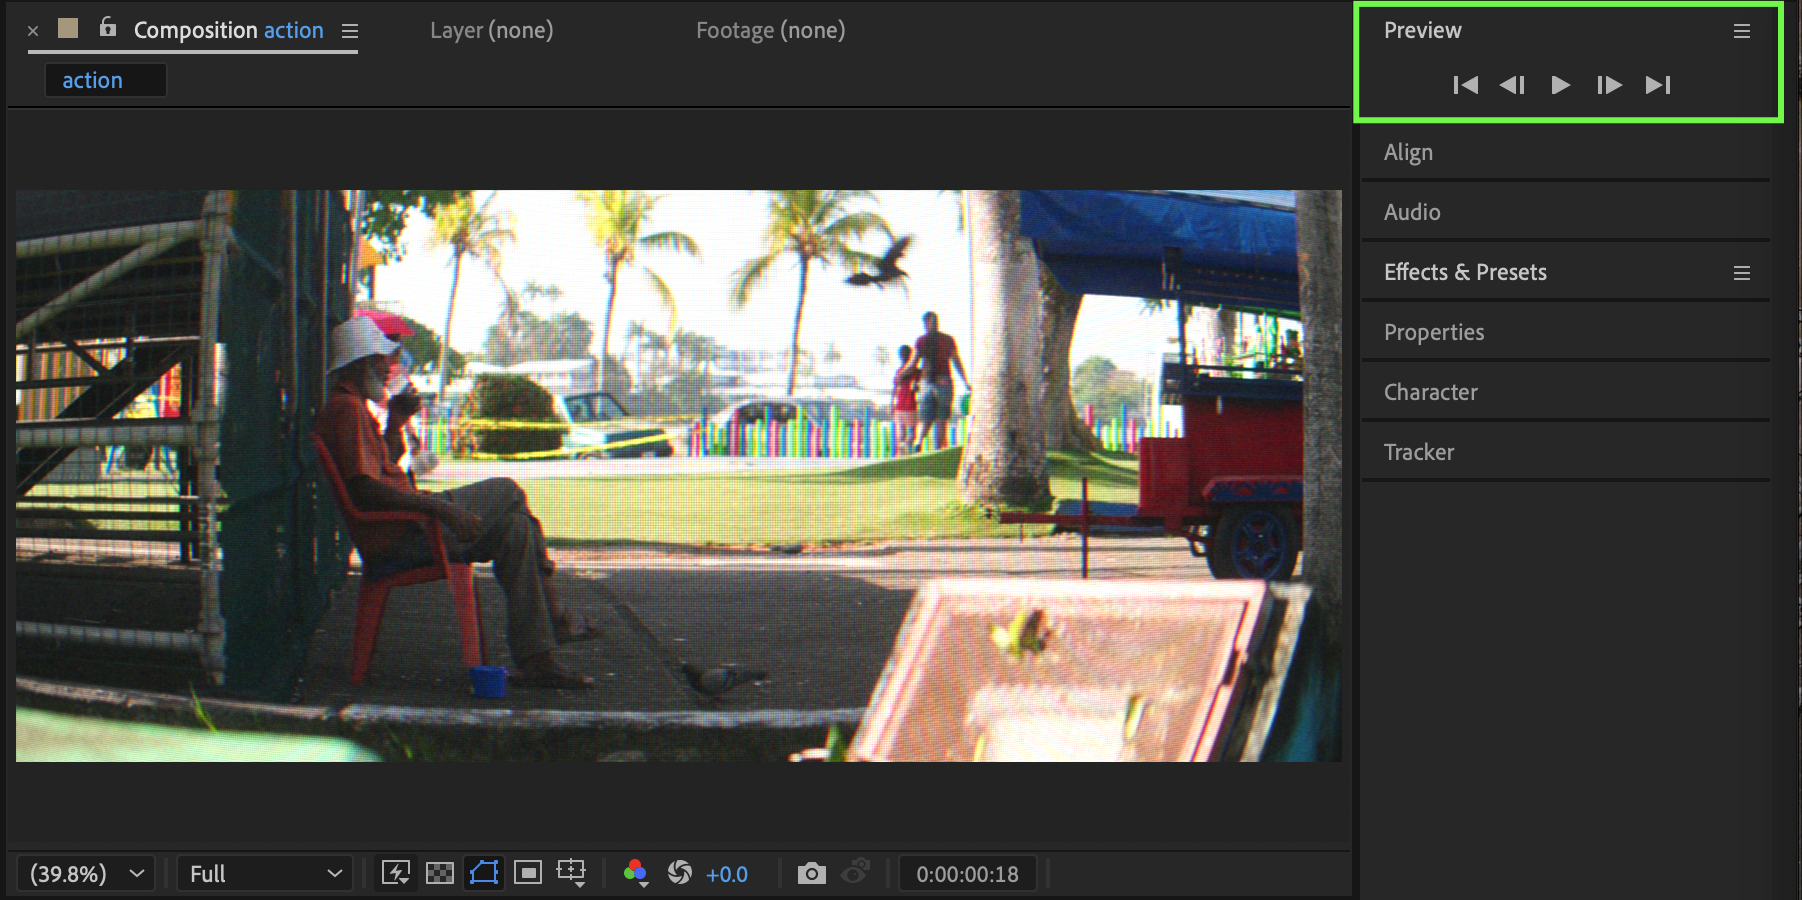
Conclusion
By combining grid, noise, glitch, optics, blur, exposure, and curves on an adjustment layer, you can create a convincing CRT-style filter in After Effects. Saving it as a preset makes it easy to reuse for retro-style videos, intros, and motion graphics.
Our Bestsellers
Our Bestsellers

