Introduction
Color filters can dramatically change the mood and visual style of your video. In this tutorial, you’ll learn how to use Color Balance and Curves in After Effects to create professional-looking color filters.
Step 1: Import Your Video
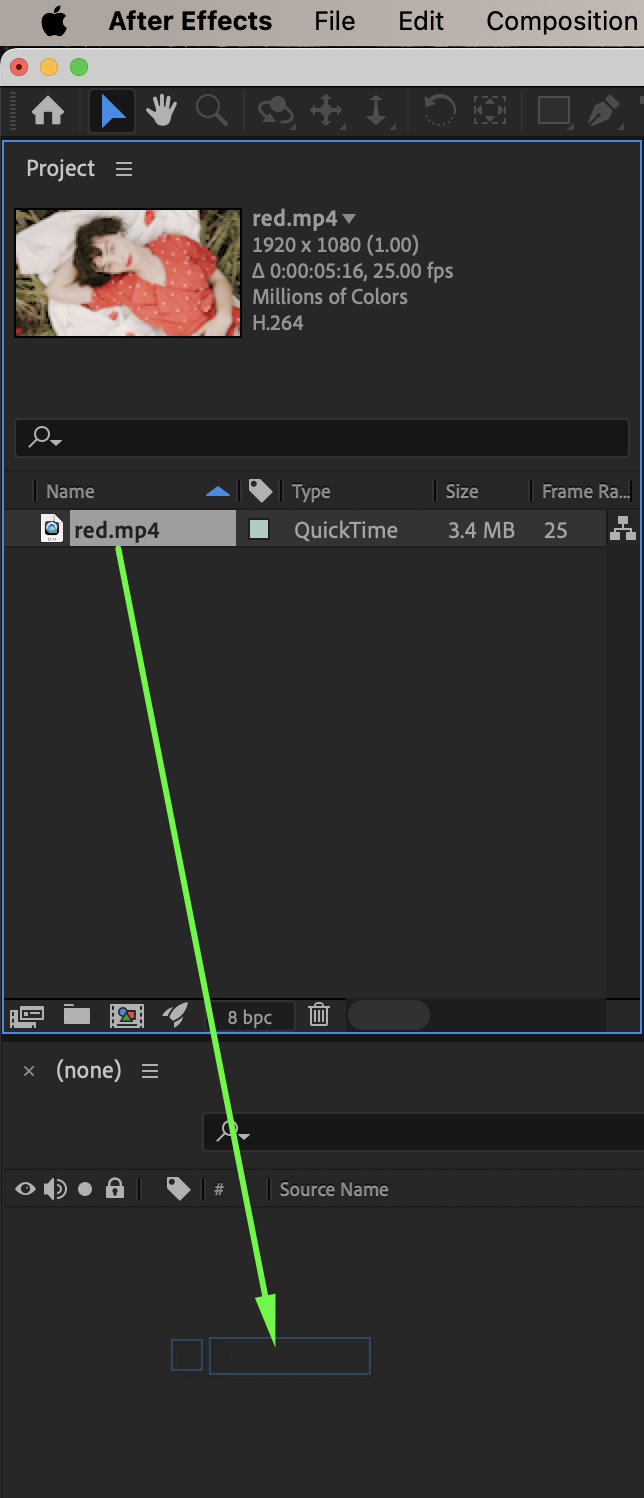
Go to File → Import → File and import your video. Drag it onto the timeline.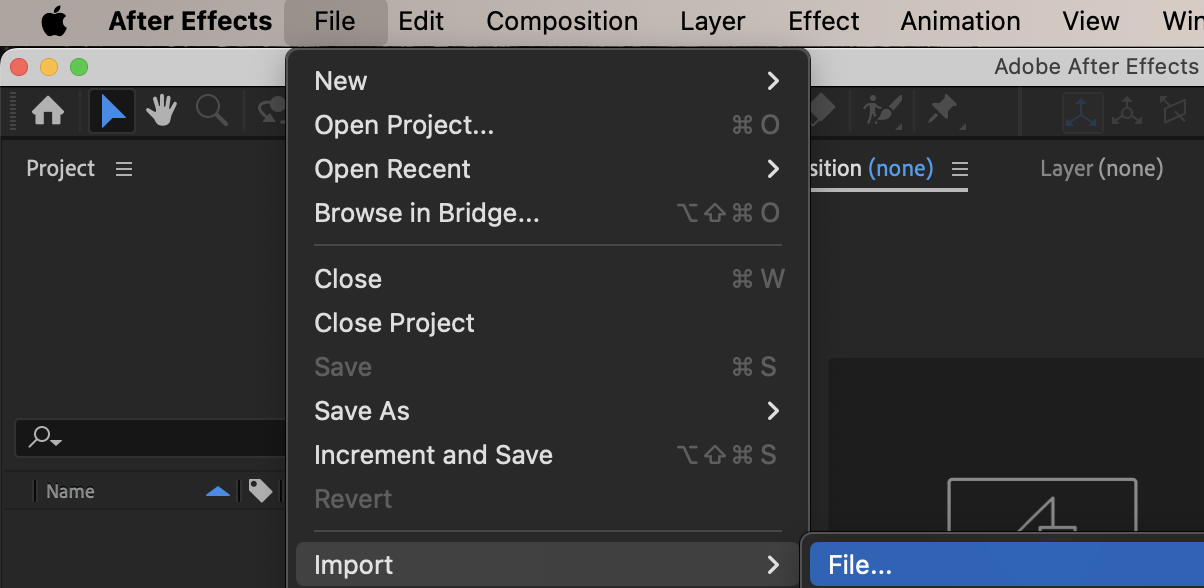
Get 10% off when you subscribe to our newsletter

Step 2: Apply the Color Balance Effect
From the Effects & Presets panel, drag Color Balance onto your video layer.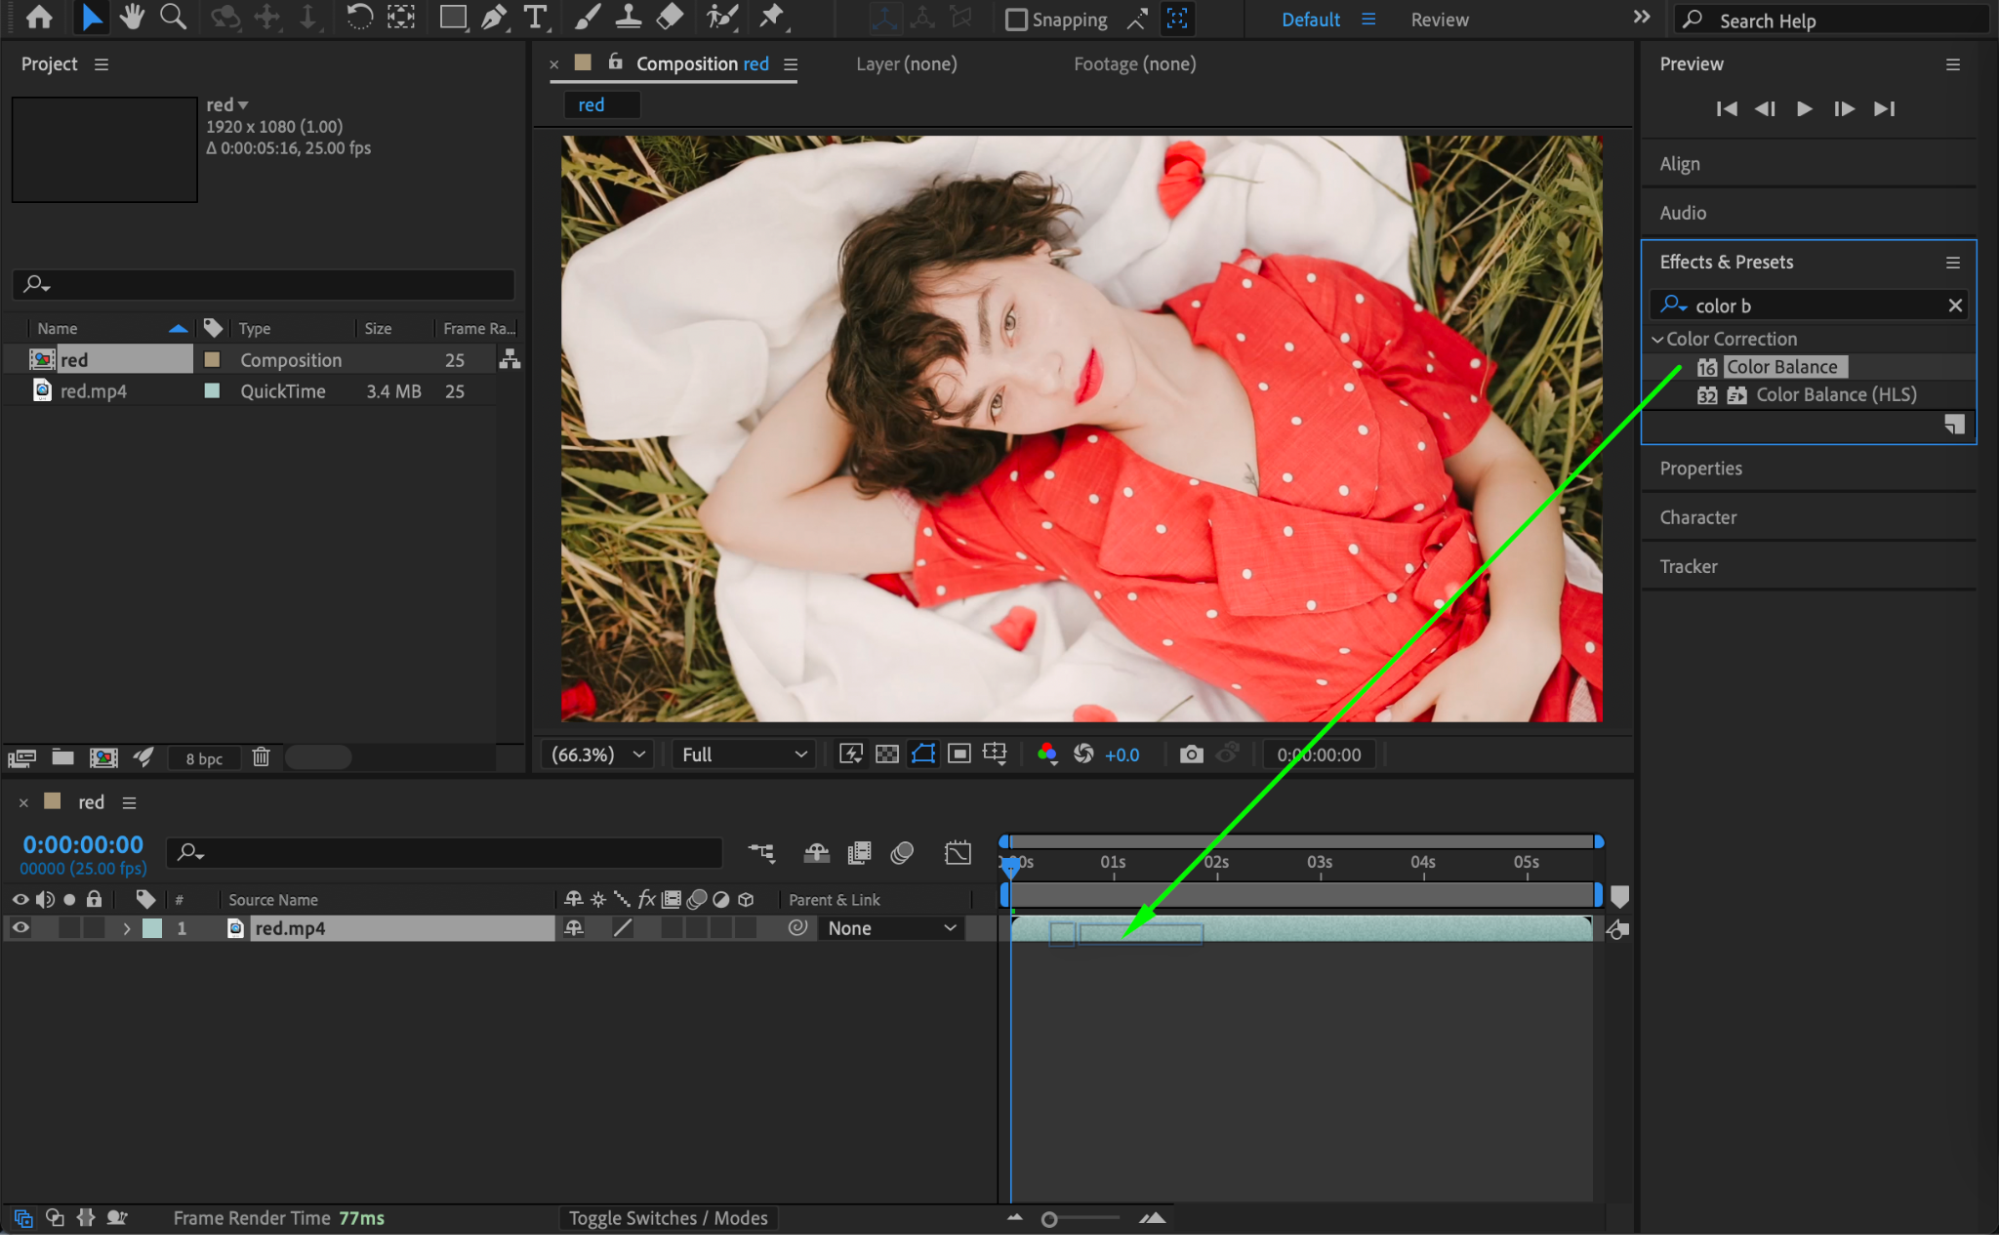
Step 3: Adjust Shadows, Midtones, and Highlights
In the Effect Controls panel, adjust the color settings for:
Shadows – affects the darker areas of the video
Midtones – affects the mid-range colors
Highlights – affects the brighter areas
This allows you to create a customized color filter for your video.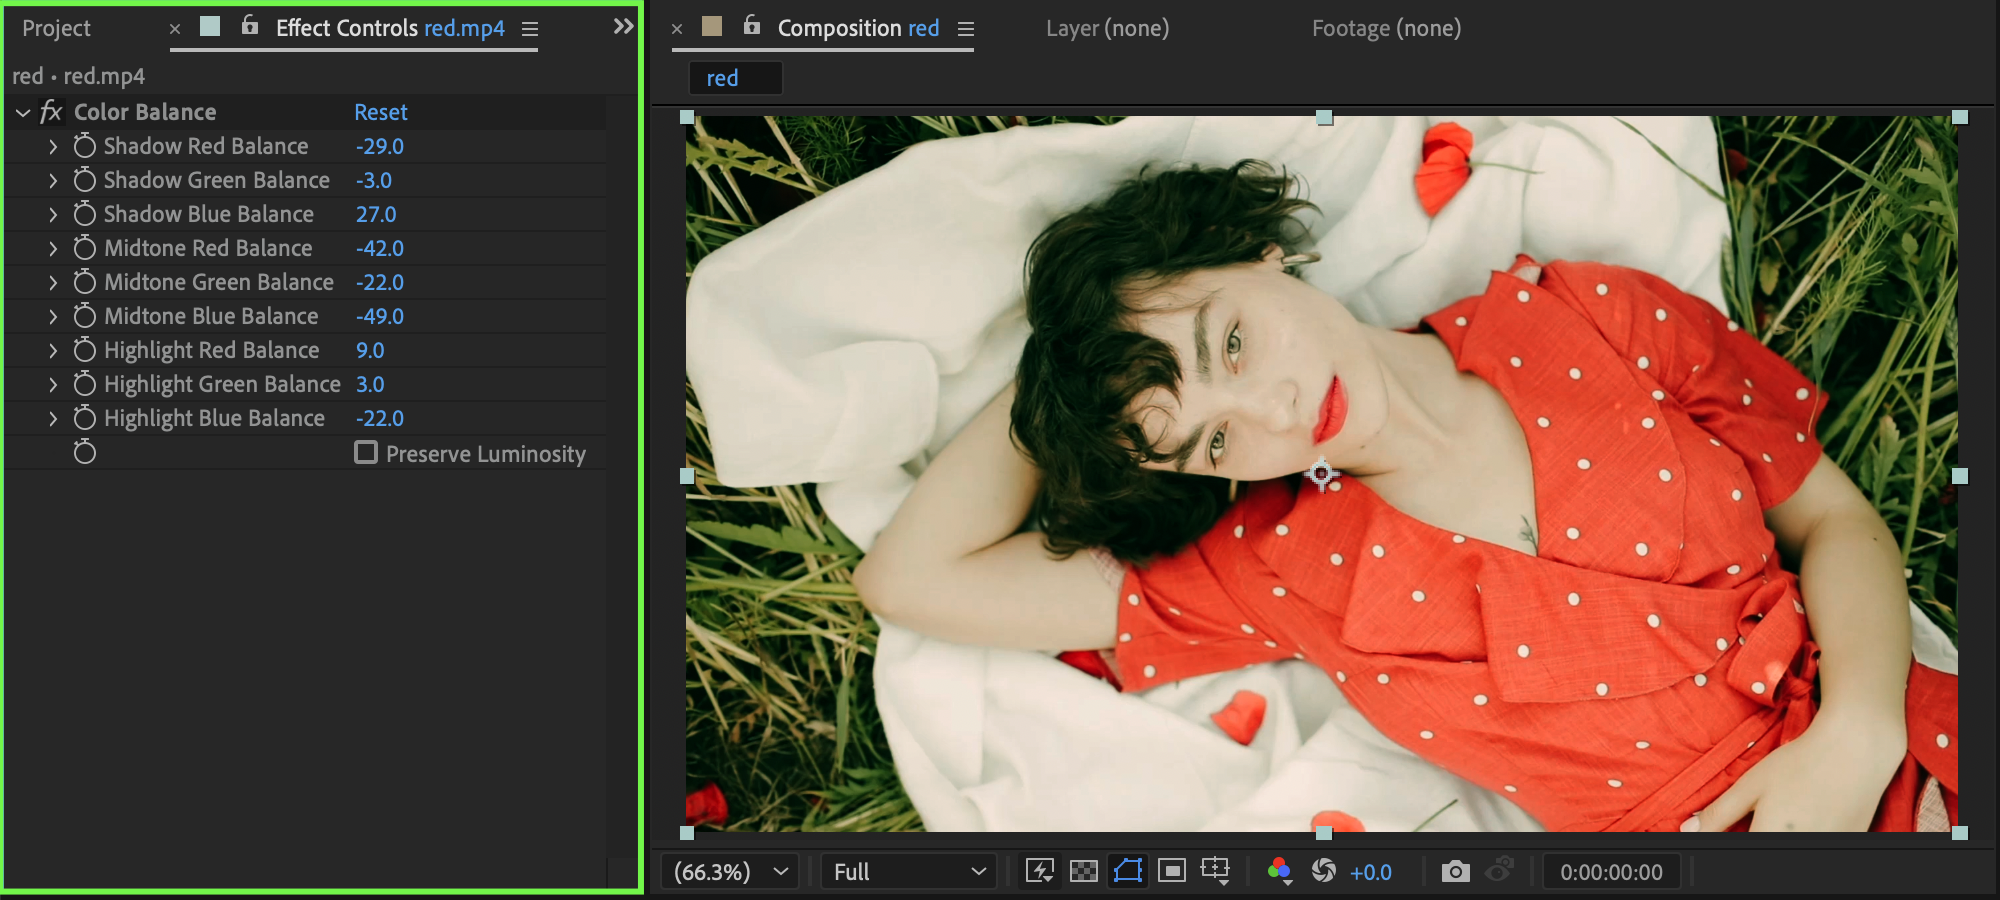
Step 4: Fine-Tune with Curves
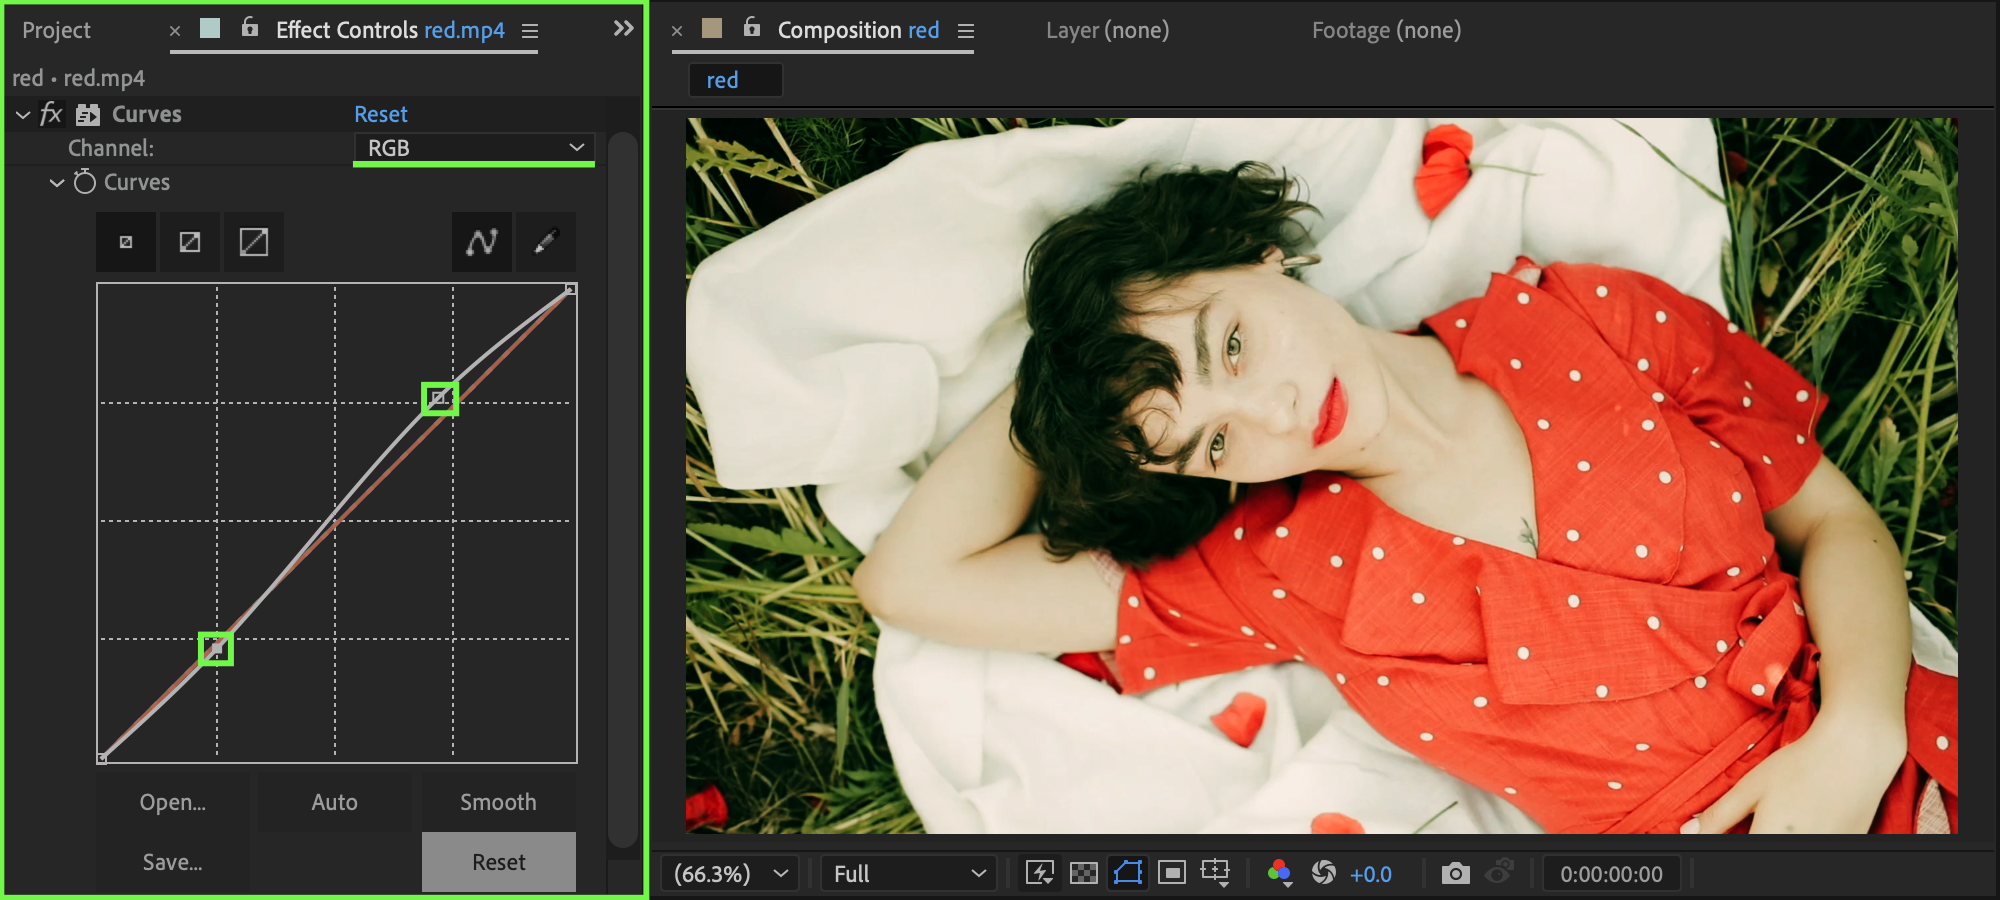
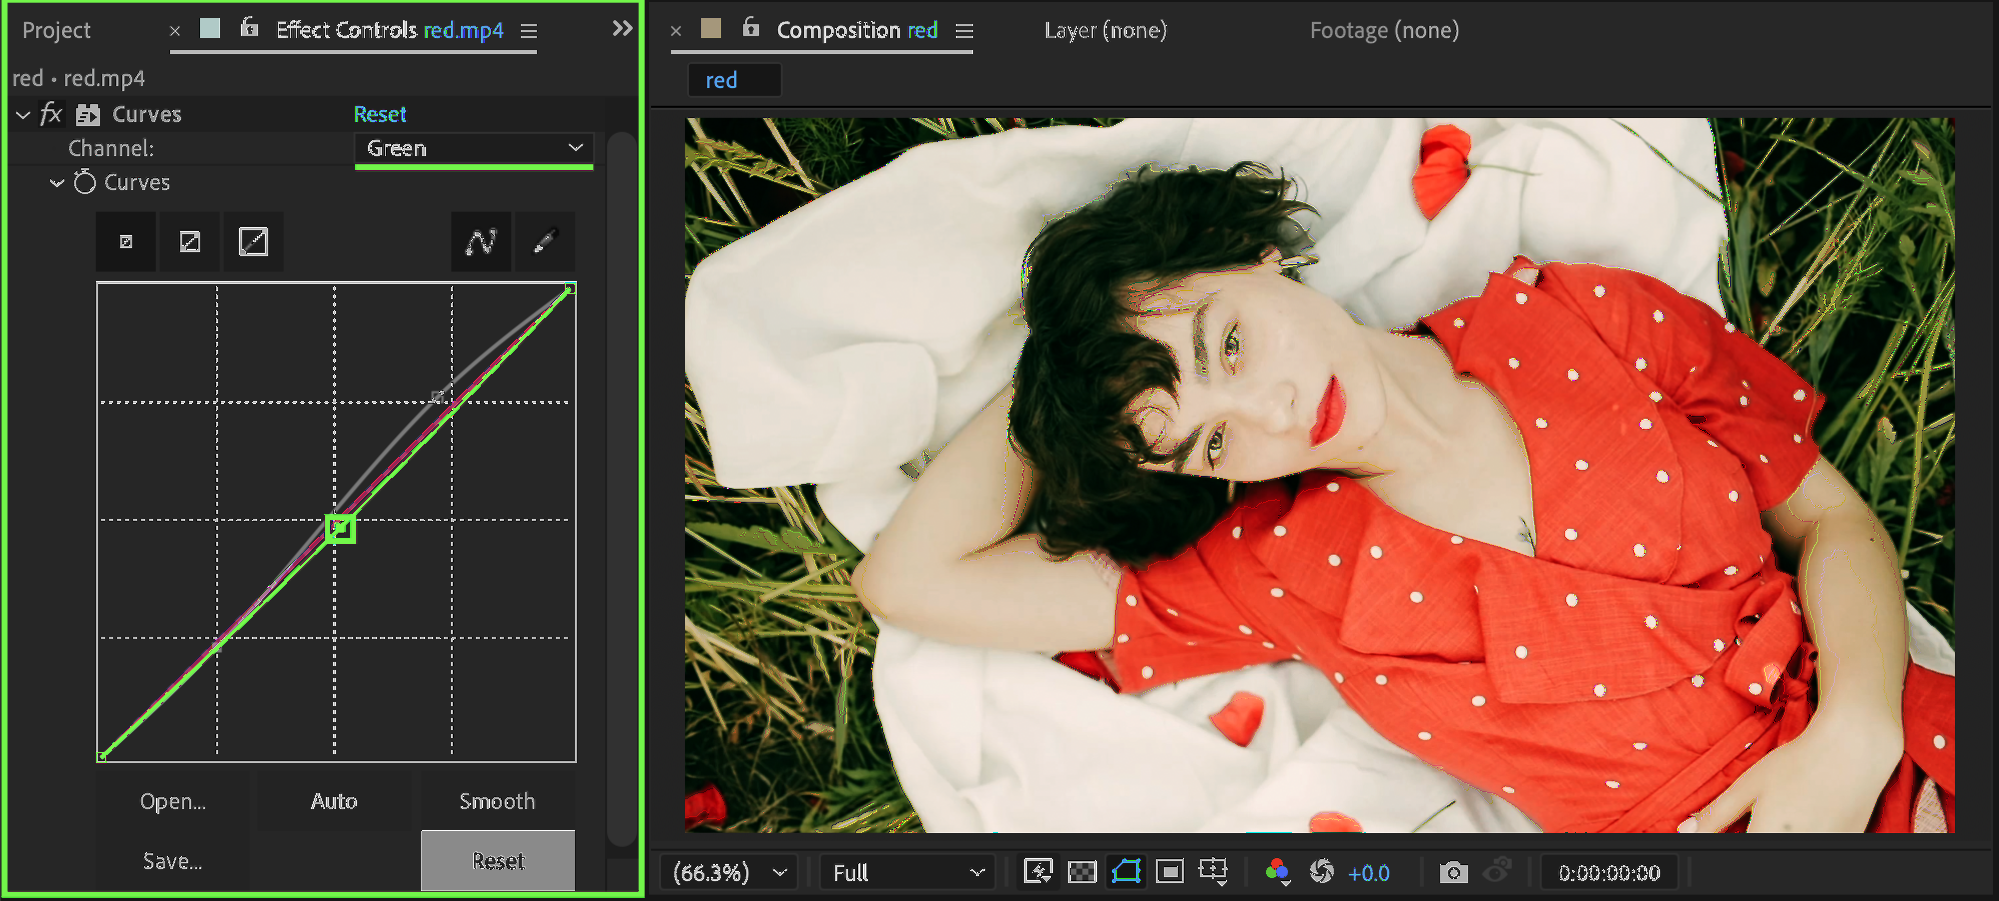
For more precise color adjustments, apply the Curves effect from Effects & Presets. Adjust the RGB curves to refine contrast and color balance until you achieve the desired look.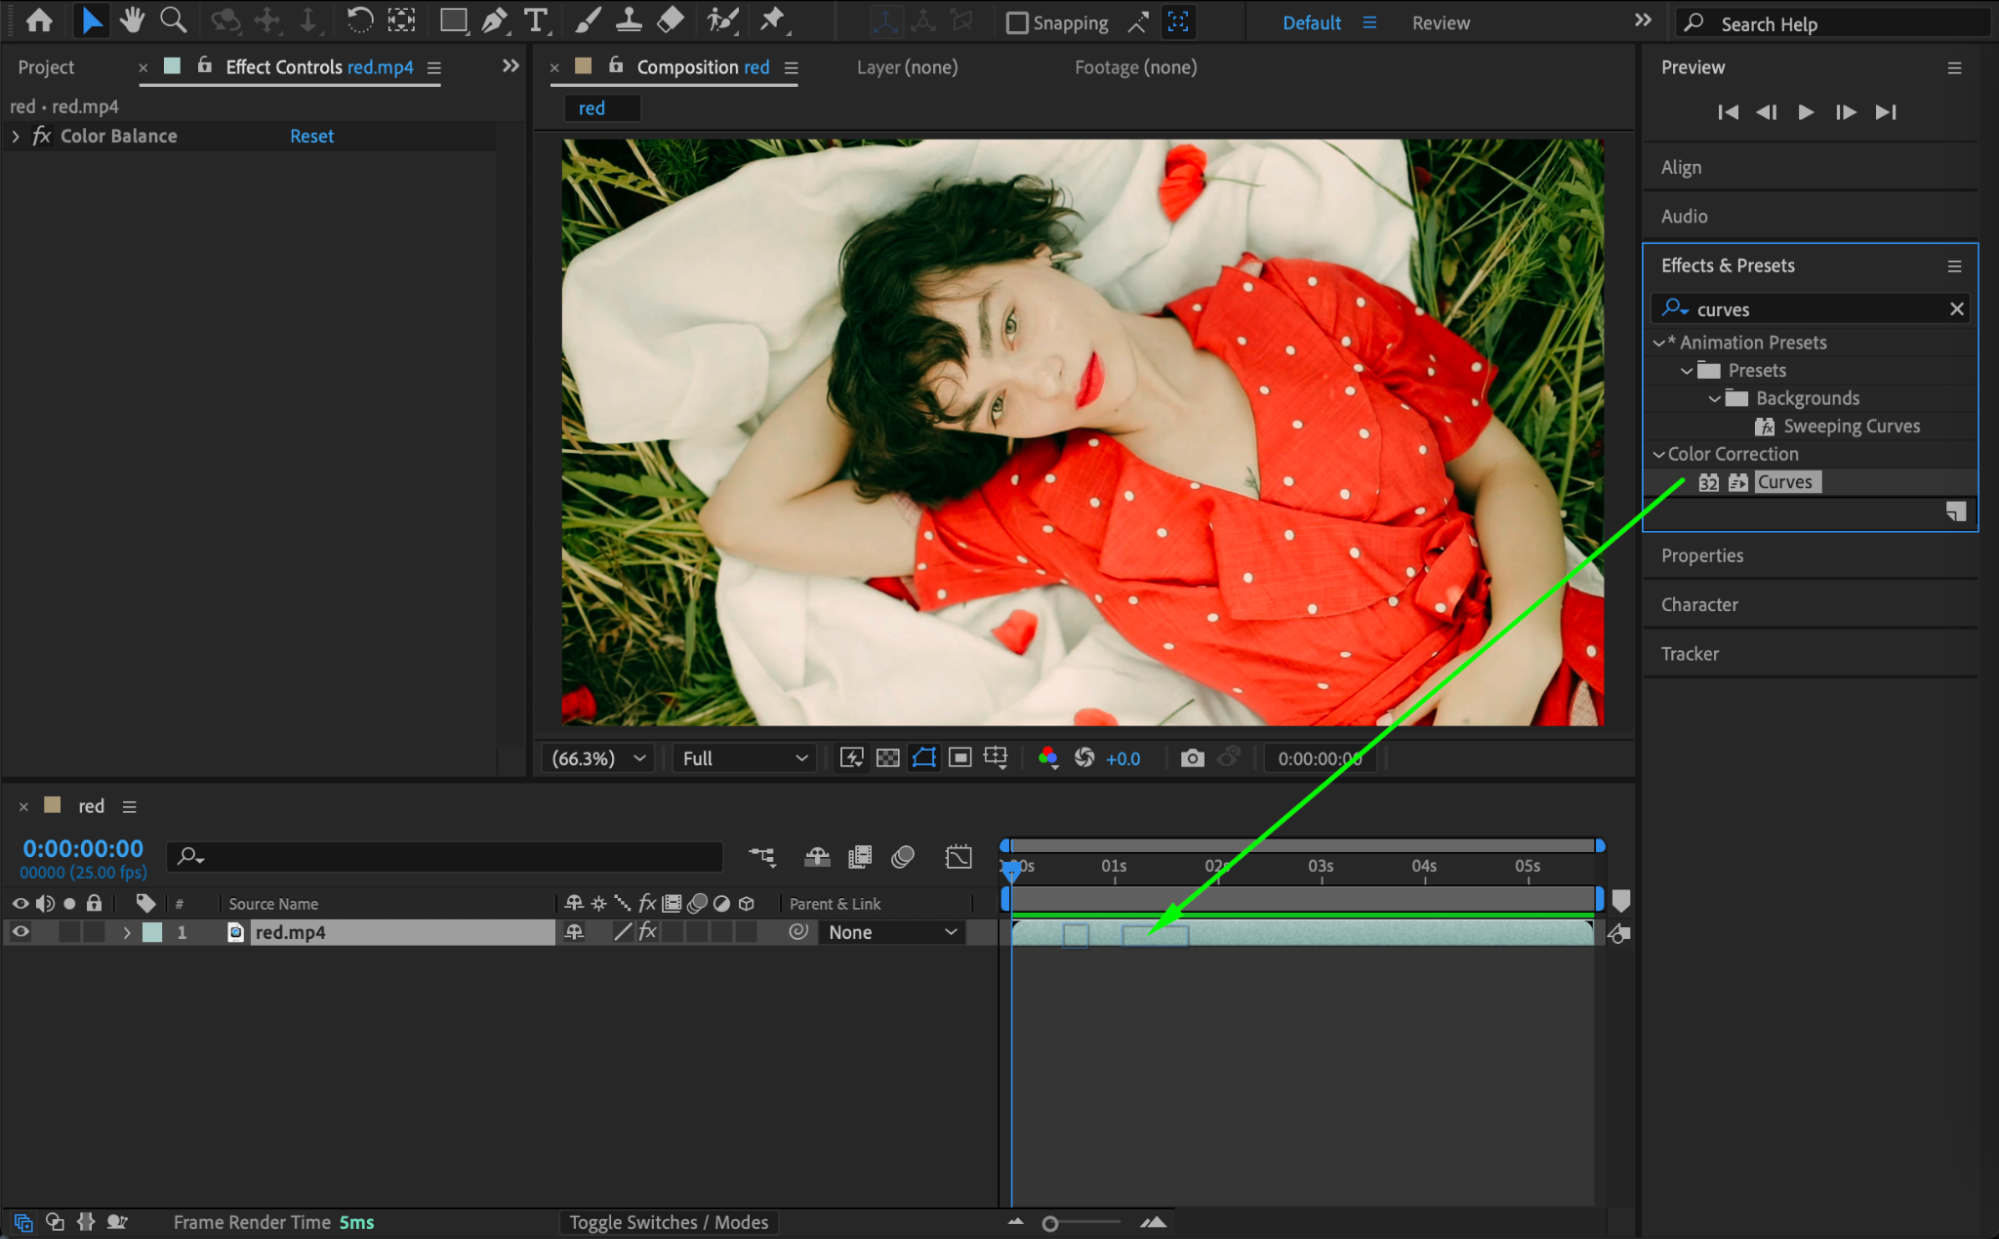
 Step 5: Preview the Result
Play the composition and make any final adjustments to the Color Balance or Curves effects to perfect your color filter.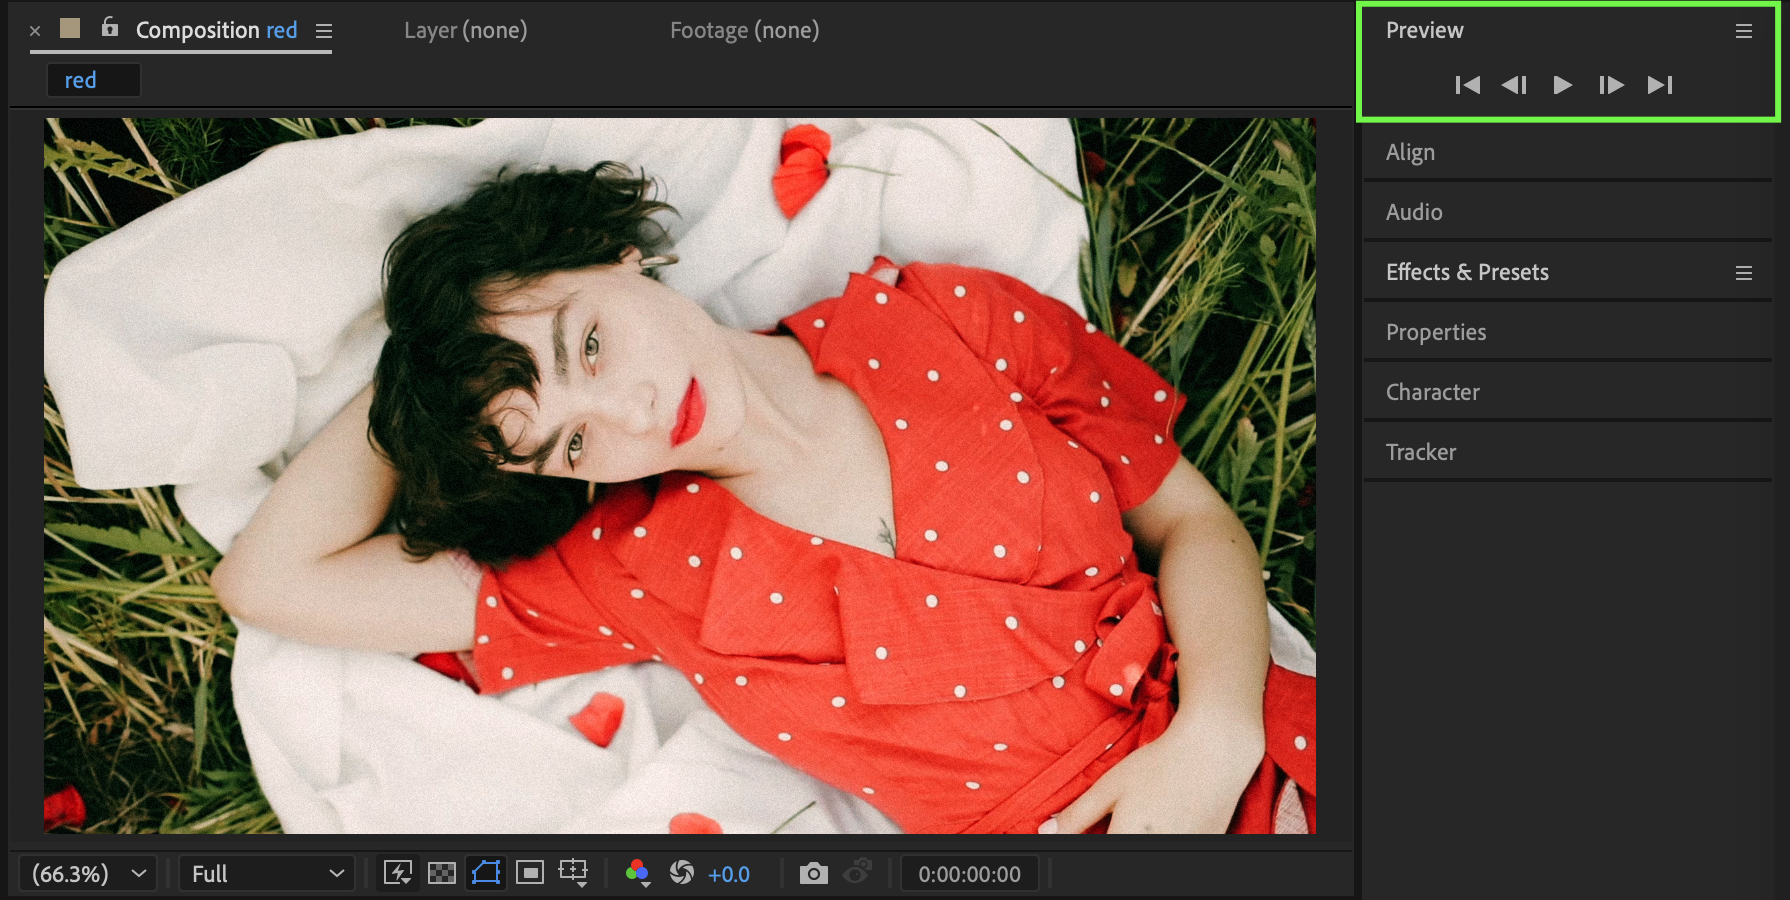
Conclusion
By combining Color Balance and Curves, you can create custom color filters in After Effects that enhance mood, style, and overall visual impact for your videos.
Our Bestsellers
Our Bestsellers

