Learn how to apply Universe Pack overlays in After Effects to create sci-fi inspired visuals with planets, galaxies, and more.
Creating Sci-Fi Visuals with Universe Pack in After Effects
Introduction to Universe Pack for Space-Themed Projects
The Universe Pack is perfect for adding cosmic visuals like galaxies, planets, and star fields to your video projects. Whether you’re working on a sci-fi film, music video, or abstract animation, this pack gives you high-quality space elements that are easy to use.
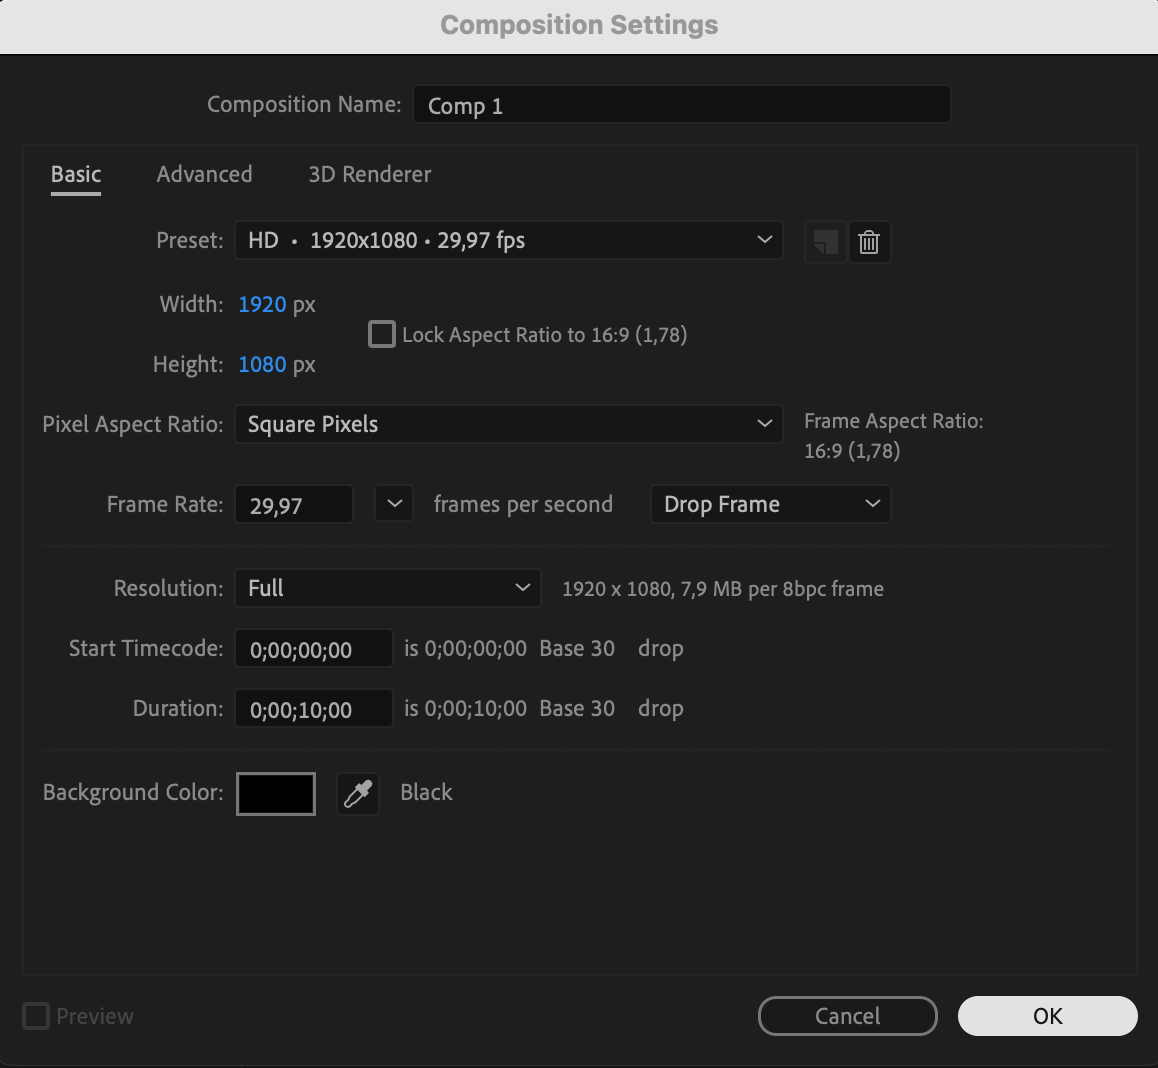
Step 1: Create a New Composition
Open After Effects and create a new composition by going to Composition > New Composition. Set your resolution, frame rate, and duration according to your project needs. This will be your base where you build the scene.
Get 10% off when you subscribe to our newsletter

Step 2: Open AEJuice Pack Manager
Go to Window > AEJuice Pack Manager 4 to open the plugin panel. This is where all your downloaded AEJuice packs are stored and managed. Step 3: Download the Universe Pack
Inside the Pack Manager, locate the Universe Pack. If it’s not already downloaded, click the pack to install it. It may take a few moments, as the assets are high-quality. Once downloaded, you’ll be able to preview and import the available space elements.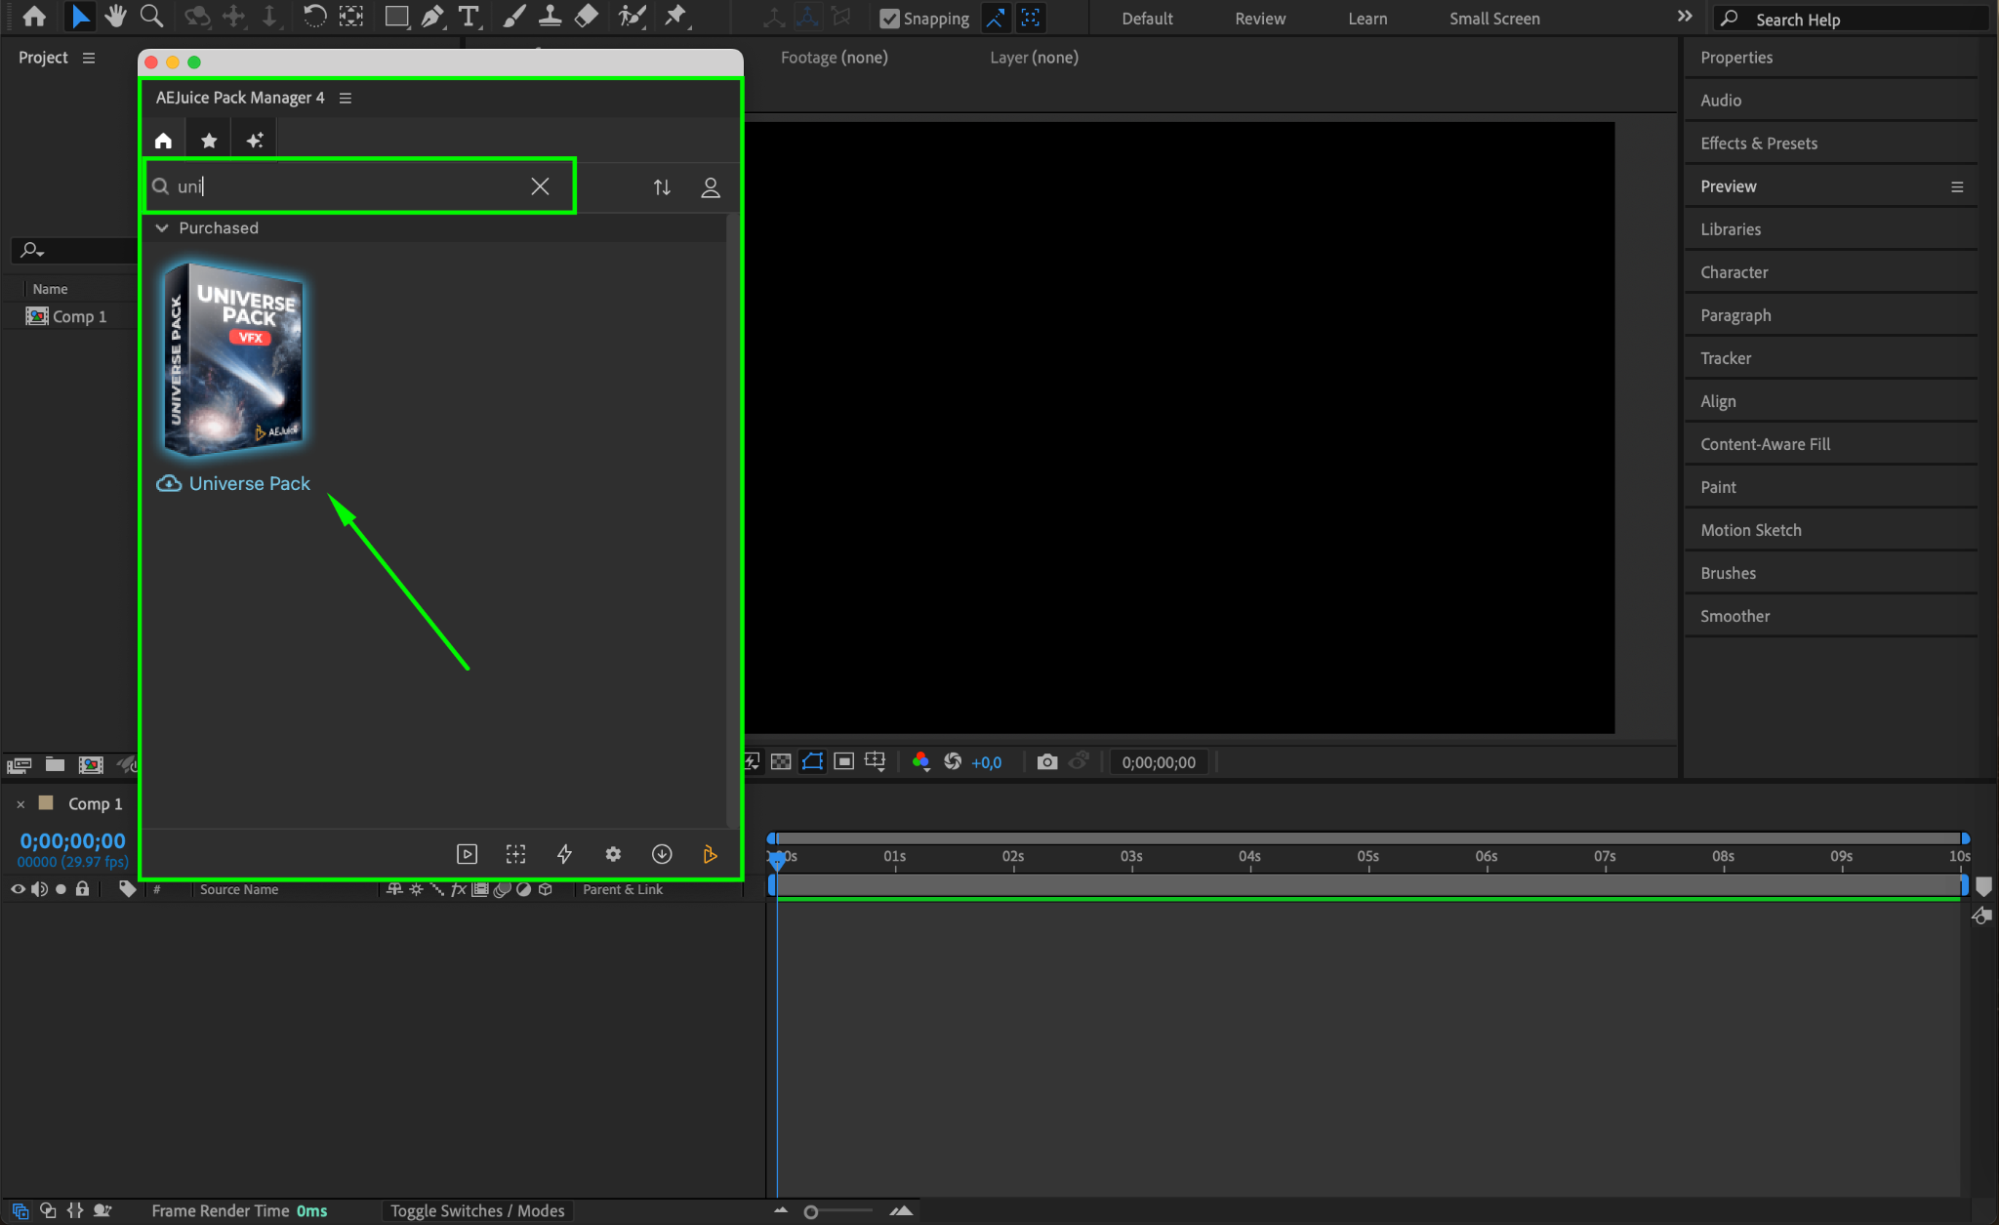 Step 4: Choose and Import Effects
Browse through the pack and choose a pre-rendered effect like a rotating planet, animated galaxy, or cosmic flare. Set your Current Time Indicator (CTI) where you want the effect to begin, then click Import. The element will appear in your timeline, automatically resized to fit your composition.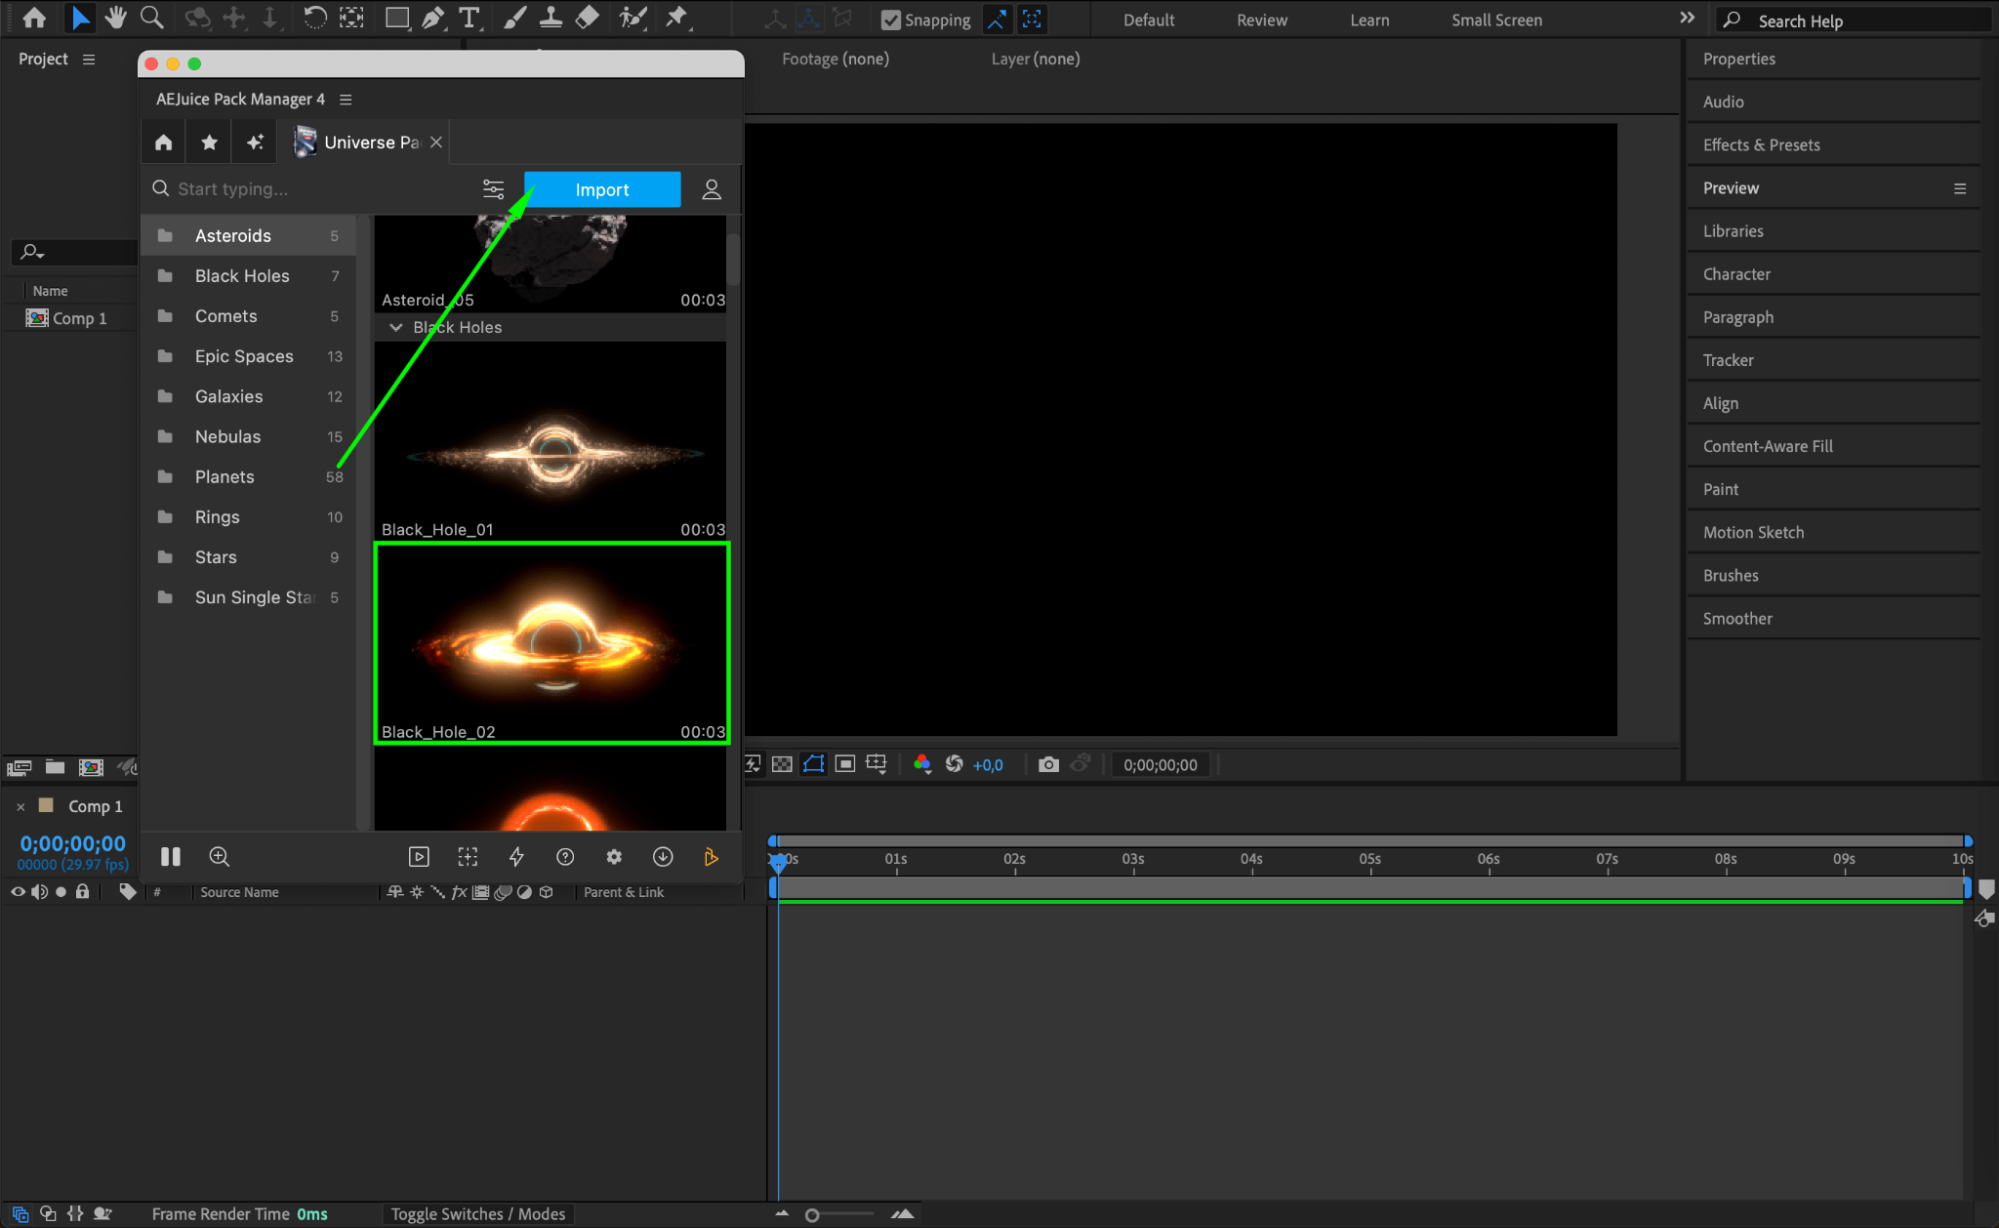
Step 5: Add Text and Blend It In
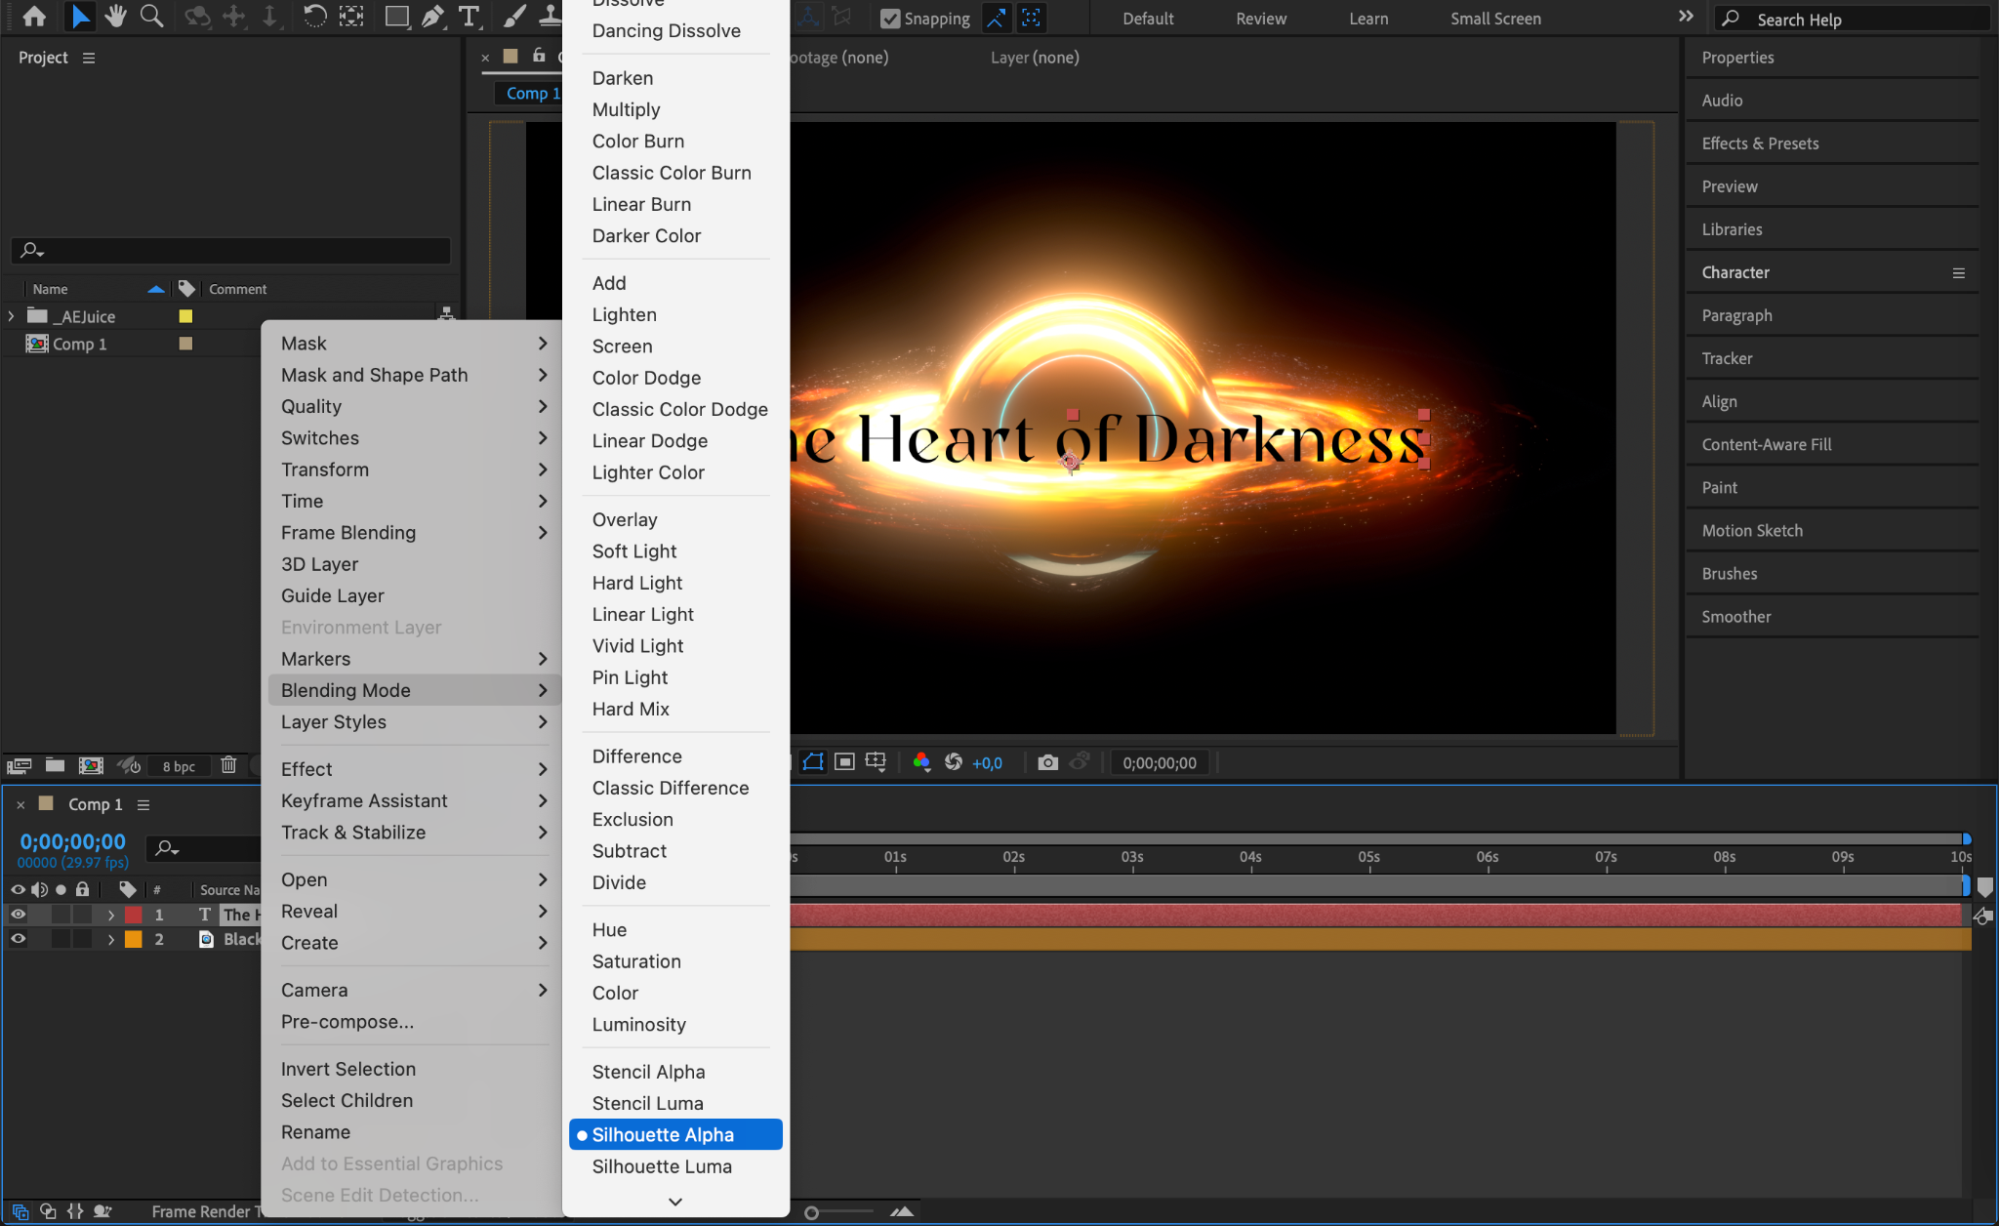
Use the Type Tool (Ctrl/Cmd + T) to add text over your space background. Customize the font, size, and position as needed. For a more cinematic look, right-click the text layer and adjust the Blending Mode (such as “Screen” or “Overlay”) to help it integrate with the cosmic background.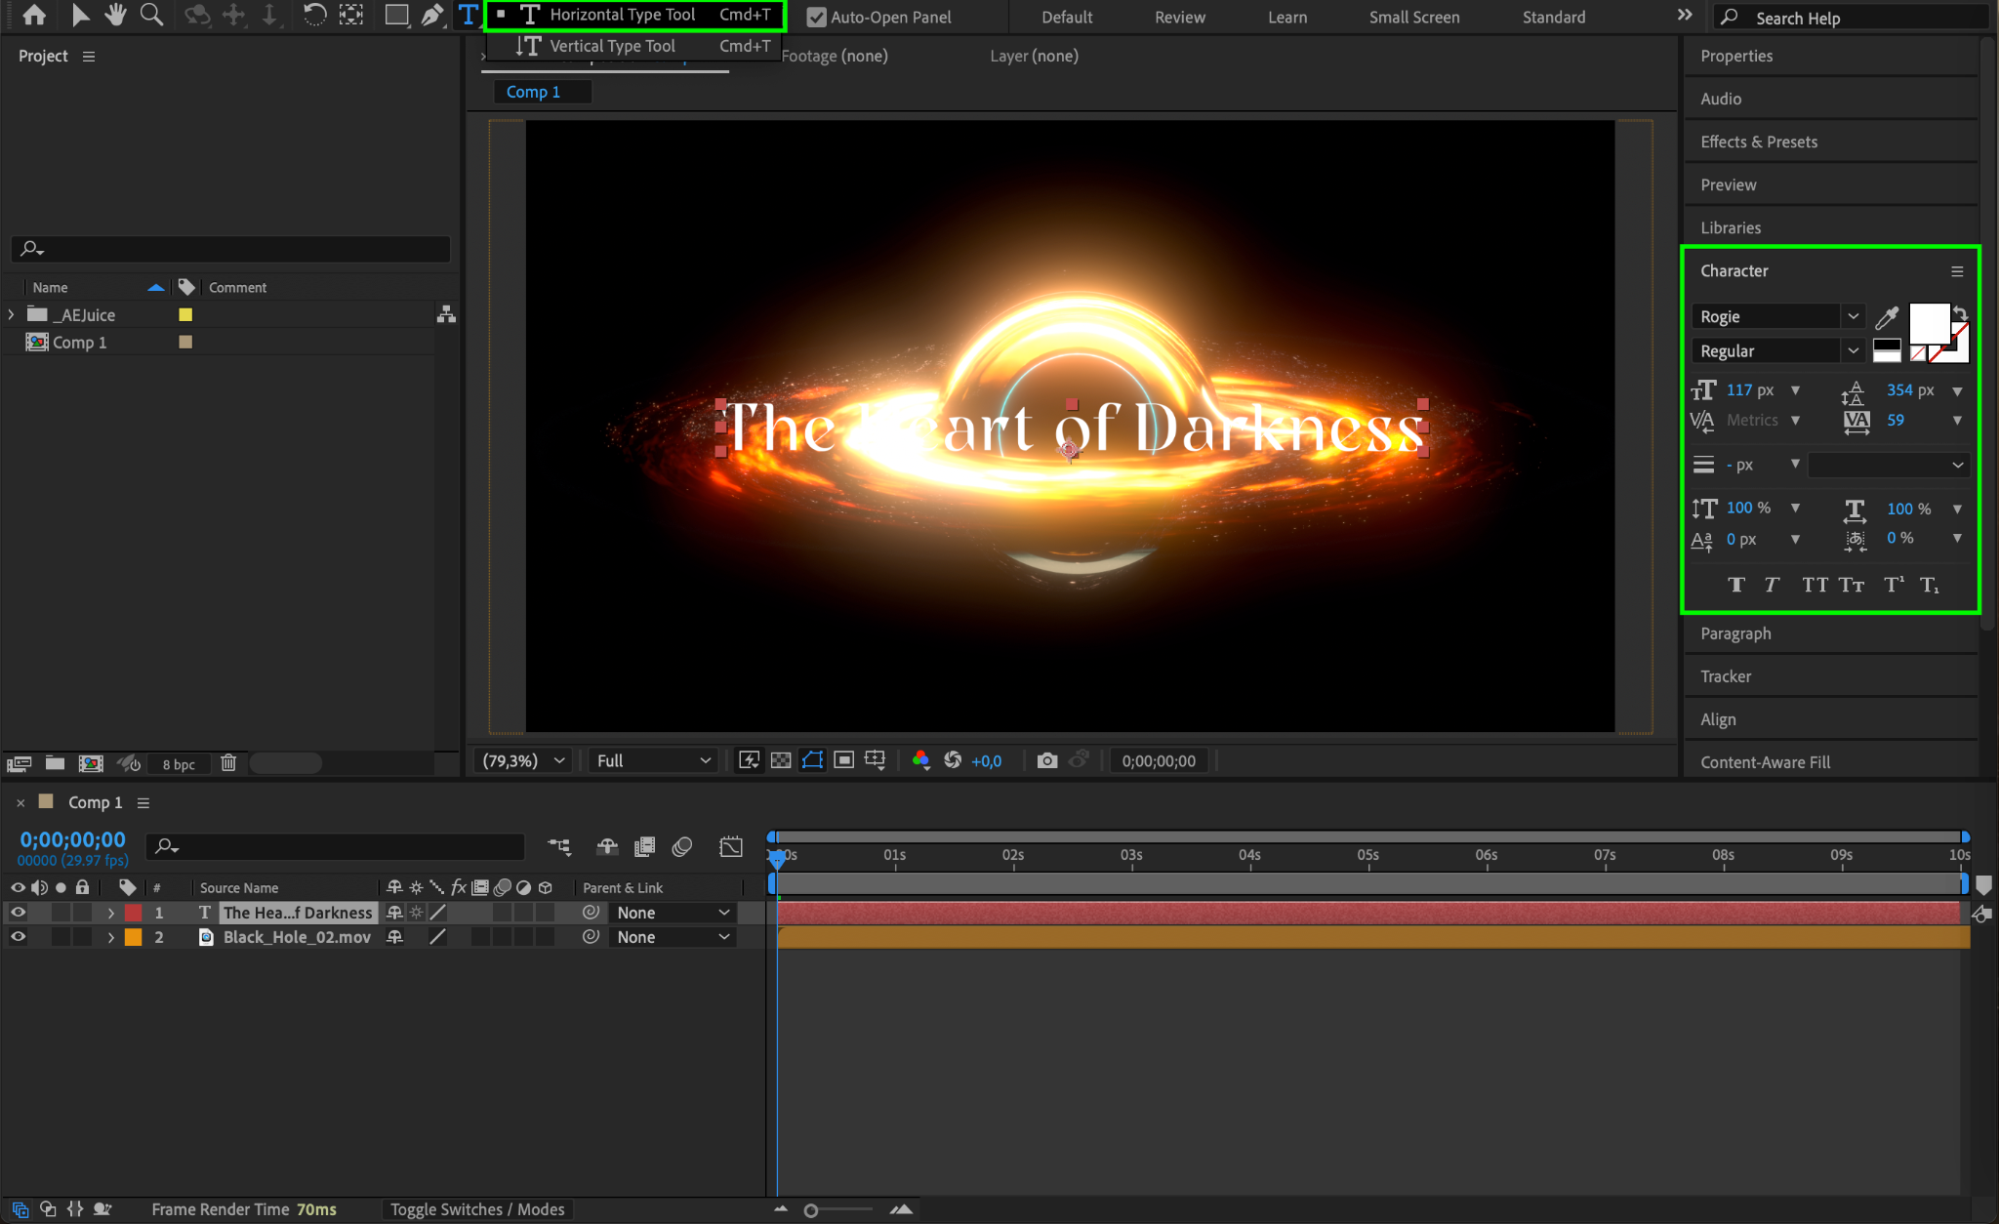
 Step 6: Optional – Create a Starfield Background
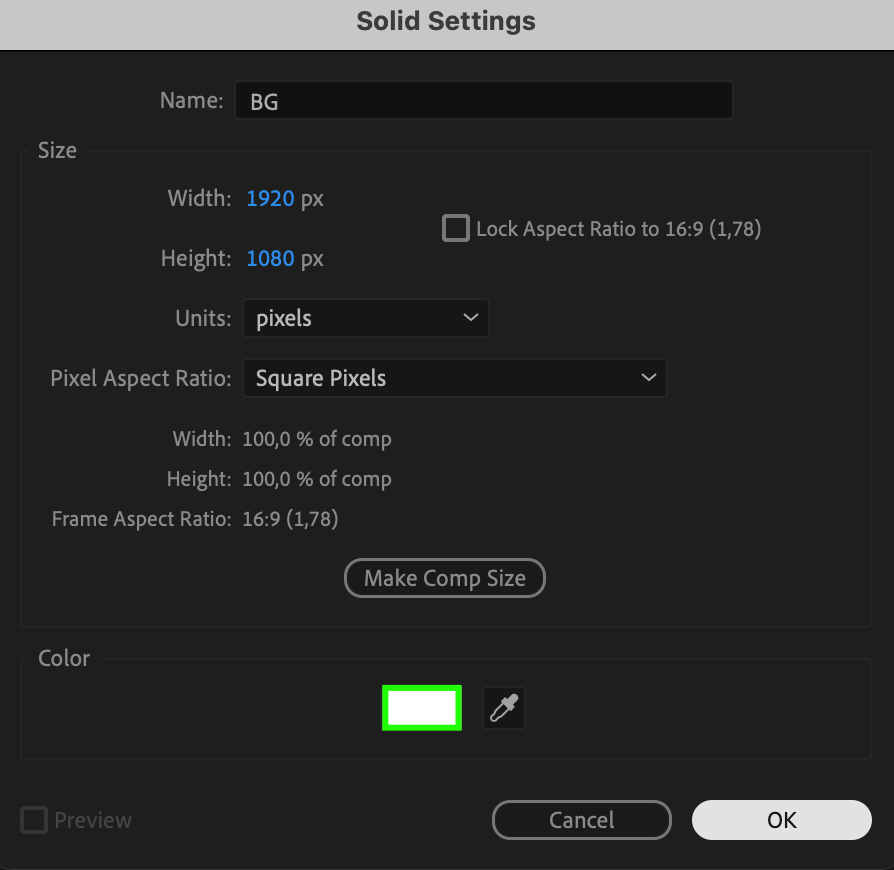
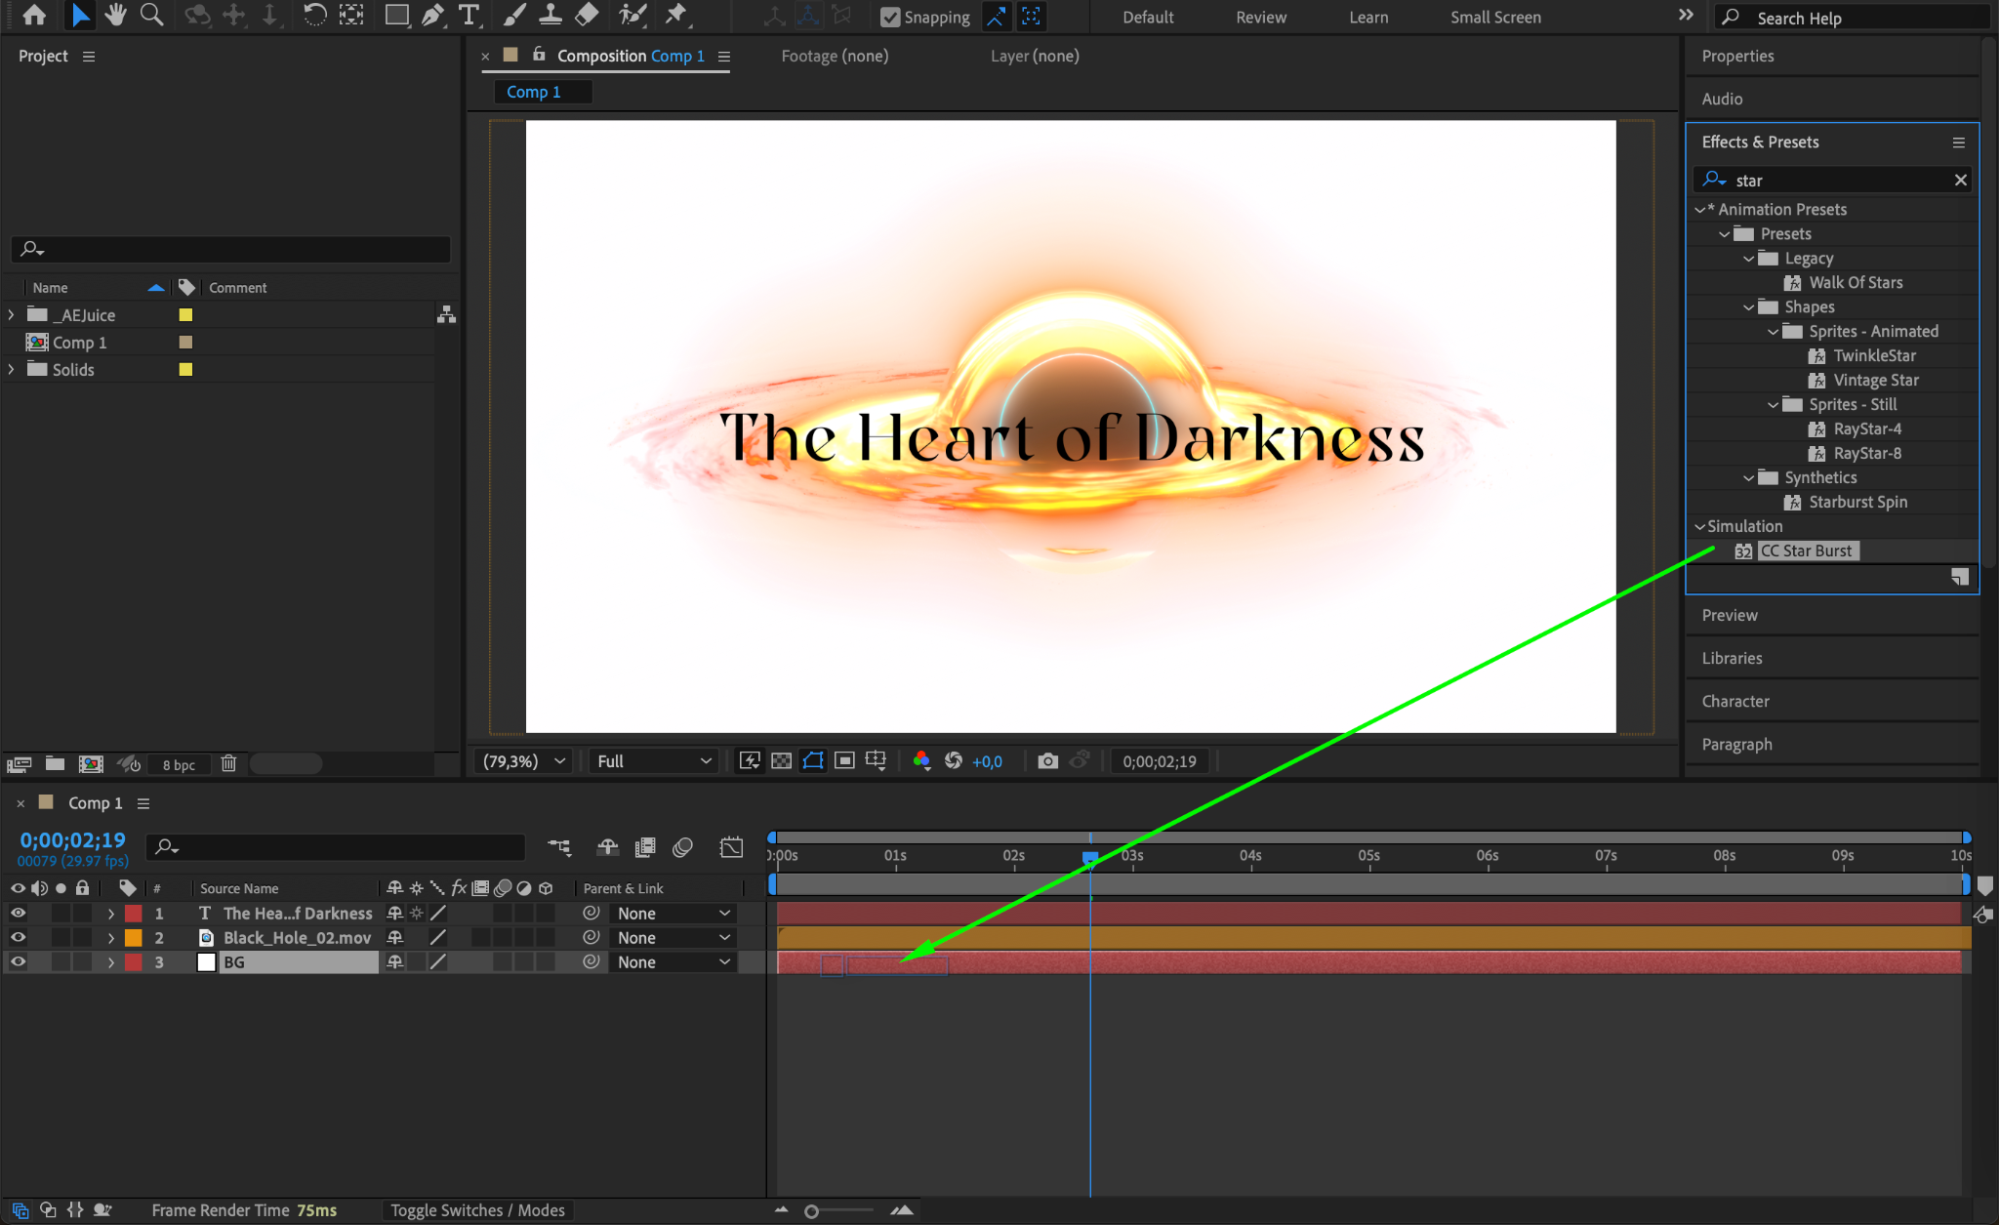
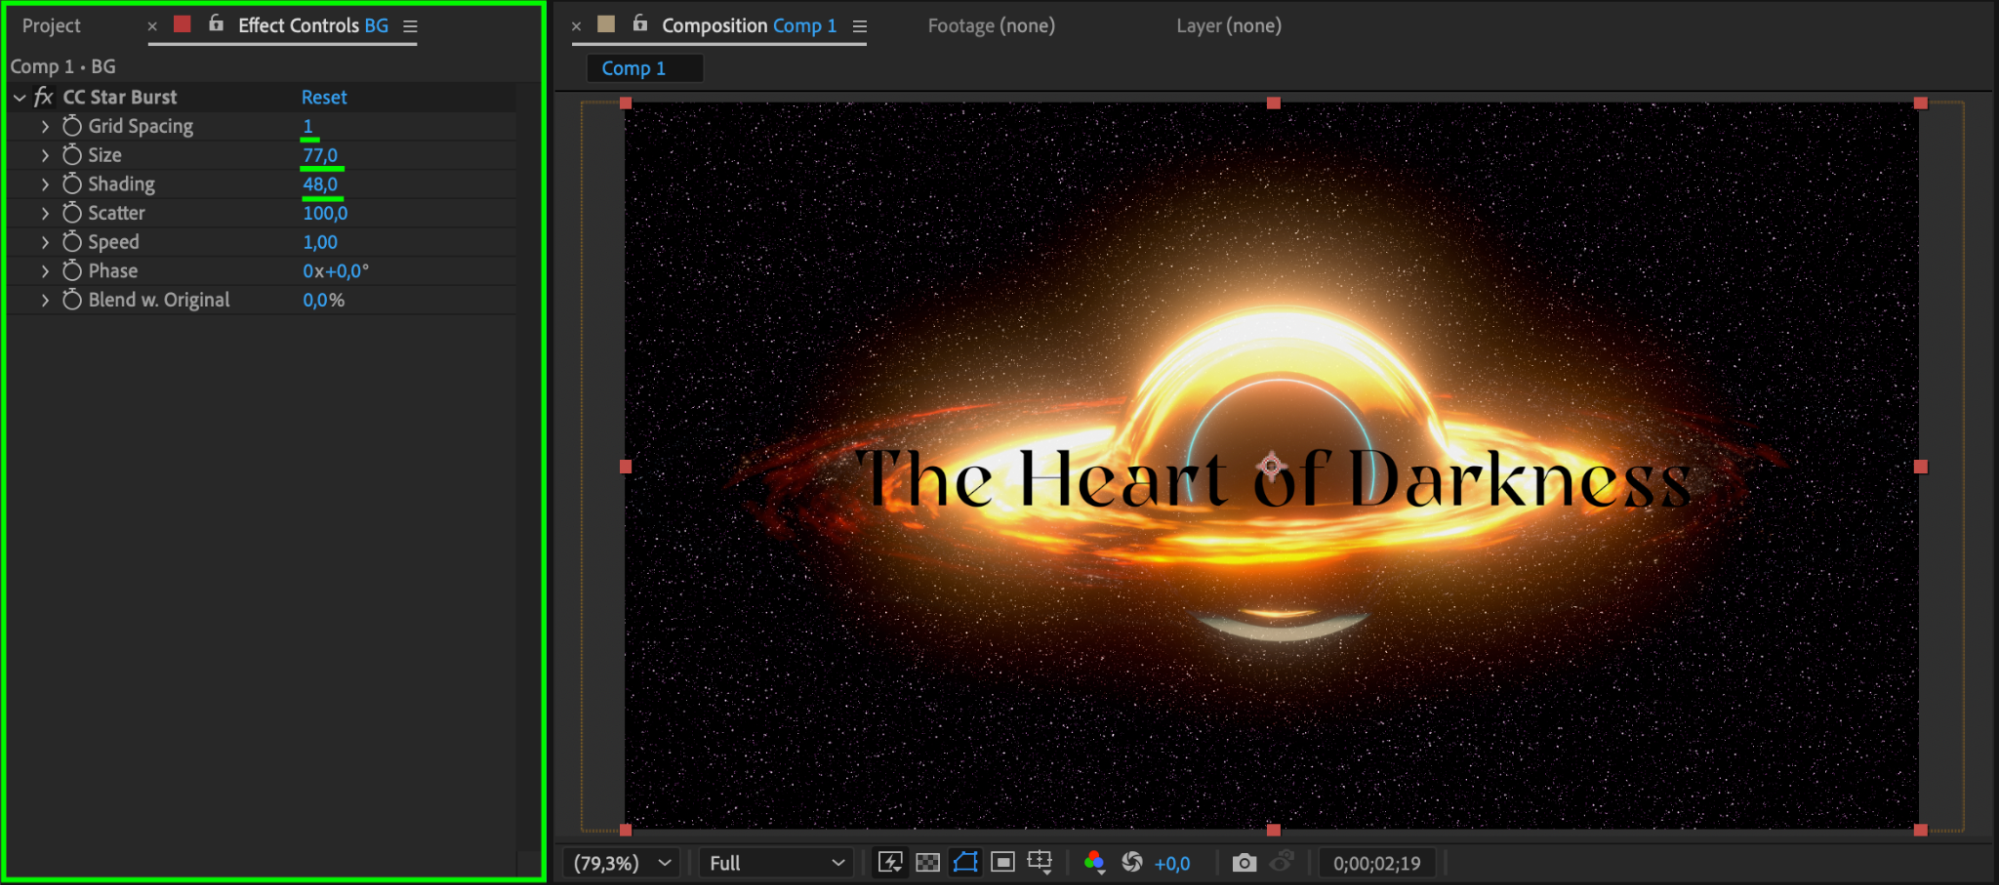
To add even more depth, go to Layer > New > Solid and create a white solid. Then apply the CC Star Burst effect from the Effects & Presets panel. Adjust parameters like speed and scatter to simulate a moving galaxy background.
 Step 7: Preview and Final Adjustments
Hit the Spacebar to preview your animation in real time. You can fine-tune the timing, opacity, or layer arrangement for the best composition. Export your video when satisfied.
Conclusion
With the Universe Pack, you can quickly build breathtaking sci-fi visuals using professional pre-rendered elements. Whether it’s a background or focal point, these cosmic effects will take your project to the stars.
Our Bestsellers


