Learn how to add dynamic, animated liquid elements to your motion design projects using AEJuice Liquid Elements Pack in After Effects.
Create Dynamic Motion Designs with Liquid Elements in After Effects
Introduction to Liquid Effects for Abstract and Creative Videos
Liquid animation is a fun and eye-catching way to bring energy and playfulness to your motion graphics. Whether you’re creating abstract visuals, explainer videos, or social content, animated liquid elements can make your projects feel alive. In this liquid elements tutorial, you’ll learn how to use the AEJuice Liquid Elements Pack, one of the best collections for abstract and creative video editing.
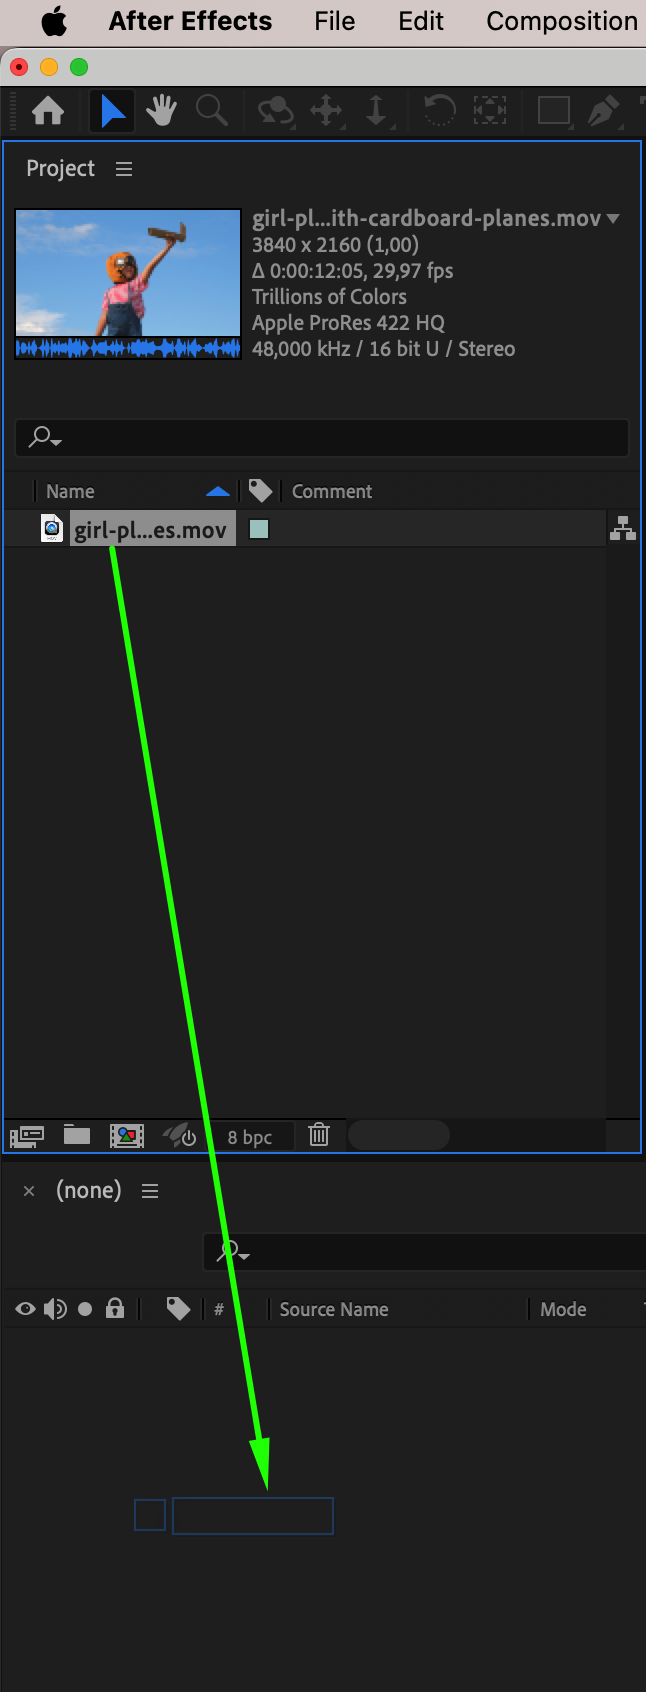
Step 1: Import Your Footage
Start by opening After Effects and creating a new composition. Then go to File > Import > File and select your video or background footage. Drag it into the timeline to set it as your base layer for the liquid animation.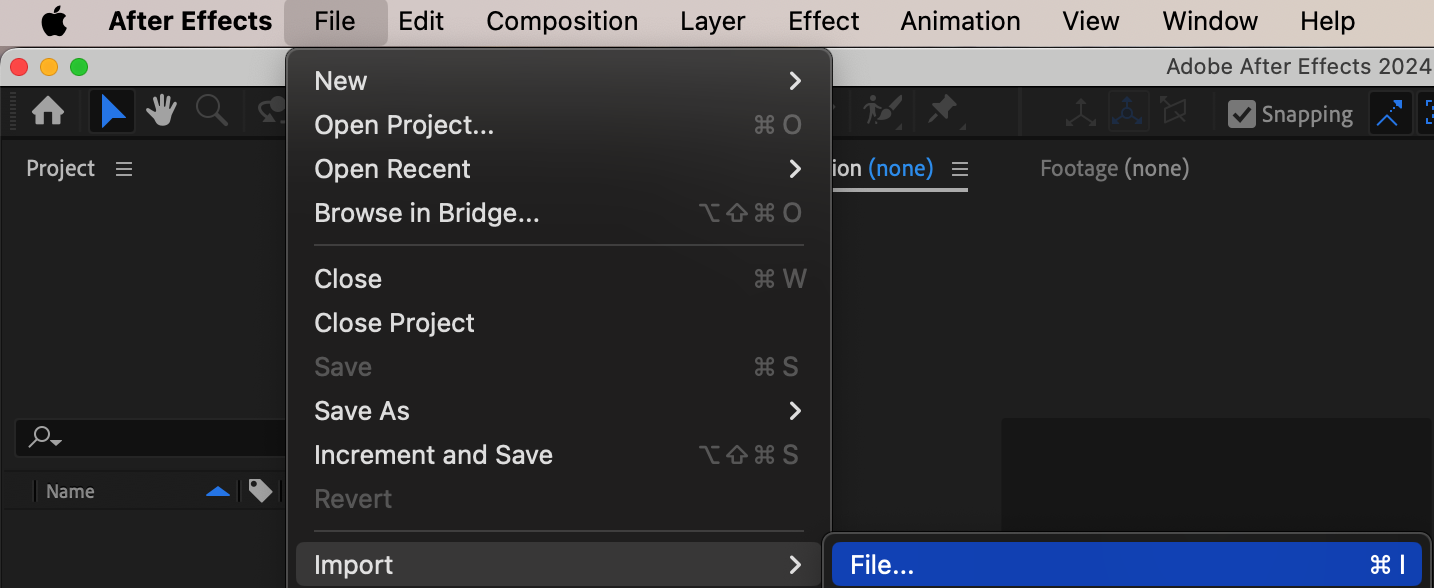
 Step 2: Open AEJuice Pack Manager
Go to Window > AEJuice Pack Manager 4 to open the AEJuice plugin panel. This panel gives you access to all your downloaded AEJuice packs and allows you to browse templates directly inside After Effects.
Get 10% off when you subscribe to our newsletter

Step 3: Download the Liquid Elements Pack
In the Pack Manager, locate the Liquid Elements Pack. If you haven’t installed it yet, click the pack to download. Once downloaded, you’ll have access to a wide range of hand-drawn liquid animations such as splashes, drops, swirls, and waves. Step 4: Choose and Import an Animation
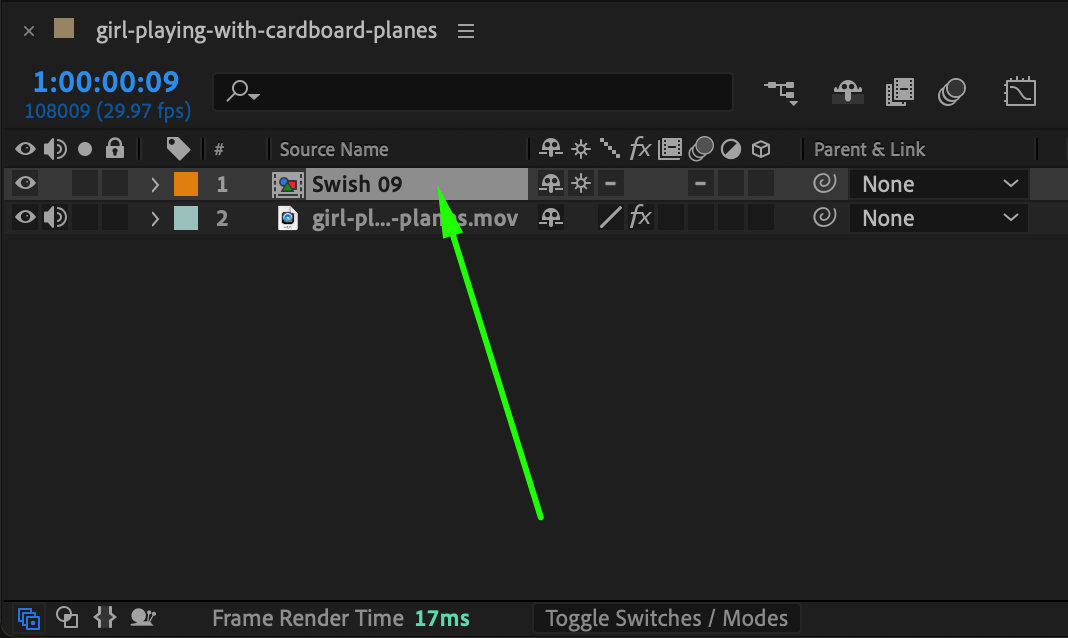
Browse through the available elements and find a liquid animation that suits your style. When you’re ready, click on it and press Import. The element will be placed in your timeline as a pre-comp.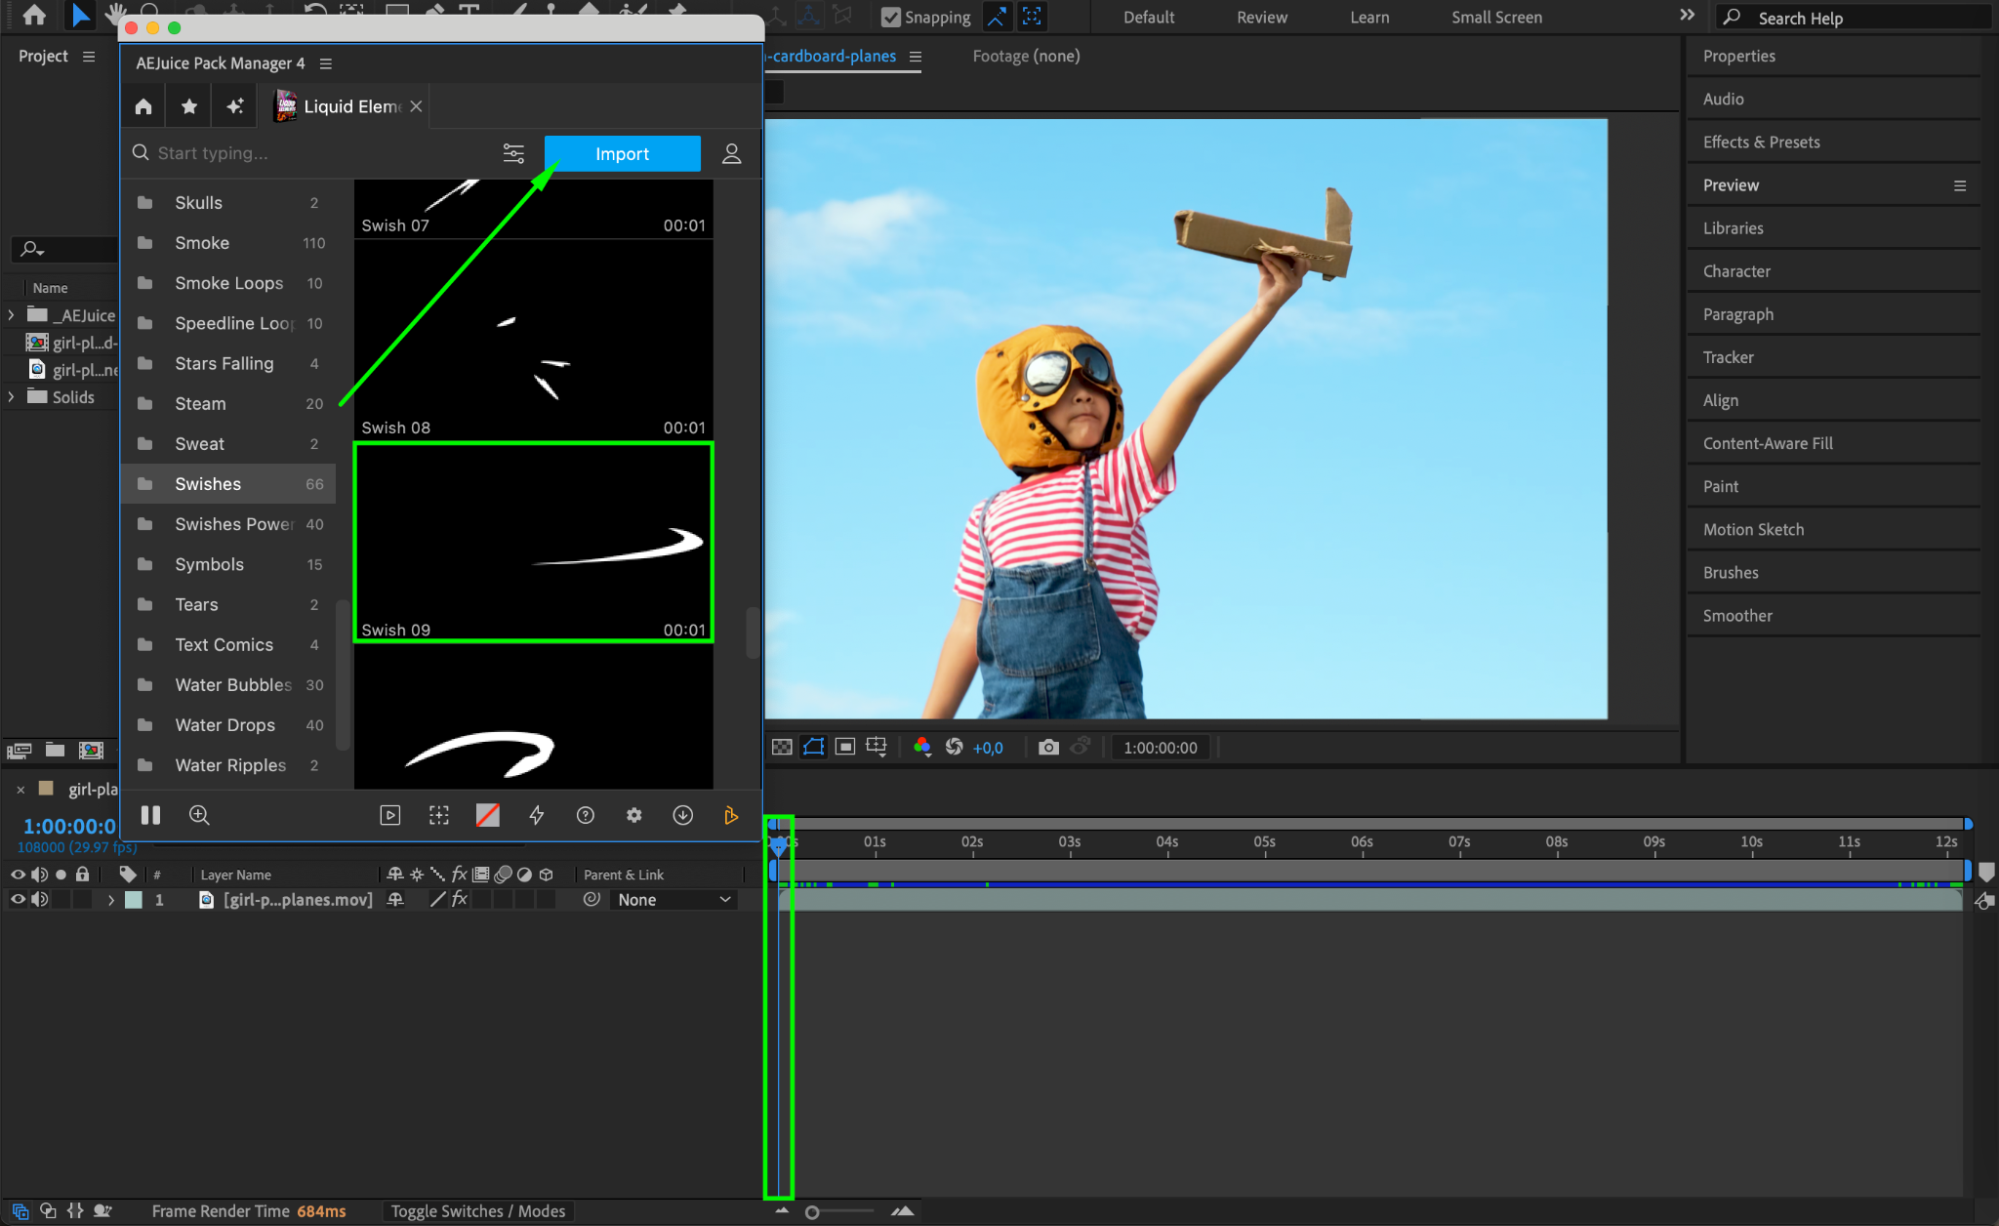 Step 5: Position, Rotate, and Scale
After importing, select the pre-comp layer and use the Selection Tool (V) to move it around your scene. Use the Rotation (R) and Scale (S) properties to adjust its size and orientation until it fits your composition perfectly.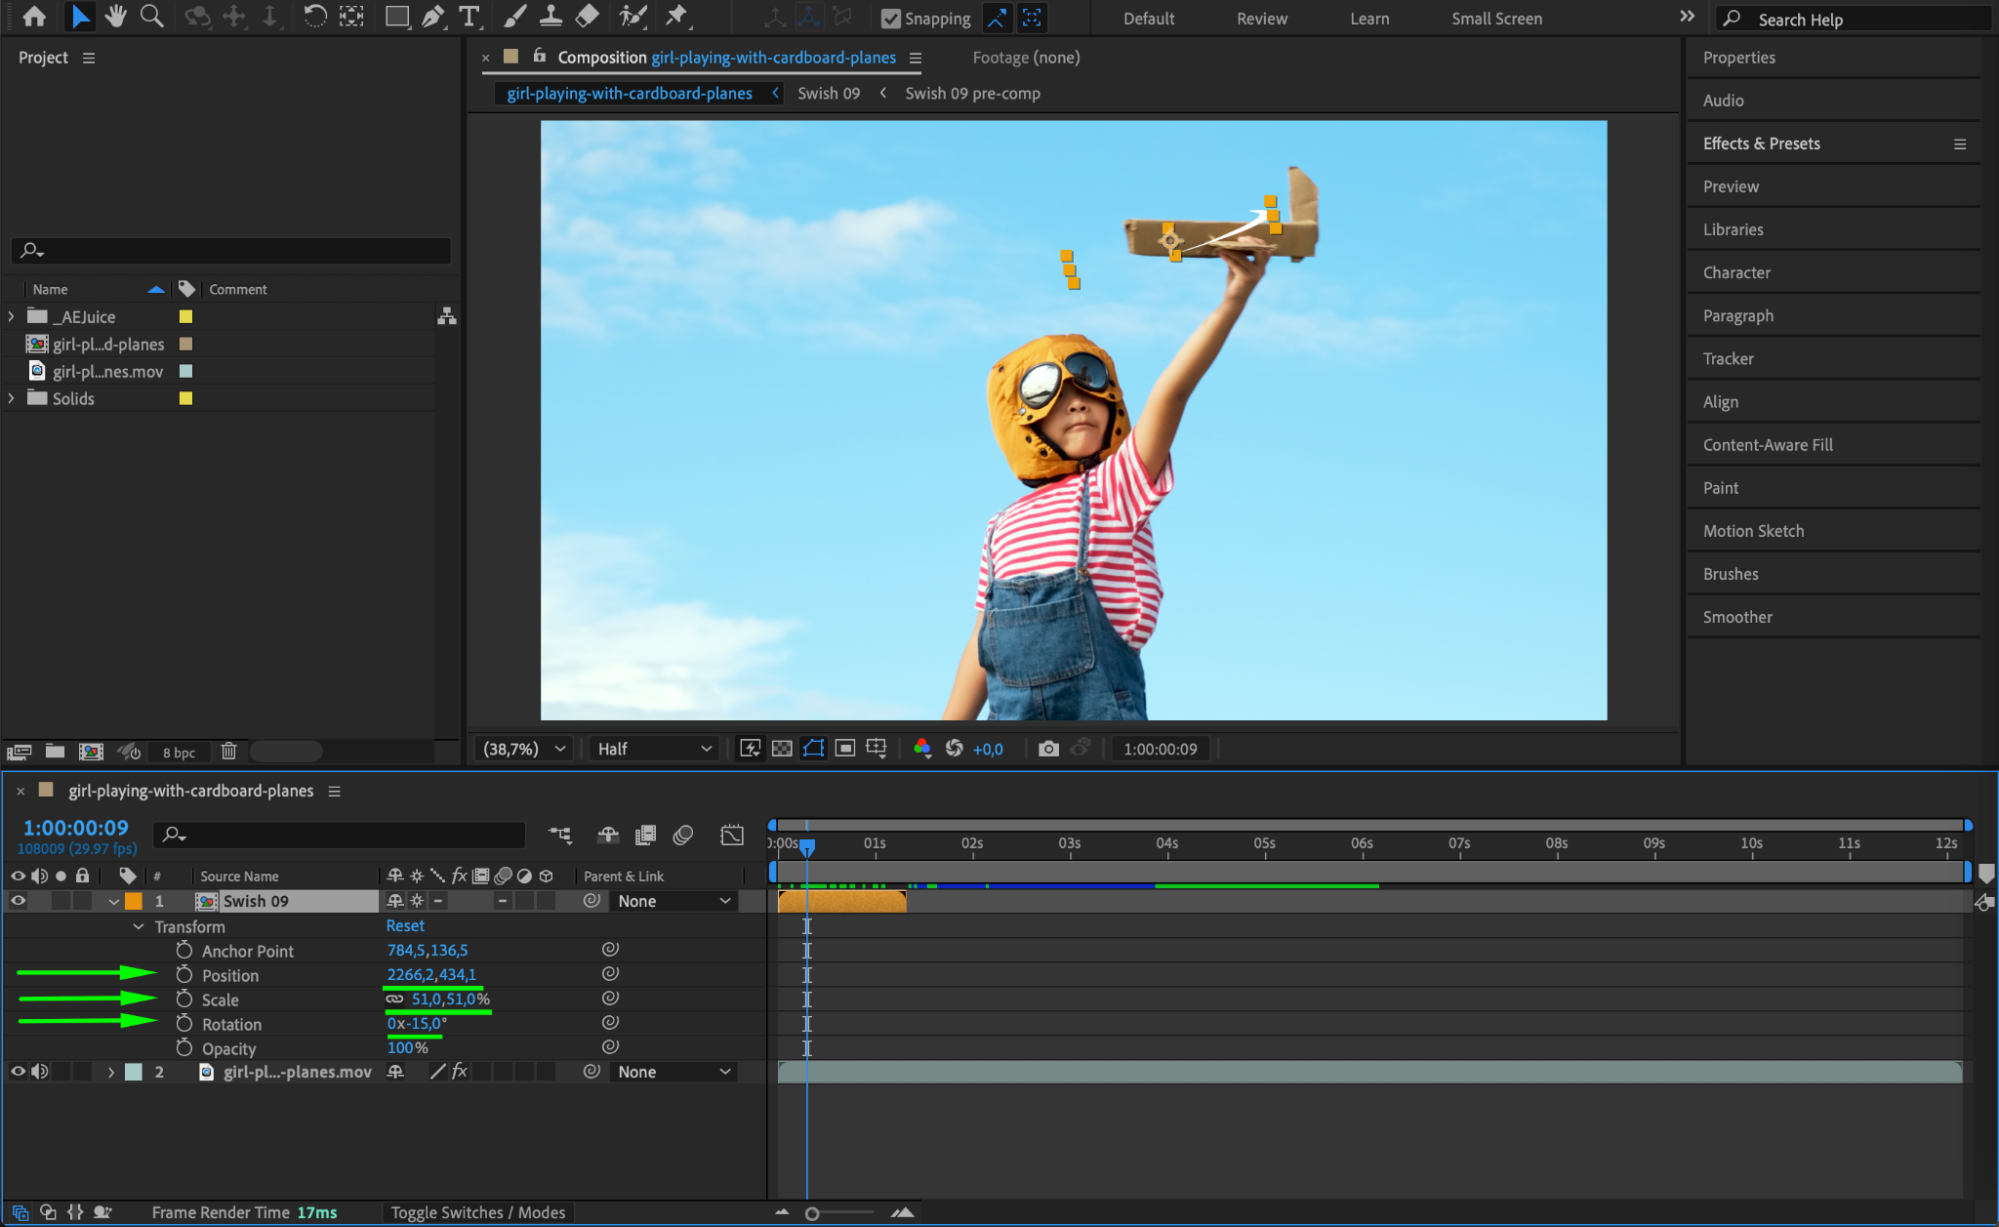 Step 6: Customize Colors
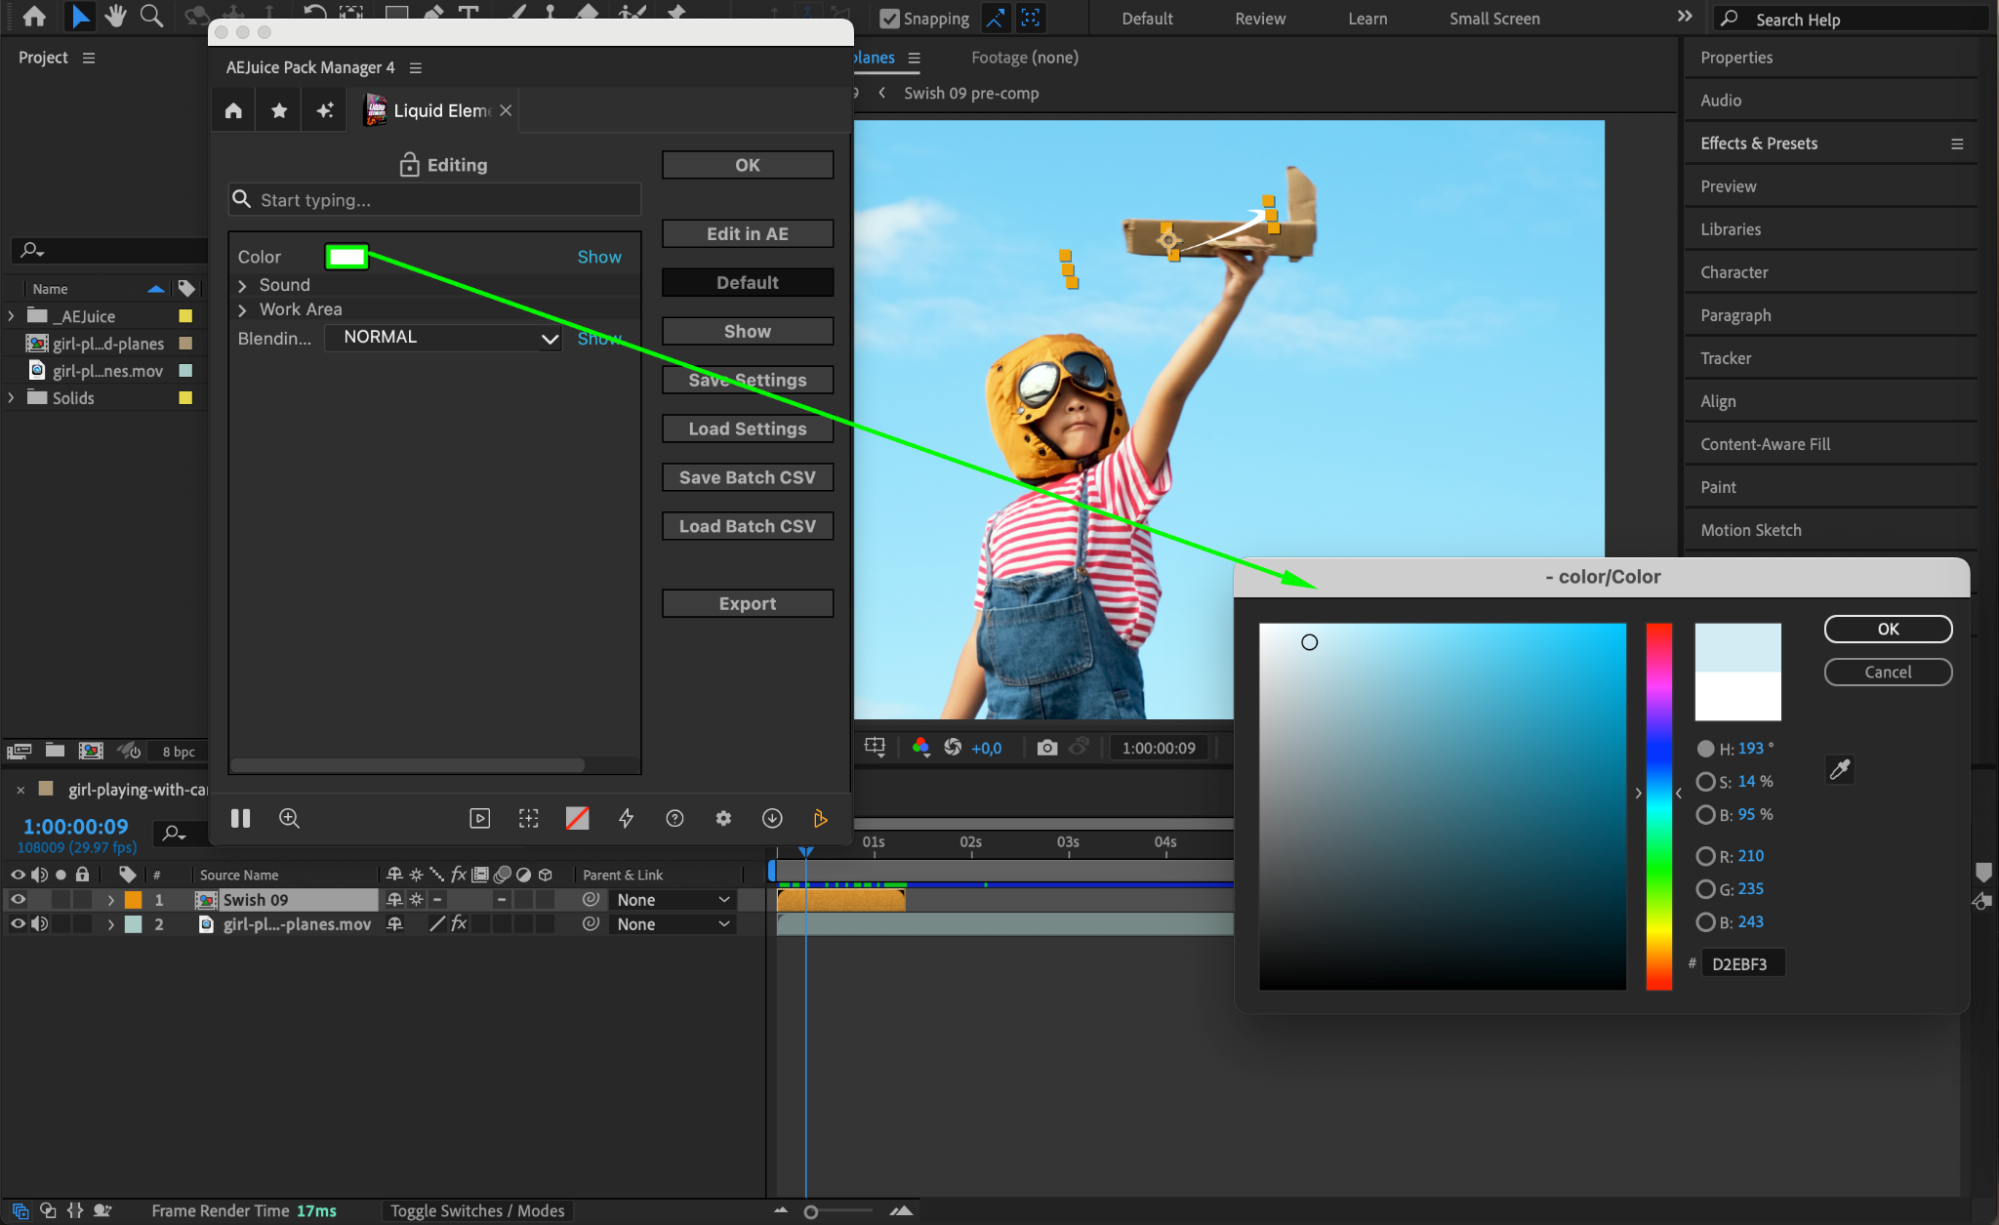
With the pre-comp selected, click the Edit button (three sliders icon) in the AEJuice panel. In the customization window, you can easily change the color of the liquid animation to match your branding or project’s color palette.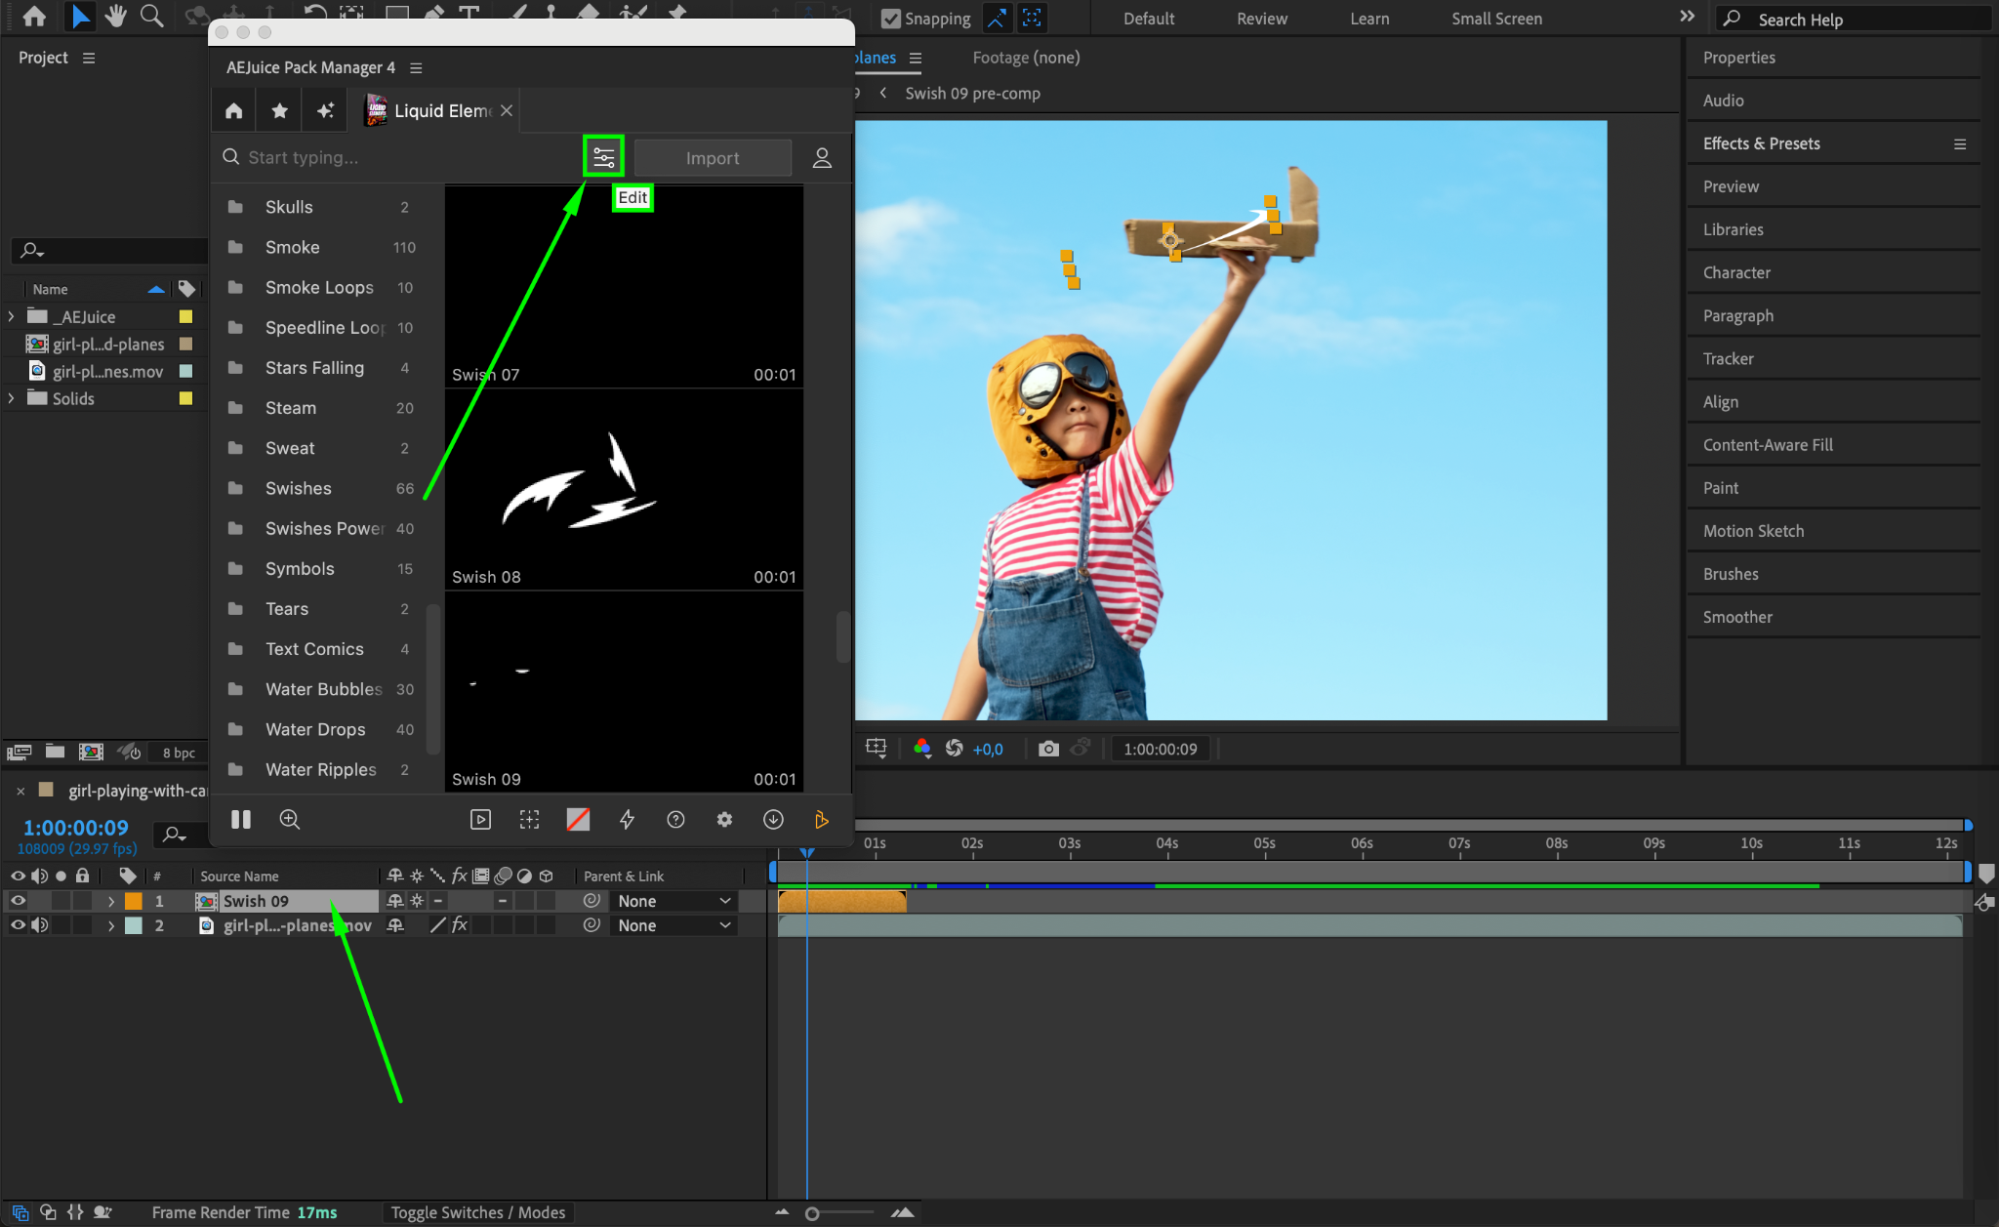
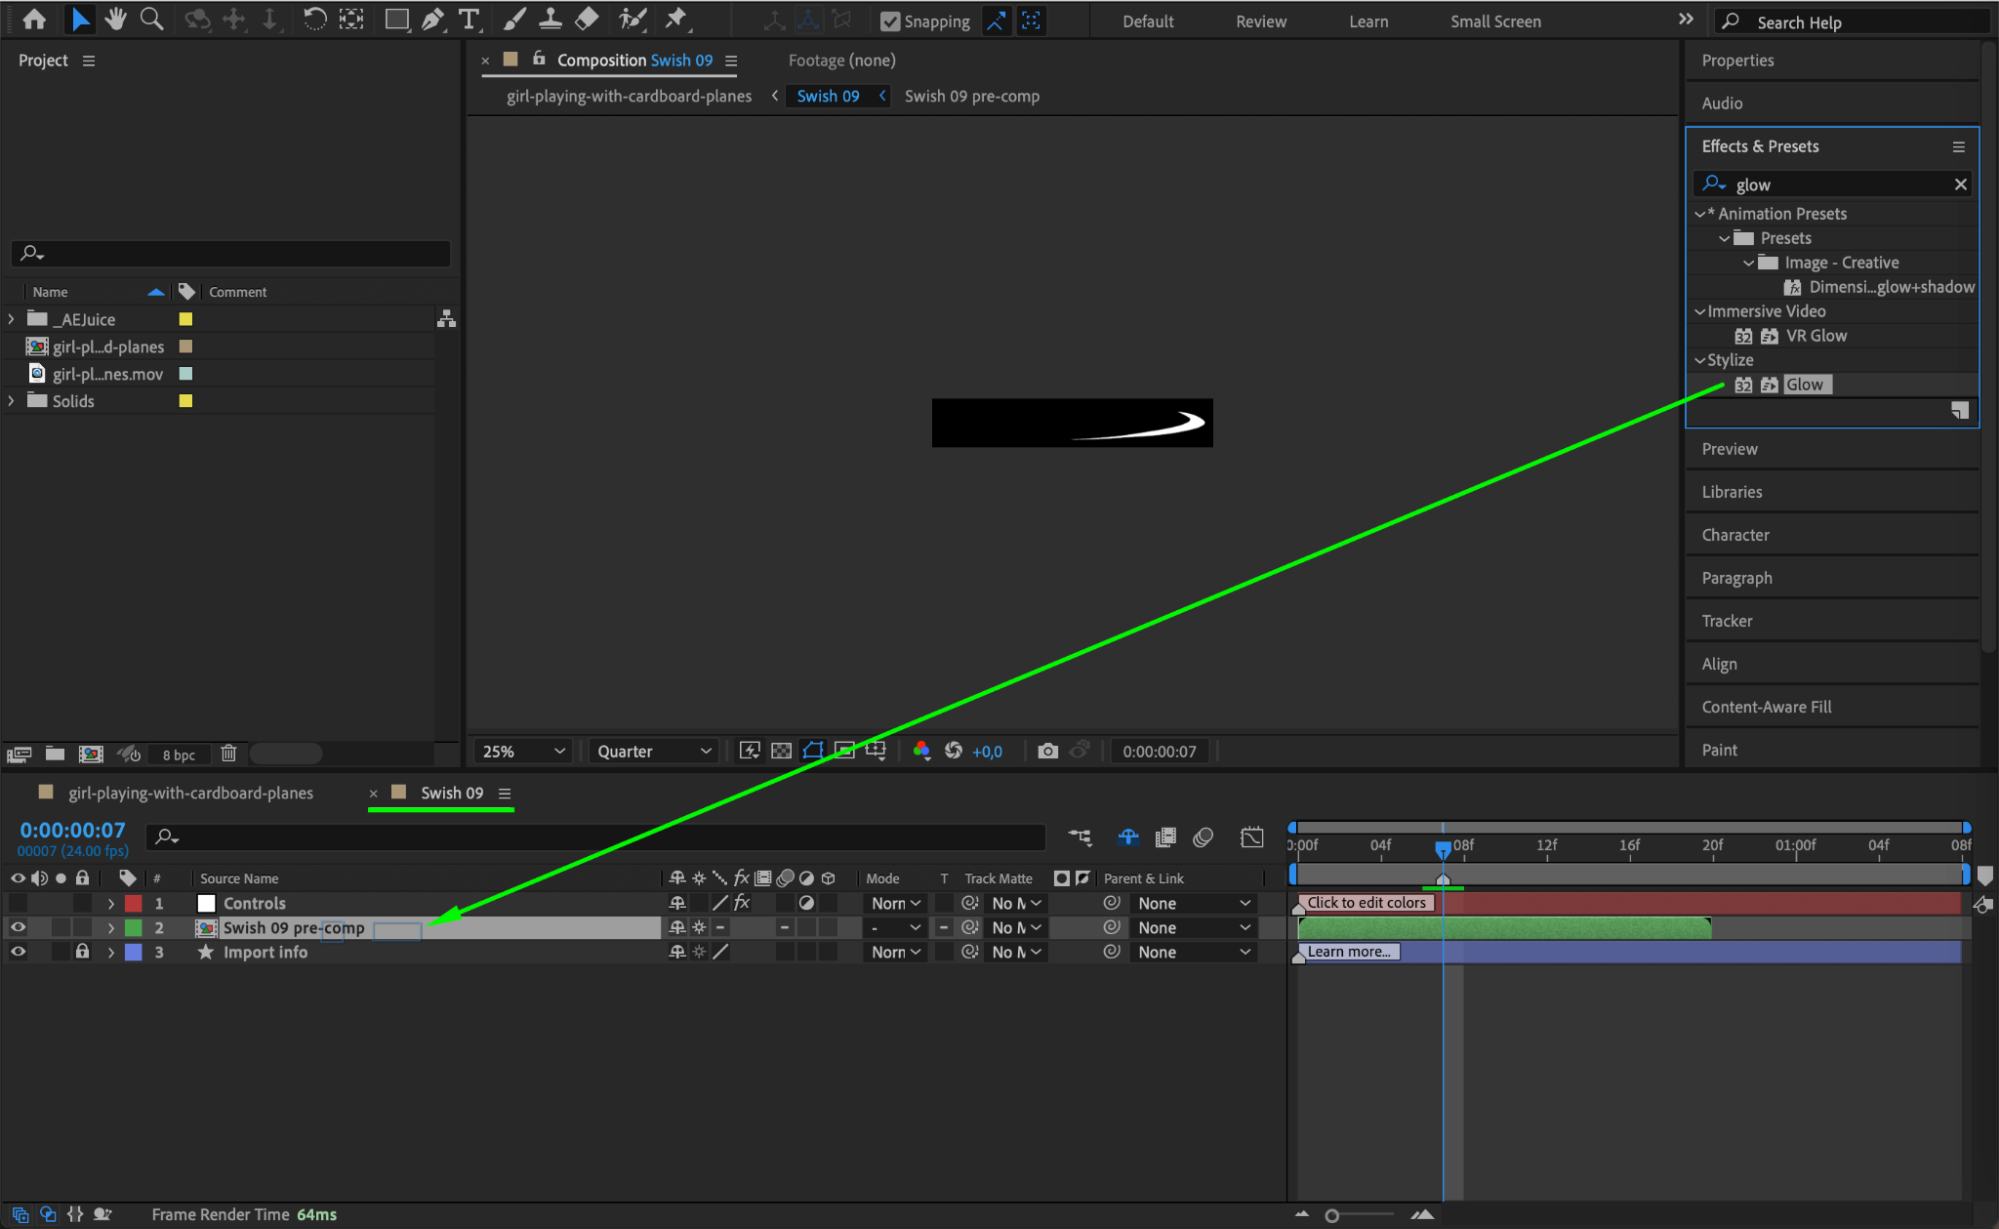
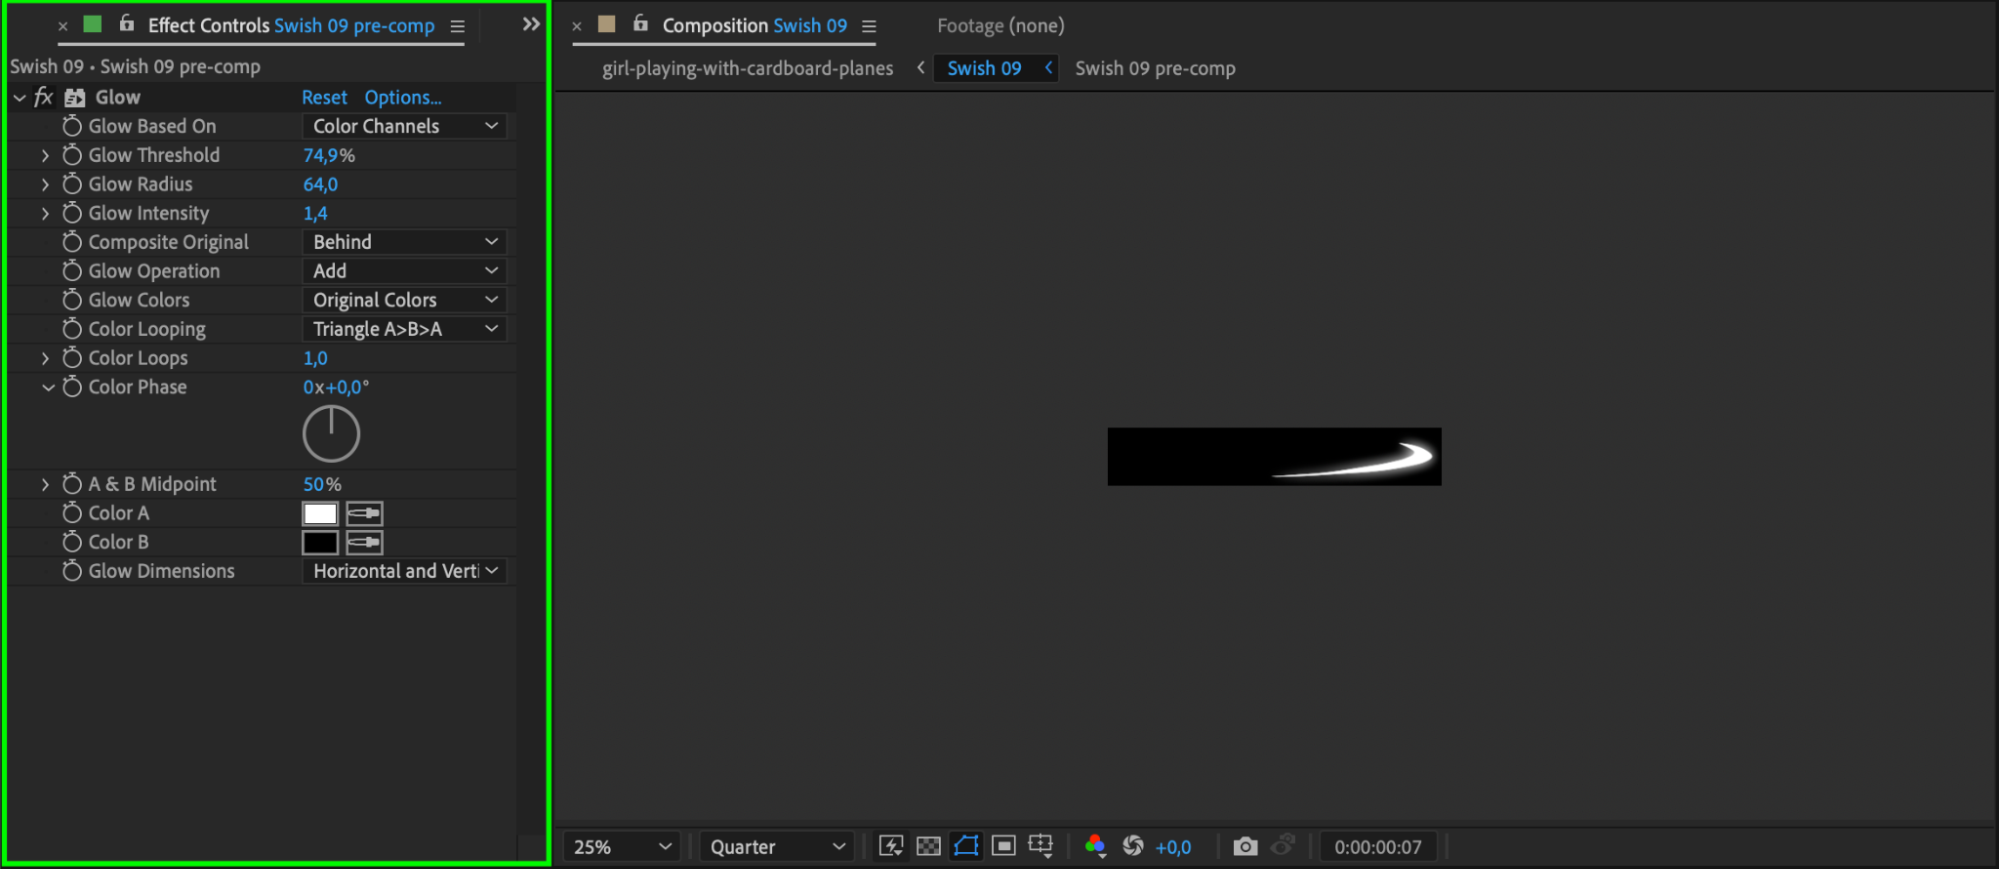
Step 7: Optional – Extra Effects for a Unique Look
If you want more creative control, double-click the pre-comp layer (e.g., “Swish 09”) to open it. Inside, locate the inner pre-comp (e.g., “Swish 09 Pre-comp”). Here you can add additional After Effects effects like:
Glow (for a neon-style liquid)
Drop Shadow (to make it pop)
Turbulent Displace (for a wavy distortion)
These effects help you stylize the animation and make it more unique to your project.
 Step 8: Preview and Finalize
Press the Spacebar to preview your animation. Make any last adjustments to the timing, position, or effects. When you’re happy with the result, you’re ready to render or export your animation.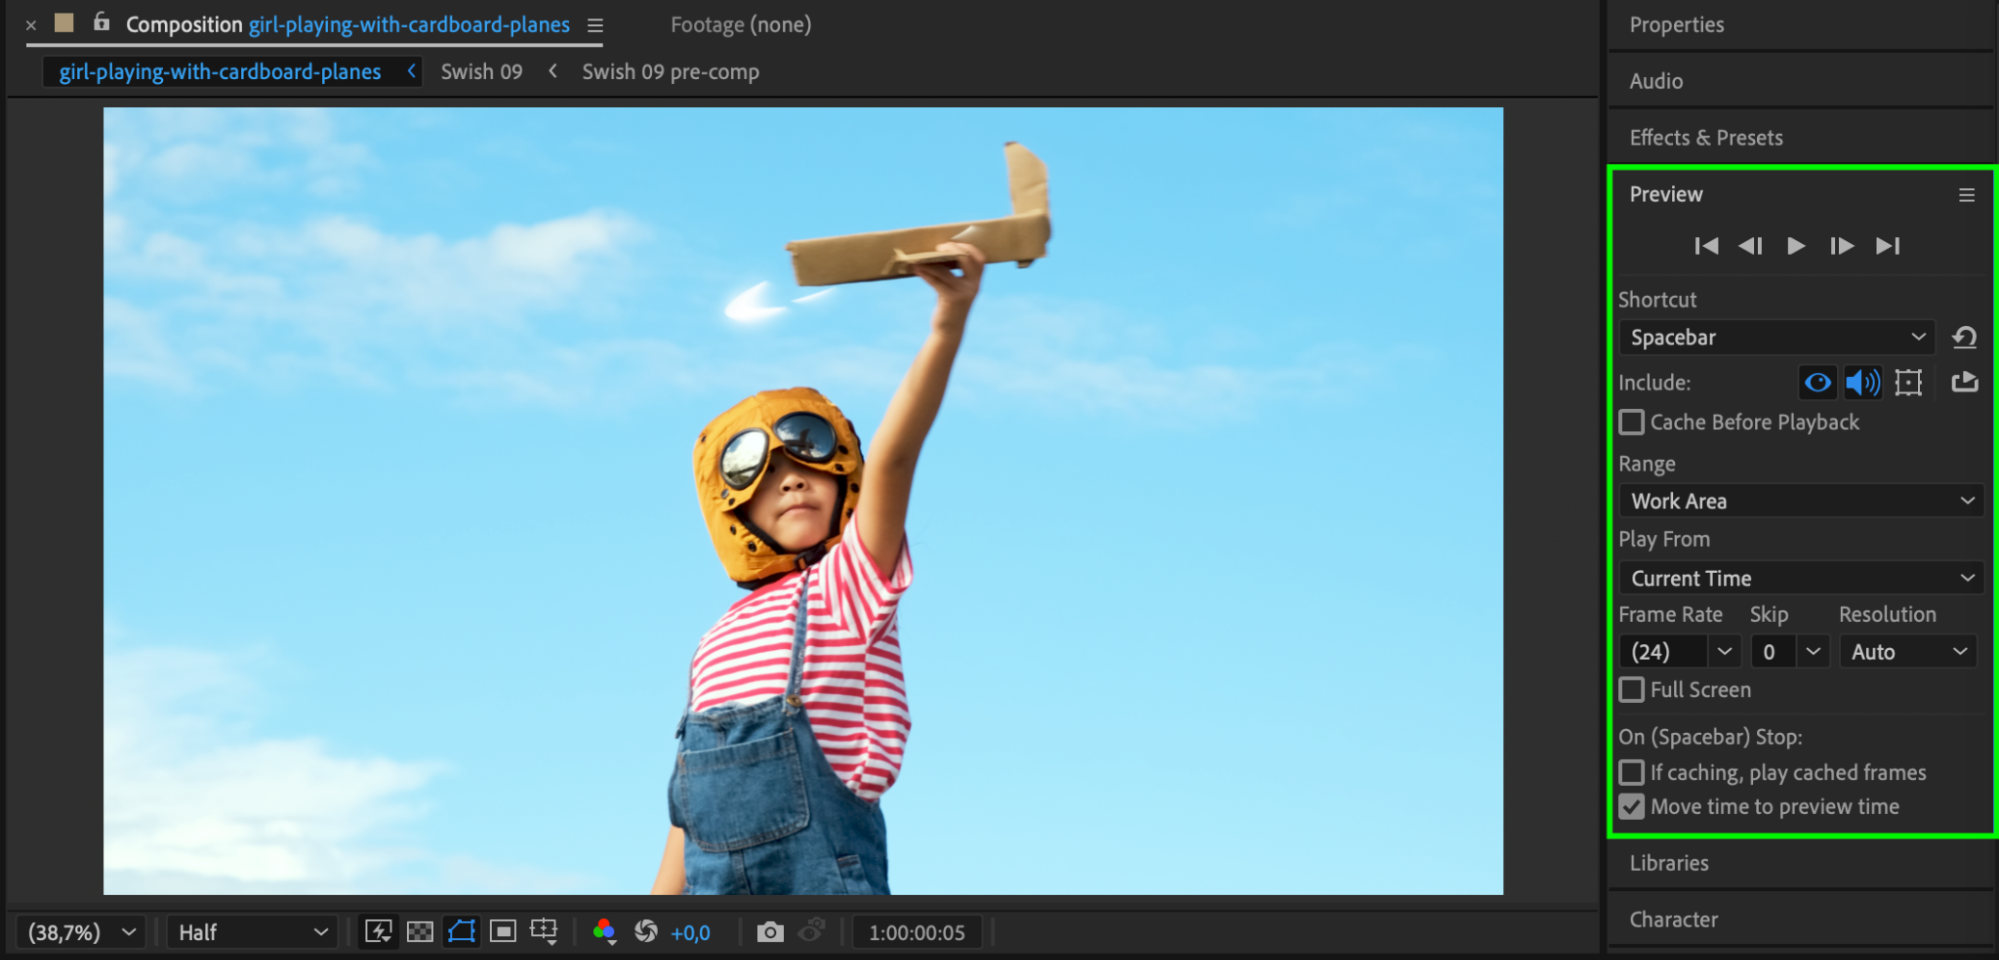
Conclusion
The AEJuice Liquid Elements Pack is an excellent toolkit for adding abstract, energetic animations to your videos. Whether you’re working on social media content, music videos, or explainer projects, these animated liquid elements can help bring your visuals to life.
Our Bestsellers


