Learn how to apply professional color grading LUTs in Premiere Pro using AEJuice packs. Perfect for giving your footage a cinematic look.
Apply Color Grading LUTs in Premiere Pro
Create Cinematic Looks with AEJuice LUT Packs
Color grading is one of the most powerful tools in post-production. With the help of LUTs (Look-Up Tables), you can instantly transform the mood, tone, and style of your footage — from raw to cinematic. In this tutorial, you’ll learn how to apply color grading LUTs in Premiere Pro using AEJuice LUT packs, one of the best resources for filmmakers and content creators.
Step 1: Launch Premiere Pro and Start a New Project
Open Premiere Pro, name your project, choose your footage, and click “Create” to begin editing.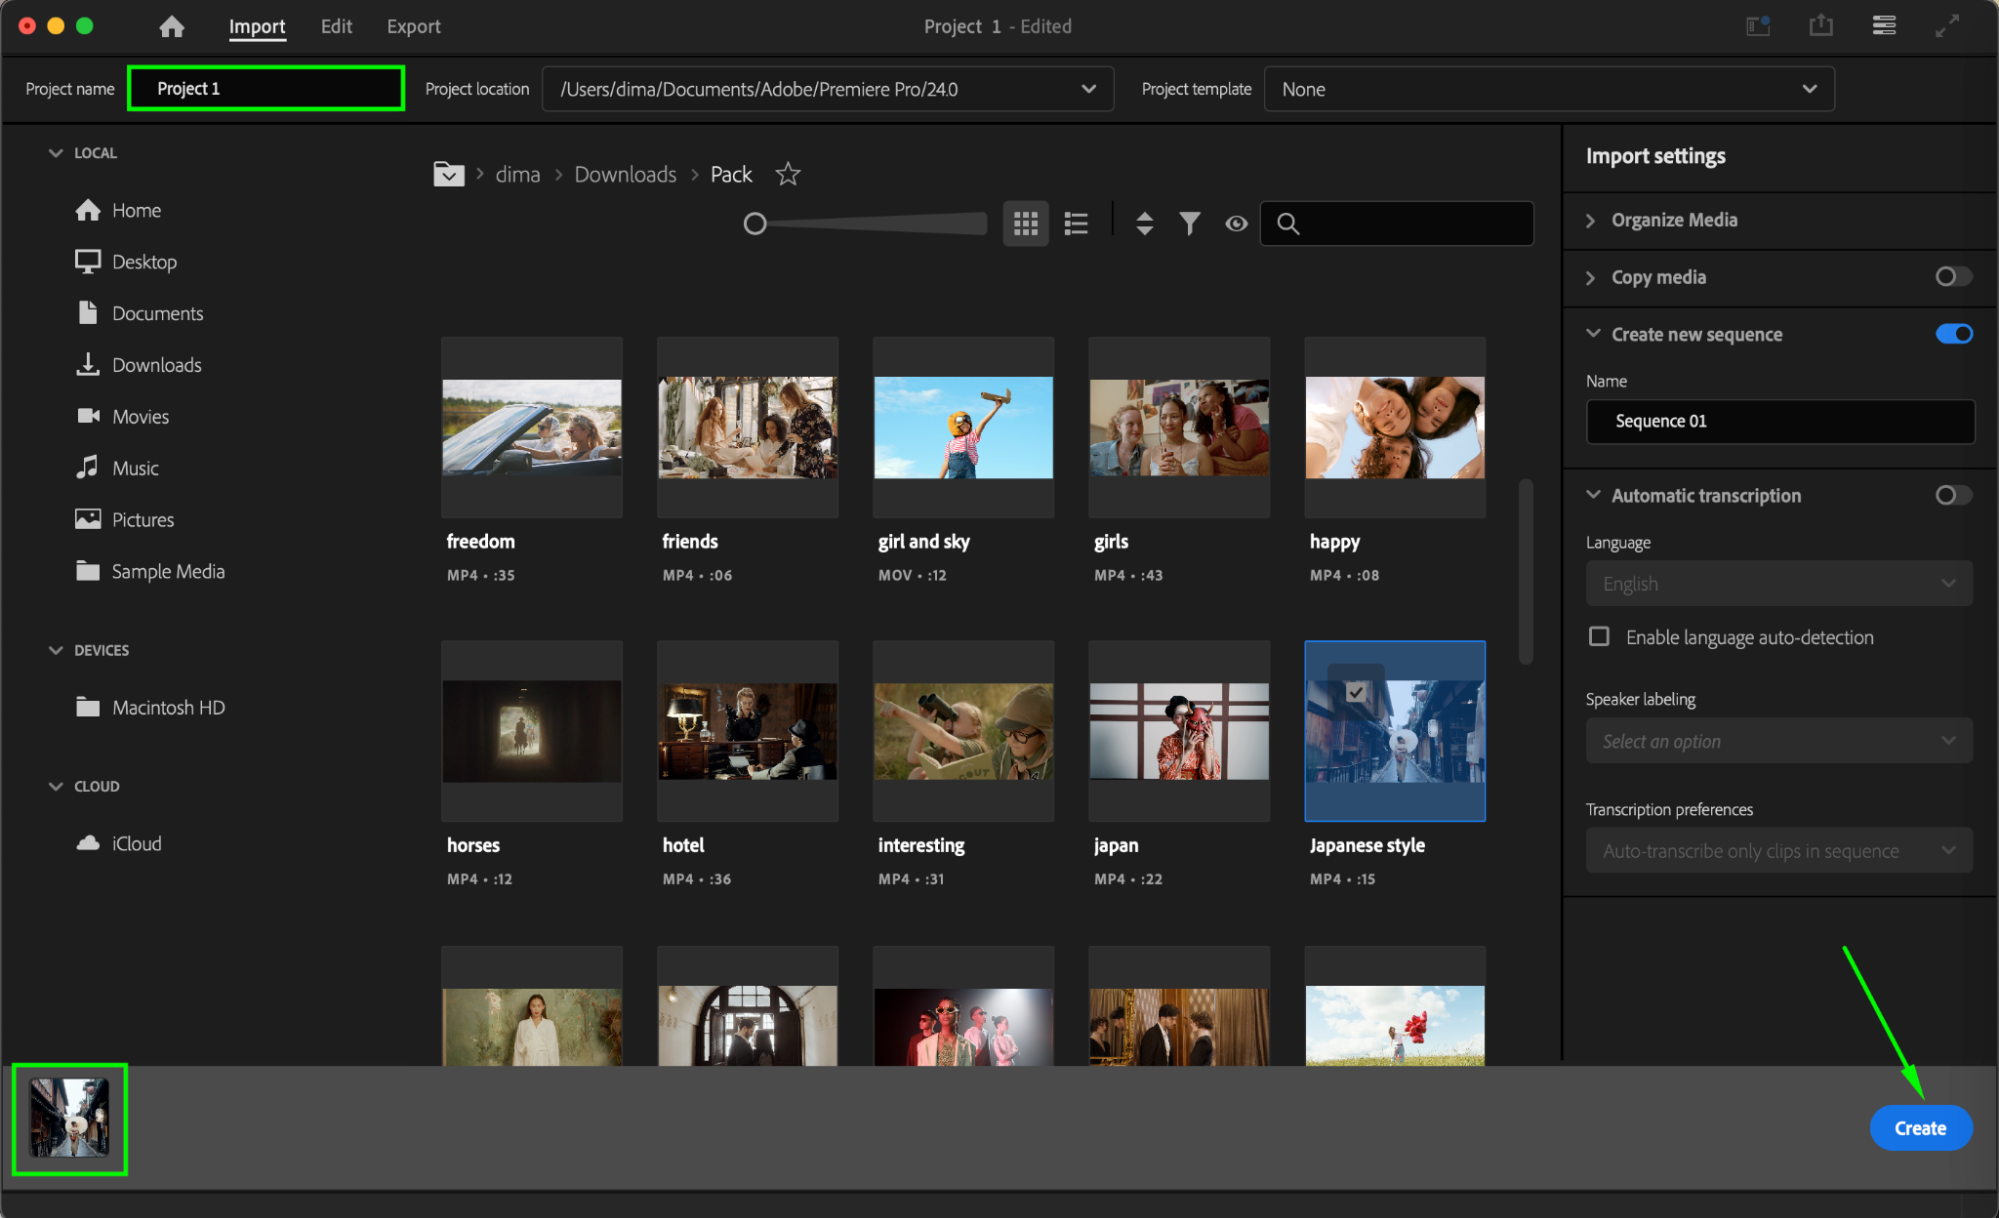 Step 2: Open AEJuice Pack Manager
Go to Window > Extensions > AEJuice Pack Manager 4 to launch the plugin panel. Here, you’ll find all your available AEJuice packs, including LUTs, transitions, motion elements, and more.
Get 10% off when you subscribe to our newsletter

Step 3: Download the Color Grading LUTs Pack
In the Pack Manager, locate the Color Grading LUTs pack. Click on it to download (if you haven’t already). Once the pack is downloaded, you’ll gain access to a wide variety of LUT styles — film looks, cinematic tones, vintage color, moody atmospheres, and more.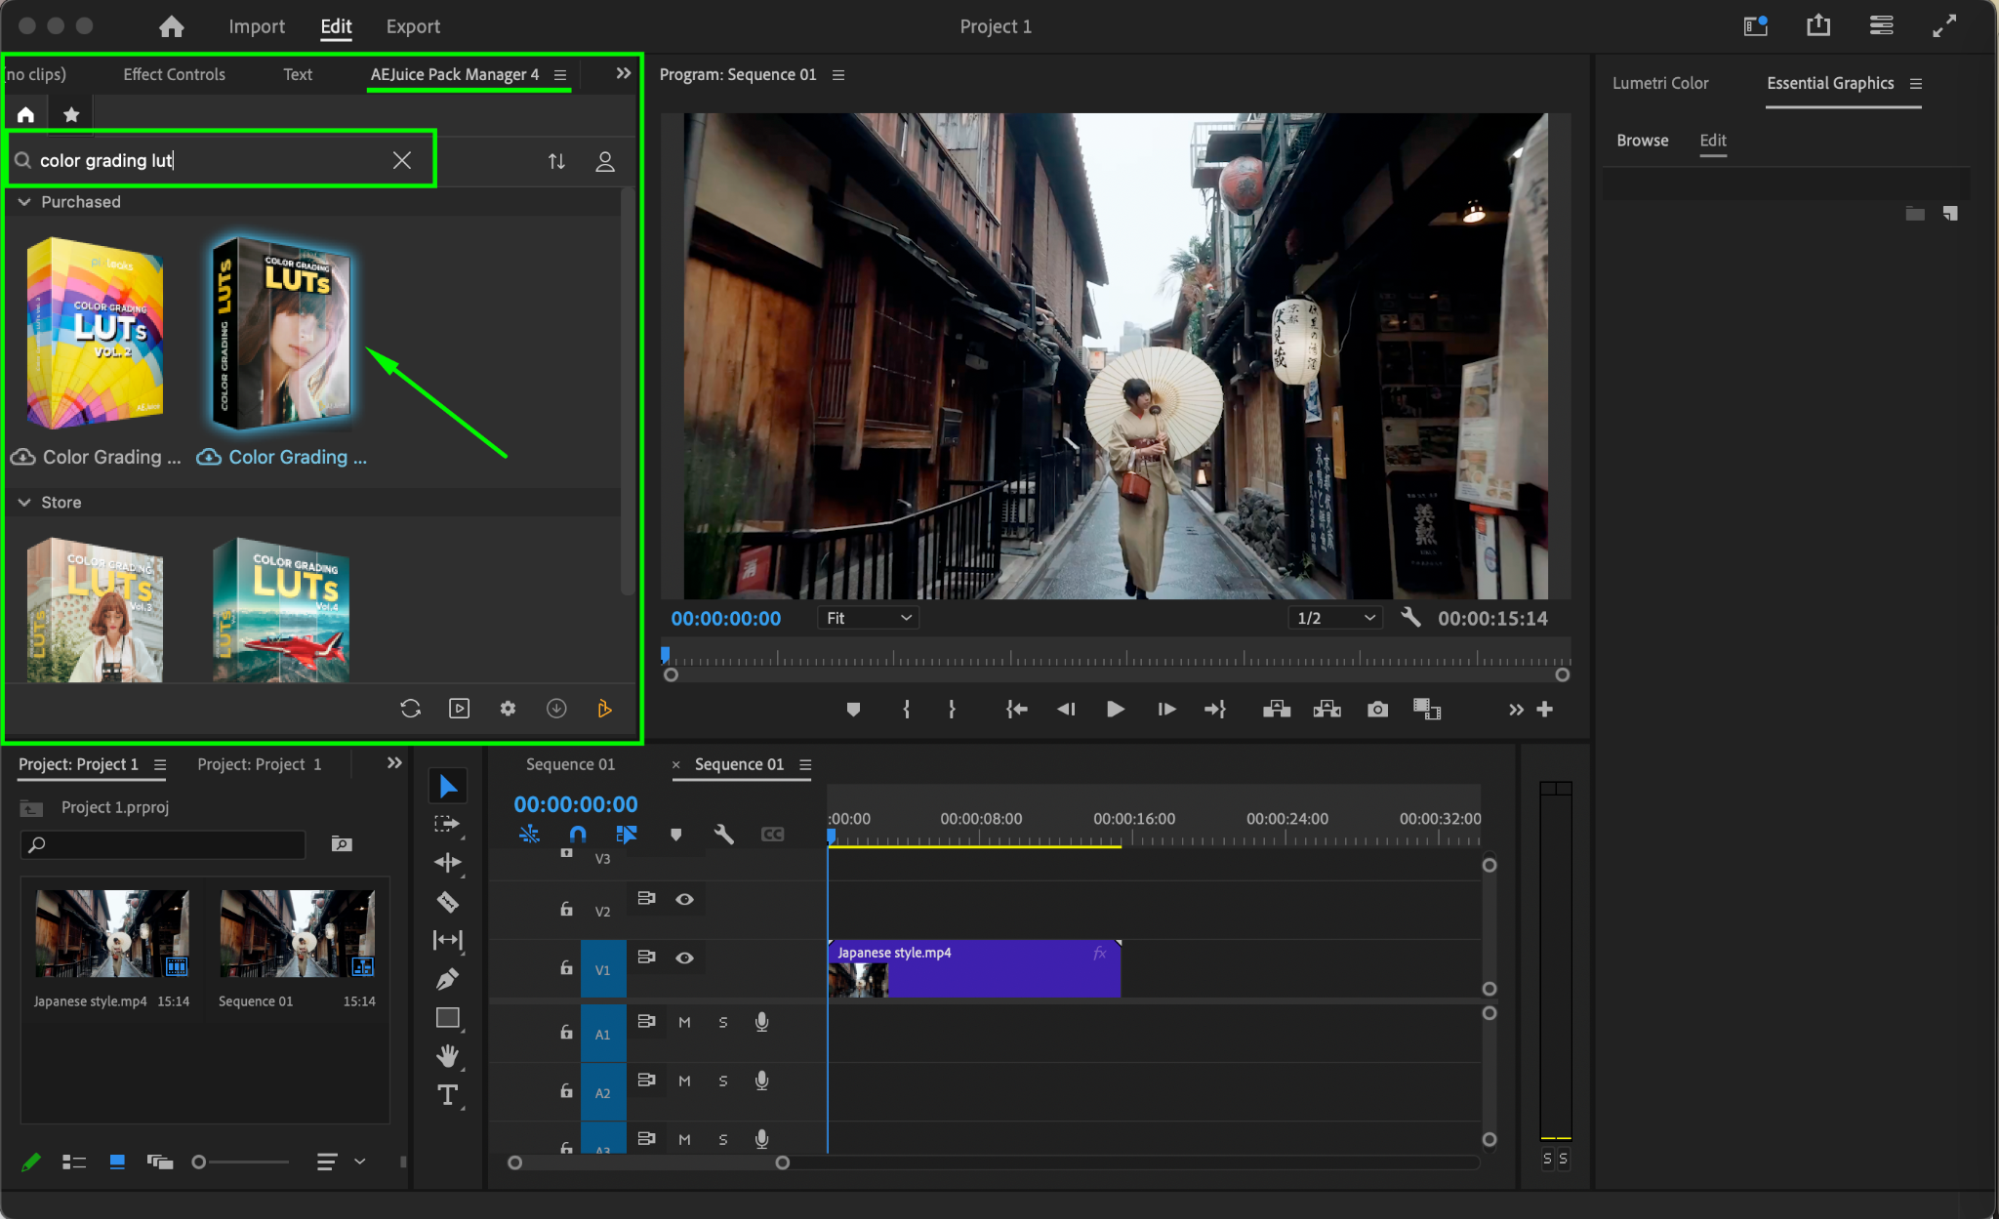 Step 4: Choose and Download LUTs
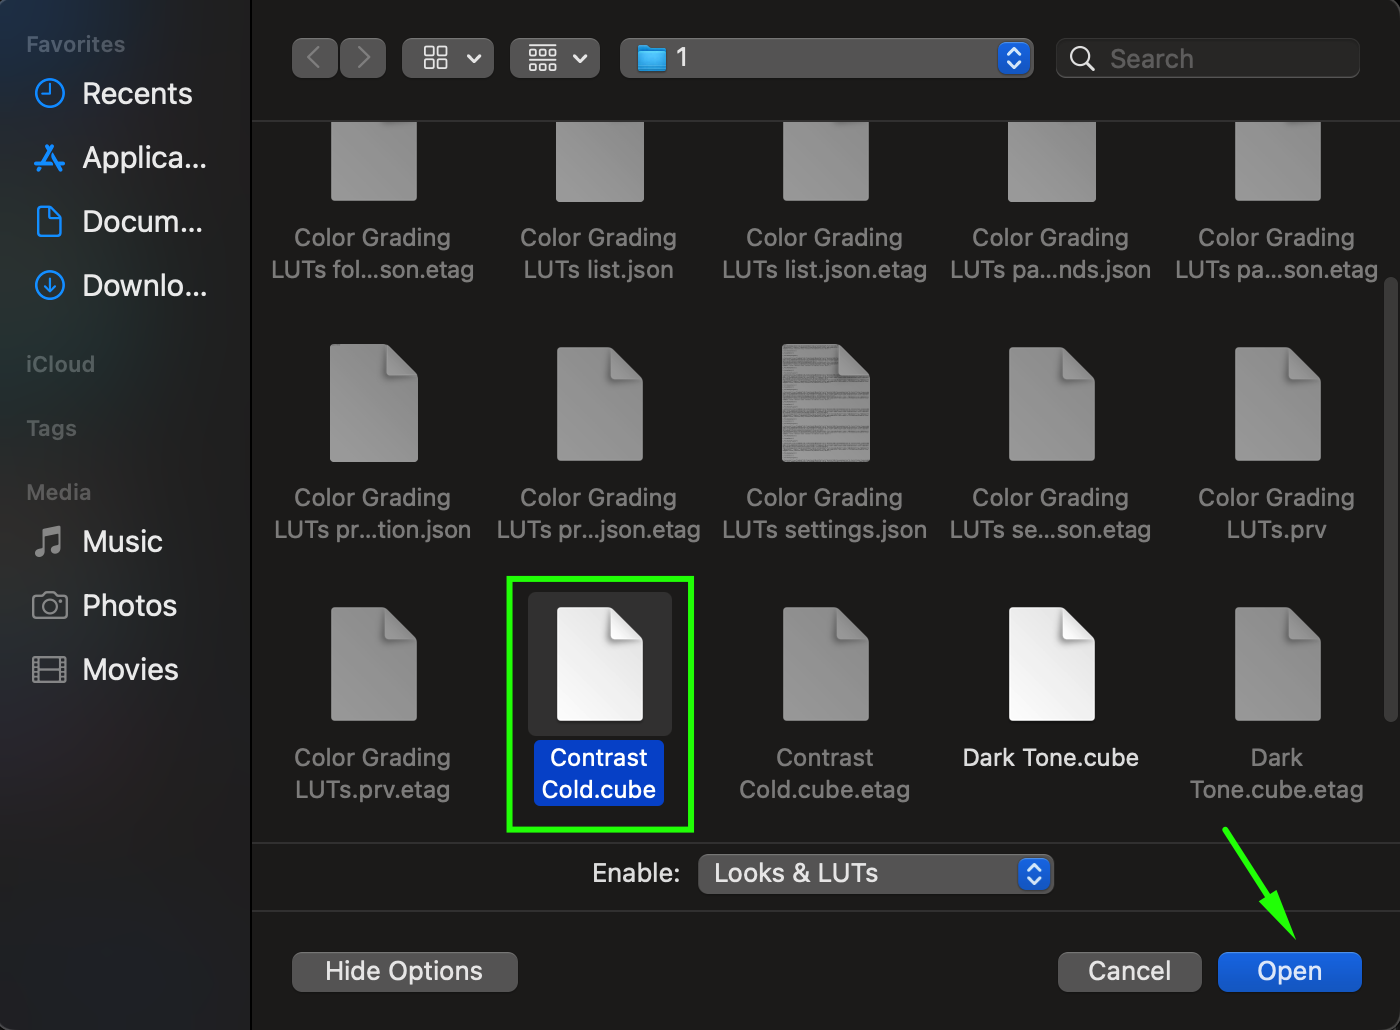
Browse through the pack and choose the LUTs that fit your project. Click on a LUT, then press Import. The selected LUTs will be saved as .cube files in a separate folder on your computer.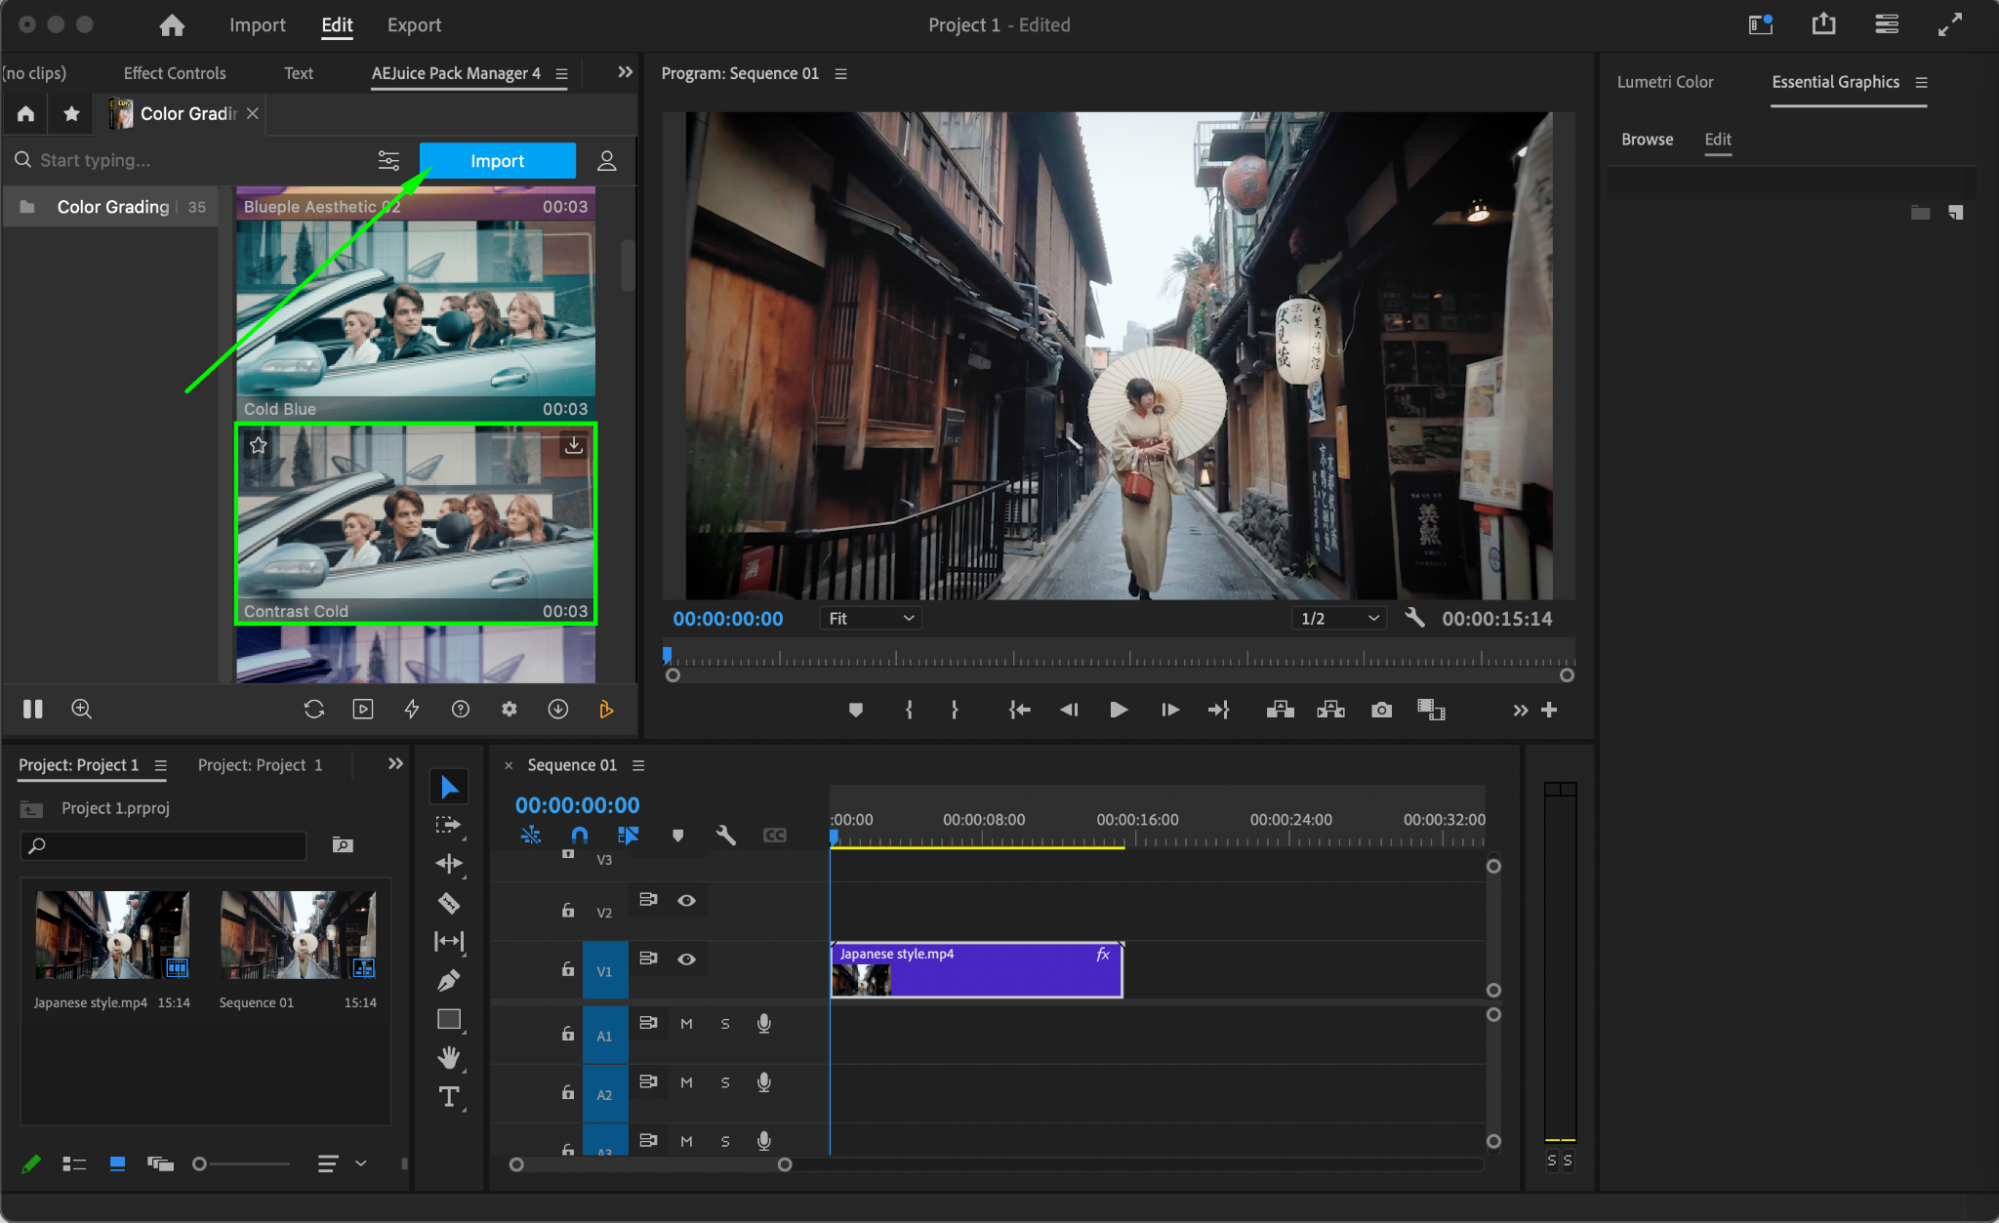 Step 5: Open the Lumetri Color Panel
Navigate to Window > Lumetri Color to open the Lumetri Color panel, where you can apply and adjust LUTs and other color grading settings.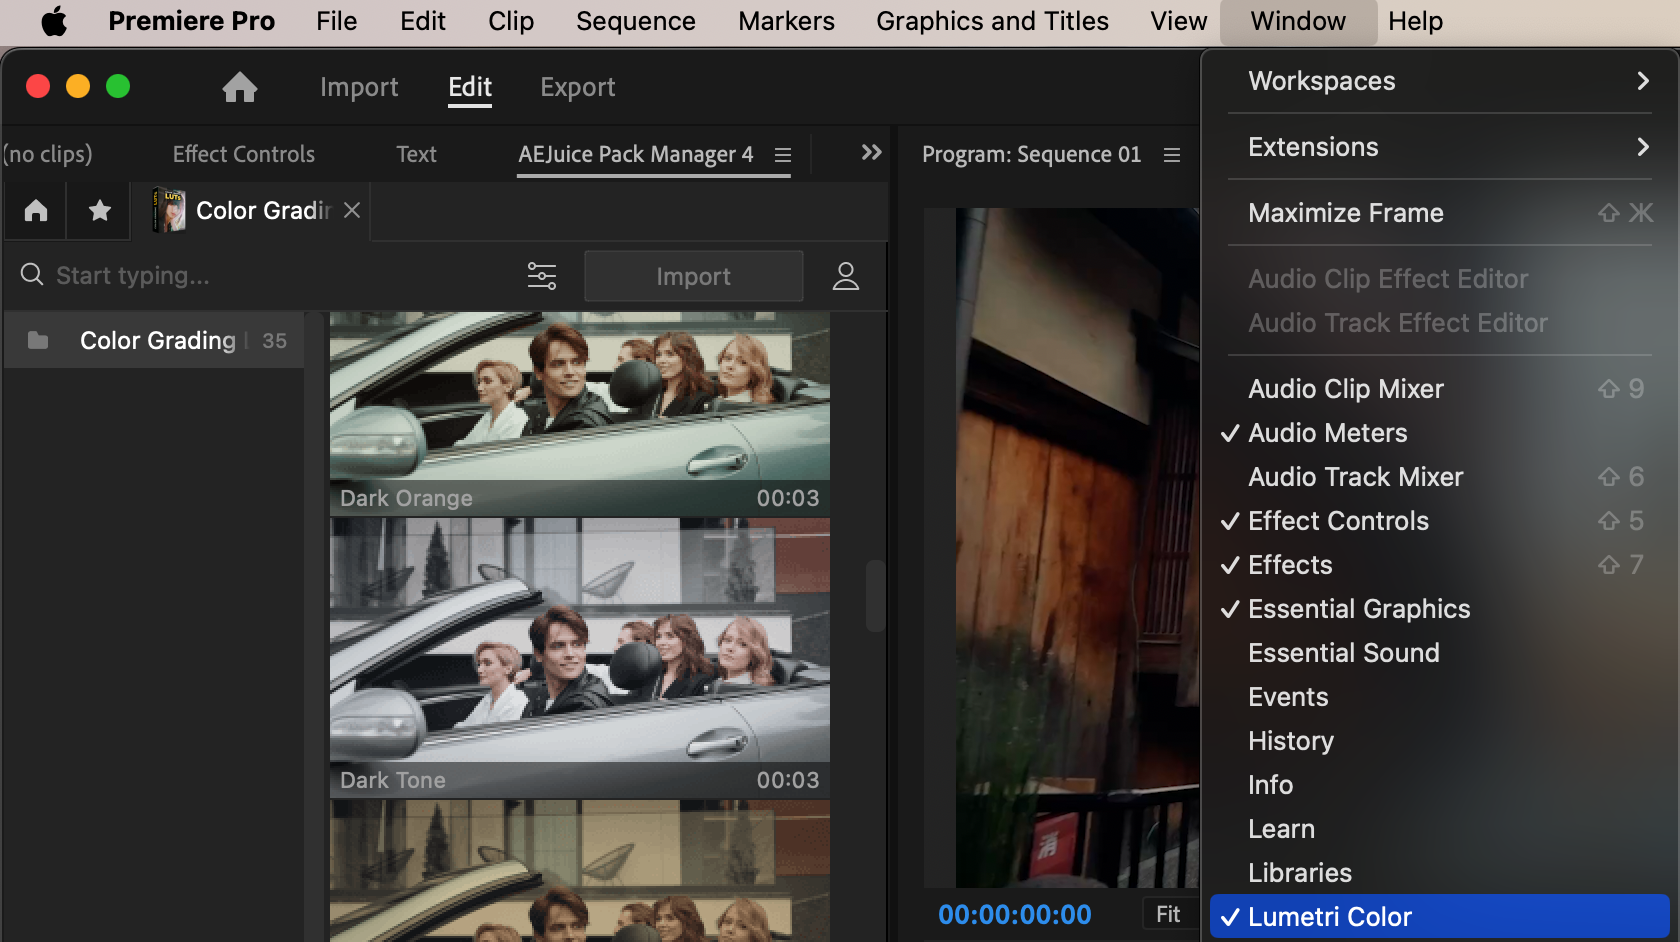
Step 6: Apply the LUT
Select your clip in the timeline. In the Lumetri Color panel, go to the Creative section. Click the dropdown menu next to Look and choose Browse. Locate the .cube LUT file you downloaded earlier and select it.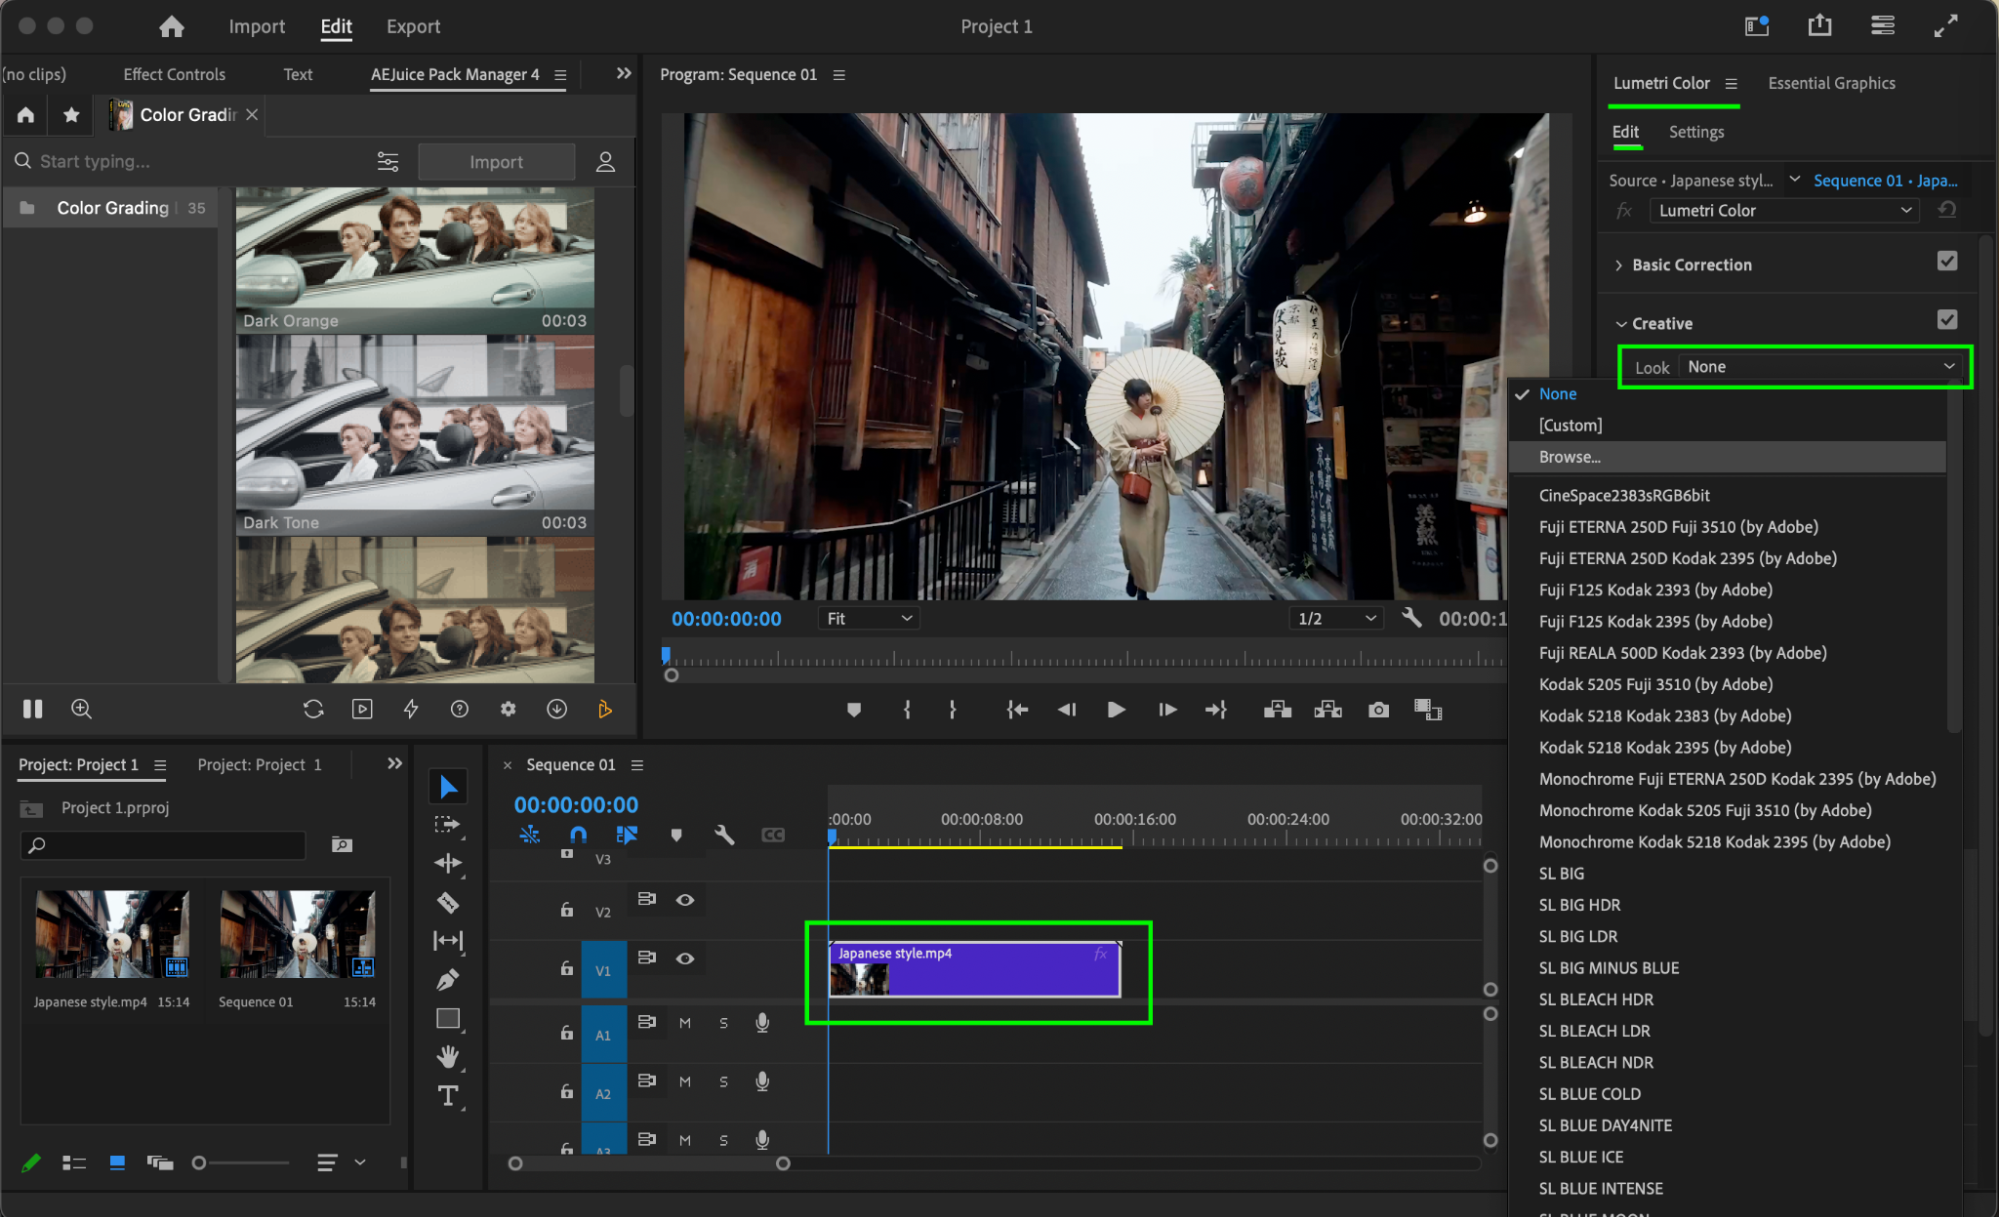
 Step 7: Adjust the Intensity
After applying the LUT, you can fine-tune the Intensity slider to control how strong the LUT effect appears. You can also use other Lumetri Color controls (like contrast, saturation, and shadows) to match the LUT perfectly to your footage.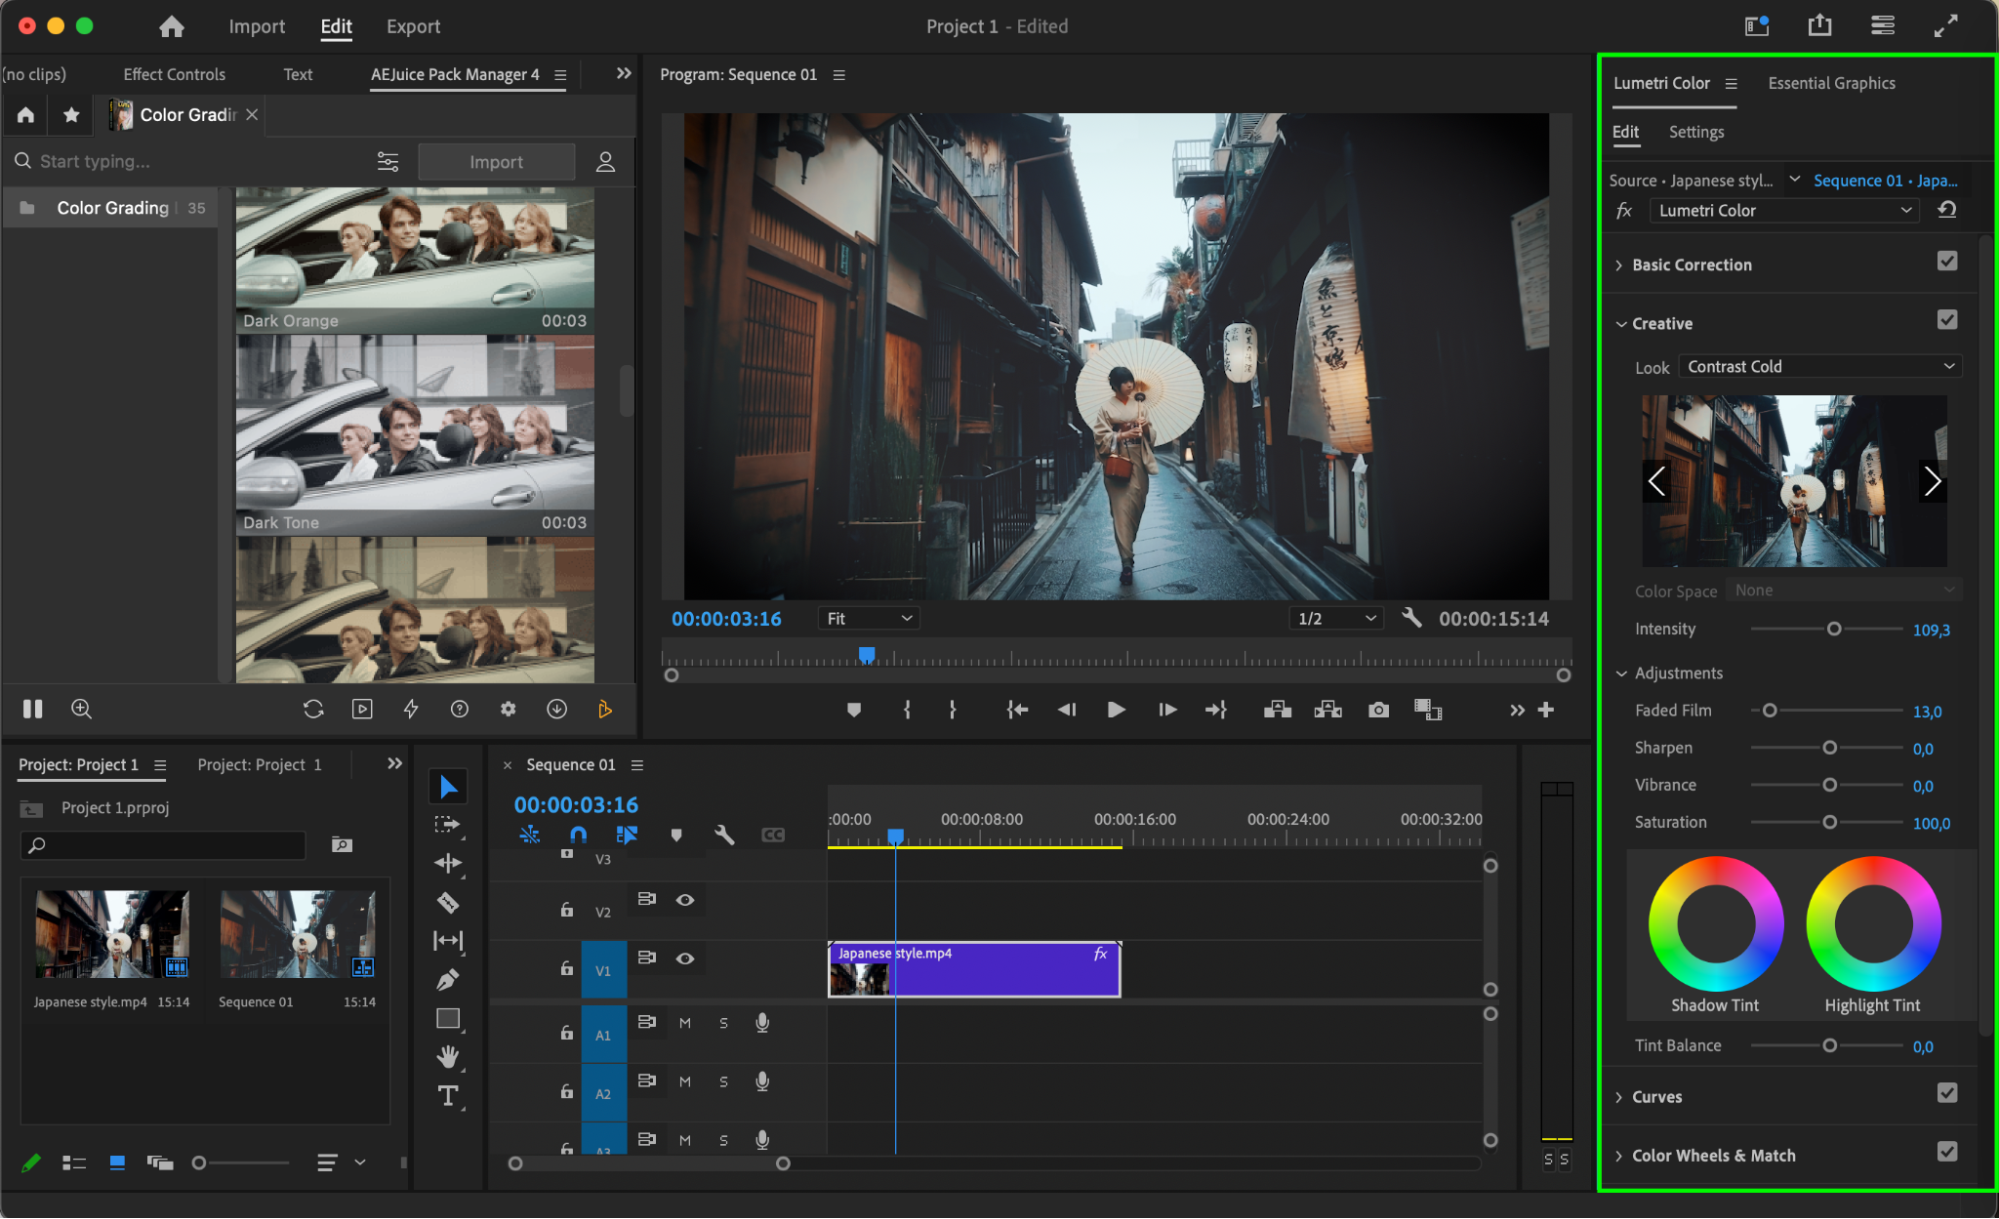 Step 8: Preview and Finalize
Press Play to preview the graded footage. Make any final adjustments and enjoy the polished, cinematic look.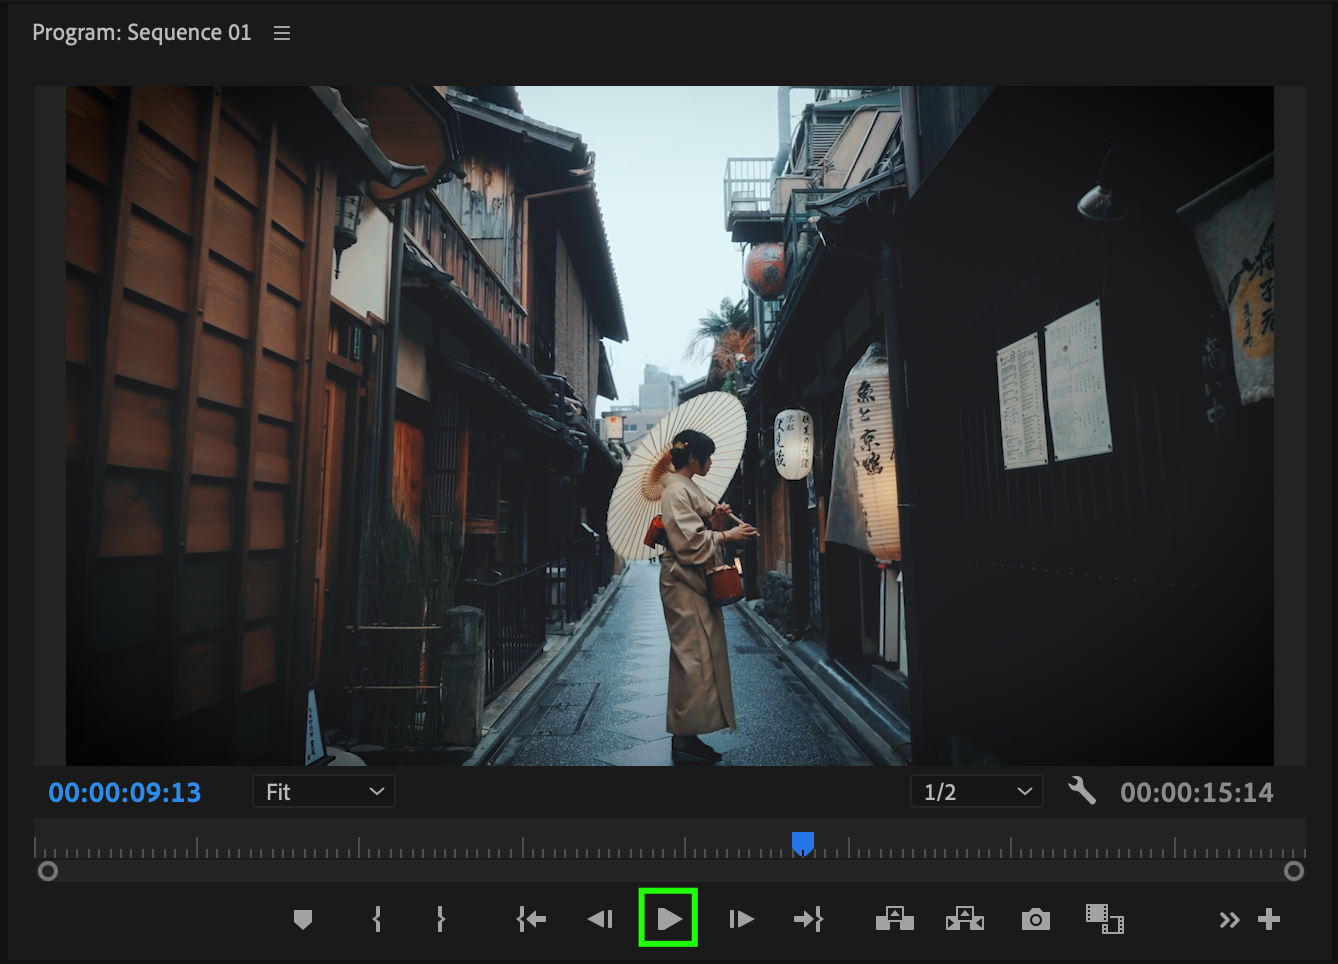 Conclusion
Using Color Grading LUTs in Premiere Pro is a fast and professional way to enhance your visuals. AEJuice offers some of the best LUT packs for filmmakers — whether you’re going for a dramatic film look, nostalgic tone, or a clean modern vibe. Try different LUTs, adjust their intensity, and make your footage stand out in just a few clicks.
Our Bestsellers


