Stranger Things Title Intro in After Effects
Introduction – Recreate the Iconic Title Style from Scratch
In this tutorial, you’ll learn how to recreate the famous Stranger Things intro using only built-in tools in Adobe After Effects. We’ll create a 3D text animation with echo trails, glowing outlines, and layered timing to match the eerie, retro feel of the original.
Step 1: Create the Text and Apply Styling
Select the Type Tool (Ctrl/Cmd + T) and type your desired title. In the Character Panel, set the fill color to None and the stroke color to red. This gives the text that outlined, vintage look.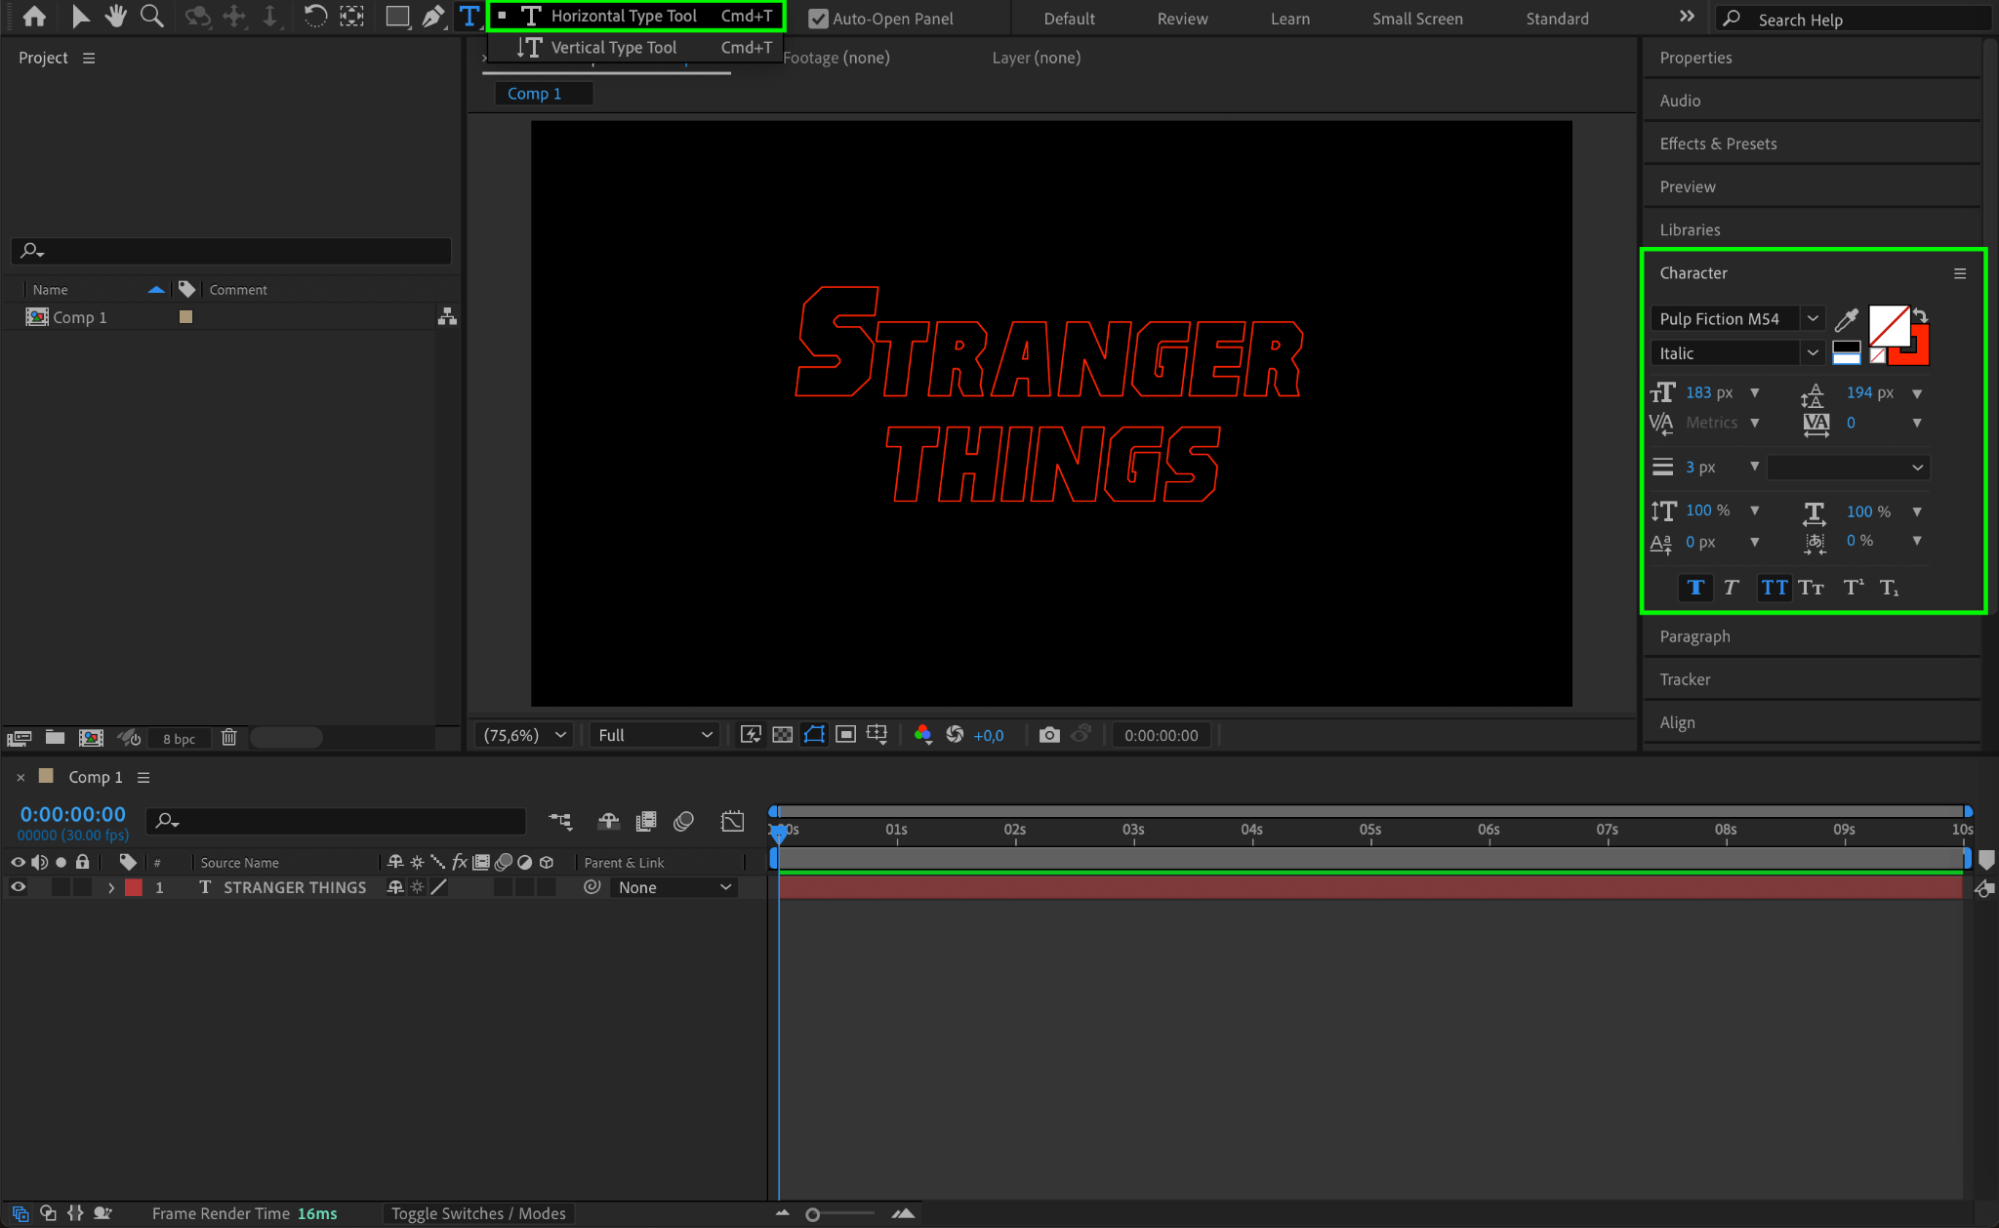 Step 2: Enable 3D and Animate the Z Position
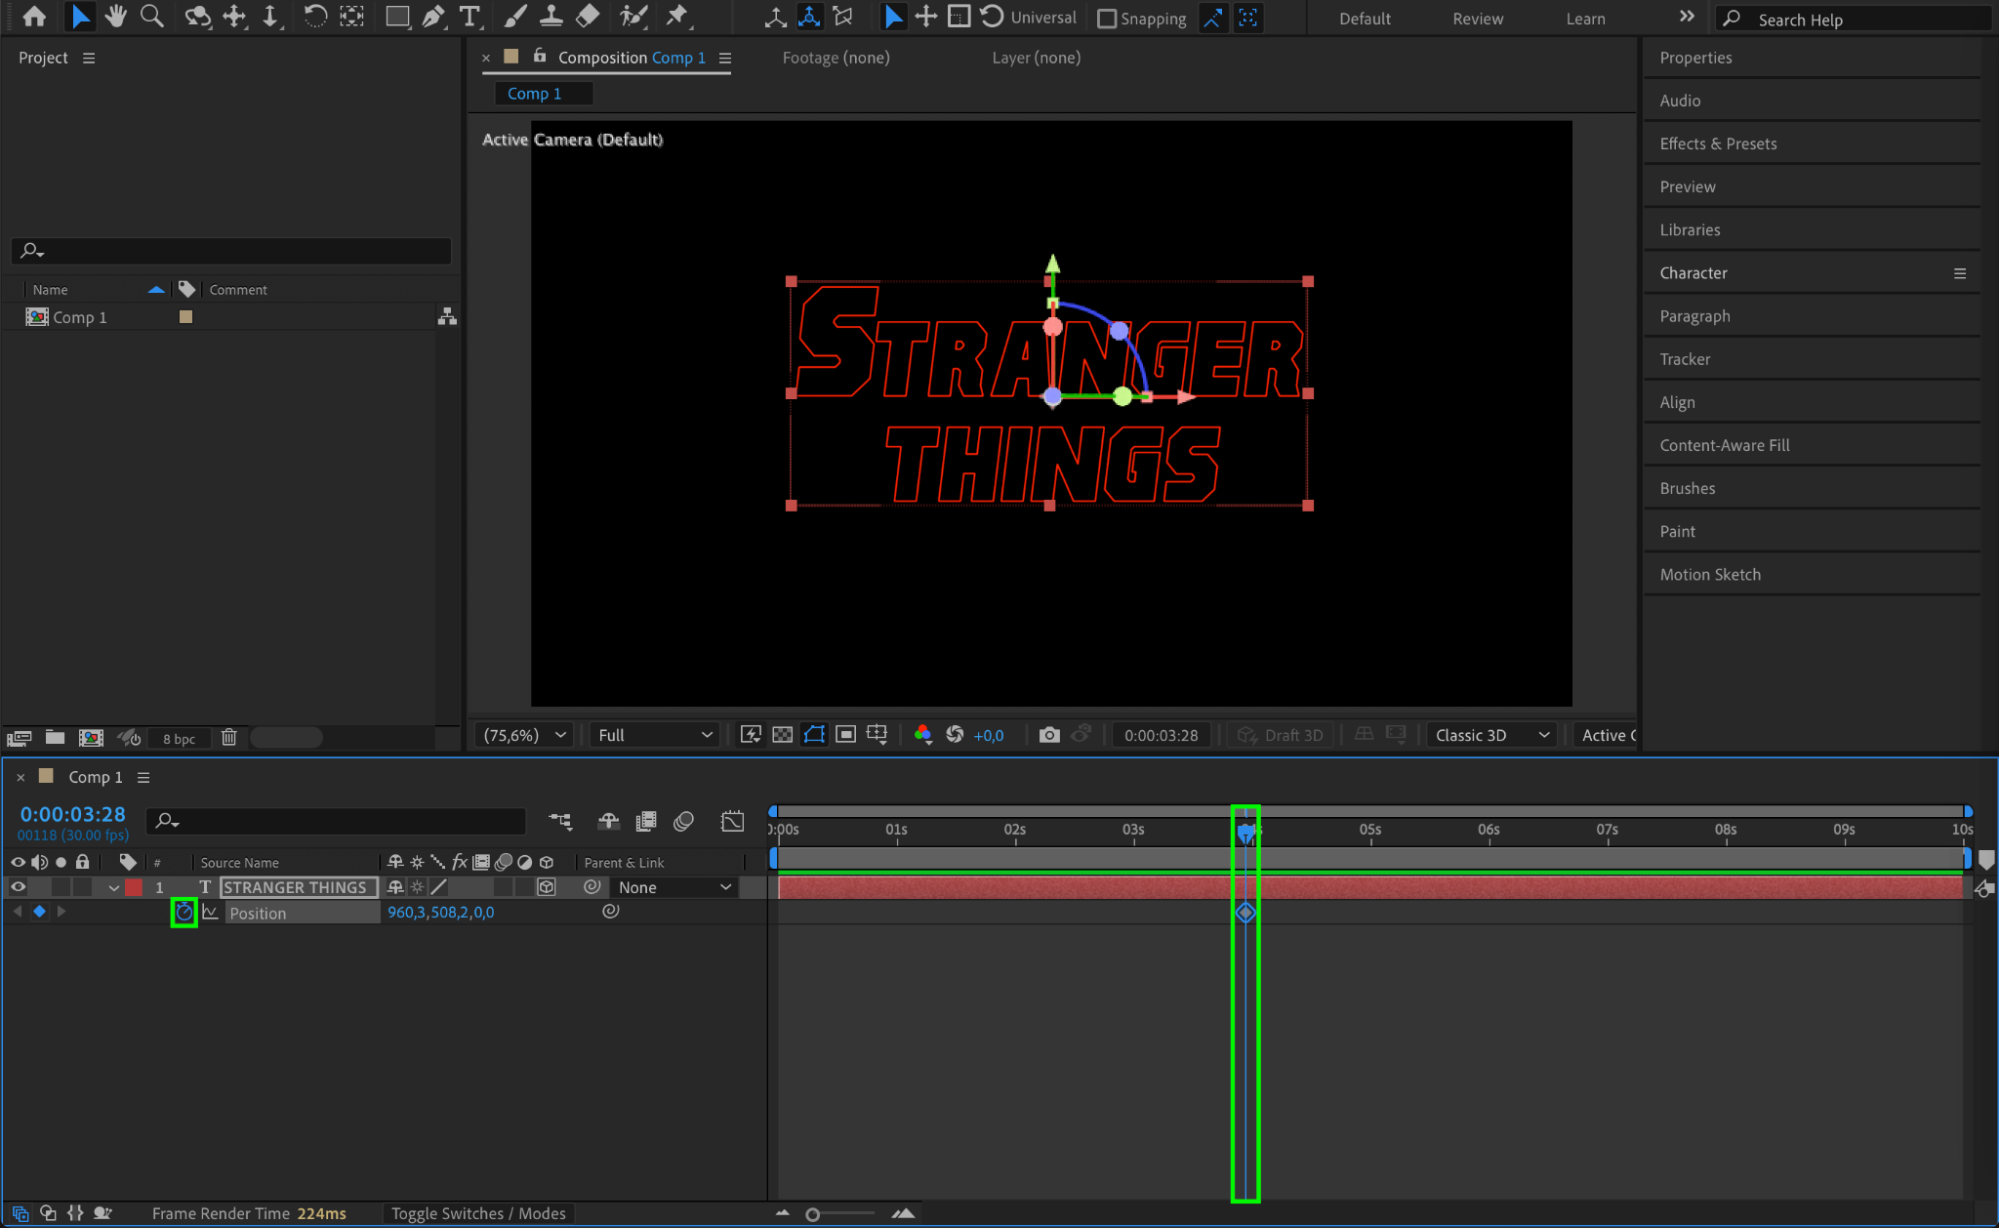
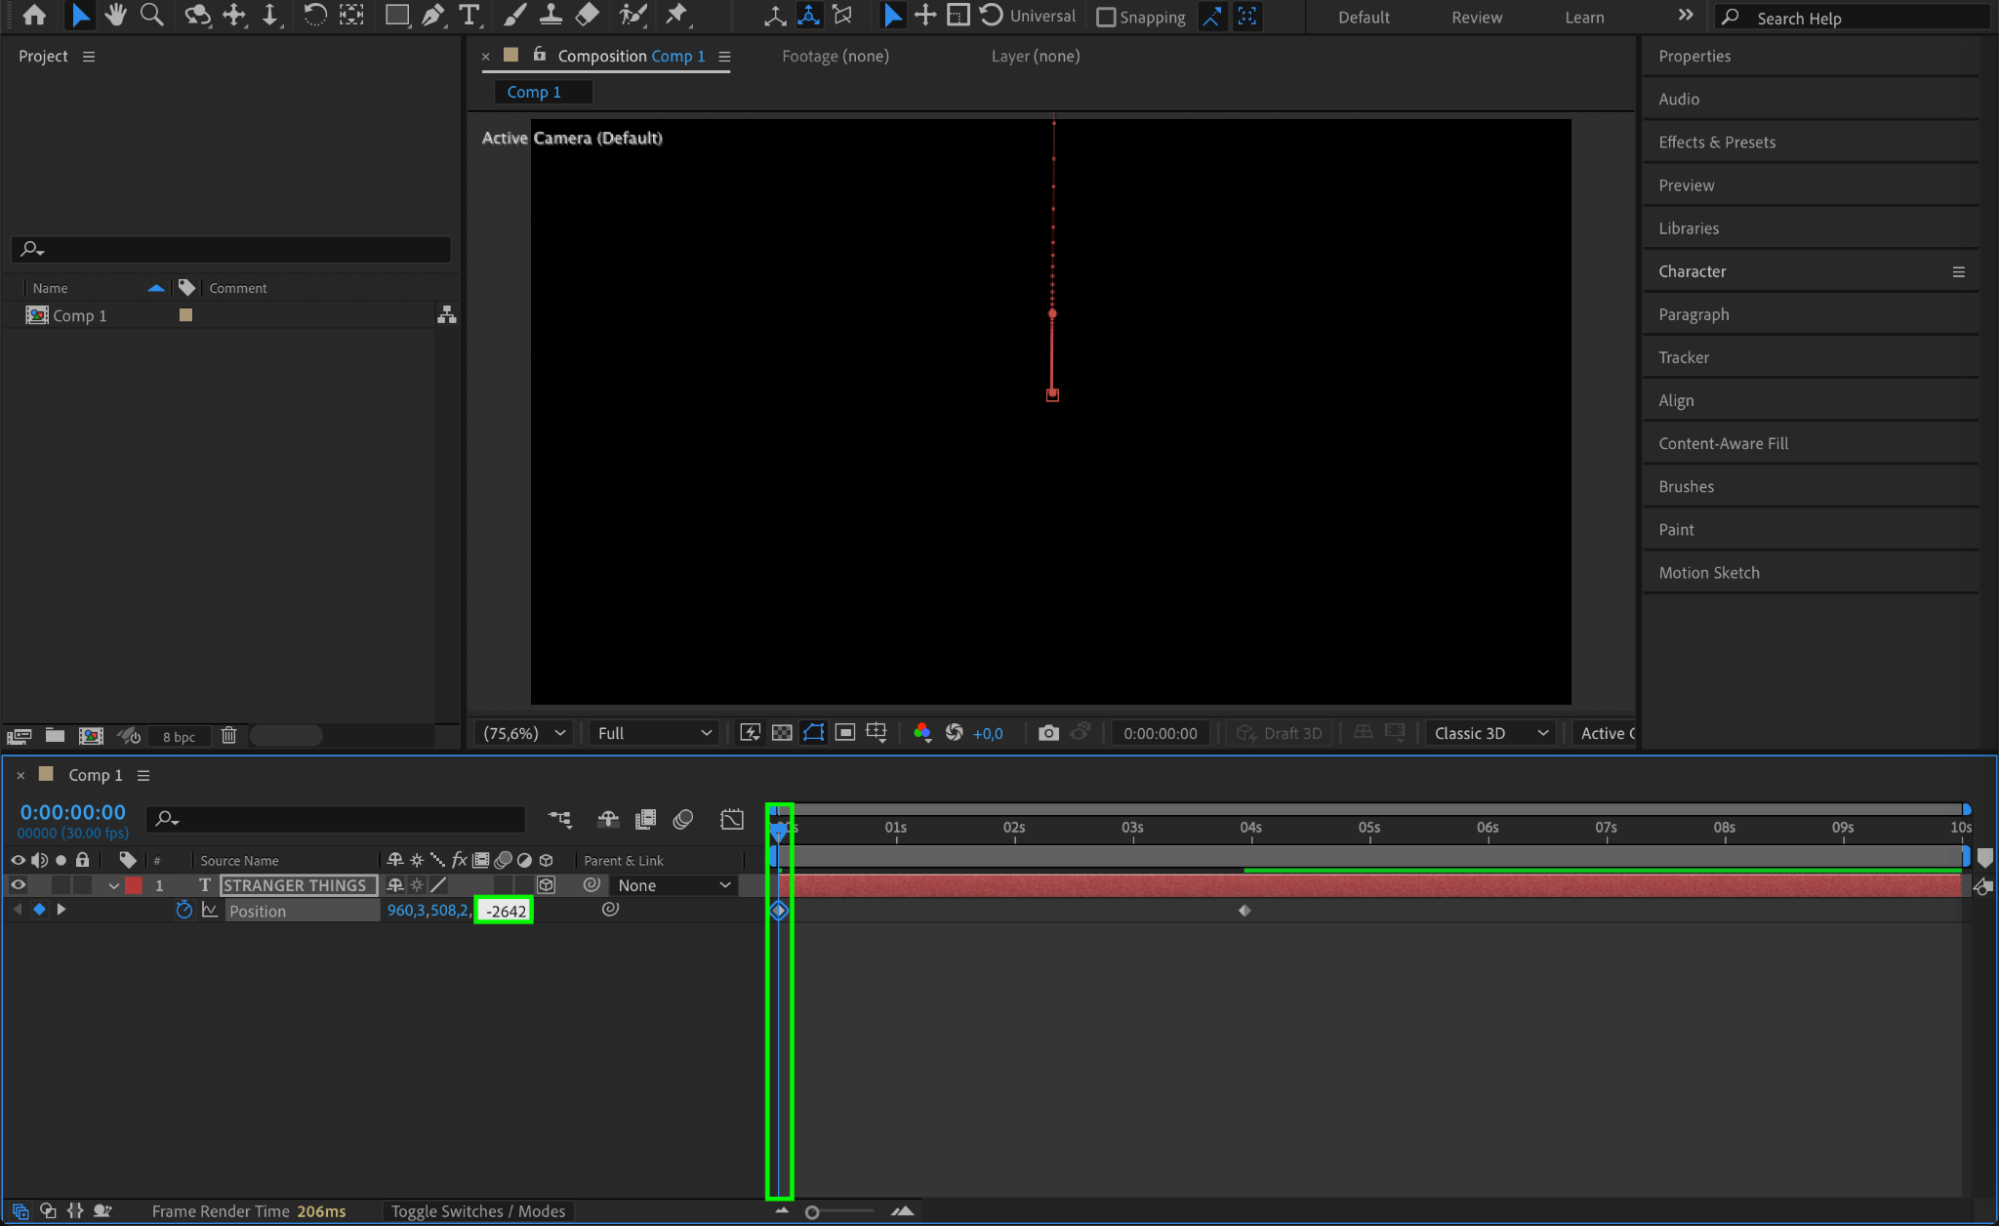
Make the text layer 3D by clicking the cube icon in the timeline. Press “P” to open Position, place the CTI (Current Time Indicator) in the middle of your comp, and click the stopwatch to create a keyframe. Then move the CTI to the beginning and change the Z-position to -2642.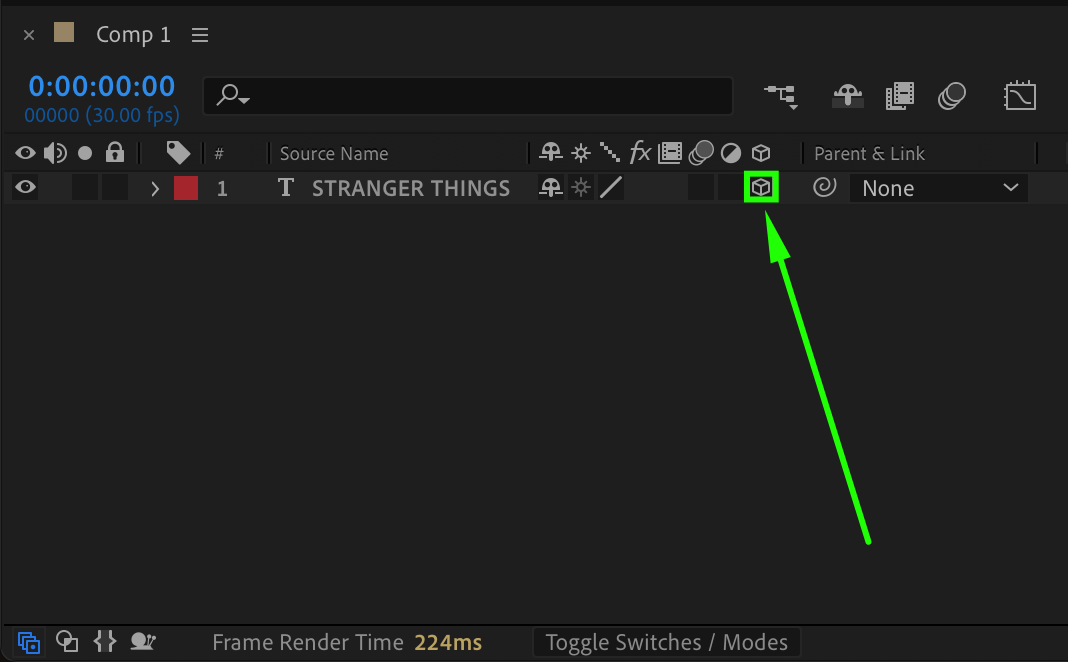
Get 10% off when you subscribe to our newsletter

Step 3: Add Easy Ease and Adjust the Motion Curve
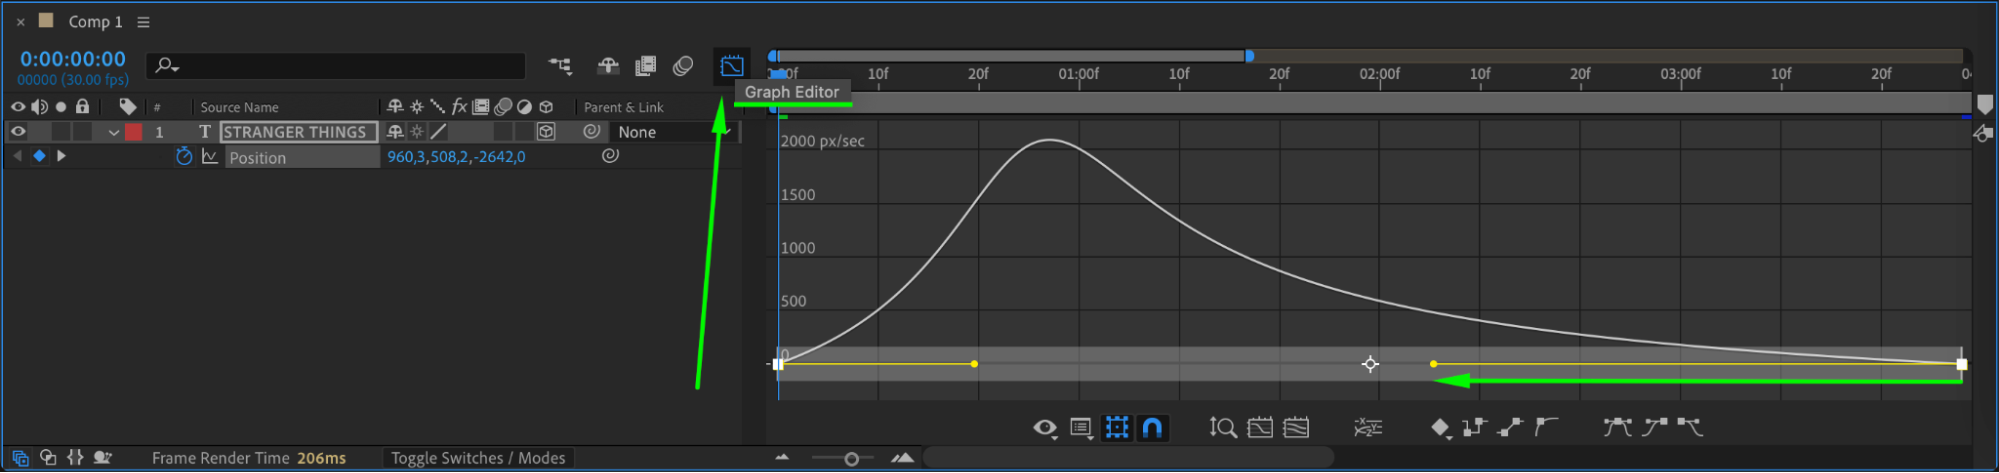
Select both keyframes and press F9 to apply Easy Ease. Open the Graph Editor, make sure you’re editing the Value Graph, and adjust the curve to ease out of the starting point and slow into the ending point. This creates cinematic, smooth motion.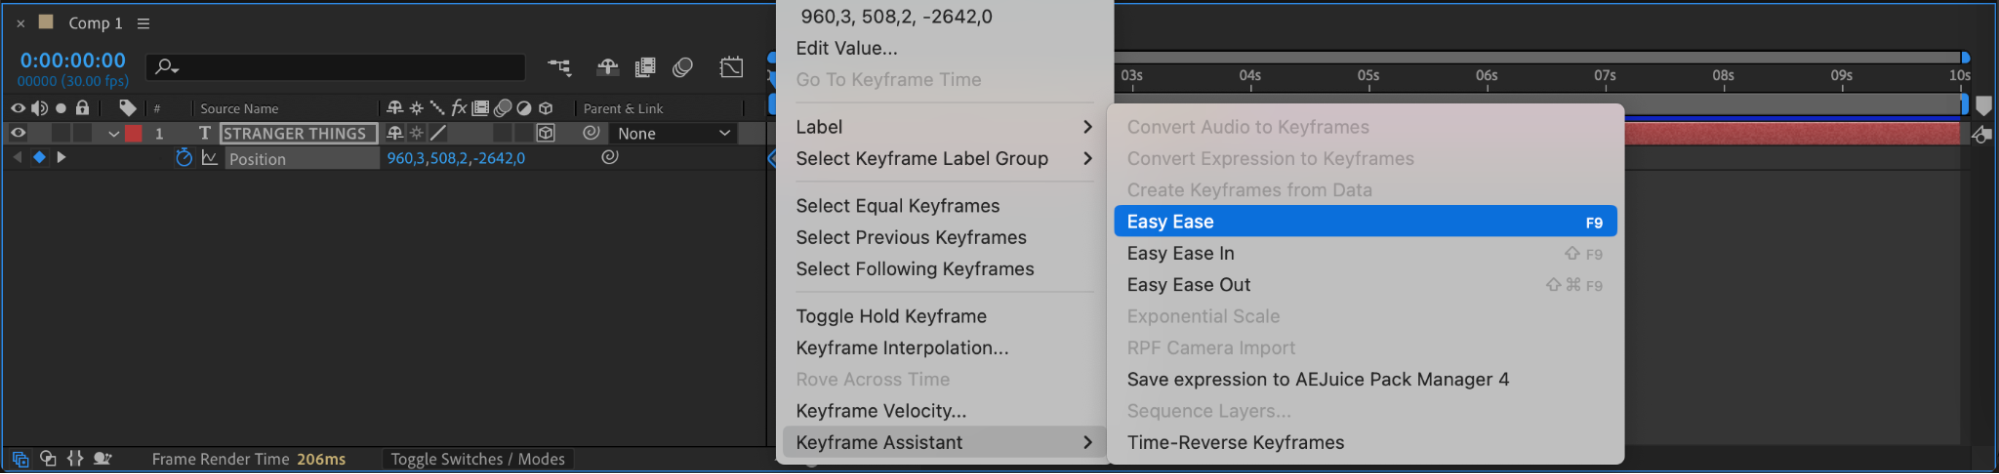
 Step 4: Apply the Echo Effect
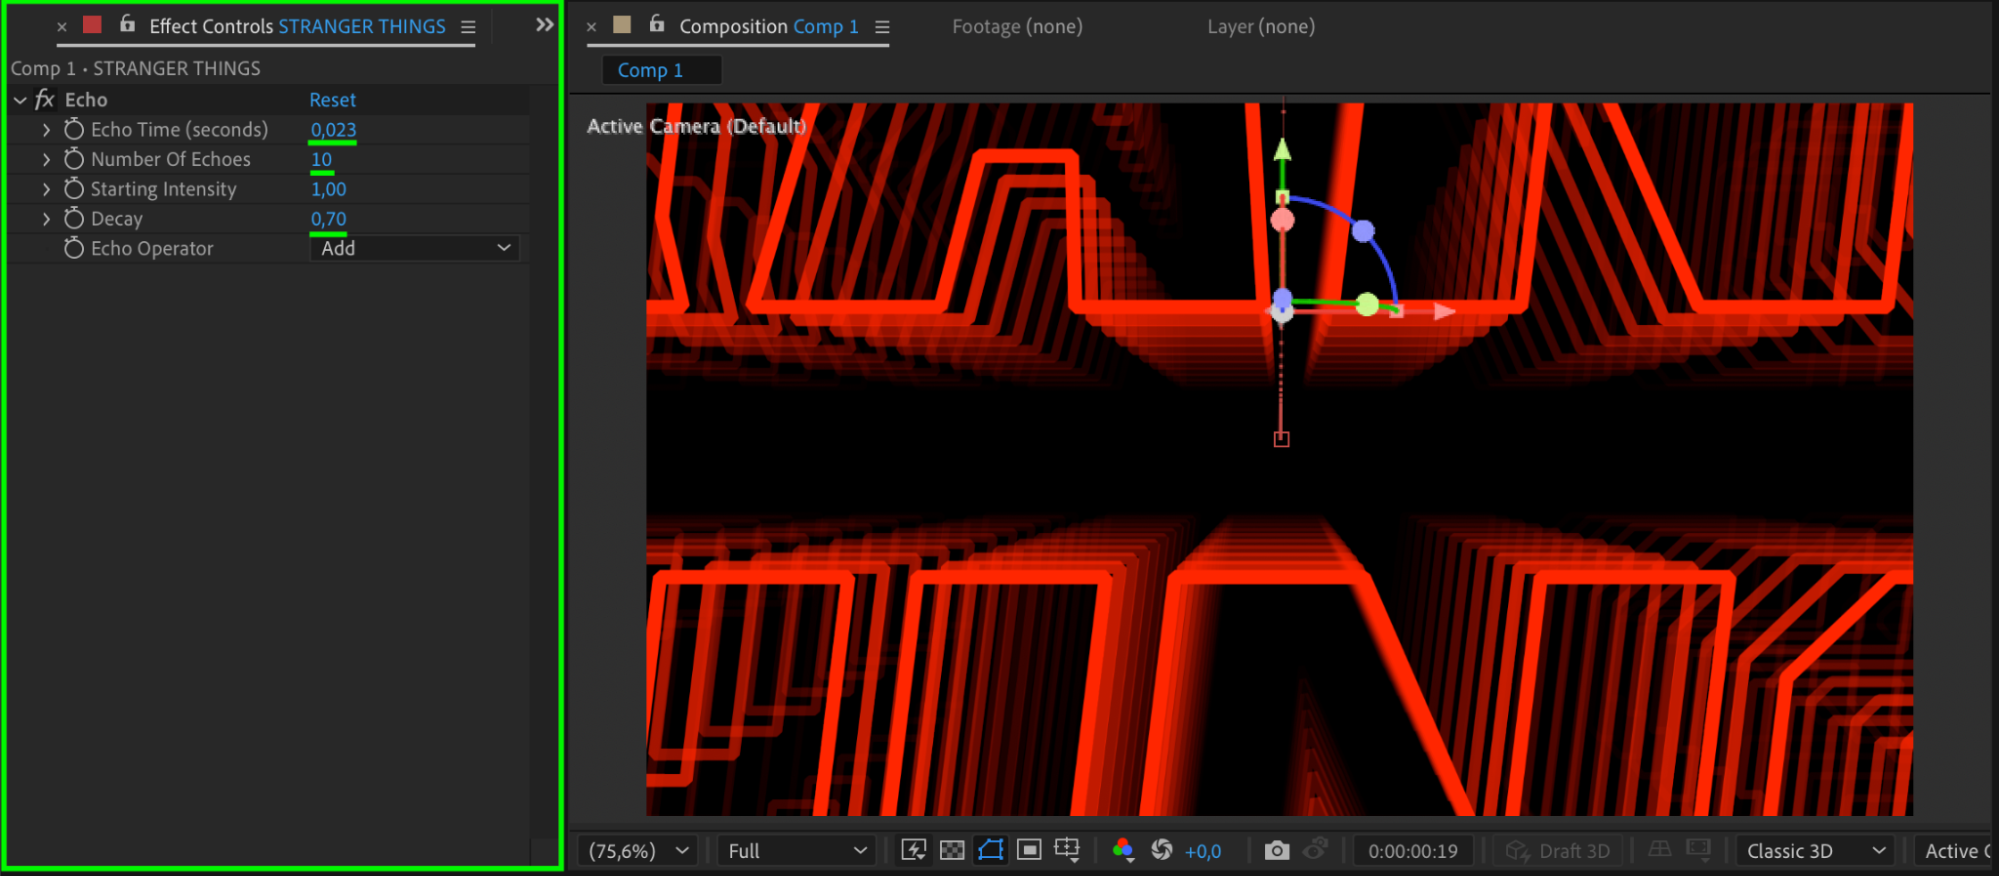
Search for Echo in the Effects & Presets panel and apply it to the text layer. Set the following values:
Echo Time: 0.023
Number of Echoes: 10
Decay: 0.7
This will create a trailing motion effect as the text moves forward in 3D space.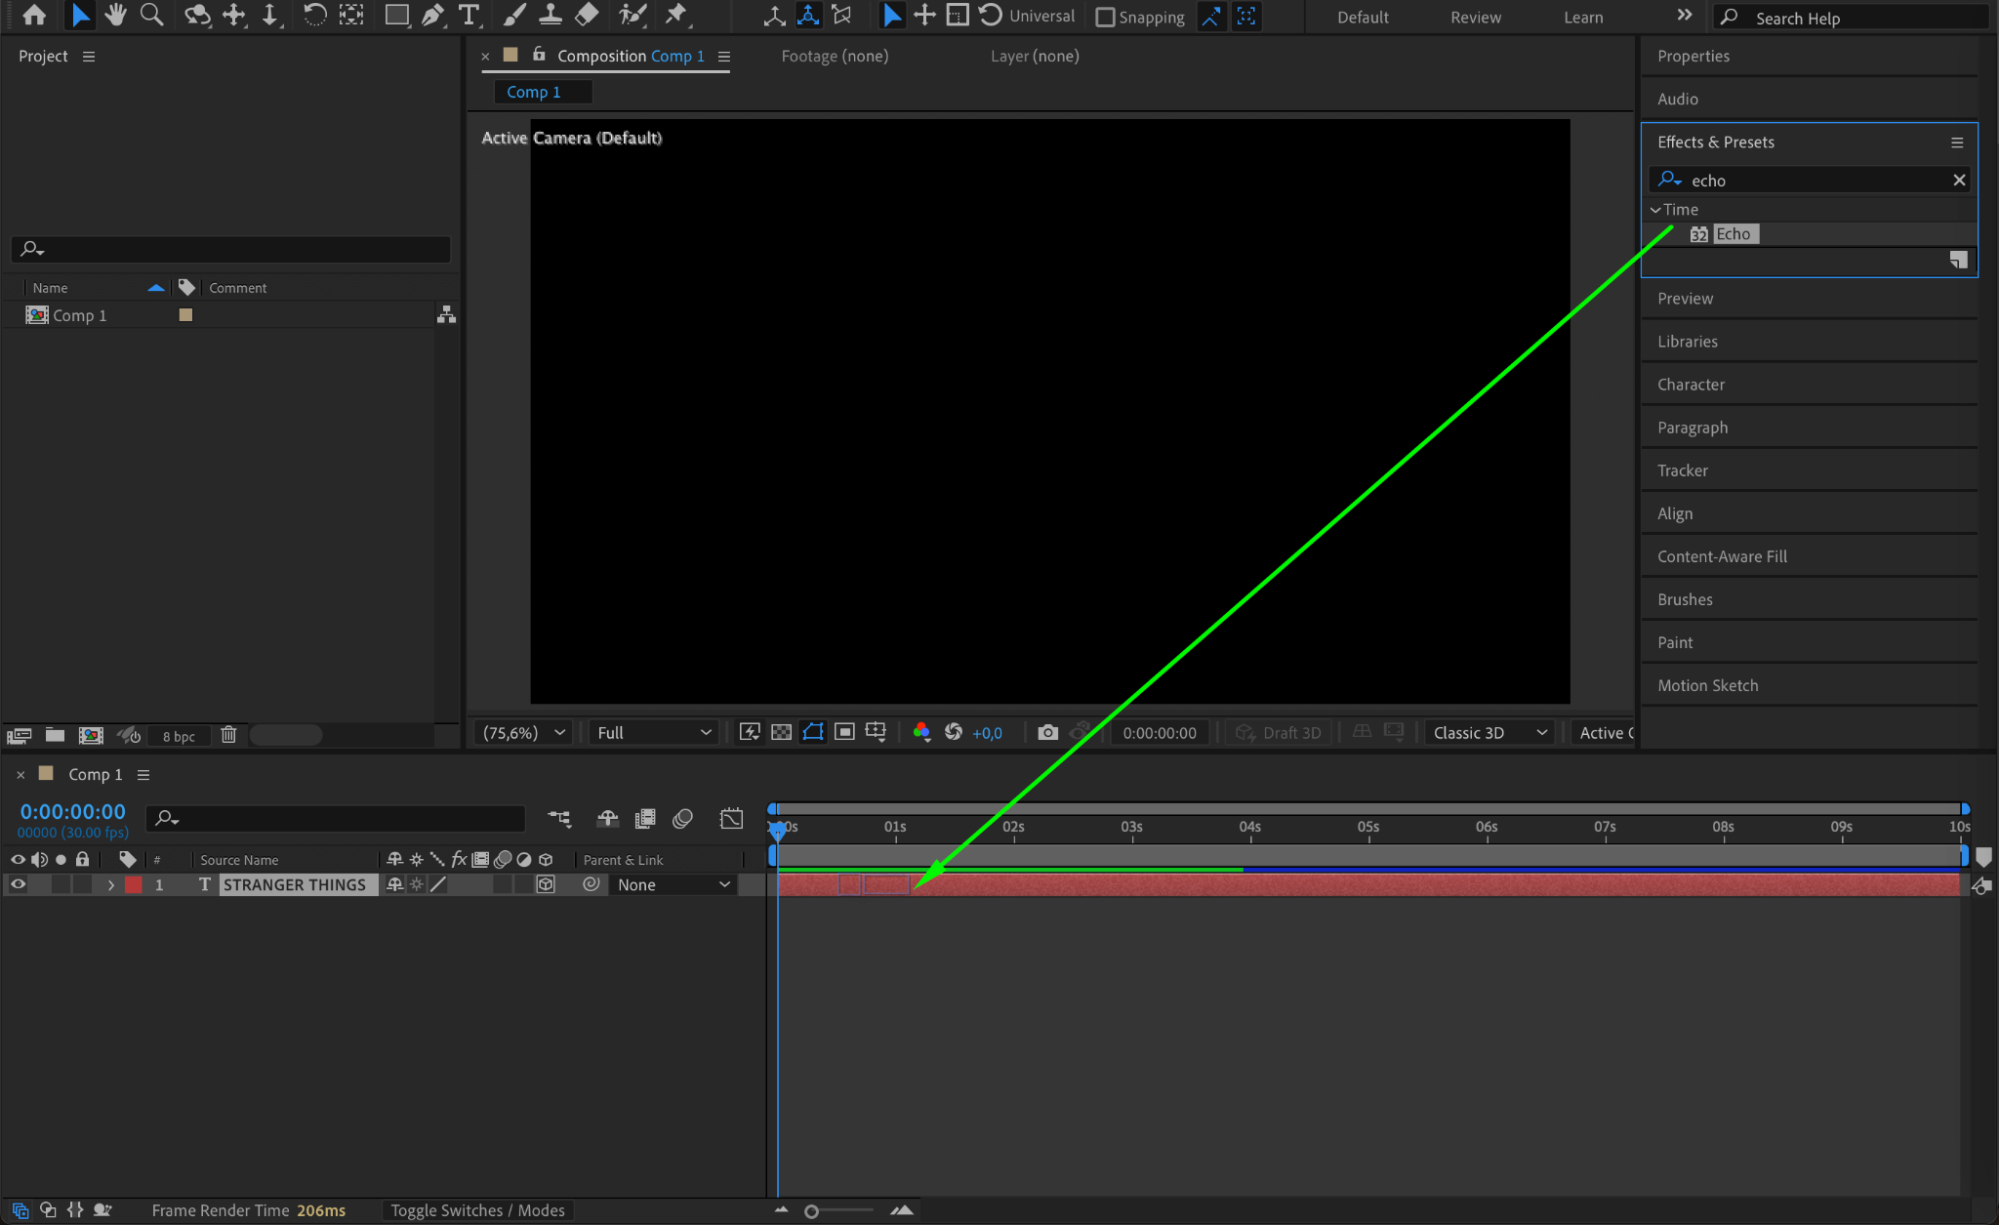
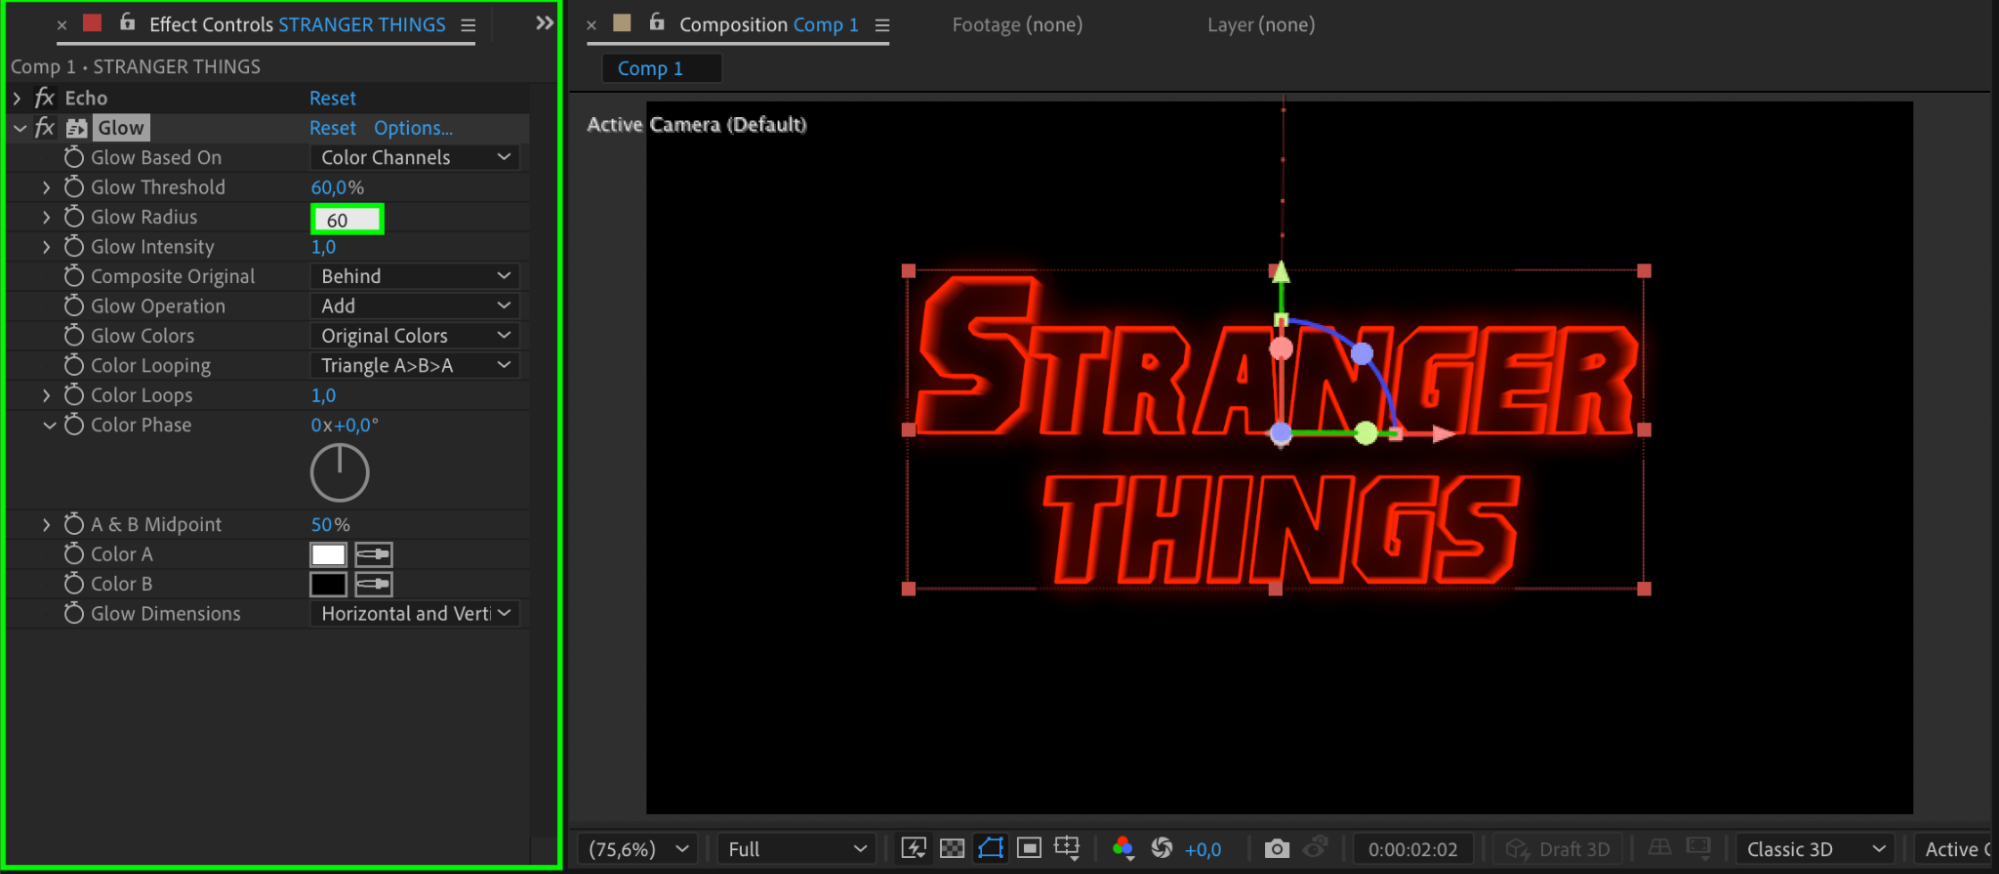
 Step 5: Add a Glow Effect
Apply the Glow effect to the same layer. Set the Glow Radius to 60 to add a subtle red outer glow that enhances the neon feel.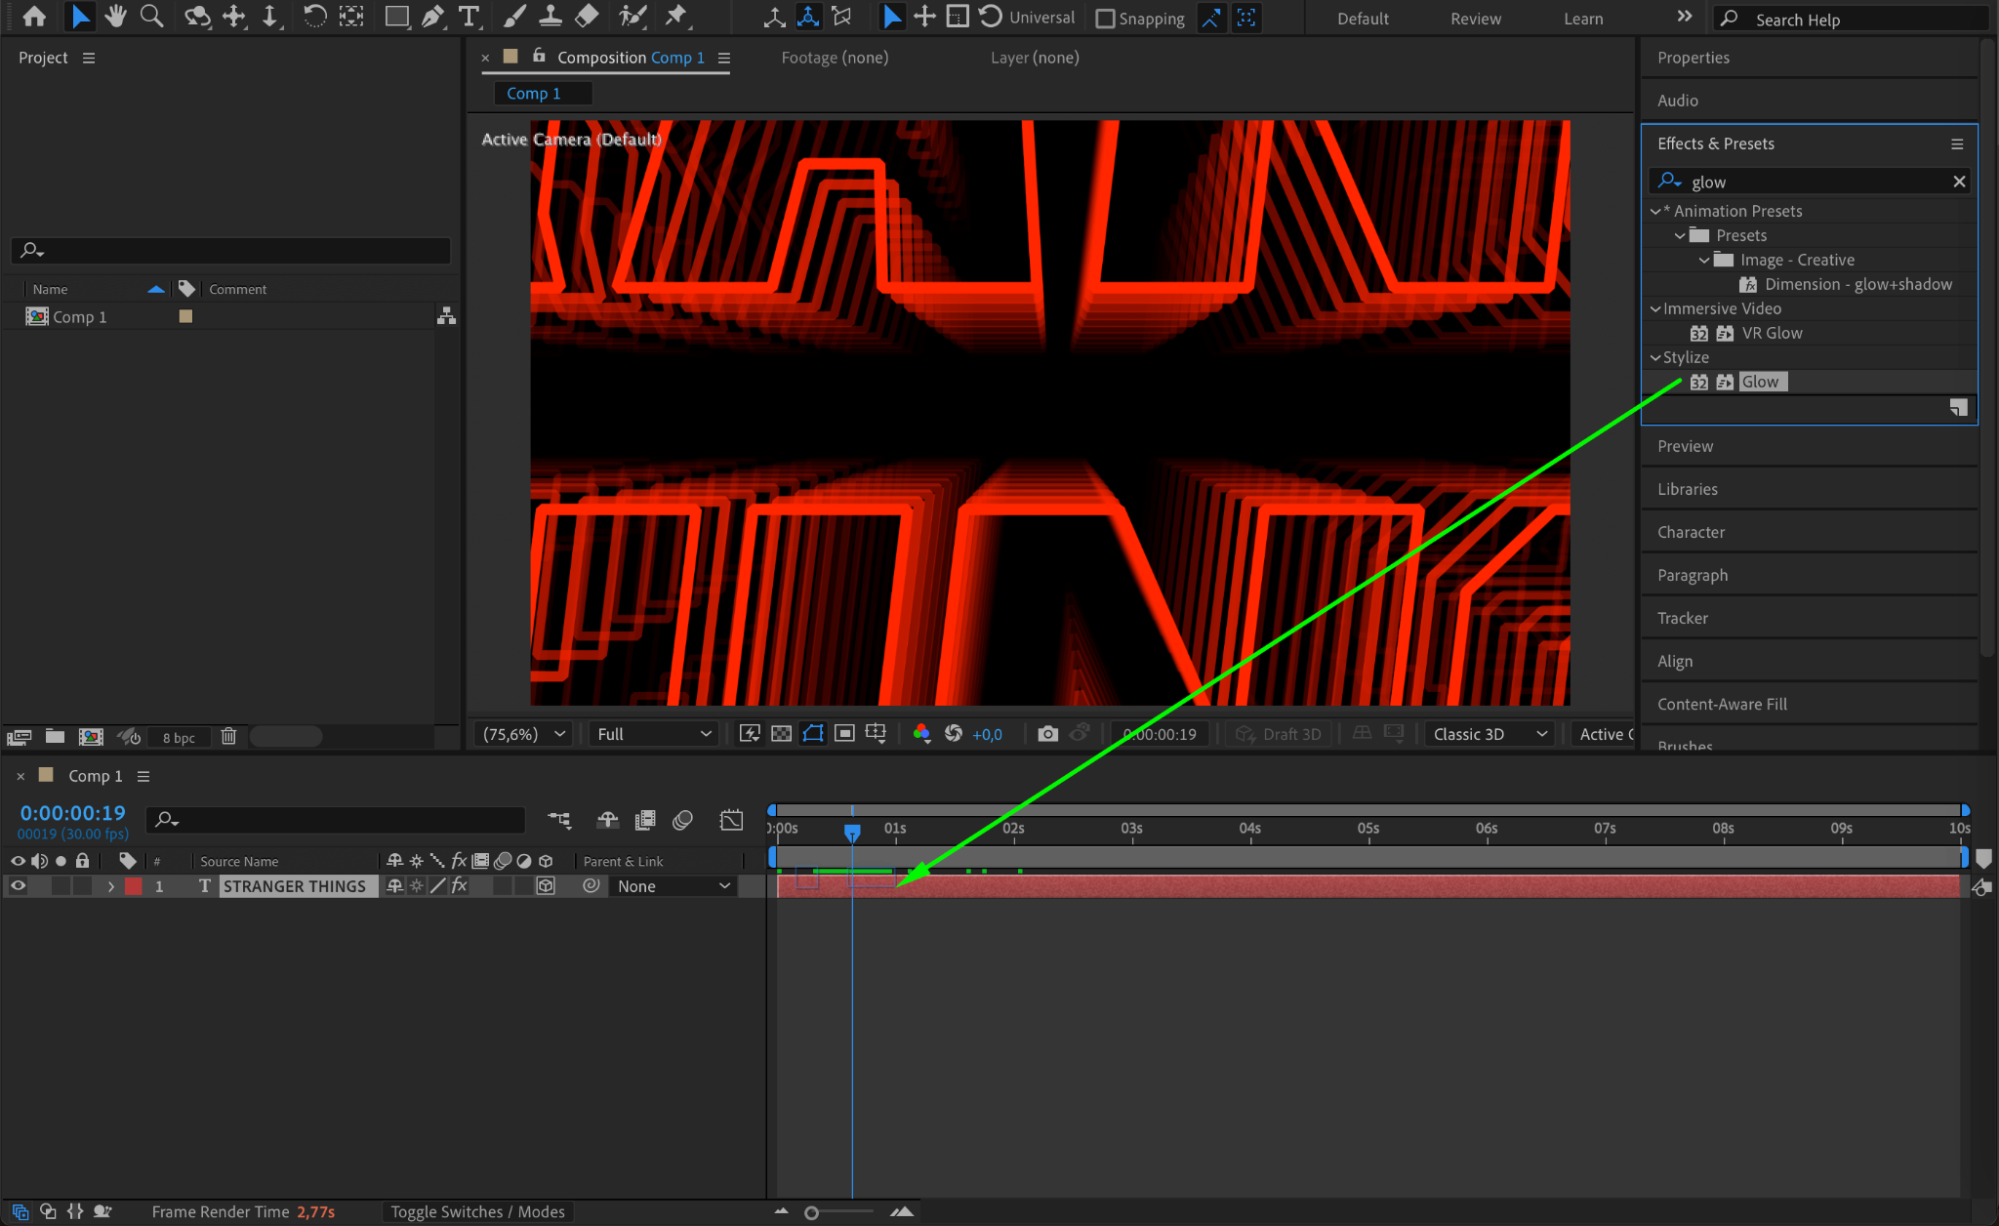
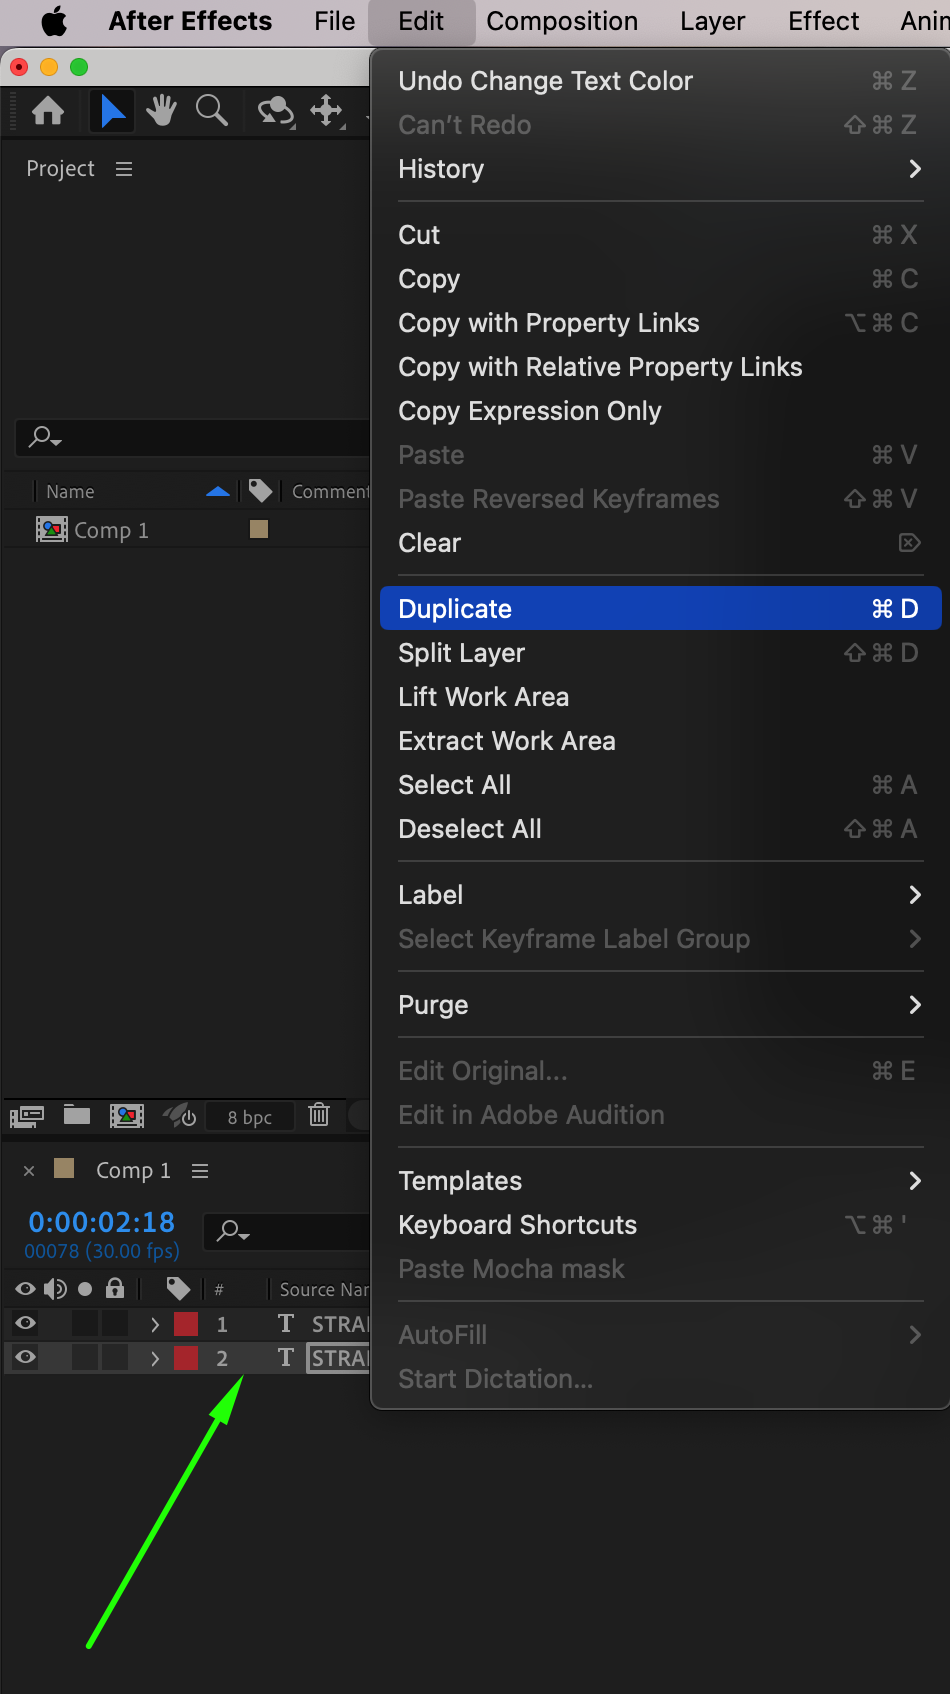
Step 6: Duplicate and Offset the Layer
Duplicate the text layer (Ctrl/Cmd + D) and shift the duplicate a few frames forward on the timeline. For the original layer, change the stroke color to orange. This layered timing adds a motion echo with different colors for a more dynamic visual.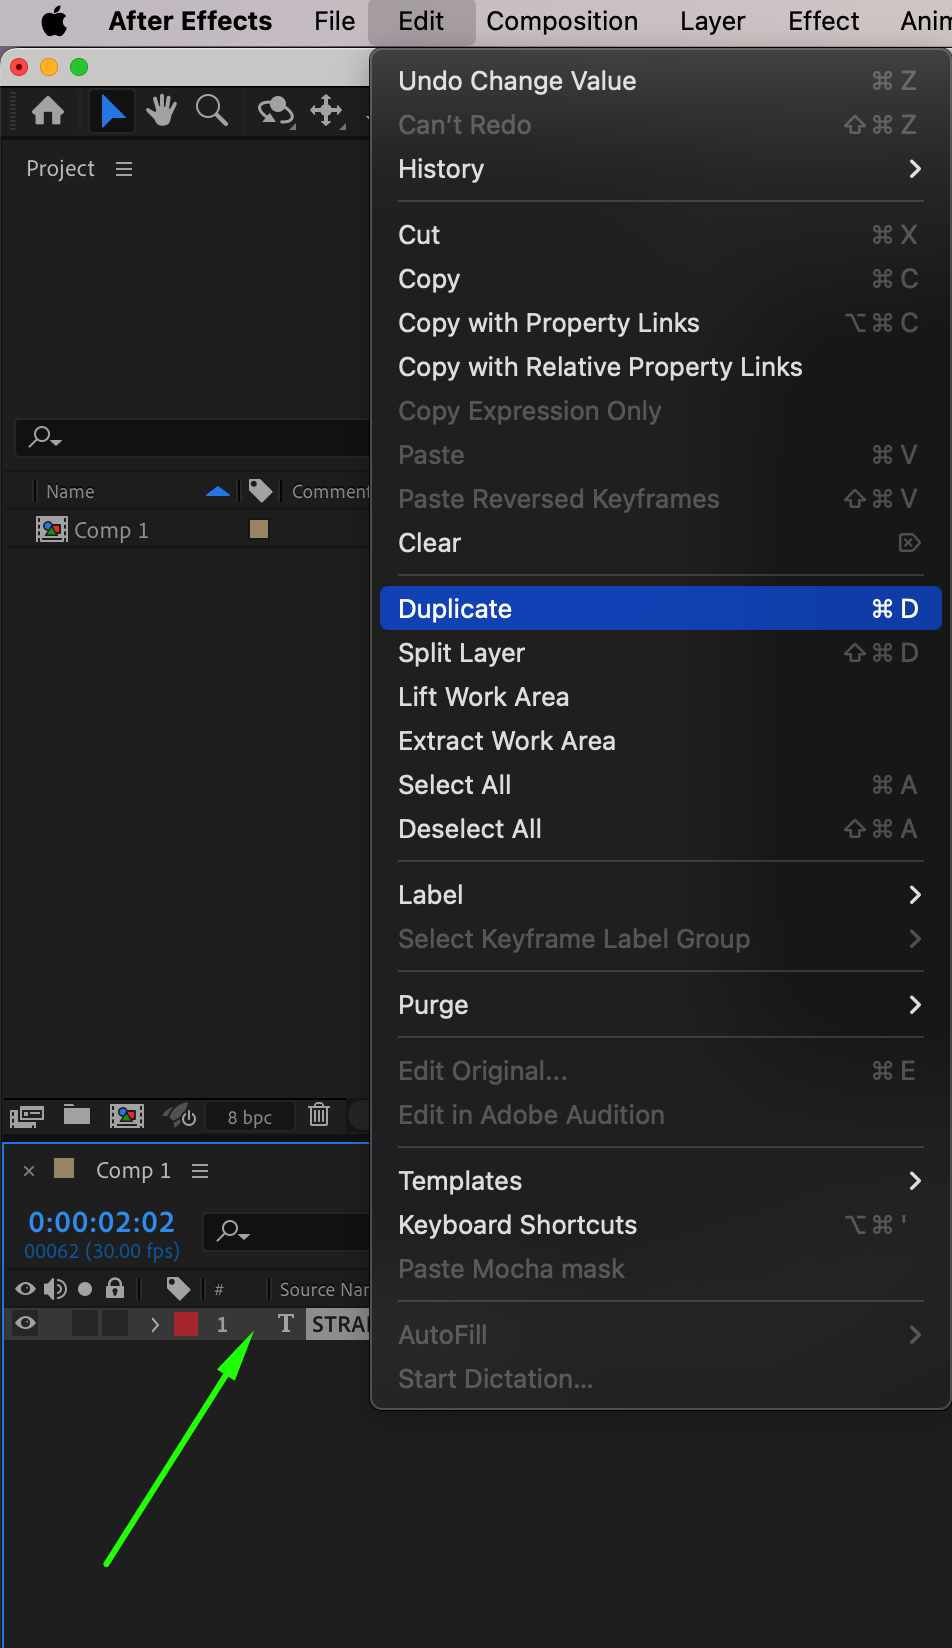
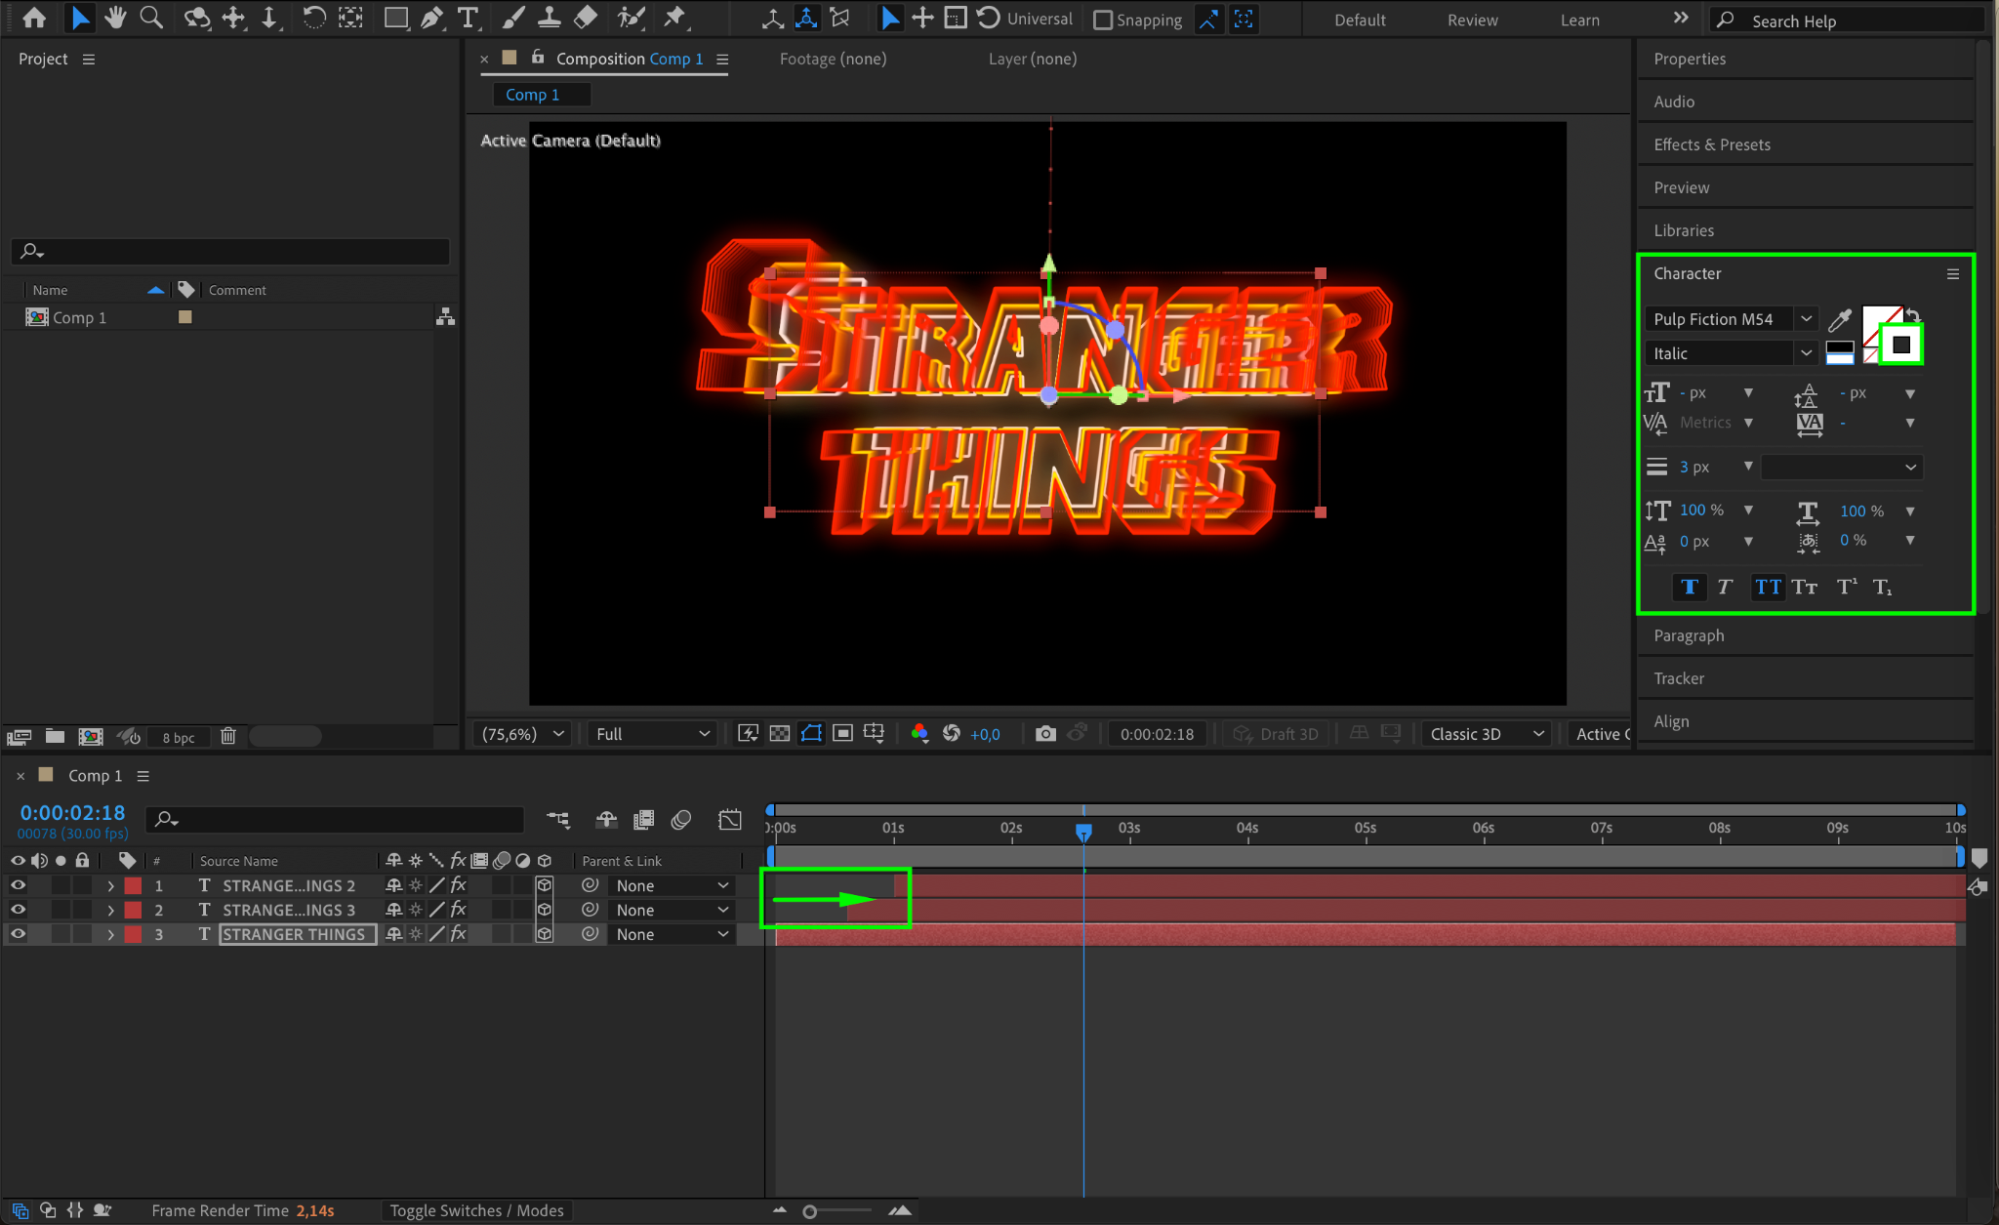
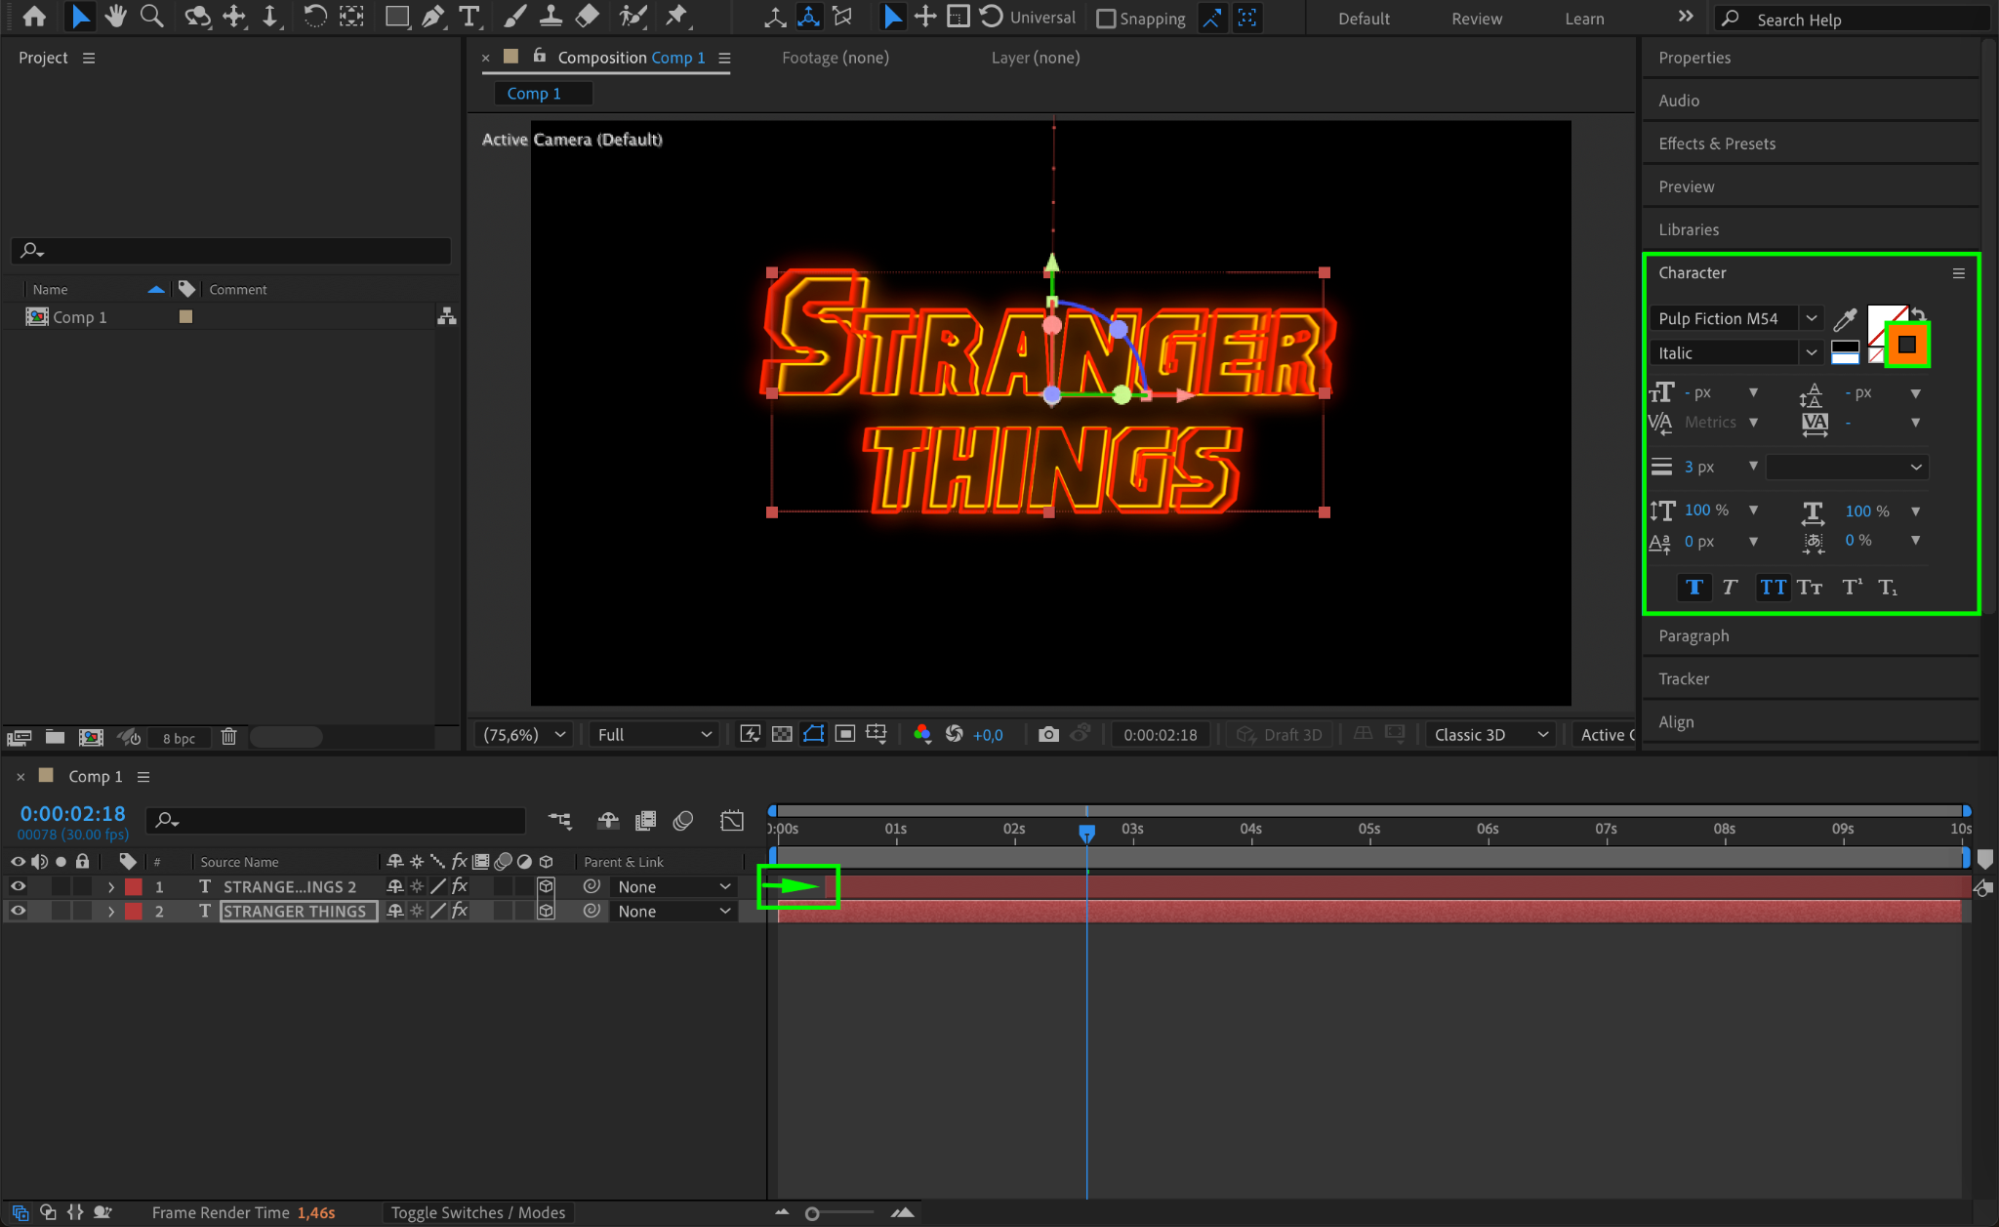 Step 7: Add a Third Layer with White Stroke
Duplicate the original layer one more time. Offset the two upper layers a few more frames to the right. On the original layer (now at the bottom), change the stroke color to white for the brightest base outline.
 Step 8: Adjust Glow and Stroke Widths
Now adjust the glow and stroke settings for each layer:
Bottom (white) layer: Glow Radius = 20, Stroke Width = 0.6
Middle (orange) layer: Stroke Width = 0.8
This layering and variation create the illusion of glowing outlines receding into space and intensifying forward.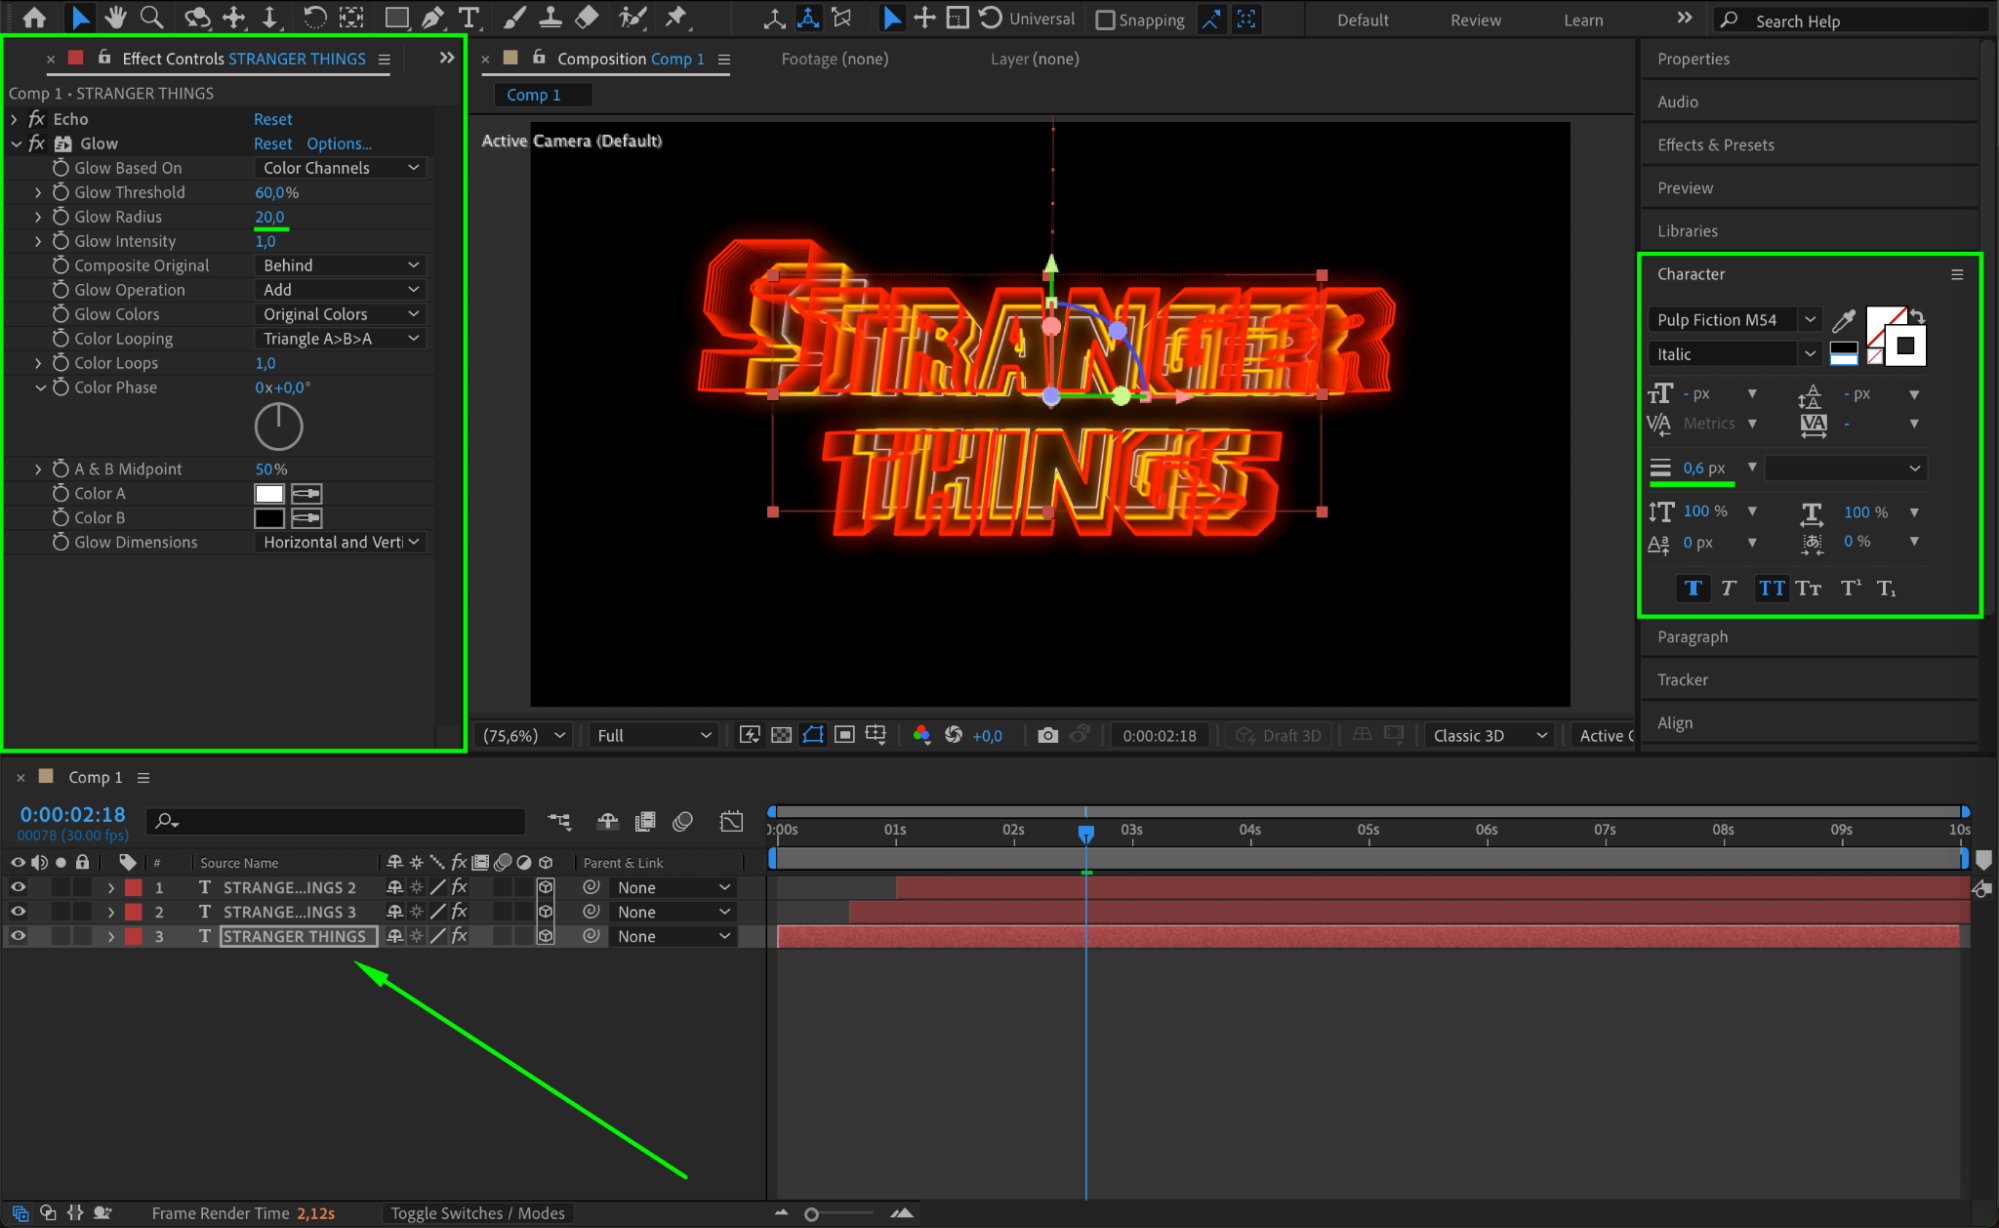
 Step 9: Preview Your Animation
Press Spacebar to preview your animation. You should see a dramatic intro with layered text glowing and moving toward the screen with smooth trails.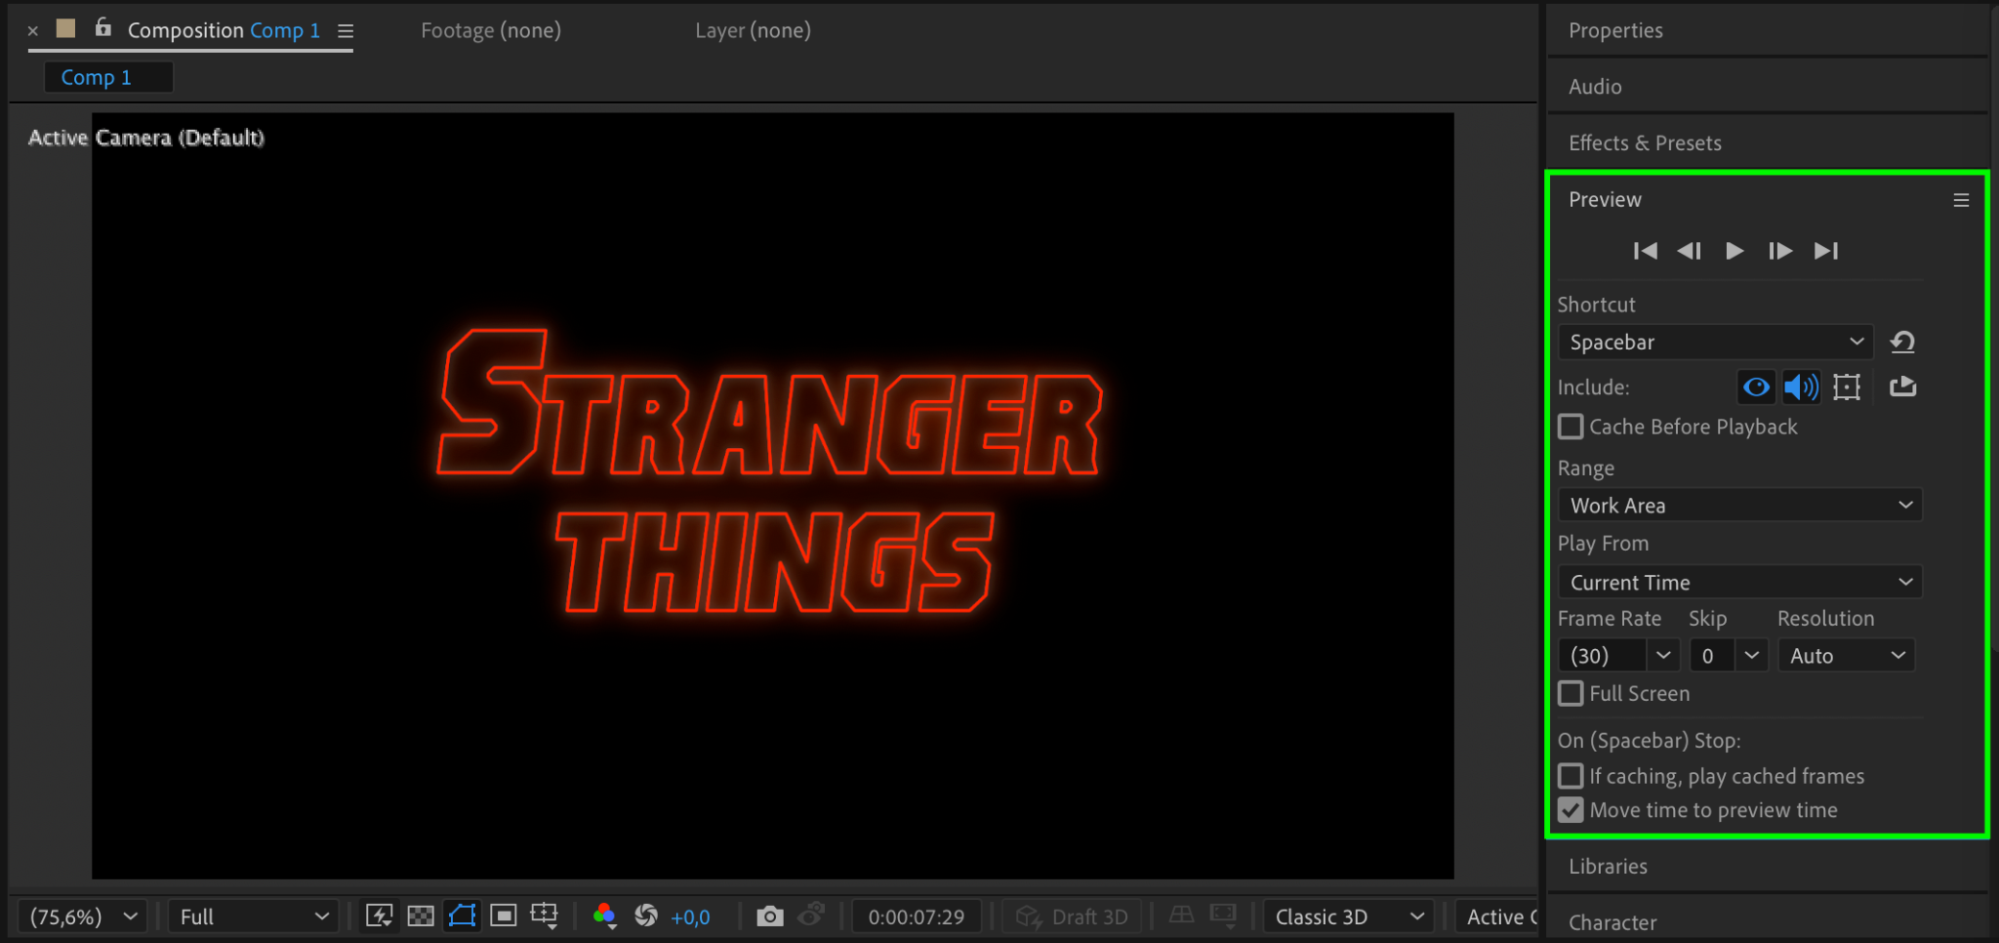
Conclusion
You’ve just created a Stranger Things-inspired intro using only text and built-in effects in After Effects. With simple animation, layering, and glow techniques, you can achieve a cinematic, mysterious title that captures the retro-horror vibe of the show. Experiment with colors, font size, and timing for your own variation of this iconic look.
Our Bestsellers


