Flying Through Text Animation in After Effects
Introduction – Create a 3D Text Fly-Through Effect
The flying text effect gives a cinematic look where the camera moves through multiple layers of text in 3D space. This is perfect for intros, trailers, or any stylized title sequence. Let’s walk through the steps to create this effect in After Effects.
Step 1: Open Your Project and Create Text
Start by opening your After Effects project or creating a new one. Use the Type Tool (Ctrl/Cmd + T) to add your text to the composition. You can enter a word or phrase that you want to animate through.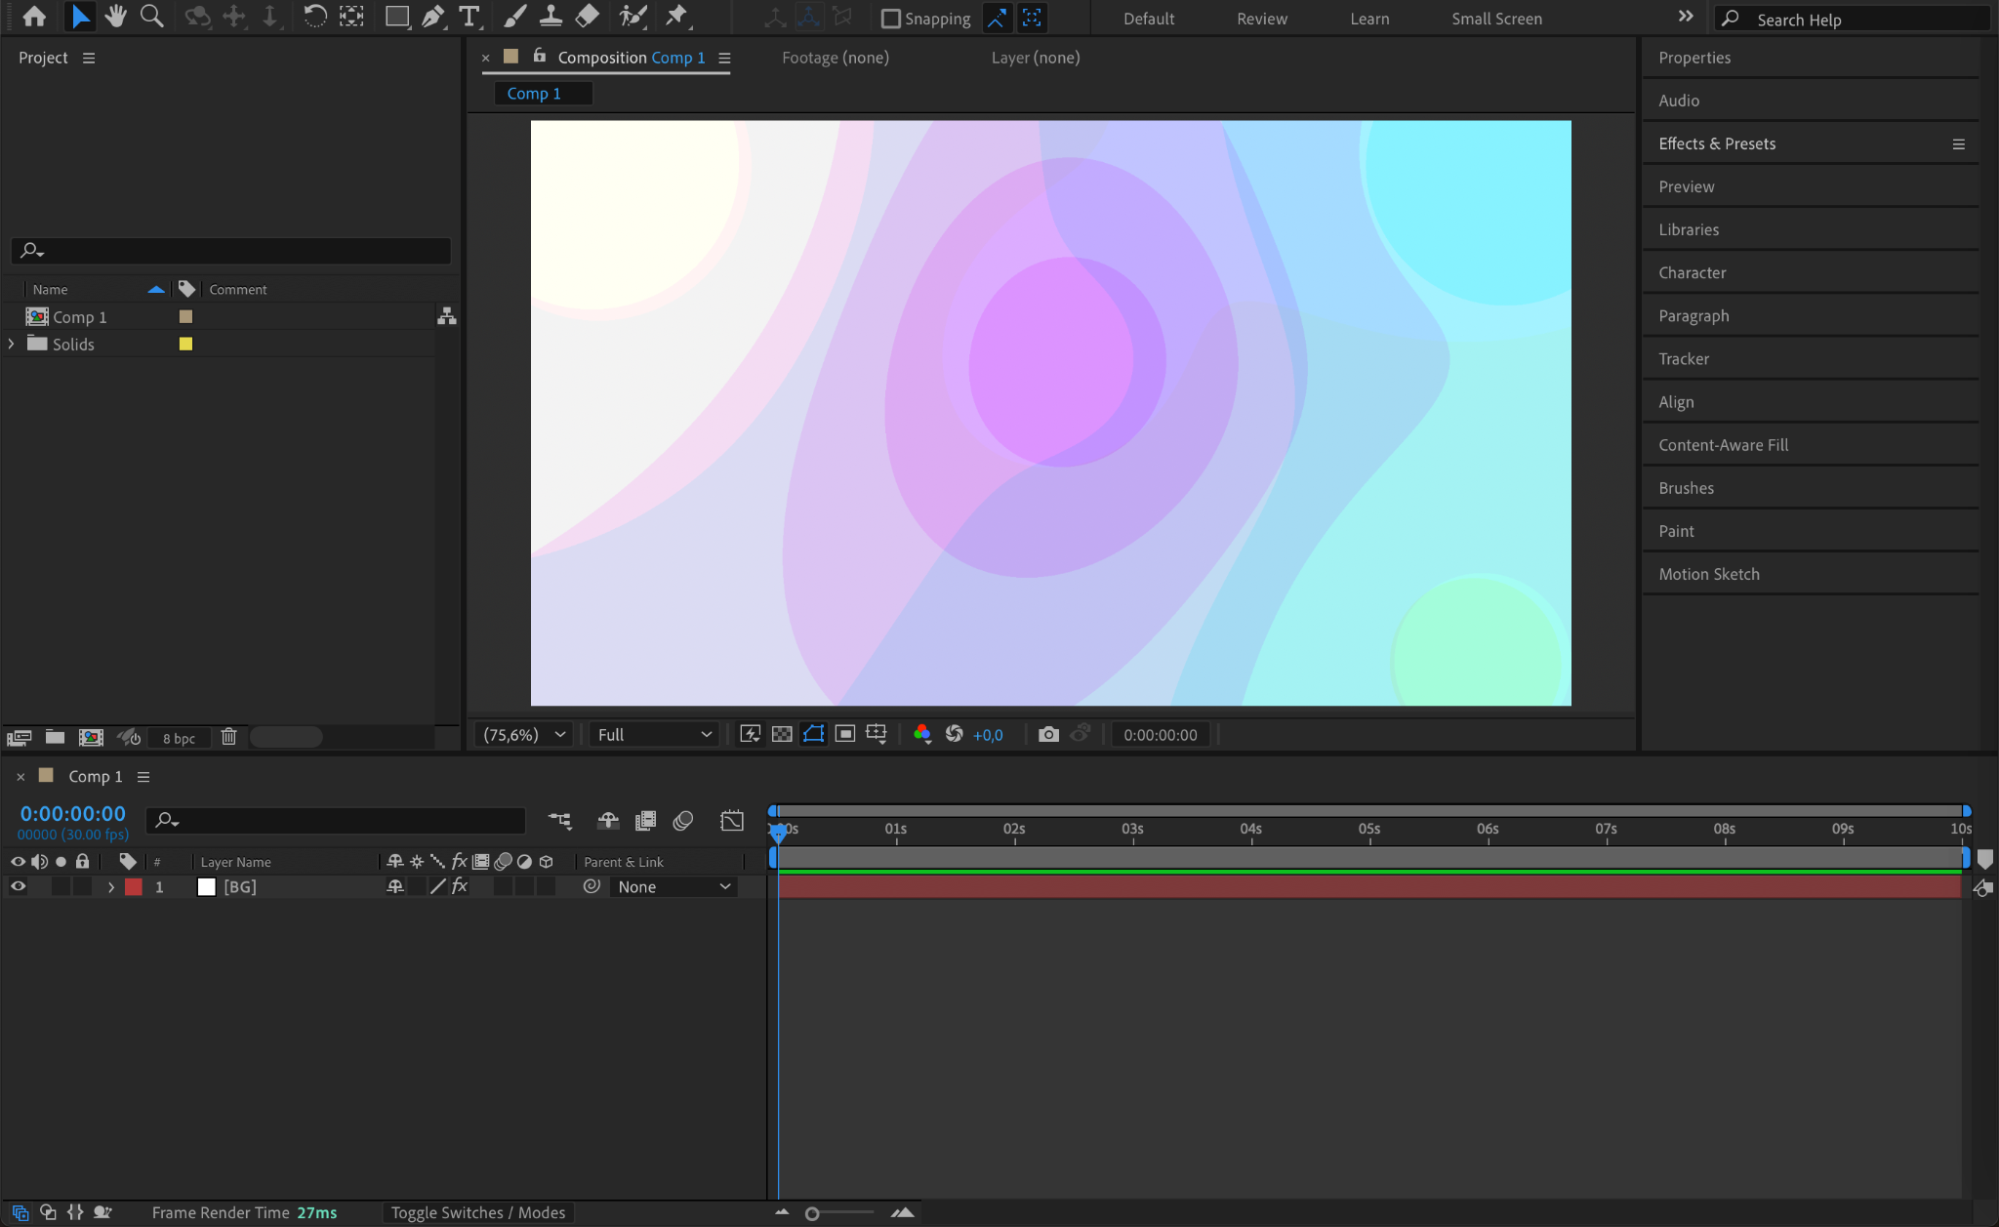
 Step 2: Center the Anchor Point
Right-click on the text layer and go to Transform > Center Anchor Point in Layer Content. This ensures that transformations like position and scale are centered properly on the text layer.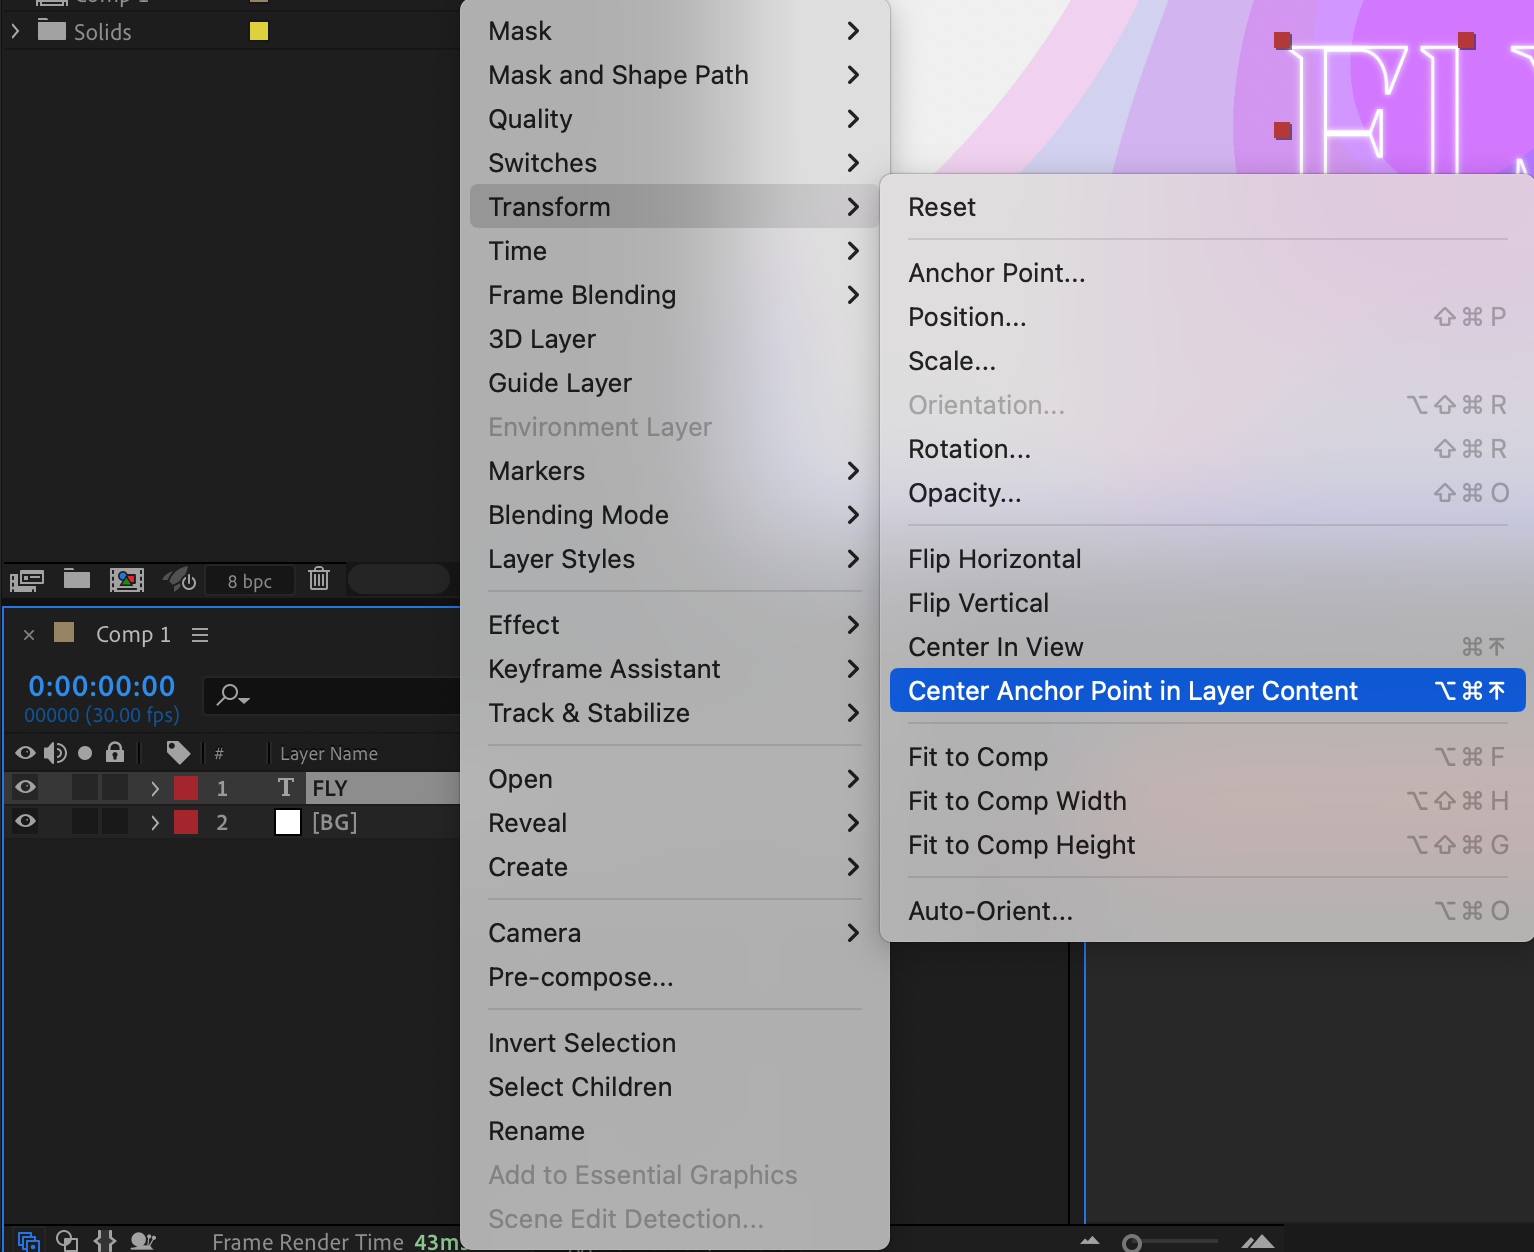
Get 10% off when you subscribe to our newsletter

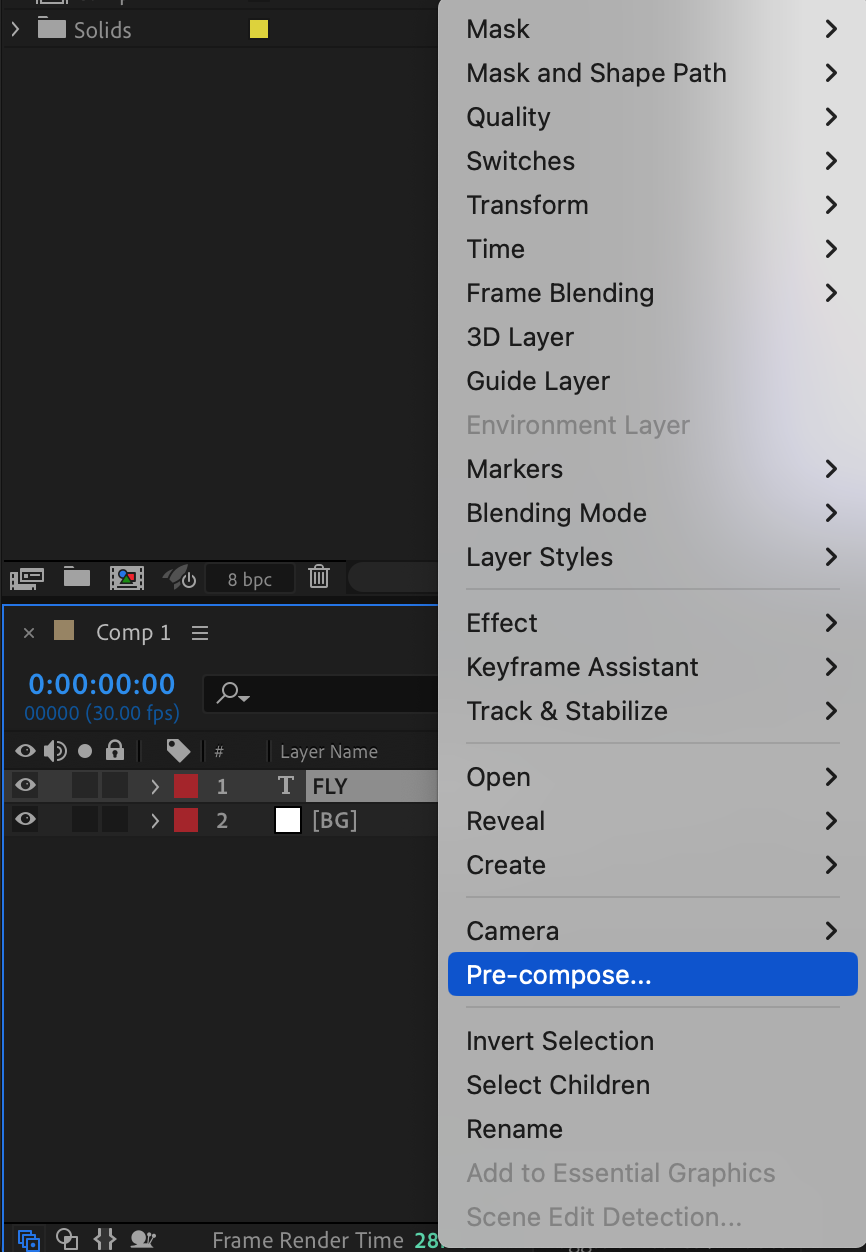
Step 3: Pre-compose the Text
Select the text layer, then go to Layer > Pre-compose. Make sure to move all attributes into the new composition. This helps with managing 3D layers and applying effects more cleanly.
 Step 4: Enable 3D for the Text
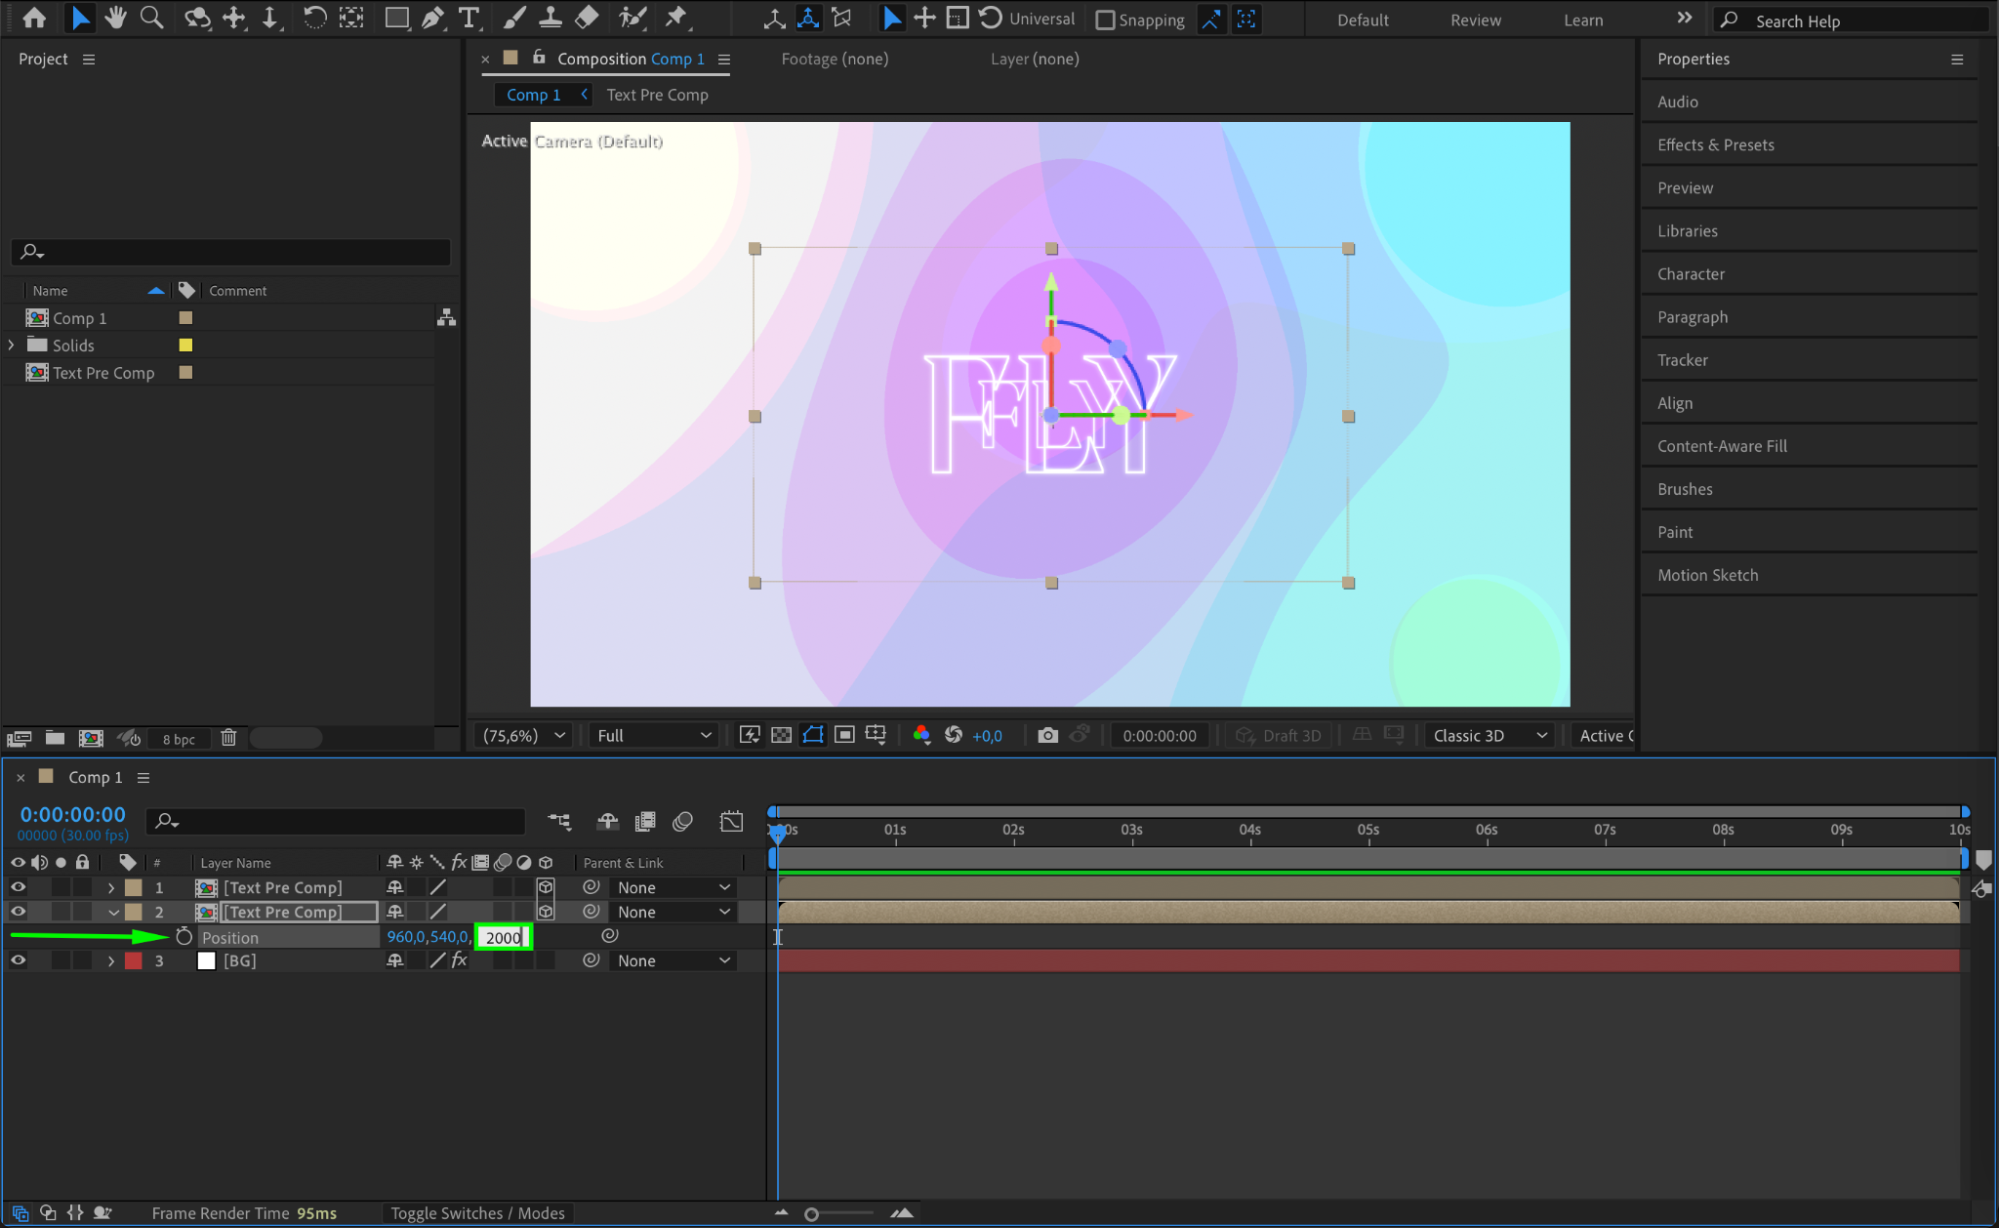
Click the 3D Layer switch (the cube icon) on the pre-comped text layer to enable 3D. This allows you to manipulate it in 3D space, including positioning it on the Z-axis.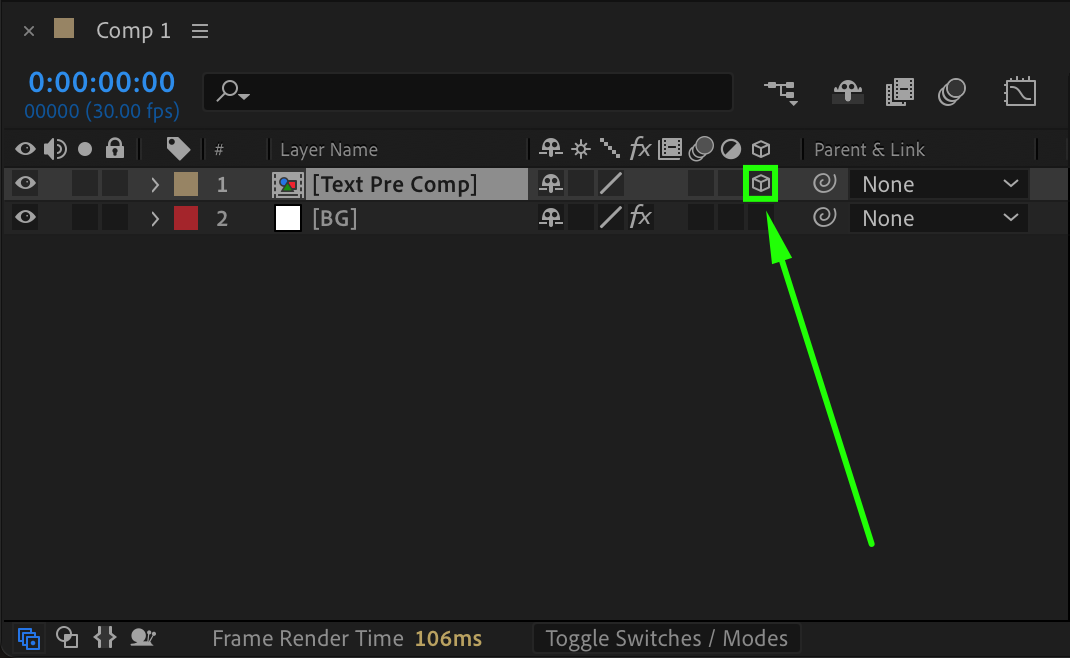 Step 5: Duplicate and Offset the Text Layers
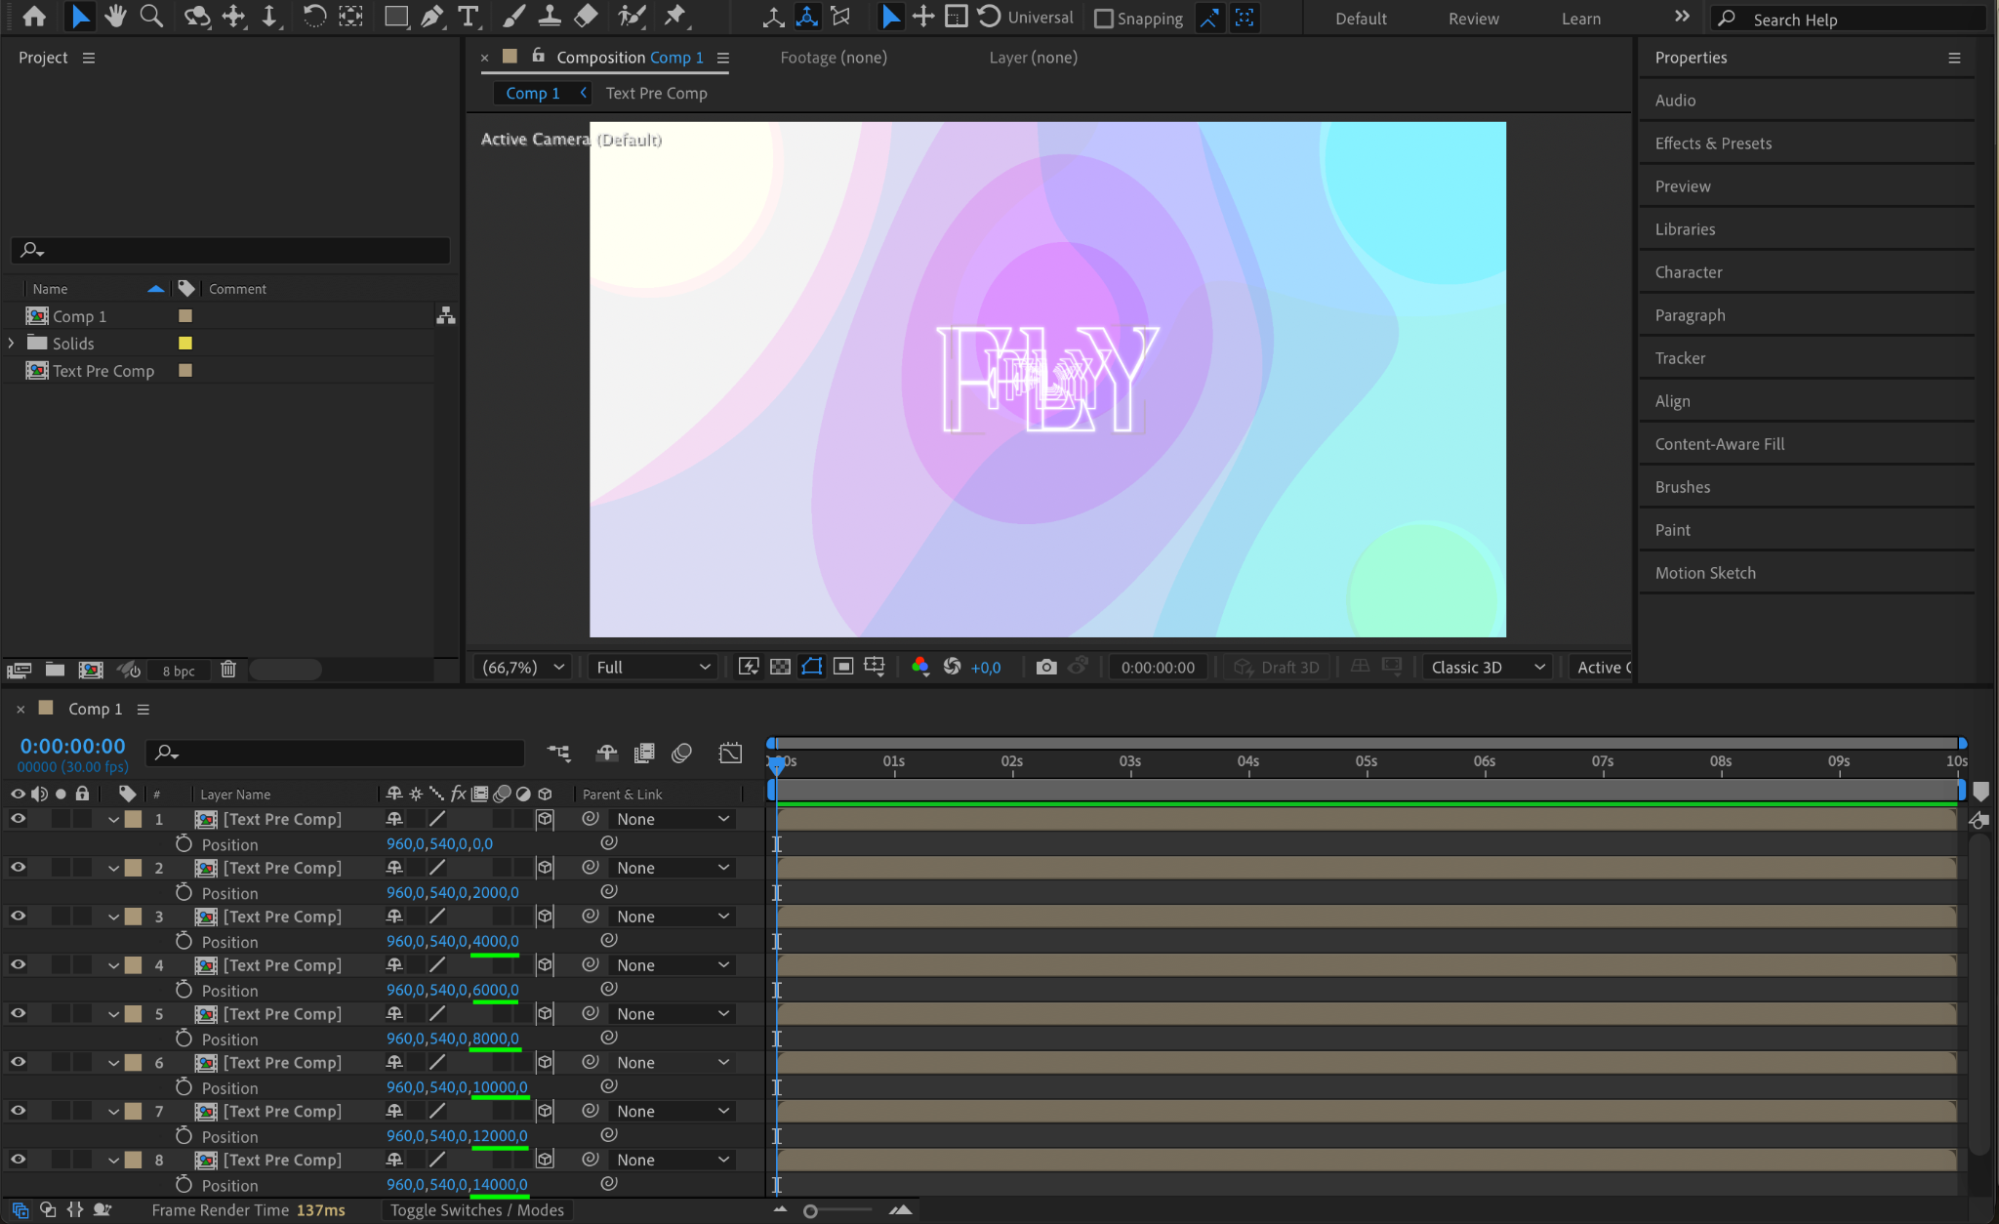
Duplicate the pre-comped text layer several times (Ctrl/Cmd + D). For each duplicate, go to the Position property, and increase the Z value by around +2000 each time. This will place each text layer farther back in 3D space.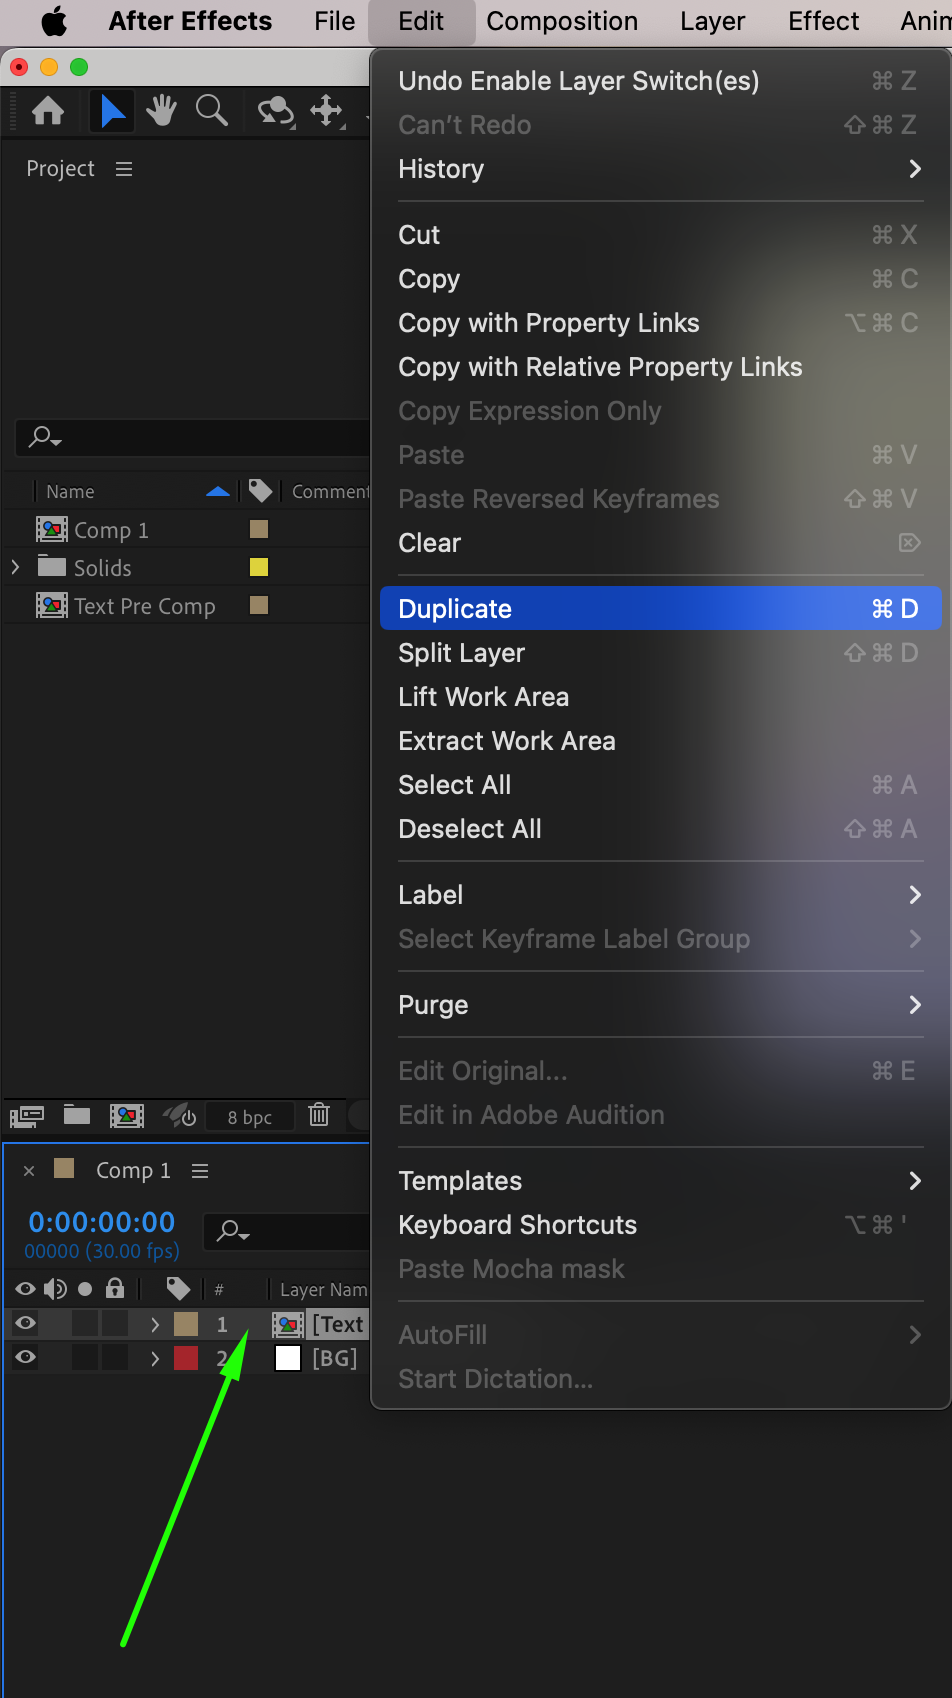
 Step 6: Add a New Camera
Go to Layer > New > Camera. This camera will be used to fly through your text layers. Make sure the camera is added to the top of your composition layers.

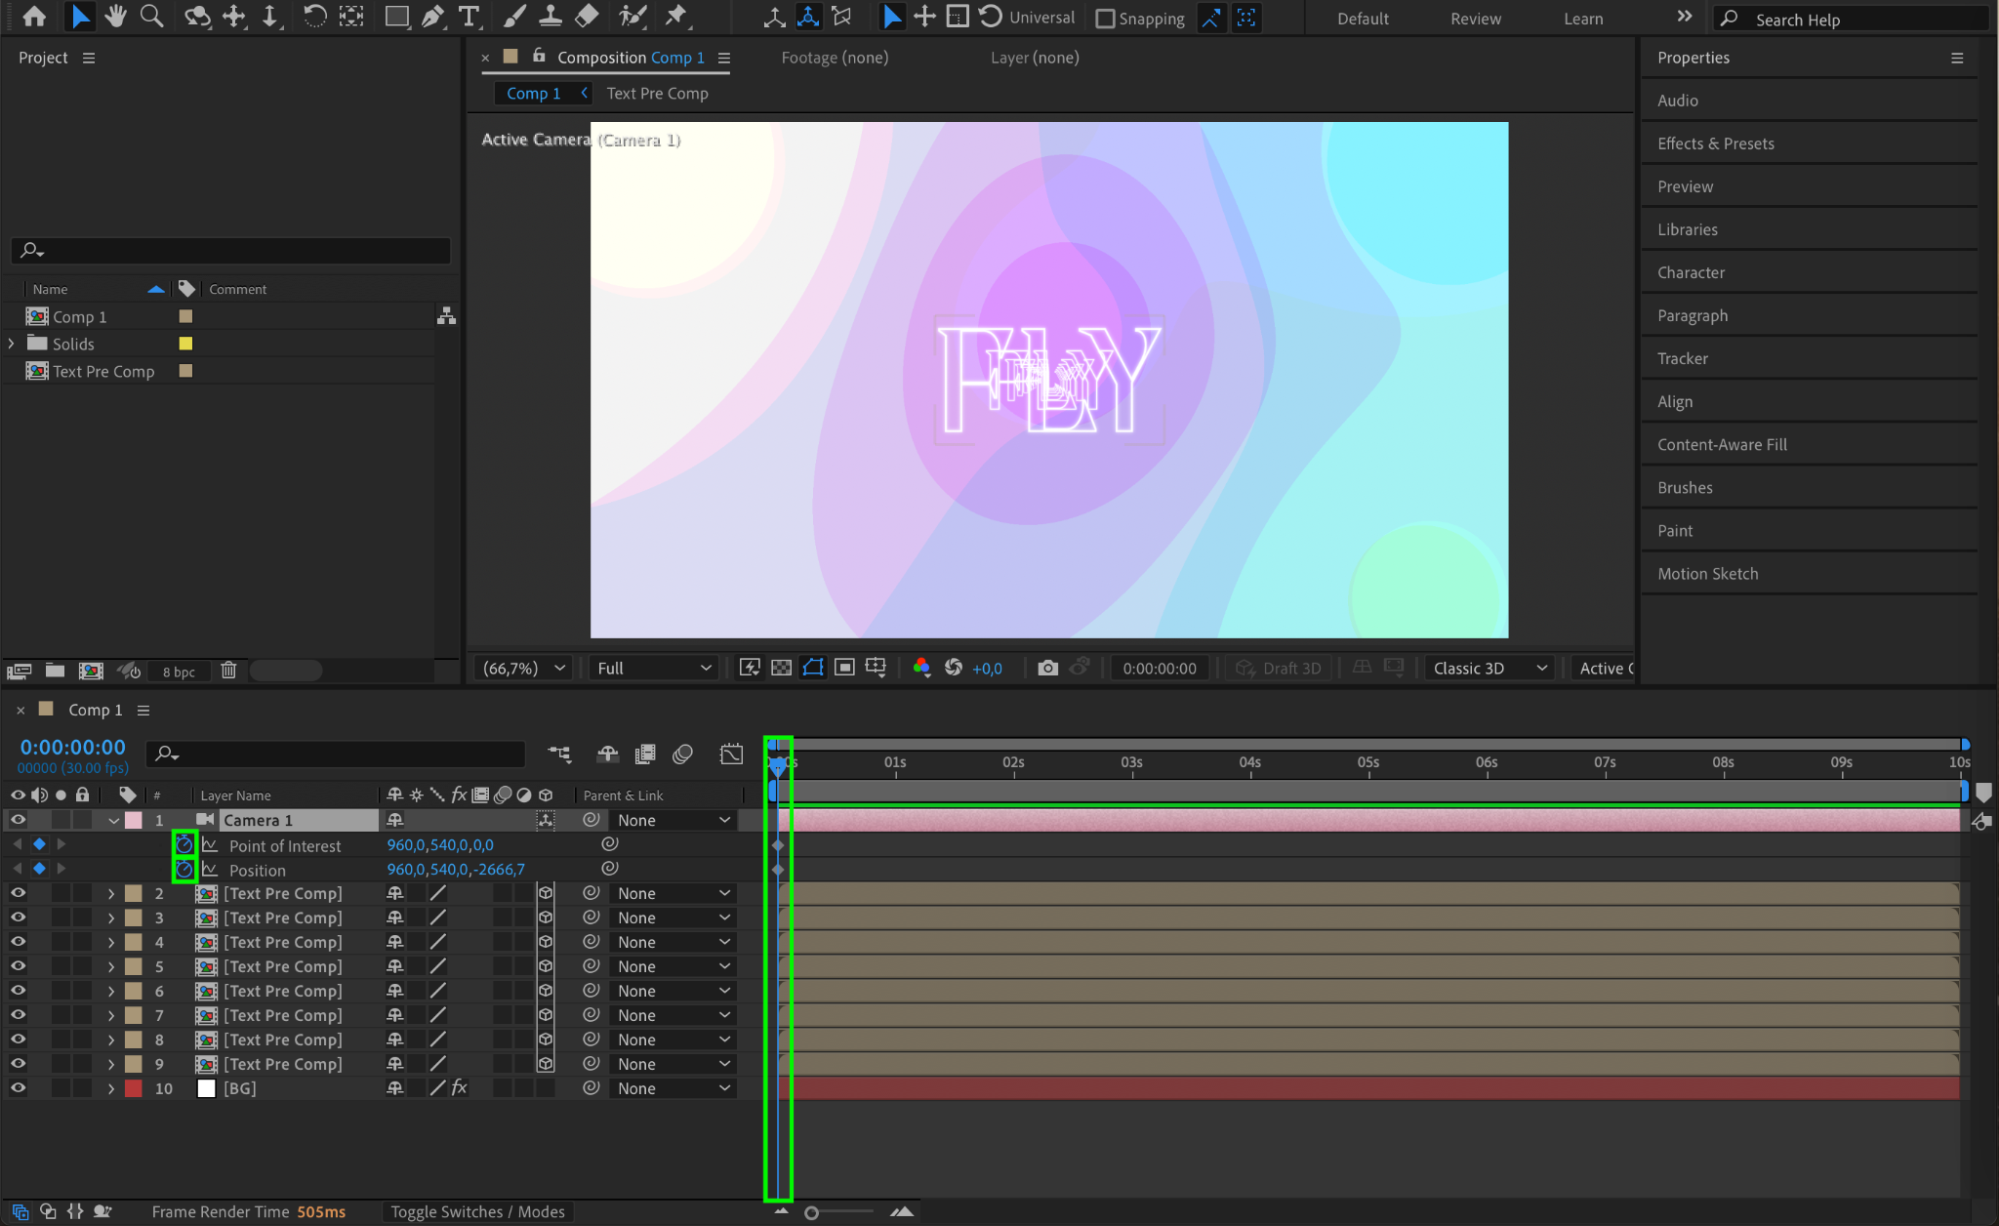
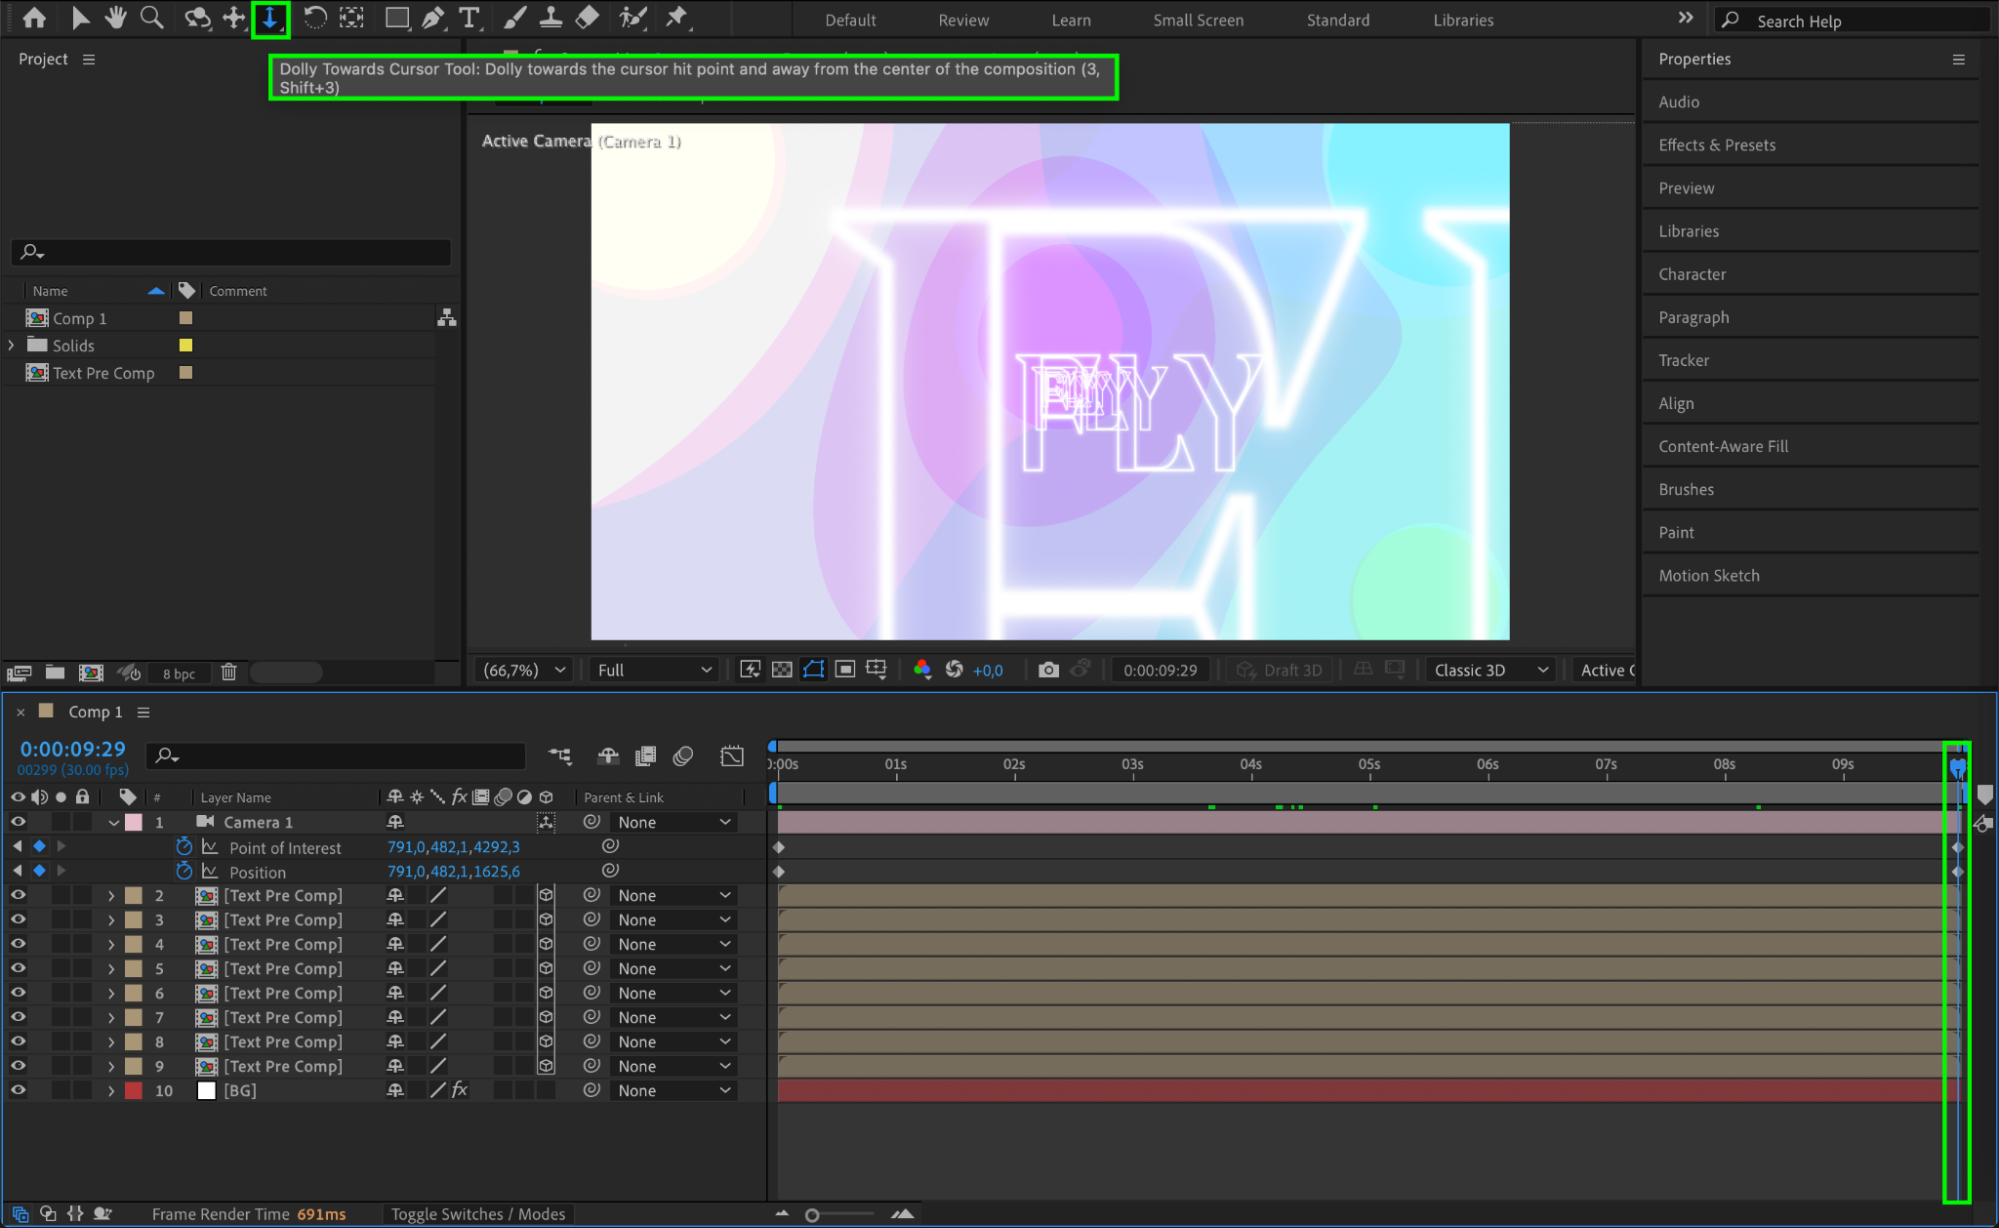
Step 7: Animate the Camera
Set the CTI (Current Time Indicator) at the beginning of the timeline. Open the camera’s Point of Interest and Position, and click the stopwatch to add keyframes. Then move the CTI to the end of the timeline and use the Dolly Towards Cursor Tool to move the camera forward through the Z-space, passing through all text layers.
 Step 8: Smooth the Animation
Select the camera keyframes and press F9 to apply Easy Ease. This smooths out the motion at the beginning and end for a more cinematic result.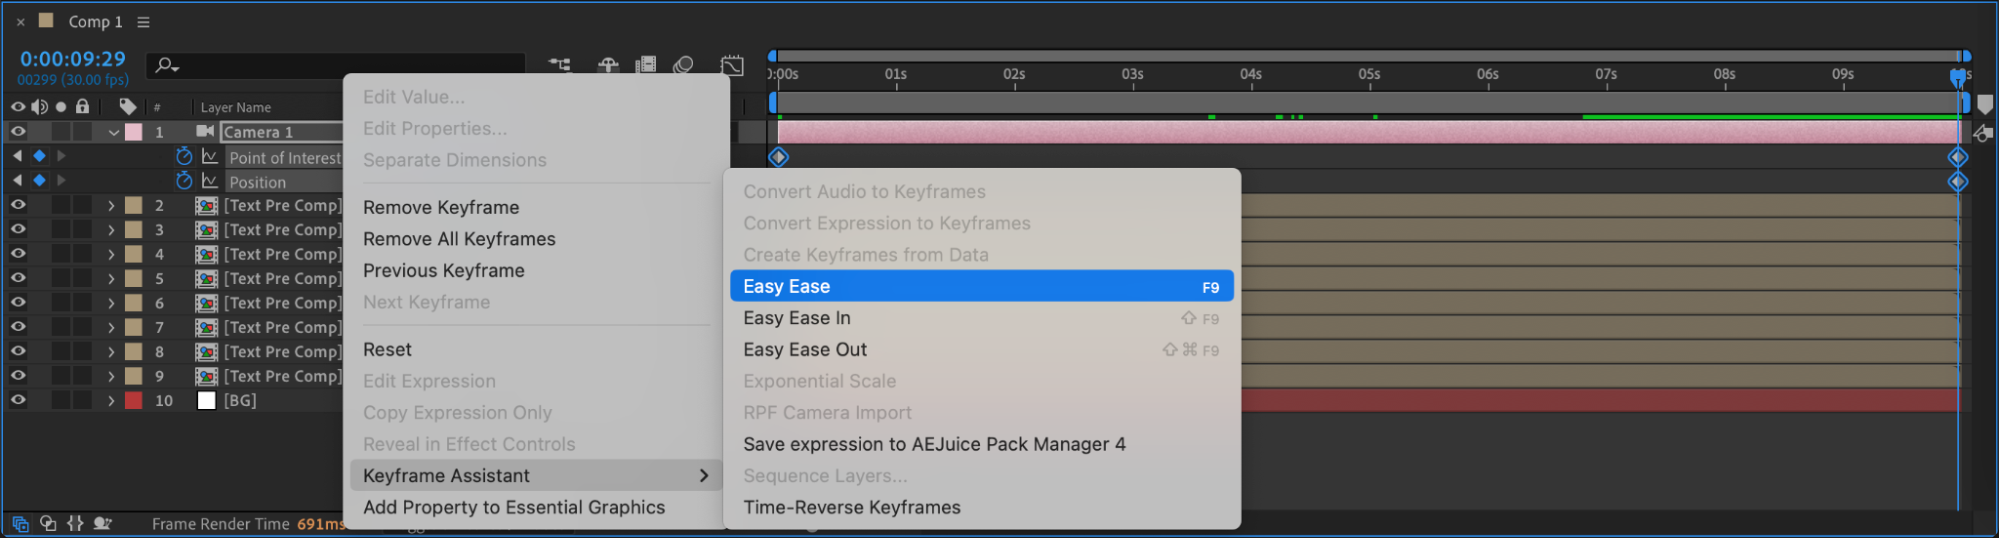 Step 9: Preview
Press Spacebar to preview your animation. You should see the camera flying through each of the 3D text layers. Adjust spacing, speed, and text content as needed.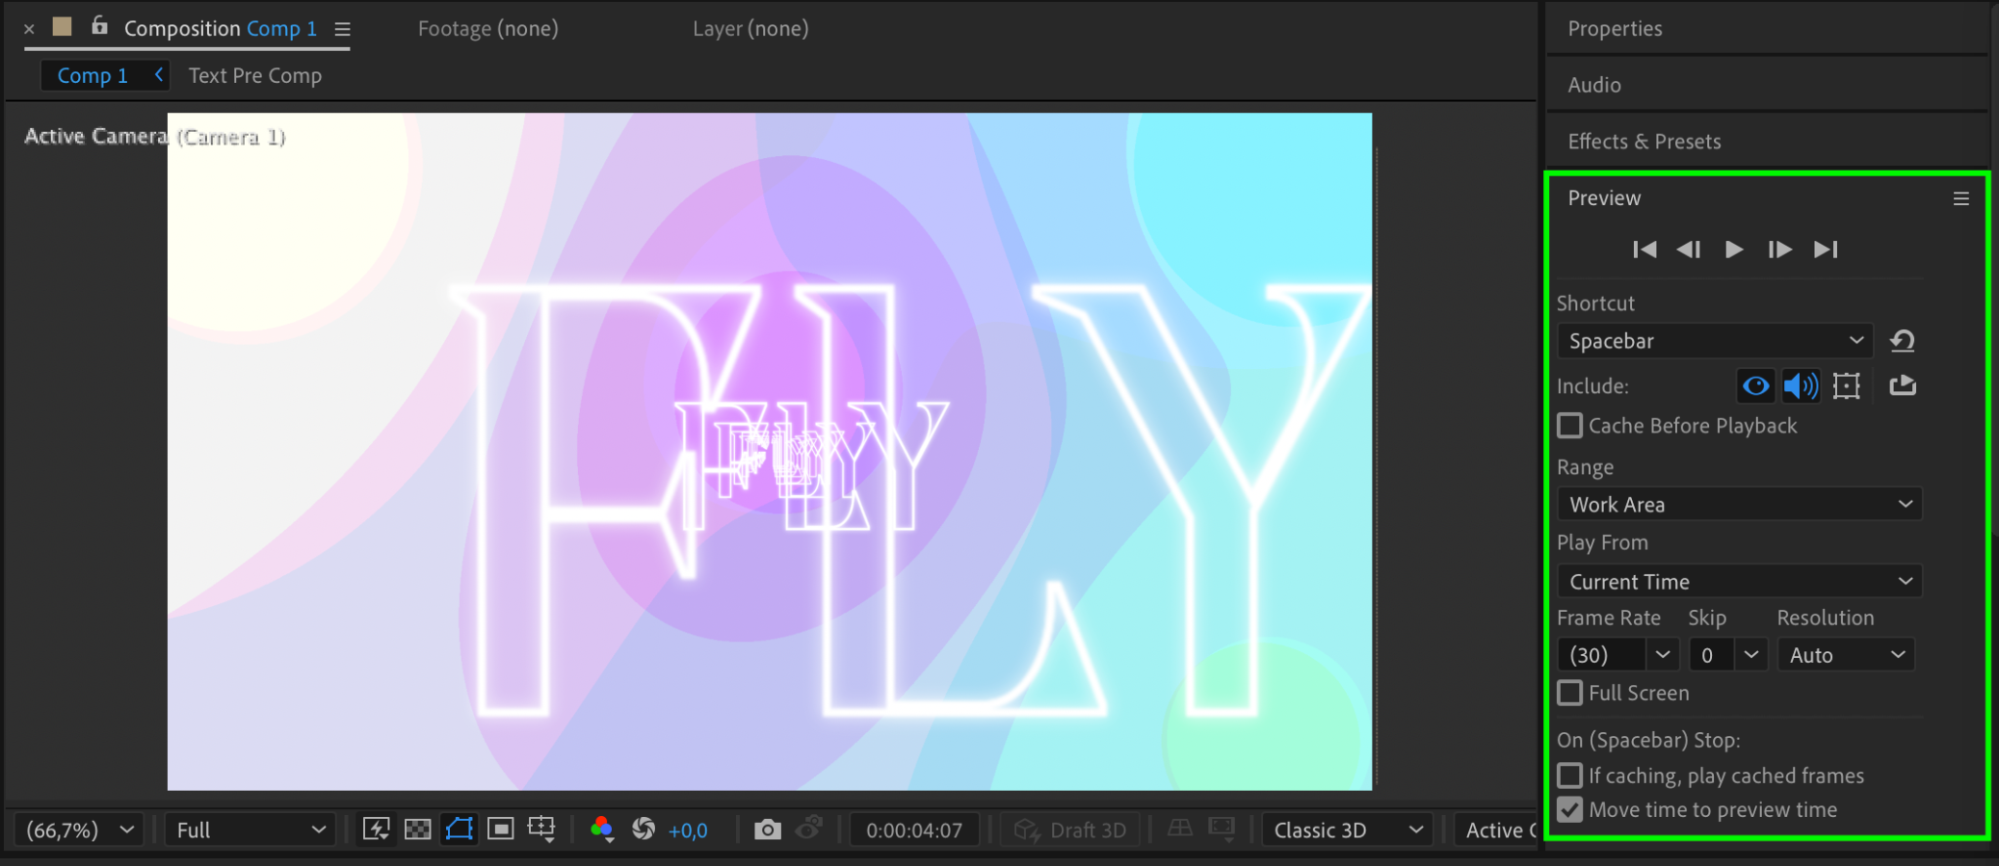
Conclusion
With a few simple steps, you can create an impressive flying text effect in After Effects using 3D layers and a camera. This technique adds depth and motion to your typography, making it ideal for dynamic intros or trailers. Experiment with different angles, fonts, and layer distances for unique results.
Our Bestsellers


