Drop Down Text Animation in After Effects
Introduction – Animate Text Falling Into Place with Style
This tutorial shows you how to create a stylish text drop-down animation in After Effects. With just a few keyframes and one distortion effect, you’ll make your text appear as if it falls from above and lands with a dynamic impact.
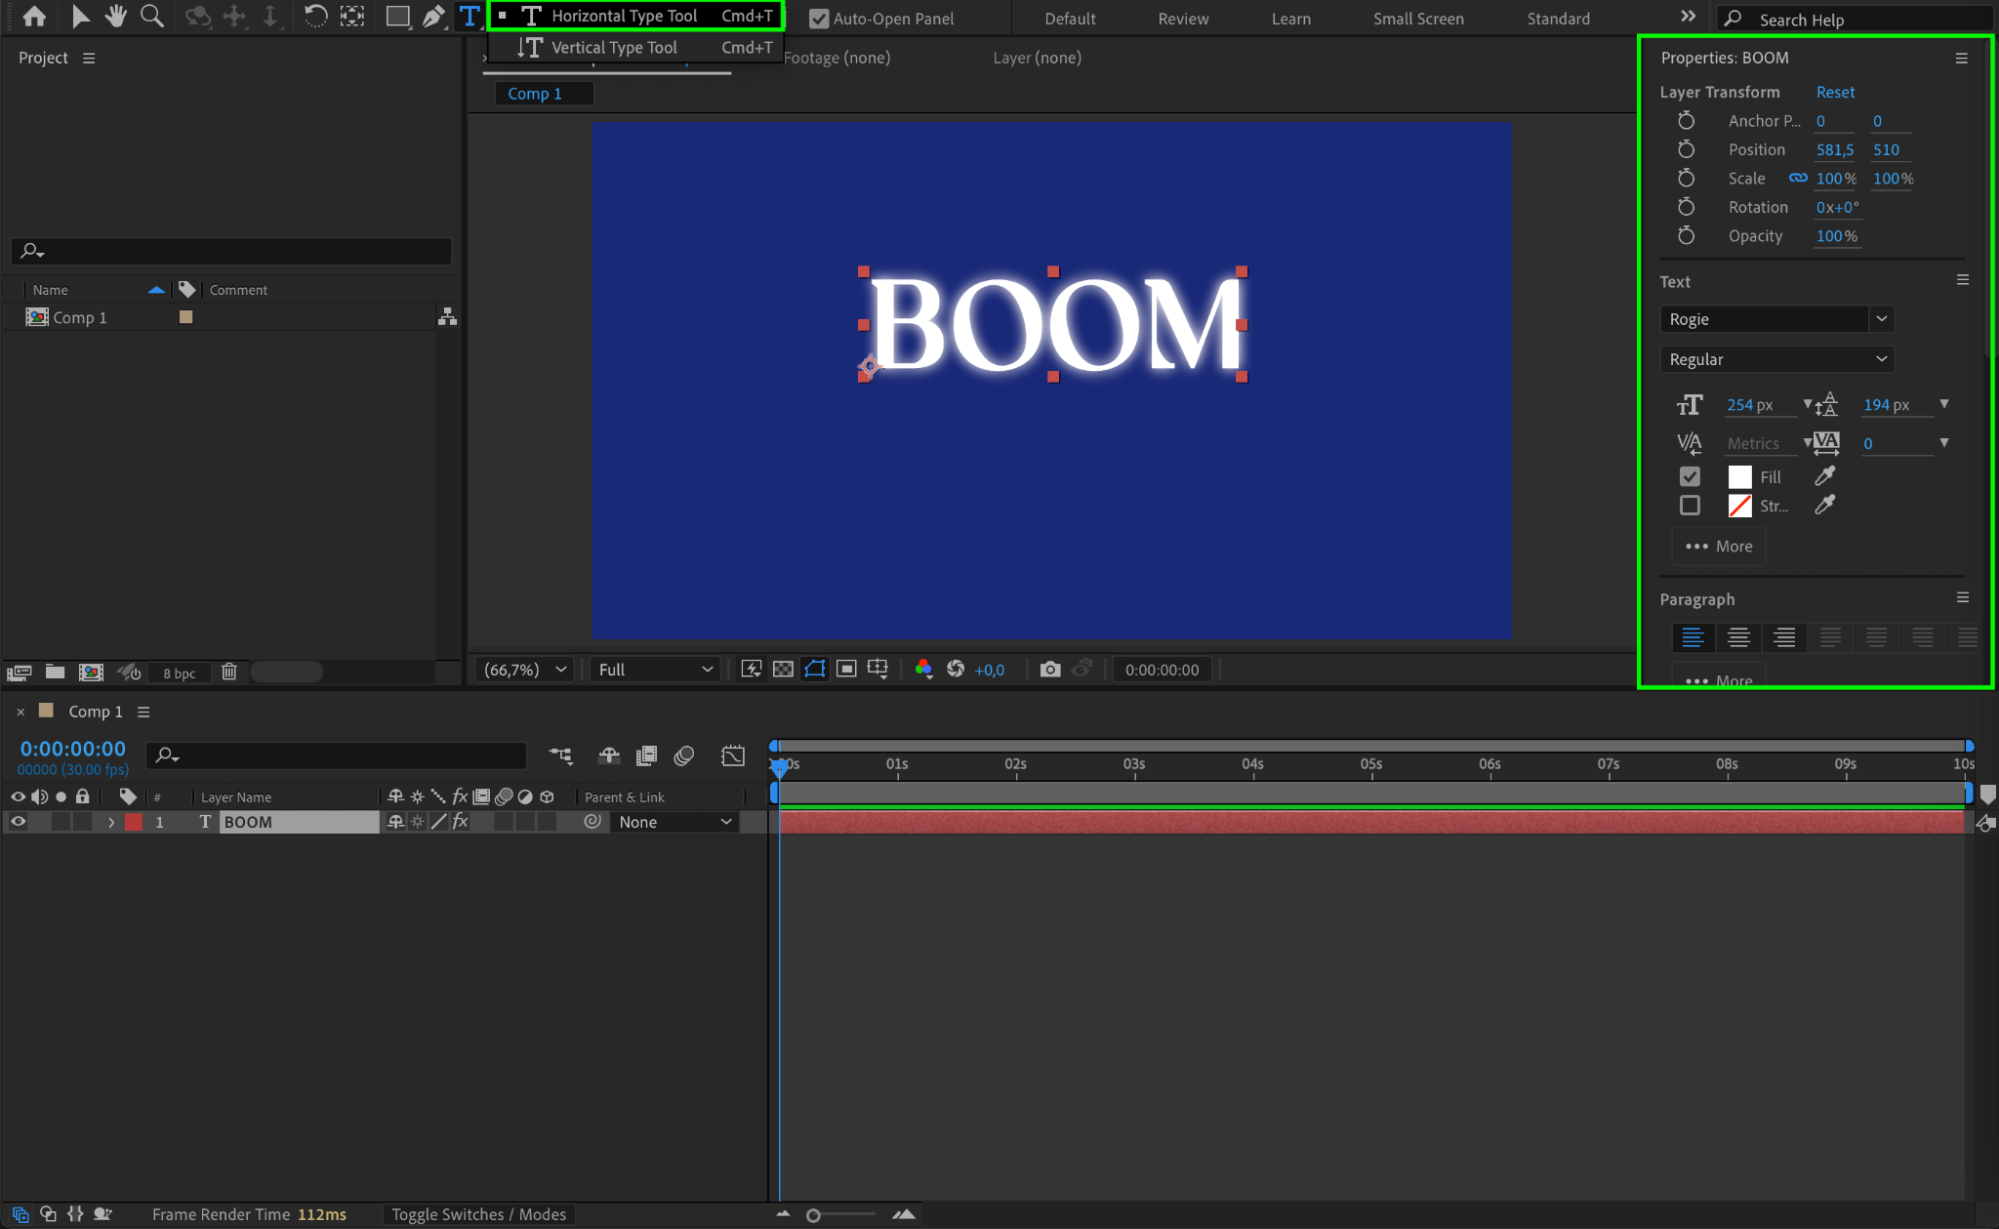
Step 1: Create Your Text
Open your After Effects project and use the Type Tool (Ctrl/Cmd + T) to create the text you want to animate. Choose your font and size in the Character panel and position the text where you want it to land.
 Step 2: Center the Anchor Point
Right-click on the text layer and choose Transform > Center Anchor Point in Layer Content. This step is important for making the rotation and position animations behave naturally around the center of the text.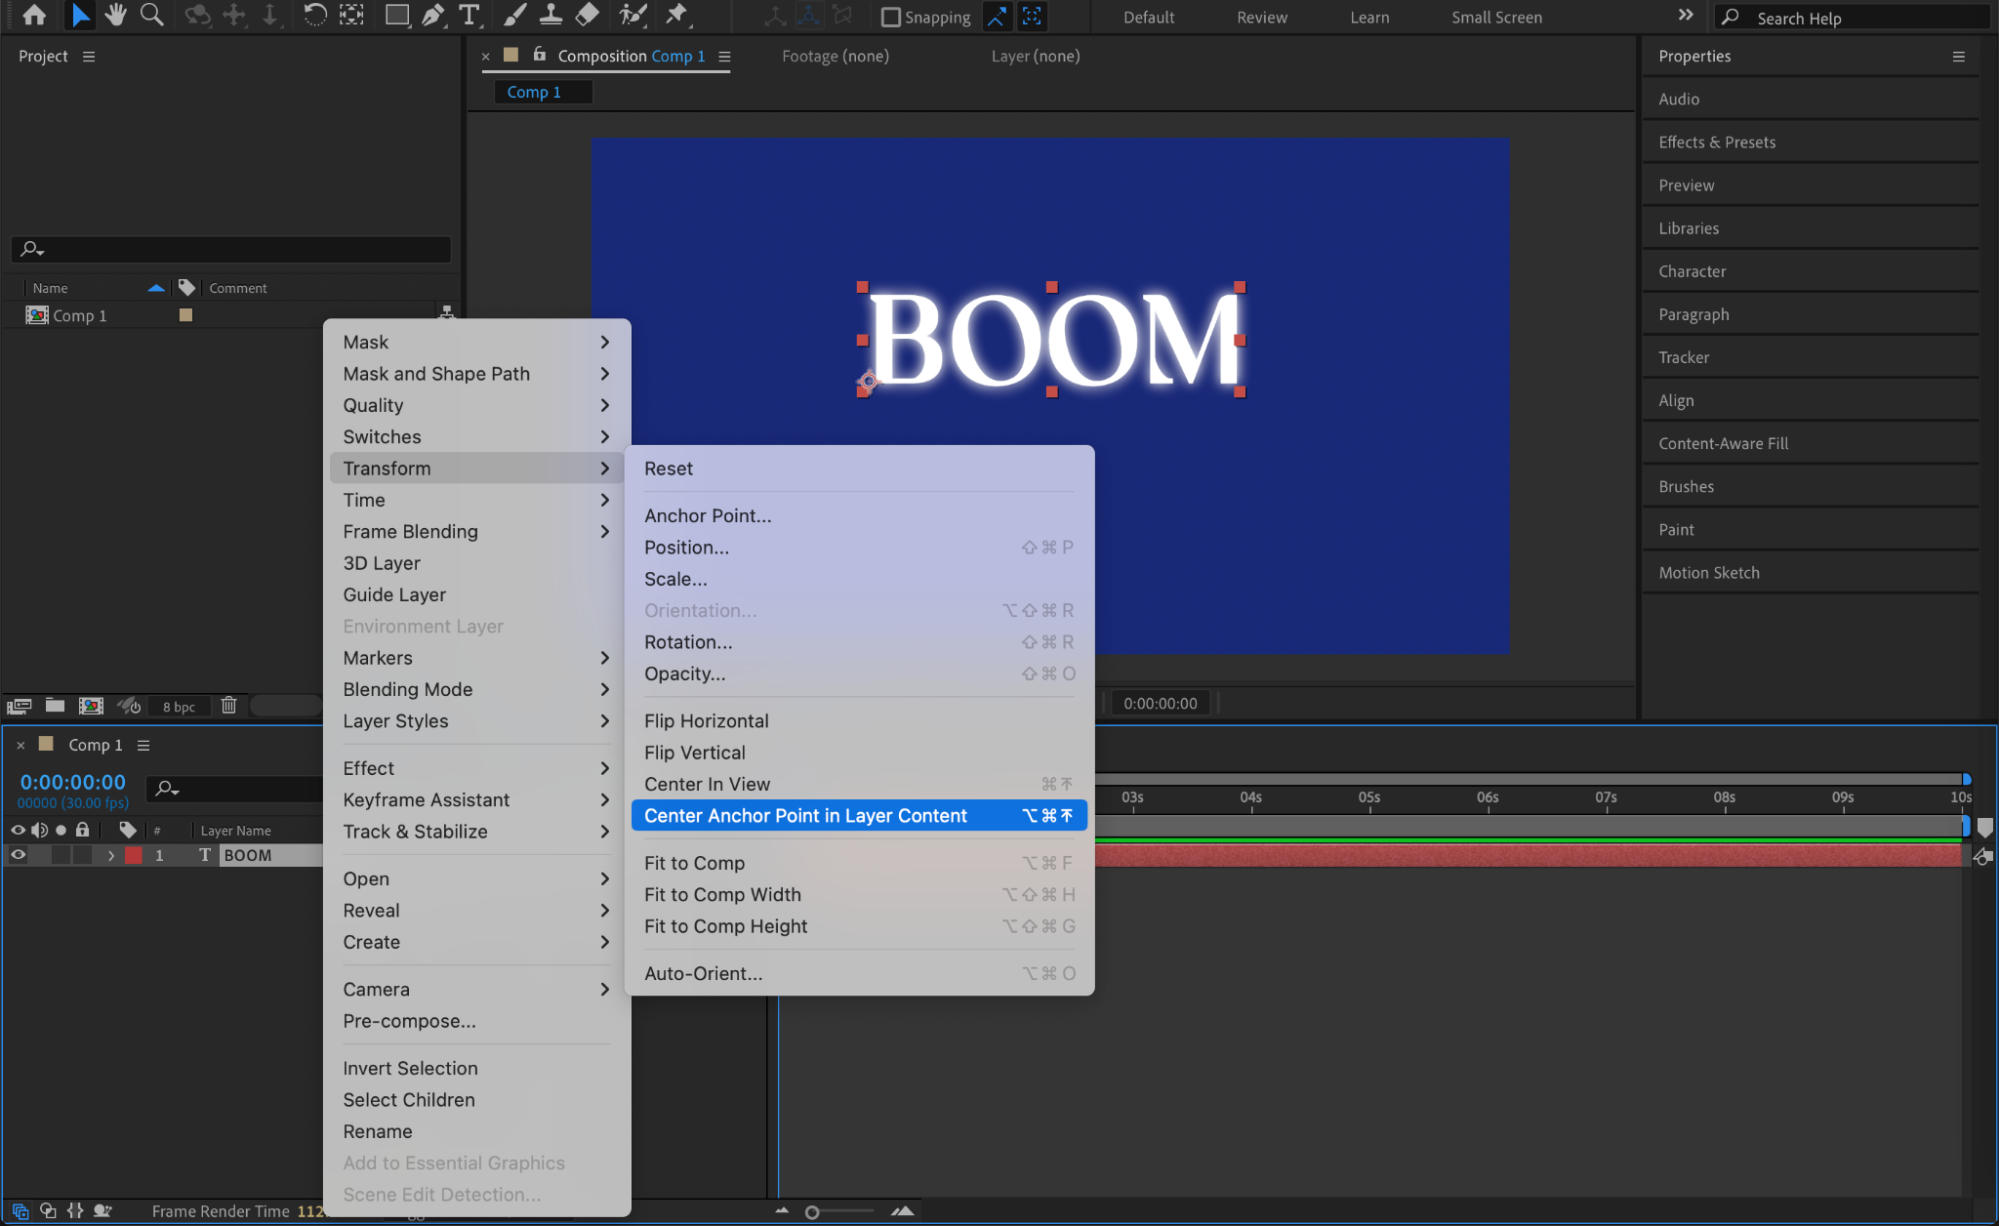
Get 10% off when you subscribe to our newsletter

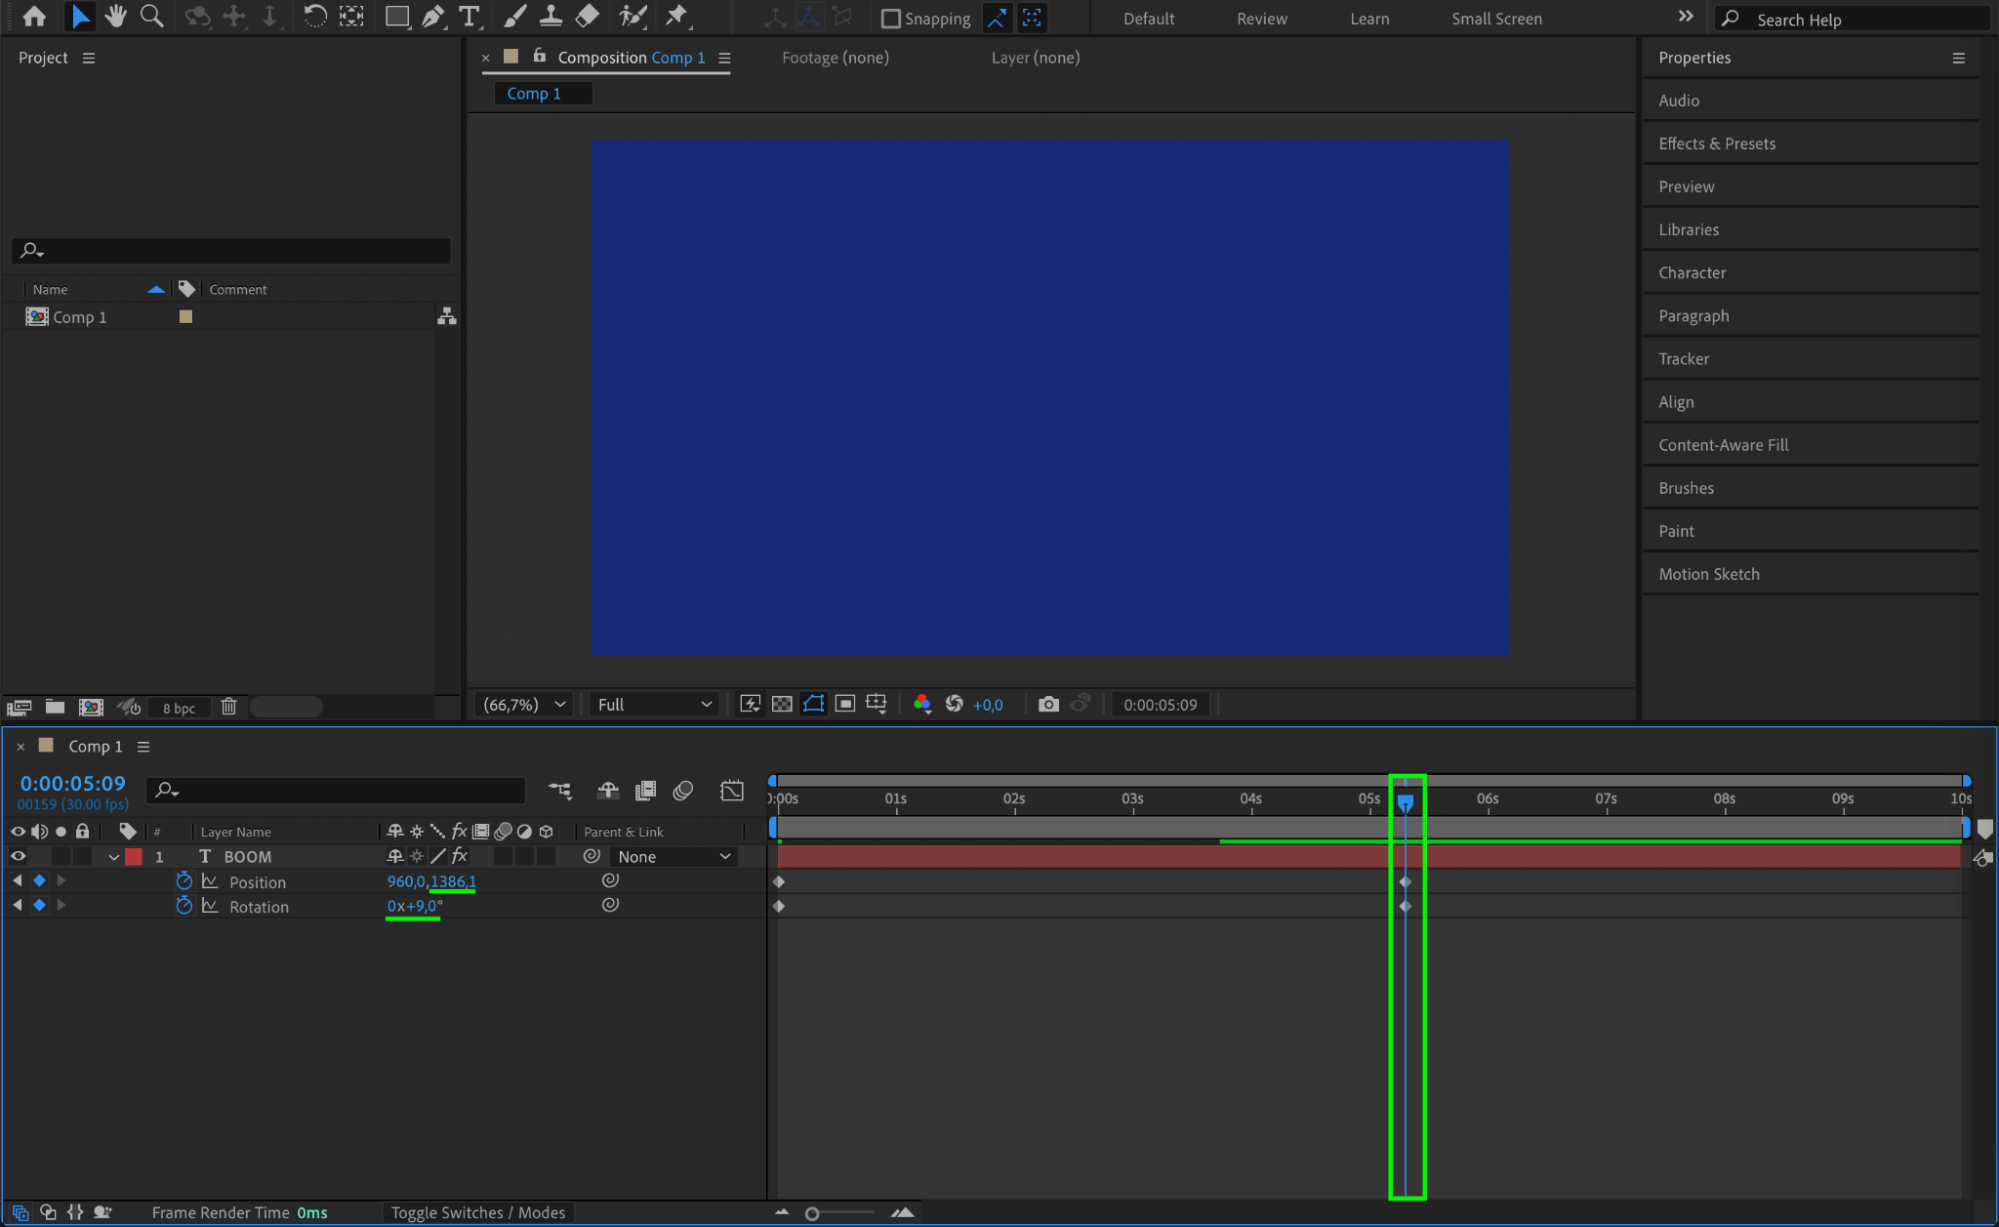
Step 3: Animate Position and Rotation
Move the CTI (Current Time Indicator) to the start of the timeline. Press “P” and “R” to reveal Position and Rotation properties, and click the stopwatches to create keyframes. Move the CTI to the middle of the comp. Change the Y value of the Position (e.g., 1300) to bring the text from above the screen, and set the Rotation to about 9° to add a slight tilt.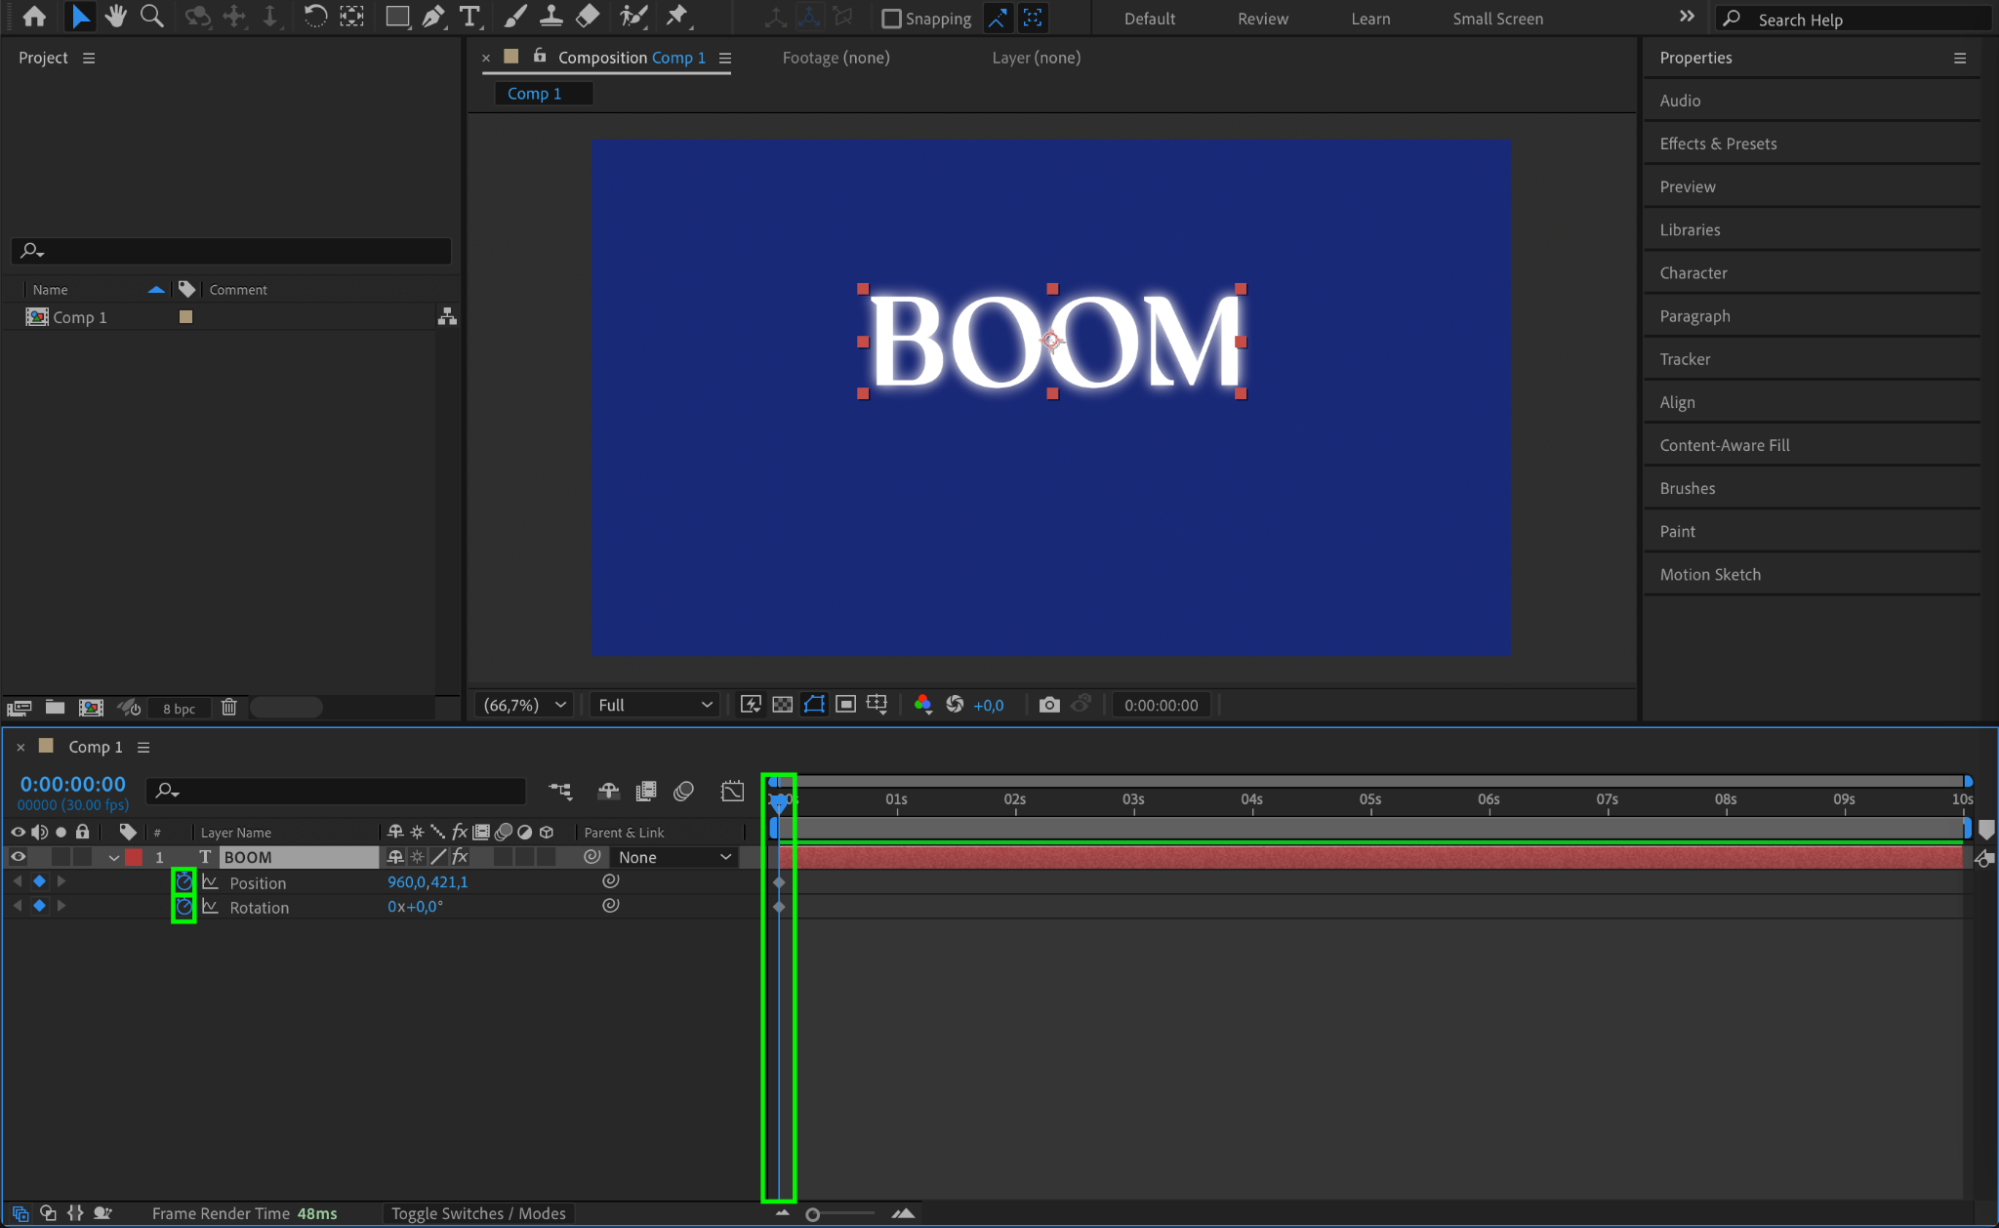
 Step 4: Smooth the Animation with Easy Ease
Select all keyframes for Position and Rotation. Right-click and choose Keyframe Assistant > Easy Ease, or press F9. 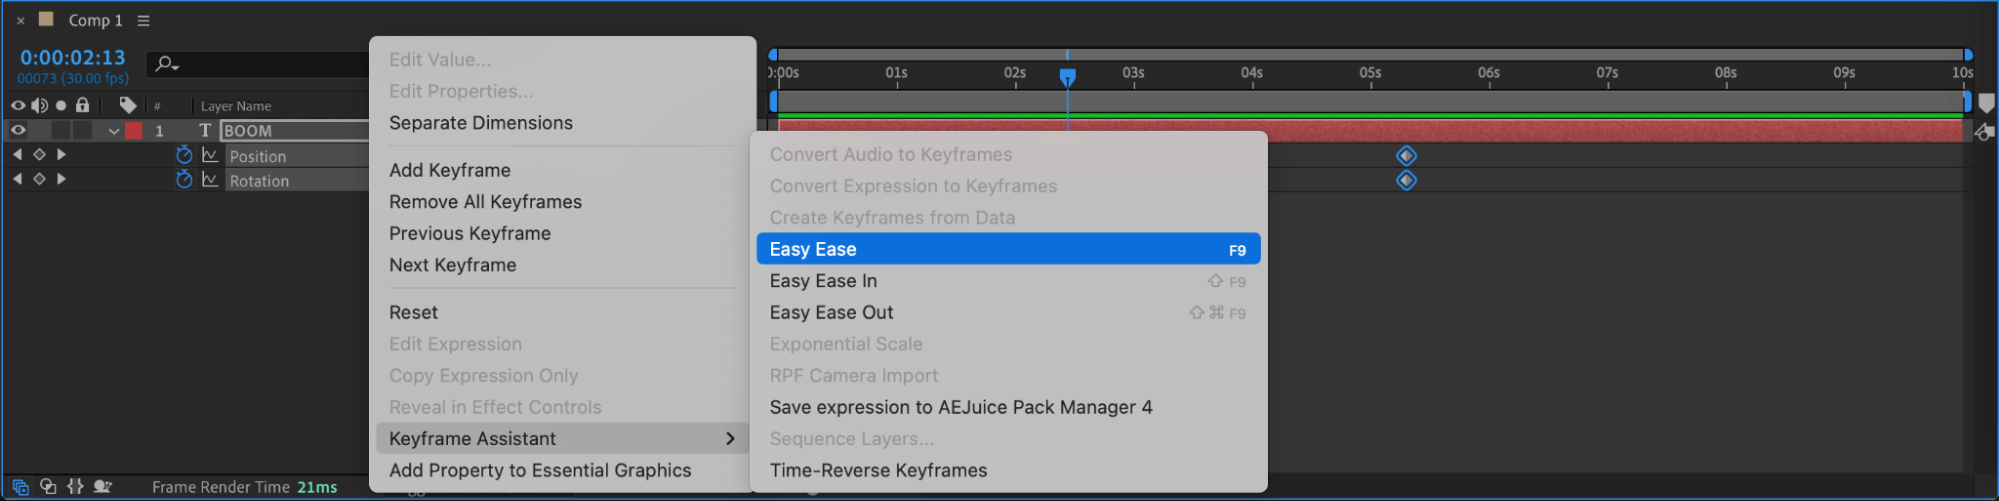
Step 5: Enable Motion Blur
Click the Motion Blur switch for the text layer and also enable Motion Blur in the timeline panel. This adds natural-looking blur as the text moves quickly into the frame.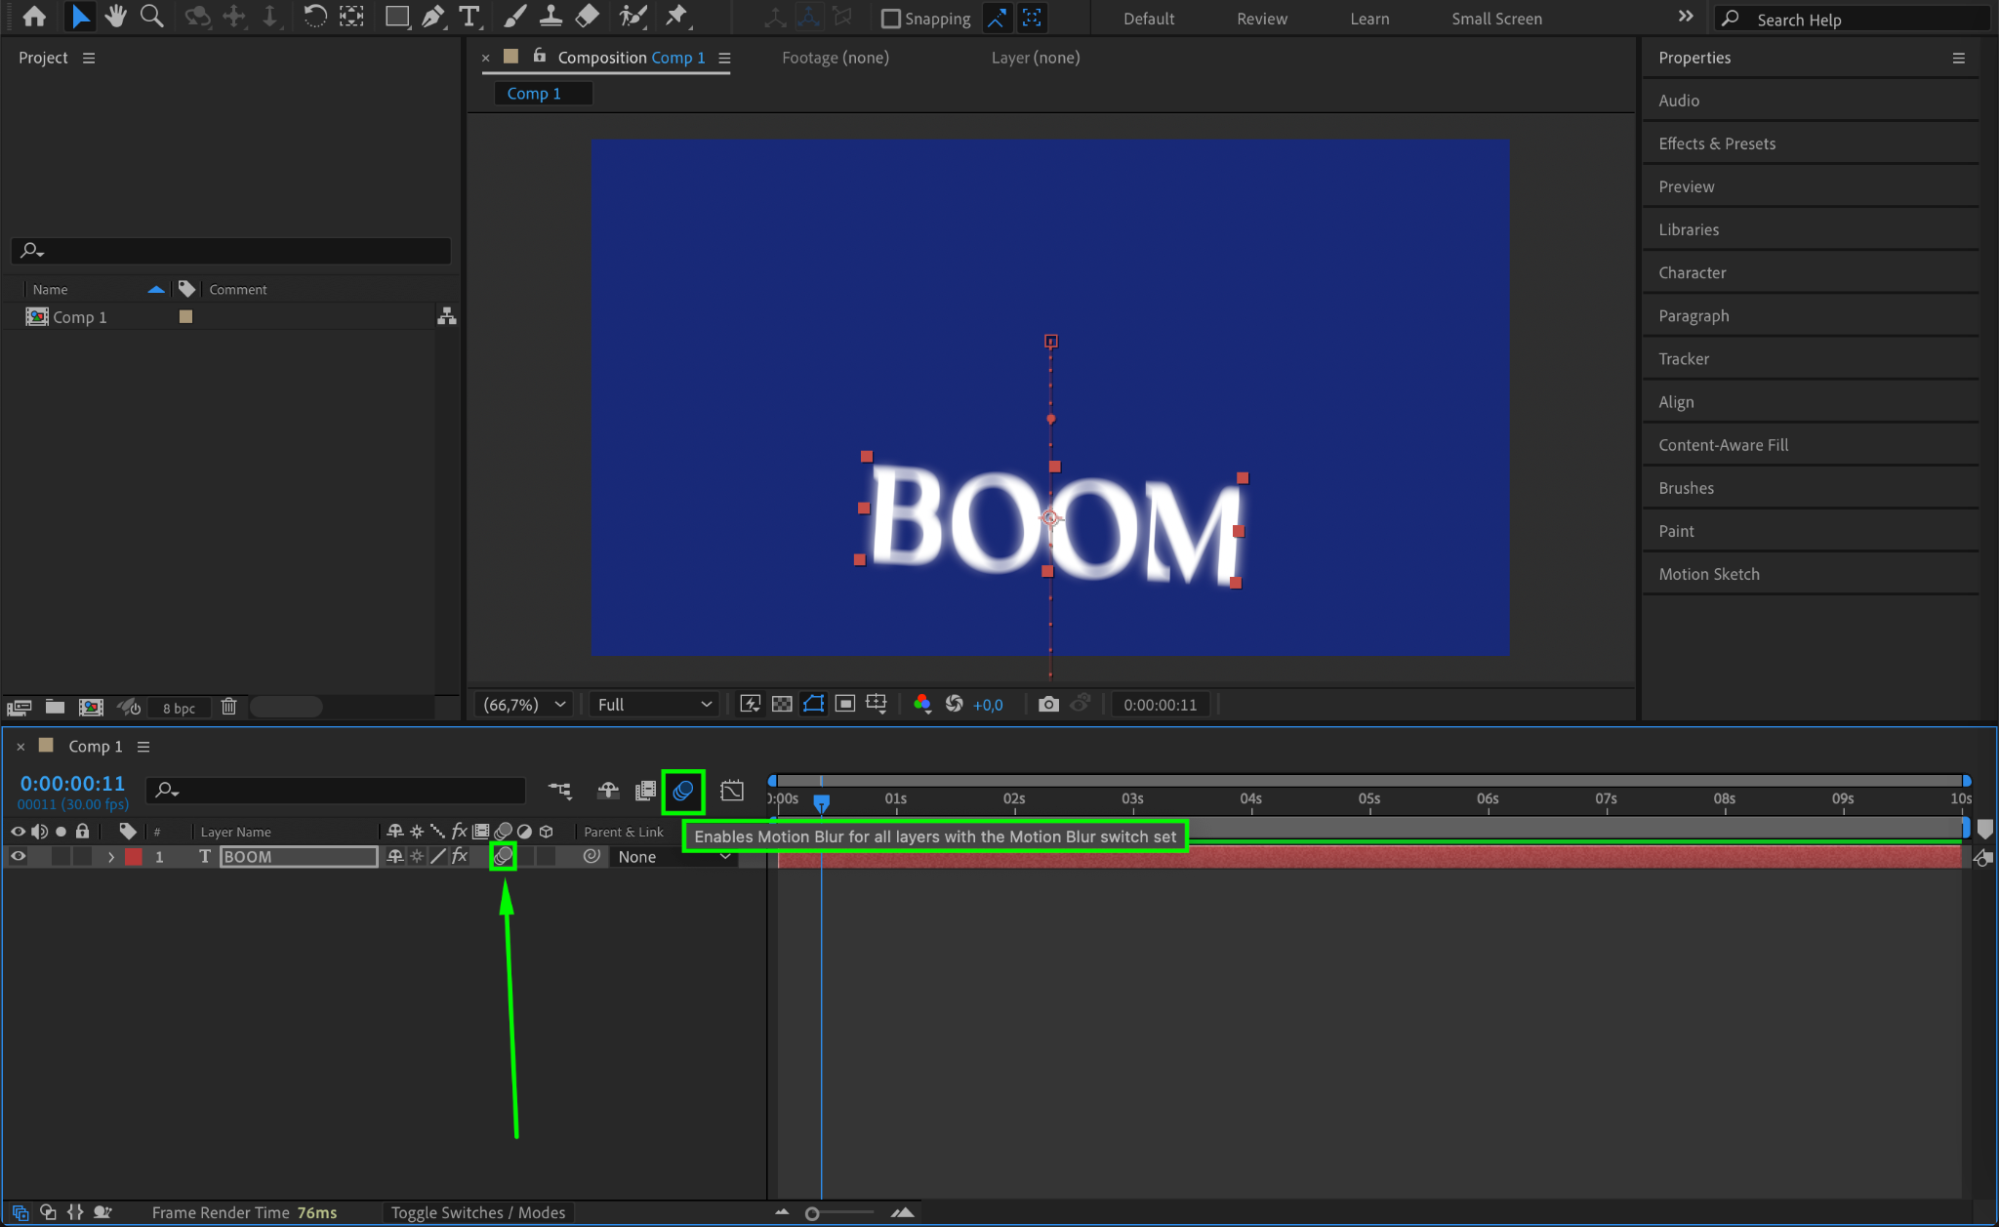 Step 6: Create an Adjustment Laye
Go to Layer > New > Adjustment Layer. This layer will be used to apply a distortion effect that enhances the impact as the text lands.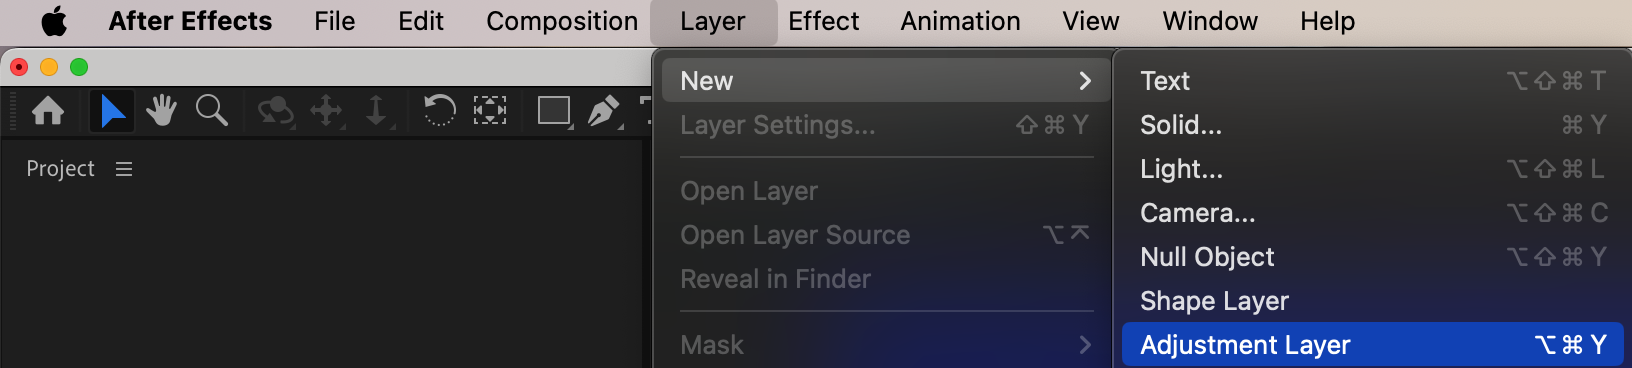 Step 7: Add Turbulent Displace Effect
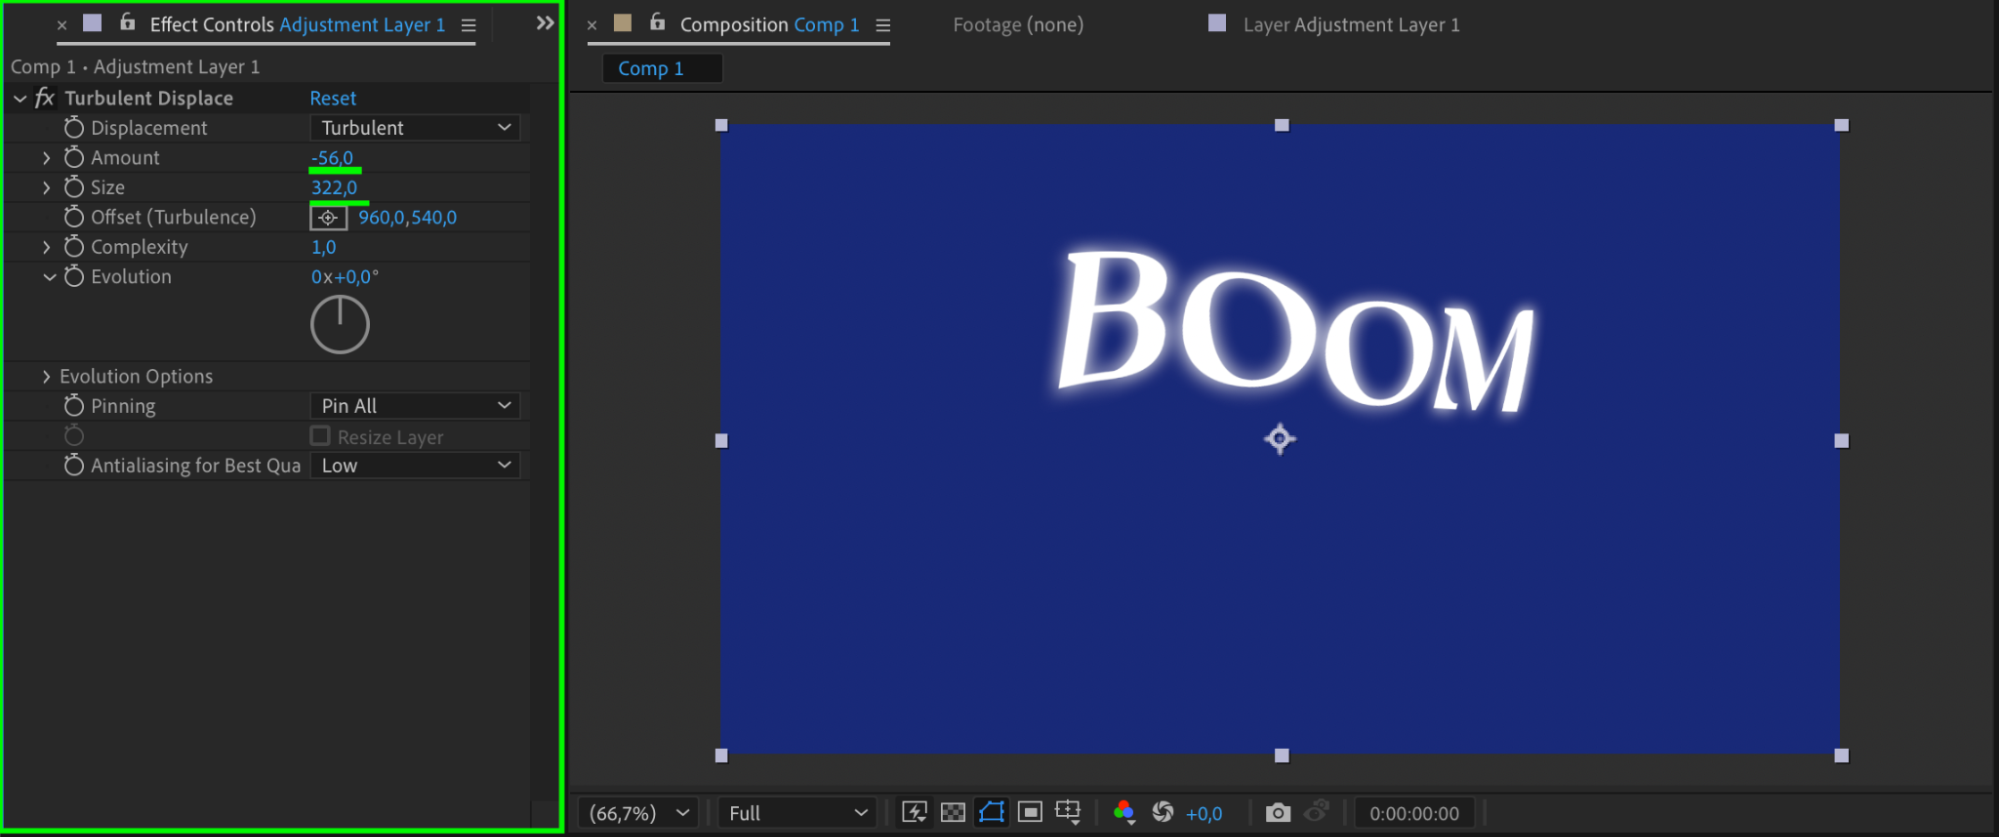
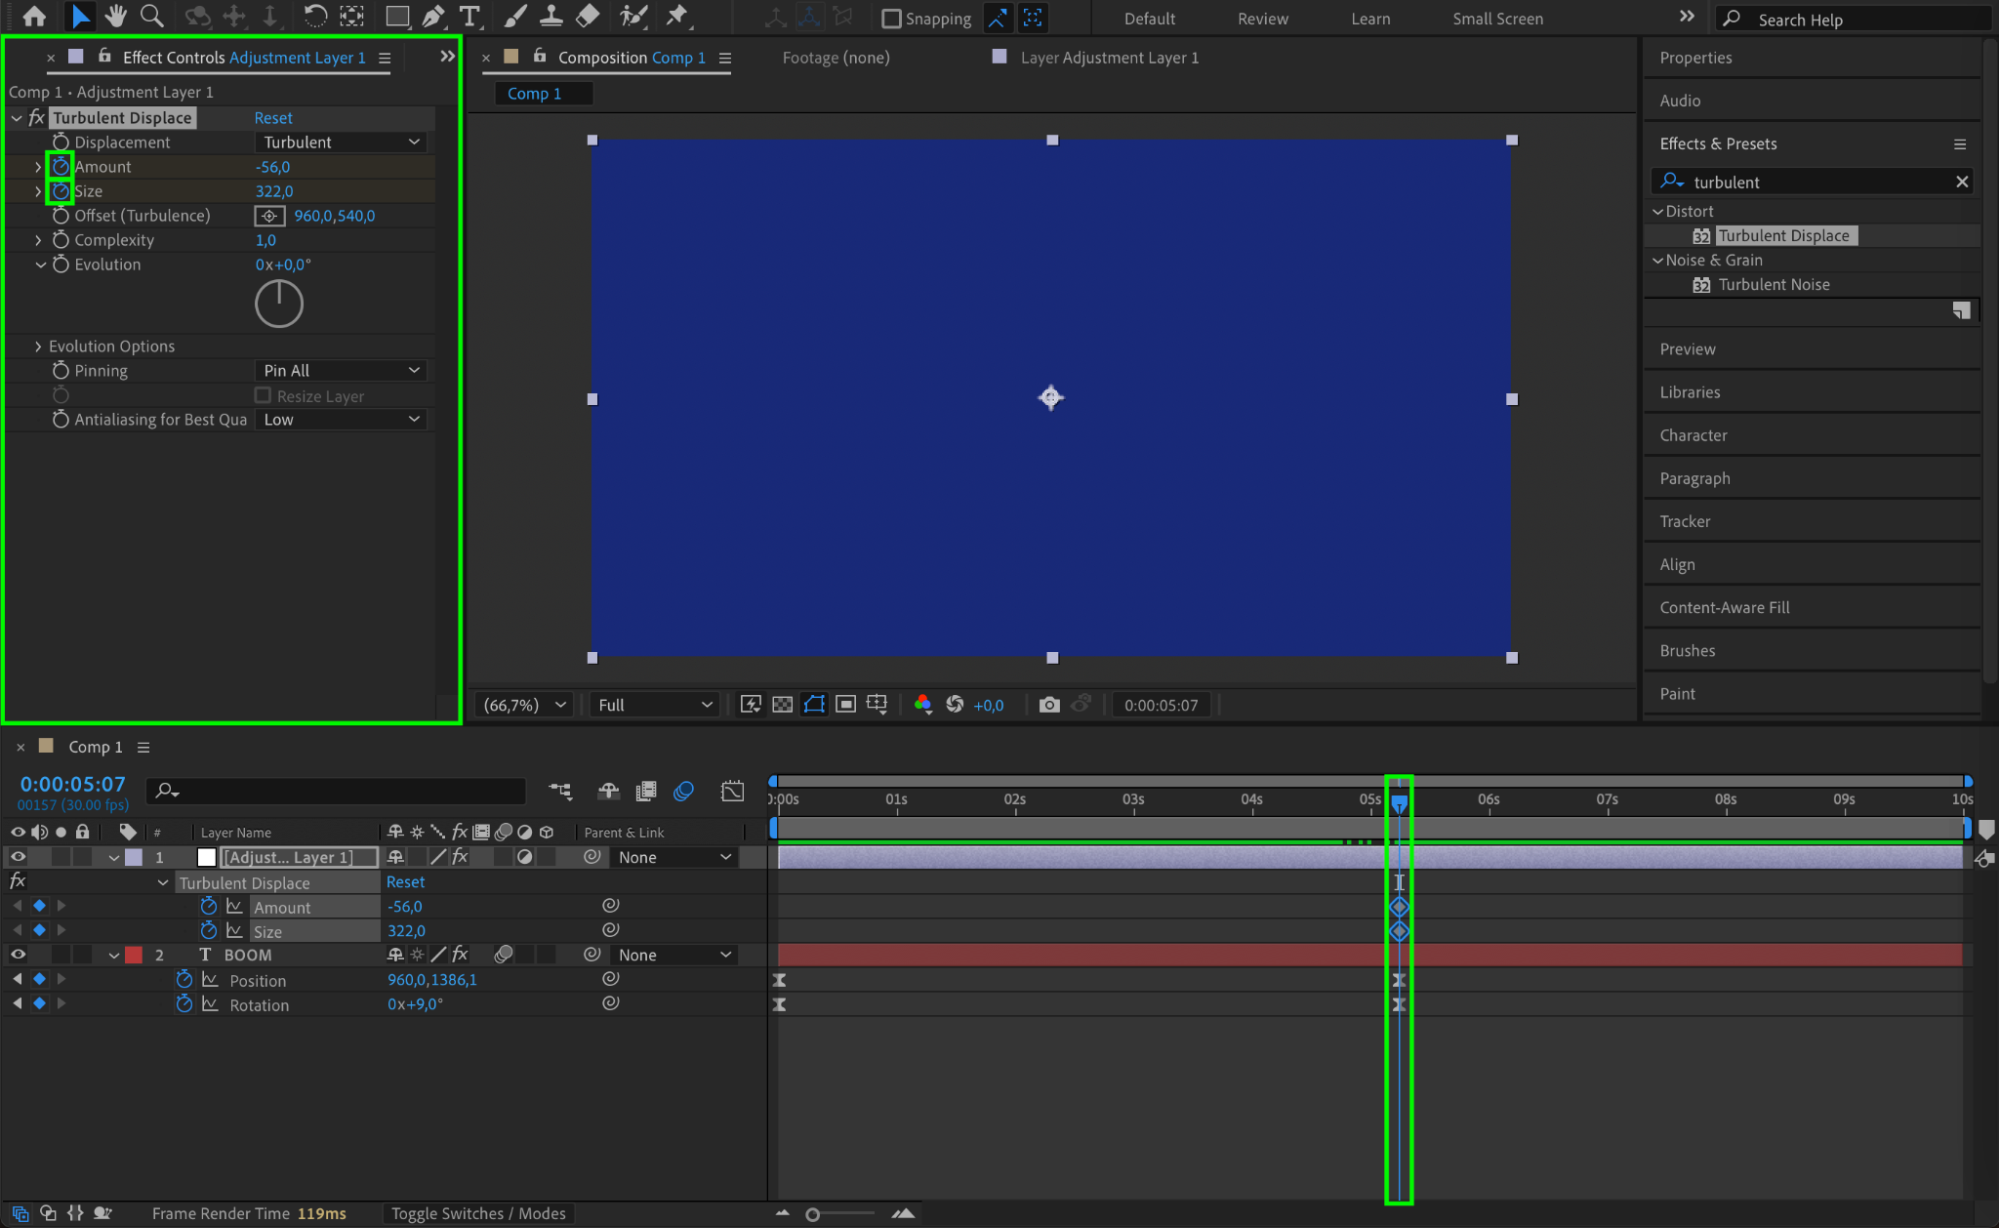
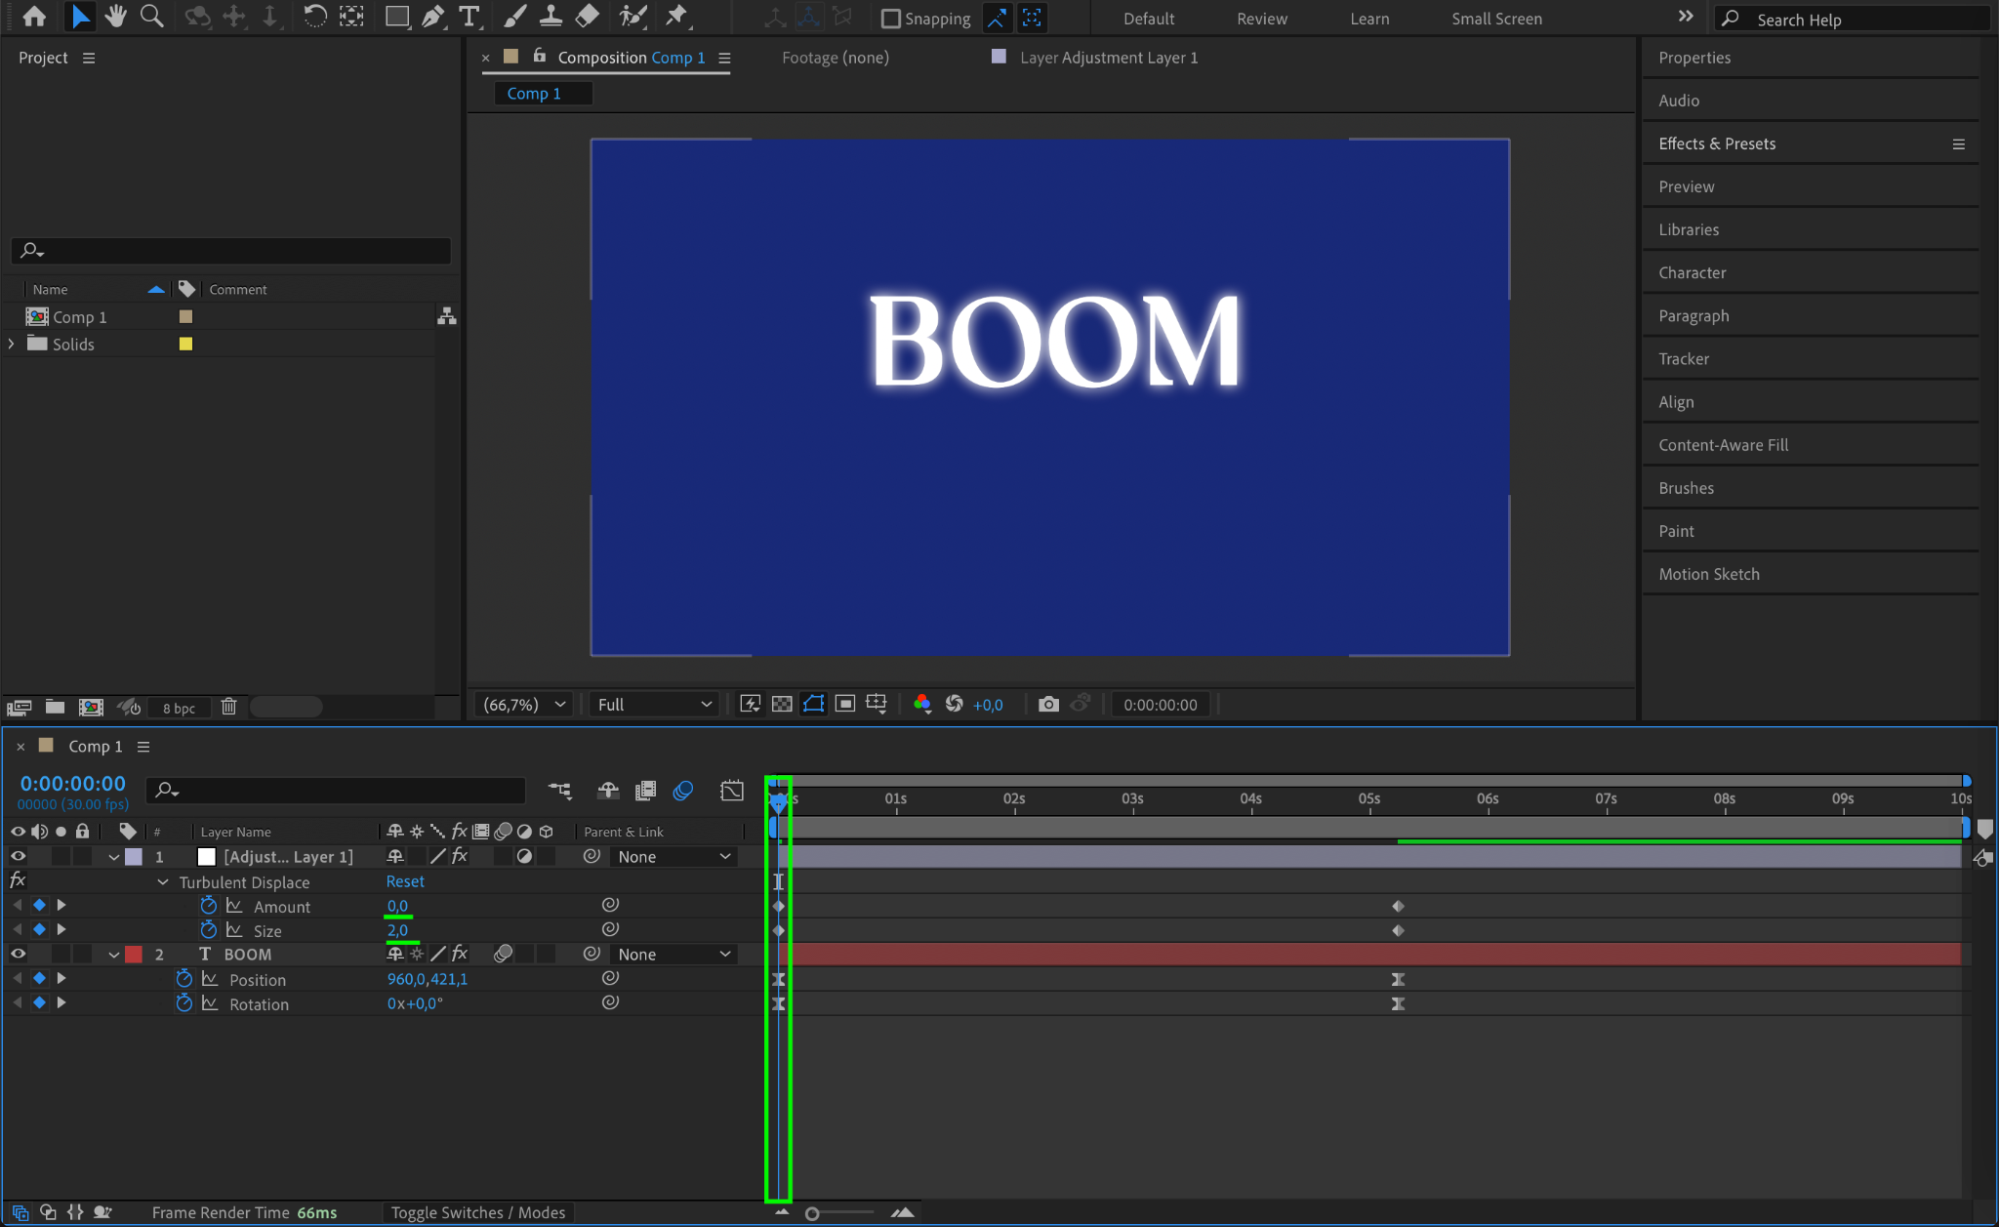
Select the Adjustment Layer and add the Turbulent Displace effect from the Effects & Presets panel. Set the Amount to -56 and Size to 322 at the midpoint of the comp. Then animate both properties by setting them to 0 and 2 at the beginning of the timeline. This makes the screen distort slightly when the text drops in.
 Step 8: Preview the Animation
Press the Spacebar to preview your animation. The text should fall from above with a slight tilt, land with a smooth ease, and cause a subtle screen shake or ripple effect using Turbulent Displace.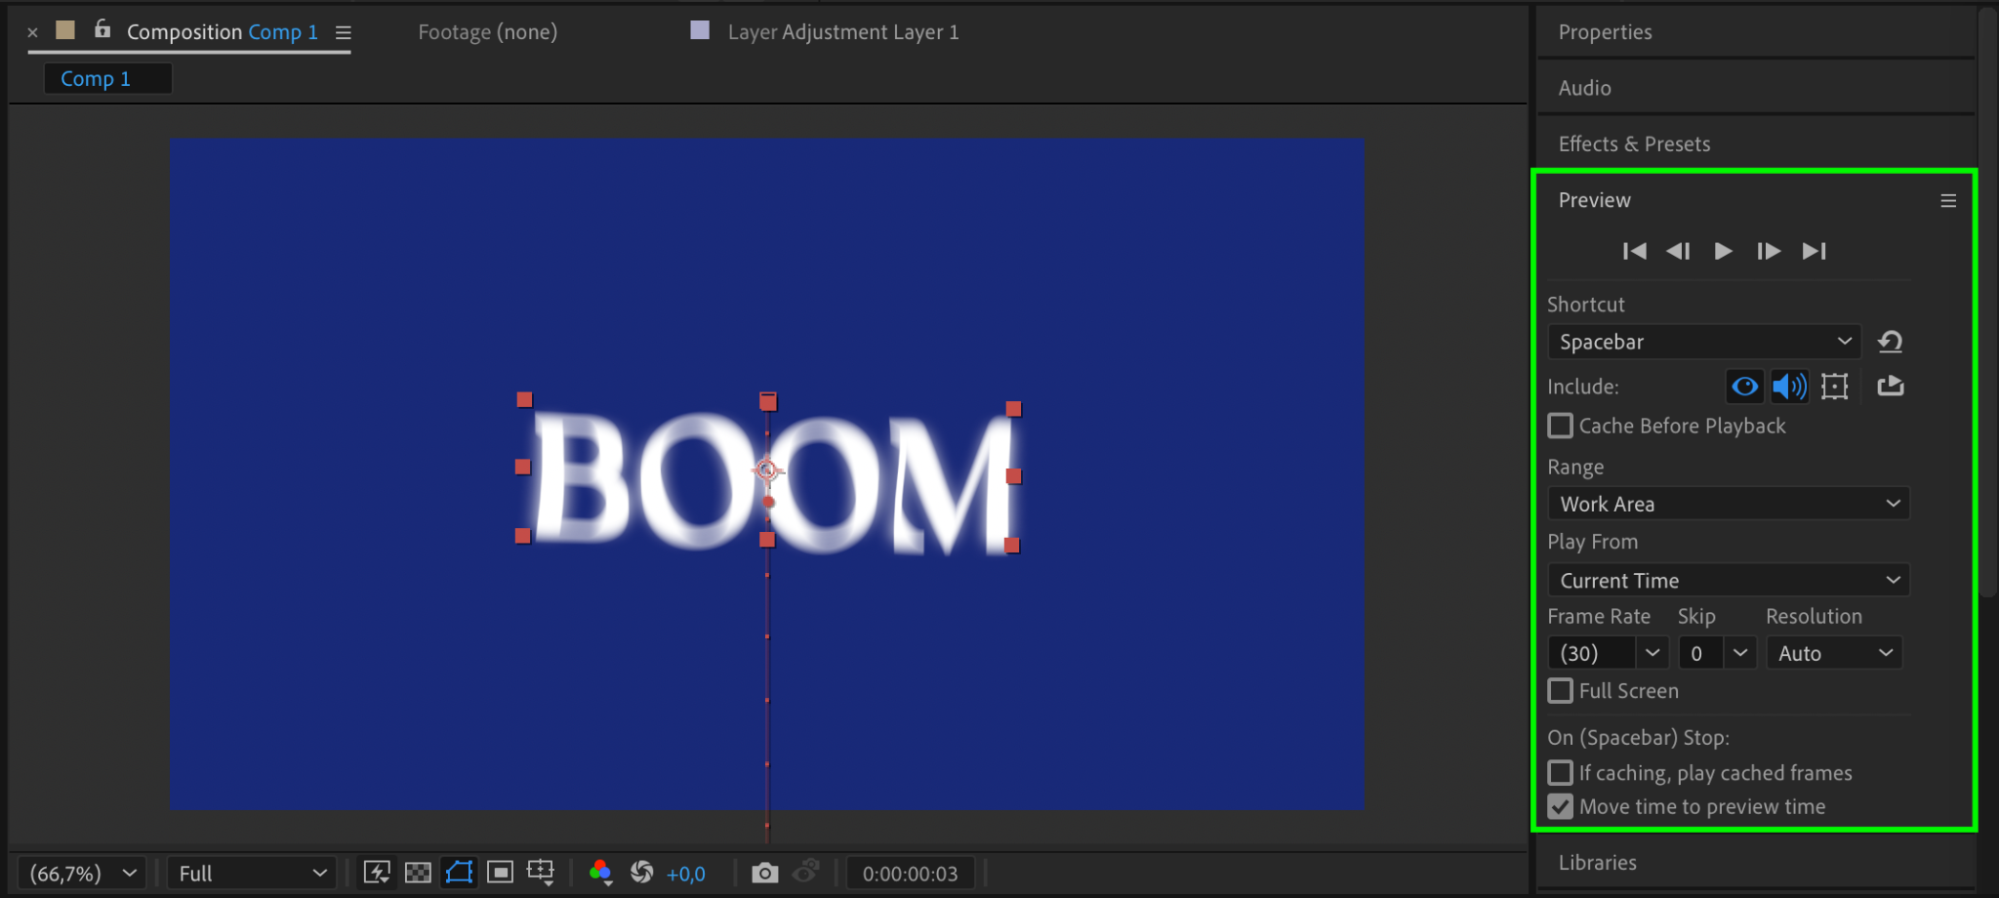
Conclusion
With just a few simple steps, you’ve created a dynamic text drop-down animation that adds energy and visual interest to your project. Use this technique for titles, intros, or transitions to make your motion design stand out.
Our Bestsellers


