How to Animate Multiple Transitions Between Clips in After Effects
Introduction
When you work with several video clips in Adobe After Effects, adding smooth transitions between them can make your project look more professional. You can animate each clip to move in and out, apply fade-outs, and enhance motion with easing and blur. In this tutorial, you’ll learn how to set up a sequence of clips with simple, custom transitions.
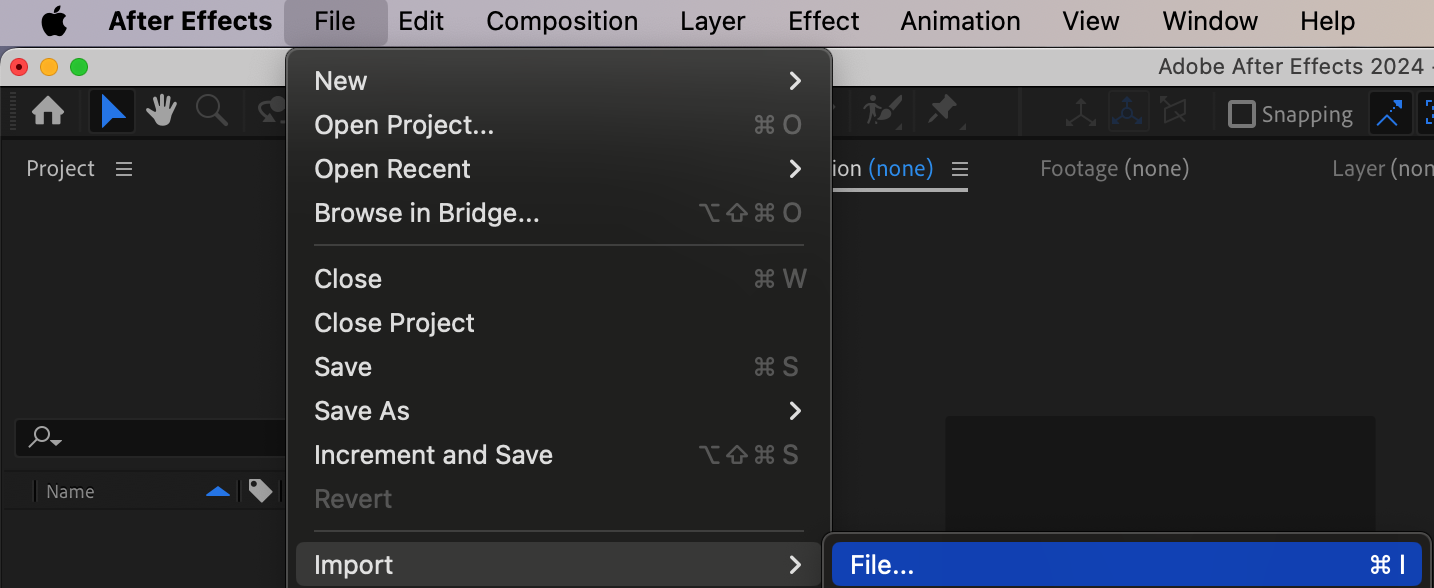
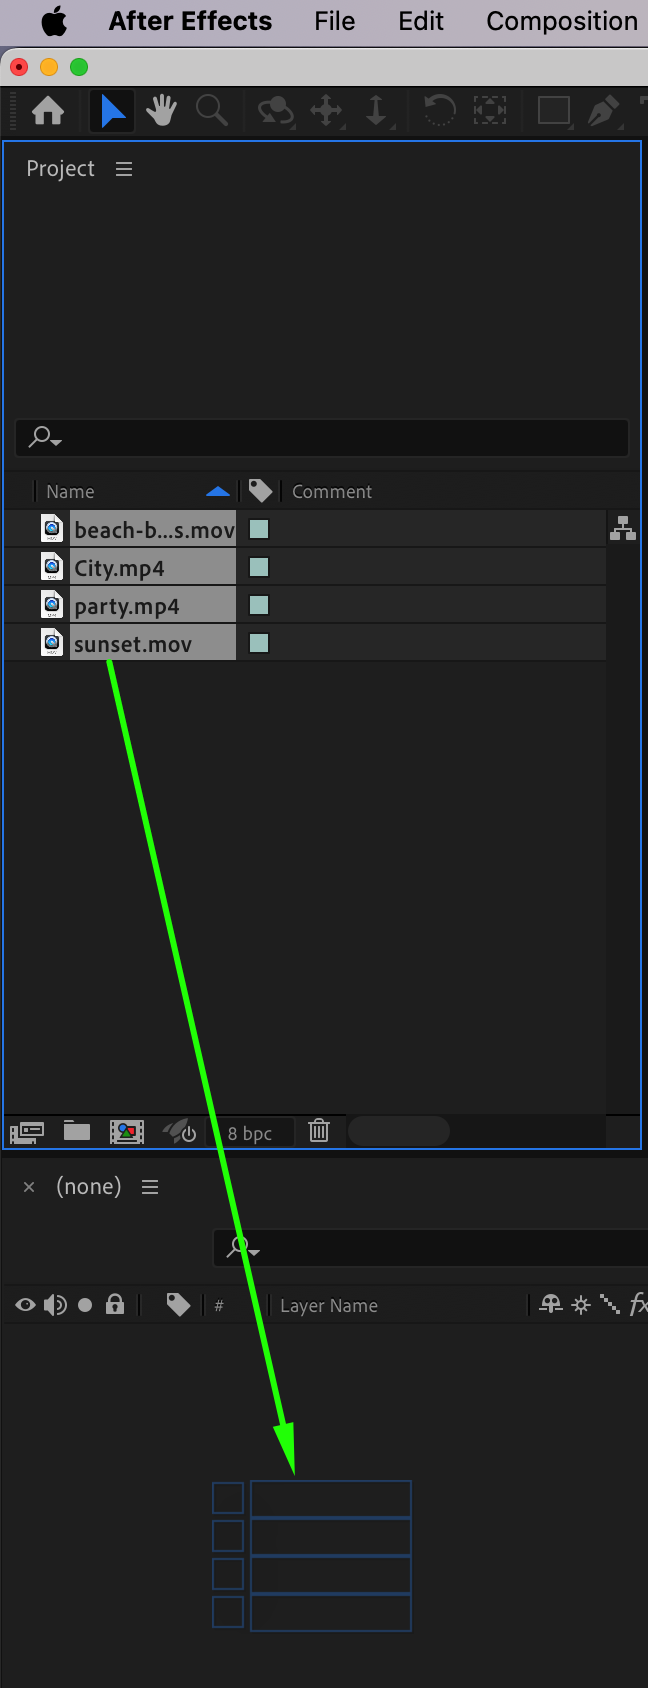
Step 1: Import Your Video Files
Go to File > Import > File and choose all the video files you want to use. Then drag them onto your timeline.
Get 10% off when you subscribe to our newsletter

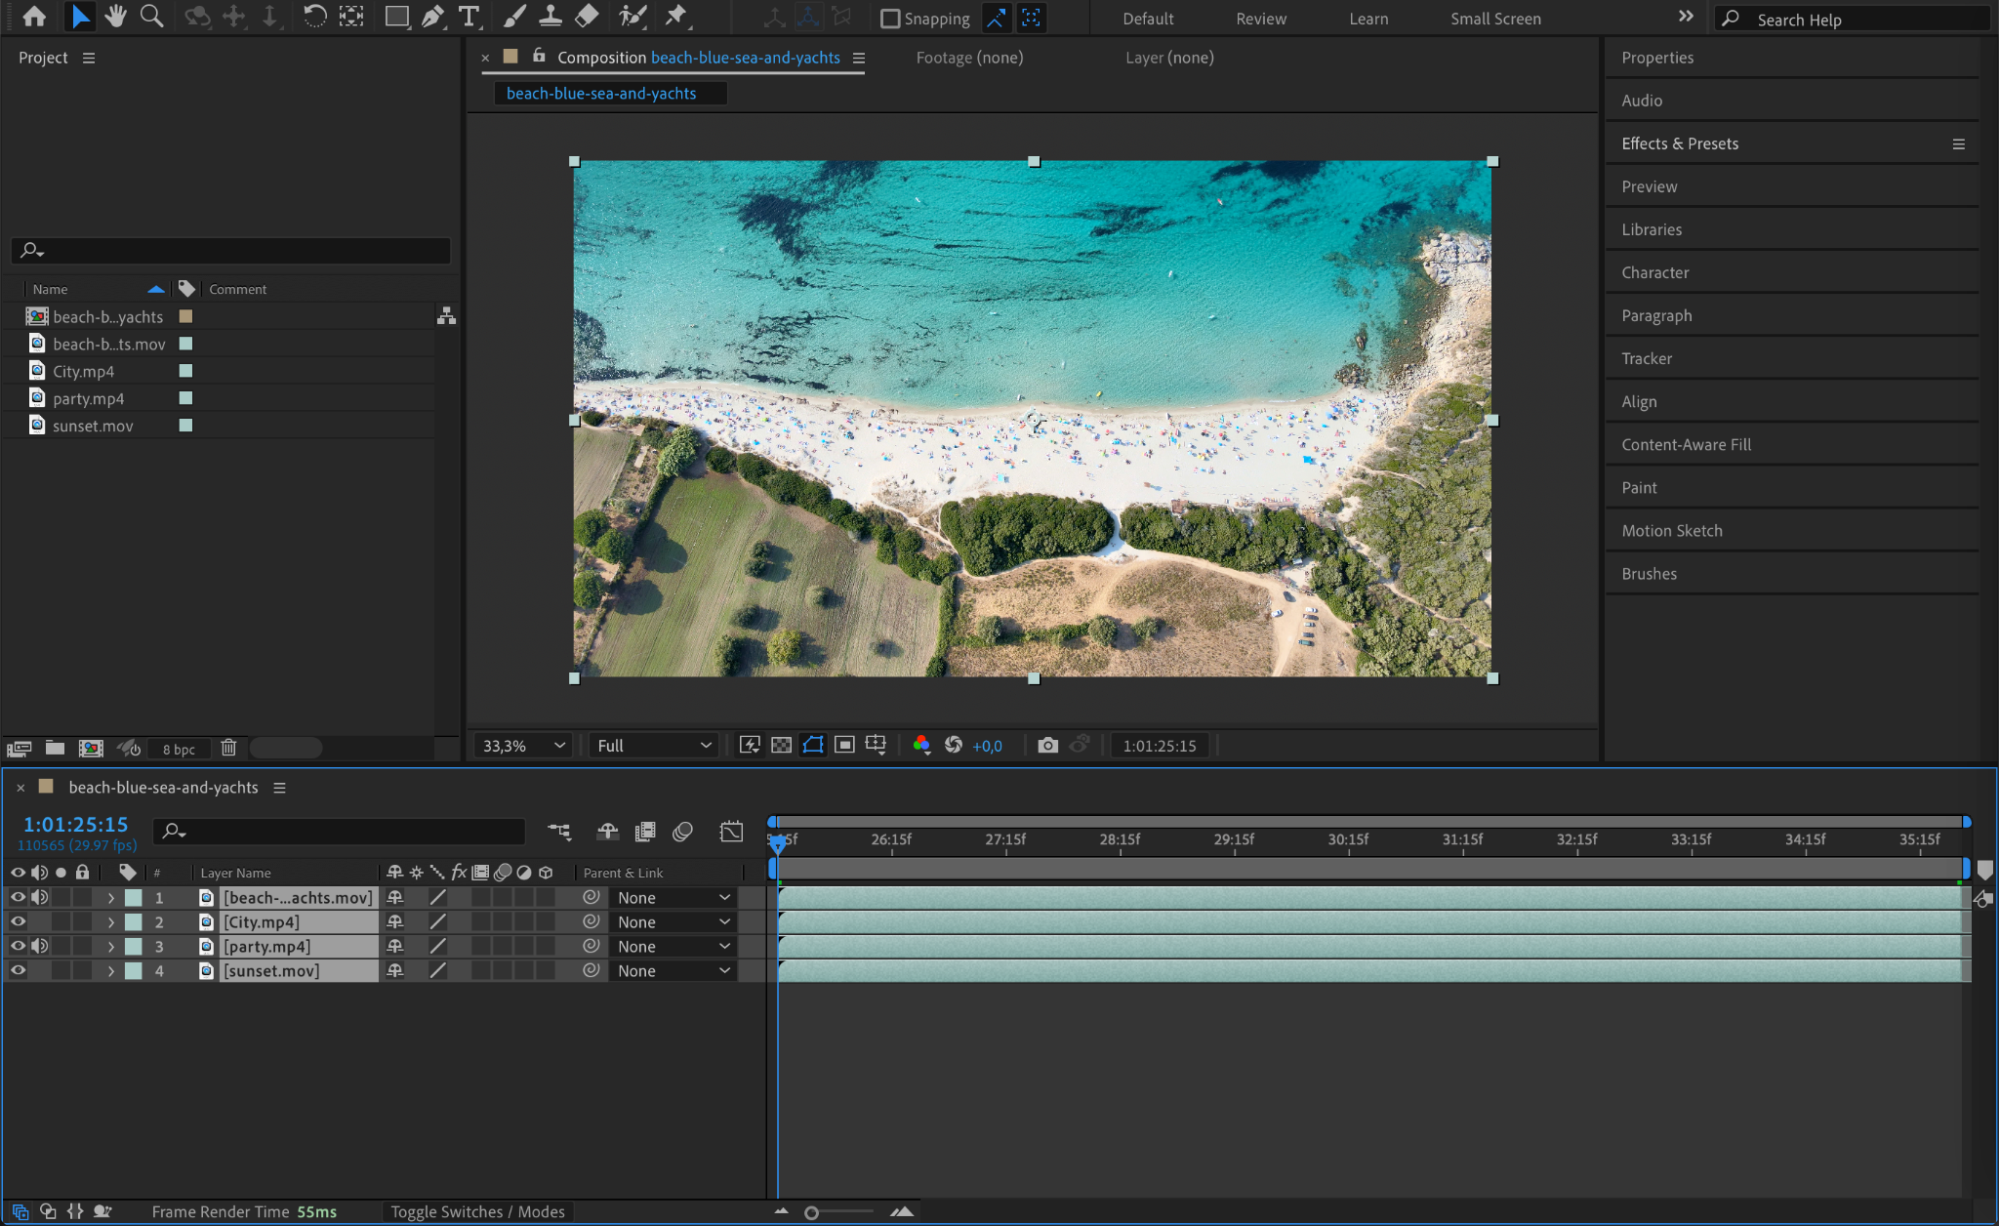
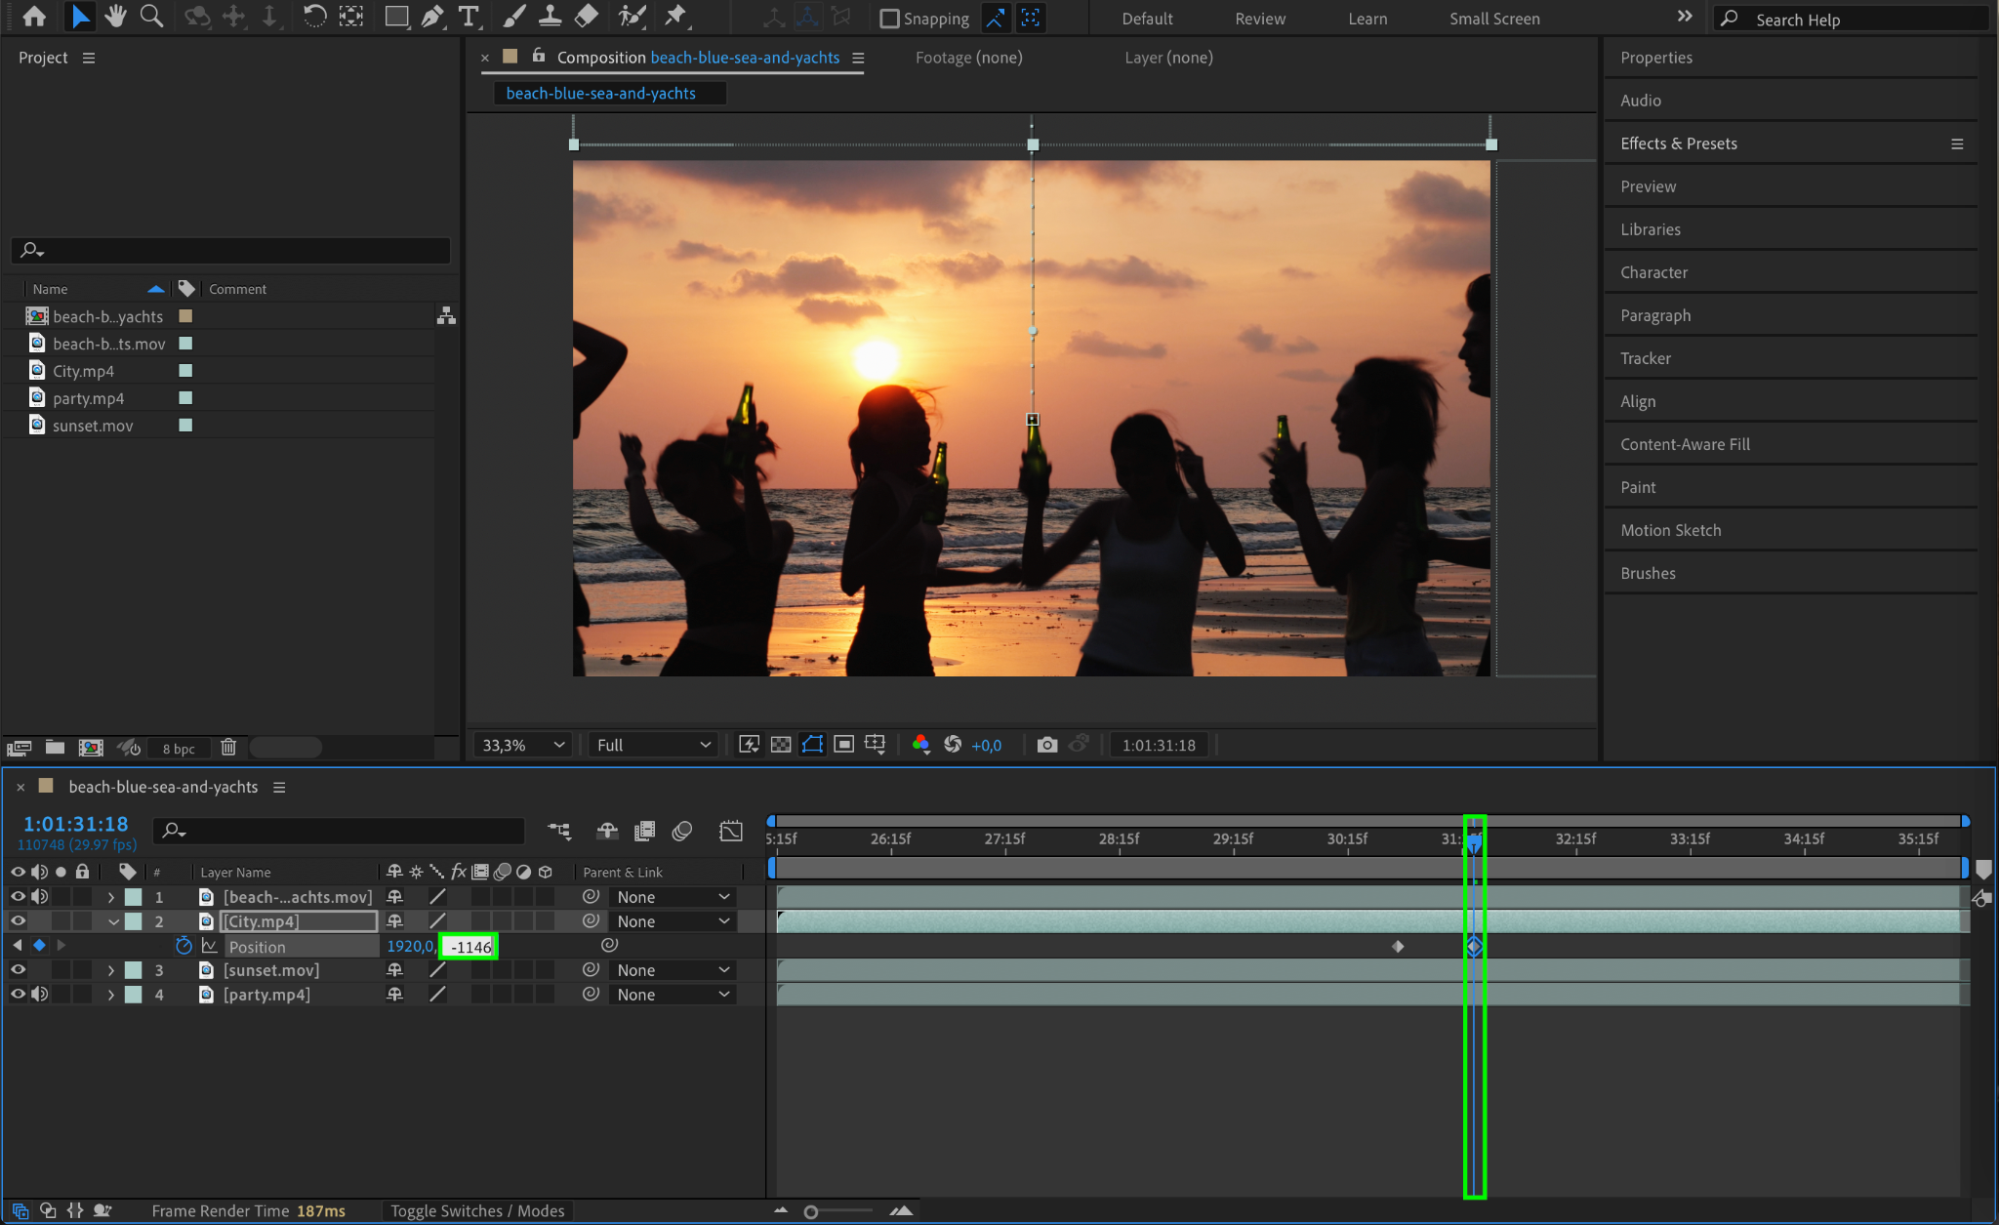
Step 2: Animate the First Transition
Move the CTI (Current Time Indicator) to the point where you want the transition to start on the first video. Click the stopwatch next to Position to add a keyframe. Then move the CTI forward about 15–20 frames and drag the video layer out of the screen (for example, move it to the right). This creates an exit animation.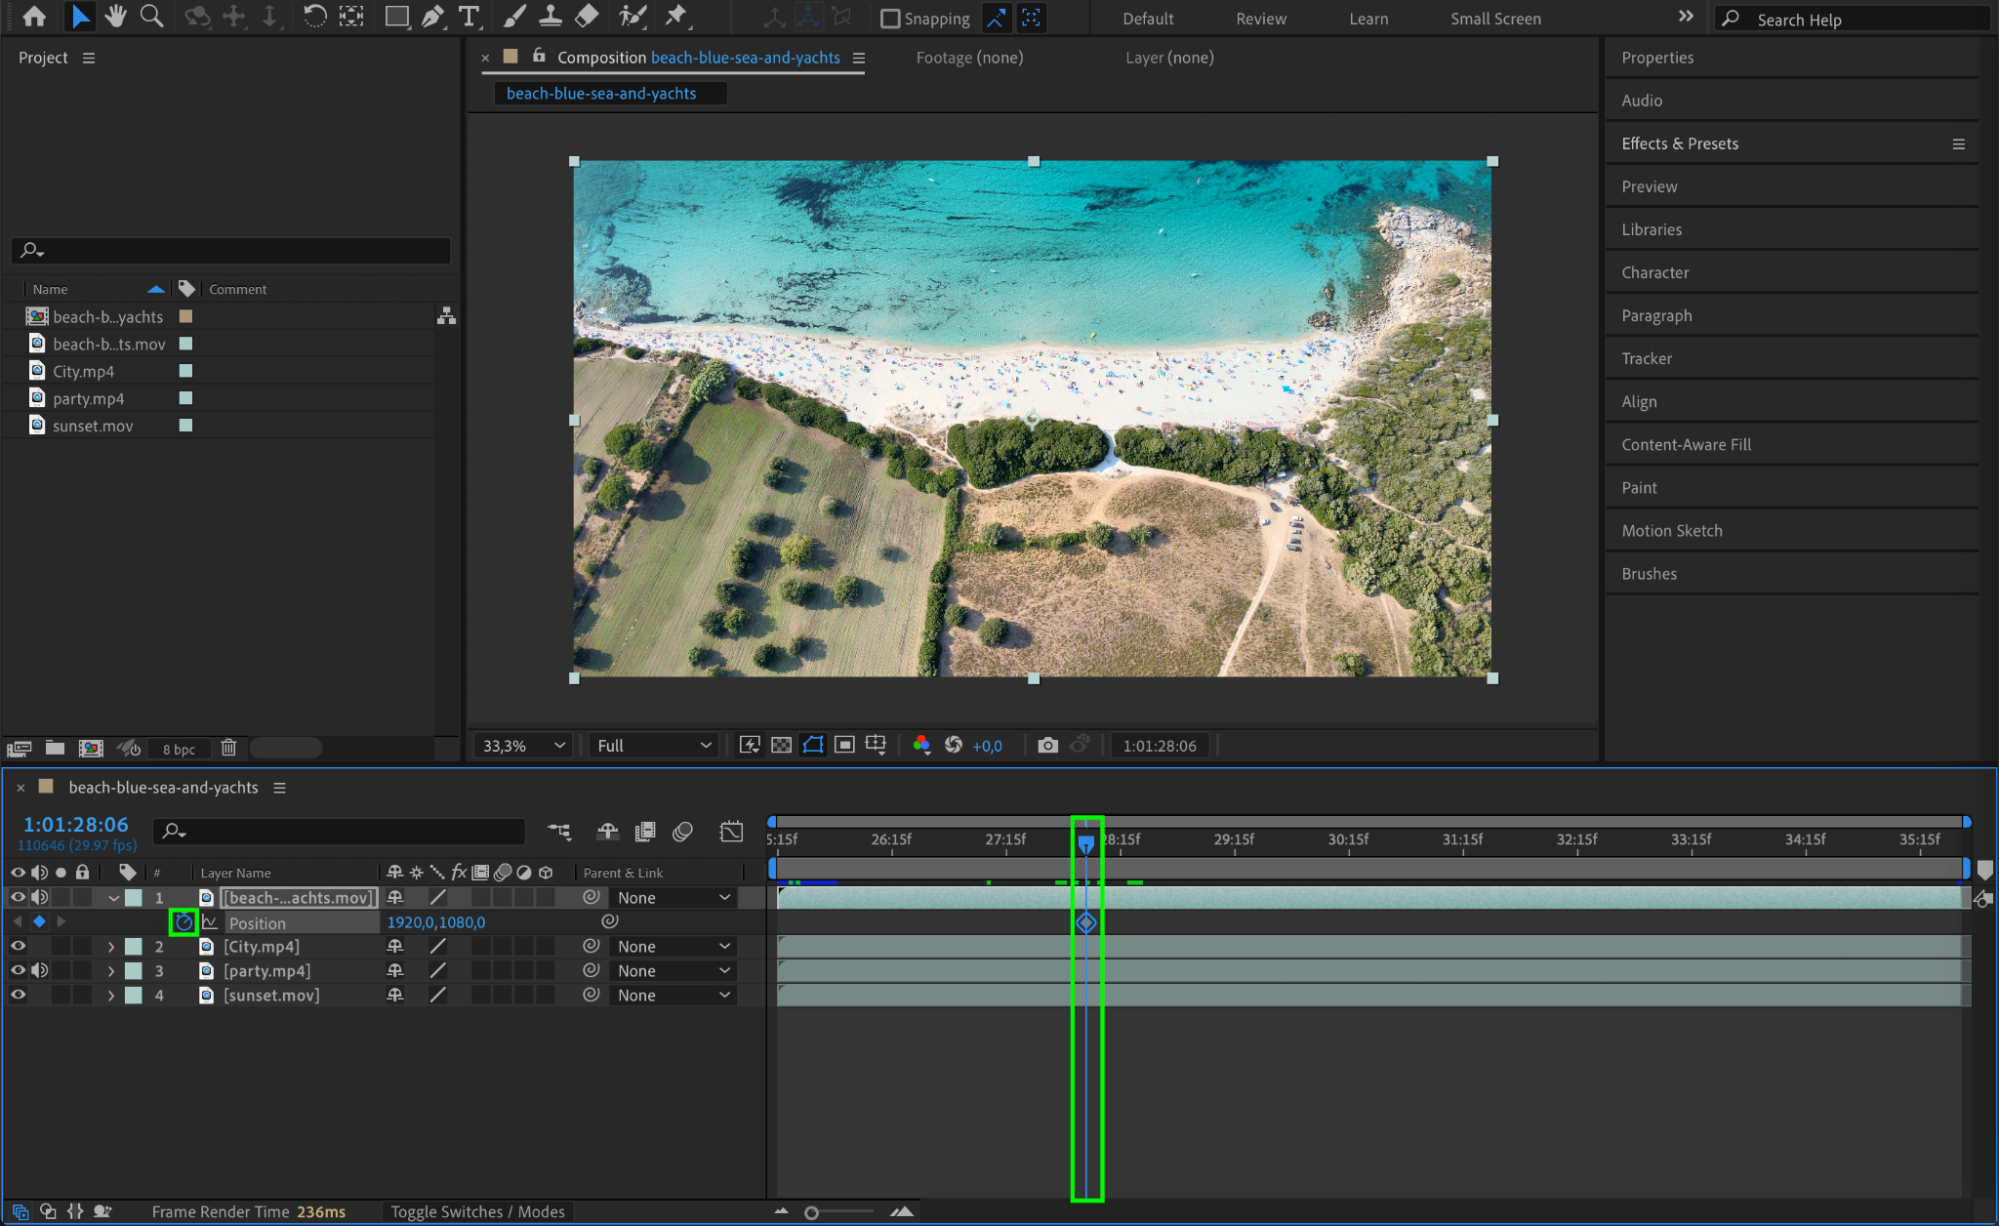
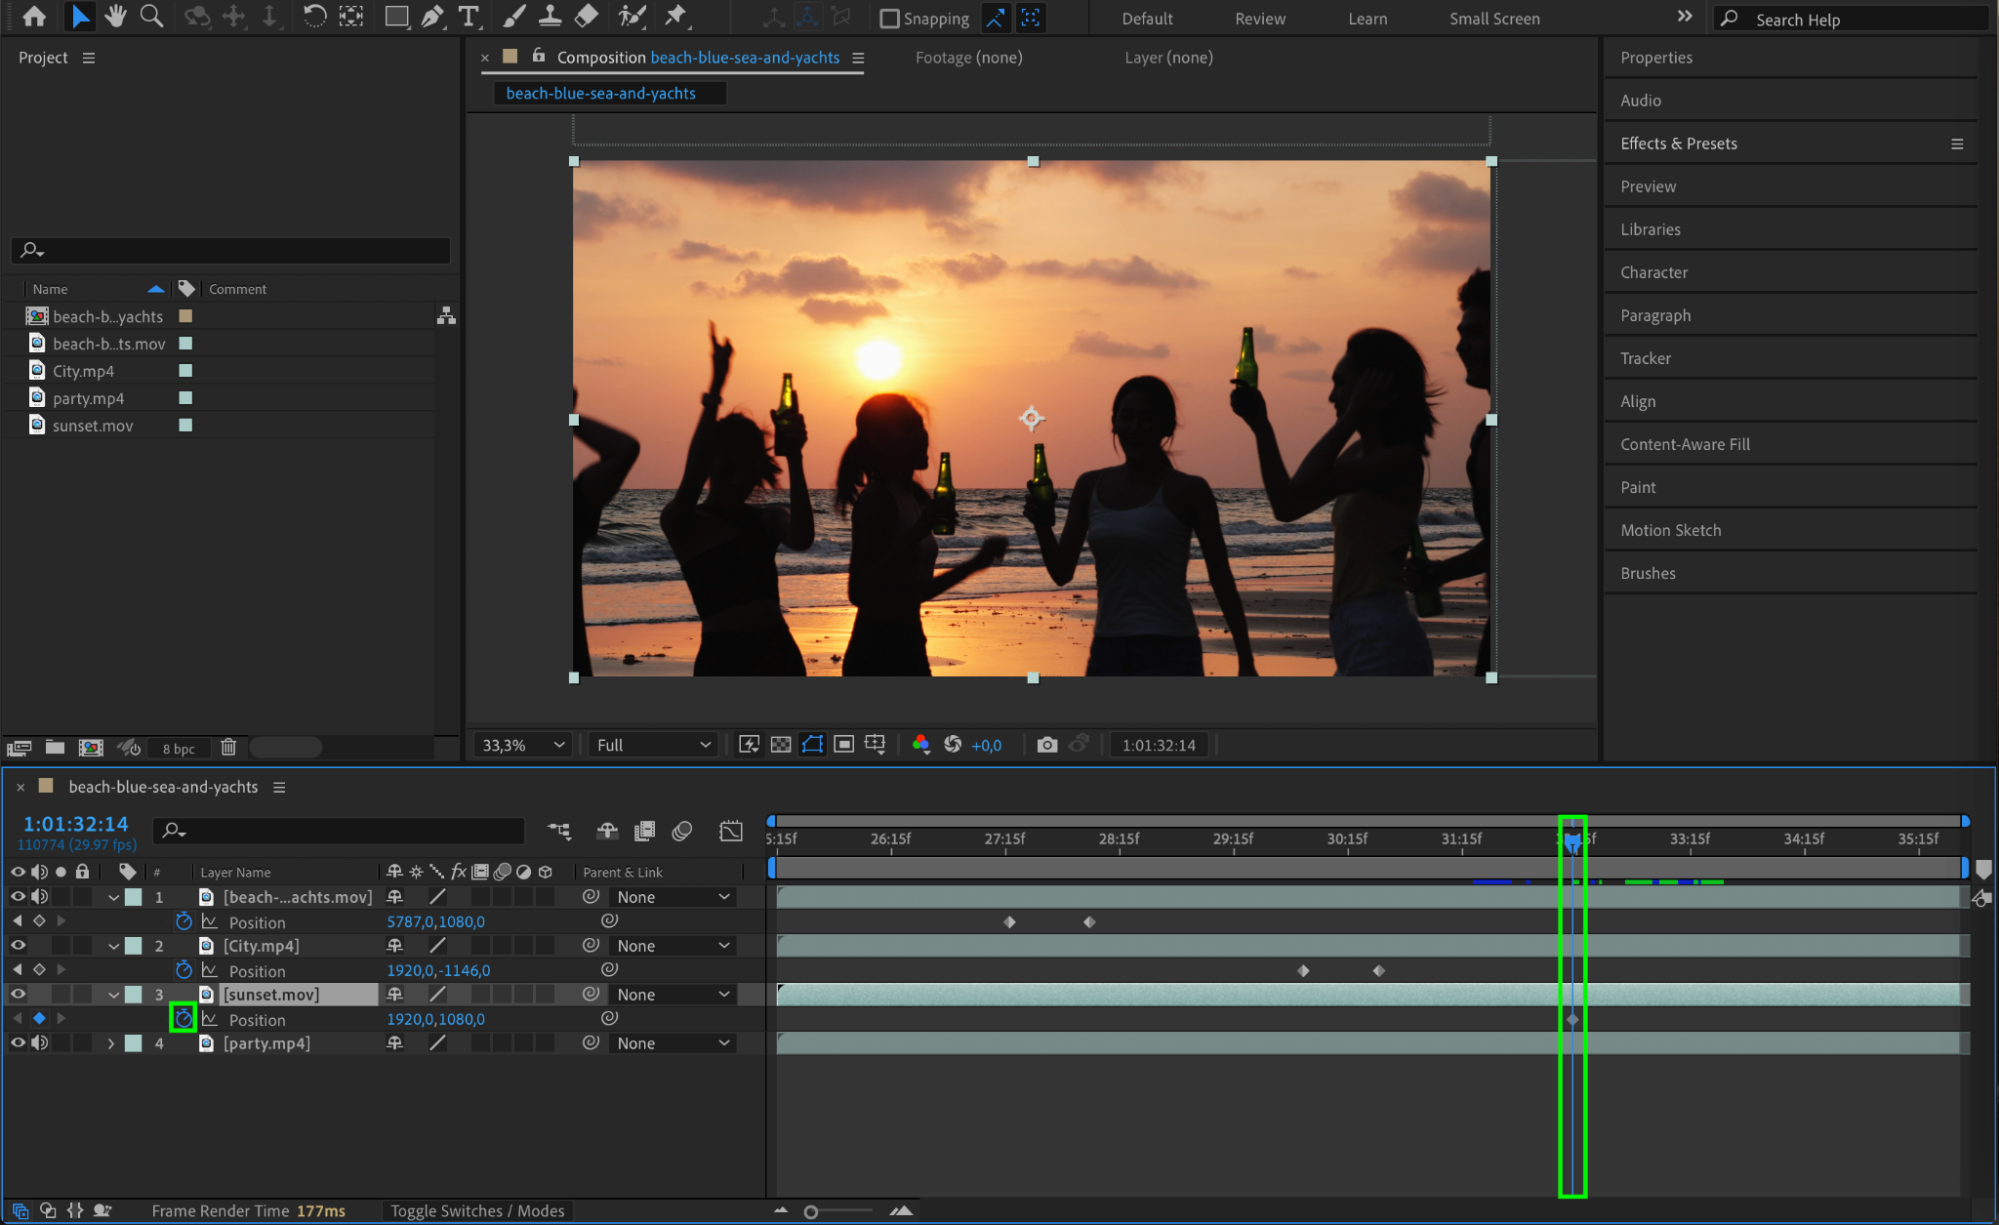
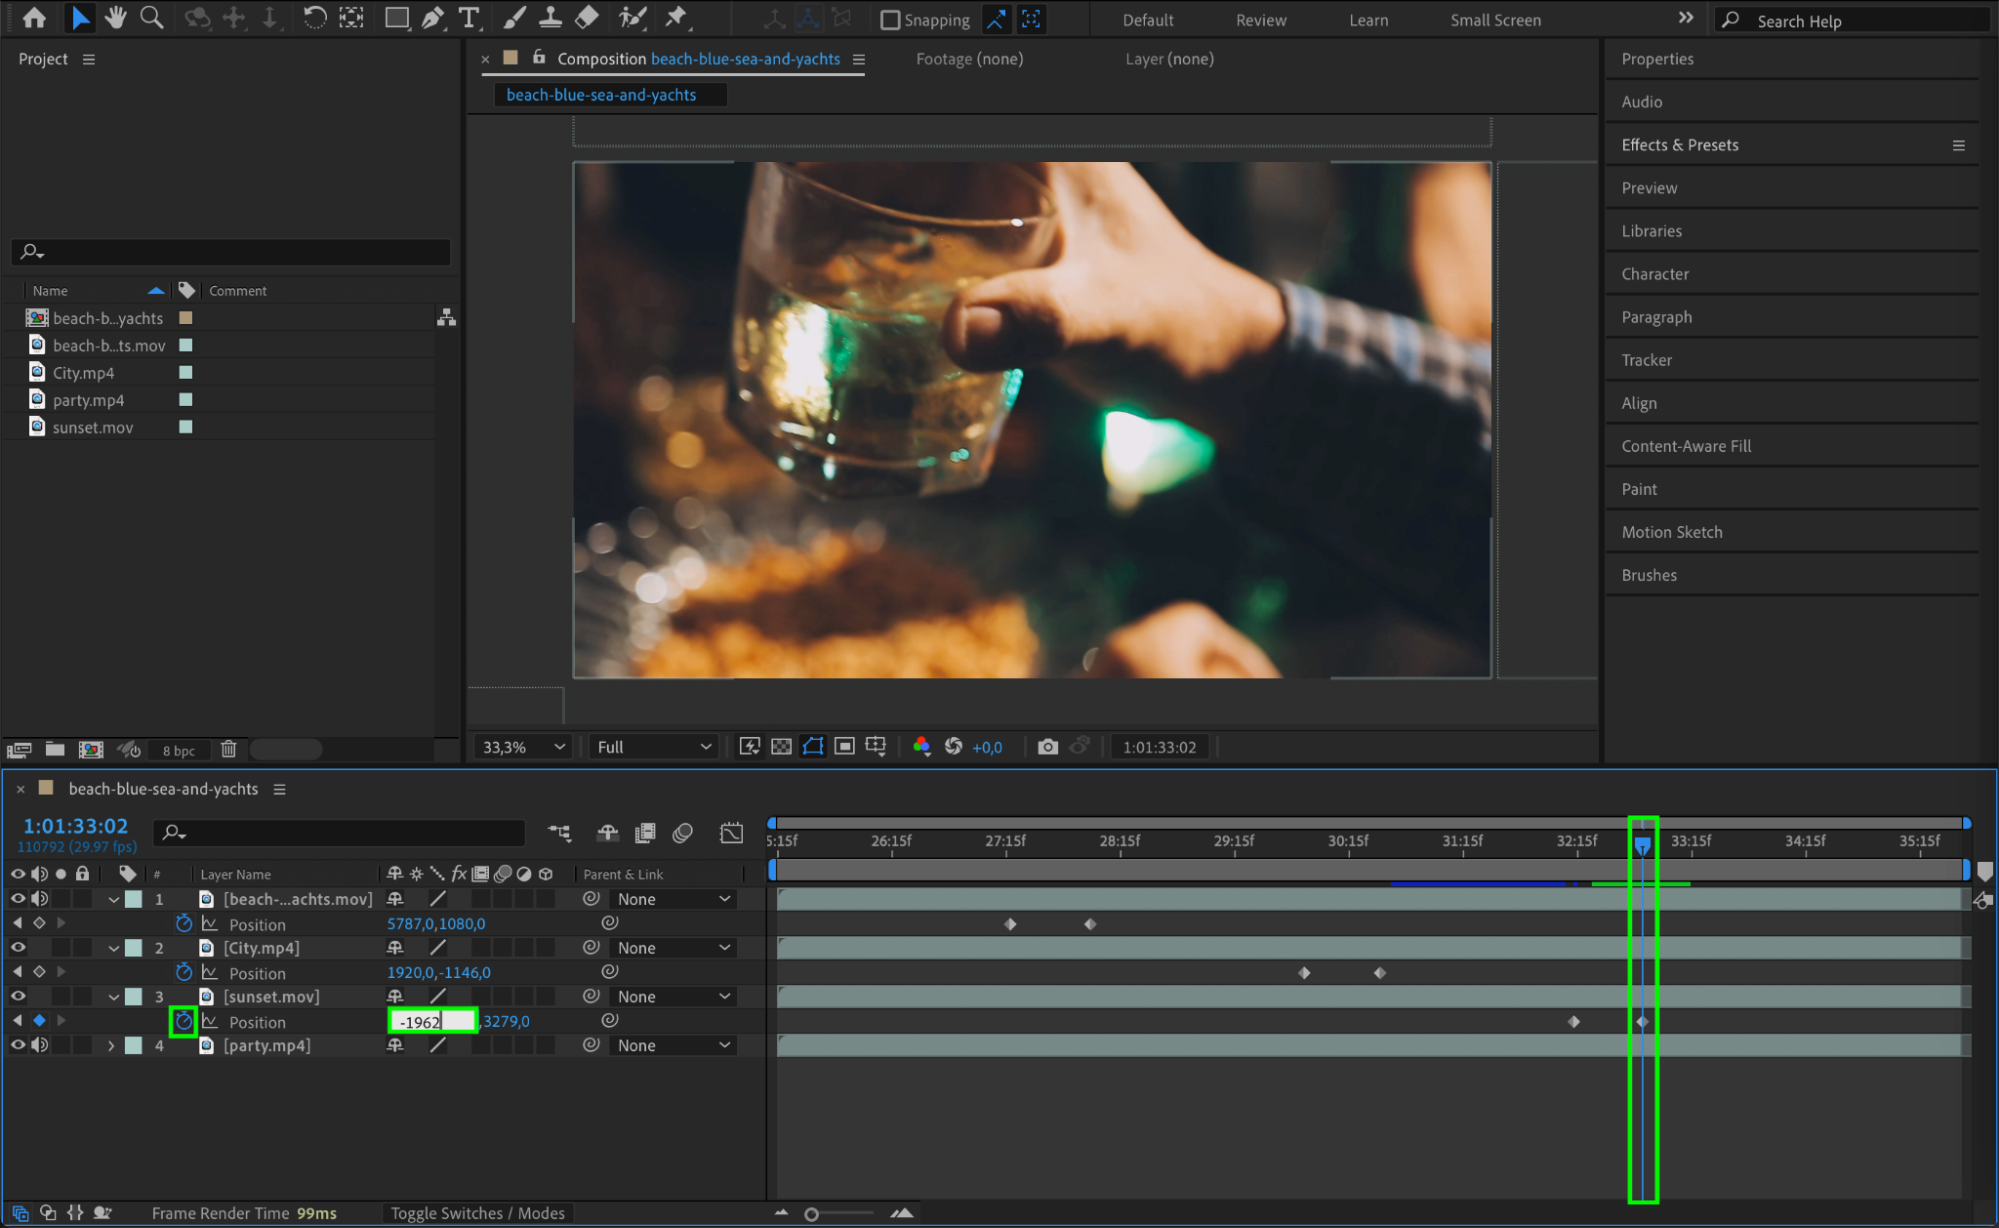
 Step 3: Repeat for Each Following Clip
For the next clip, animate its Position property in the opposite direction. Start it off-screen, add a keyframe, and move the CTI forward to bring the clip onto the screen. Repeat this process for each following video, changing the direction if you like — left, right, up, or down — to make the sequence dynamic and varied.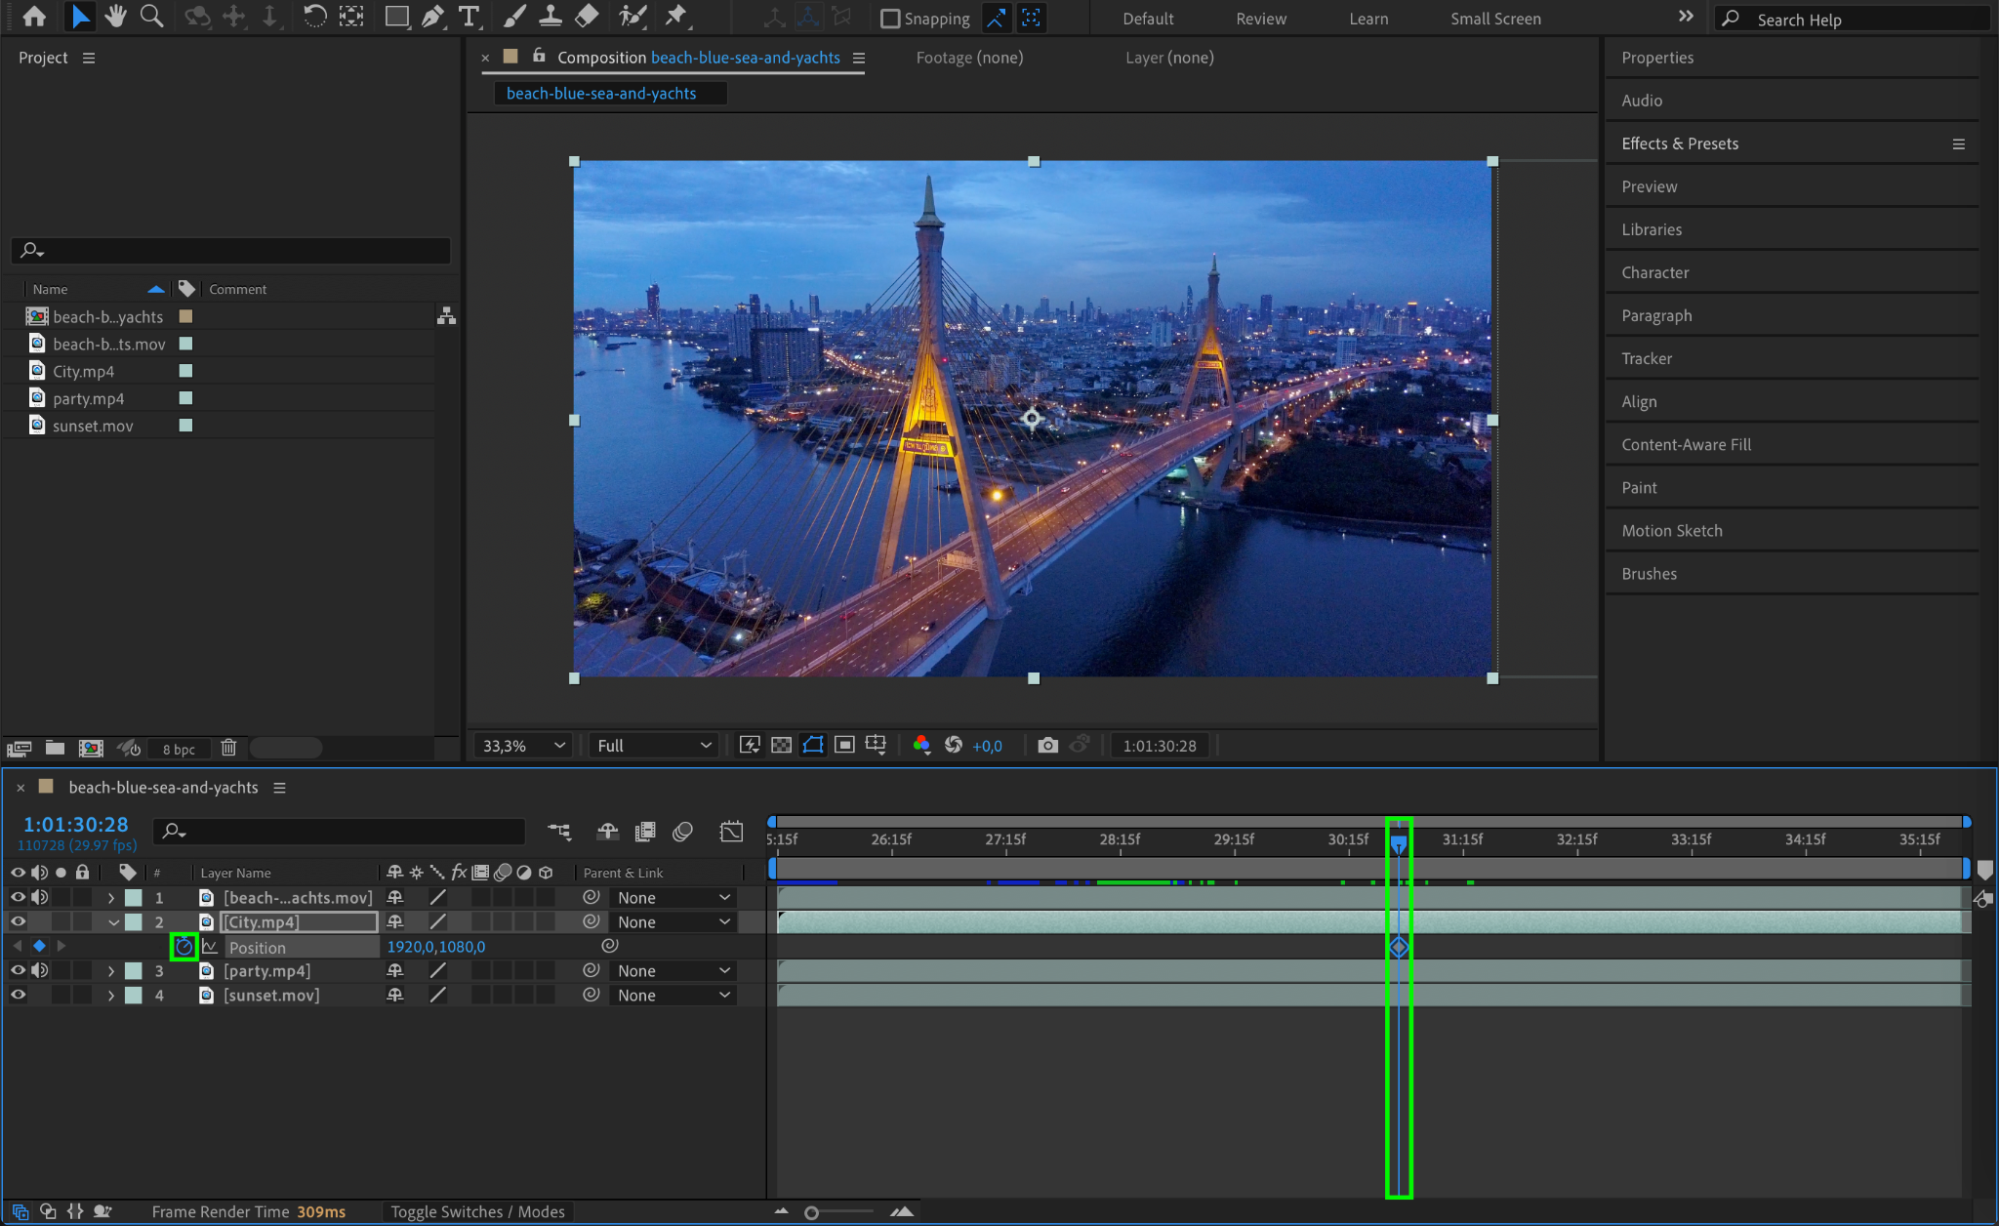
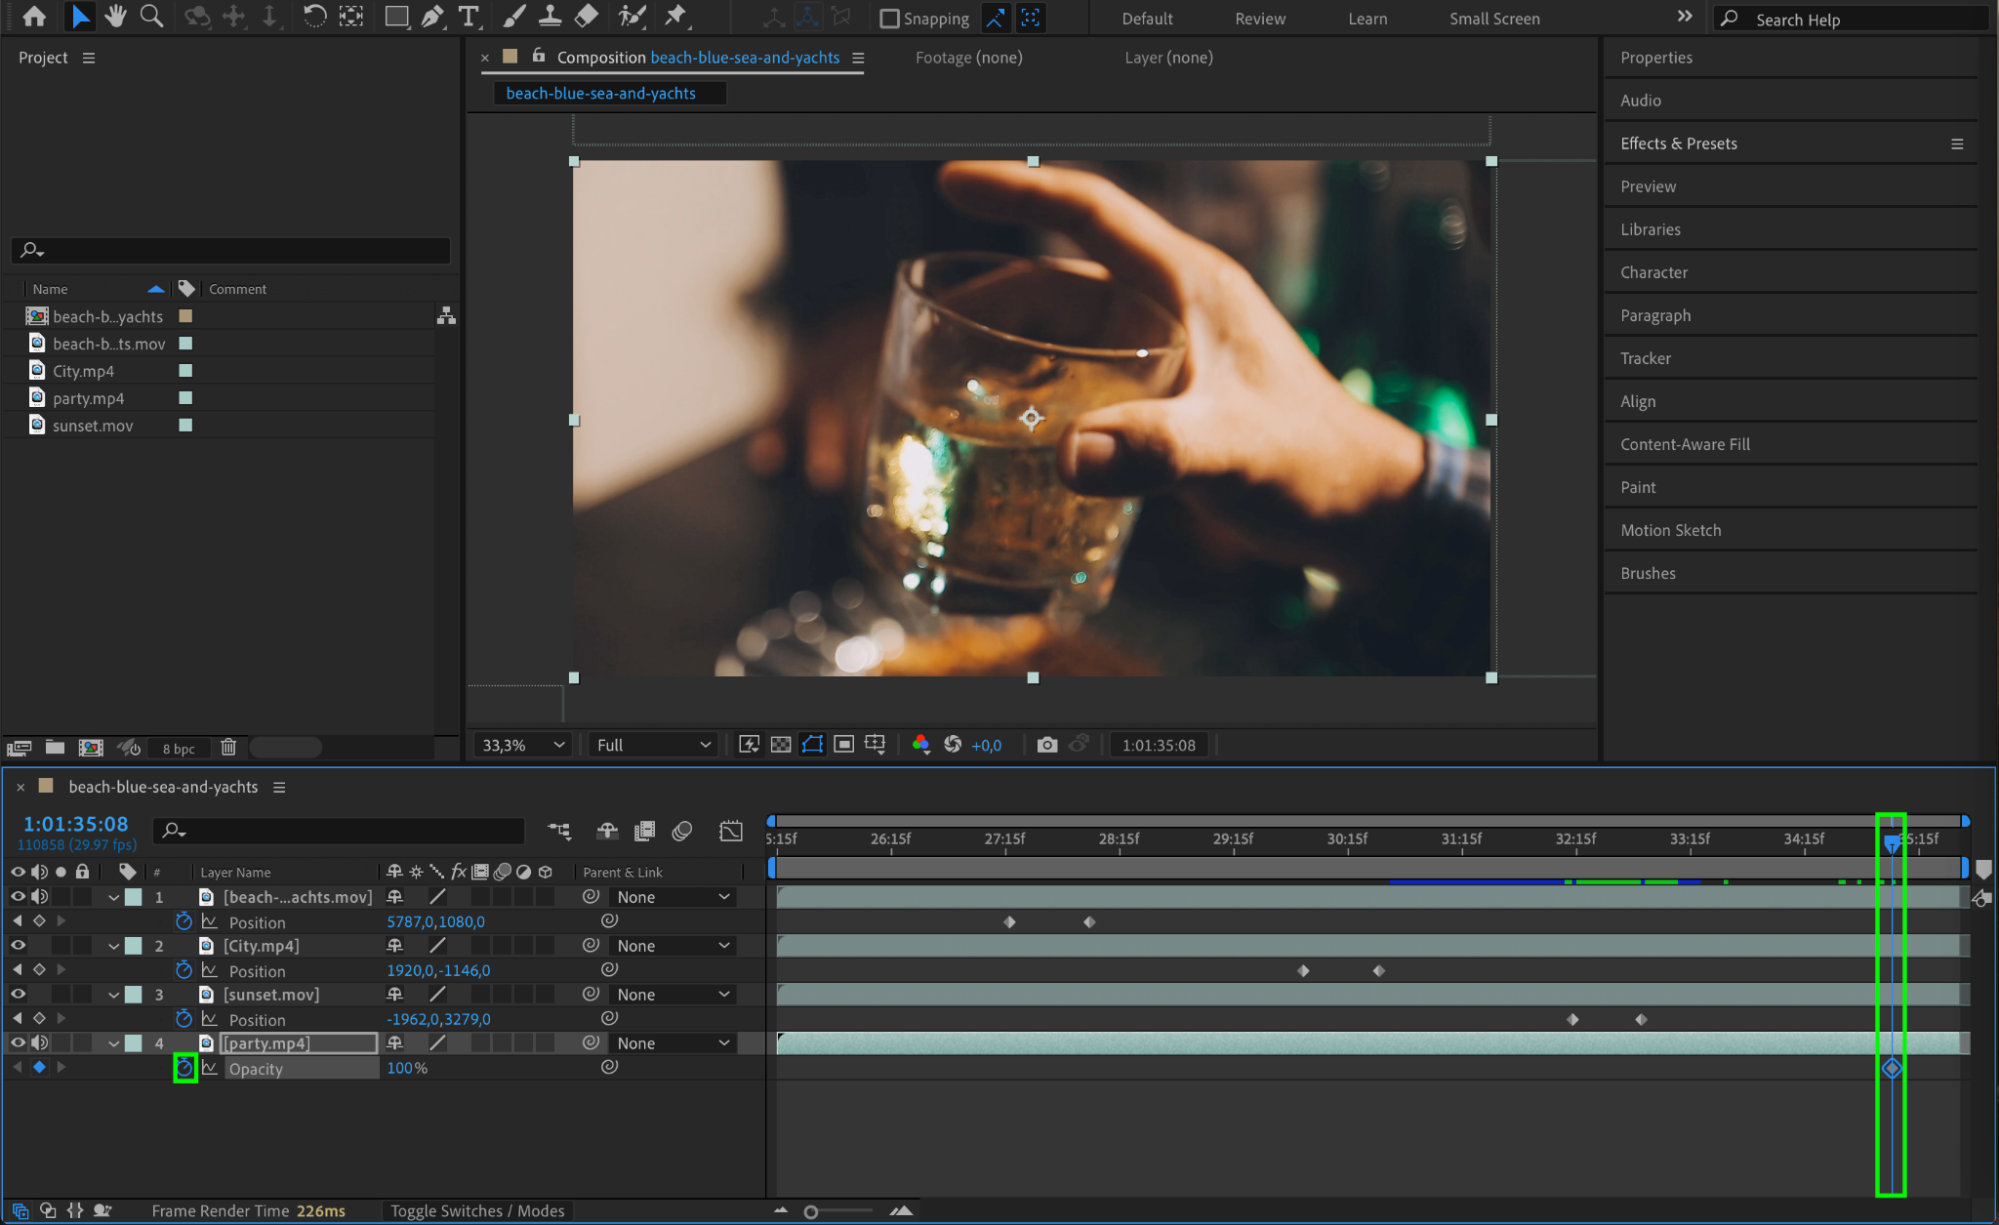
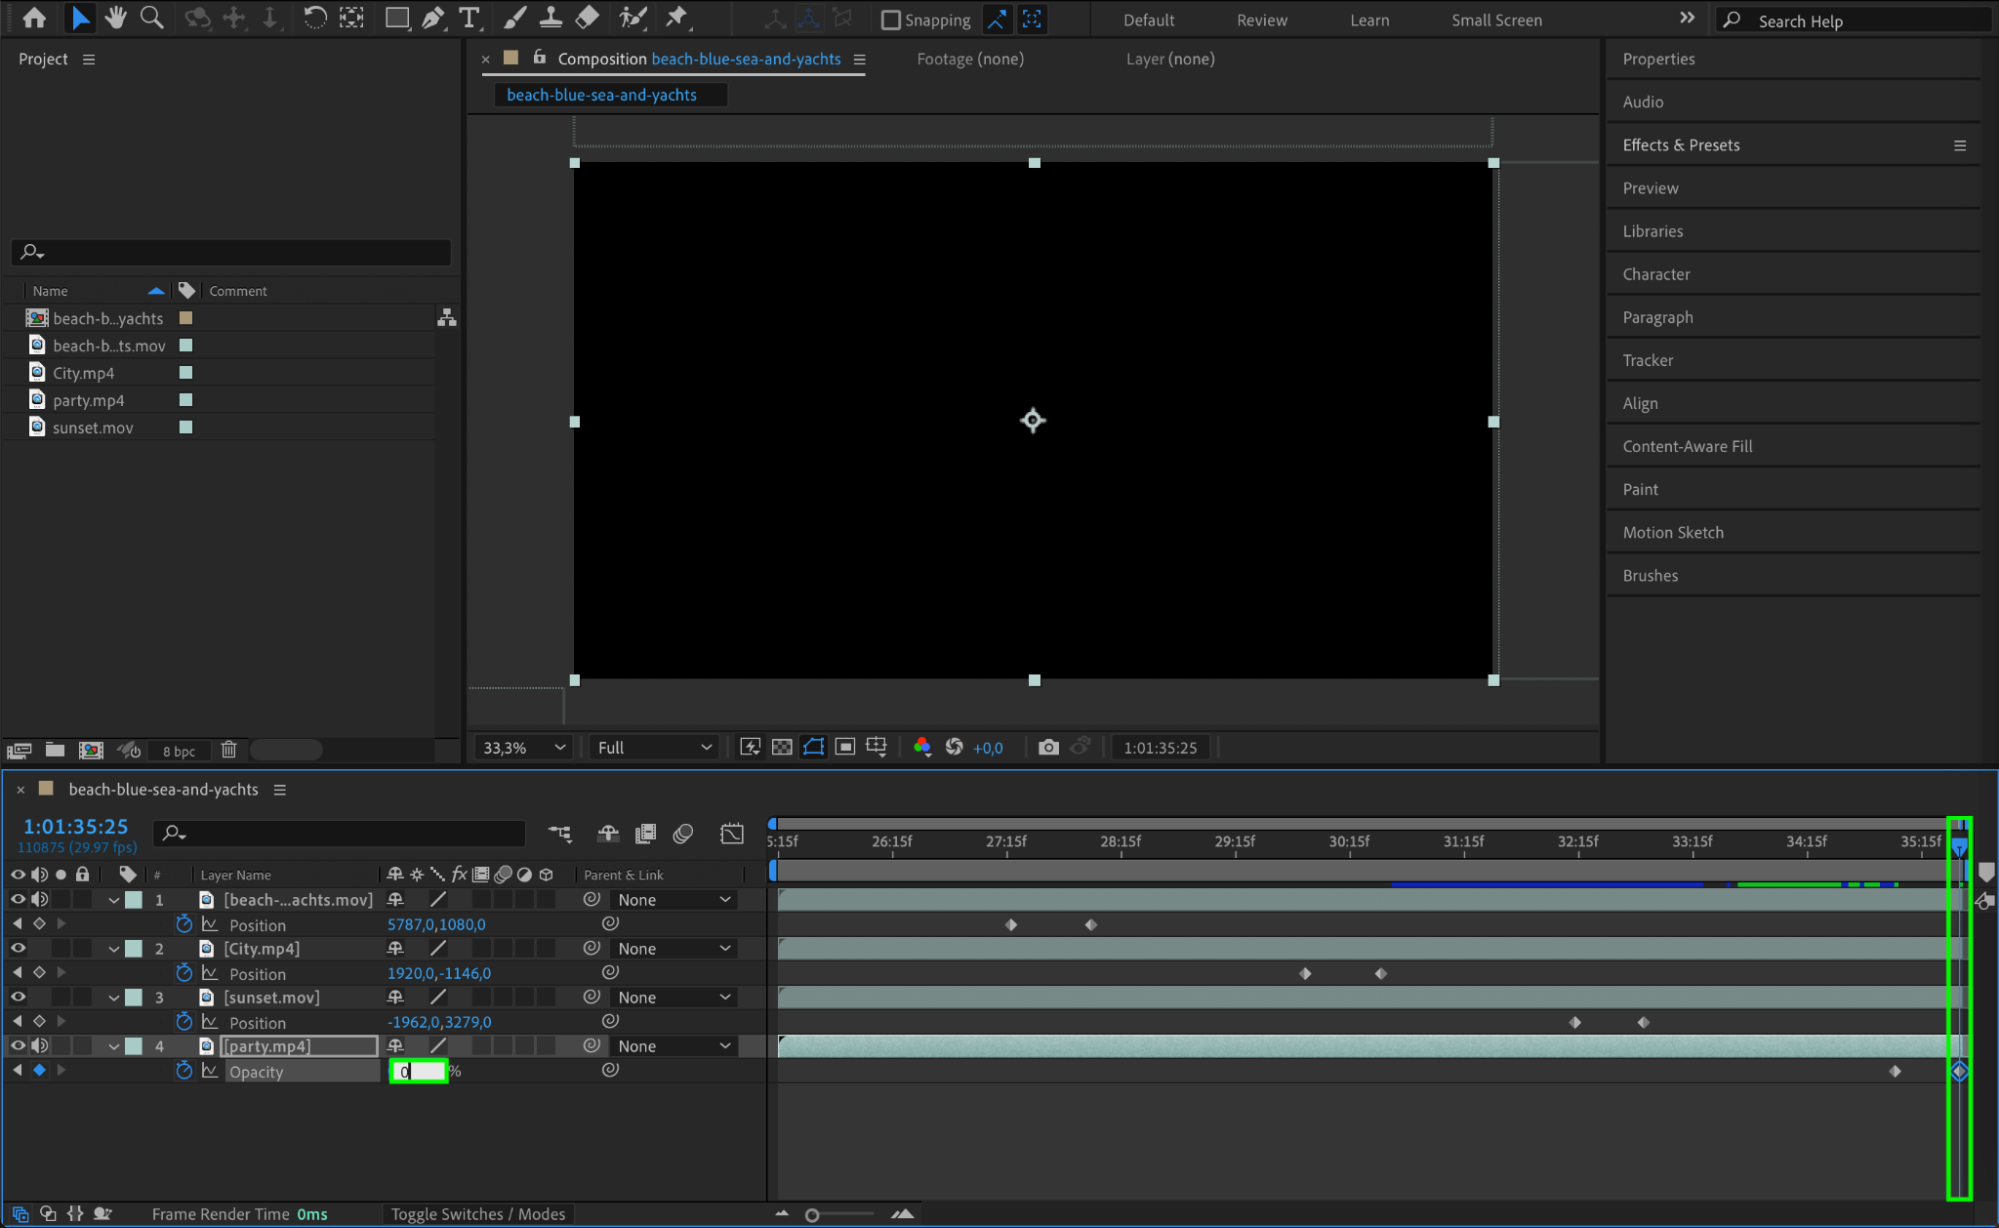
Step 4: Fade Out the Last Clip
On the final video, go to the end of the timeline. Set a keyframe for Opacity at 0%. Move the CTI a bit earlier (around 15–20 frames before the end) and set the opacity to 100%. This will create a smooth fade-out effect at the end of your sequence.
Step 5: Apply Easy Ease for Smoother Motion
Select all your keyframes for Position and Opacity. Right-click and choose Keyframe Assistant > Easy Ease, or press F9. This will smooth the start and end of your animations, making transitions feel more natural.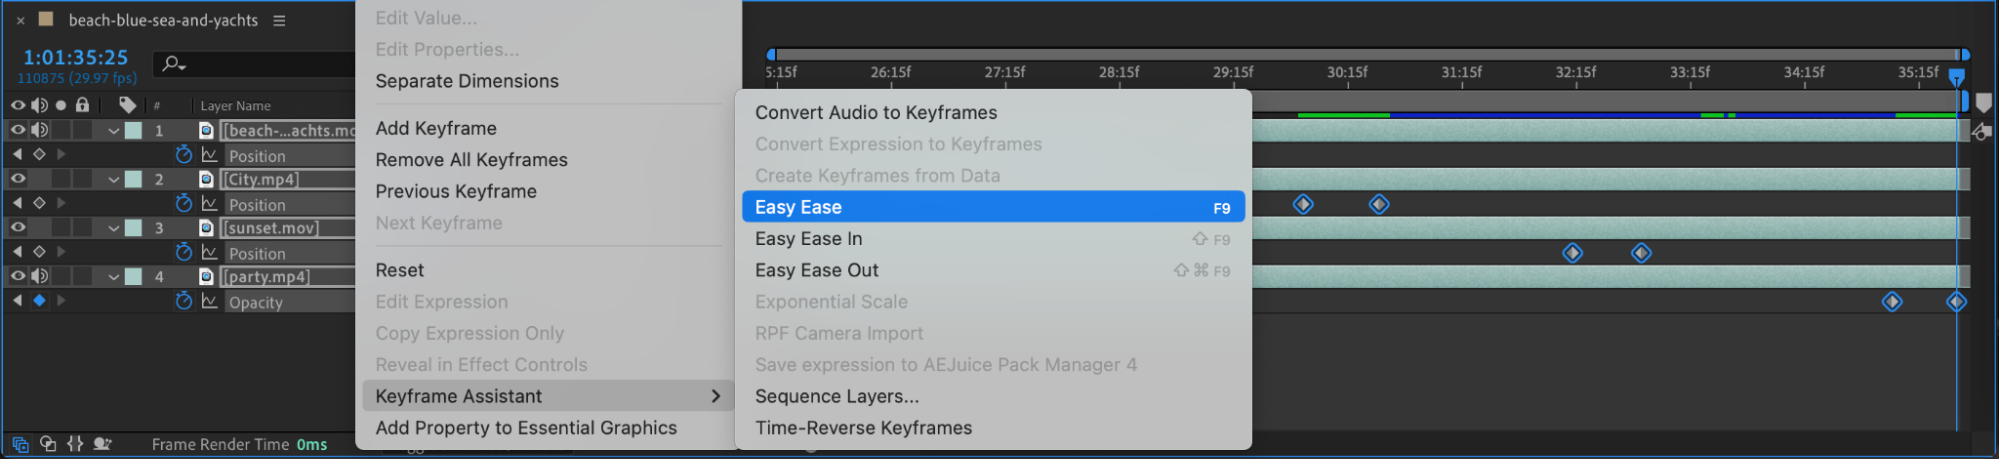
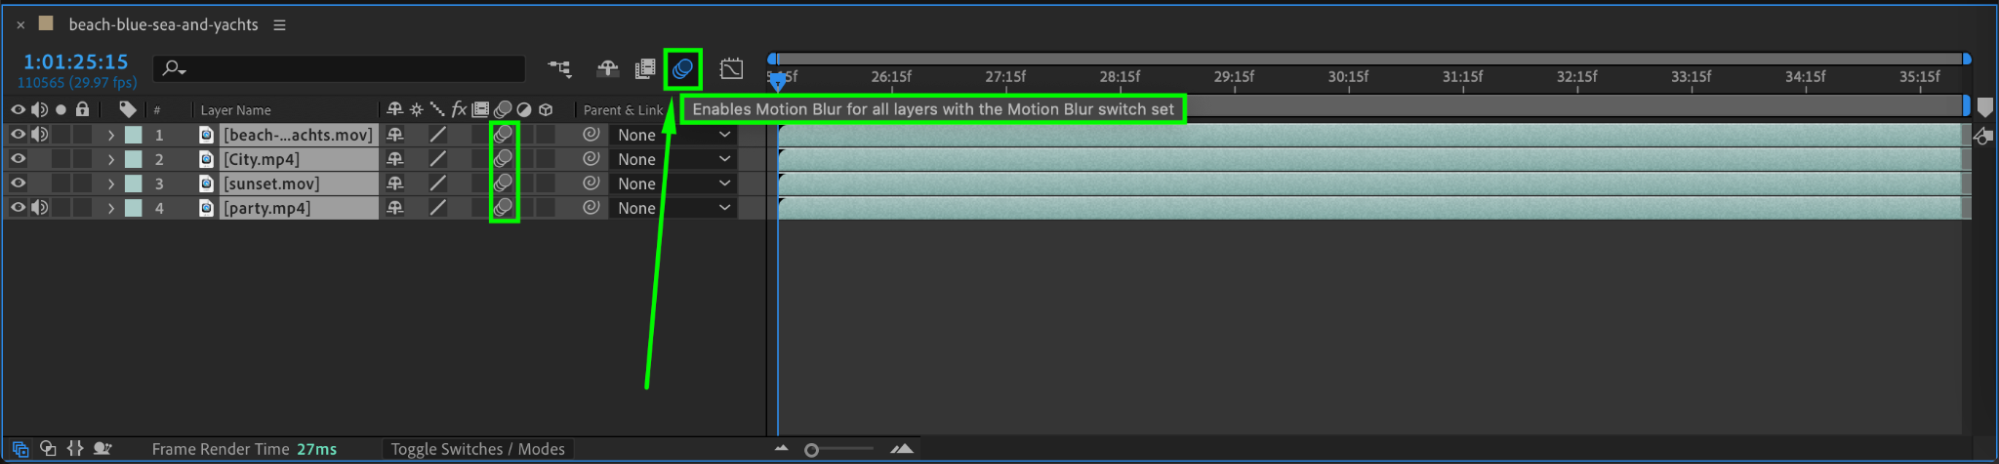
Step 6: Enable Motion Blur
To add extra realism to the motion, turn on Motion Blur. First, click the motion blur icon (three overlapping circles) for each animated layer. Then enable motion blur globally by clicking the same icon at the top of the timeline panel. This helps blend frames during movement.
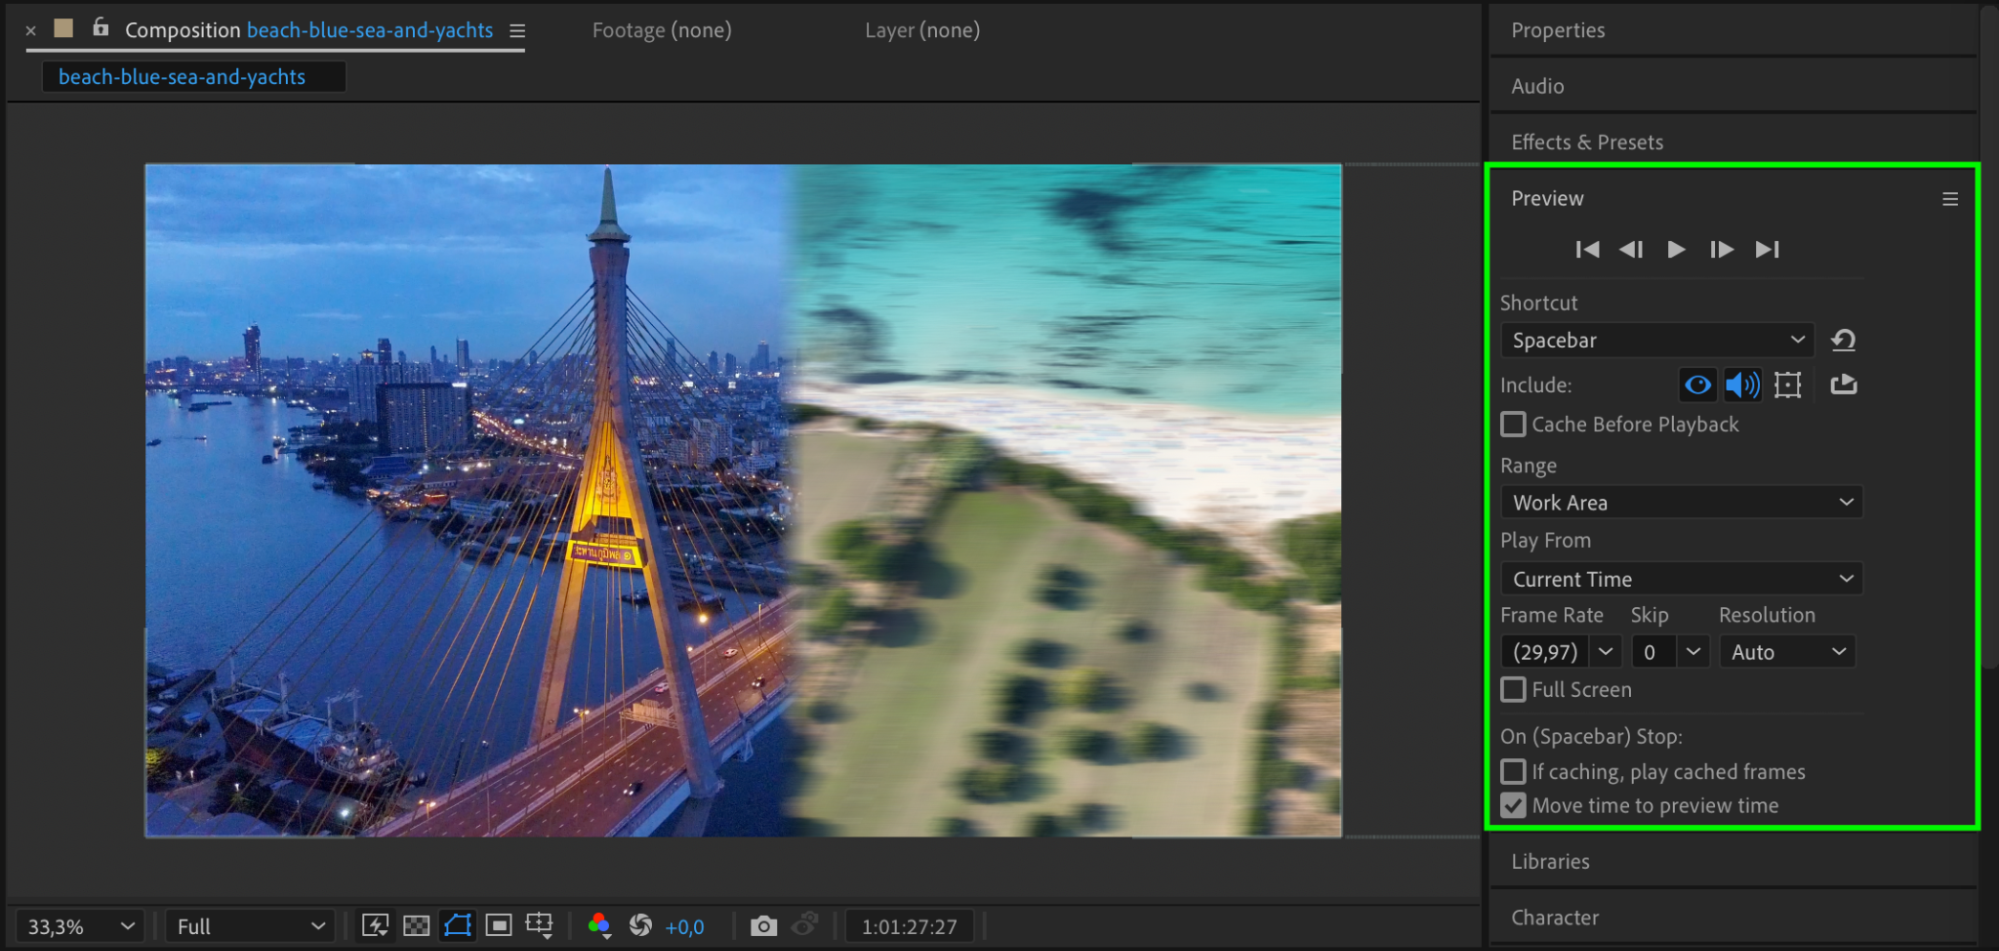
Step 7: Preview and Final Adjustments
Press Spacebar to preview your sequence. Make sure each transition flows smoothly from one video to the next. You can adjust timing, spacing between keyframes, or motion blur settings for better results. Once you’re satisfied, render your composition.
Conclusion
By using simple position animations, fade-outs, and motion blur, you can build clean and stylish transitions between multiple video clips in After Effects. This approach gives you full creative control without needing third-party plugins or templates, making it ideal for beginners and experienced editors alike.
Our Bestsellers


