Creating Moving Picture Effects in After Effects
Introduction
Transforming still images into animated, lifelike visuals is a powerful technique in After Effects. Whether you’re making a fish wiggle, a flag wave, or simply adding camera-style movement to a photo, animating pictures brings your projects to life. This tutorial will guide you through the essential steps of adding motion, deformation, and looping to still images.
Step 1: Create a New Composition
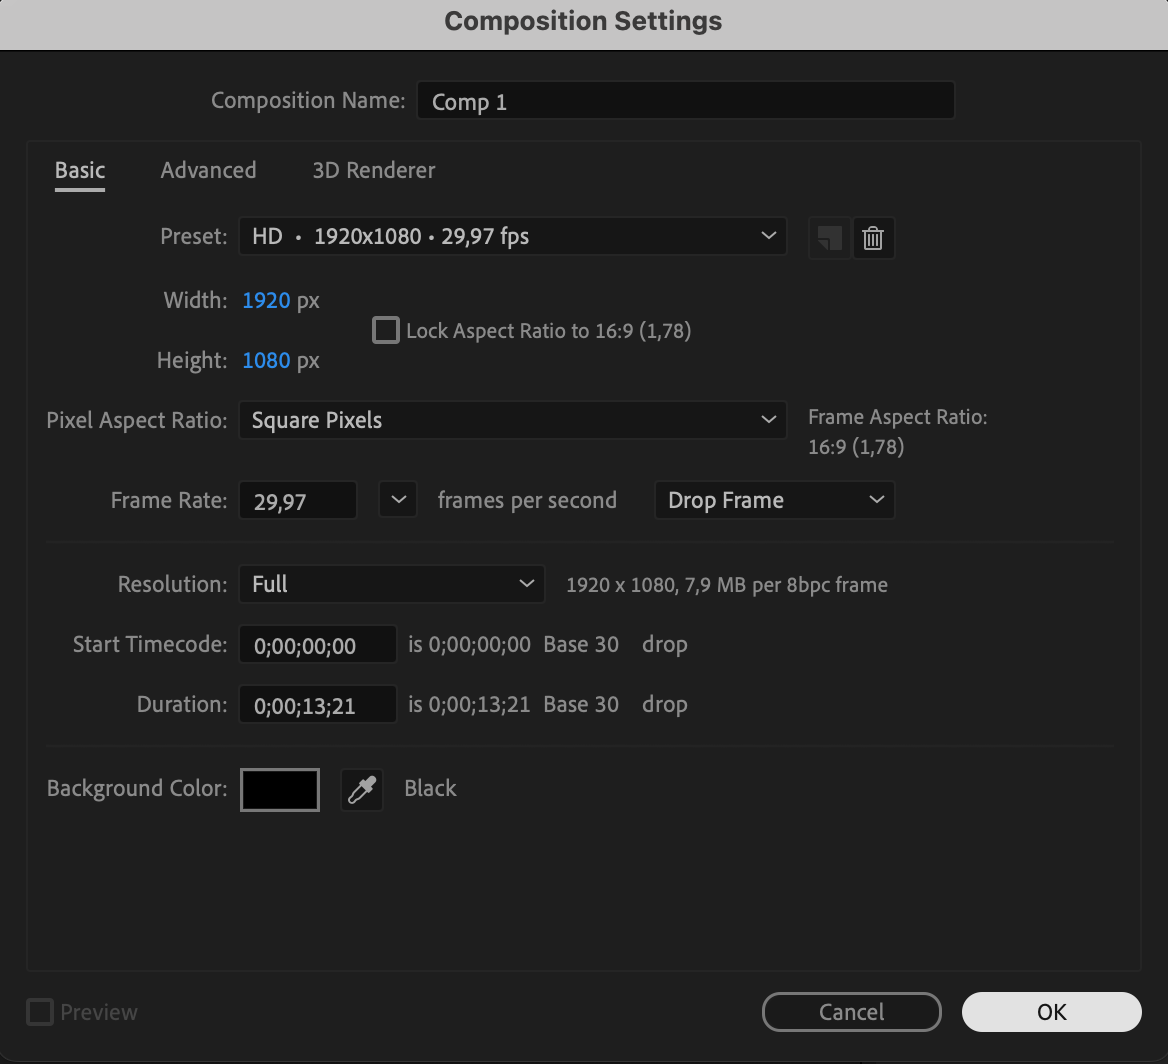
Open After Effects and go to Composition > New Composition. Set your resolution, frame rate, and duration. Click OK to create your new comp.
 Step 2: Import and Place Your Image
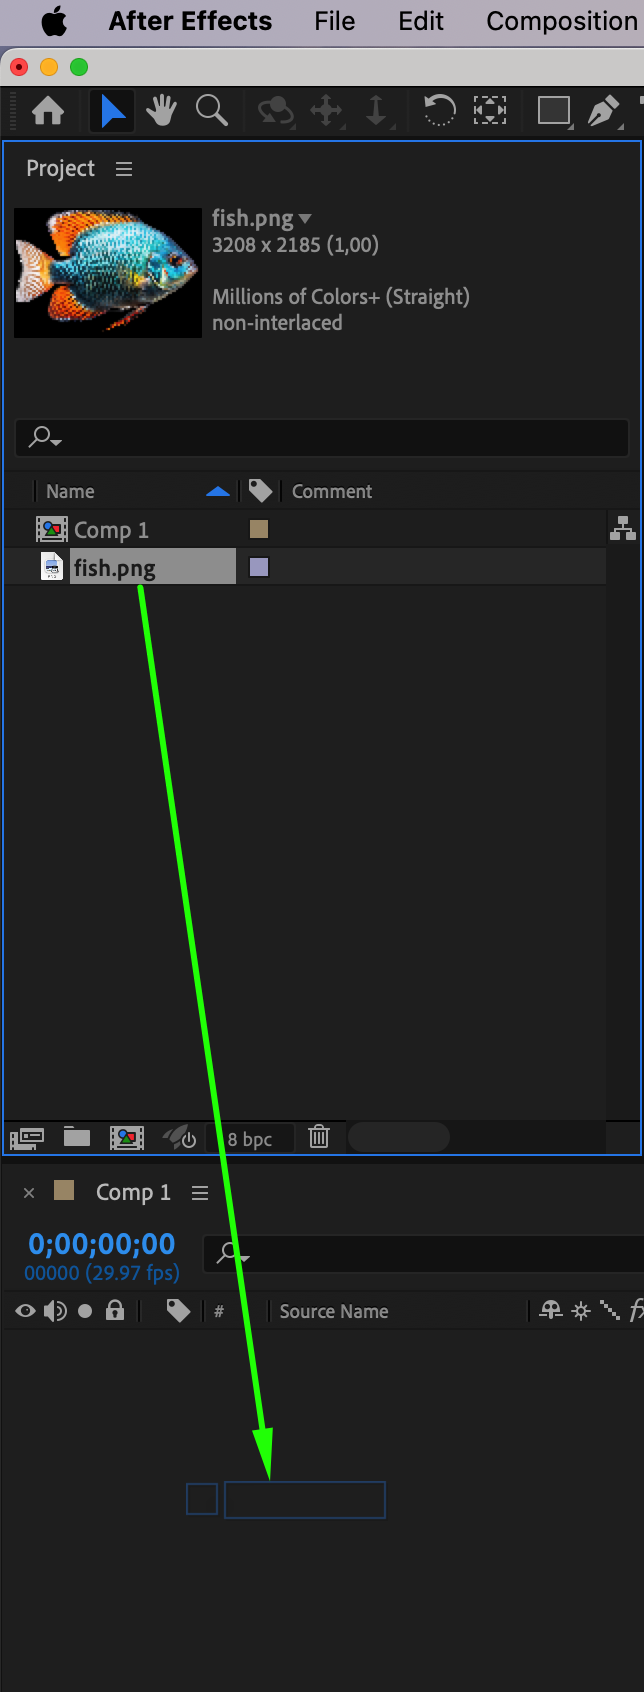
Go to File > Import > File, select your image, and drag it onto the timeline. This will automatically add it to your current composition.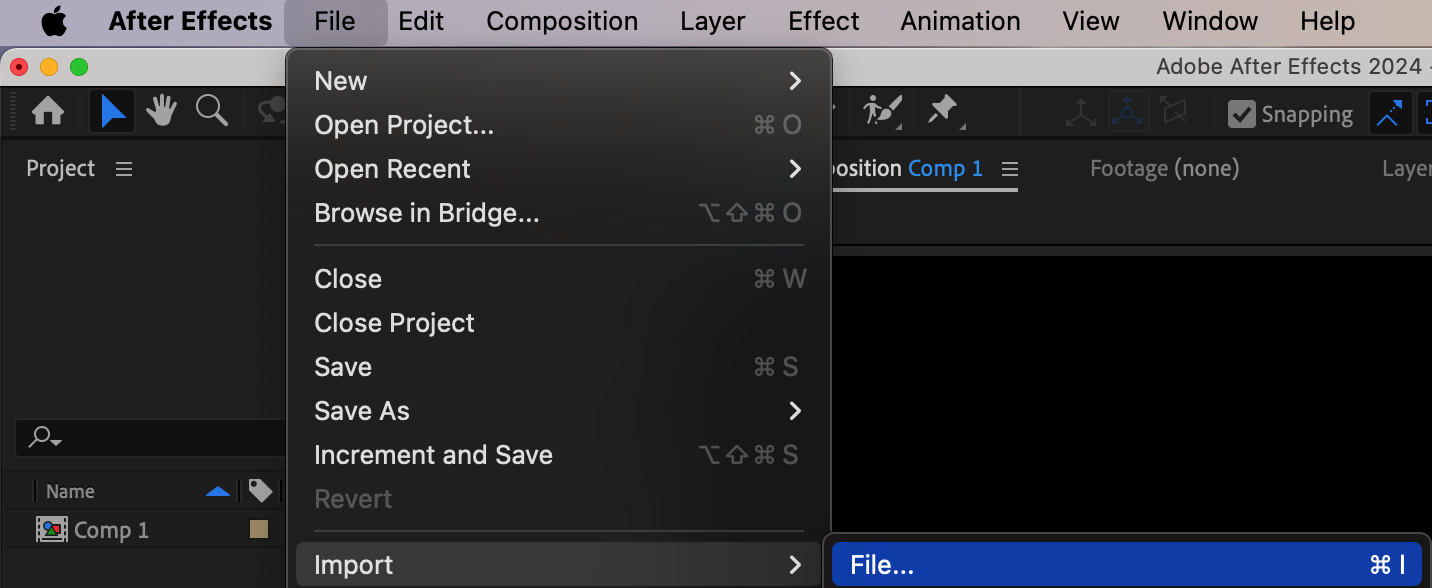
 Step 3: Adjust the Scale
Click the image layer and press “S” to reveal the Scale property. Adjust the values if the image is too big or too small to fit your comp.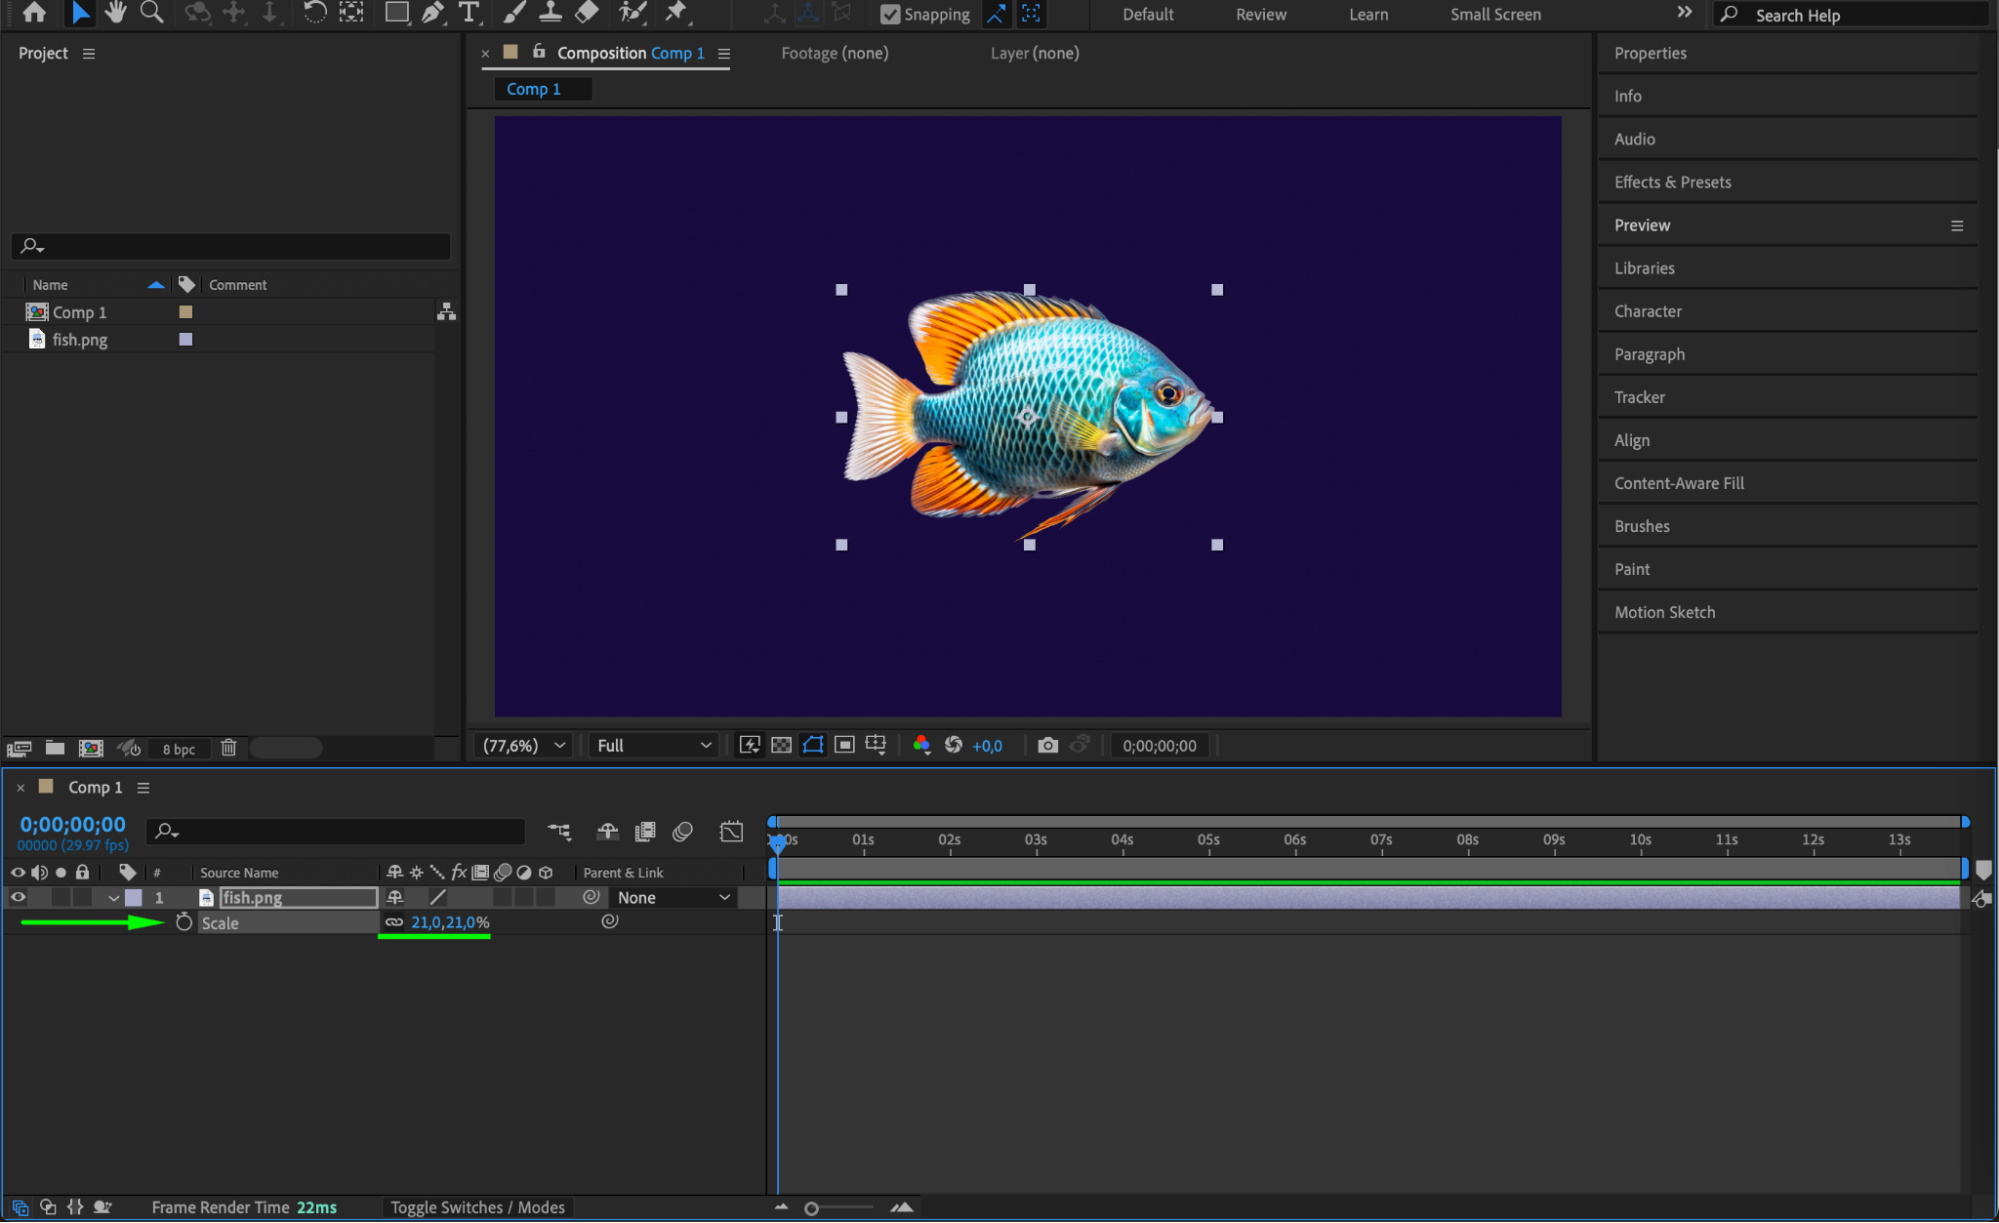
Get 10% off when you subscribe to our newsletter

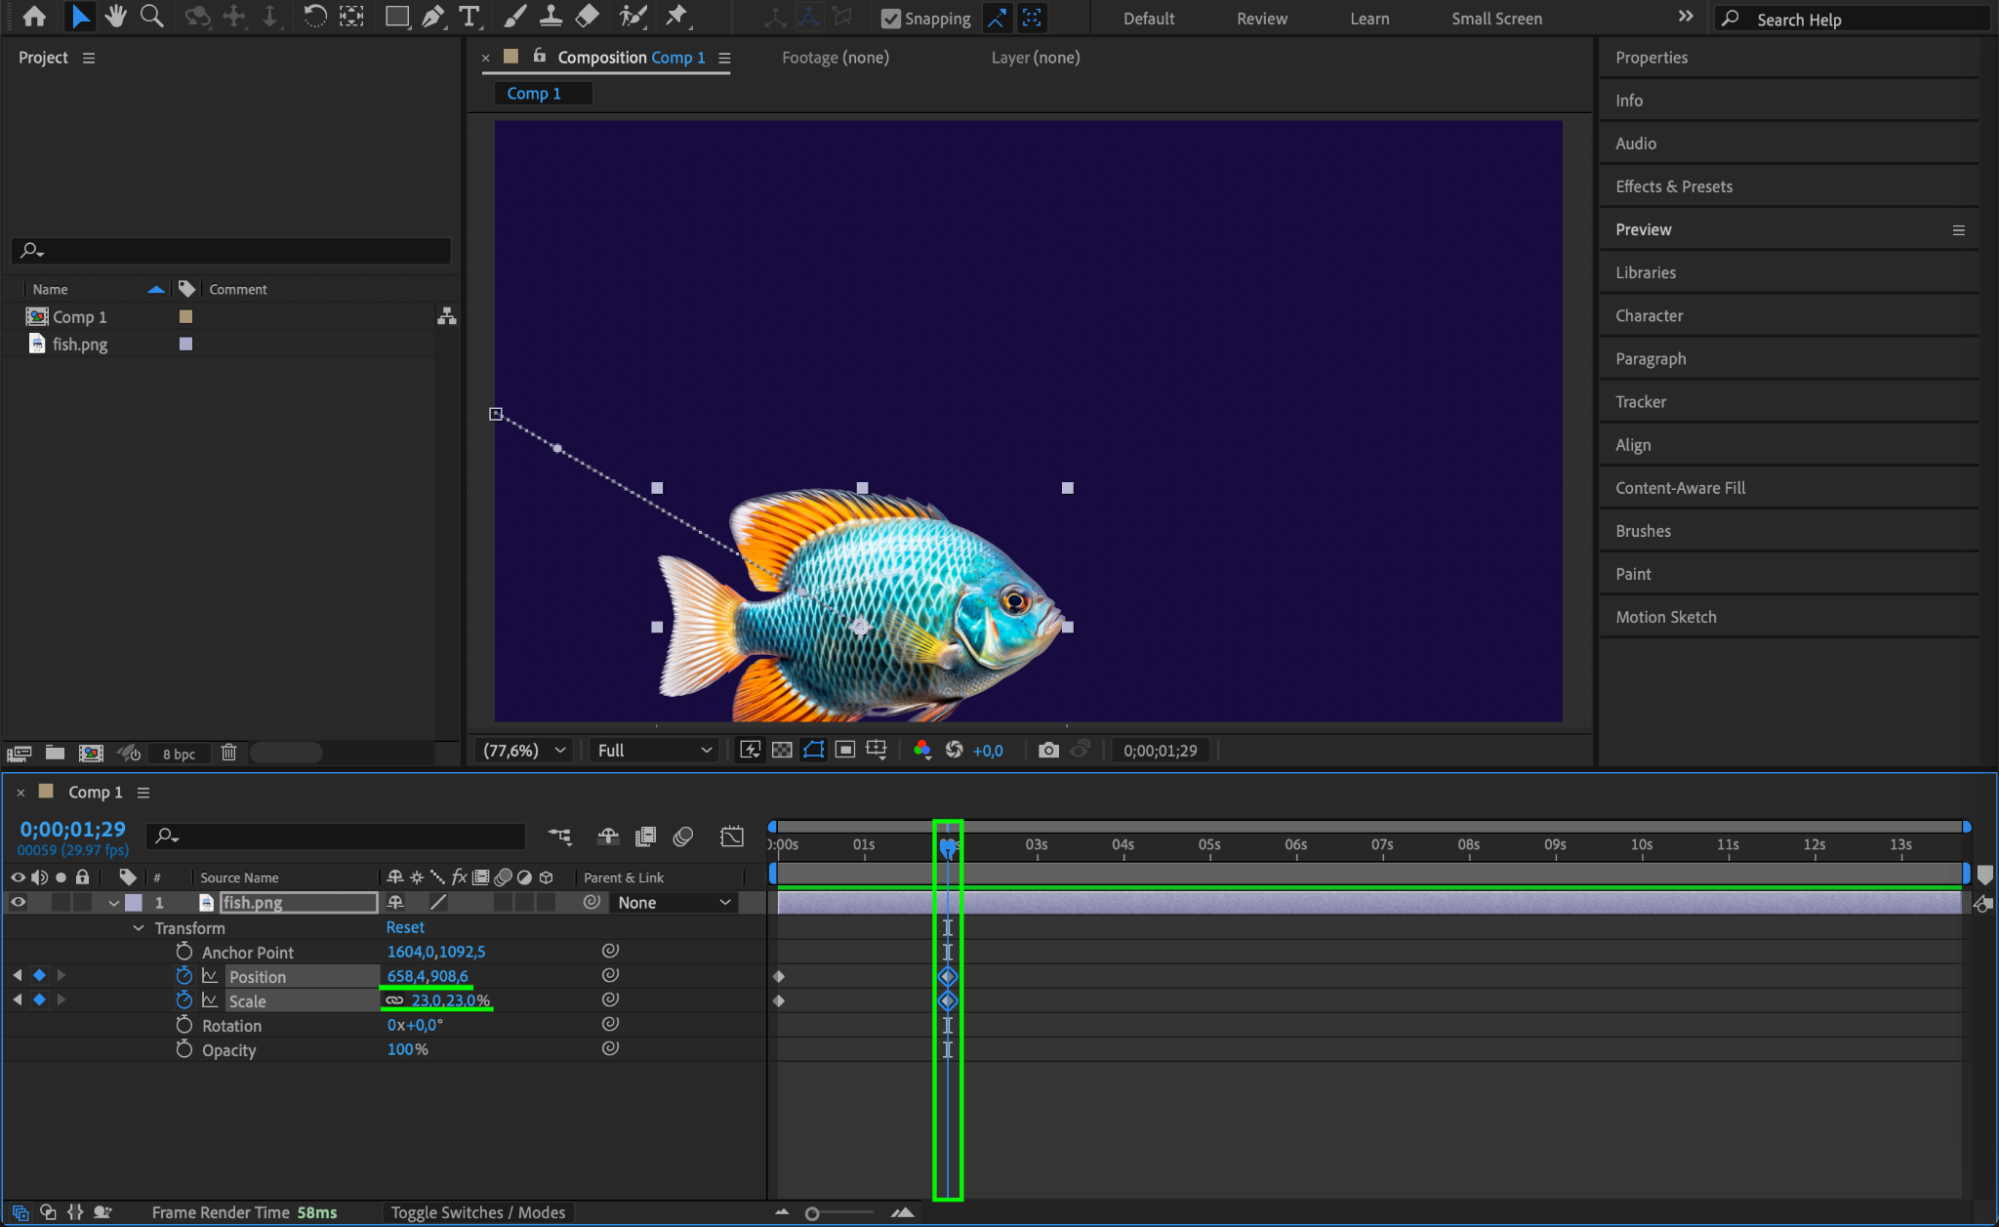
Step 4: Animate Position and Other Properties
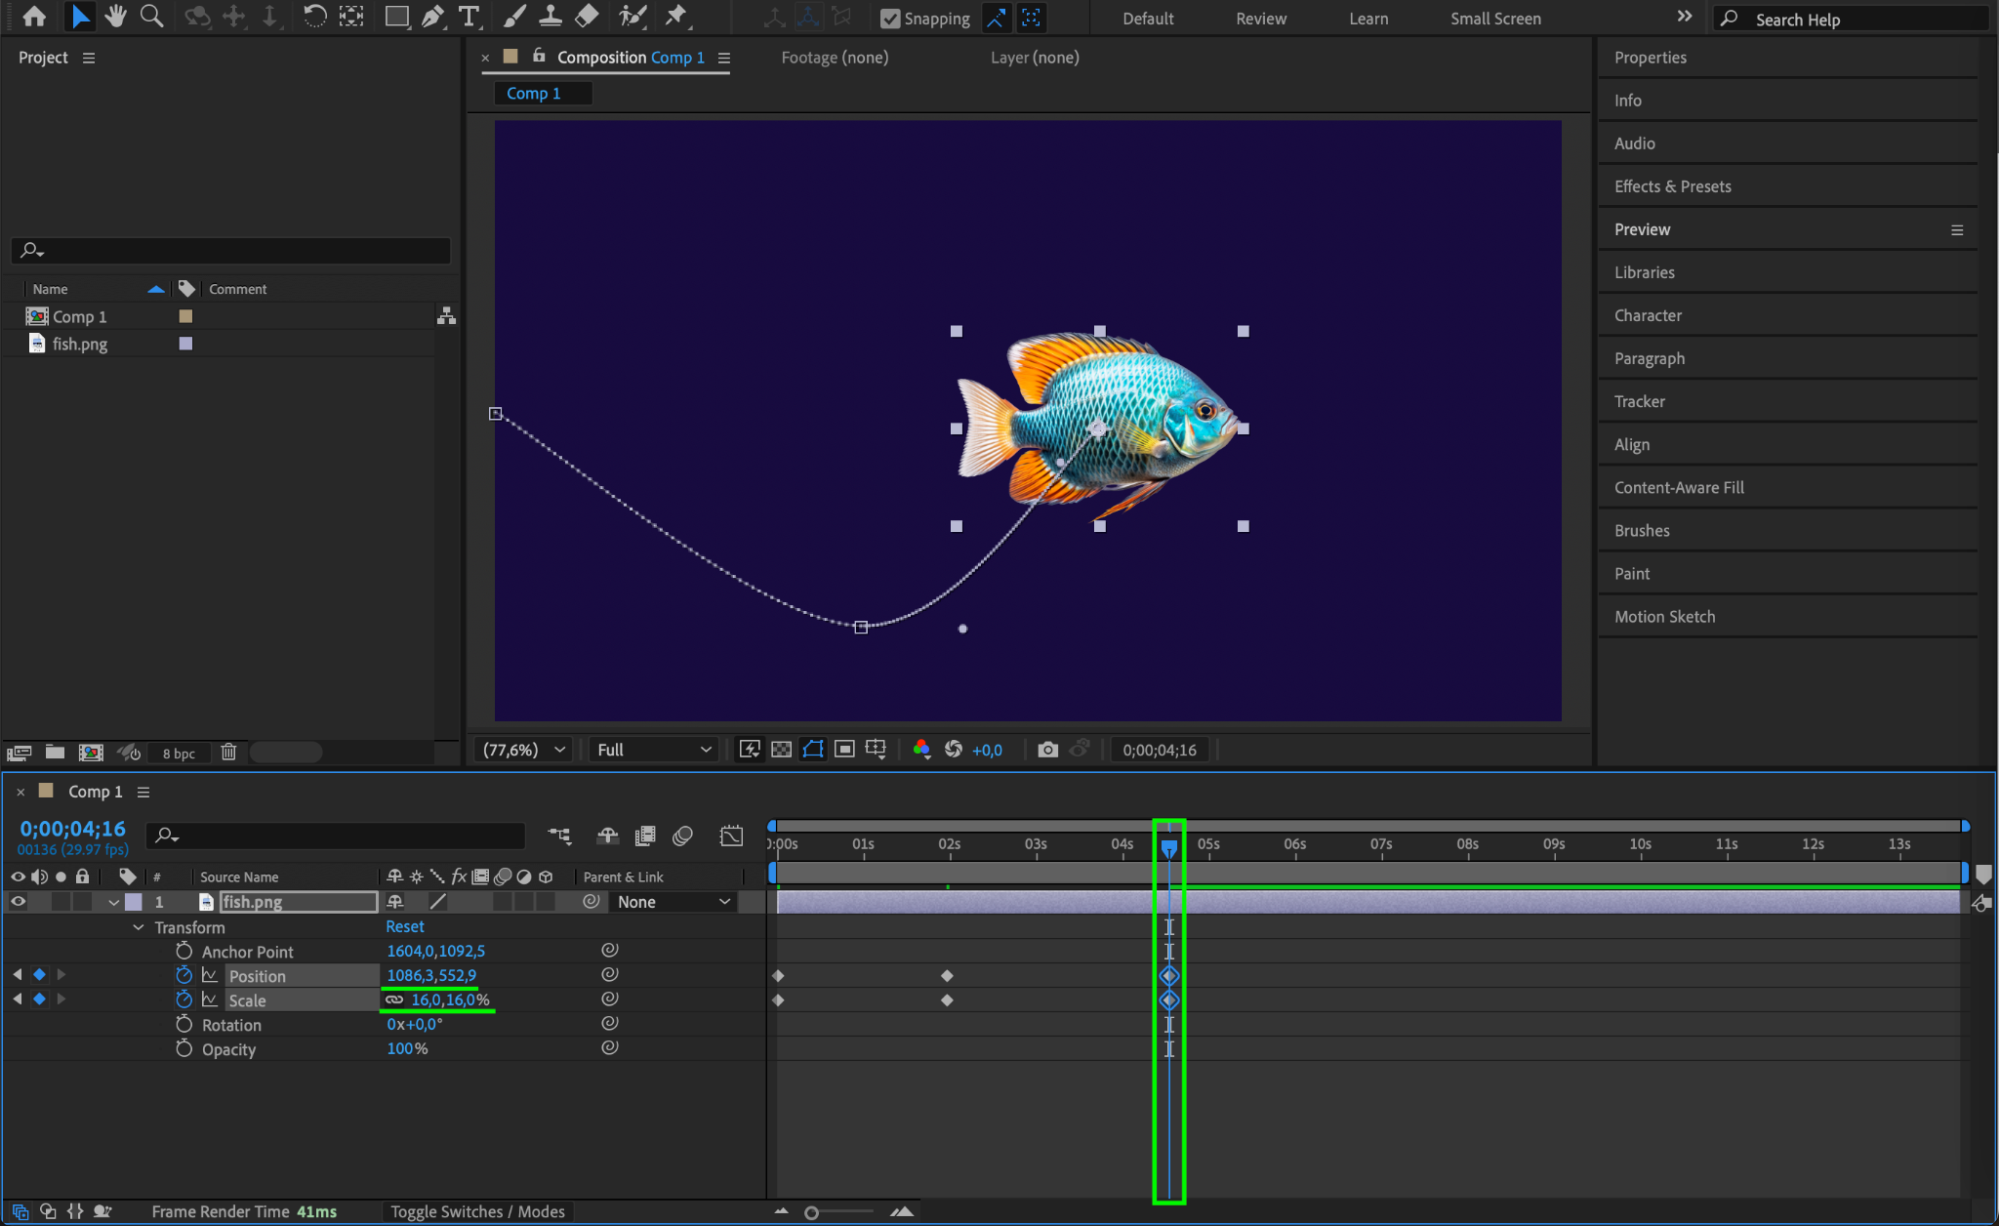
Press “P” to open the Position property. Move the CTI (Current Time Indicator) to the start of the timeline and set a keyframe. Then move the CTI forward and reposition the image either by dragging in the Composition panel or by changing the numeric values. You can also animate Scale (S) and Rotation (R) for added motion.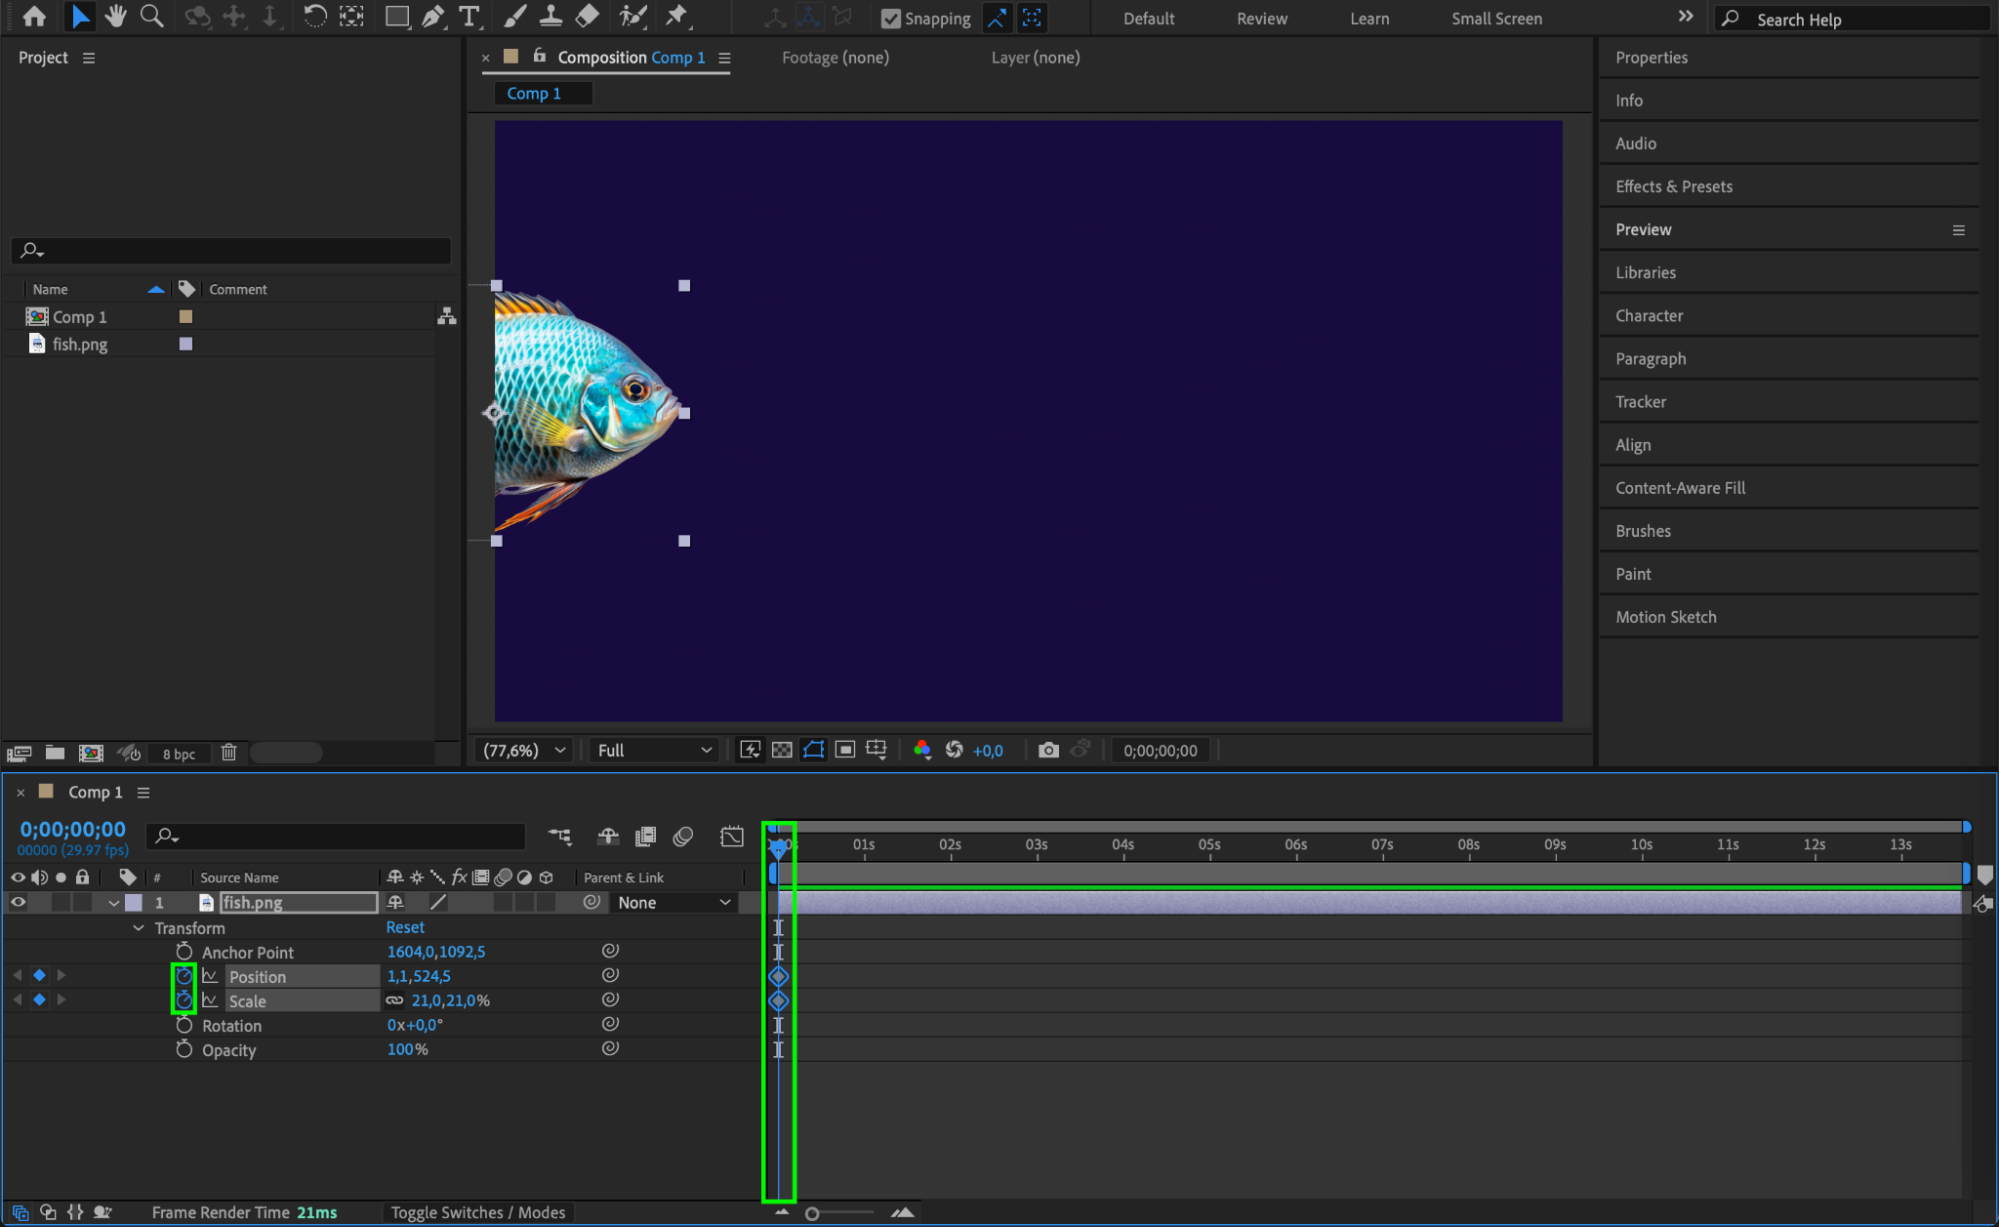
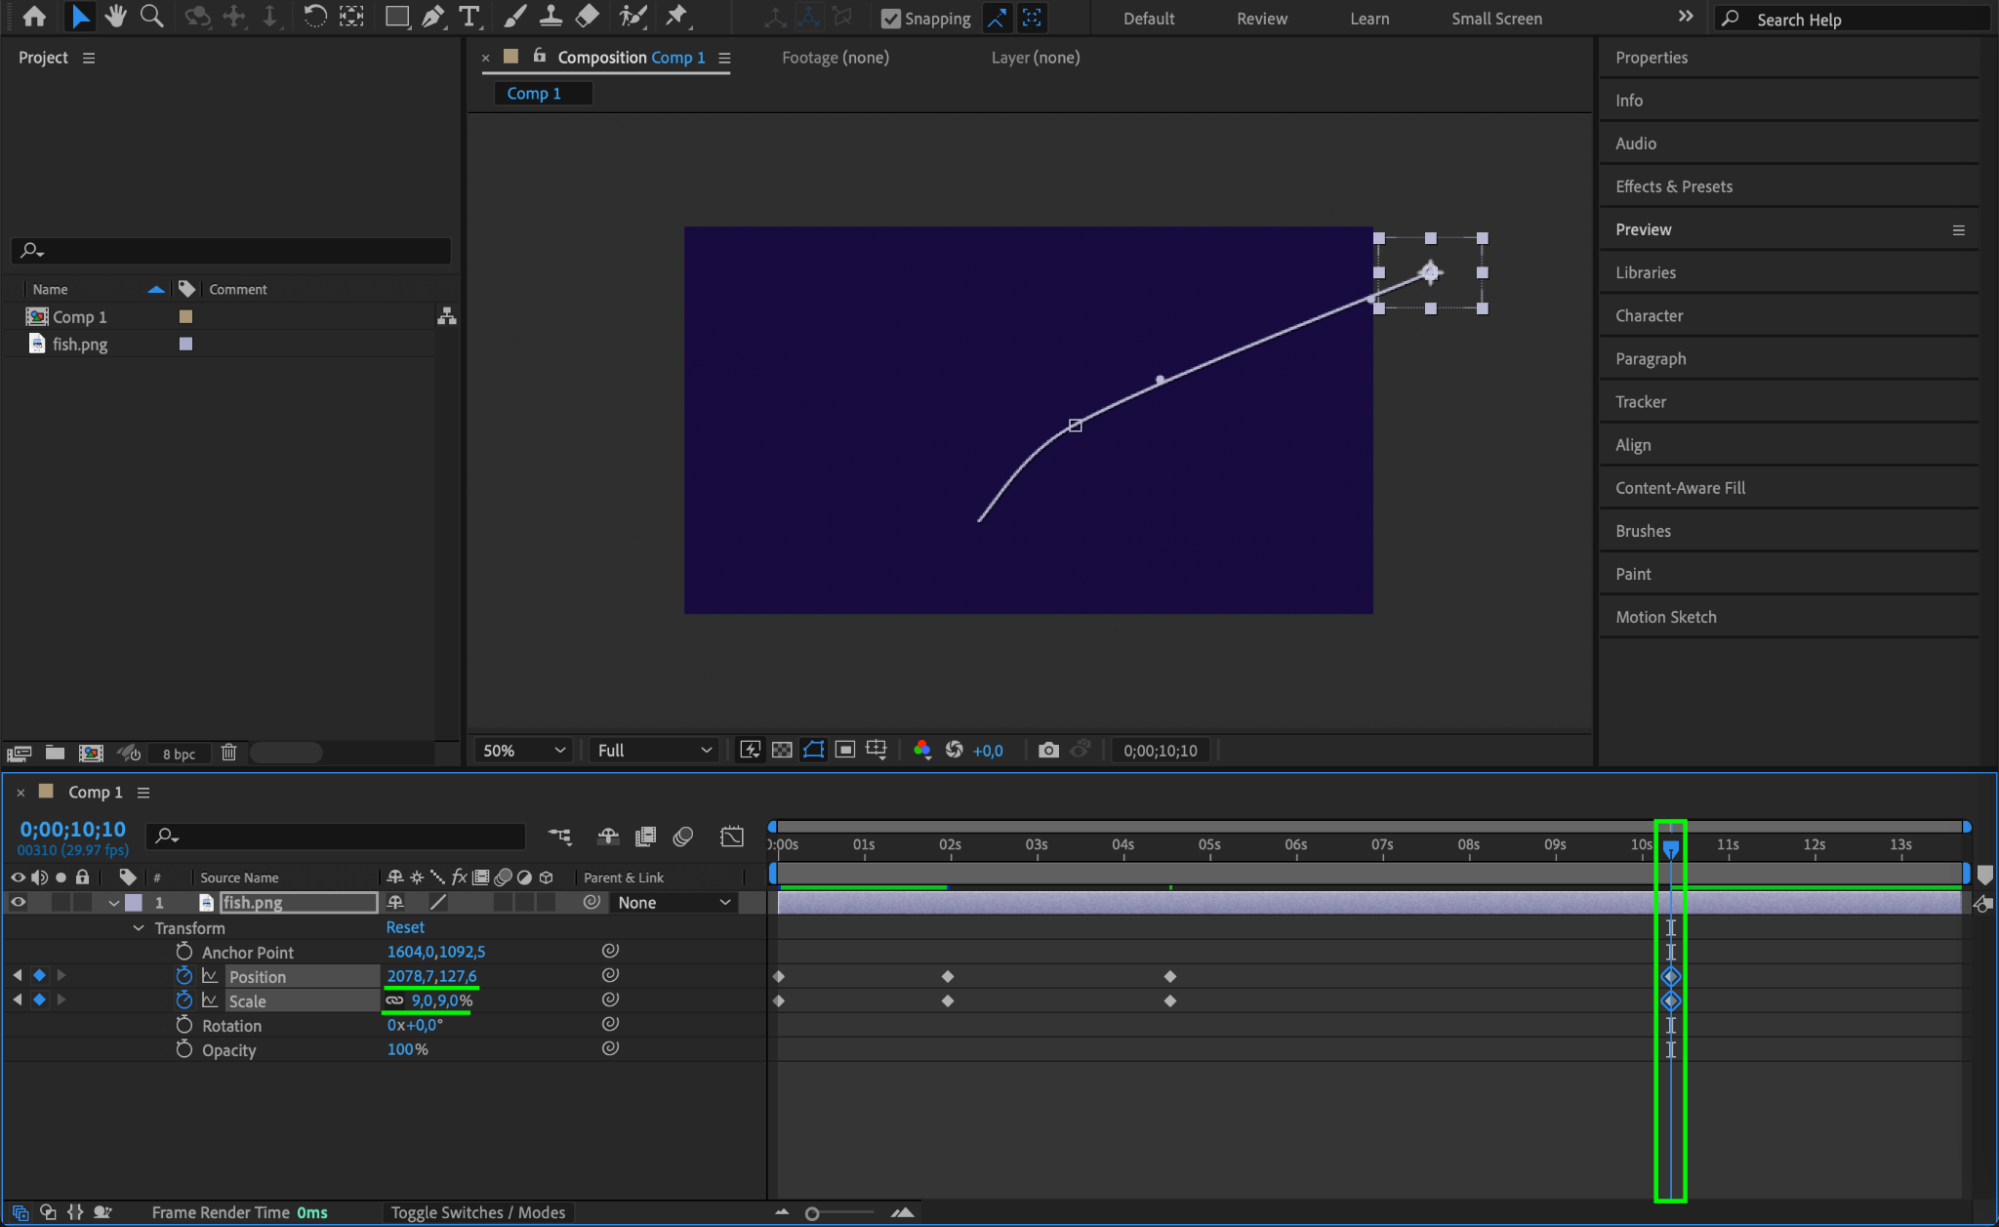 Step 5: Add Smoothness with Easy Ease and Graph Editor
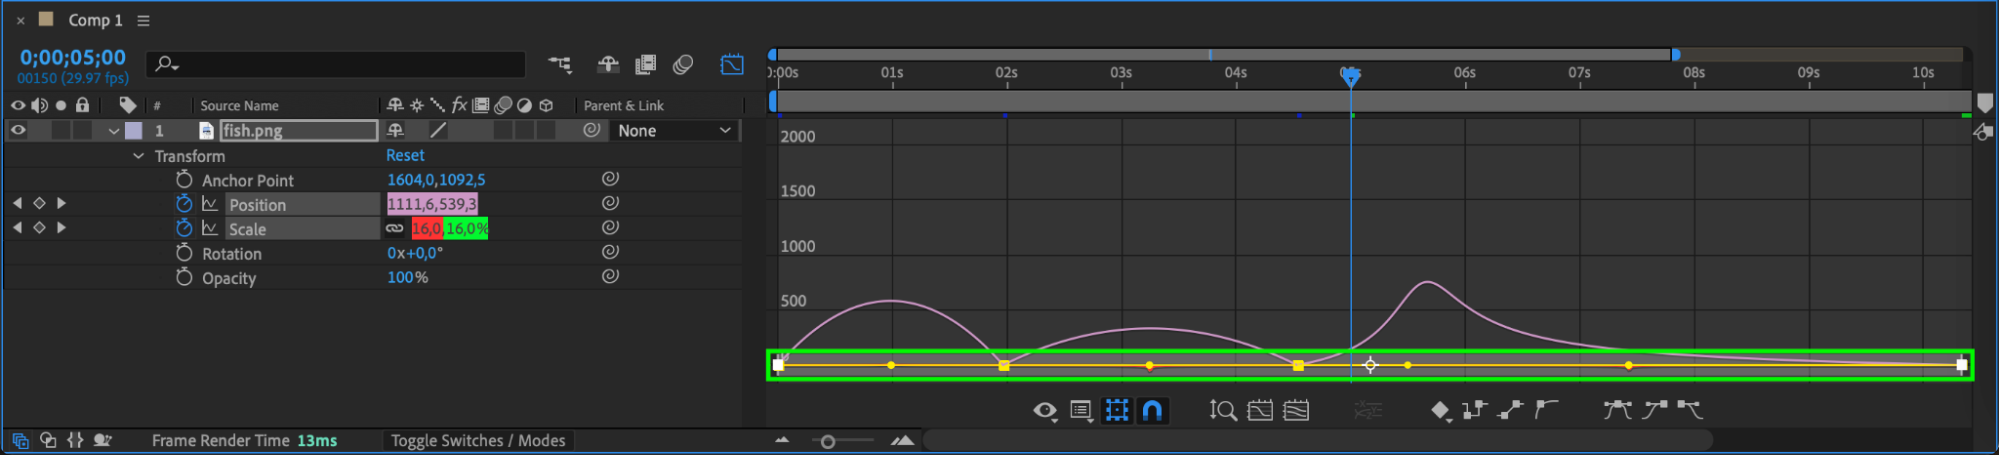
Select your keyframes, right-click, and choose Keyframe Assistant > Easy Ease. Then open the Graph Editor to fine-tune the speed curve, making the movement feel more natural and professional.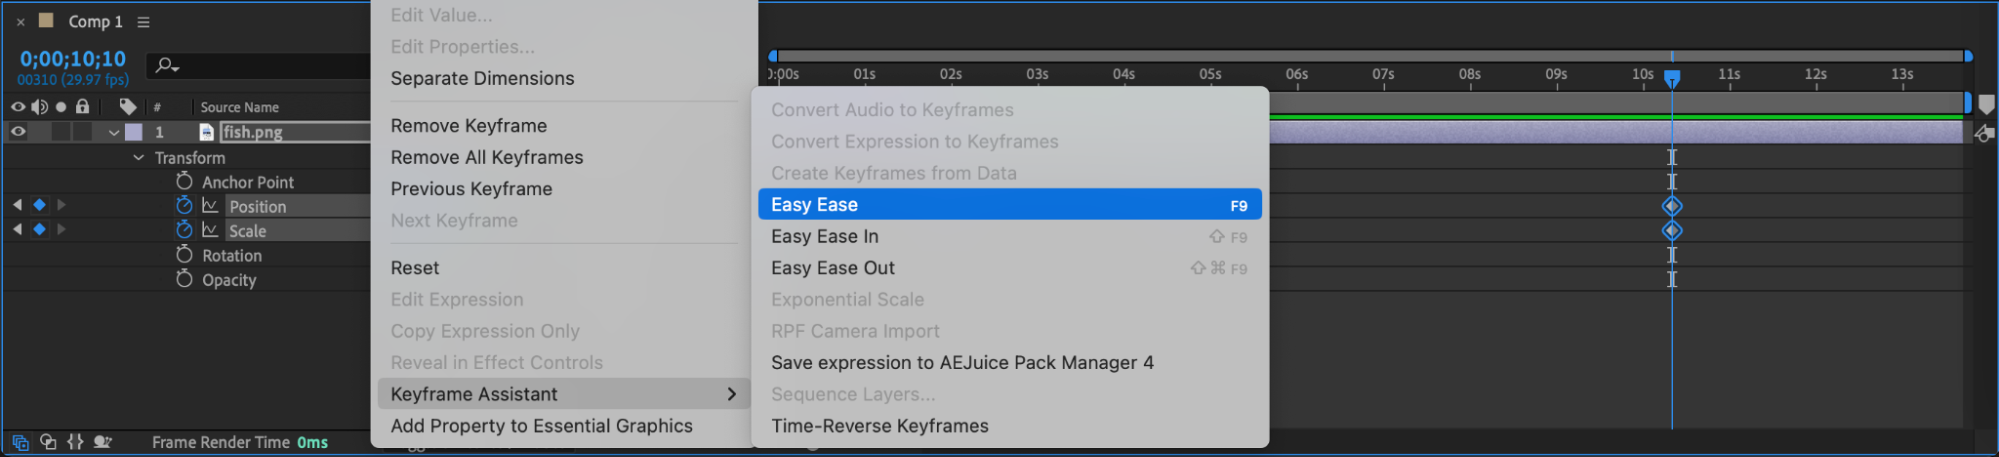
 Step 6: Animate the Shape with Puppet Pin Tool
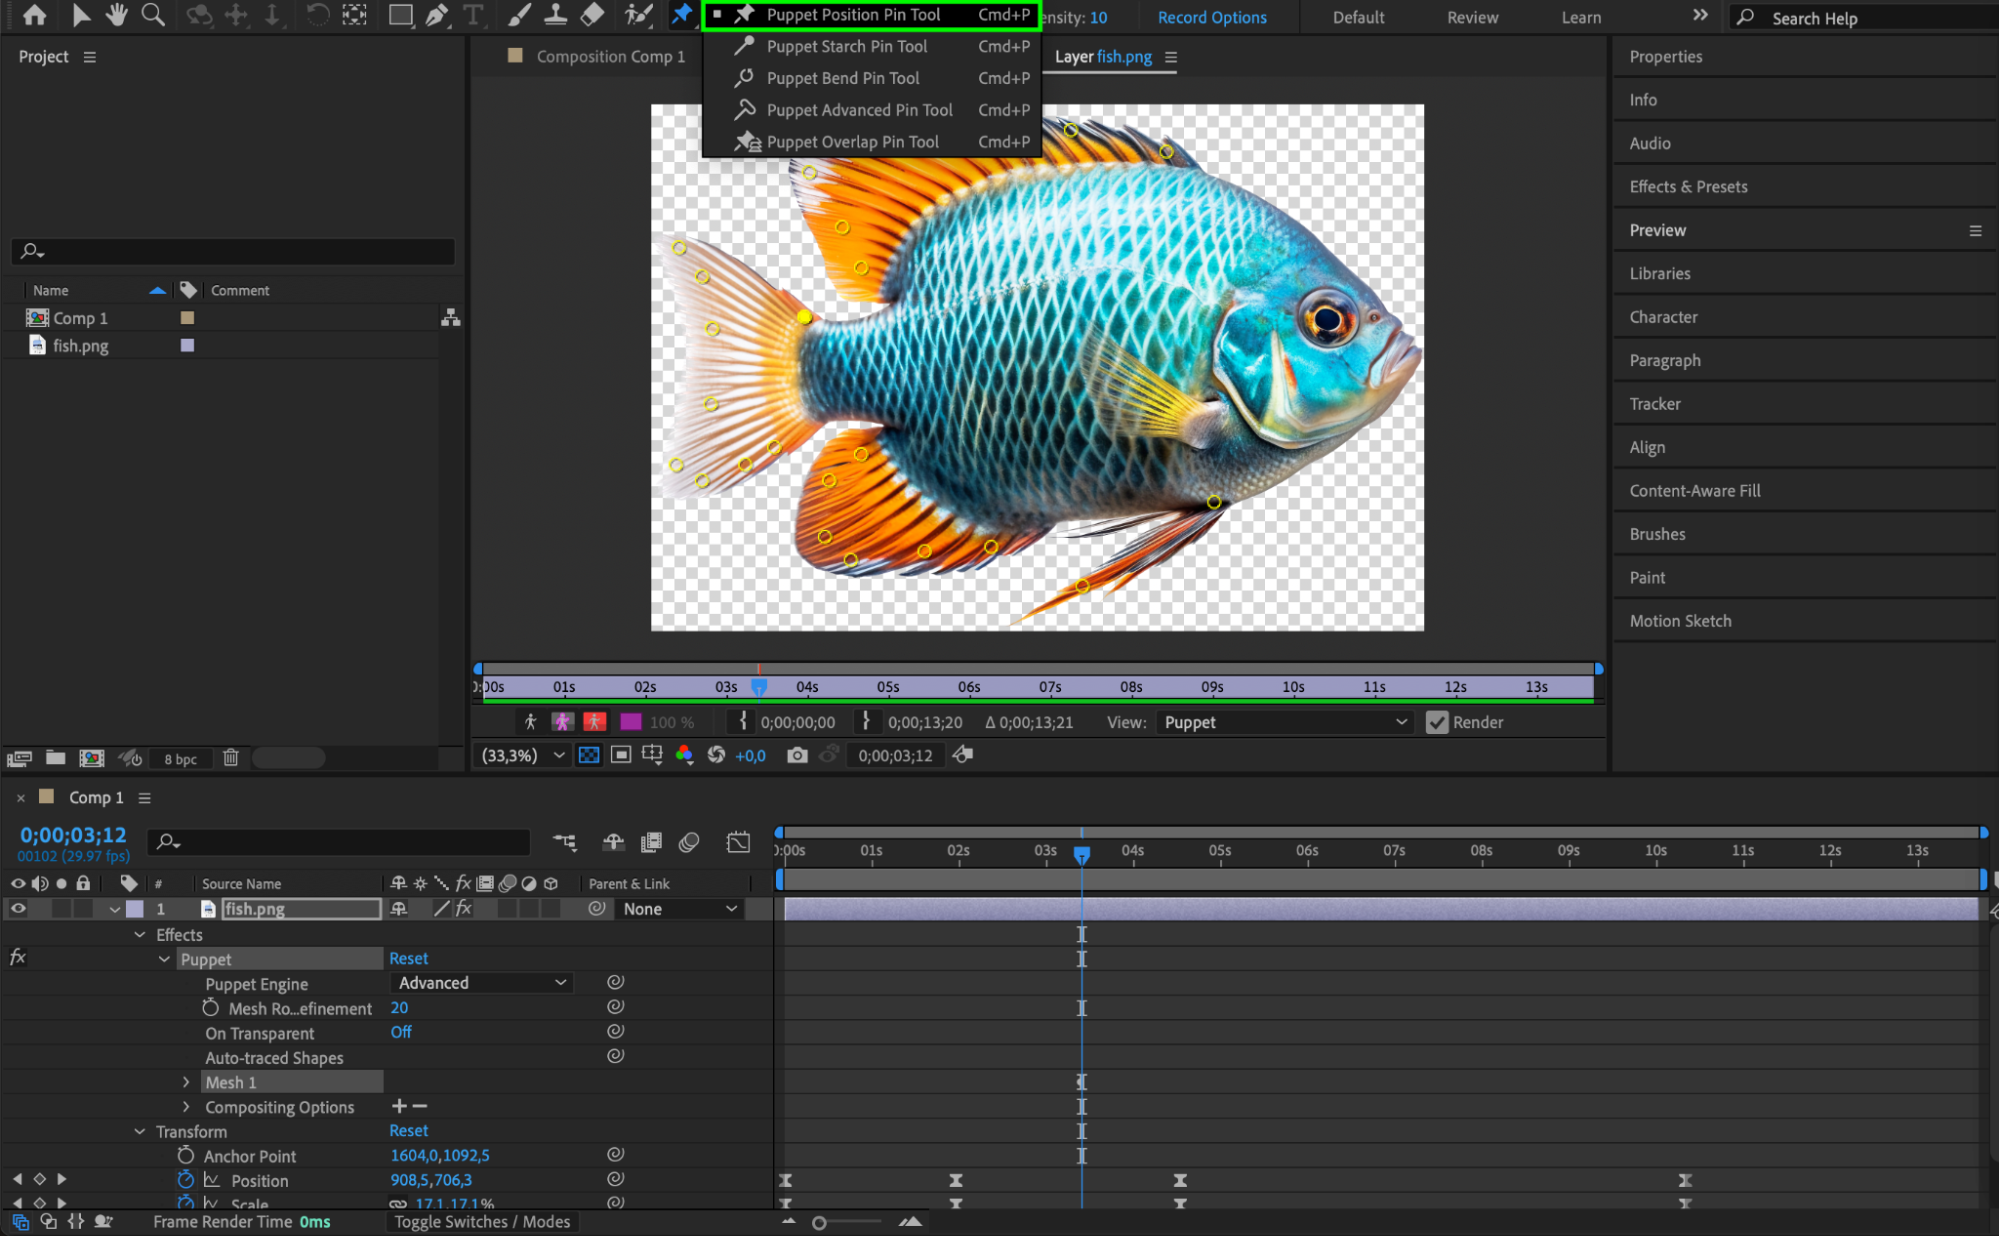
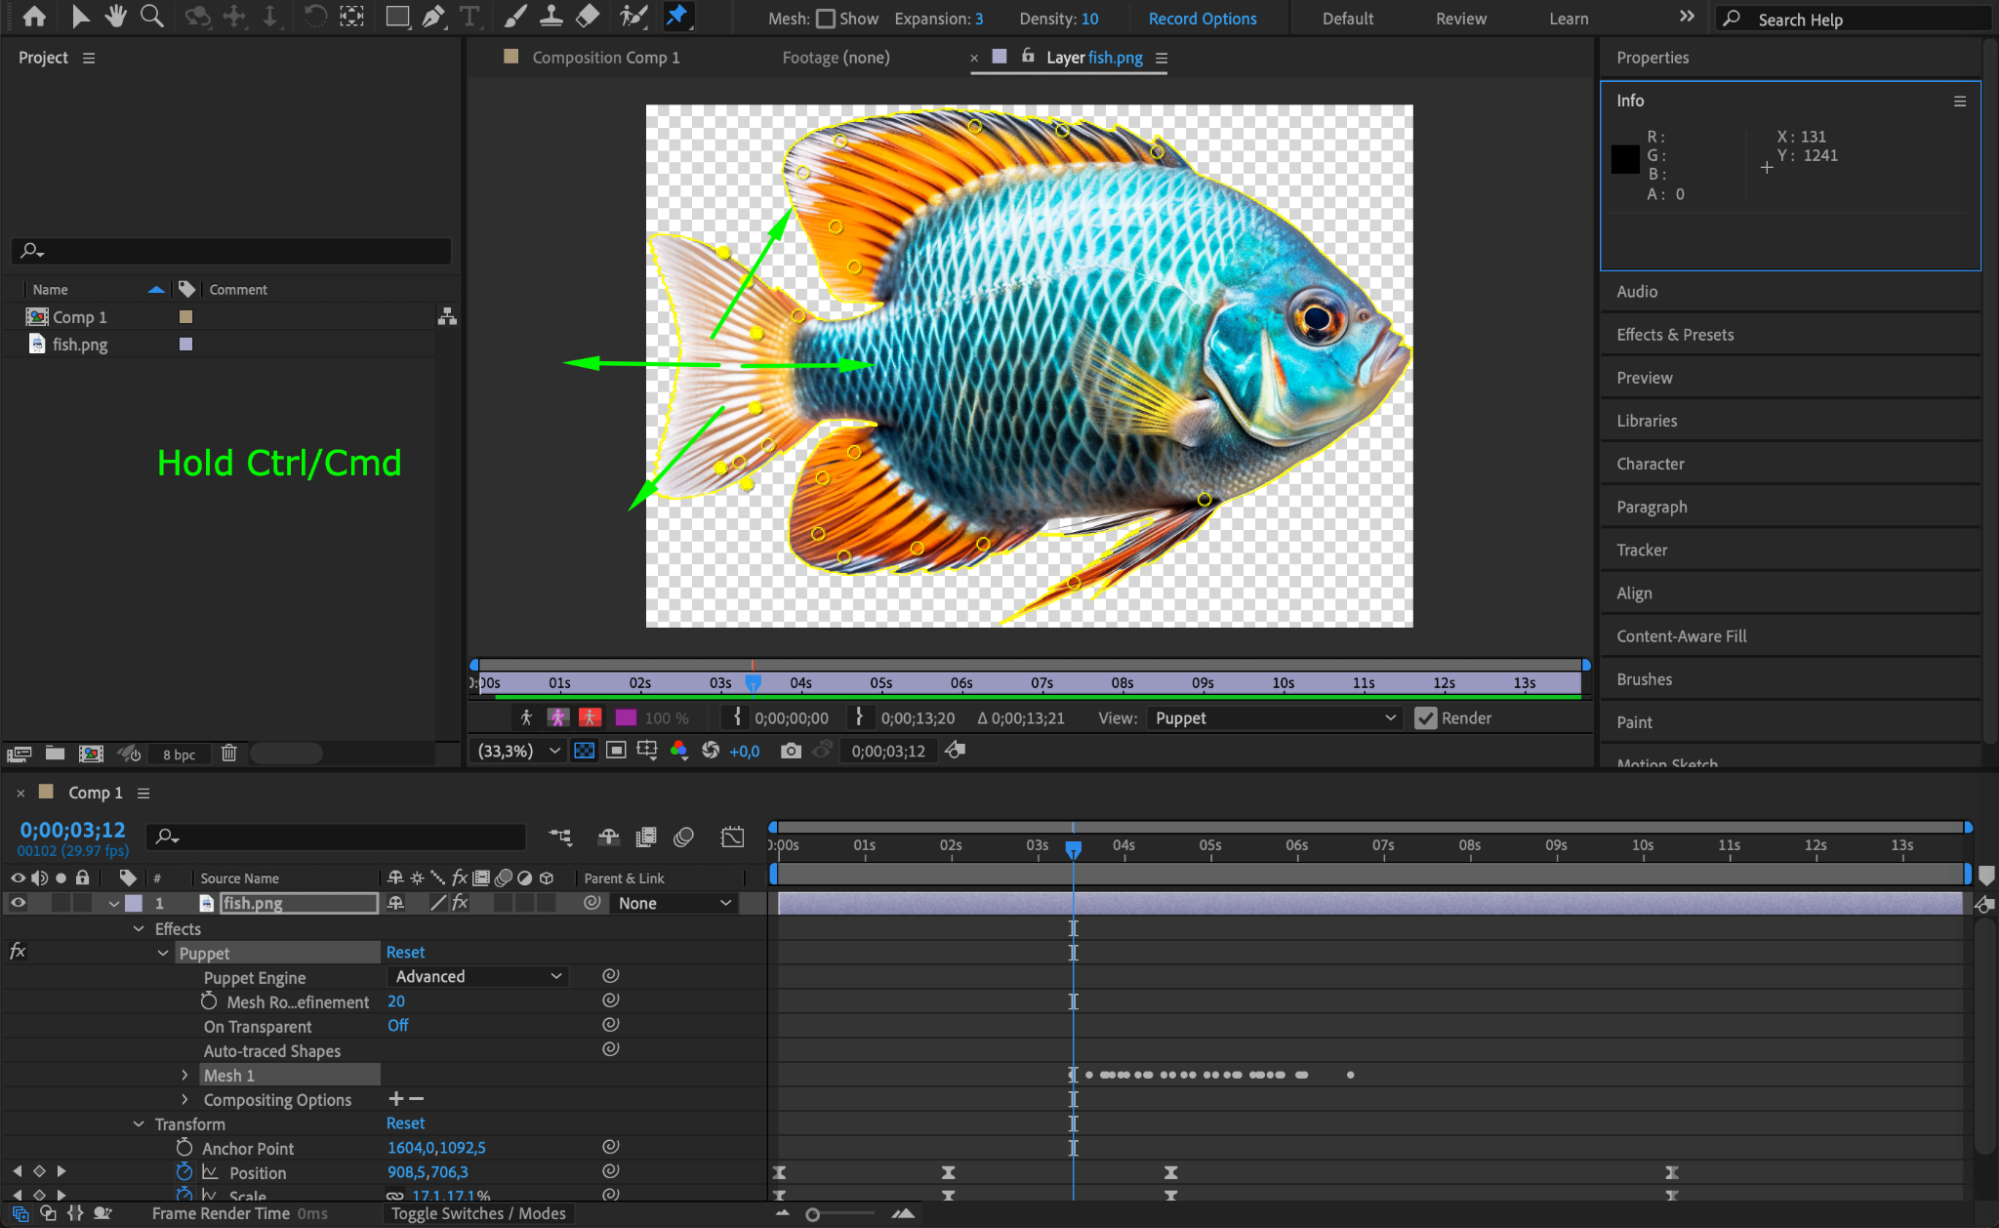
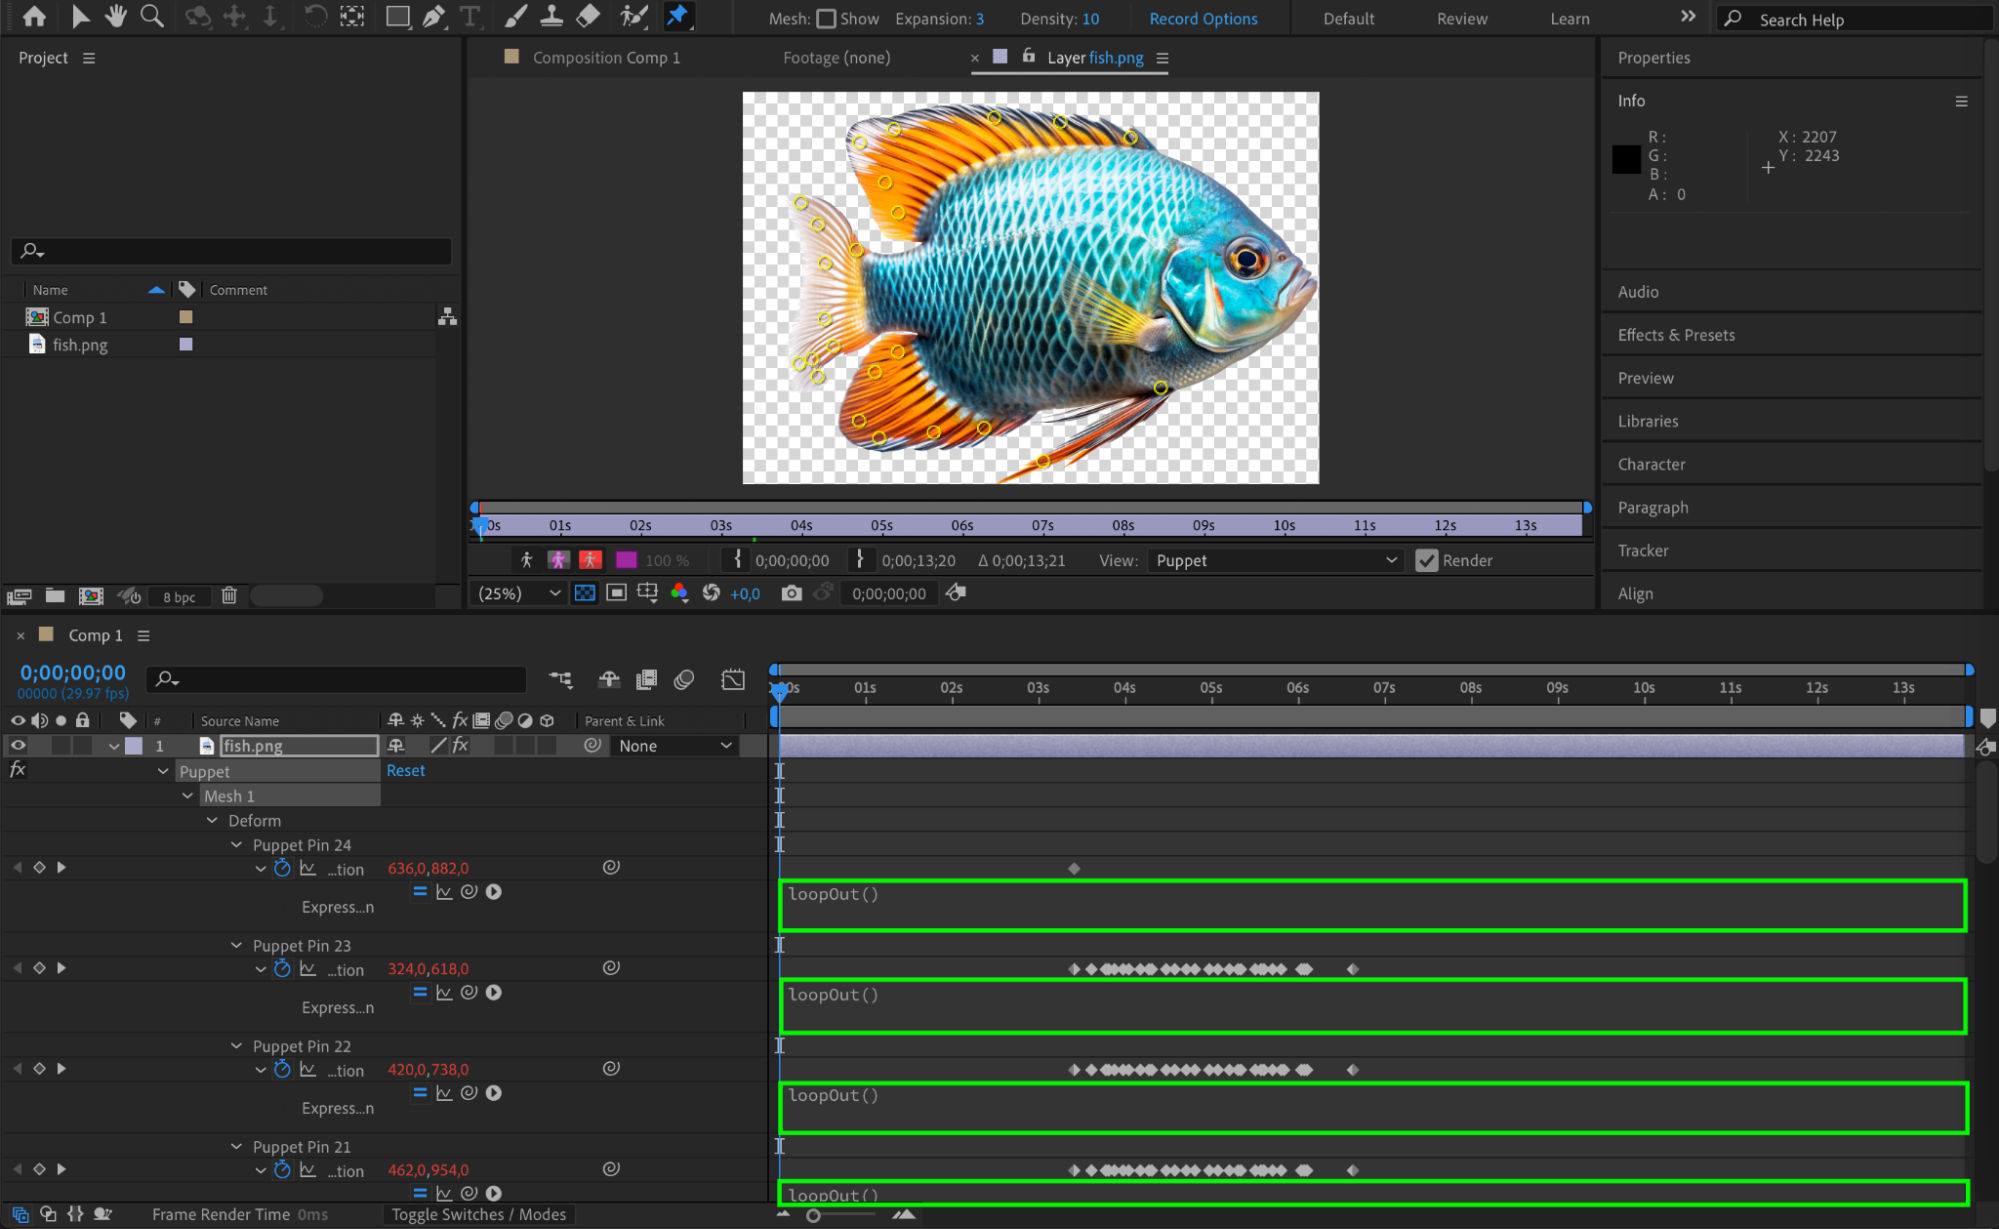
Double-click the image layer to open it in the Layer Panel. Select the Puppet Pin Tool (Ctrl/Cmd+P) and click to place pins on the areas you want to animate (such as a fish’s tail or fin). Move the CTI (Current Time Indicator) to the beginning of the timeline and set the initial positions. Then, hold Ctrl/Cmd and drag the pins to new positions at a different time – this records motion over time and creates automatic keyframes. This simulates movement, such as gentle flapping or waving. Once your animation is done, apply the expression loopOut() to each animated property to make the movement loop continuously.
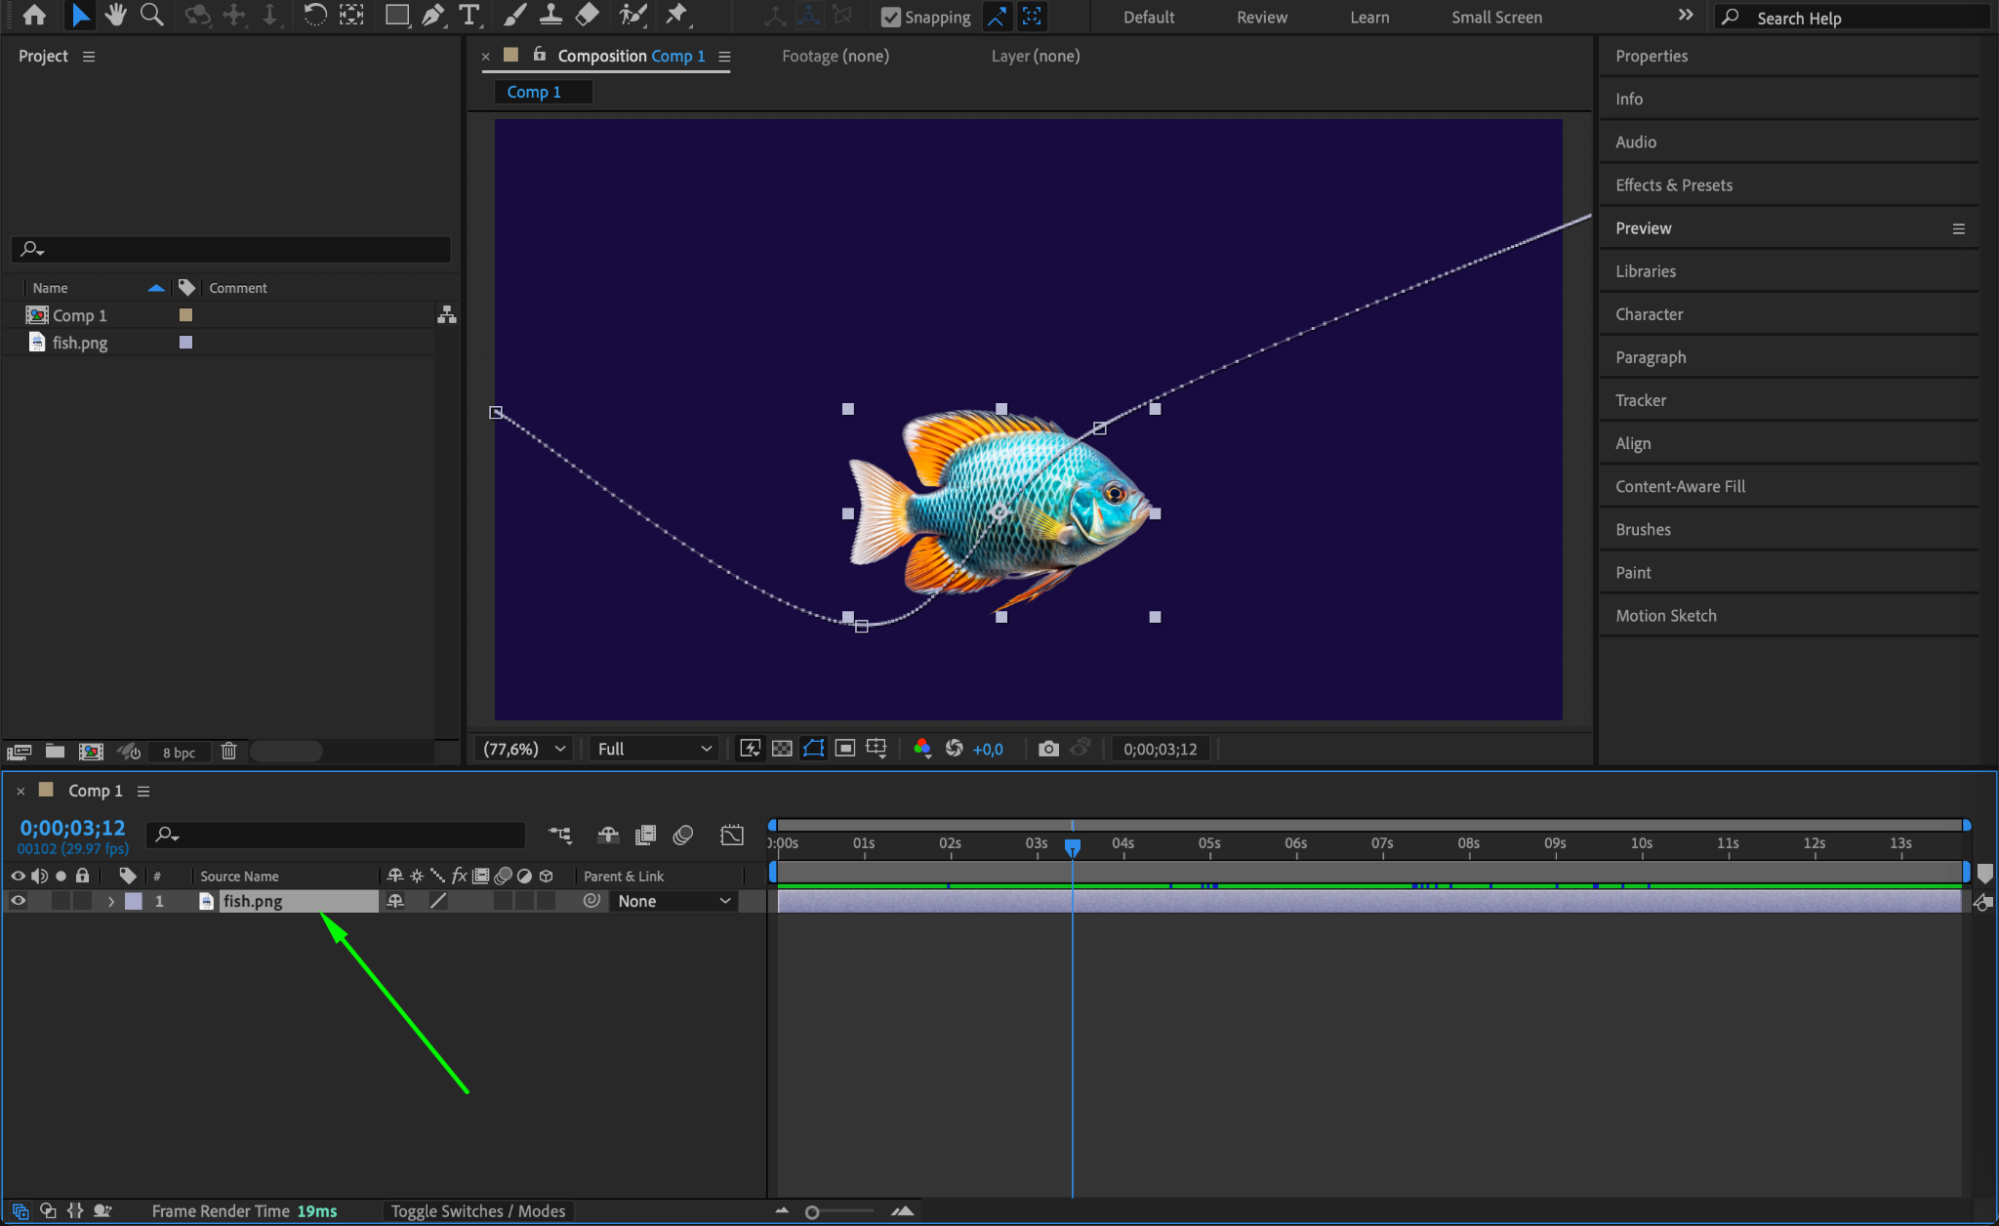
Step 7: Return to Comp Panel and Enable Motion Blur
Go back to the Composition Panel and enable Motion Blur by clicking the icon for your image layer and activating it in the timeline. This adds a more realistic motion effect.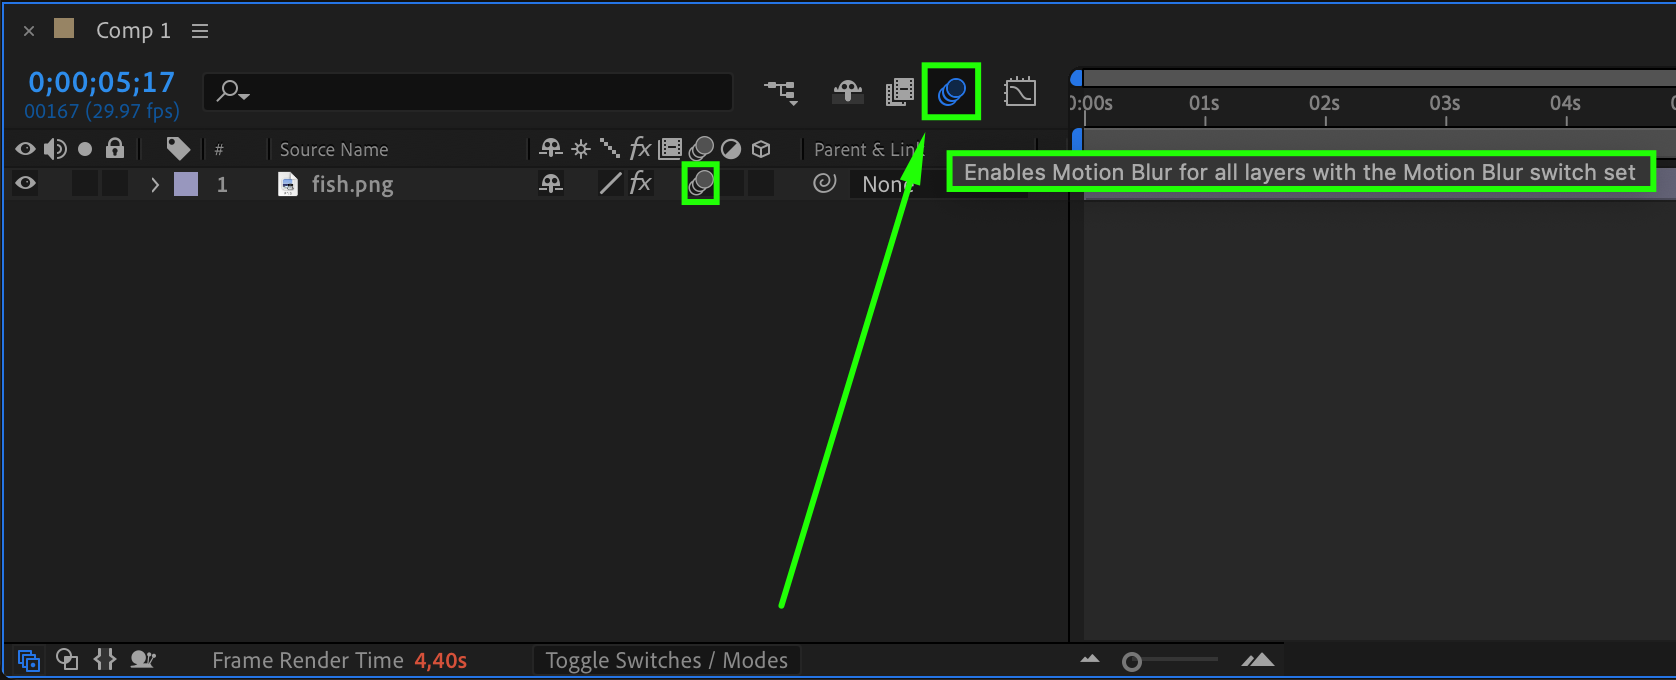
Step 8: Import and Add Background
Go to File > Import > File, bring in your background image or video, and place it below your moving image layer. This will complete the scene and provide context for your animation.
Step 9: Preview Your Animation
Press the spacebar to preview your work. Watch how your still image now moves, deforms, and interacts naturally within the scene.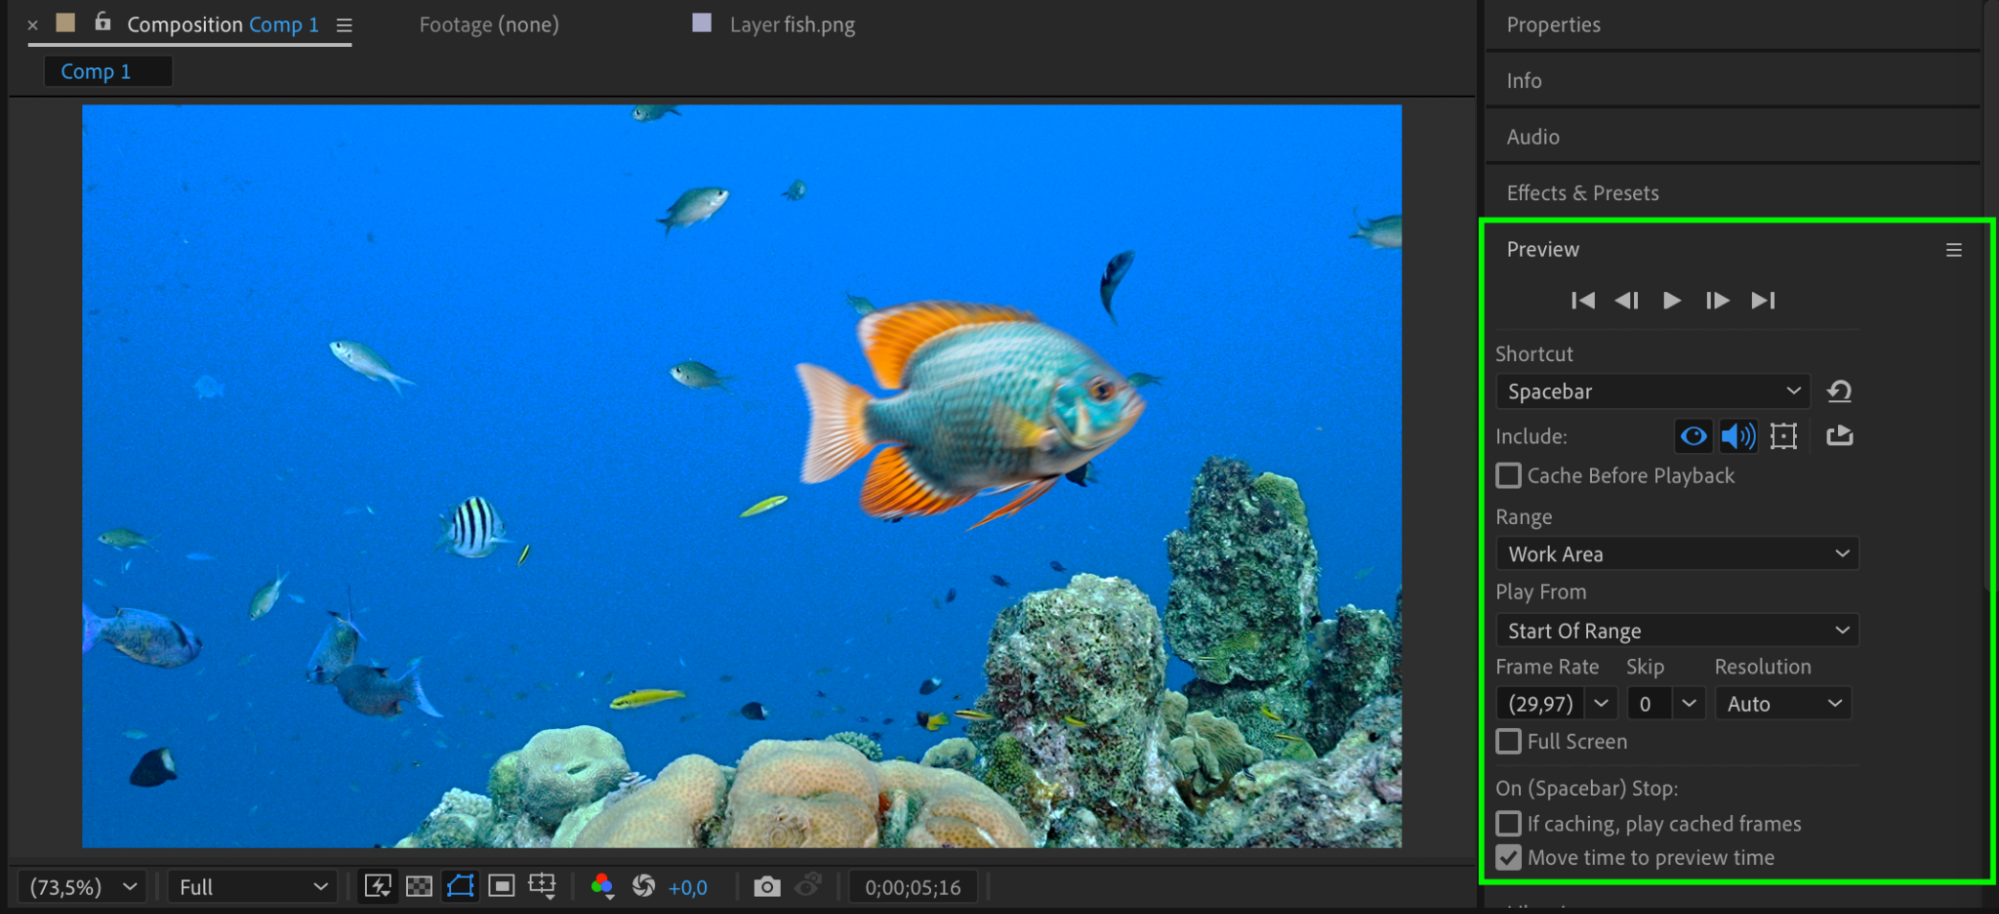 Step 10: Render Your Final Animation
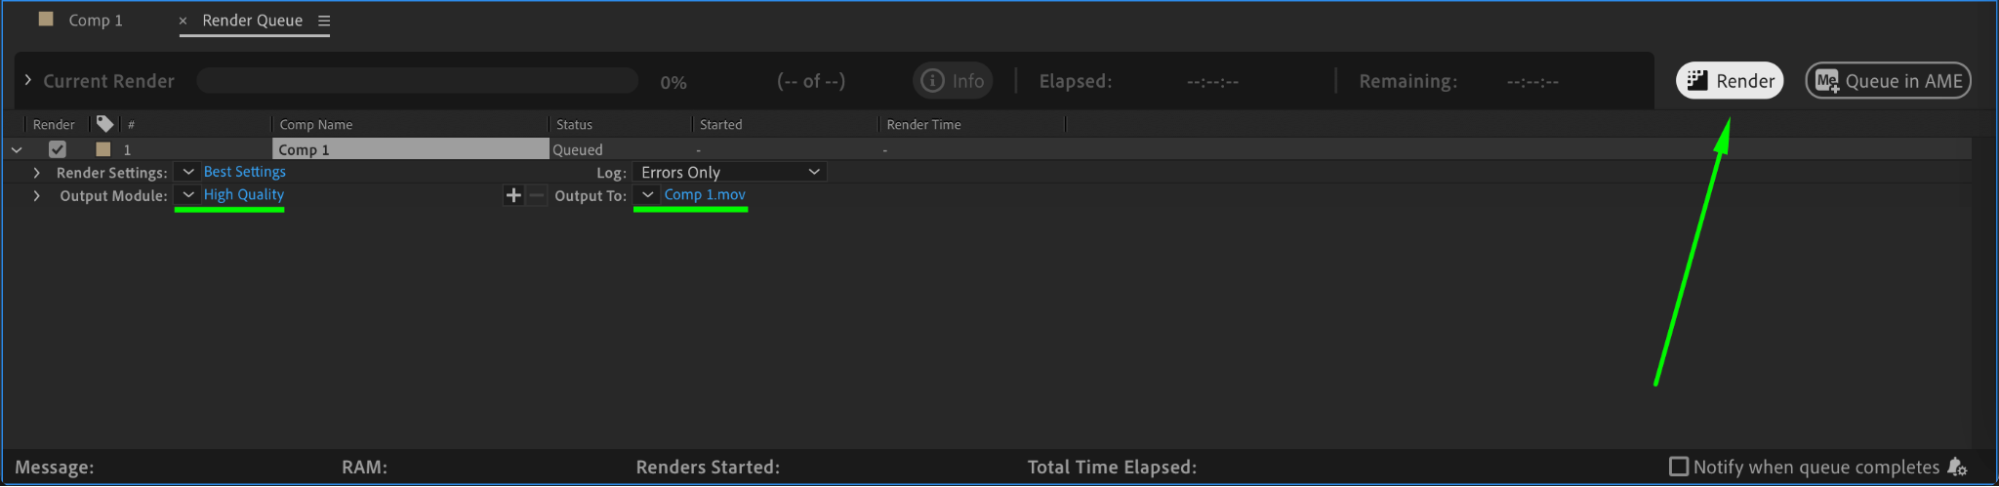
Once satisfied, go to Composition > Add to Render Queue. Choose your desired output format and click Render to export the finished animated photo.

Conclusion
Animating static images in After Effects can turn a simple picture into an engaging visual element. With keyframe animation, puppet deformation, and loop expressions, you can create dynamic effects that give your designs energy and realism.
Our Bestsellers


