Creating Animated Christmas Lights in After Effects
Introduction to Christmas Lights Animation
Adding Christmas lights to your After Effects project can create a festive and warm atmosphere. Using Vegas and Strobe Light effects, you can make a glowing, blinking light string with customizable colors and animations. Follow these steps to create a realistic Christmas light effect.
Step 1: Create a New Composition
Go to Composition > New Composition and set the frame rate to 29.97 fps. Adjust the resolution and duration as needed for your project. Click OK to create the composition.
 Step 2: Add an Adjustment Layer for Glow
Go to Layer > New > Adjustment Layer and name it “Glow.” This layer will be used later to enhance the brightness of the lights.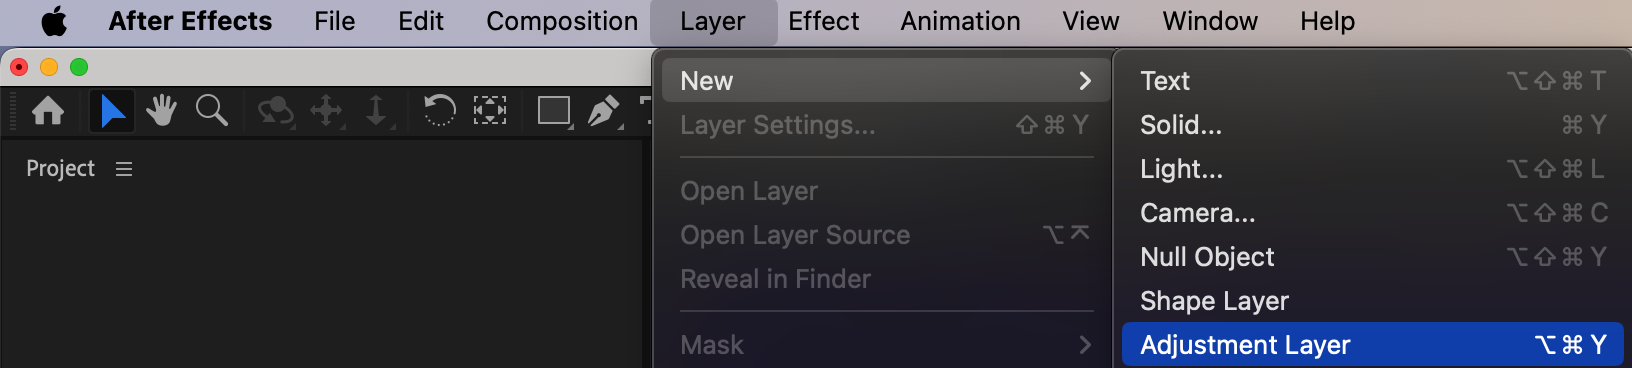 Step 3: Apply Glow Effects
Open the Effects & Presets panel, search for Glow, and apply it twice to the Glow adjustment layer. This will give the lights a realistic glowing effect.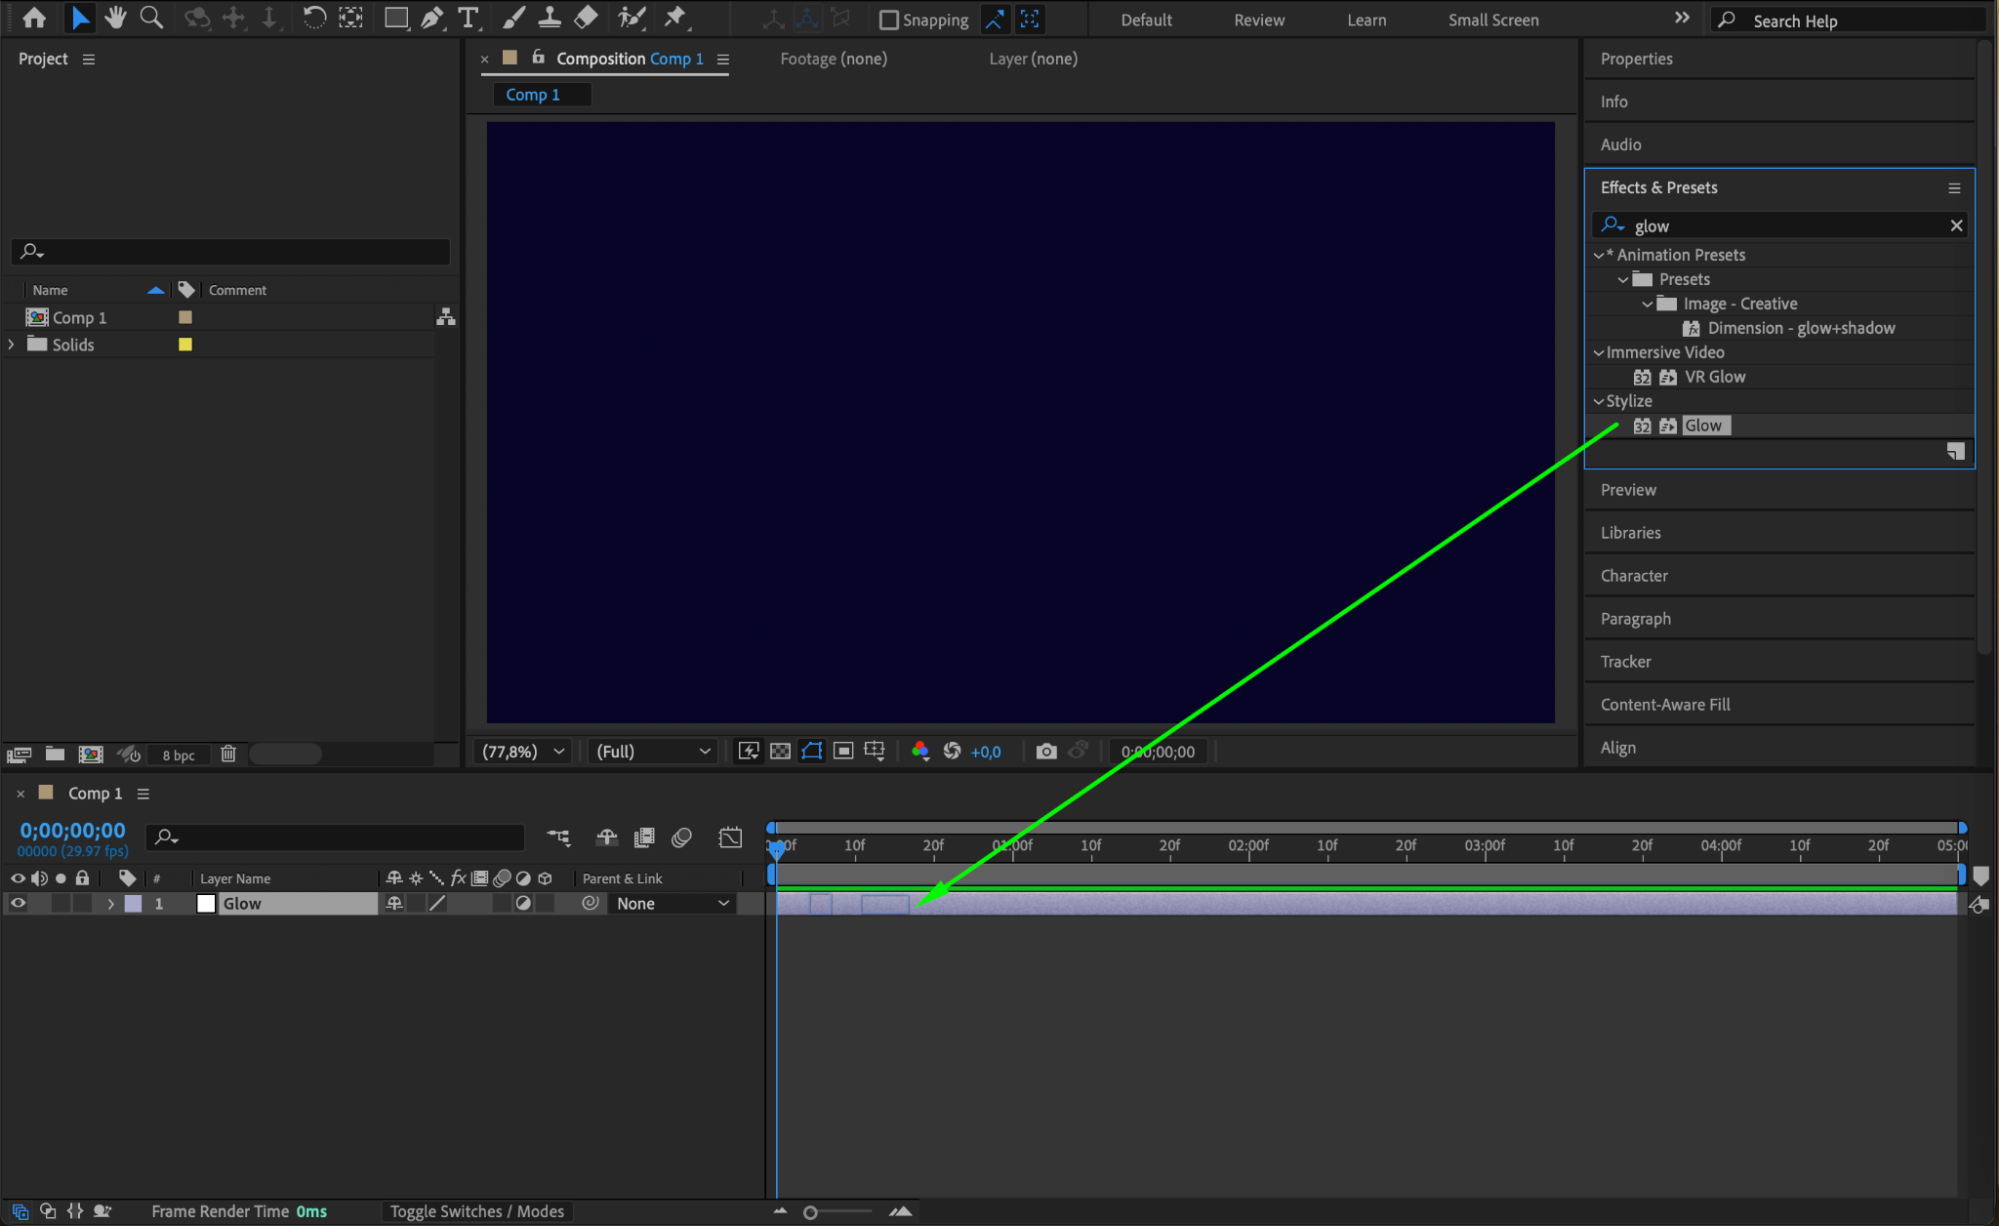 Step 4: Create a Solid Layer for the Light Path
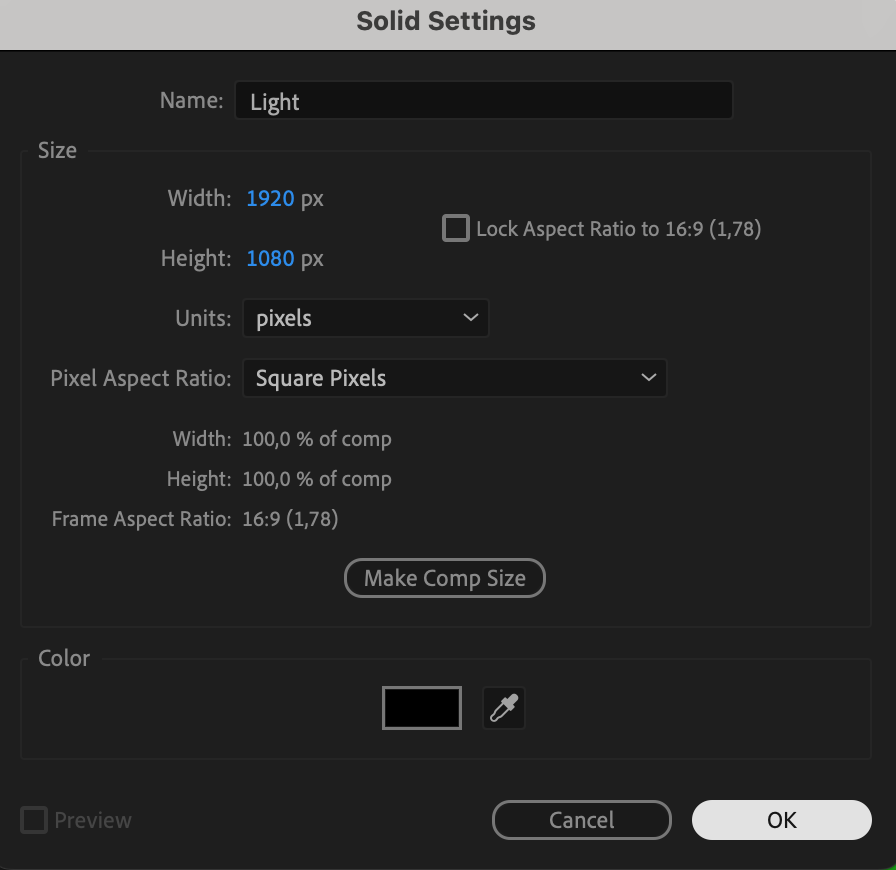
Go to Layer > New > Solid, choose any color, and name it “Light.” Place this layer below the Glow adjustment layer. This solid will act as the base for the Christmas light string.
 Step 5: Draw the Light String Shape
Select the Light solid layer and use the Pen Tool (G) to draw a path that represents the shape of the Christmas light string. This can be a simple curved line or a more complex shape.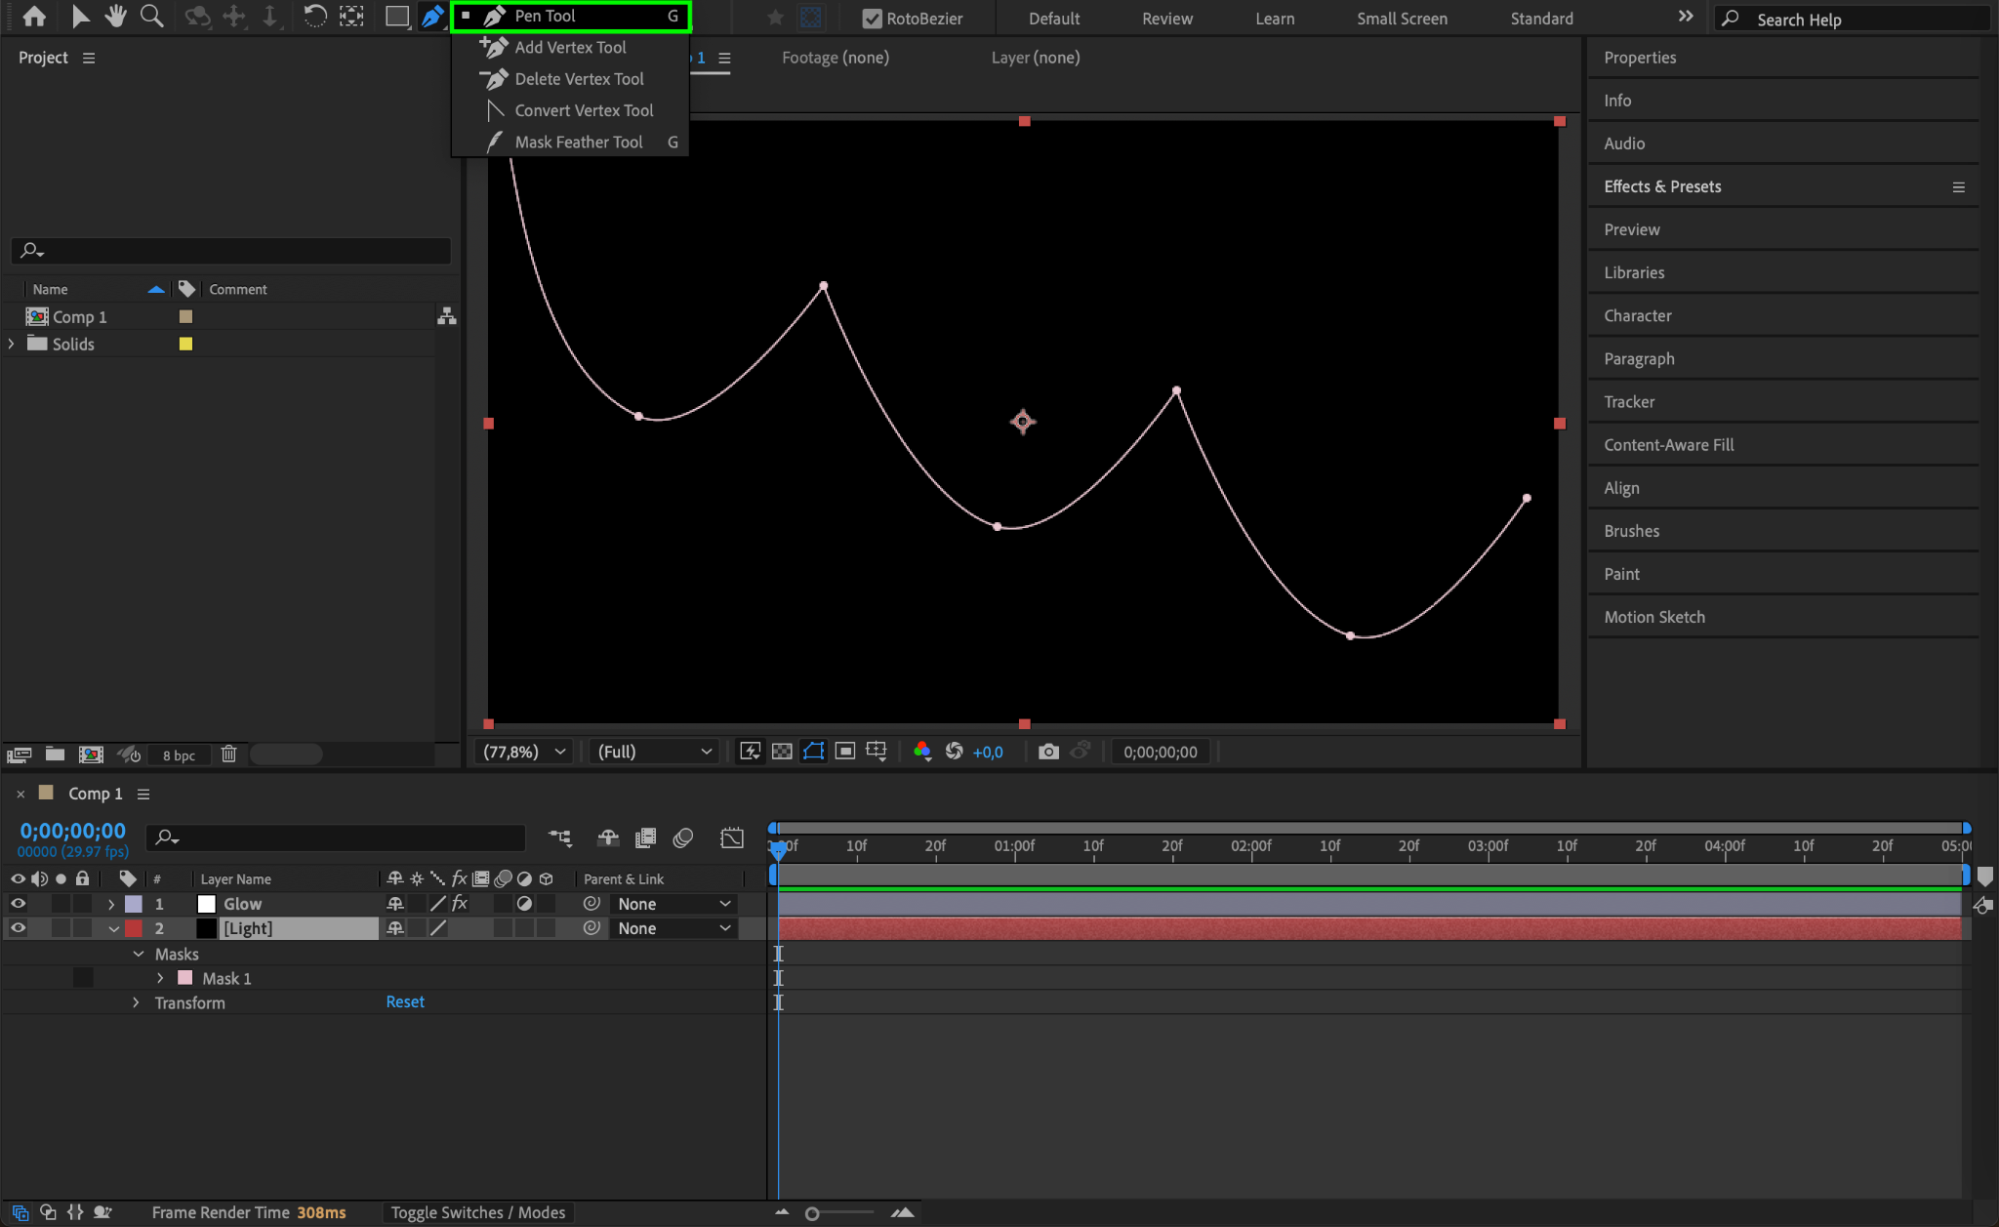
Get 10% off when you subscribe to our newsletter

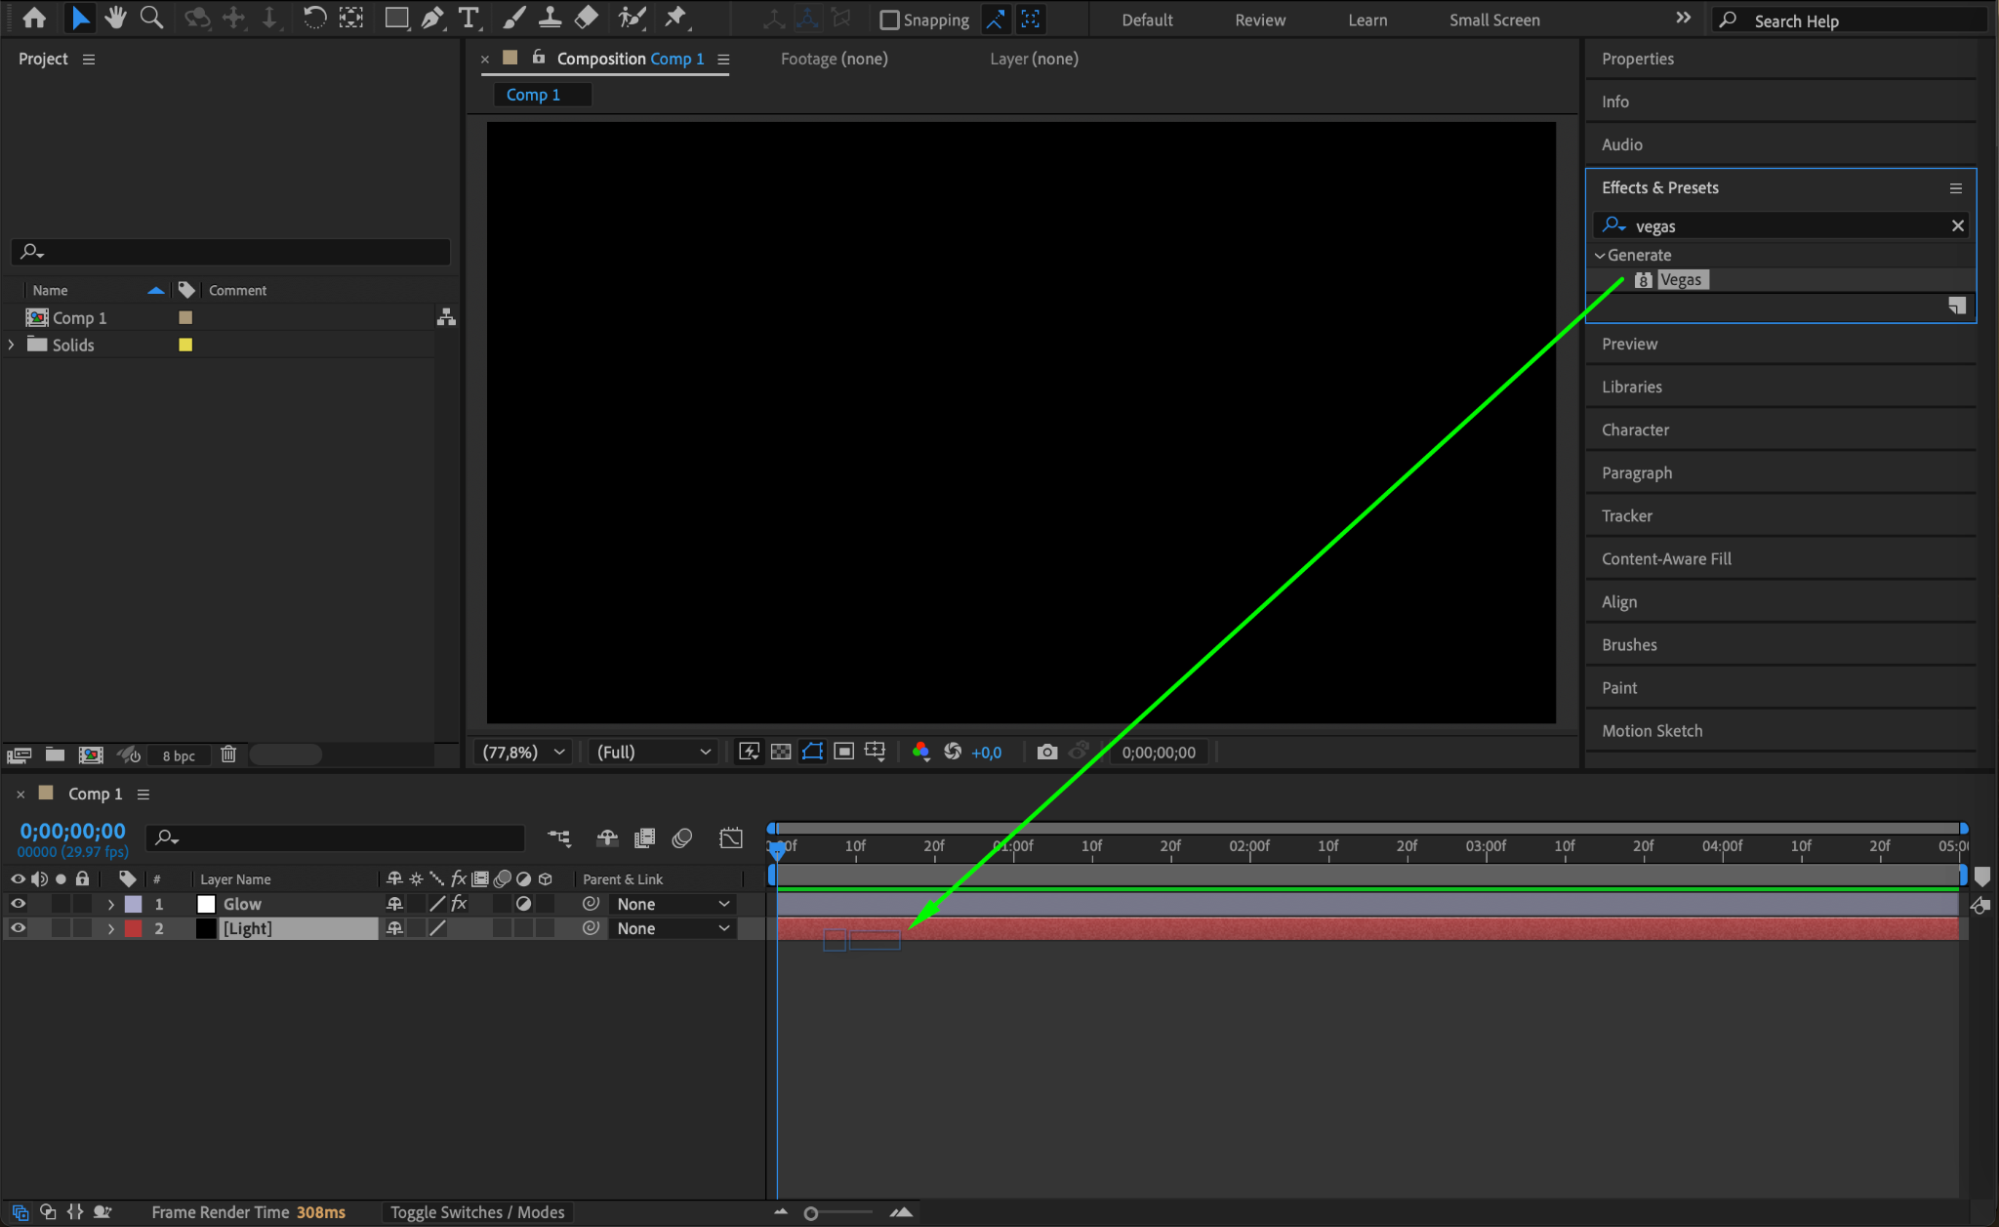
Step 6: Apply the Vegas Effect
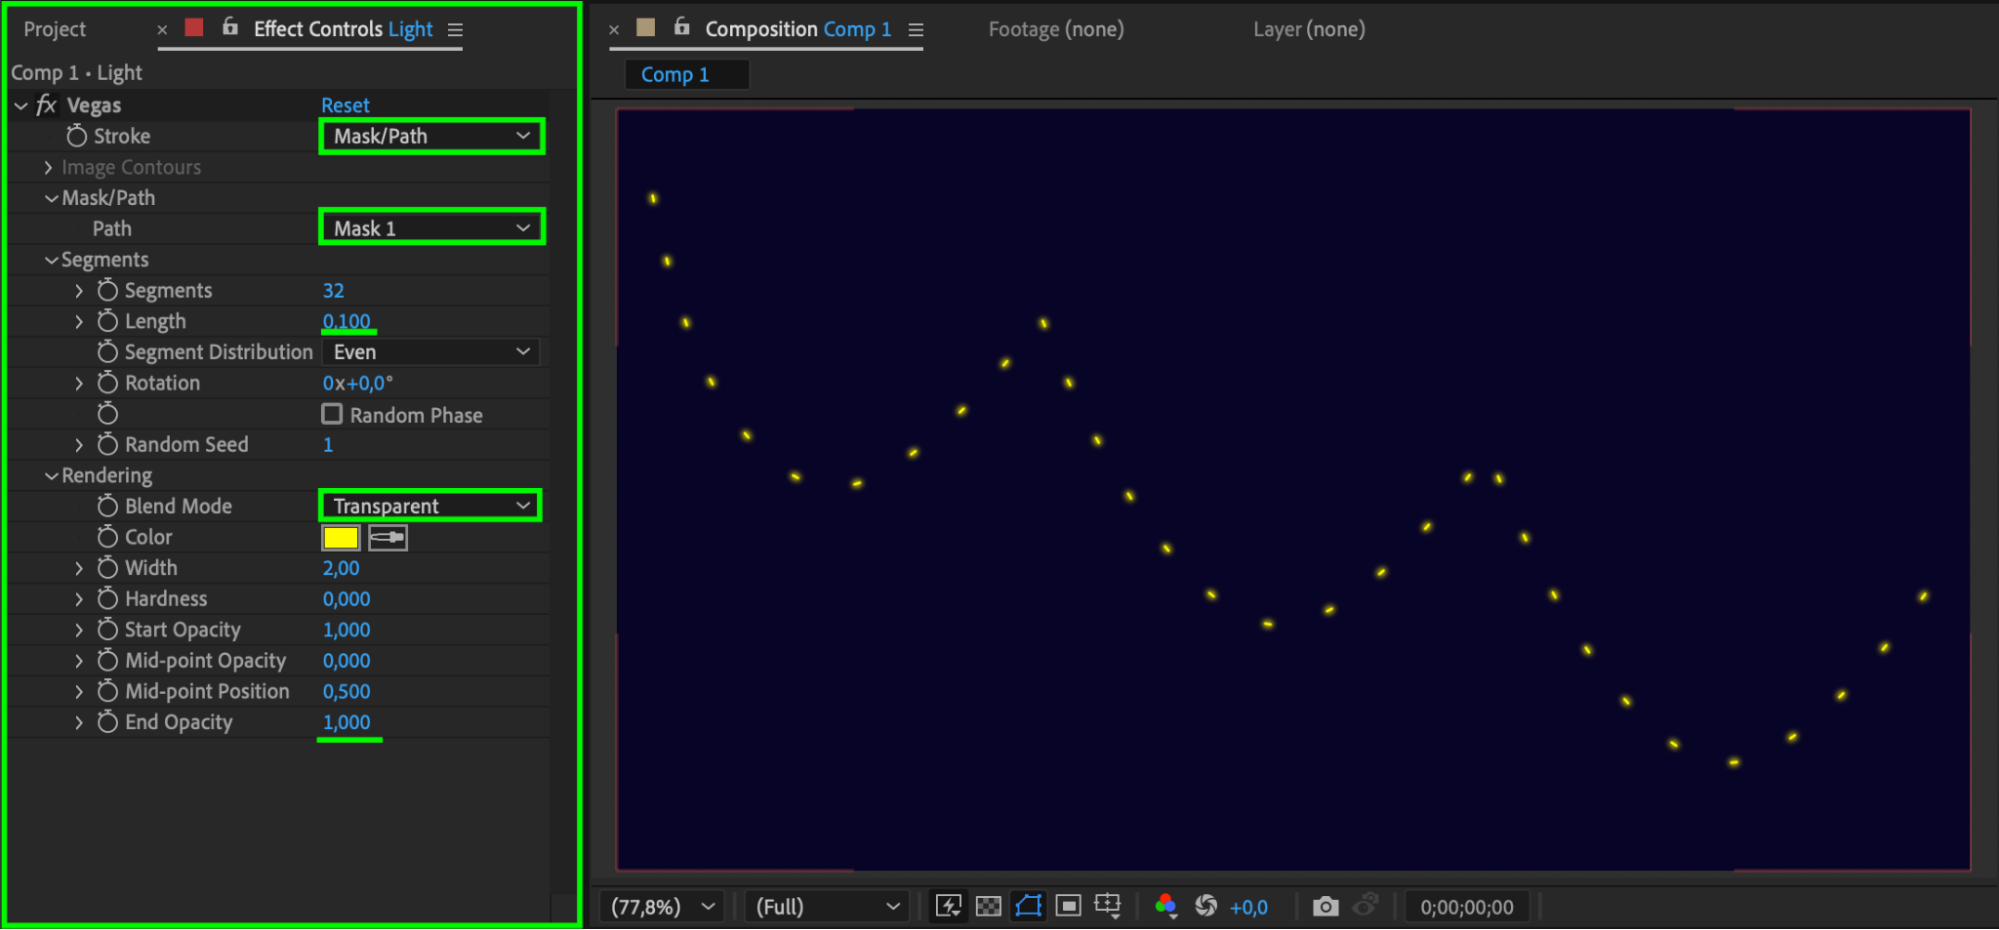
Search for Vegas in the Effects & Presets panel and apply it to the Light solid layer. Adjust the following settings in the Effect Controls Panel:
Stroke: Mask/Path
Path: Mask 1
Length: 0.1
Blend Mode: Transparent
End Opacity: 1
 Step 7: Add the Strobe Light Effect
Apply the Strobe Light effect to the Light solid layer. In the Effect Controls Panel, modify these settings:
Strobe Duration: 0.2
Strobe Period: 0.4
Random Strobe: 3
Strobe Operator: Makes Layer Transparent
In the bottom-left corner of the interface, change the Resolution to Quarter to improve playback performance.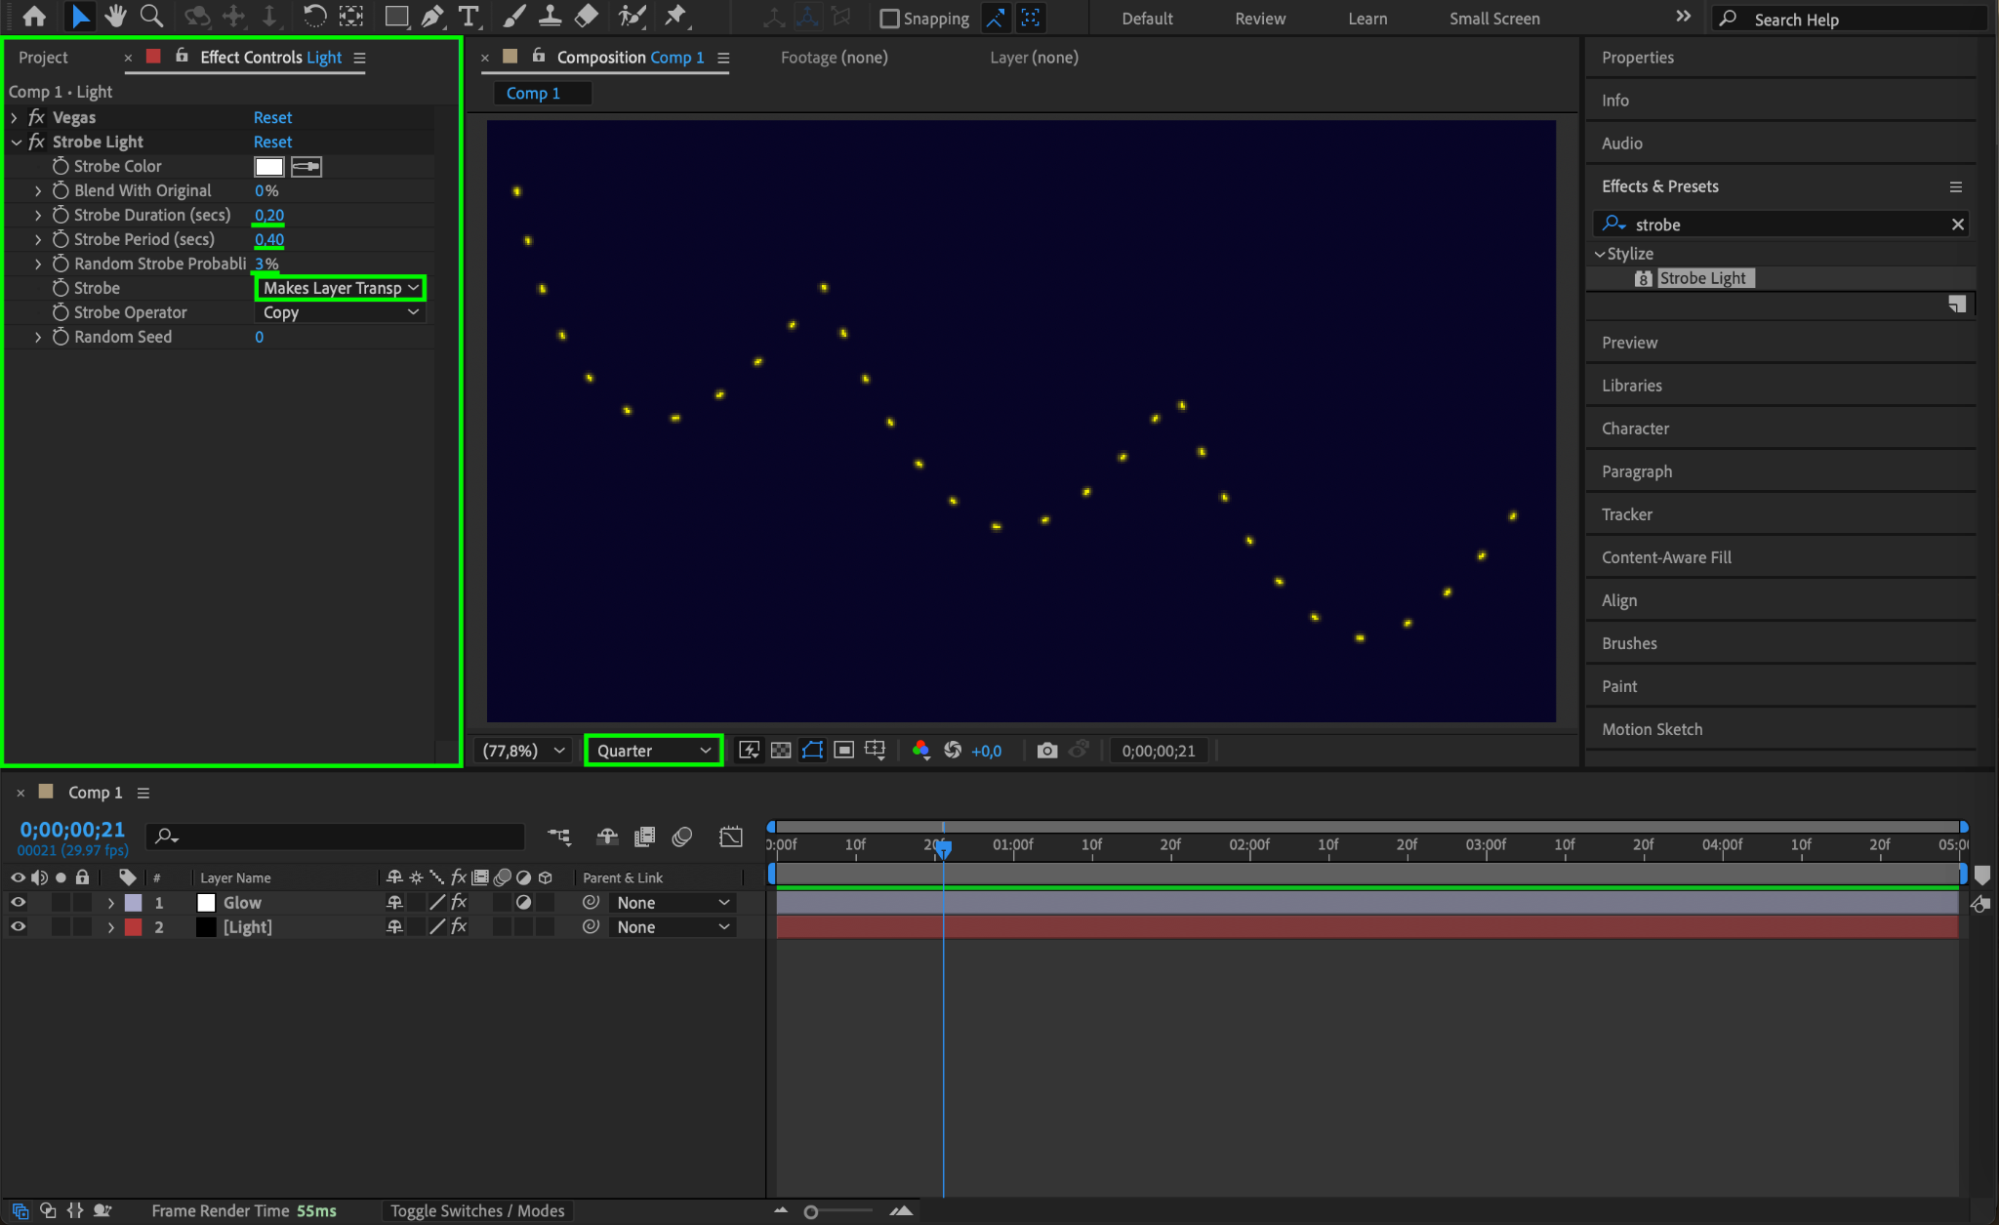 Step 8: Duplicate the Light Layer
Duplicate the Light layer twice by selecting it and pressing “Ctrl/Cmd + D” twice. Now you have three identical layers.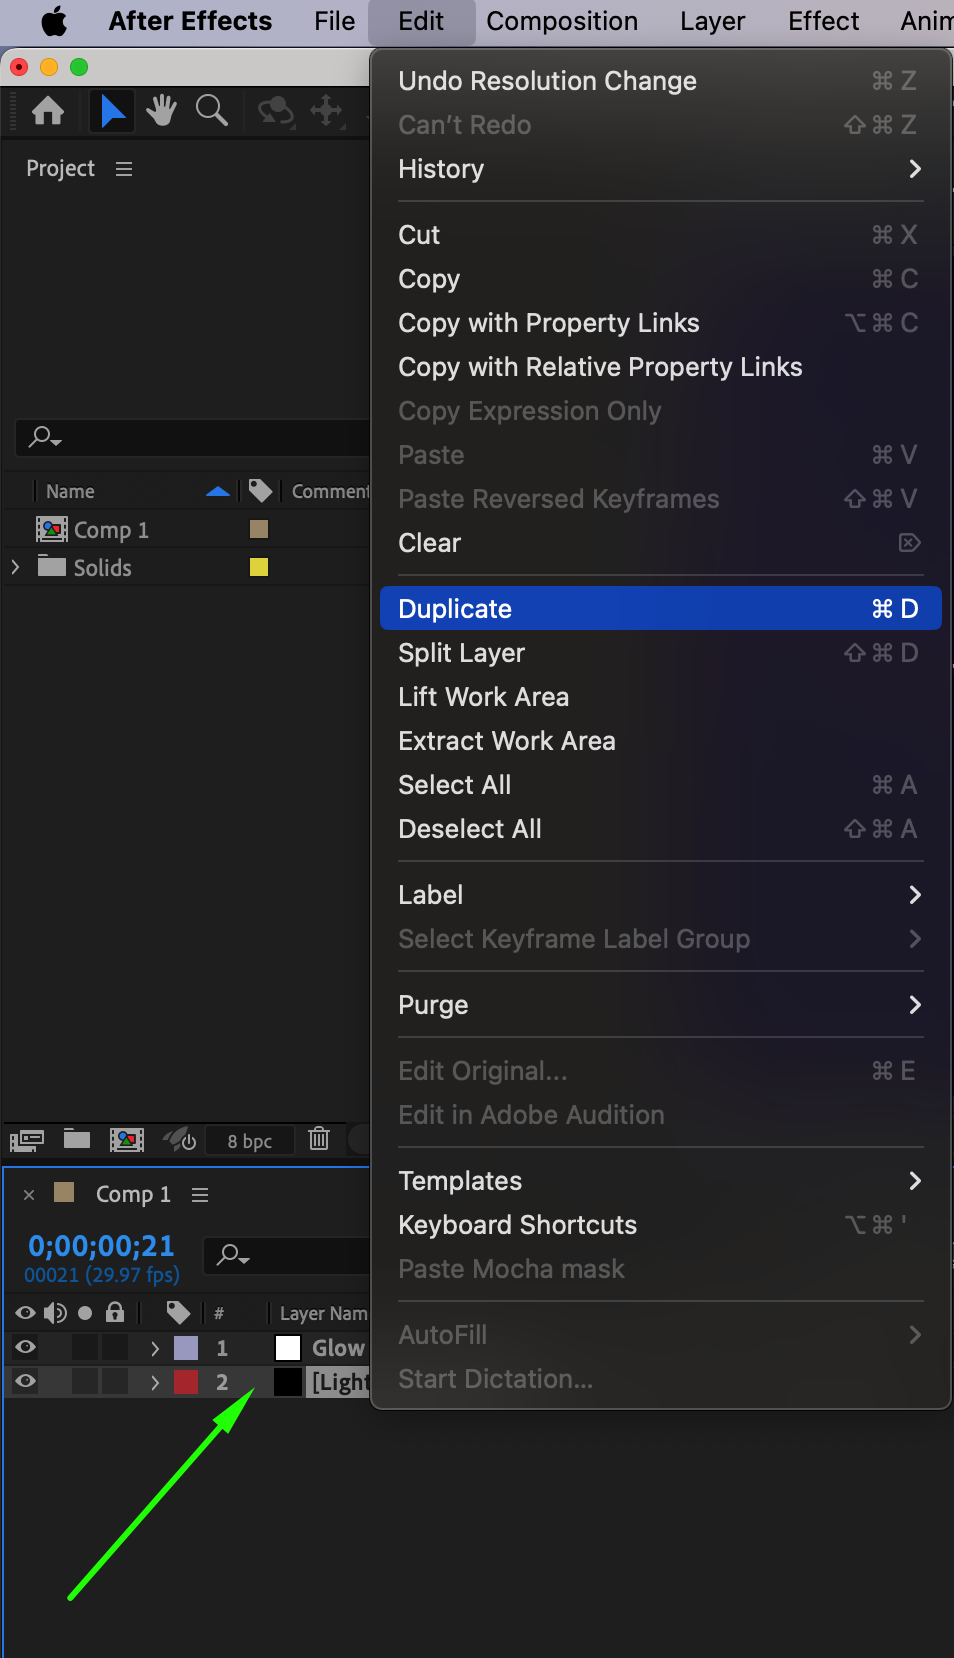
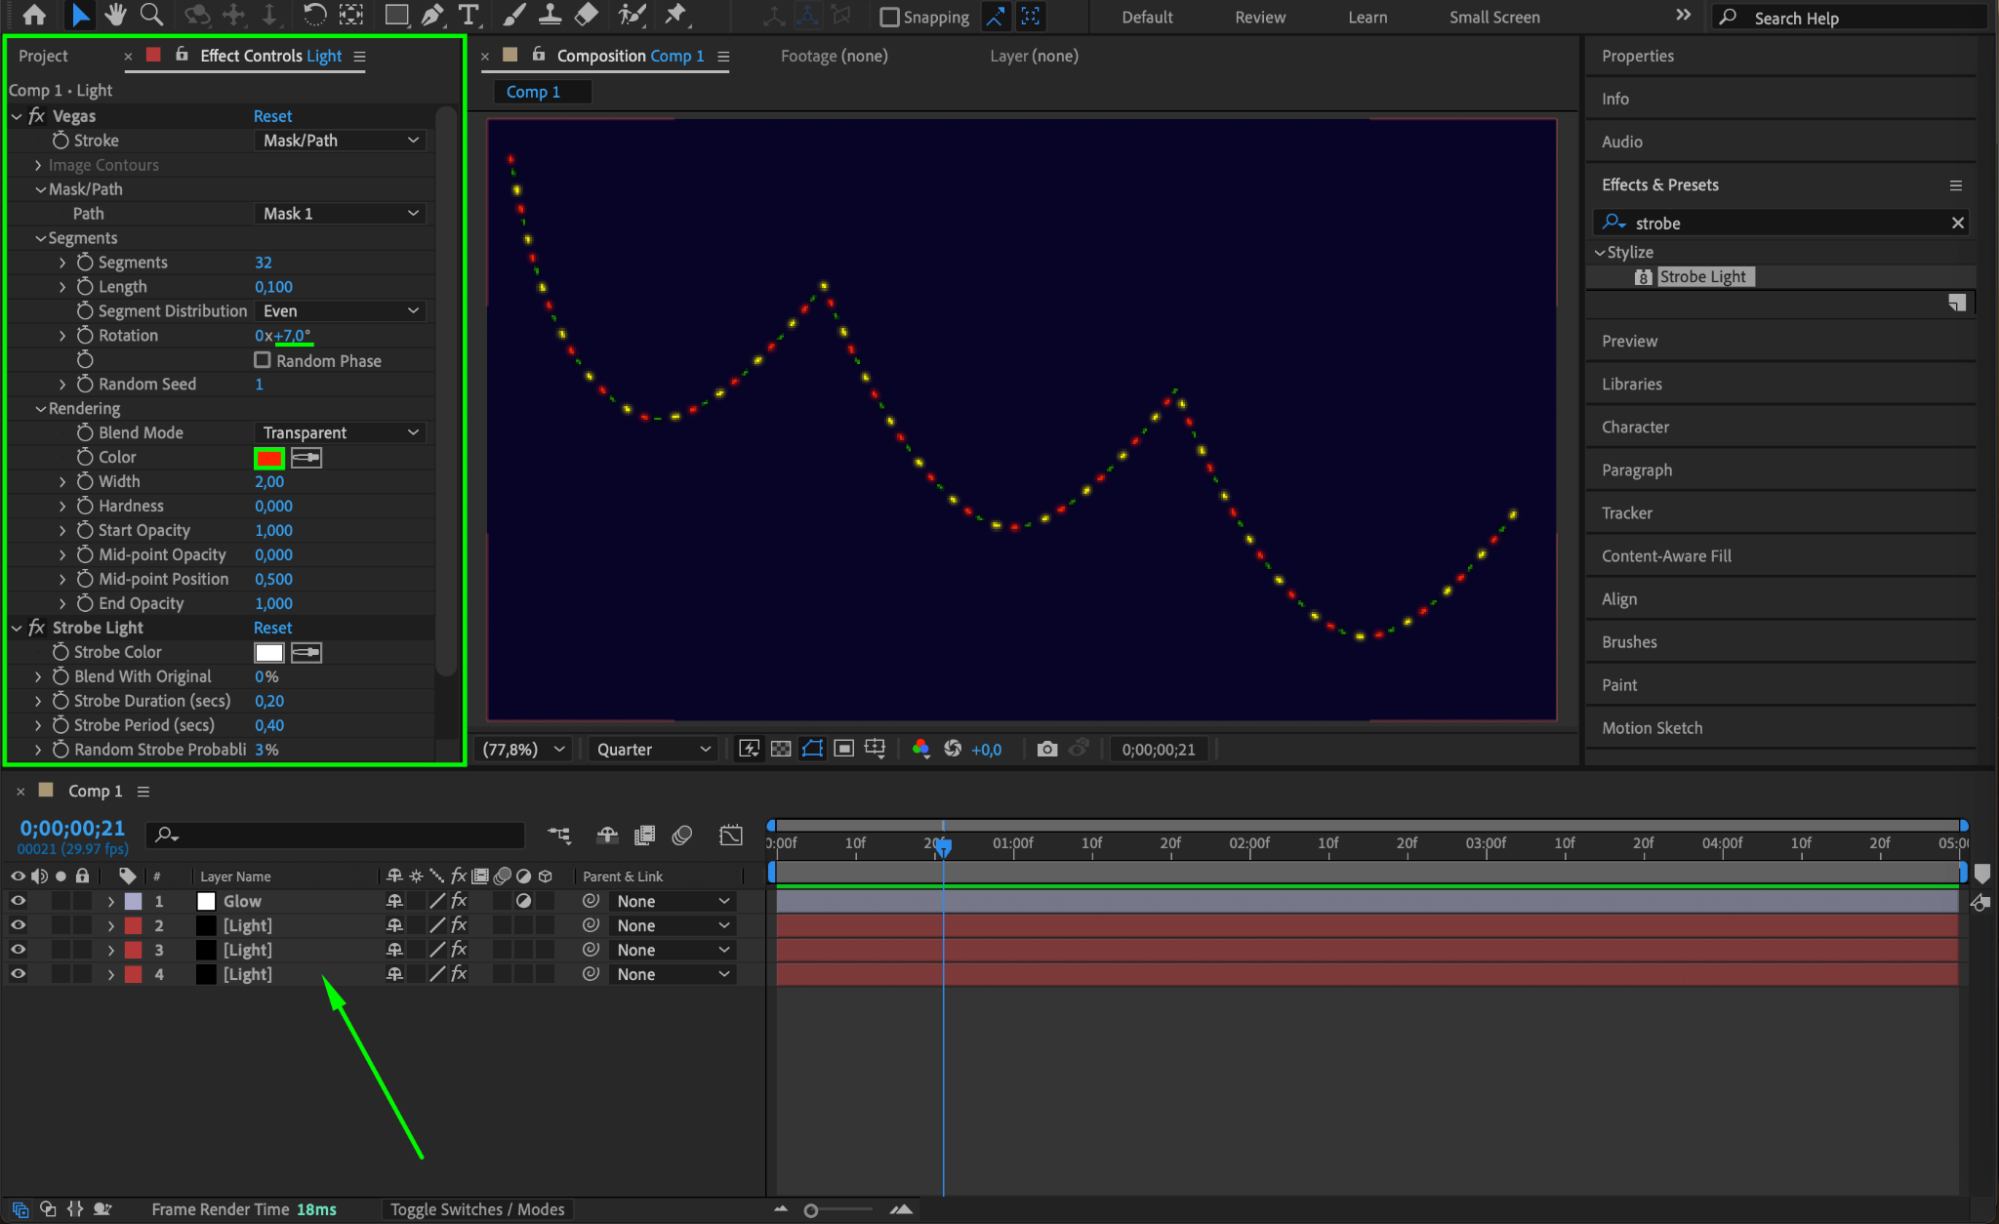
Step 9: Adjust Colors and Rotation for Each Layer
For the two duplicated Light layers:
Change the Vegas Effect color to Green and set Rotation to 4.
Change the Vegas Effect color to Red and set Rotation to 7.
This will create a variation in the Christmas lights.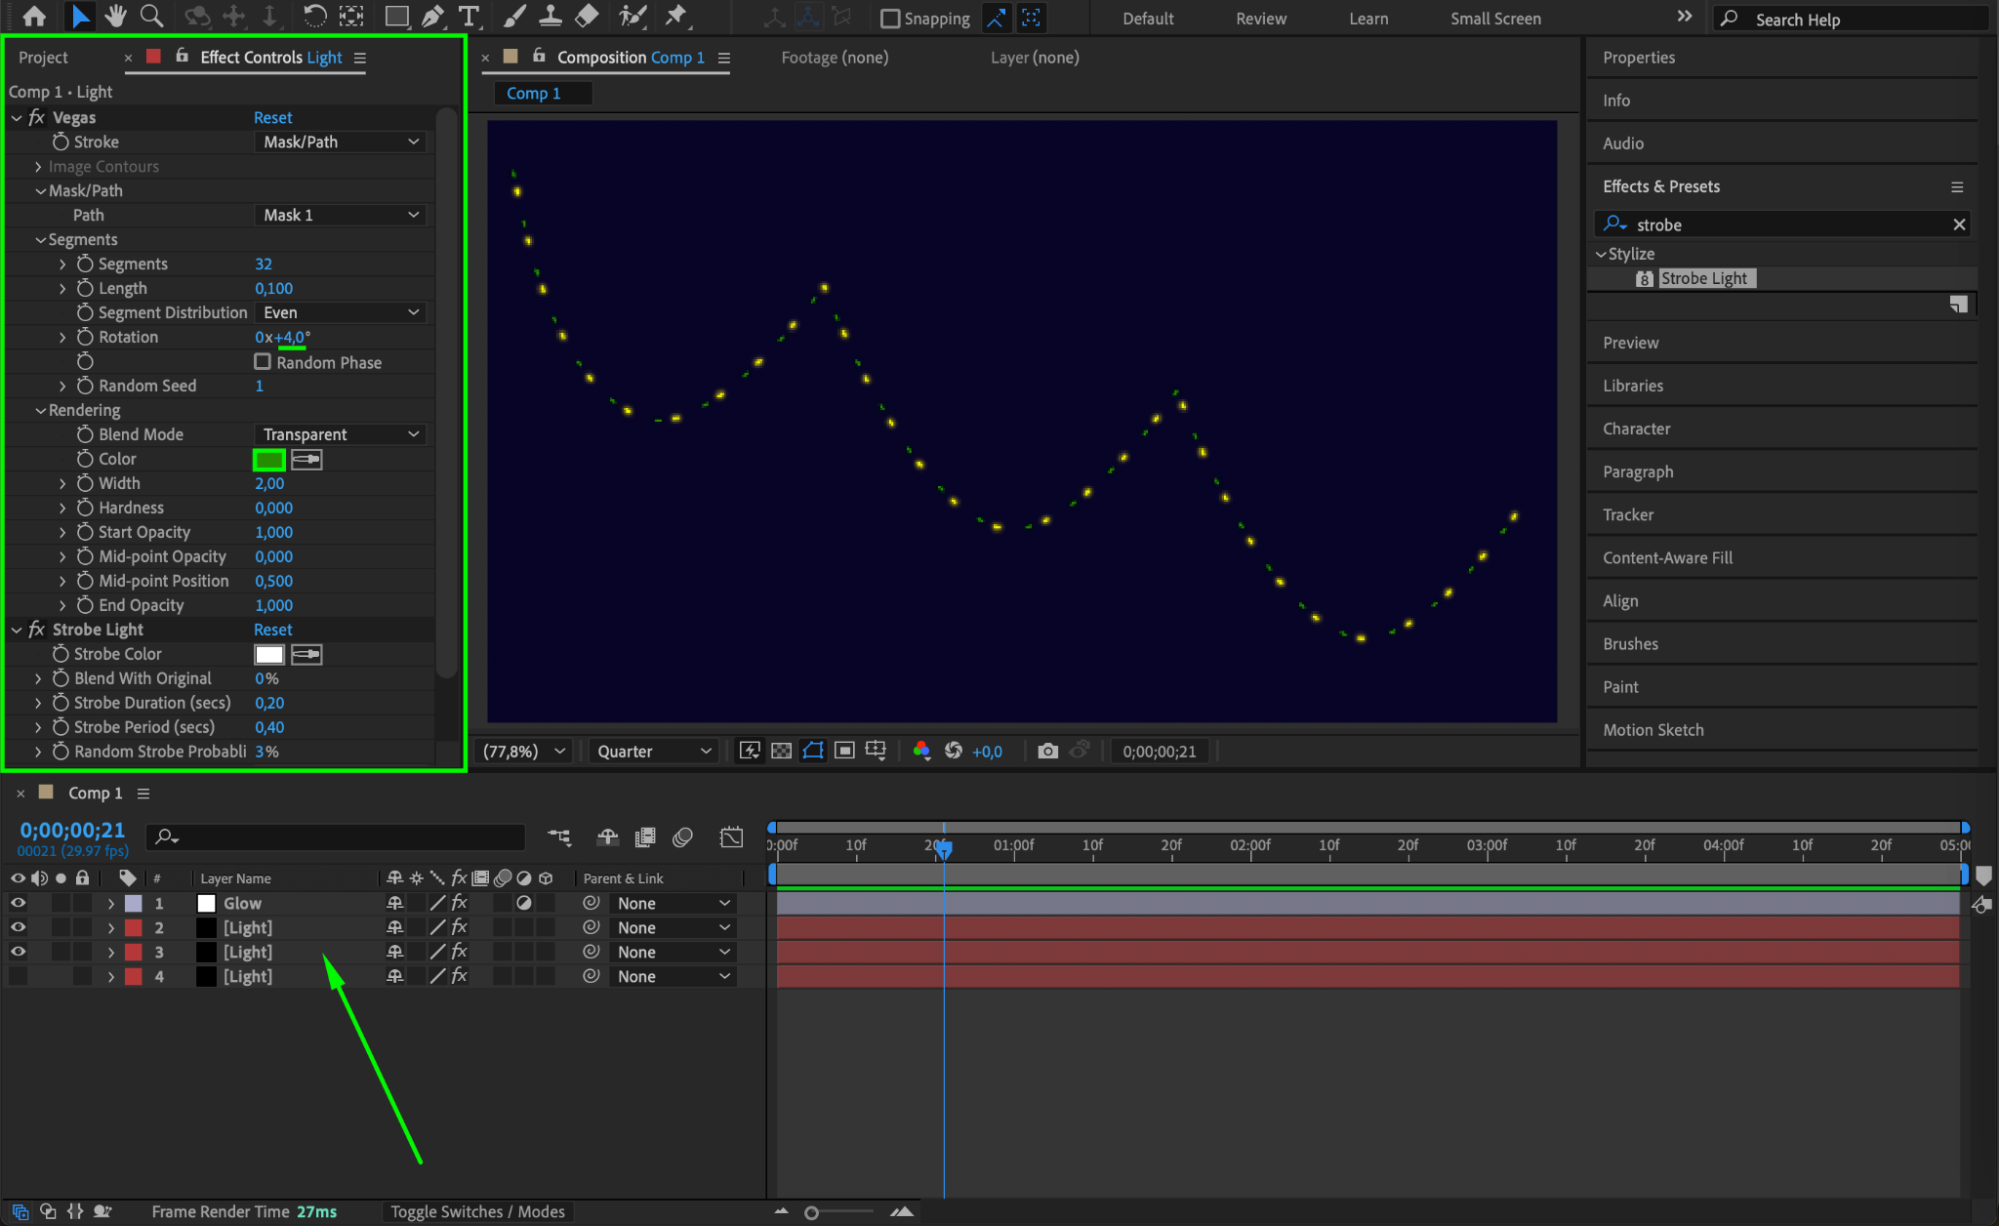
 Step 10: Arrange Layers for Blinking Effect
If you want the lights to blink in a sequence, stagger the Light layers in the Timeline Panel. If you prefer all lights to blink at the same time, leave them as they are.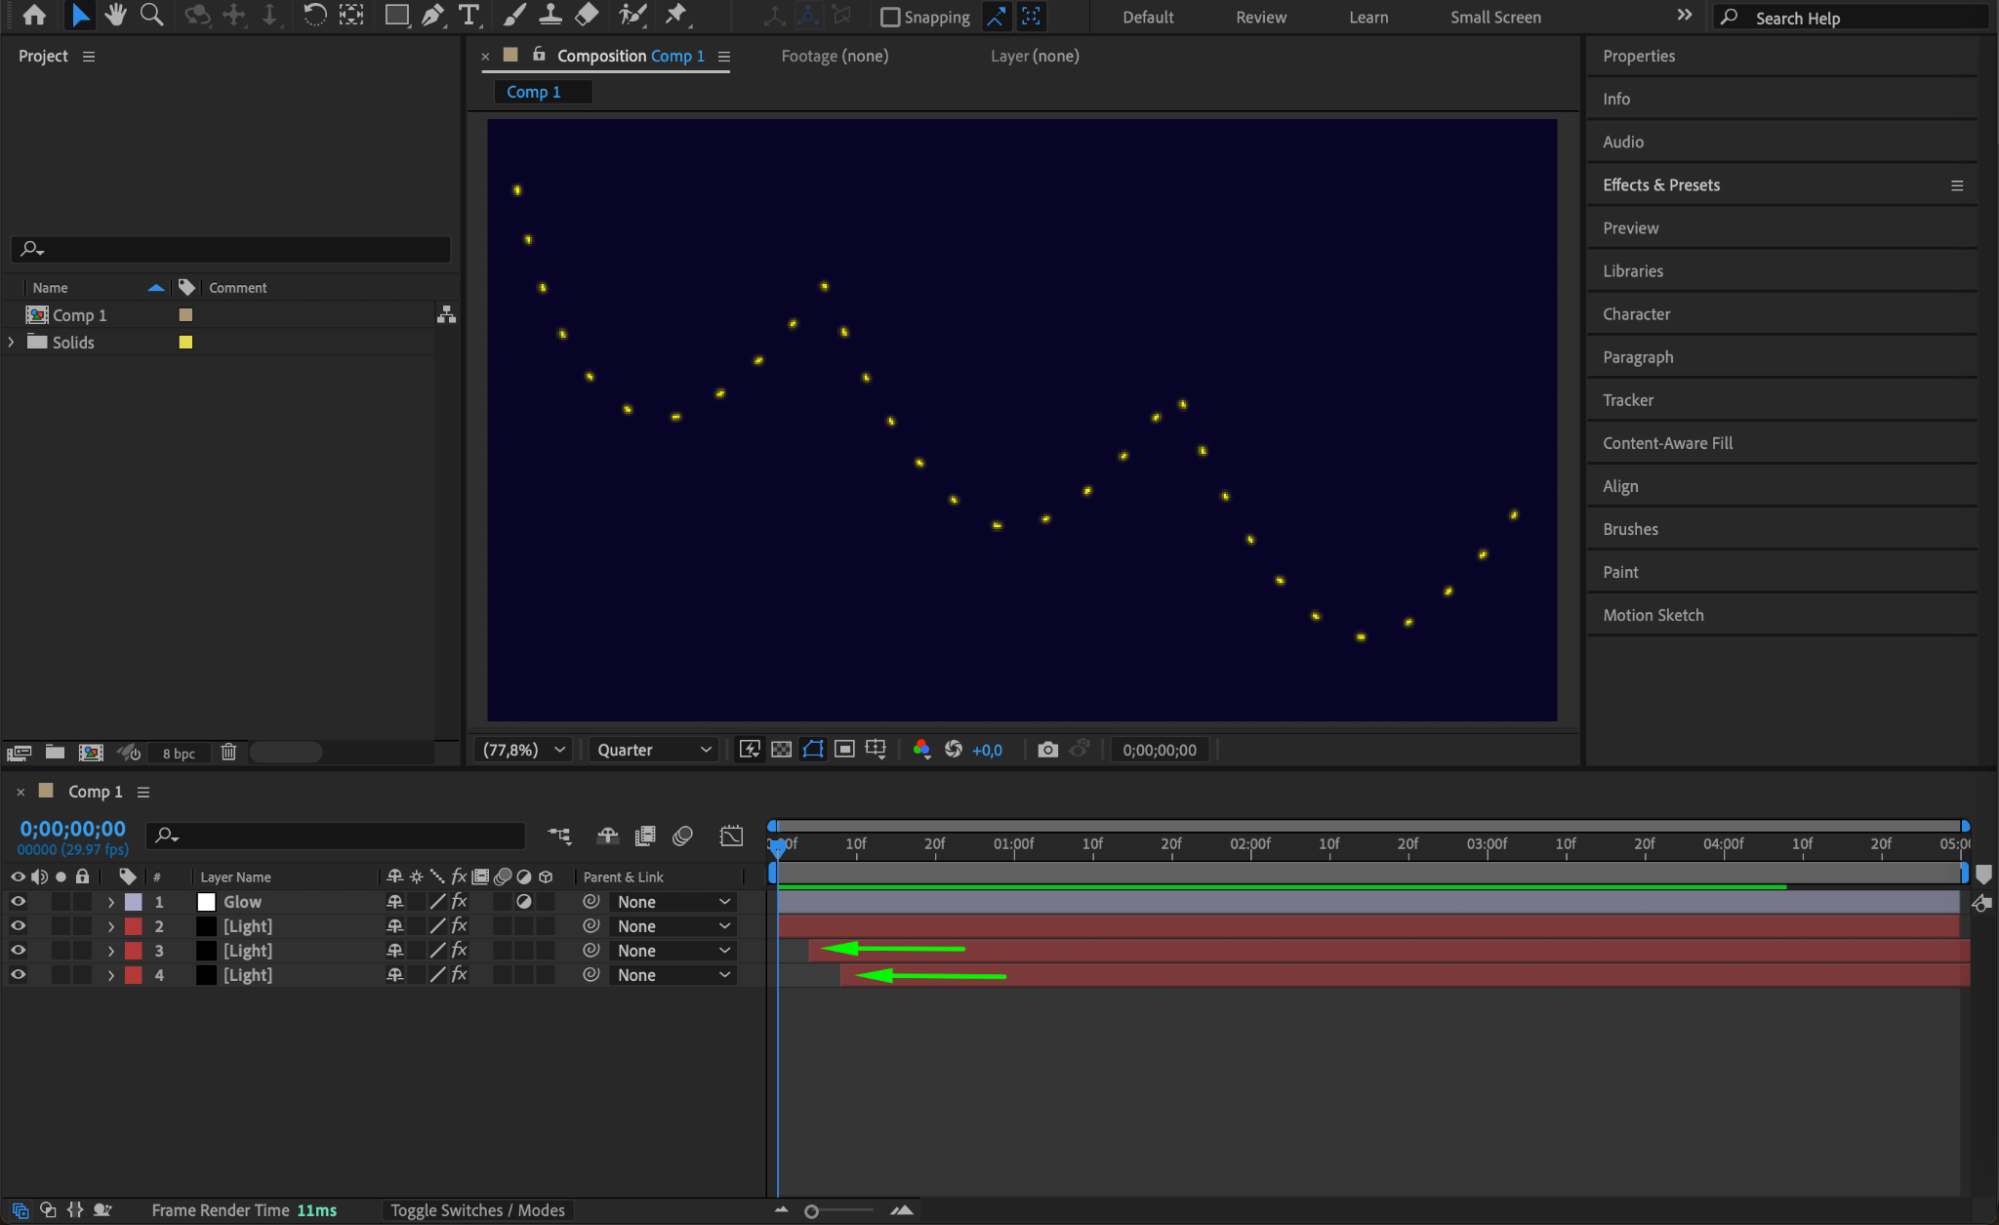 Step 11: Preview the Animation
Press Spacebar to preview your animation. Adjust the Vegas and Strobe Light settings if necessary to refine the effect.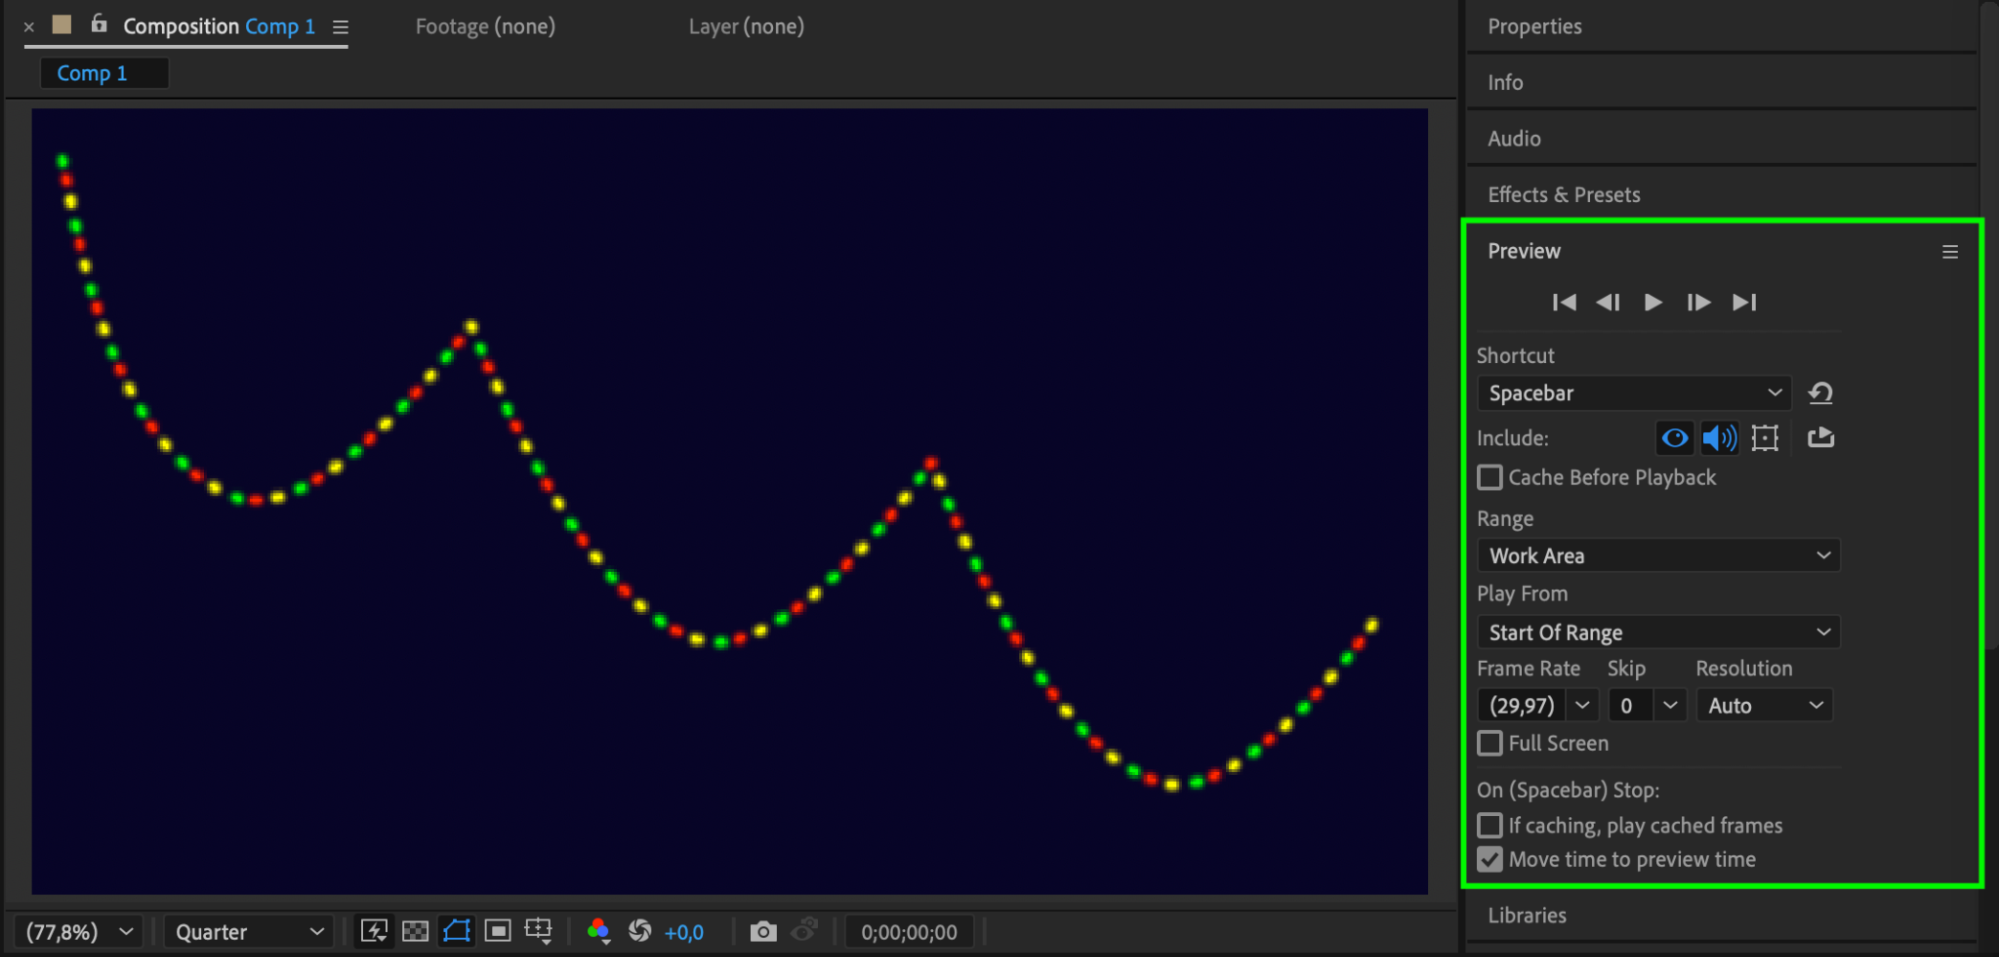 Step 12: Render the Final Composition
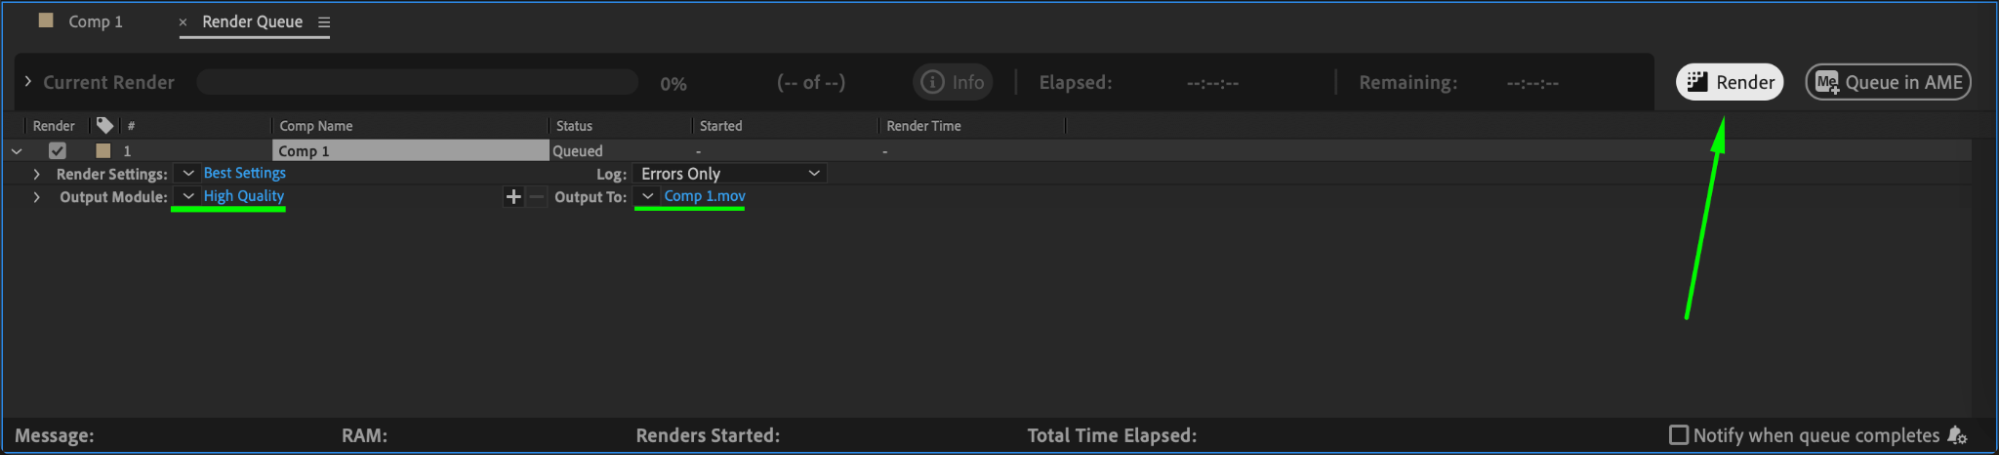
Once satisfied with the animation, go to Composition > Add to Render Queue, or use Adobe Media Encoder for high-quality output.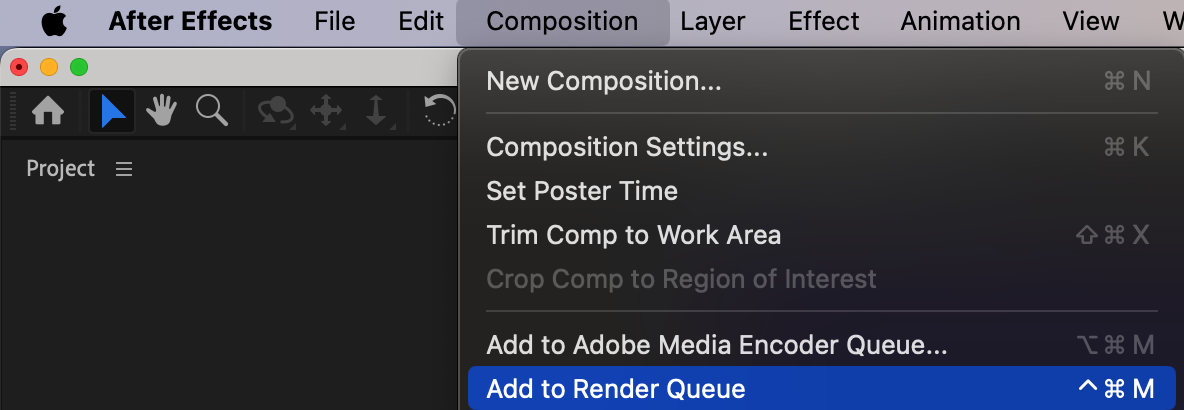
 Conclusion
By using Vegas and Strobe Light effects, you can easily create beautiful and customizable Christmas lights in After Effects. Adjust colors, blinking speed, and glow settings to match your project’s theme.


