Creating Animated Callout Titles in After Effects
Introduction to Callout Titles
Callout titles are widely used in videos to highlight objects, provide labels, or add additional information in a clean and modern way. In After Effects, you can create these titles using shape layers, the Pen Tool, and Trim Paths to animate them smoothly. Follow these steps to design a professional-looking callout title.
Step 1: Open Your Project
Open your After Effects project containing the object you want to label. If you don’t have an existing project, create a new composition and add an image or video to work with.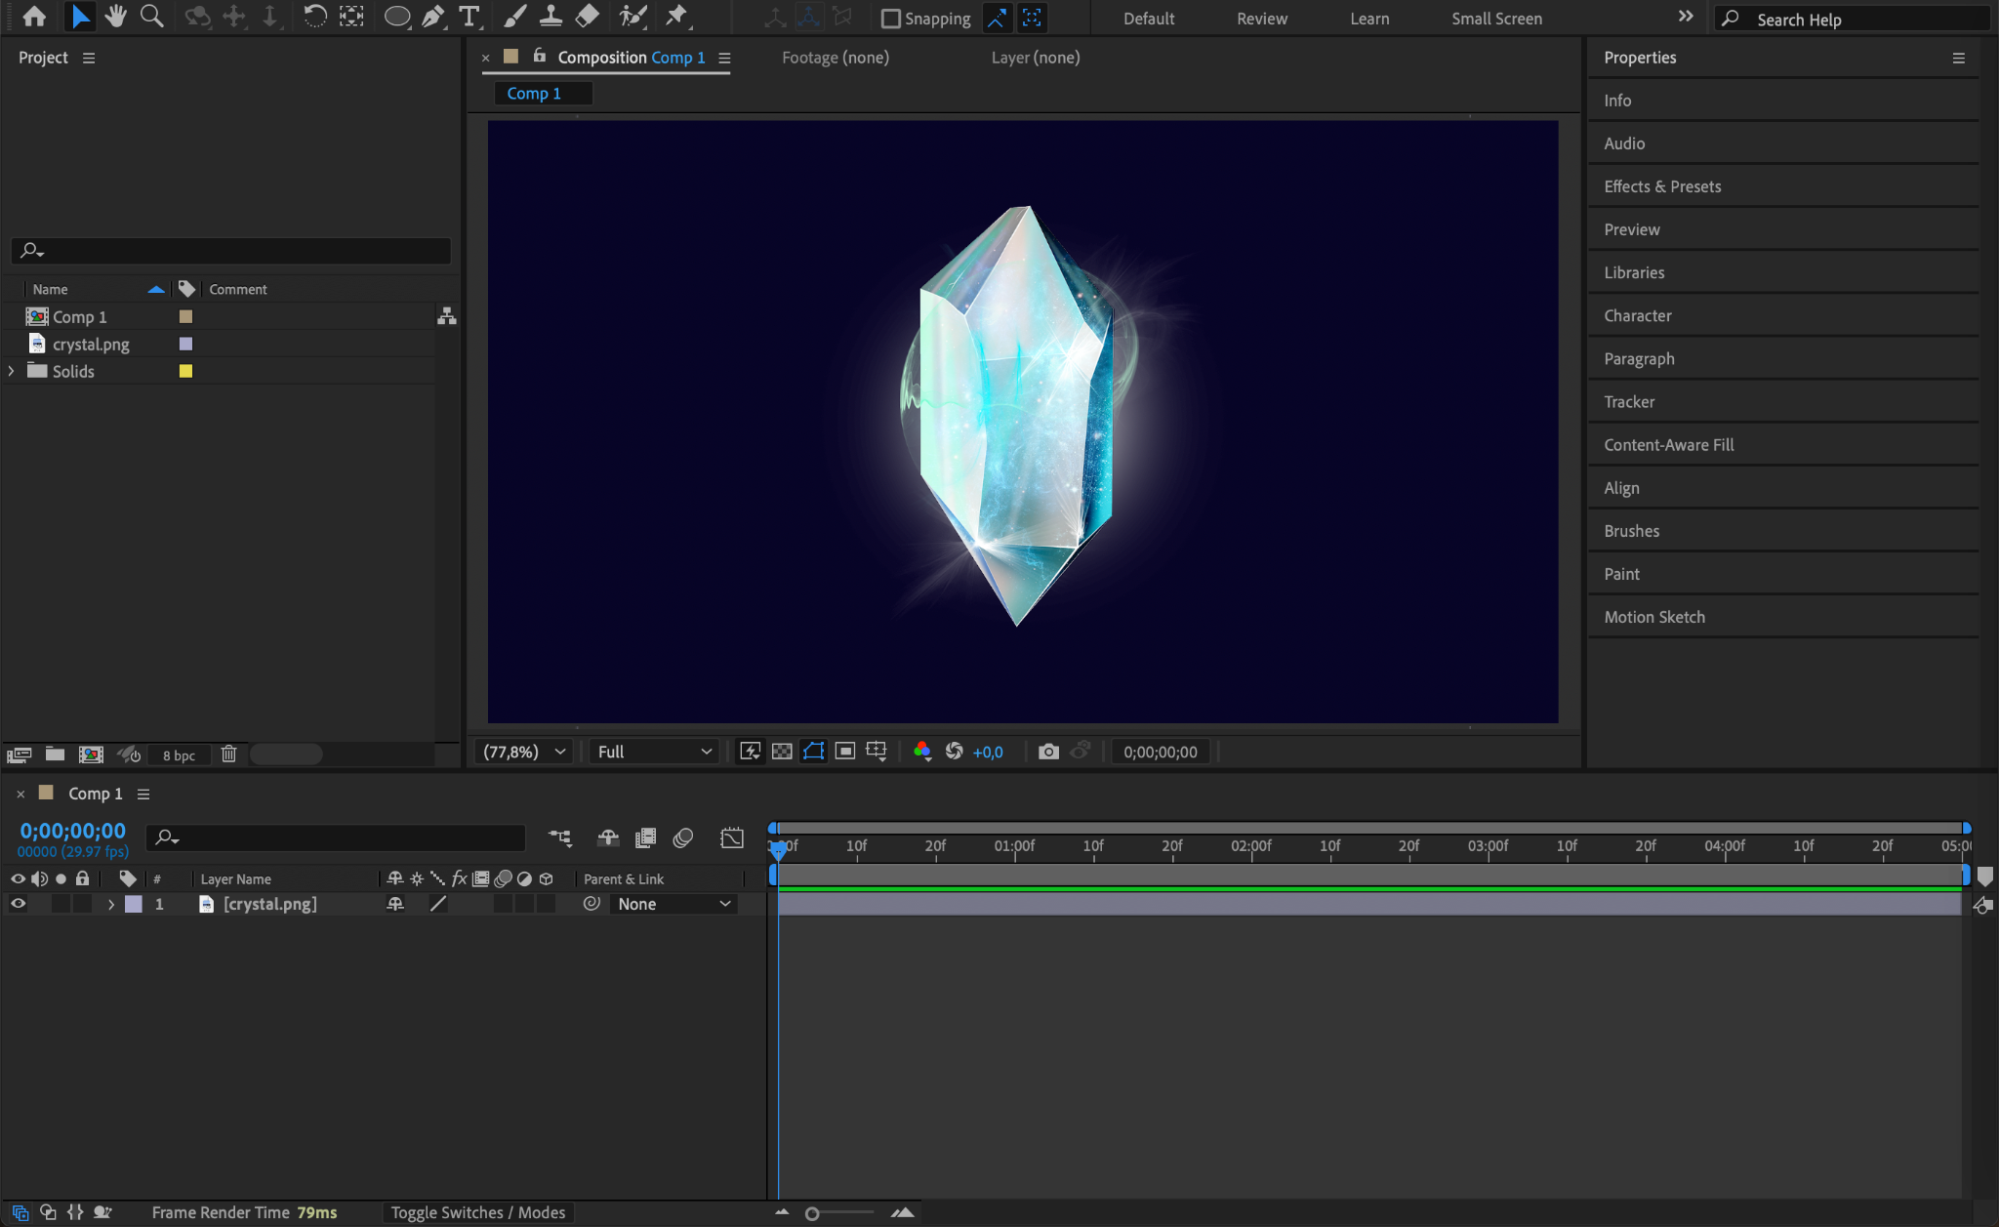
Step 2: Create a Circle Marker
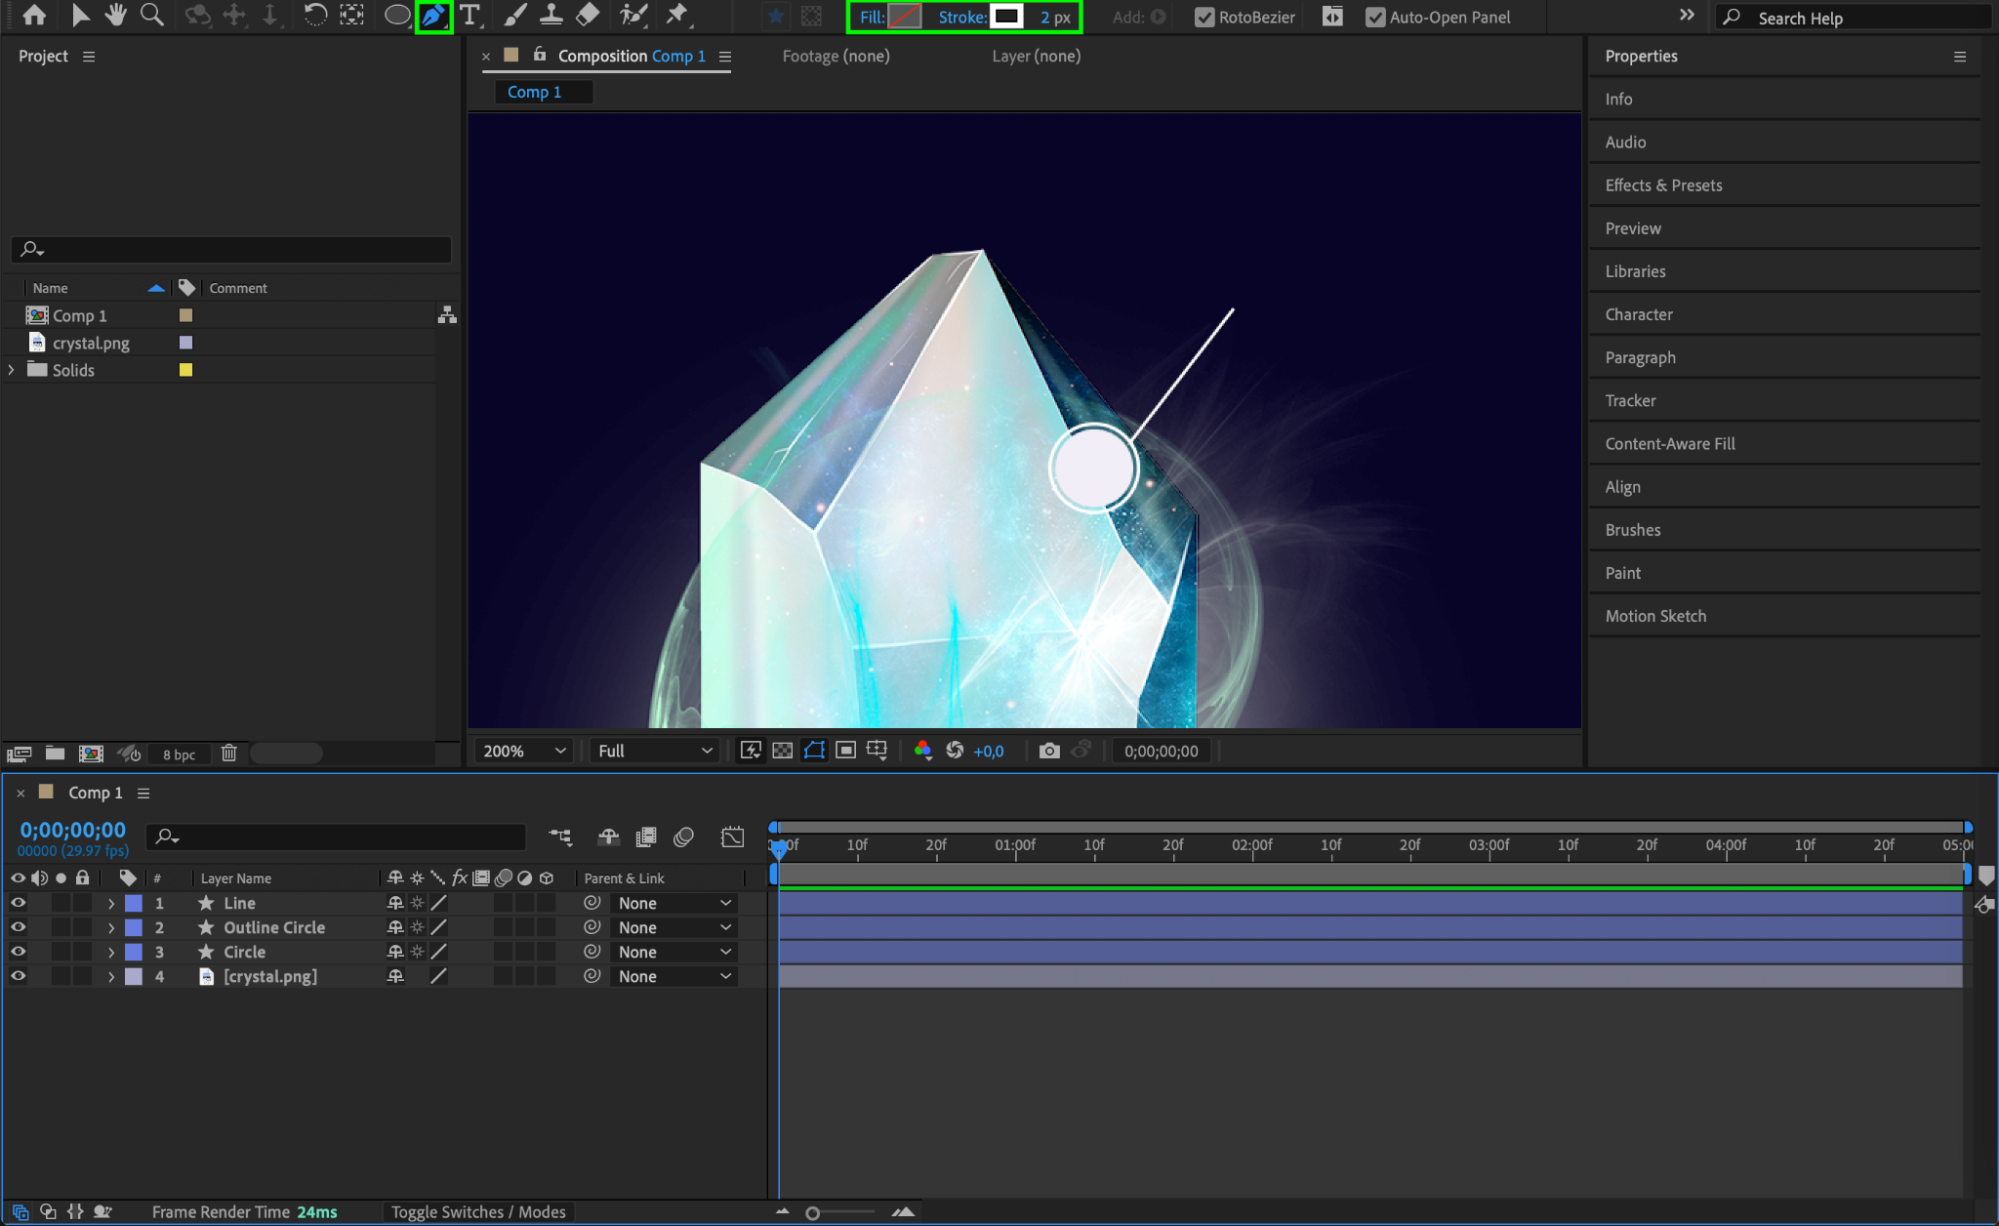
Select the Ellipse Tool (Q) and draw a small circle over the object you want to highlight. Hold “Ctrl/Cmd + Shift” while drawing to create a perfect circle. In the Fill Settings, choose White and set the Stroke to None. Rename this layer “Circle.”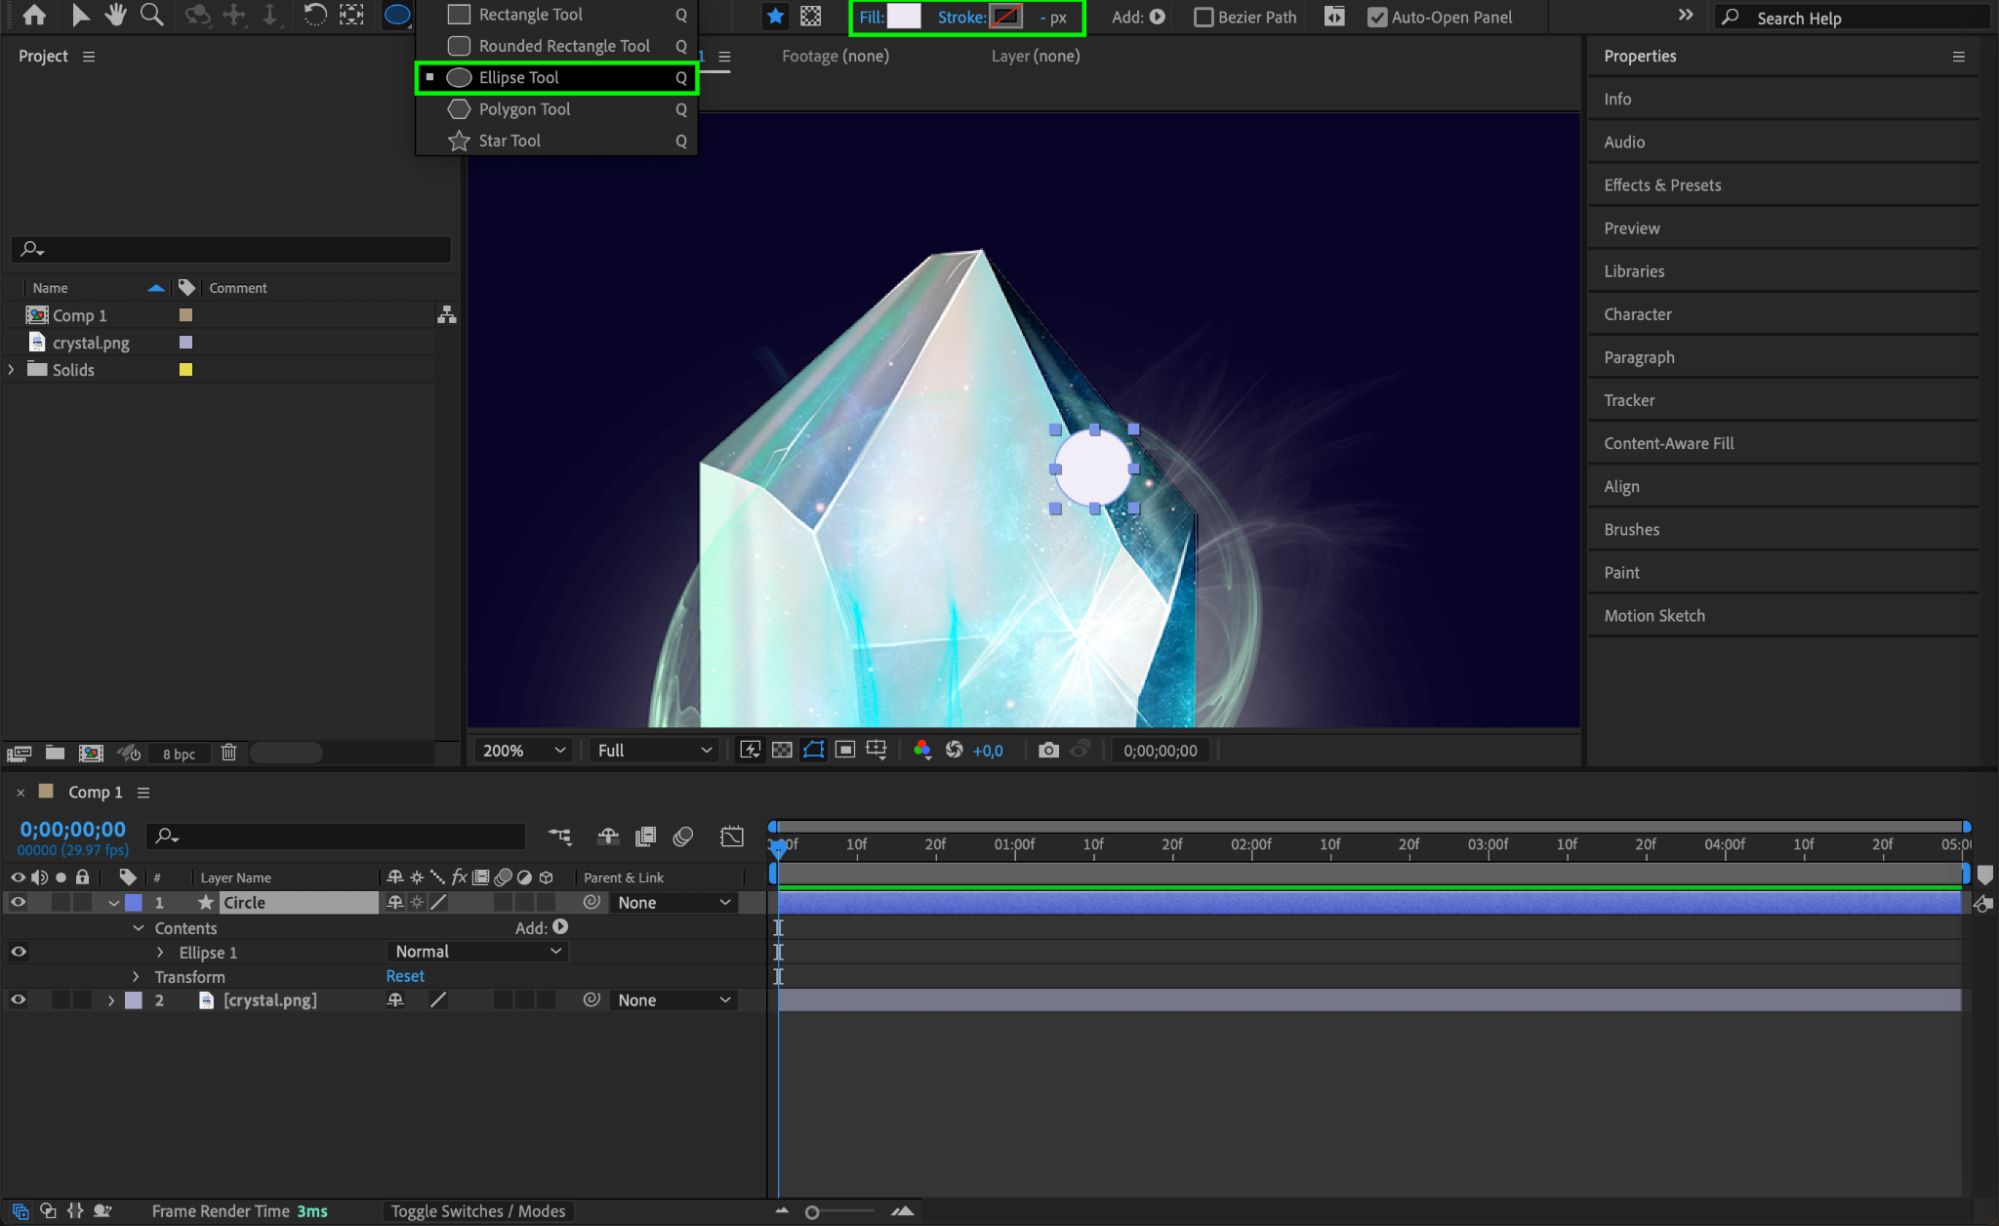
Get 10% off when you subscribe to our newsletter

Step 3: Add an Outline Around the Circle
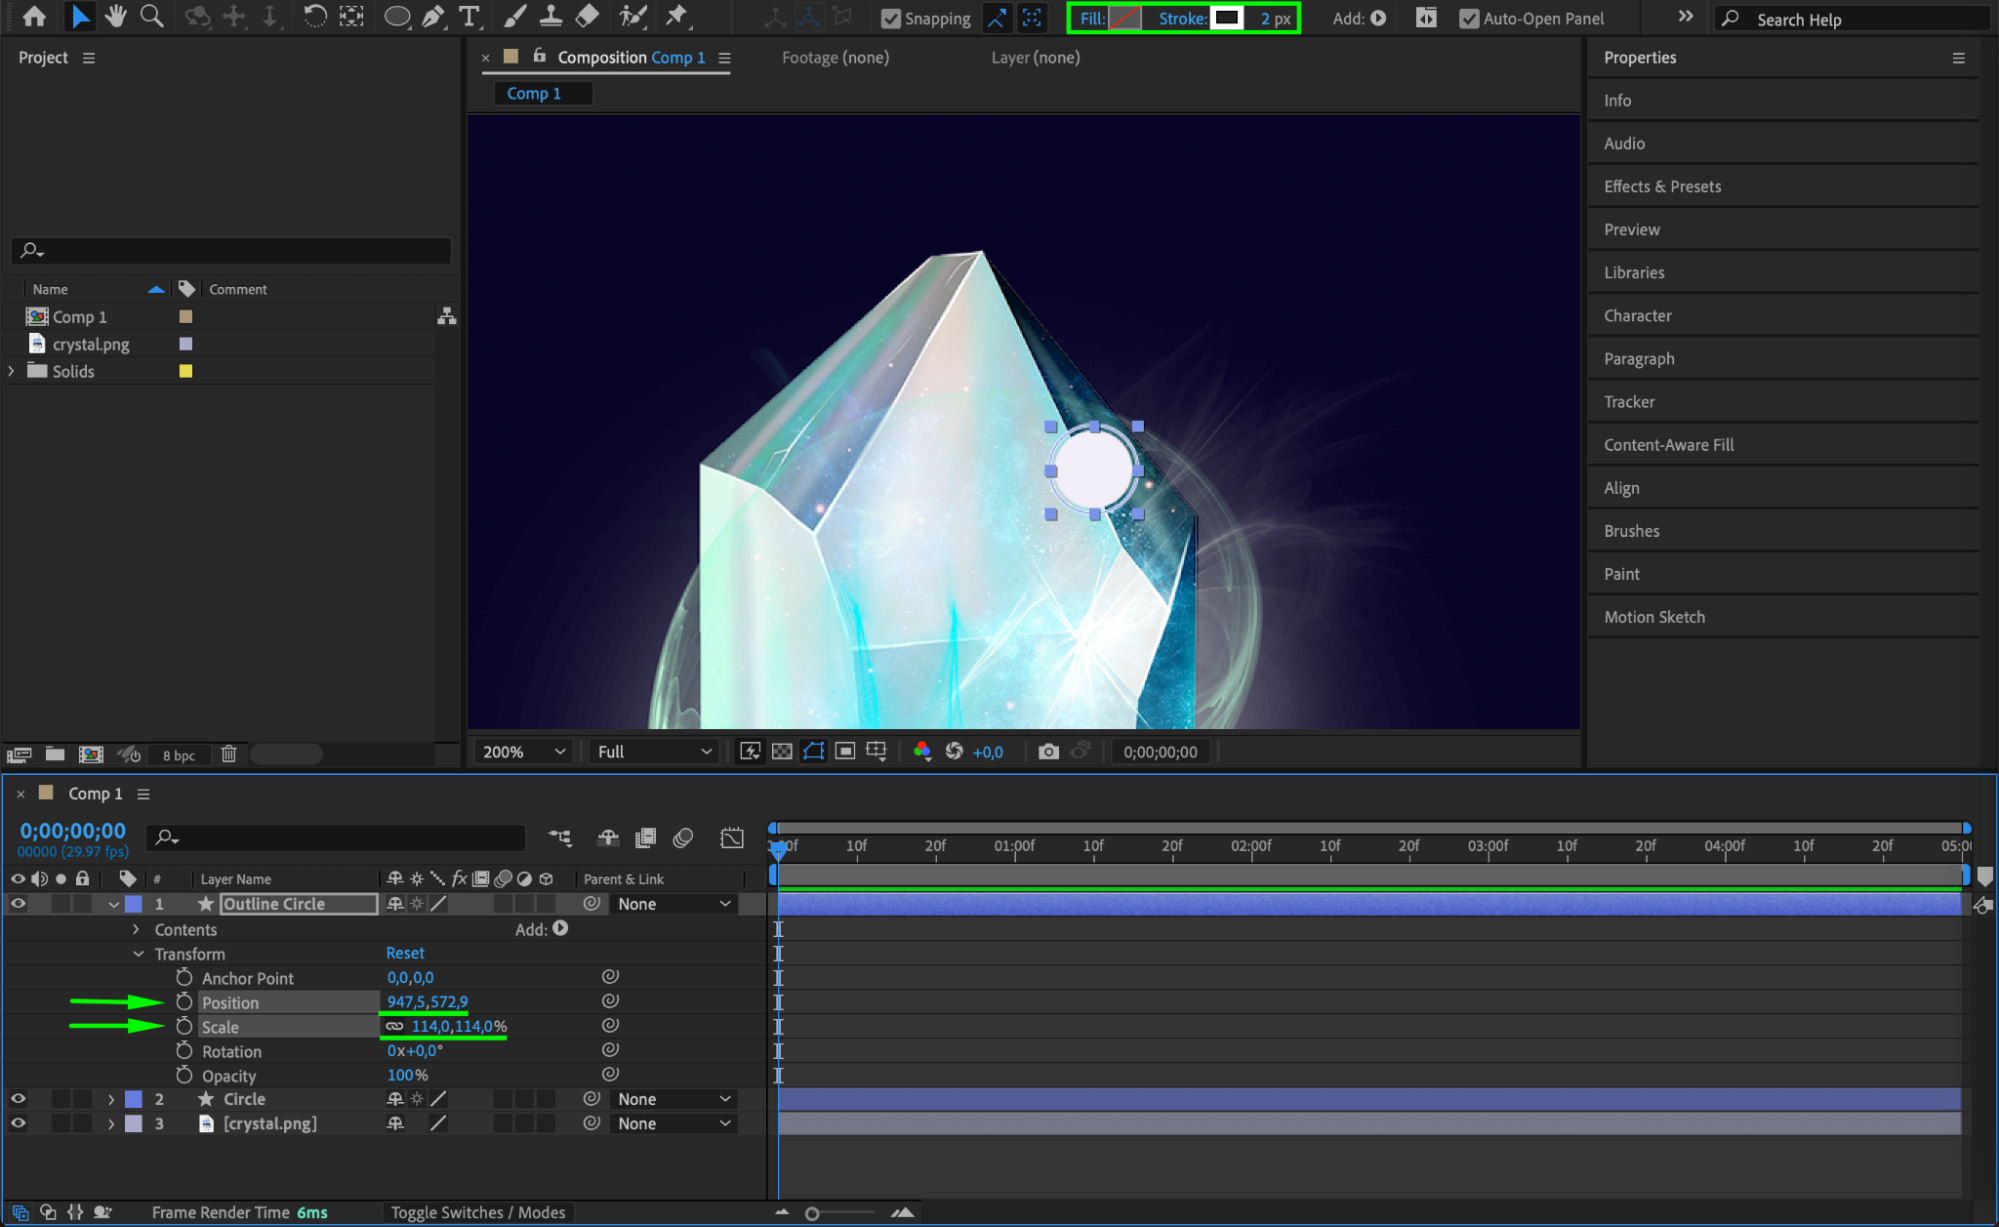
Duplicate the Circle layer (Ctrl/Cmd + D) and rename the copy to “Outline Circle.” Change the Fill to None and set the Stroke to White with a 2px width. Adjust its Position and Scale so it creates a symmetrical outline around the first circle.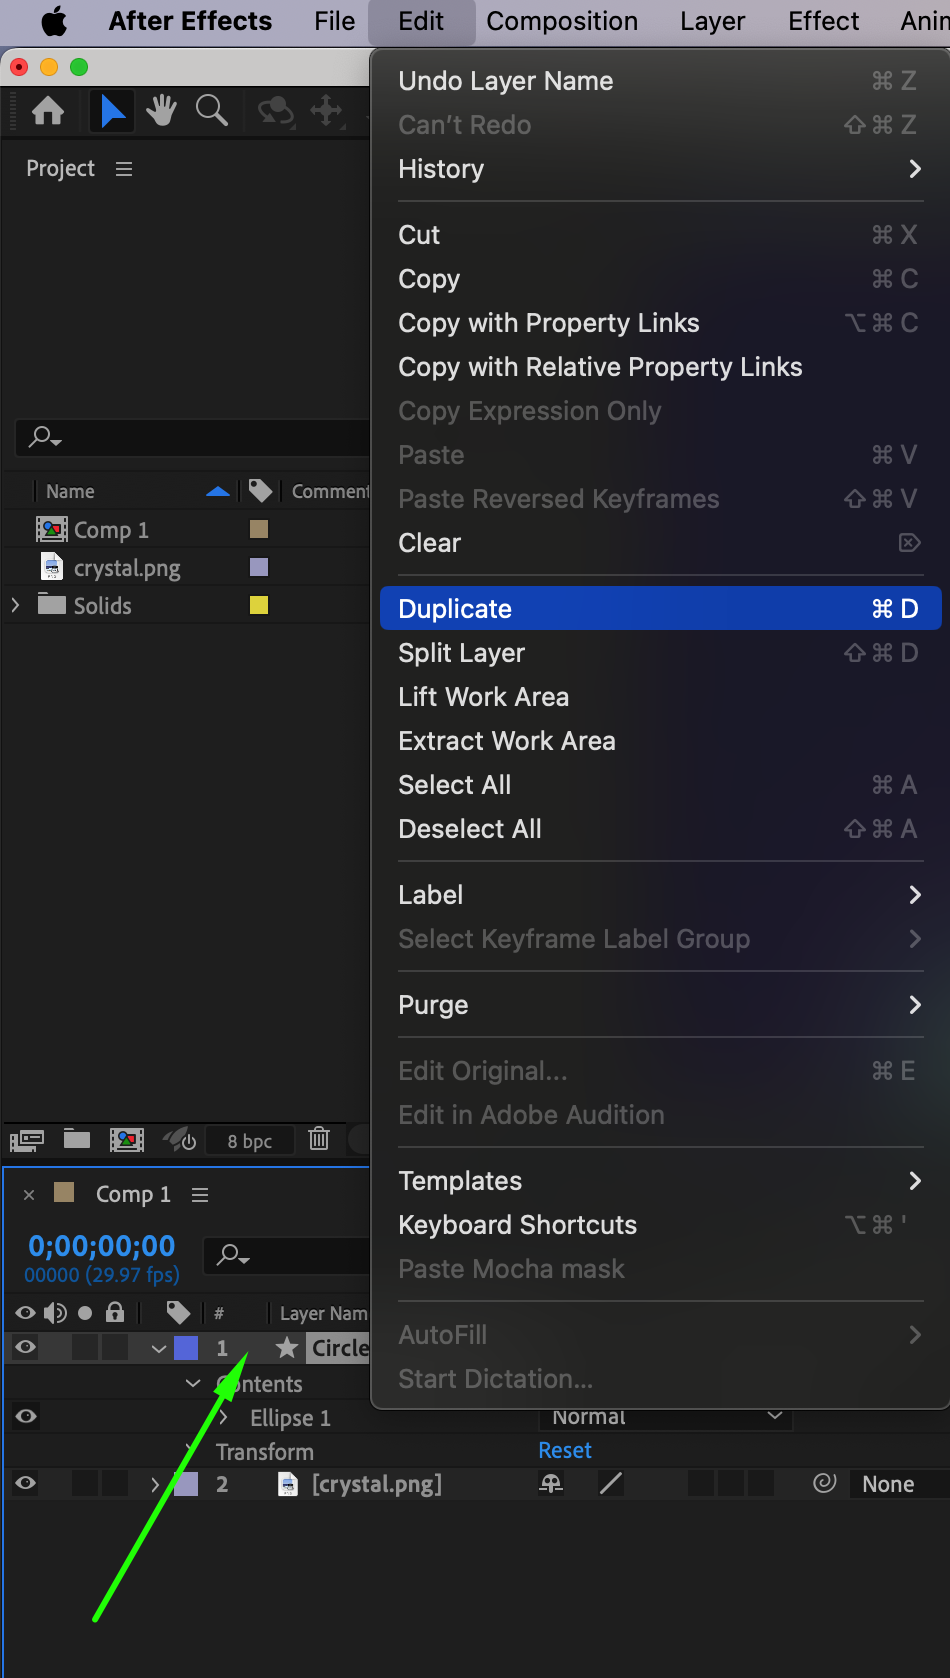
 Step 4: Draw a Connecting Line
Select the Pen Tool (G) and create a straight line extending from the Outline Circle to where you want the text to appear. Name this layer “Line.” Adjust the stroke width in the Shape Layer Properties to match the design.
Step 5: Add a Text Background
Use the Rectangle Tool (Q) to draw a background box for the text. Position it near the end of the line where the callout text will be placed. Name this layer “Rectangle.”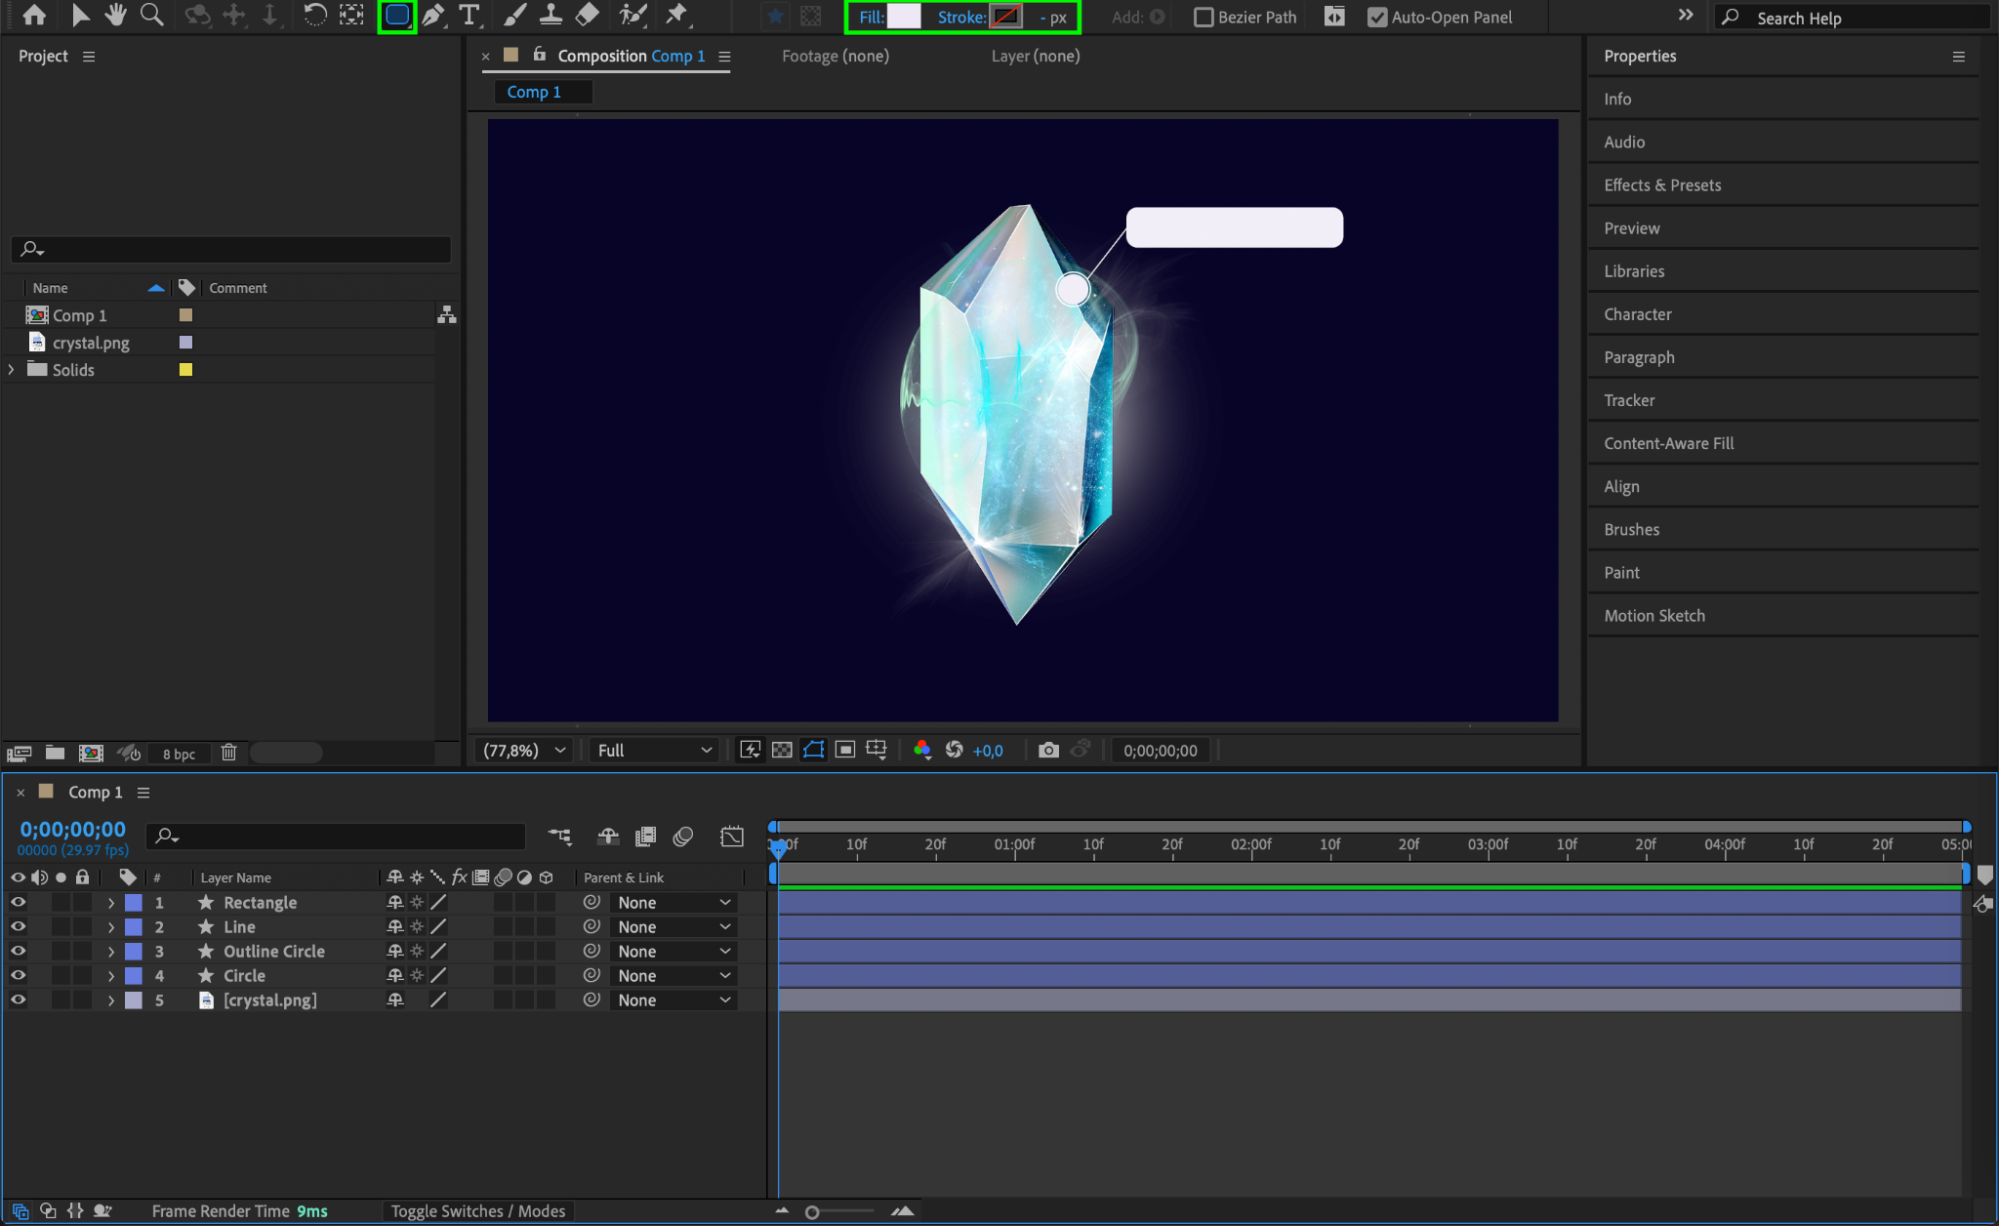 Step 6: Create the Callout Text
Select the Type Tool (Ctrl/Cmd + T) and click on the composition to add text. Type your label and customize the font, size, and color using the Character Panel. Align it properly with the rectangle background.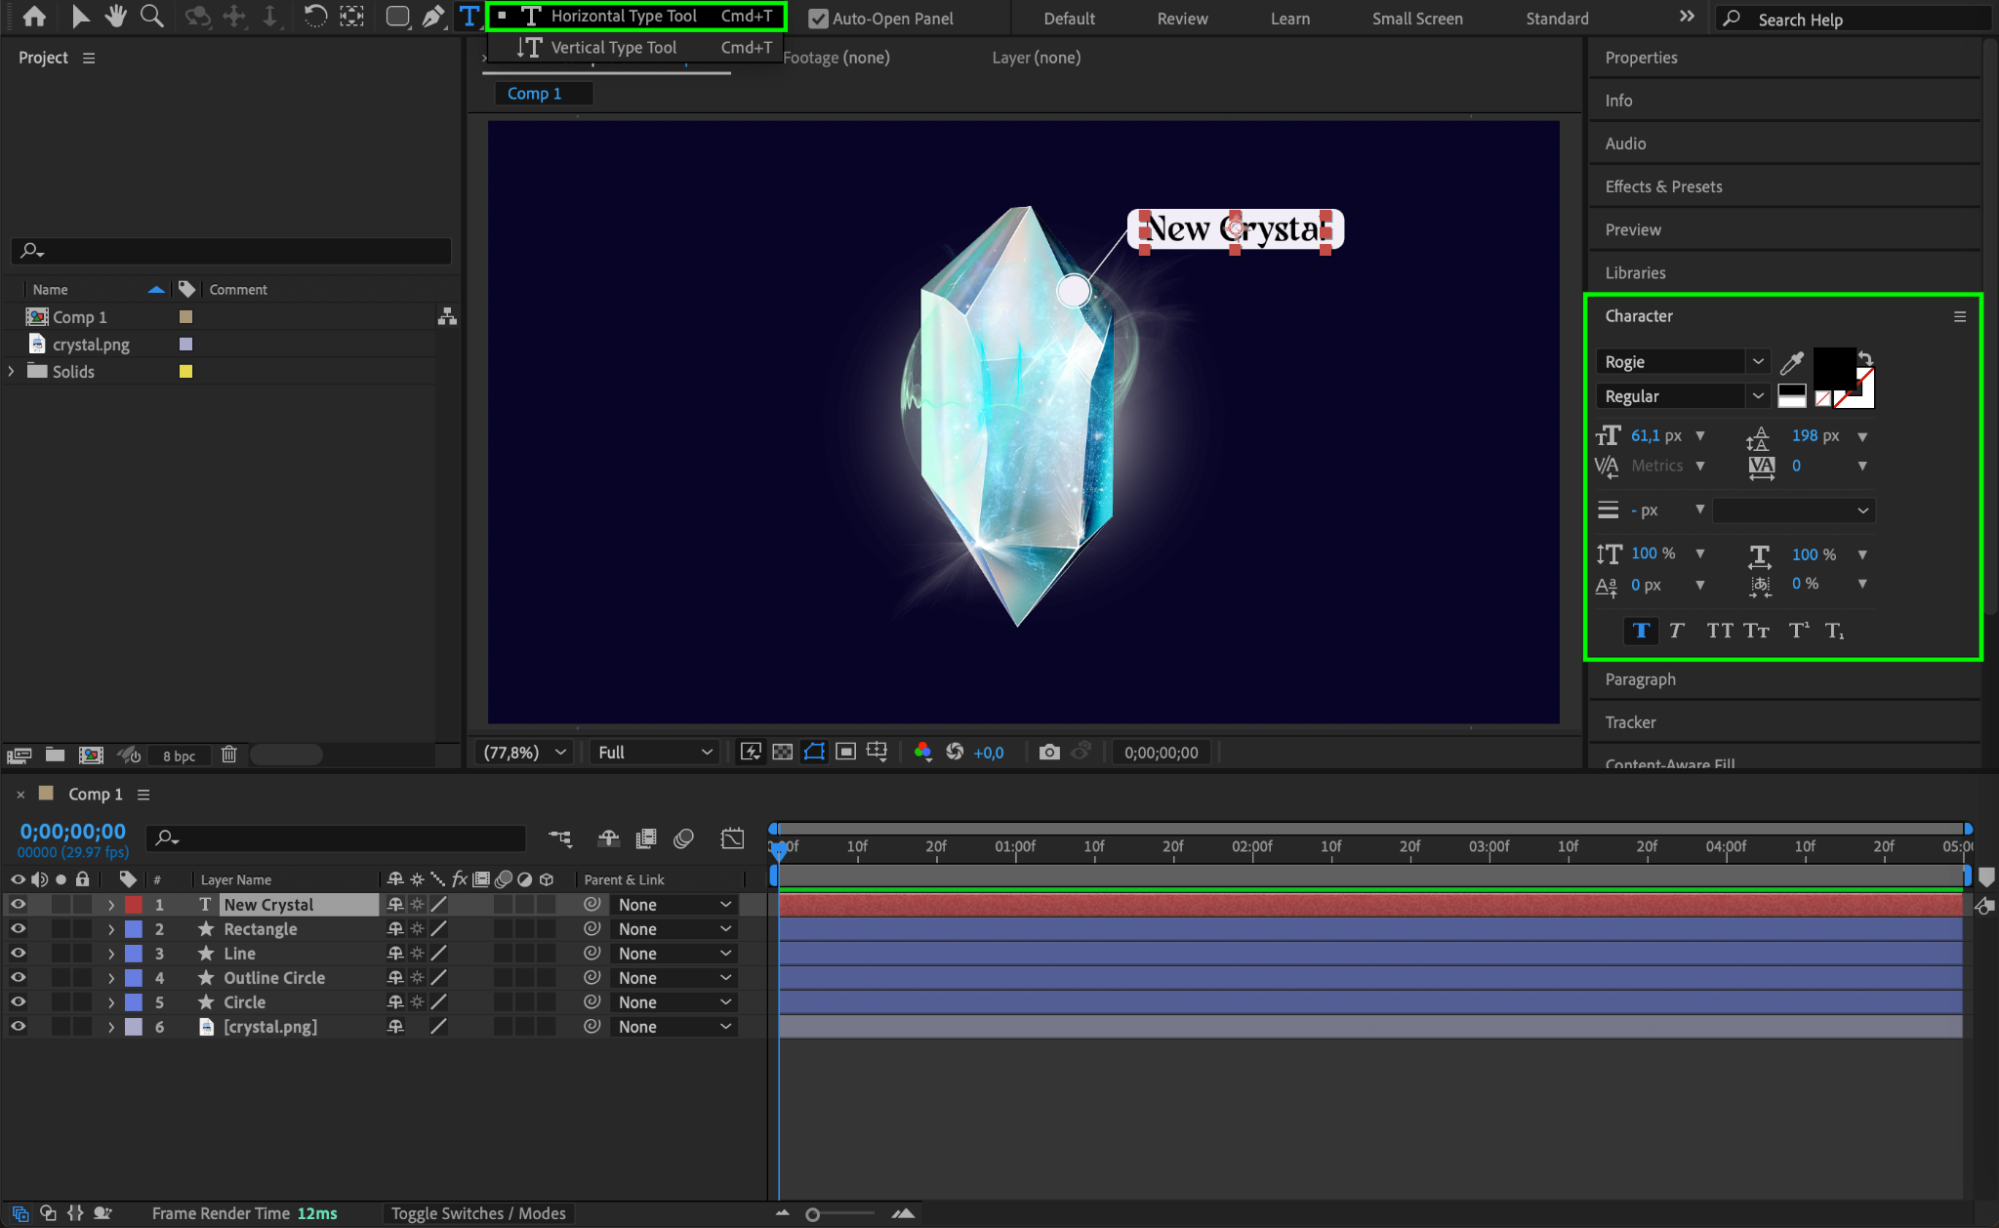
Step 7: Apply Trim Paths to Animate Elements
For each Shape Layer (Circle, Outline Circle, Line, and Rectangle), add a Trim Paths animation:
Expand the shape layer properties.
Click the Add button next to Contents and choose Trim Paths.
This will allow you to animate the drawing of each shape.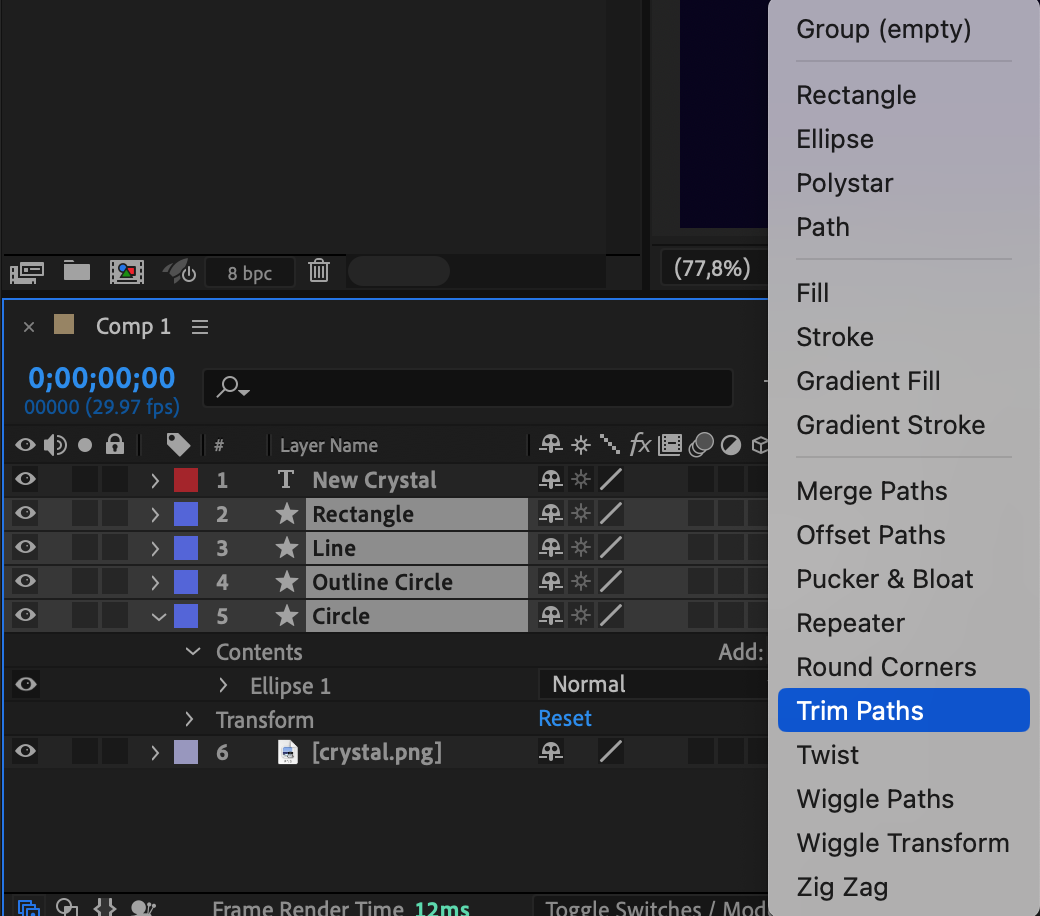 Step 8: Animate the Callout Title
Animate the appearance of each element sequentially:
Select the Circle Layer, go to the Trim Paths settings, and set the End value to 0 at the start of the timeline (Position 1). Move the Current Time Indicator (CTI) forward a few frames (Position 2) and change End to 100 so the circle gradually appears.
Repeat this process for the Outline Circle, setting End to 0 at Position 2 and increasing it to 100 a few frames later (Position 3).
Move the CTI forward and animate the Line and Rectangle in the same way, setting their End values from 0 to 100 to create a smooth reveal.
Finally, use the Opacity Property for the Text Layer to fade it in as the shapes animate, ensuring a cohesive transition.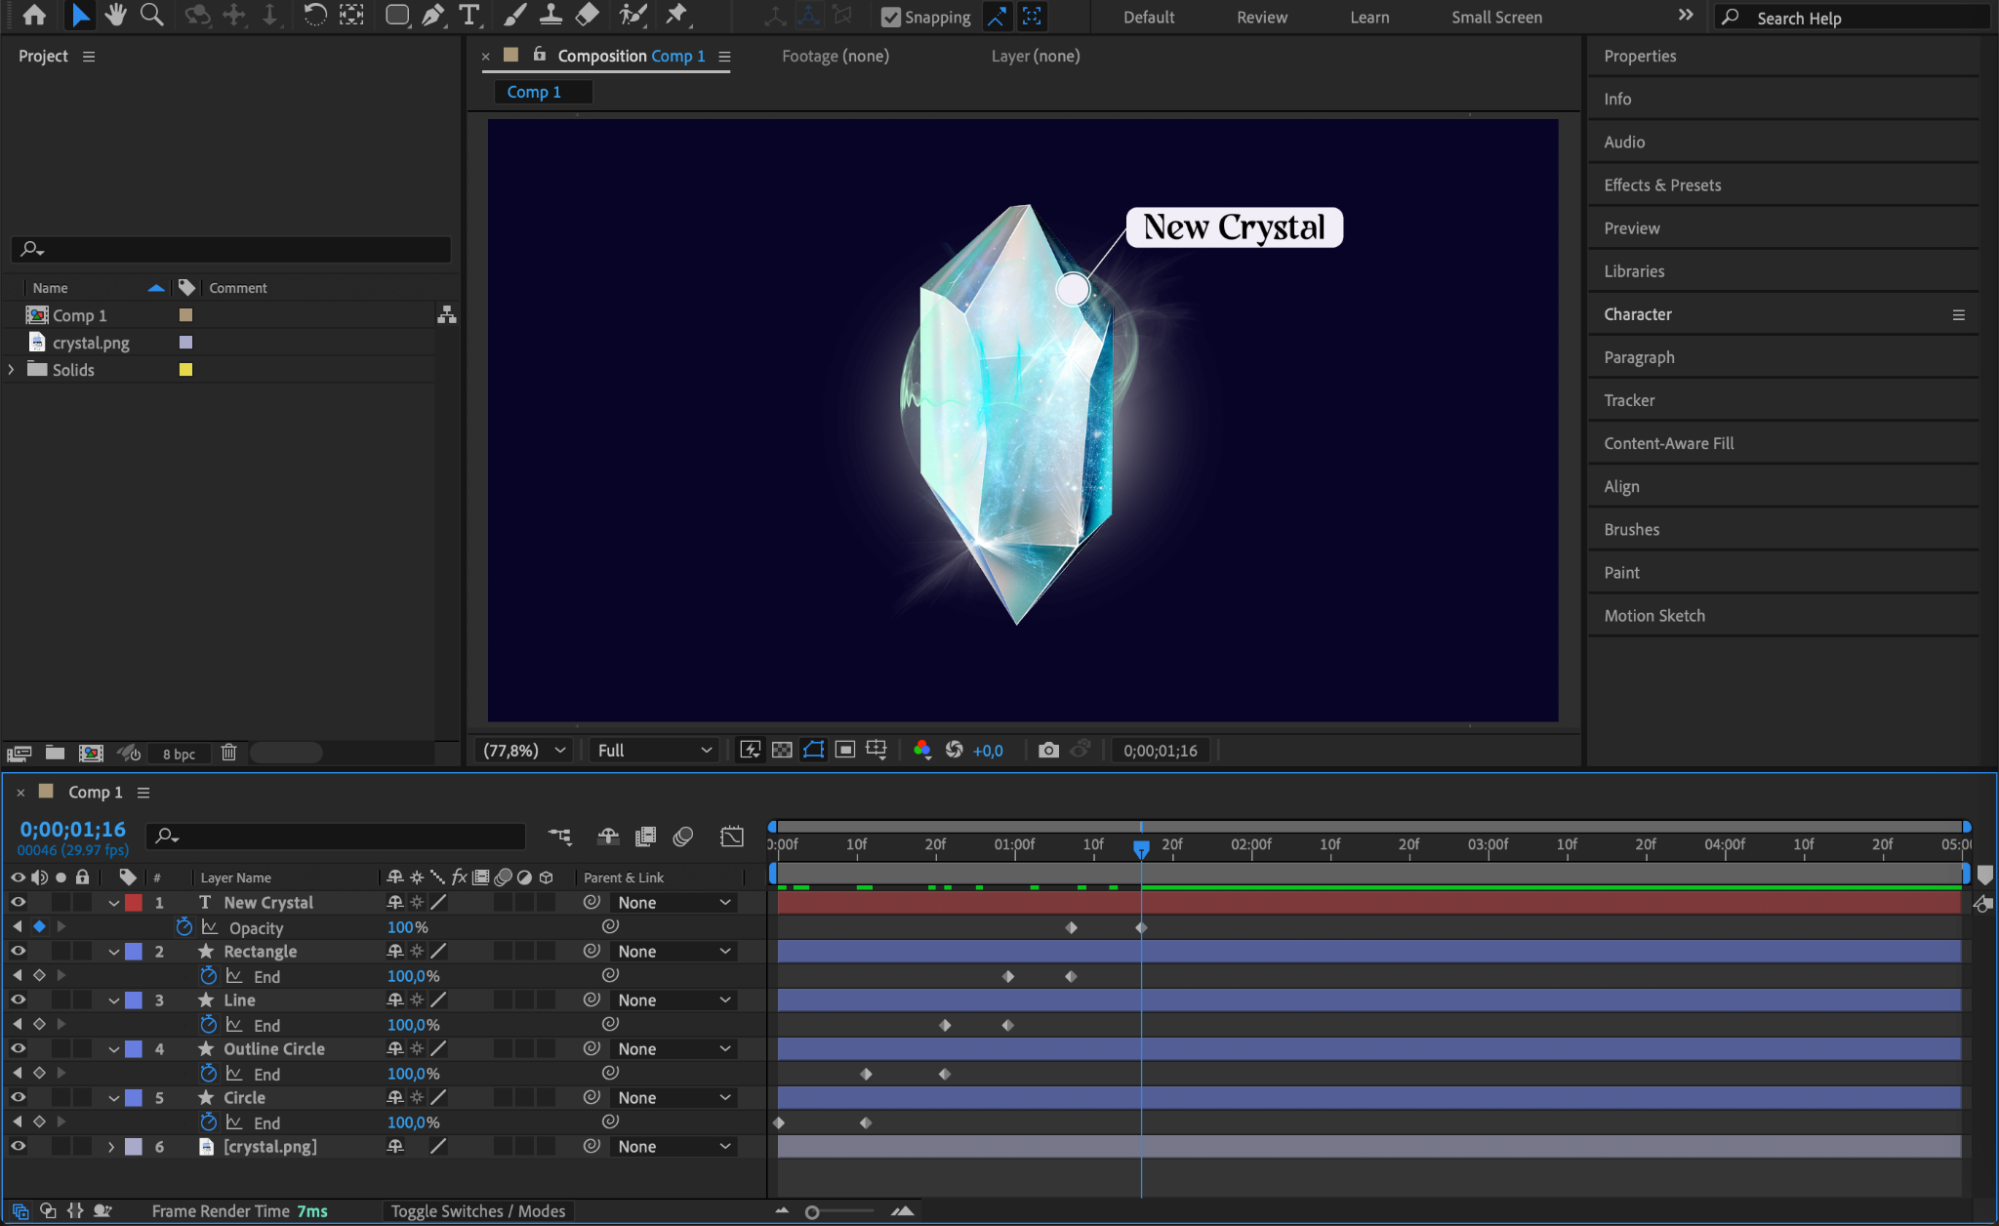 Step 9: Preview the Animation
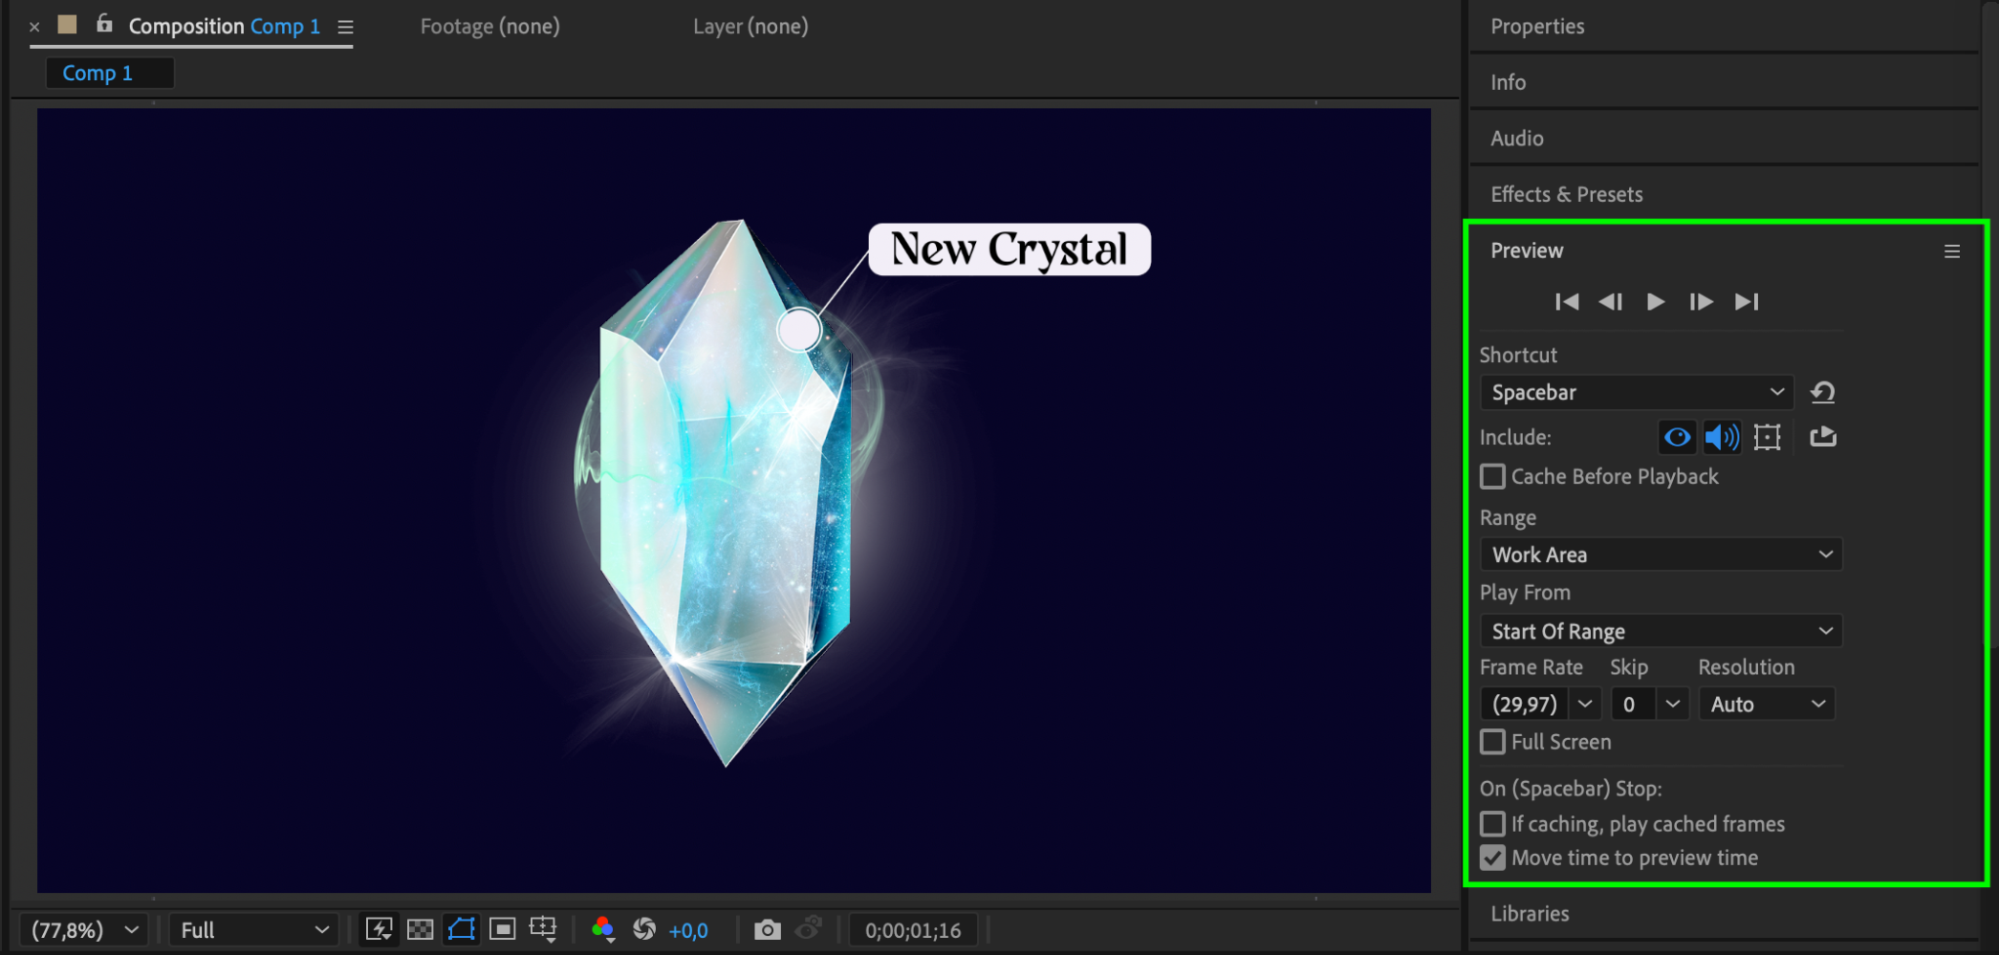
Press Spacebar to preview the animation. Adjust keyframe timing to make the movement smooth and natural.
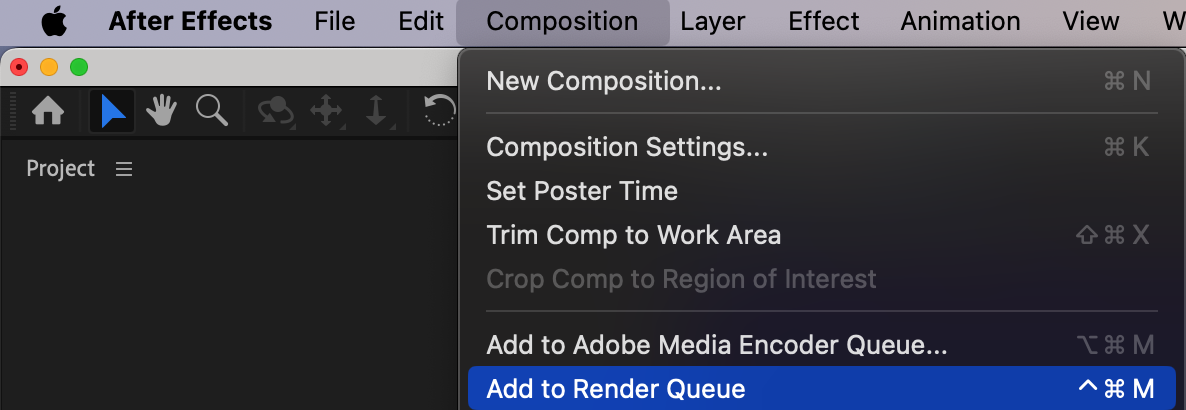
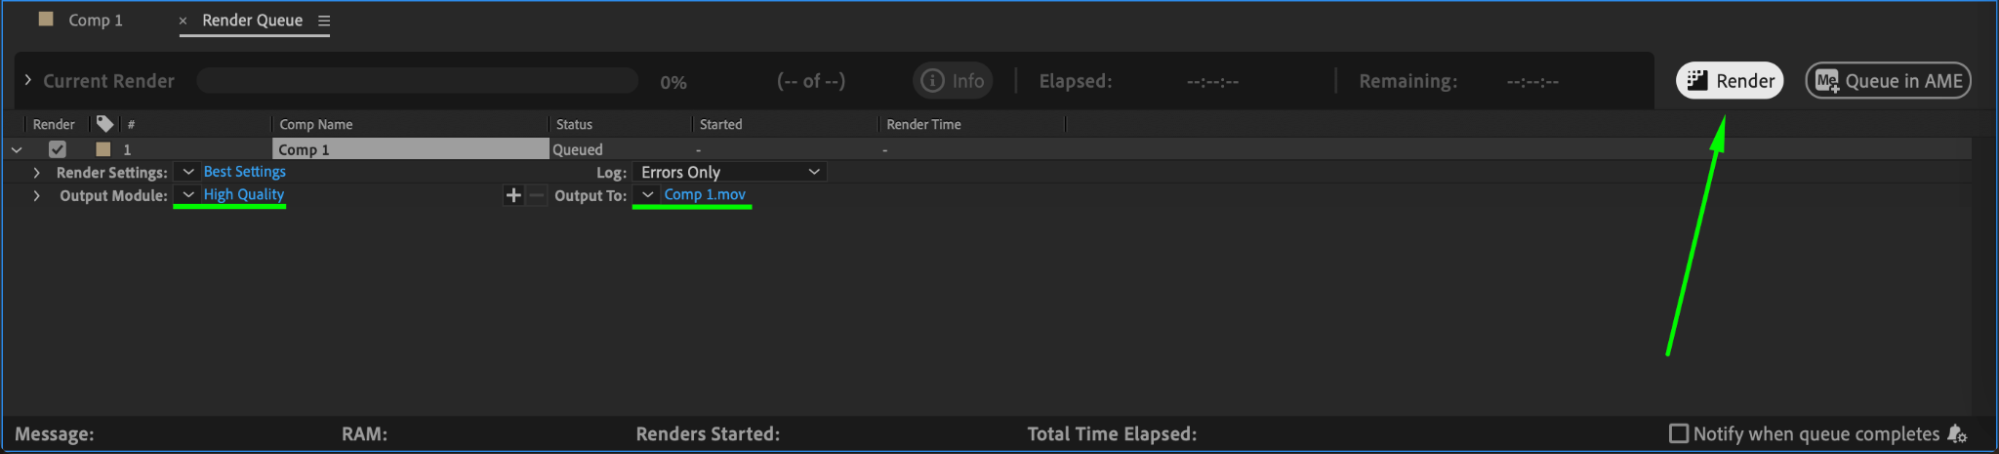
 Step 10: Render the Final Animation
Once satisfied, go to Composition > Add to Render Queue and render the animation for use in your video.
Conclusion
By using shape layers, trim paths, and basic animation techniques, you can create professional callout titles in After Effects. These titles are perfect for labeling objects, providing additional information, or enhancing explainer videos.


