Learn how to add and customize analog glitch overlays using AEJuice to give your video a retro, distorted aesthetic.
Create Retro Vibes with Analog Glitch Effects in After Effects
Introduction – Why Use Analog Glitch Effects?
Analog glitch effects can give your video a nostalgic, distorted, or VHS-inspired style. These effects work great in music videos, experimental edits, or any project that needs a retro touch. With AEJuice’s Analog Glitch pack, you can easily add high-quality glitch overlays to your footage and fully customize them for your creative needs. In this tutorial, you’ll learn how to apply, modify, and enhance analog glitch effects in Adobe After Effects.
Step 1: Import Your Footage
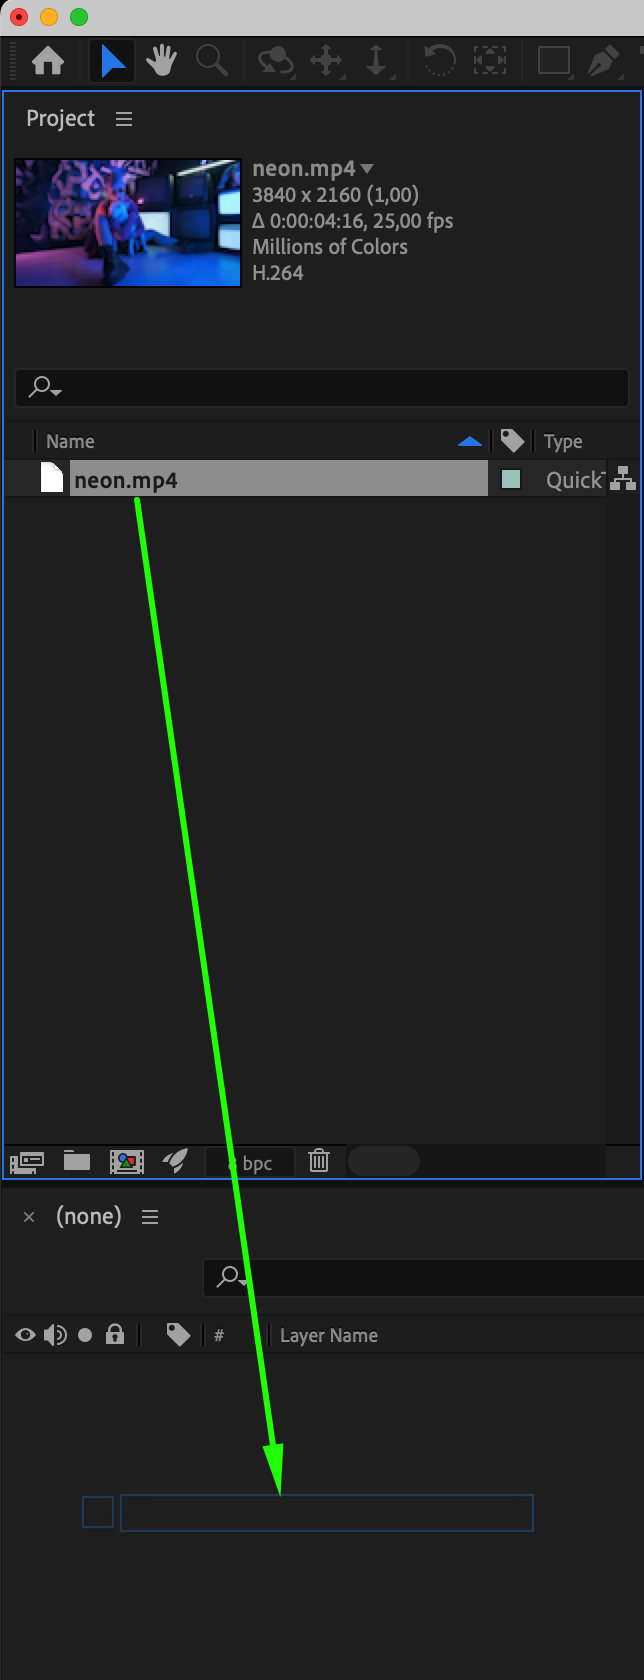
Go to File > Import > File, select your video, and drag it into the timeline. This creates a new composition with your footage as the base layer. This is where you will apply the glitch effect.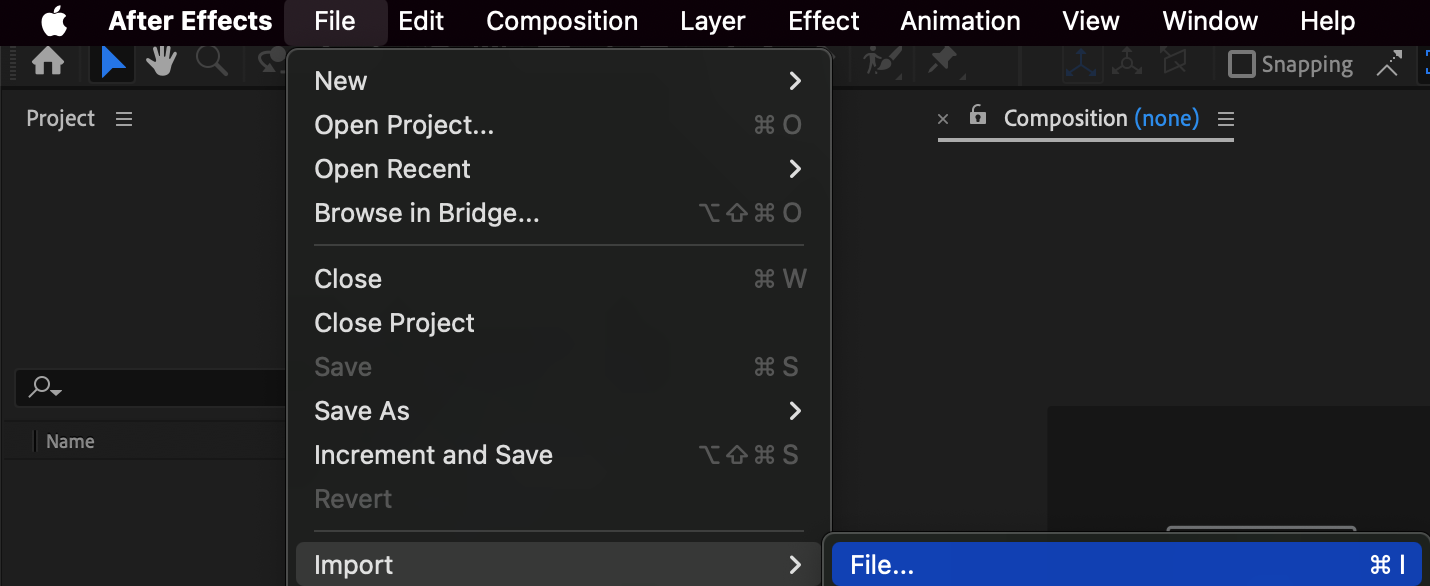
Get 10% off when you subscribe to our newsletter

Step 2: Open AEJuice Pack Manager
Navigate to Window > AEJuice Pack Manager 4 to open the plugin panel. From here, you can explore all the available AEJuice packs, including various glitch overlays and transitions. Step 3: Download the Analog Glitch Pack
In the Pack Manager, scroll until you find the Analog Glitch pack. Click on it to download the pack if it’s not already installed. Once it’s downloaded, you’ll be able to preview and apply a variety of analog glitch animations.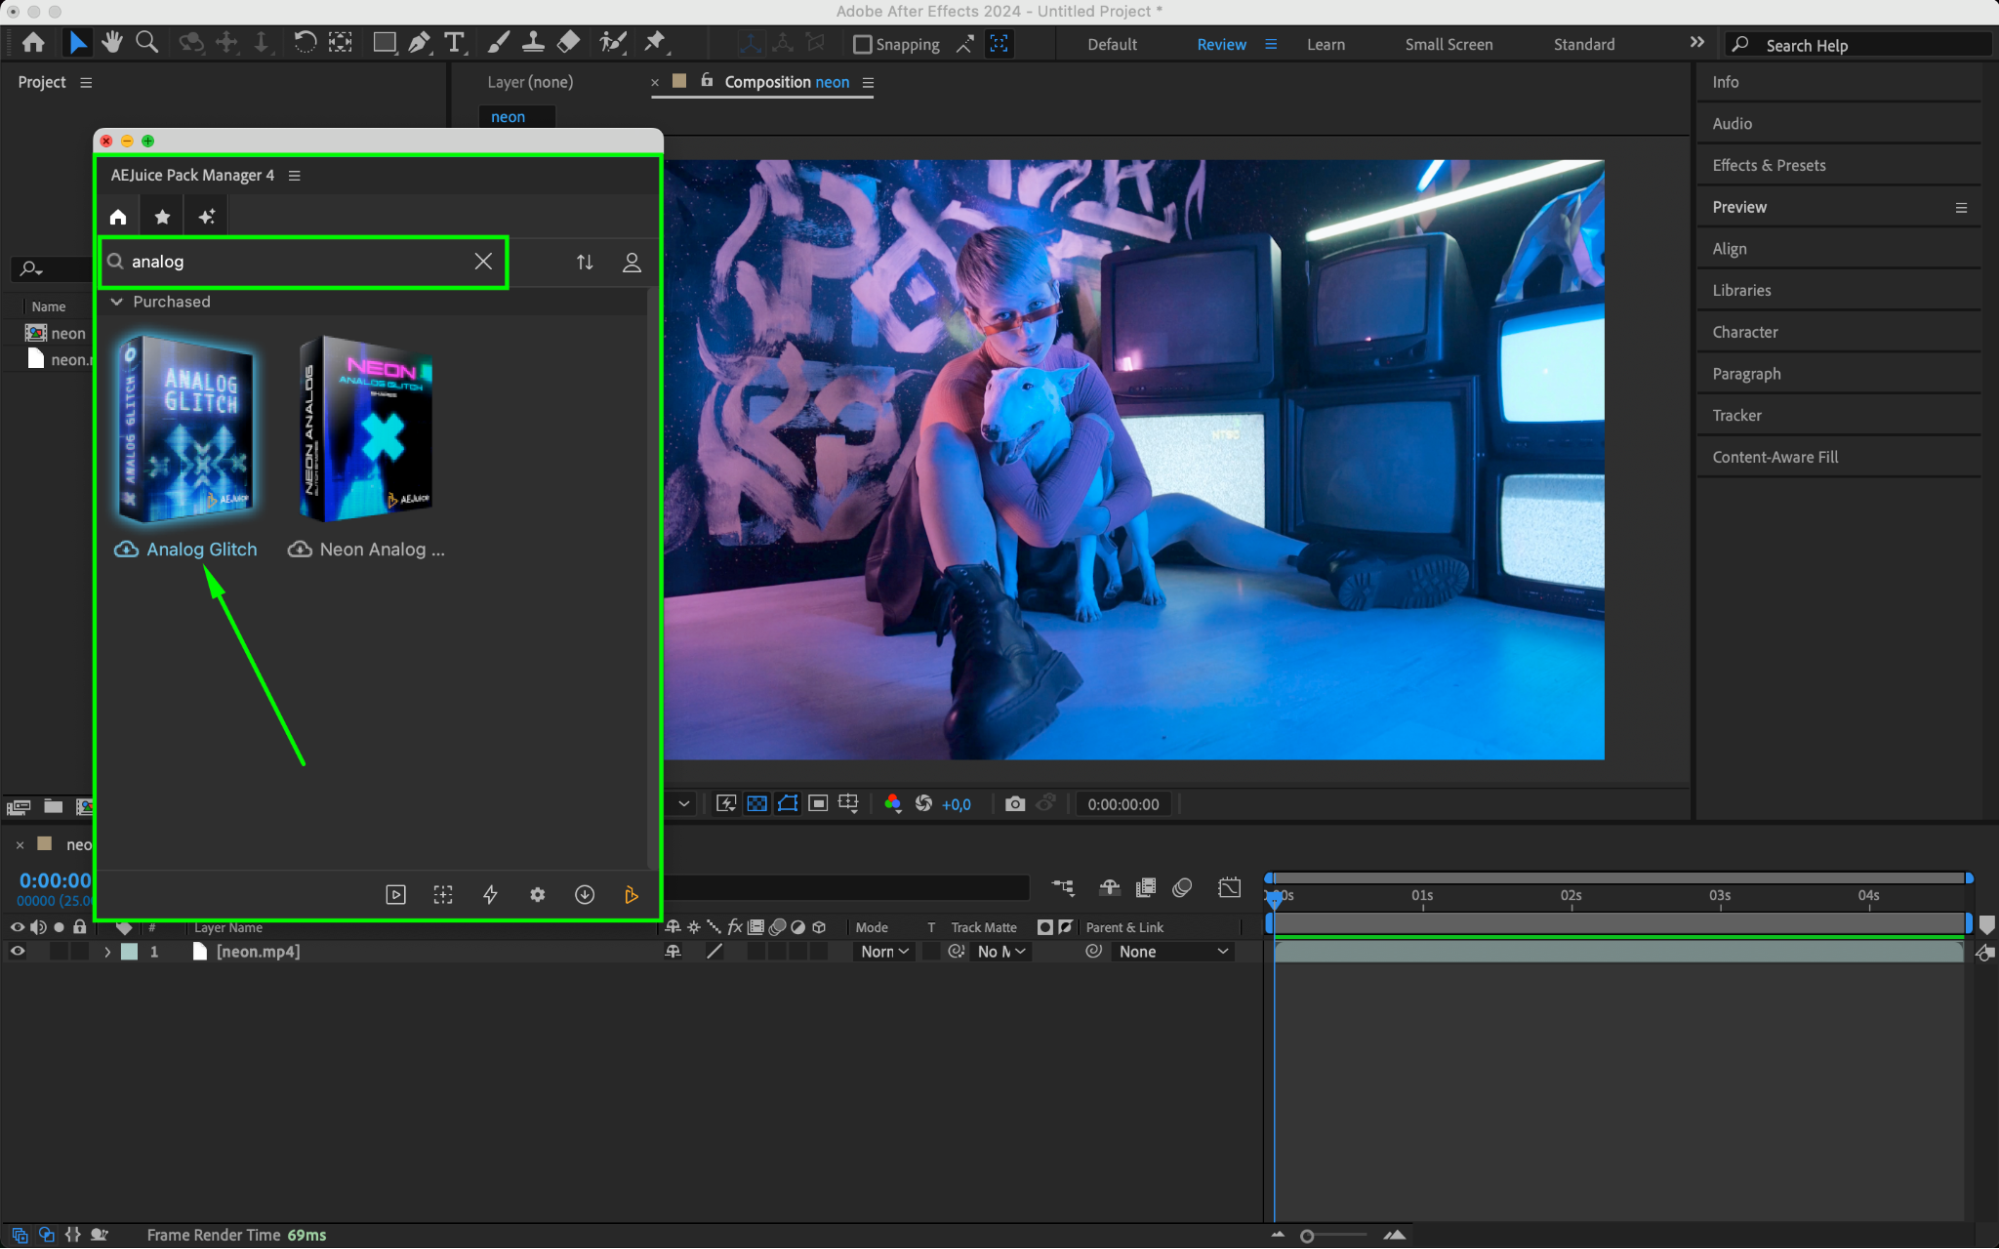 Step 4: Choose and Import a Glitch Overlay
Browse through the glitch templates in the pack and pick the one that fits your project. Click on the animation you like and press the Import button. A new pre-composition, such as Analog Glitch 32, will appear in your timeline.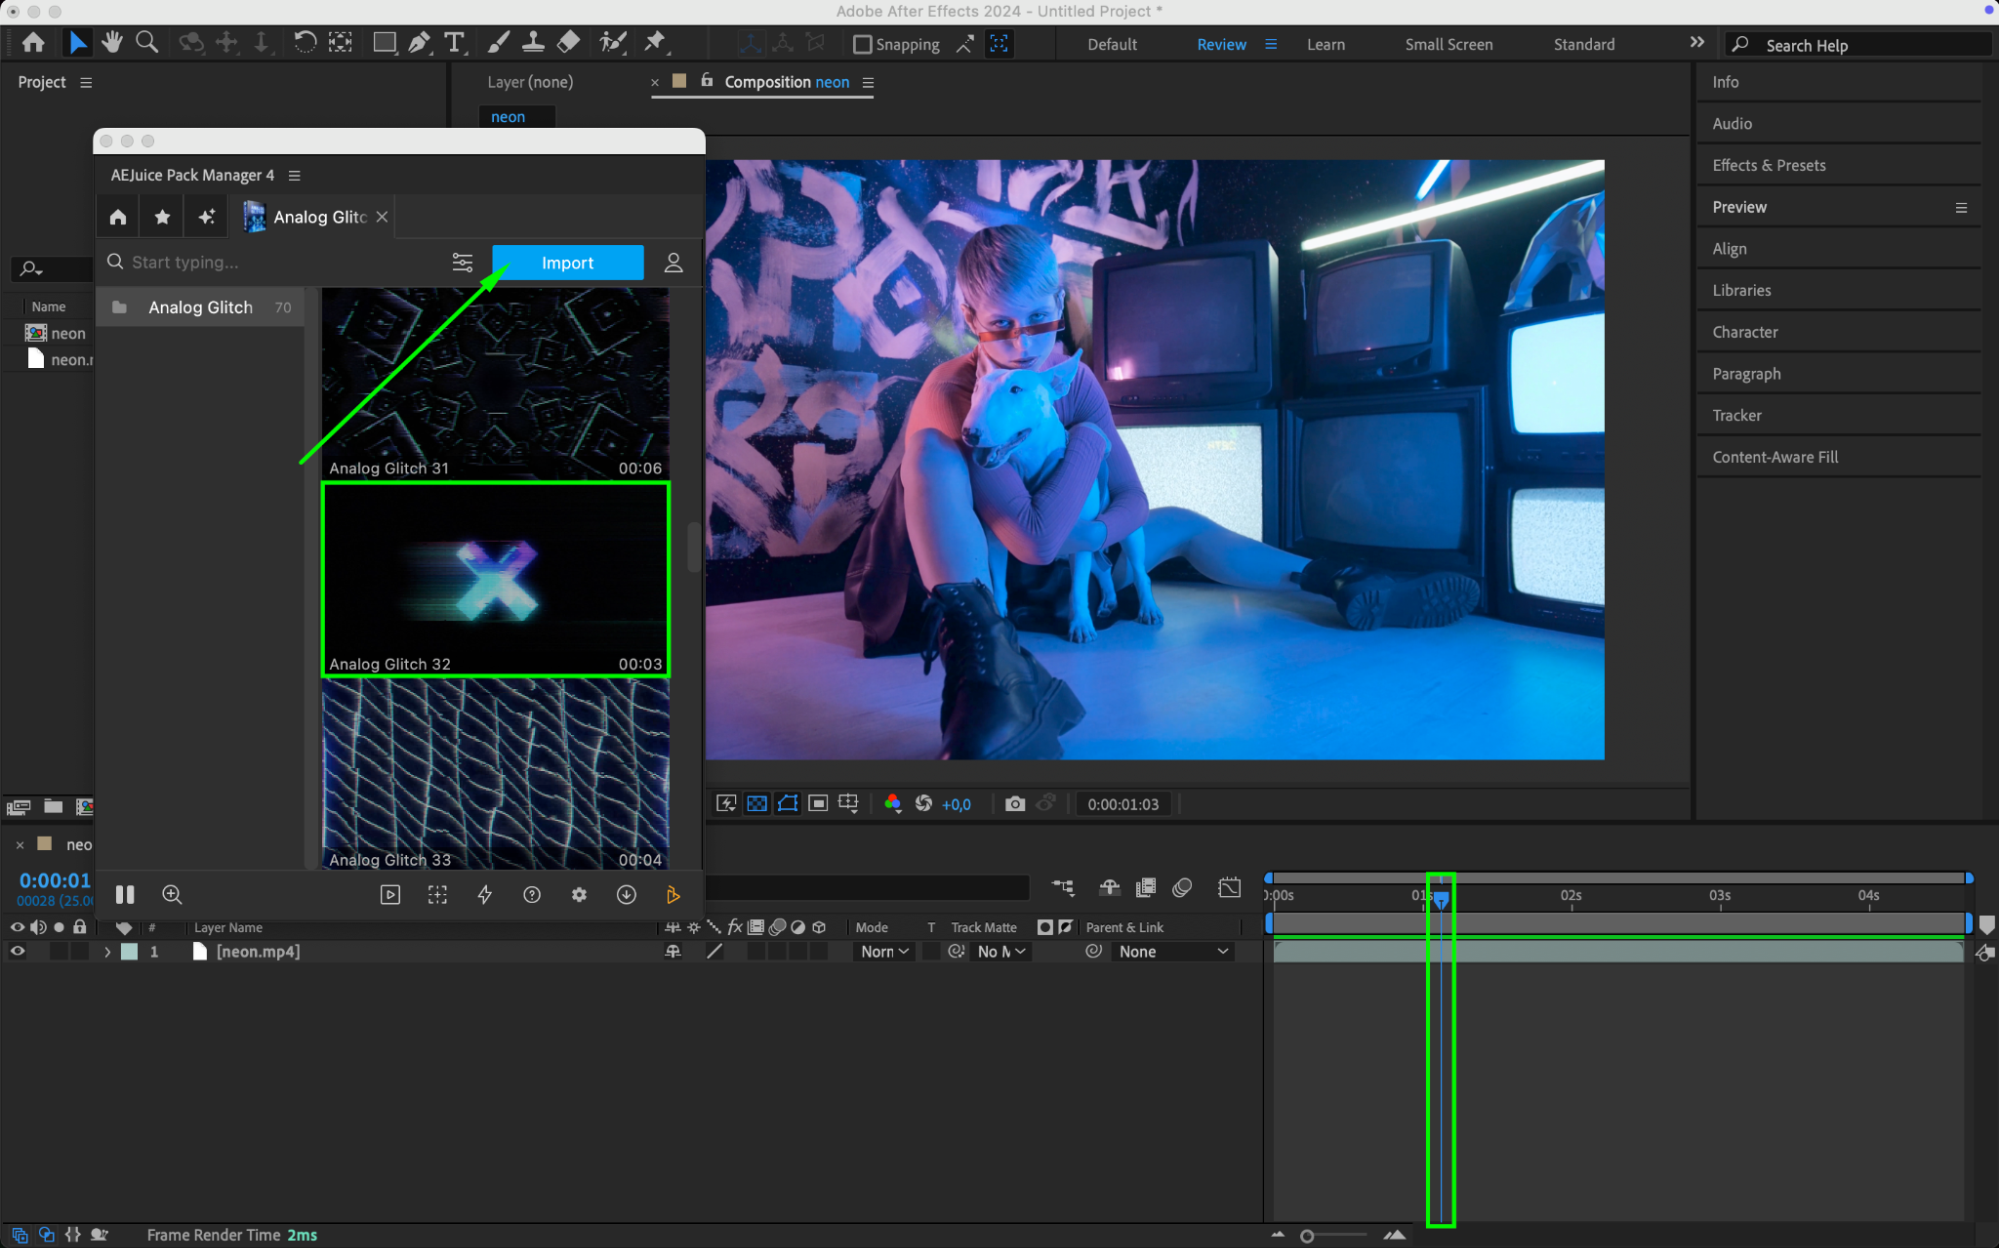
Step 5: Customize Glitch Color with Hue & Saturation (Optional)
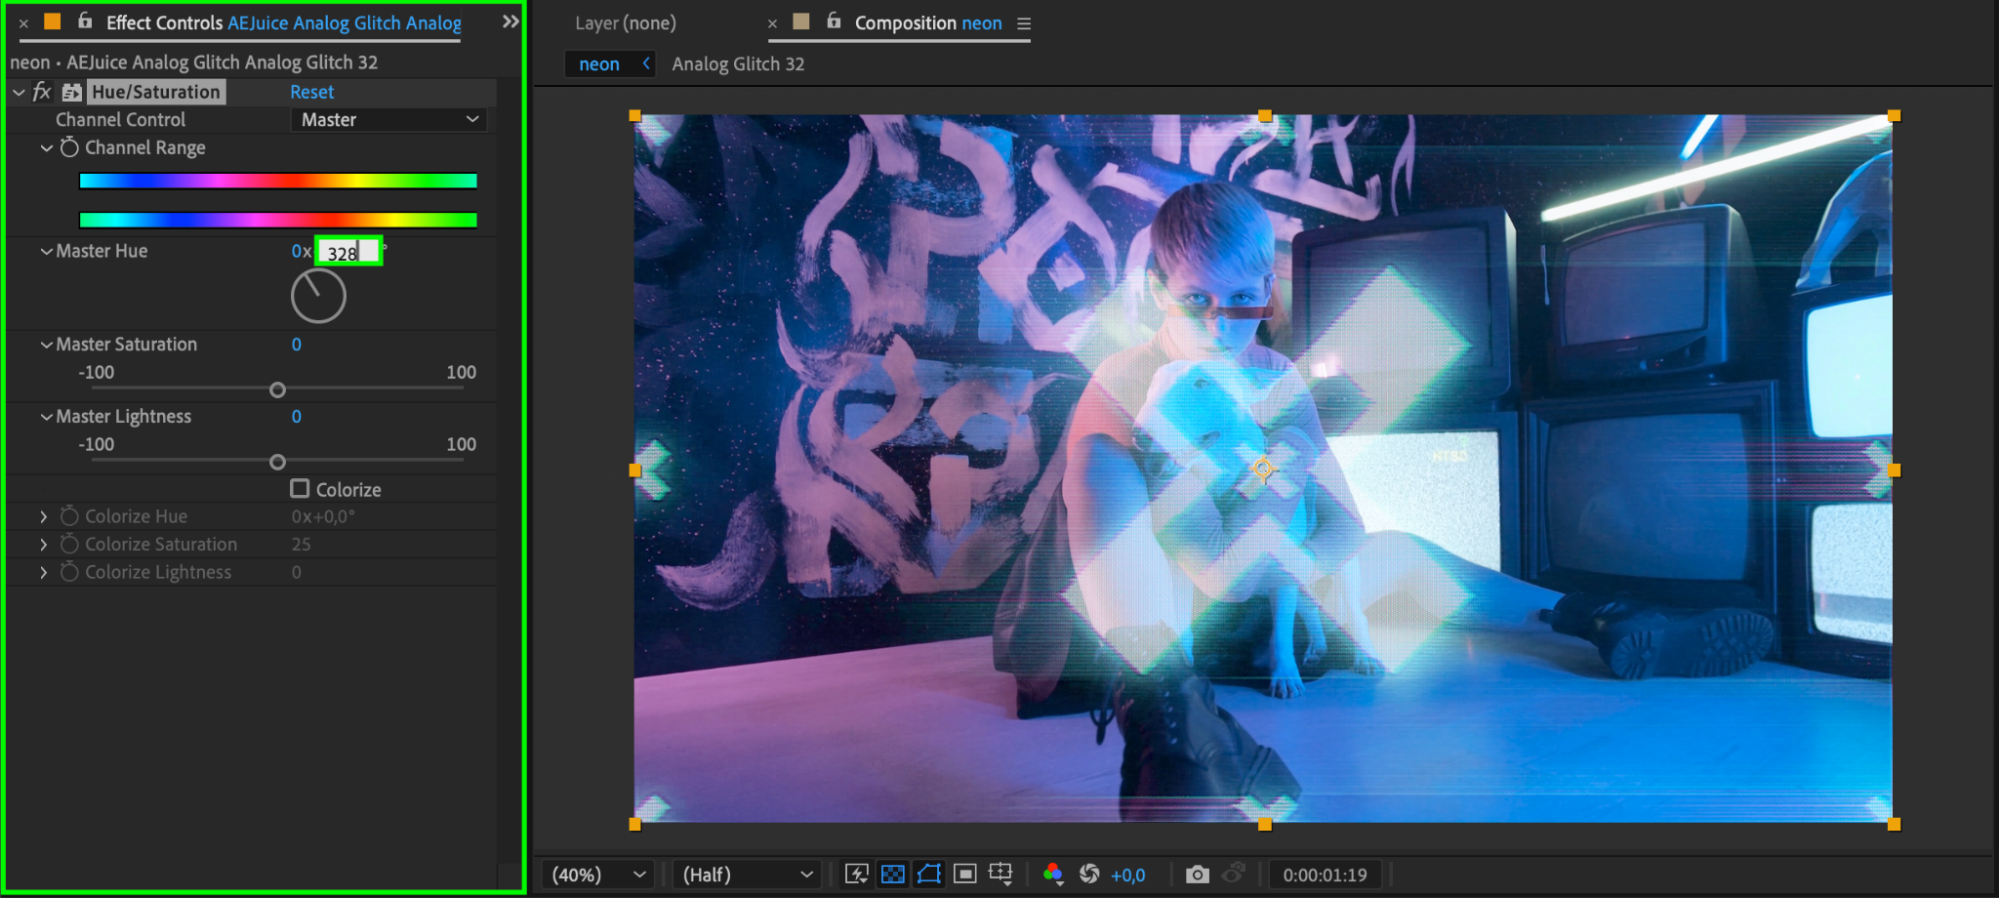
Go to the Effects & Presets panel and search for Hue/Saturation. Drag this effect onto the glitch layer. In the Effect Controls Panel, adjust the Master Hue to shift the colors and create a custom glitch style that fits your project’s mood.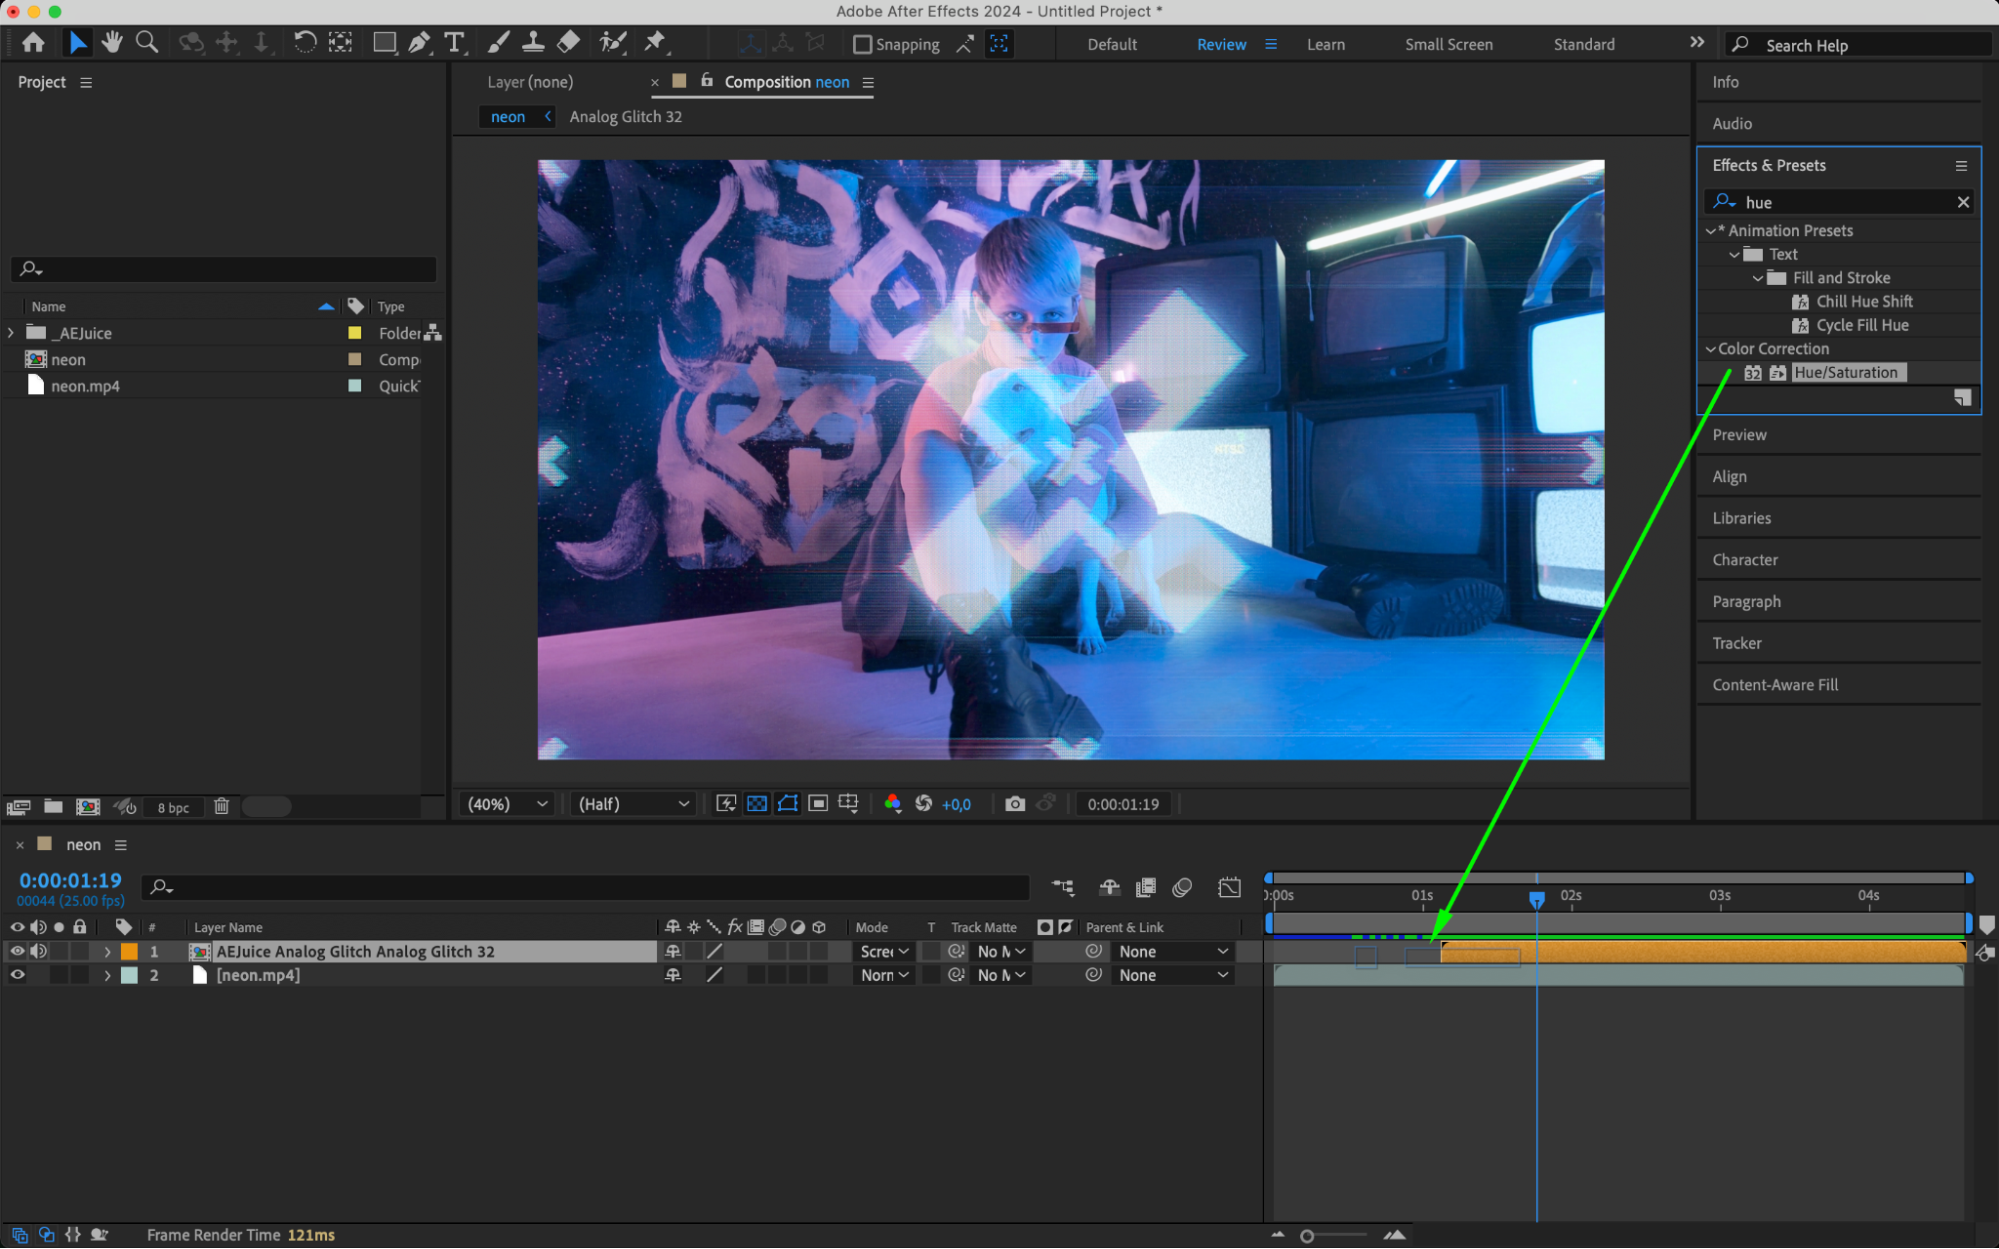
 Step 6: Enhance with Glow Effect (Optional)
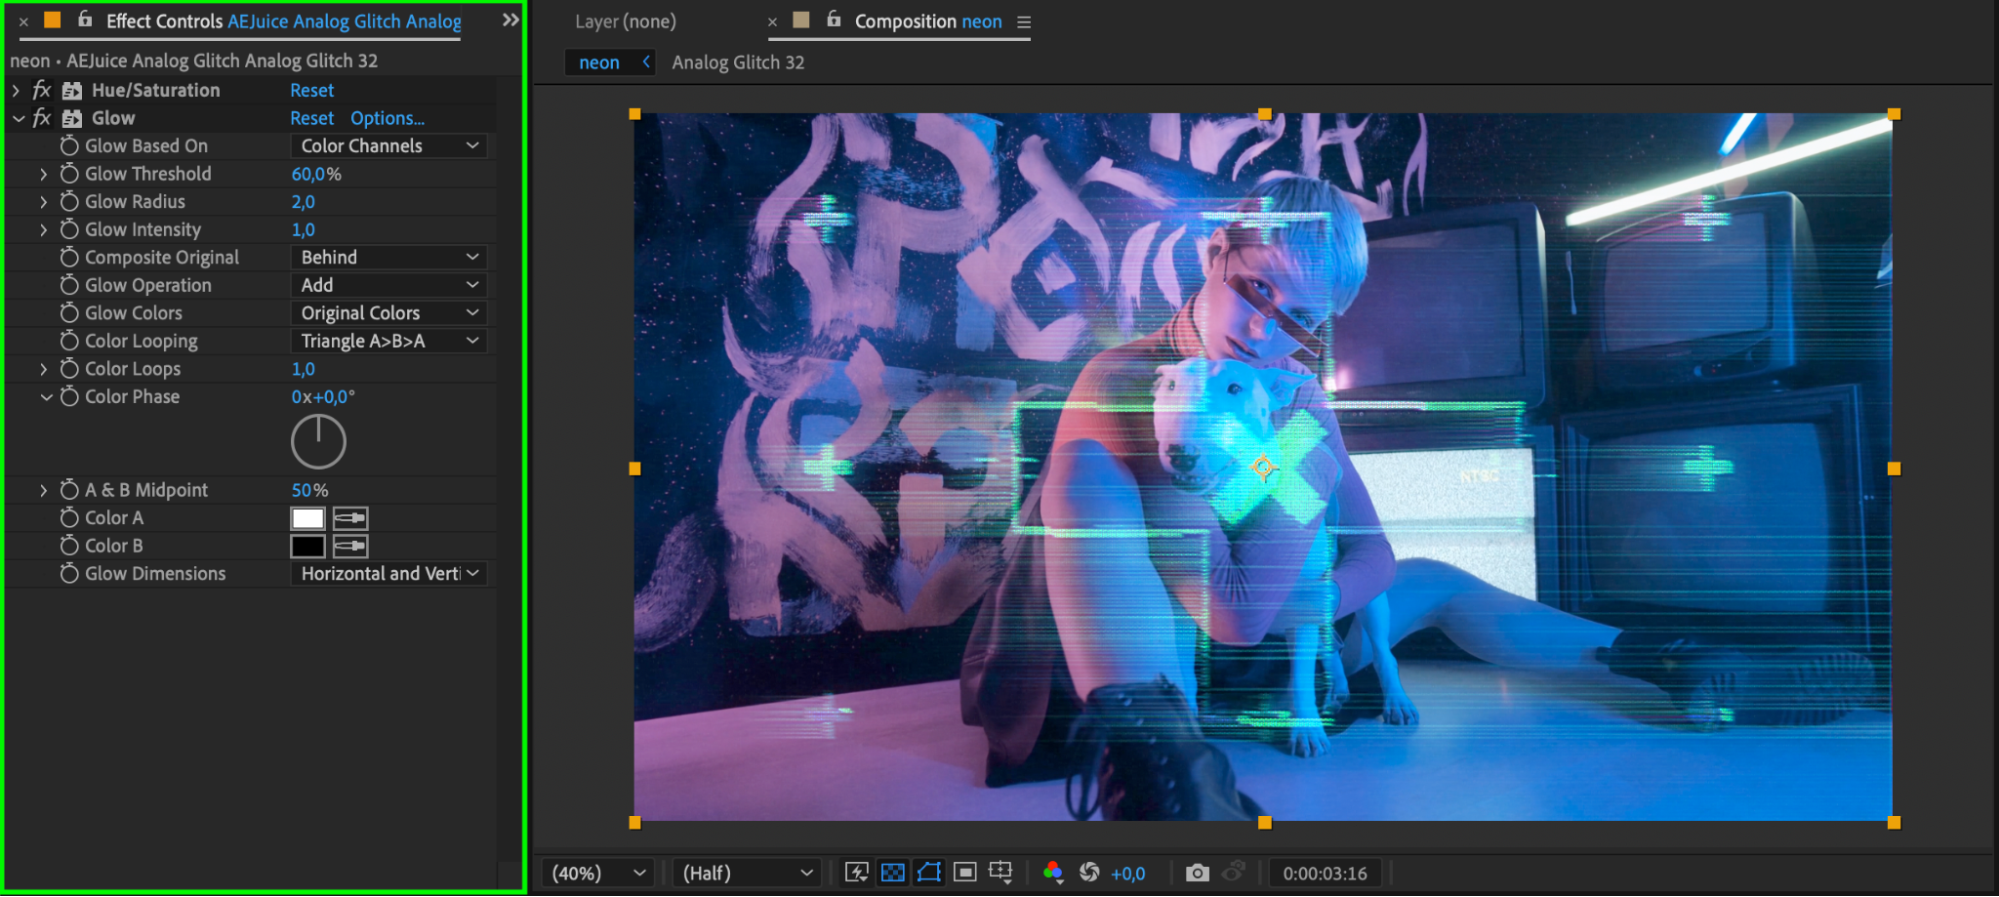
To make the glitch pop even more, add a Glow effect by going to Effects & Presets > Stylize > Glow. Adjust the settings like Glow Radius and Glow Intensity to get the desired impact.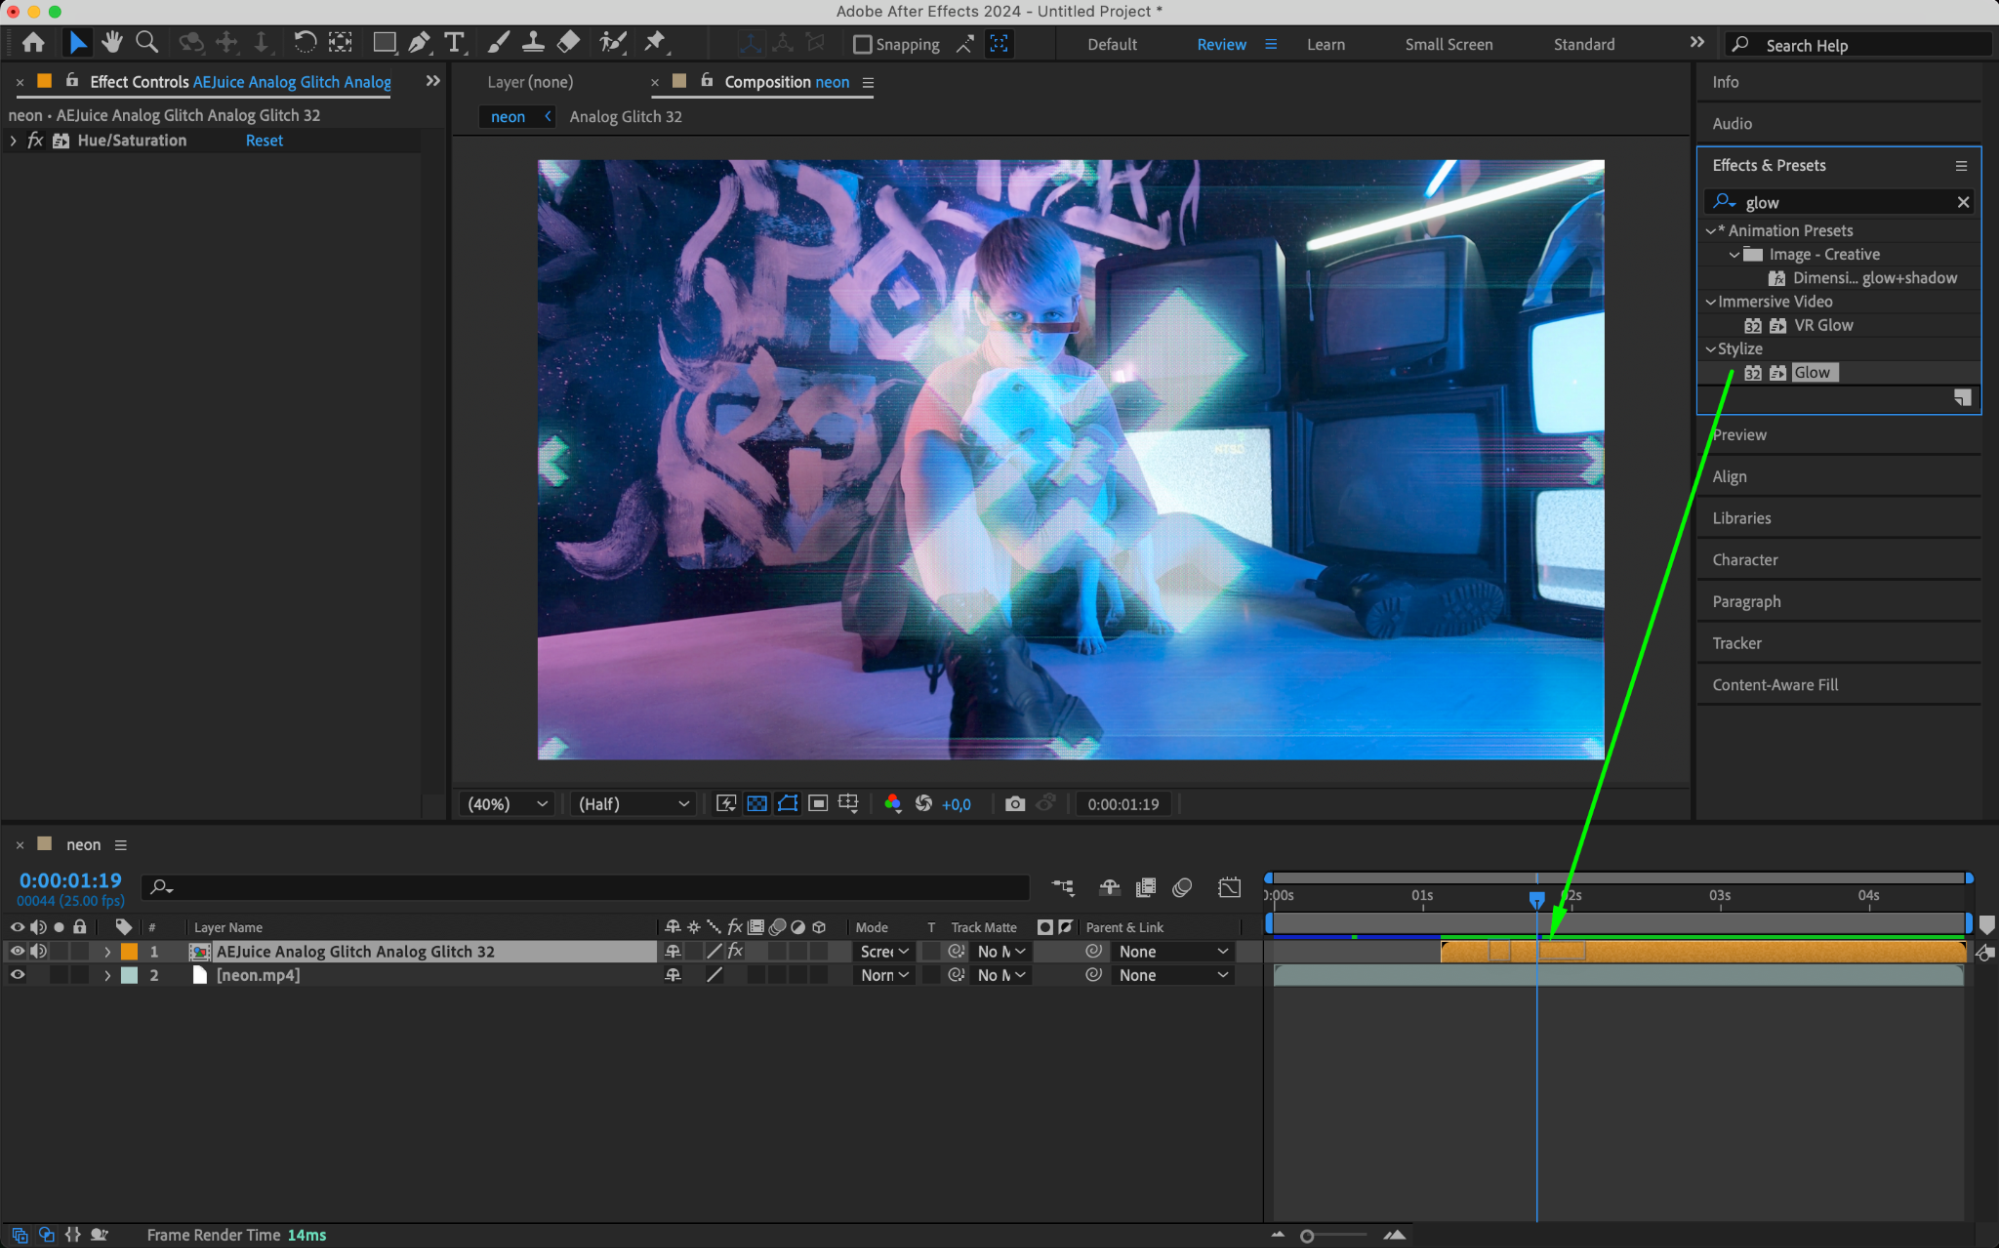
 Step 7: Preview and Finalize
Preview your video to check the timing and appearance of the analog glitch. Once everything looks good, export your video using Composition > Add to Render Queue.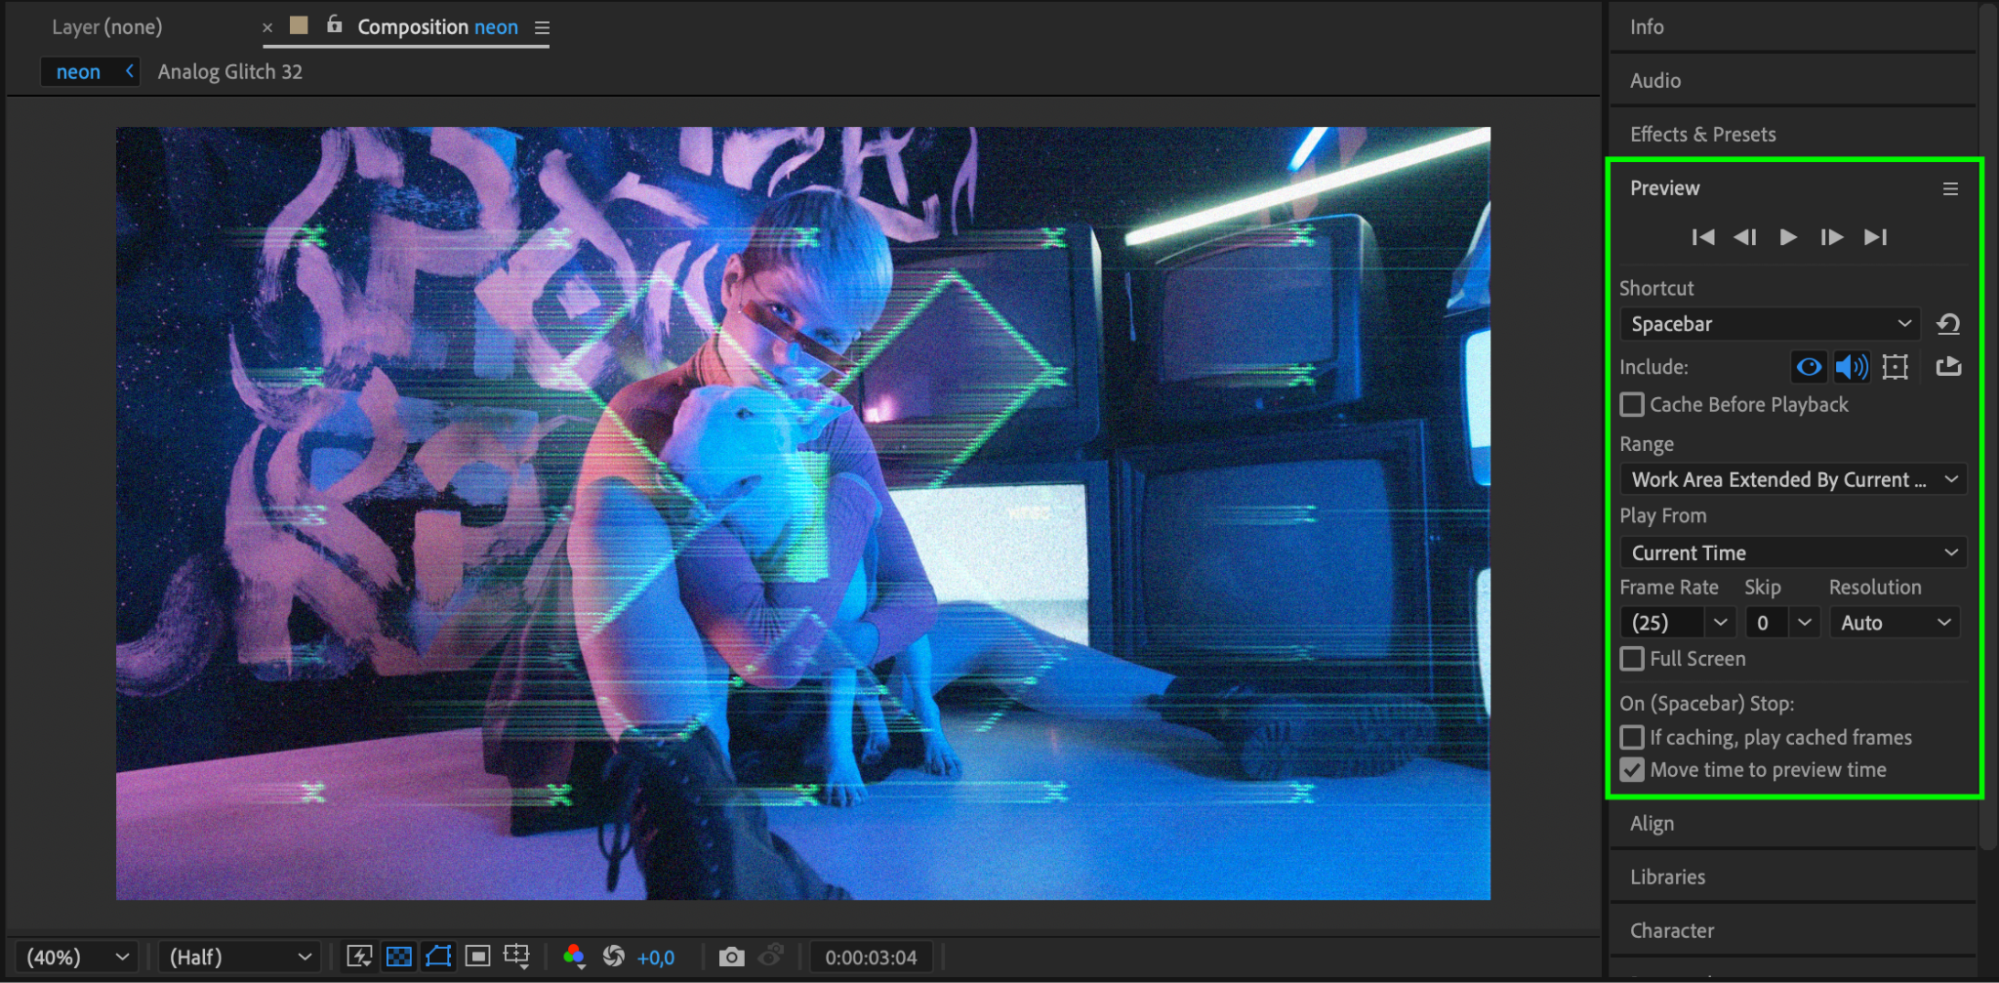
Conclusion
Analog glitch effects are one of the best overlays to create a retro and distorted video style. With the AEJuice Analog Glitch pack, you can easily add and customize high-quality analog distortions with just a few clicks. Use this analog glitch tutorial as a starting point and keep experimenting with color, glow, and layering to build your own signature look.
Our Bestsellers


