Creating a Photo Video in After Effects
Introduction
Creating a photo video in After Effects allows you to showcase images in a dynamic and visually appealing way. Whether you’re making a slideshow, a cinematic montage, or a presentation, animating photos with smooth transitions can enhance your project. In this guide, we’ll go through the steps to import photos, arrange them, and animate a scrolling effect to make your video more engaging.
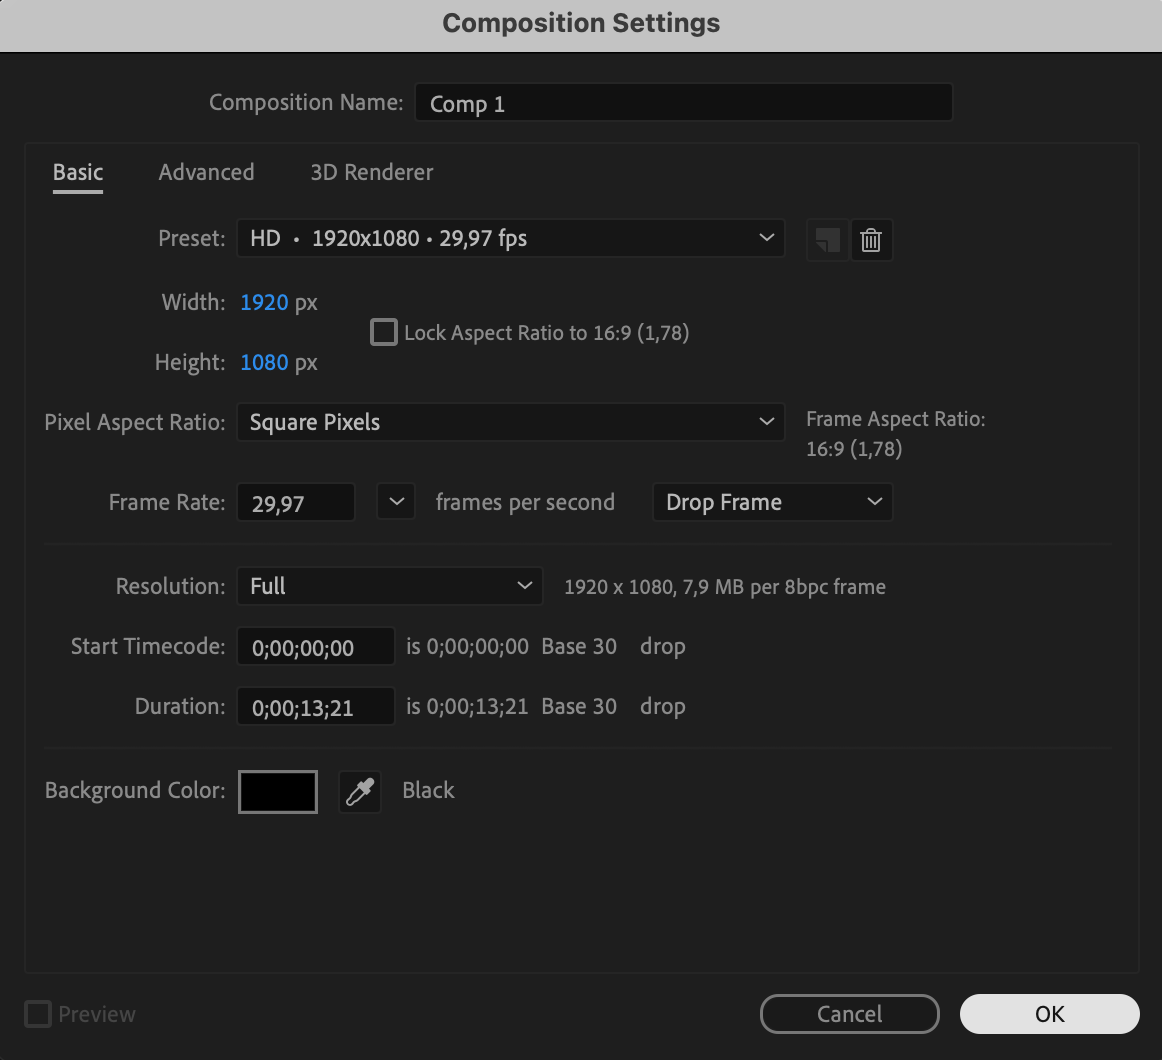
Step 1: Create a New Composition
Open After Effects and go to Composition > New Composition. Set the resolution, frame rate, and duration according to your project needs. Click OK to create the composition.
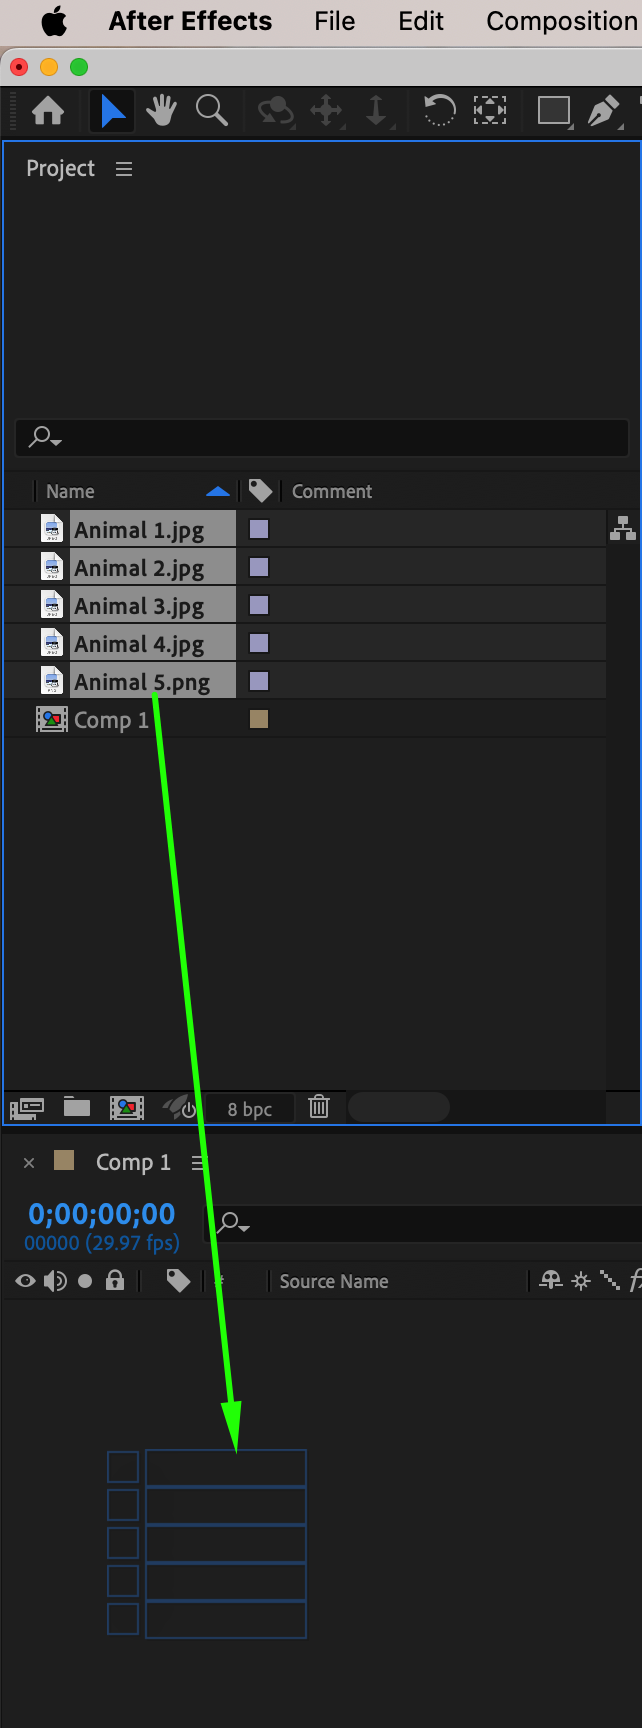
 Step 2: Import Photos and Add to Timeline
Go to File > Import > File, select your photos, and click Open. Drag the imported images onto the timeline, placing them in order.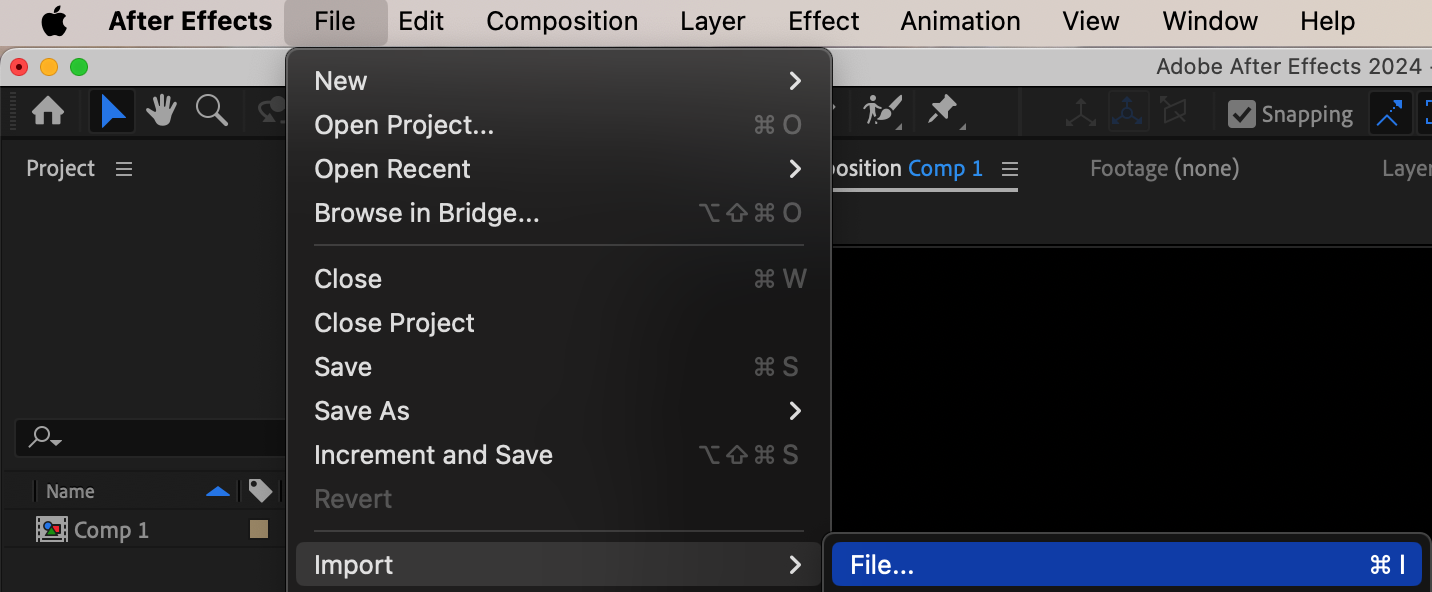
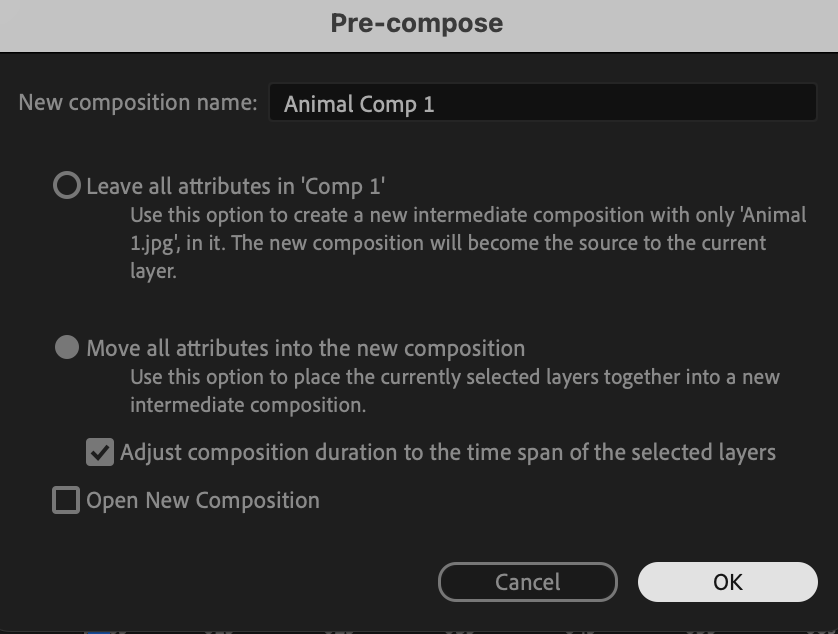
 Step 3: Pre-Compose Each Photo
Right-click on each photo layer and select Pre-Compose. This helps in keeping the project organized and allows for independent adjustments within each composition.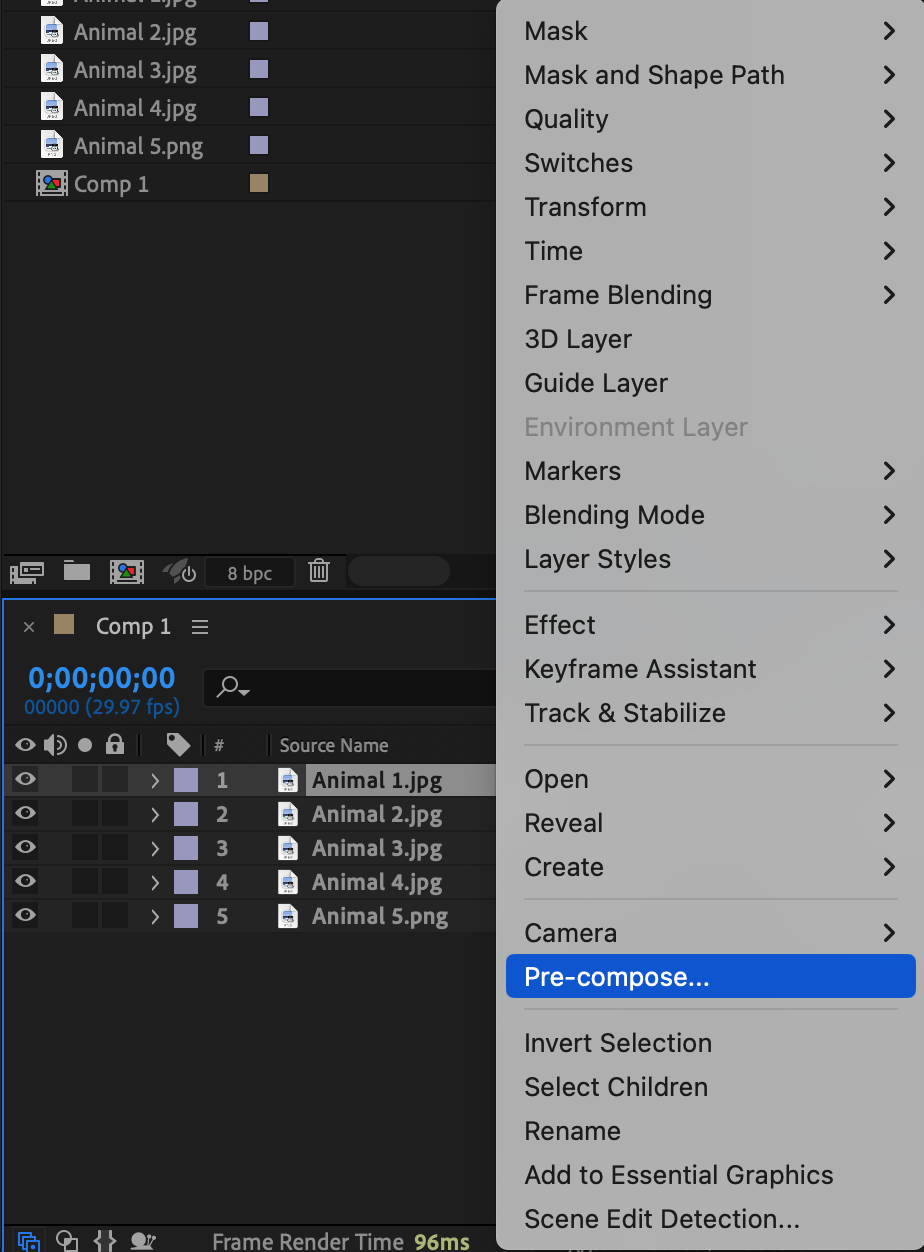
Get 10% off when you subscribe to our newsletter

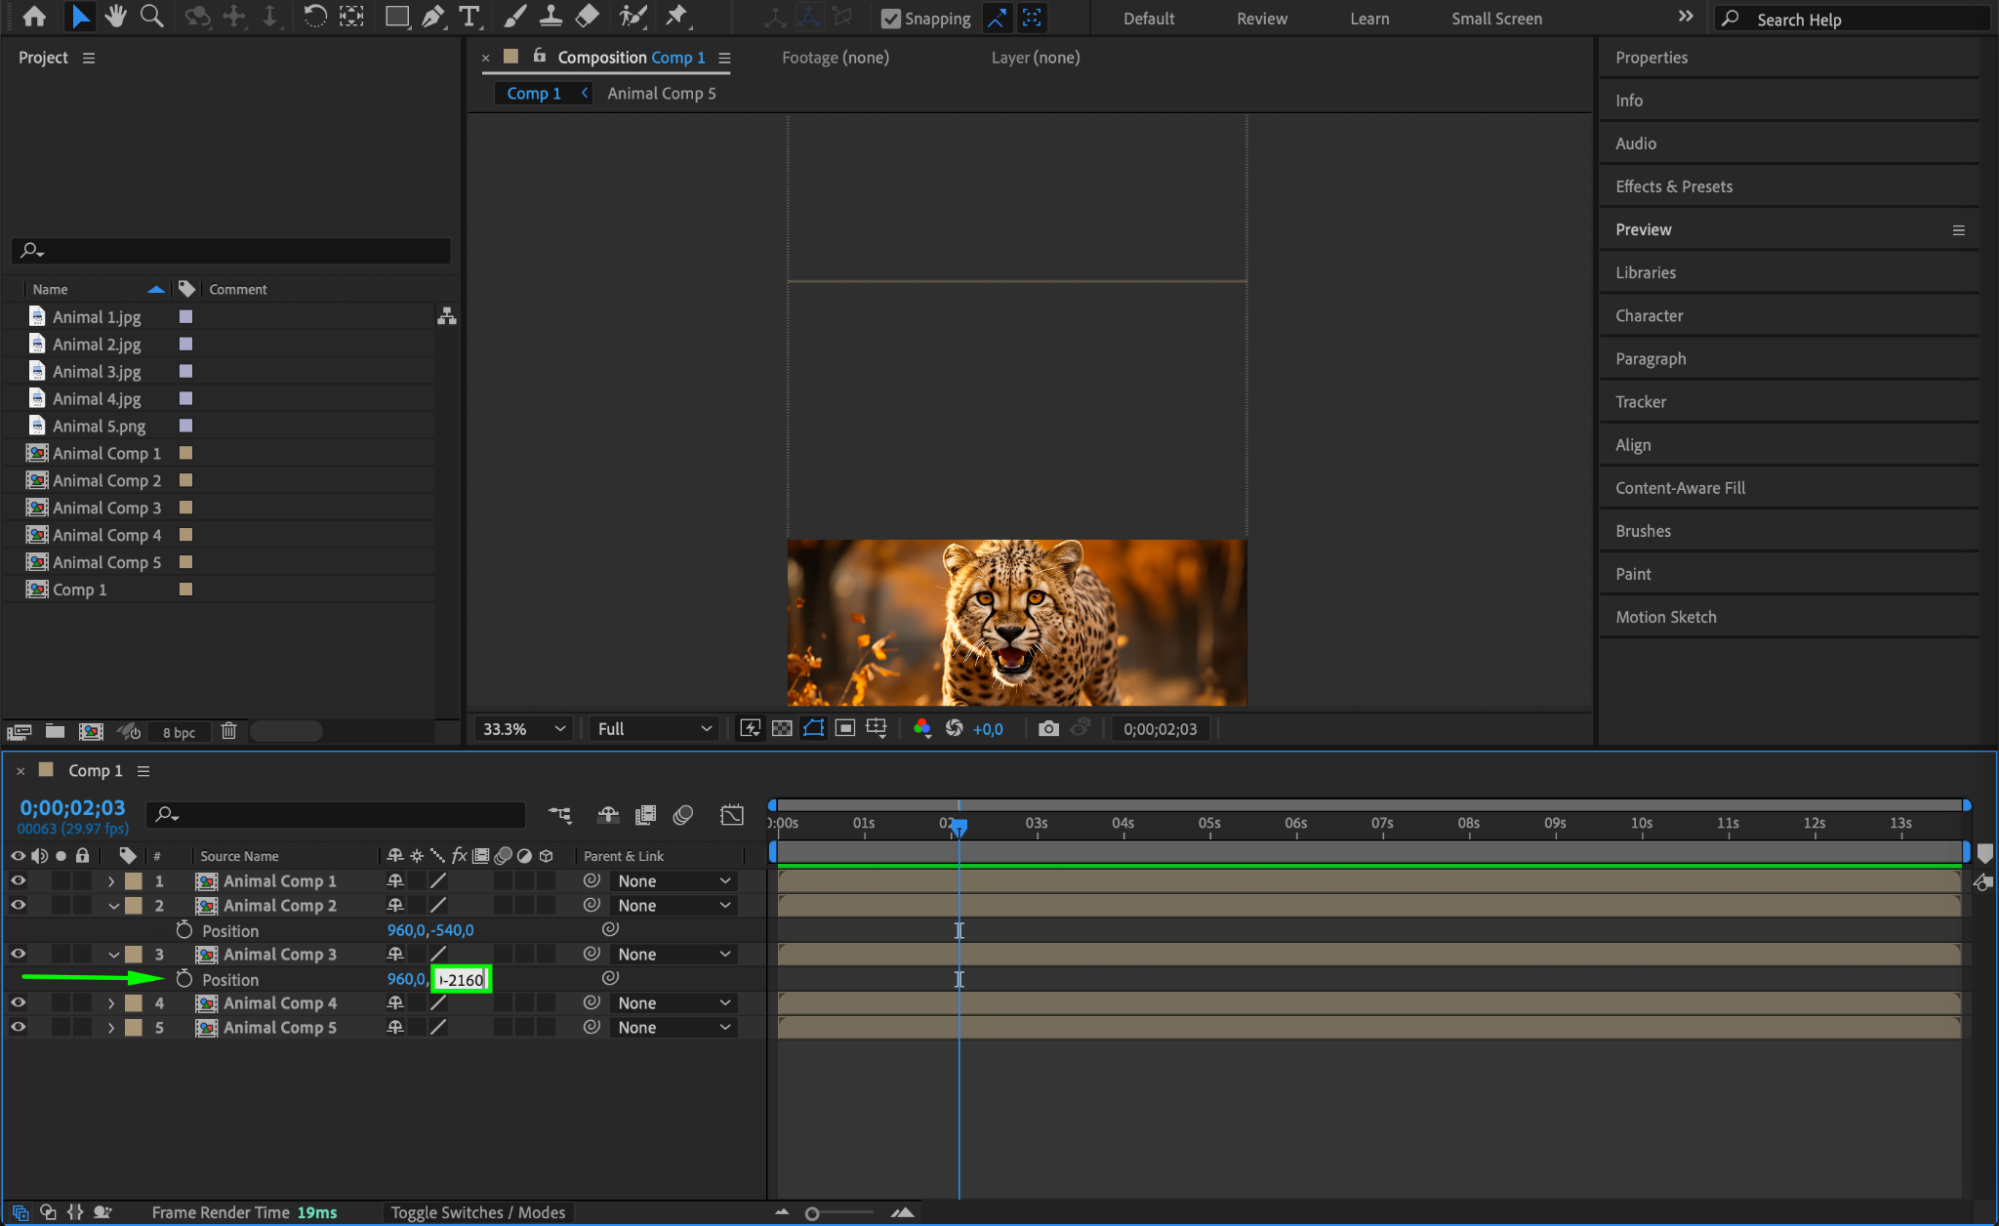
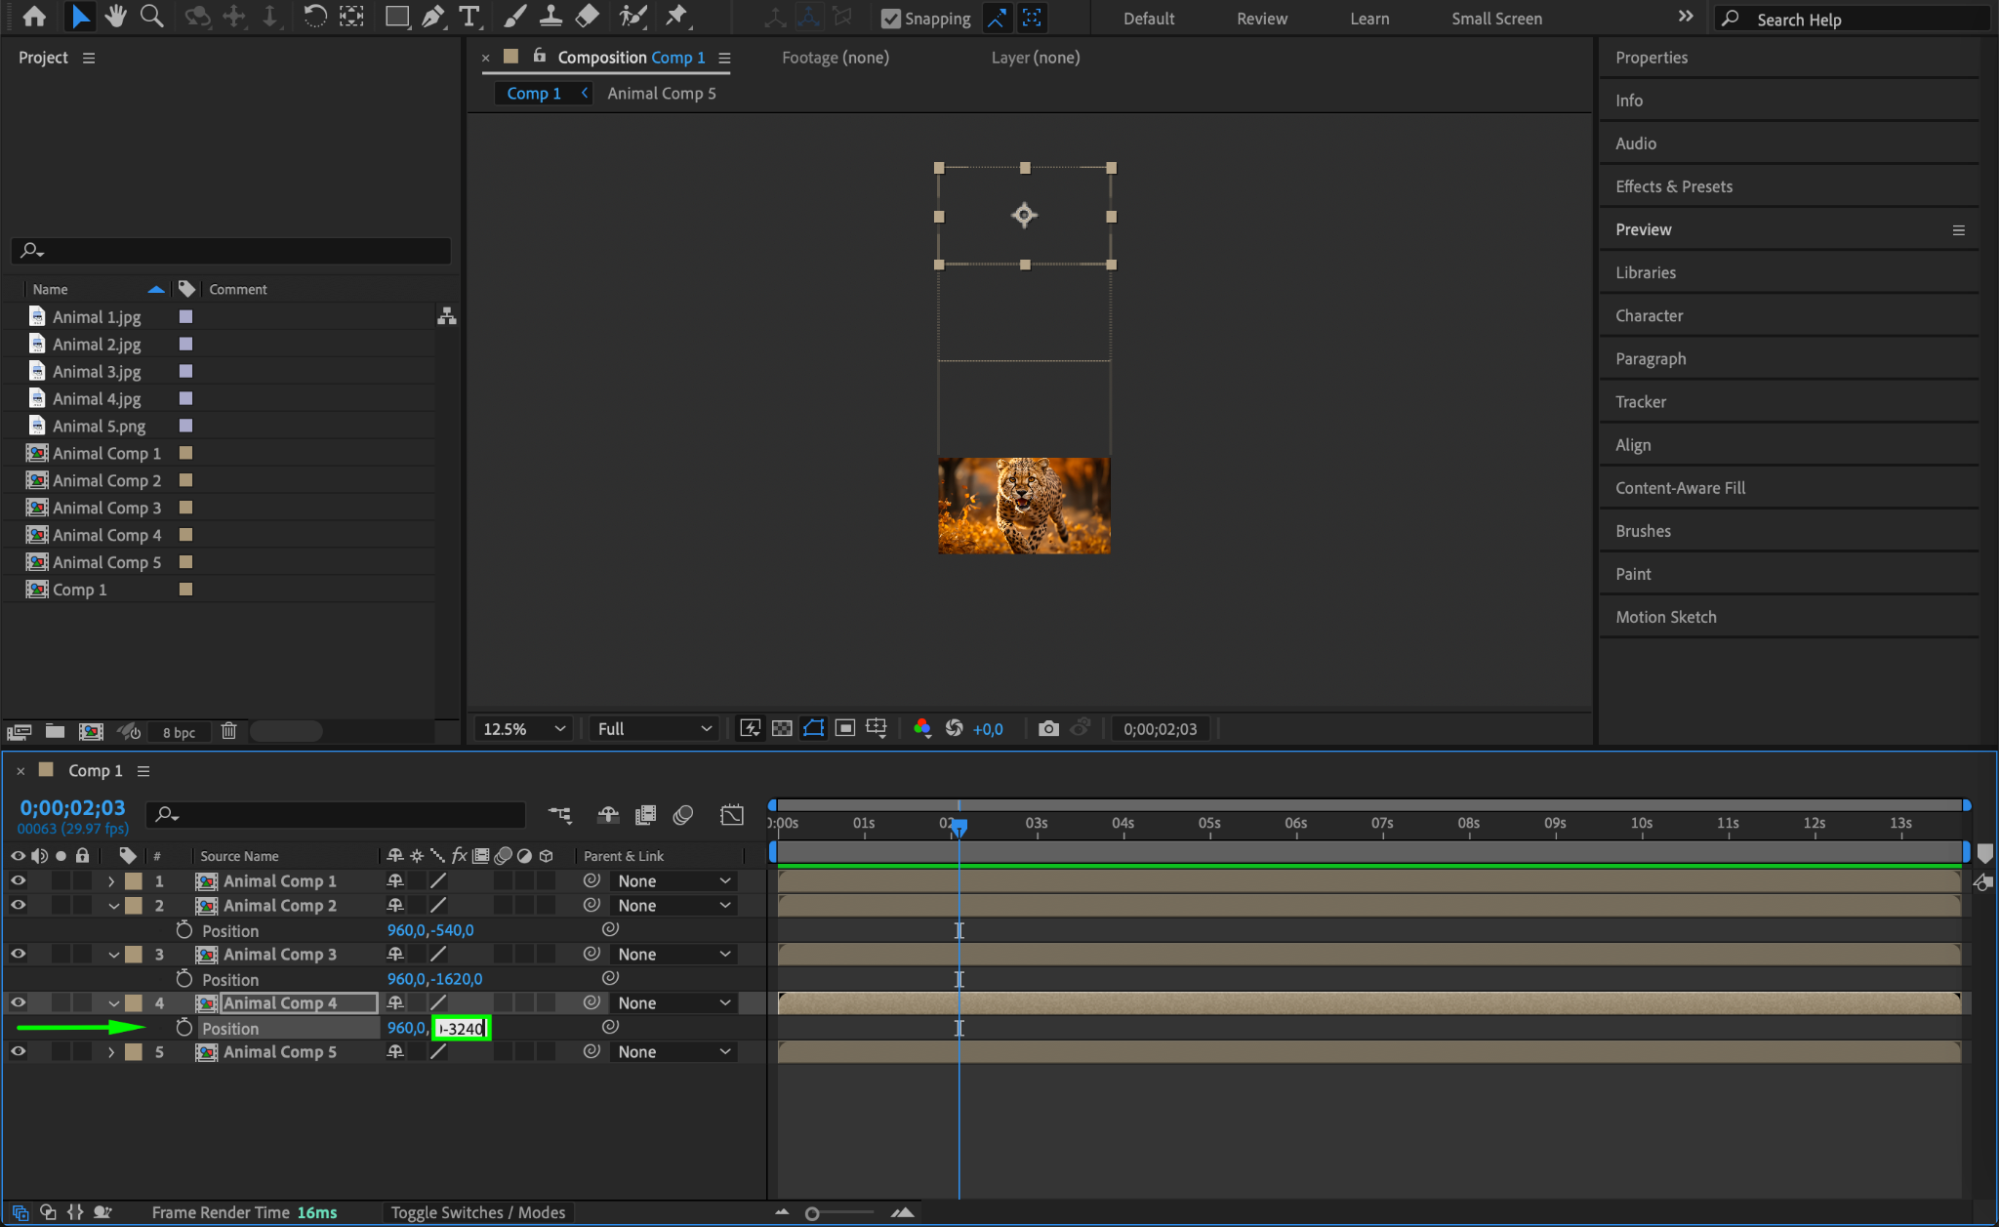
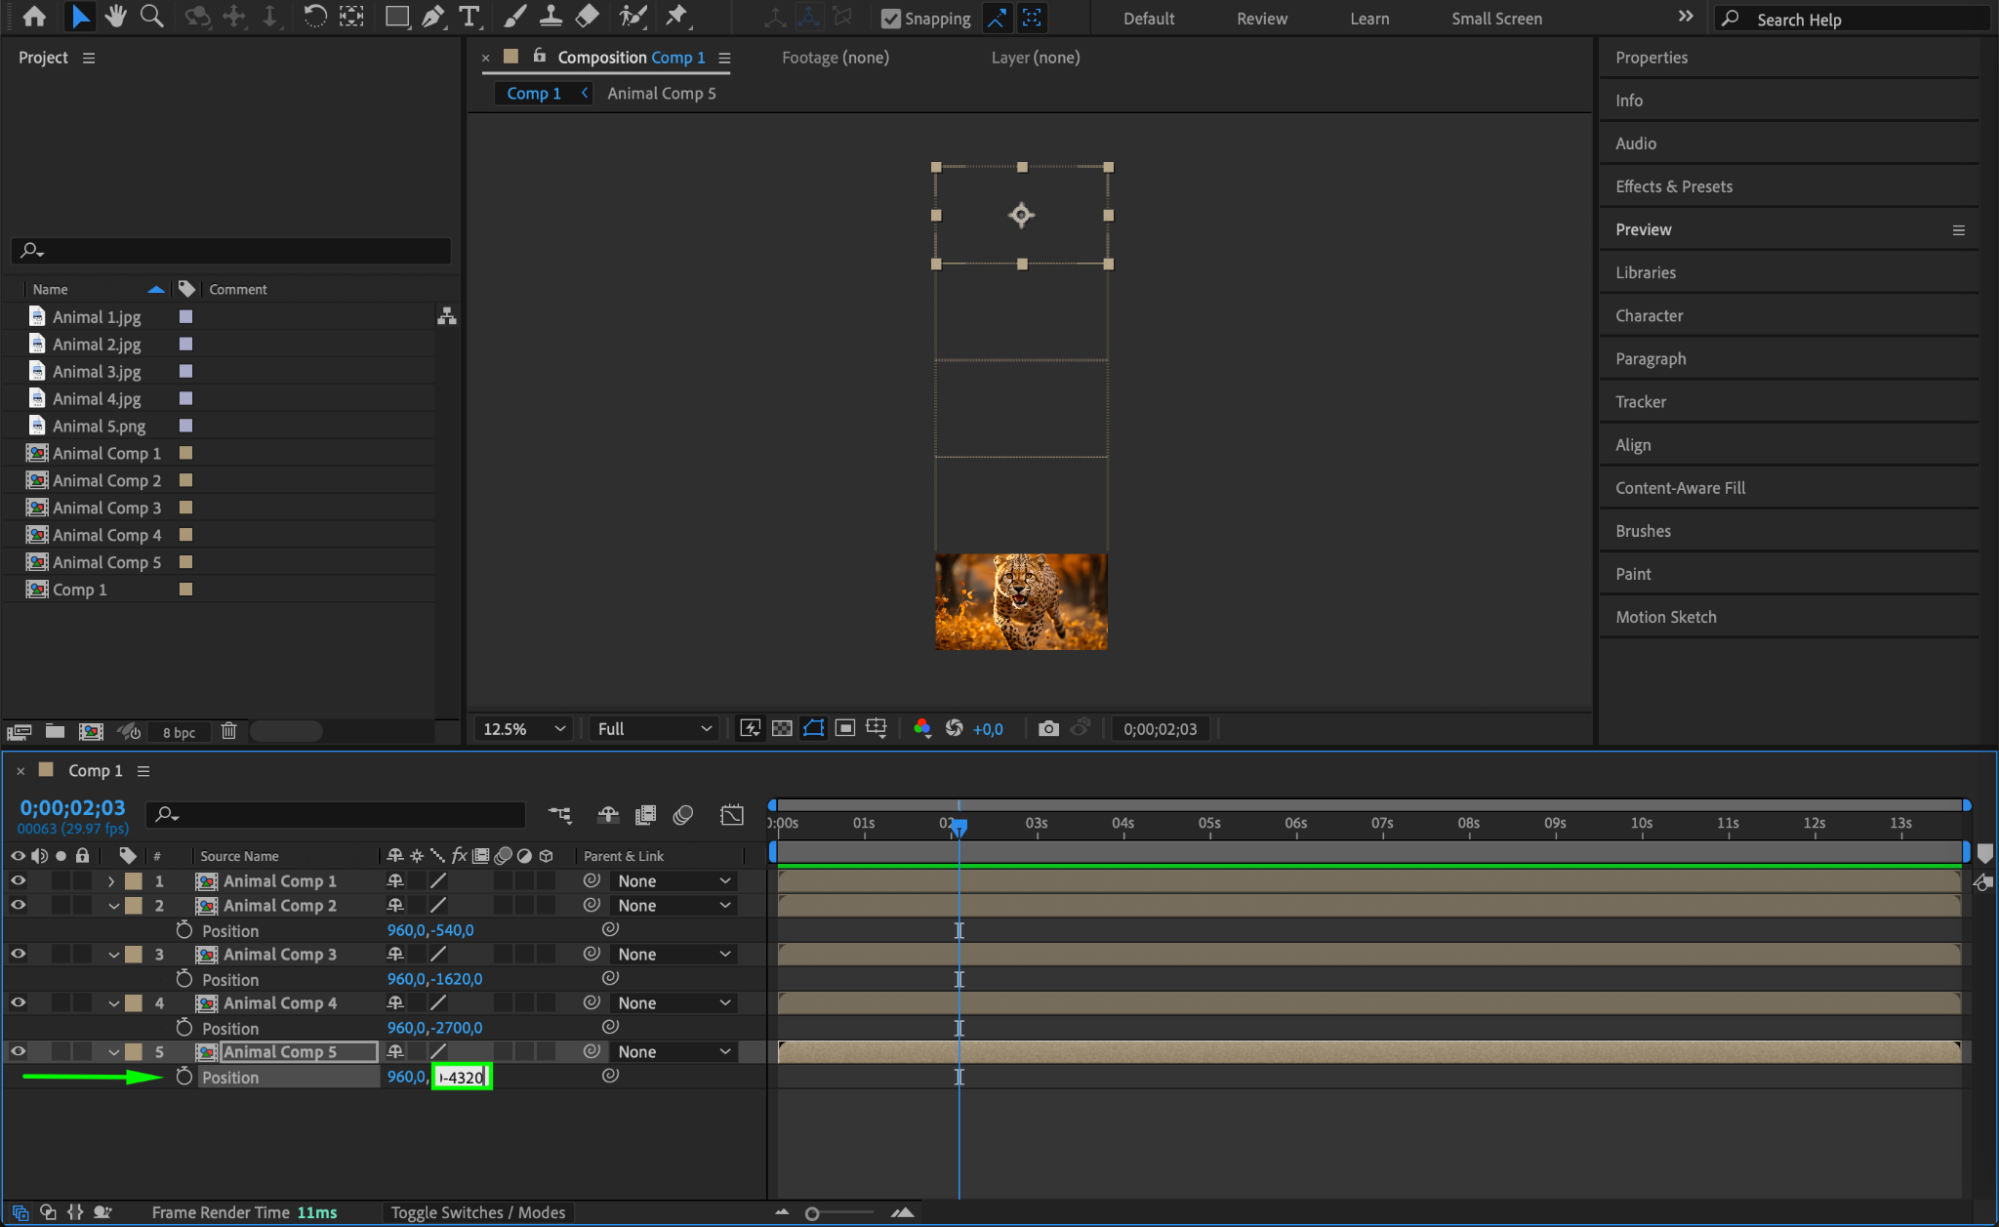
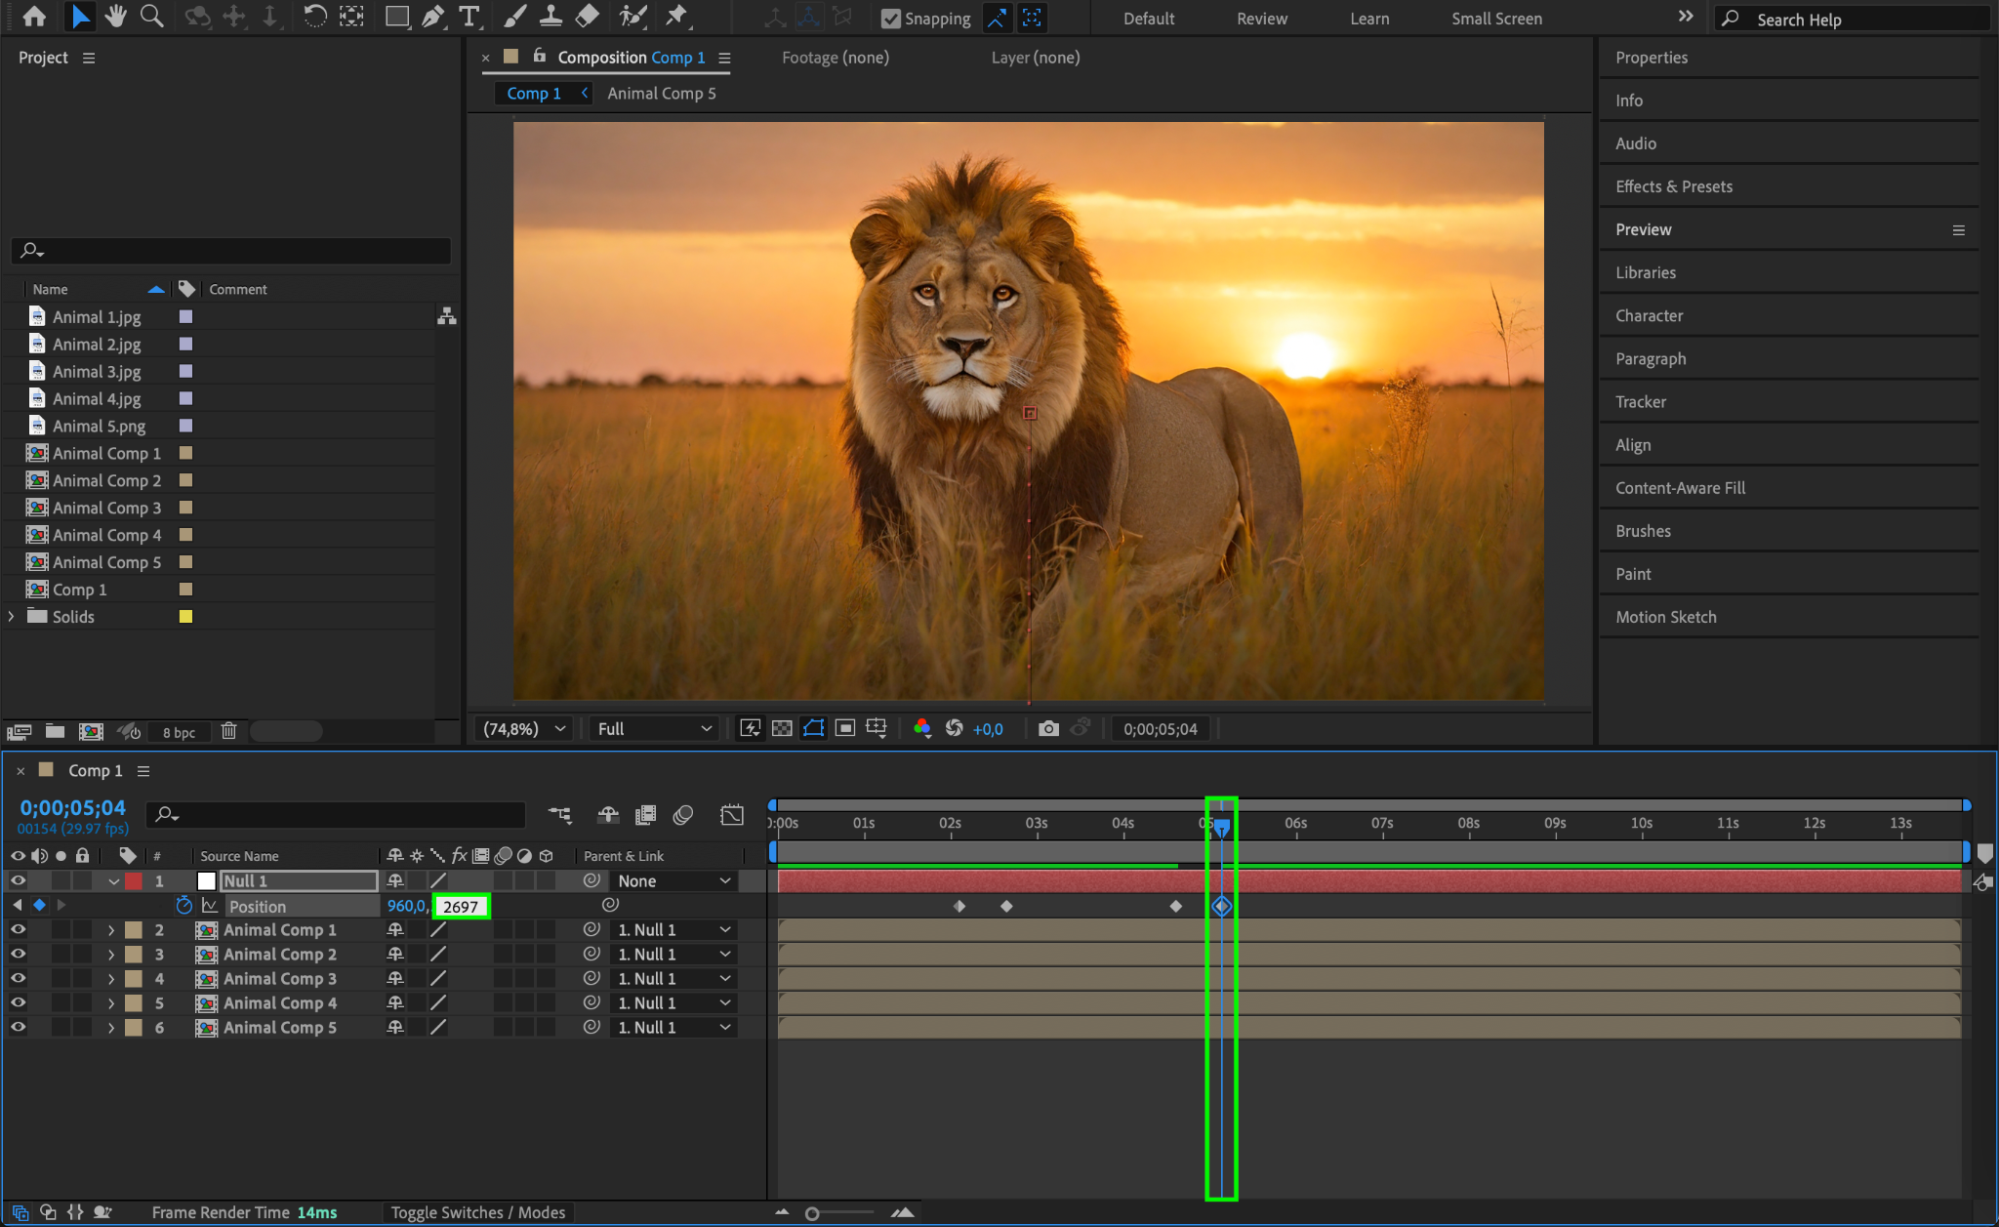
Step 4: Arrange the Photos Vertically
Select the second photo and press “P” to open the Position property. Adjust the Y value so that the image starts above the first one. For example, if your composition height is 1080, subtract that value from the Y position of the second photo (original Y – 1080). Repeat this for each additional photo by multiplying the height value (-2160 for the third, -3240 for the fourth, etc.).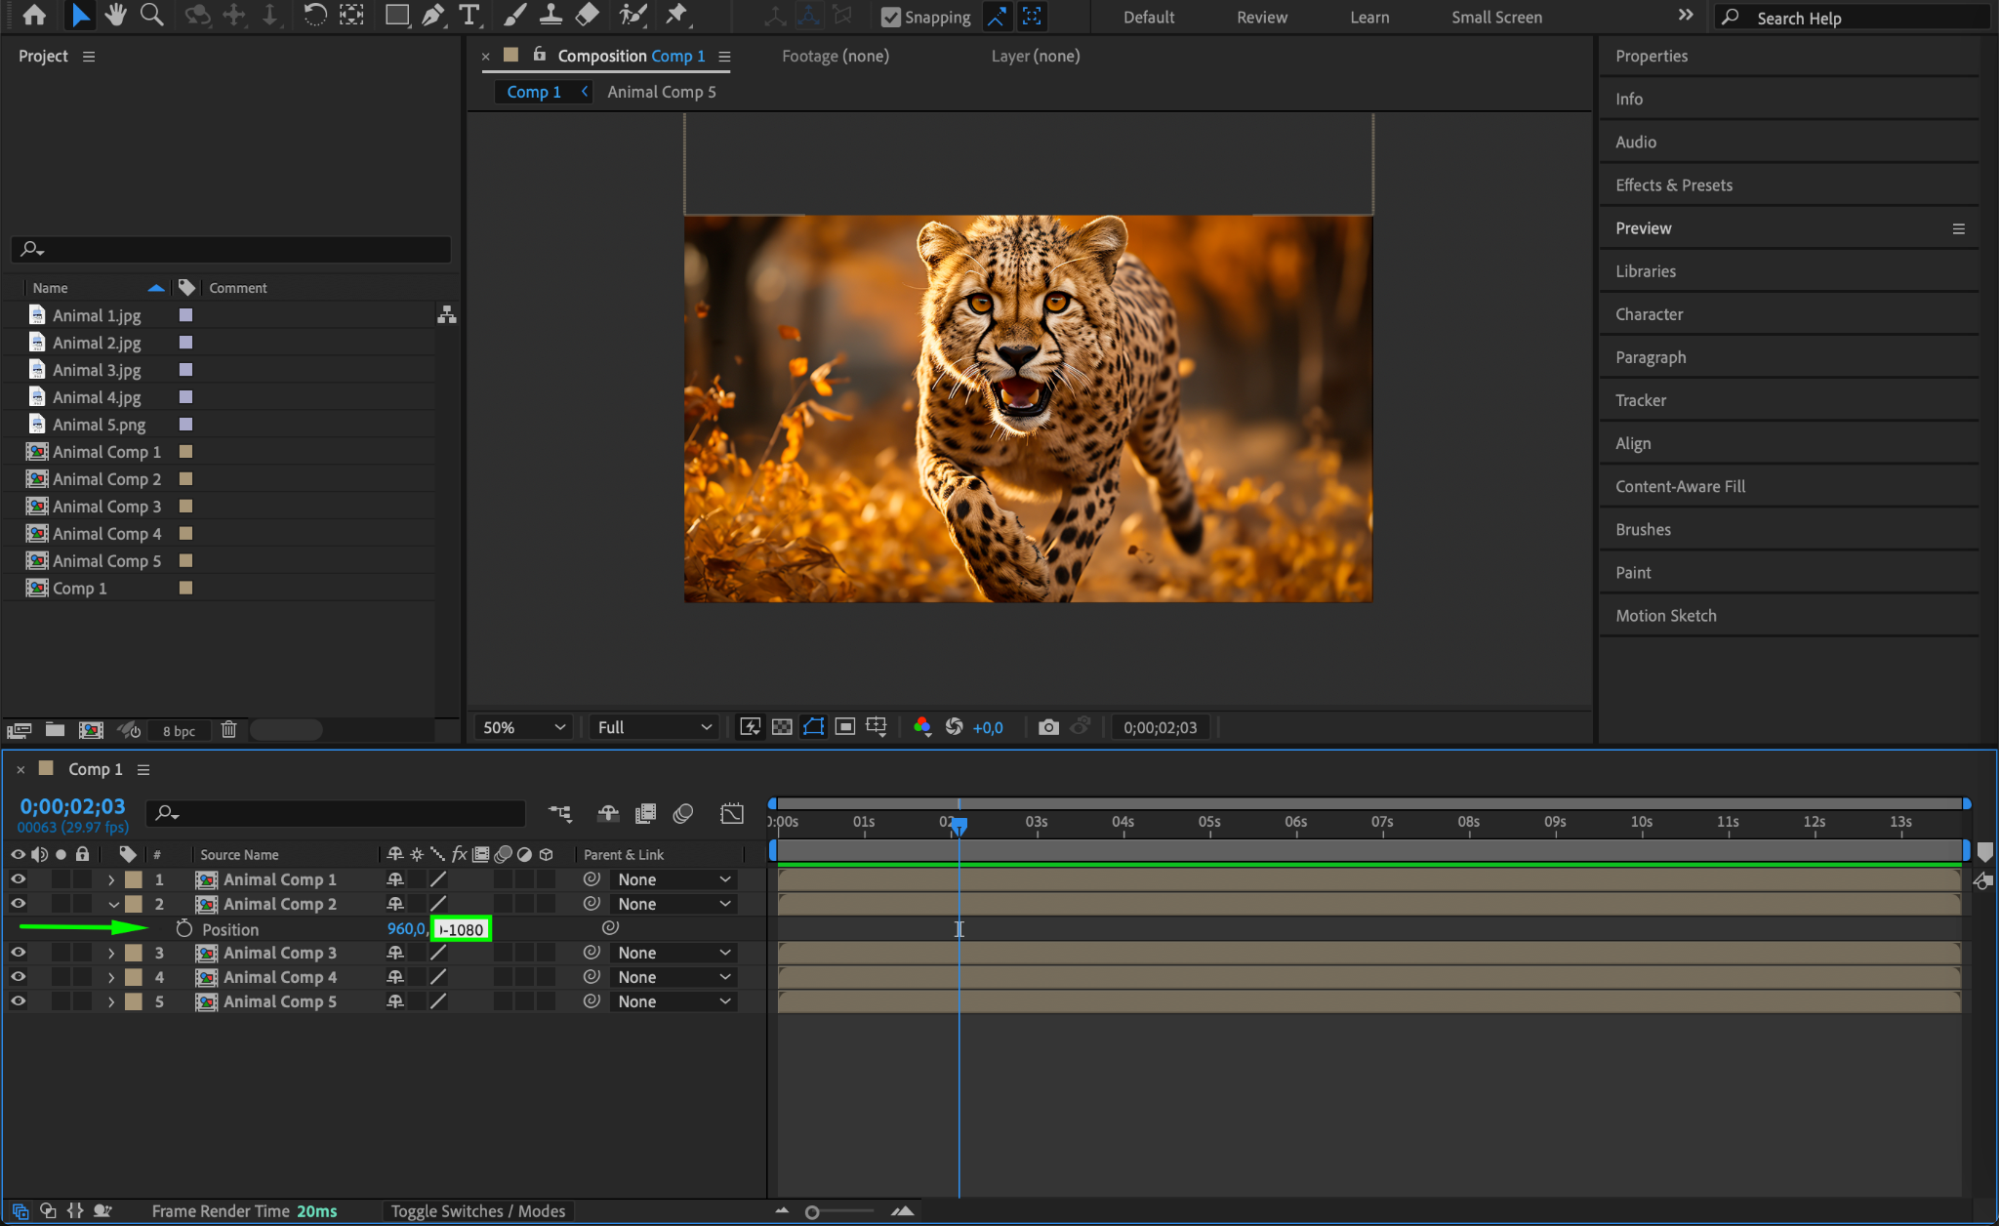
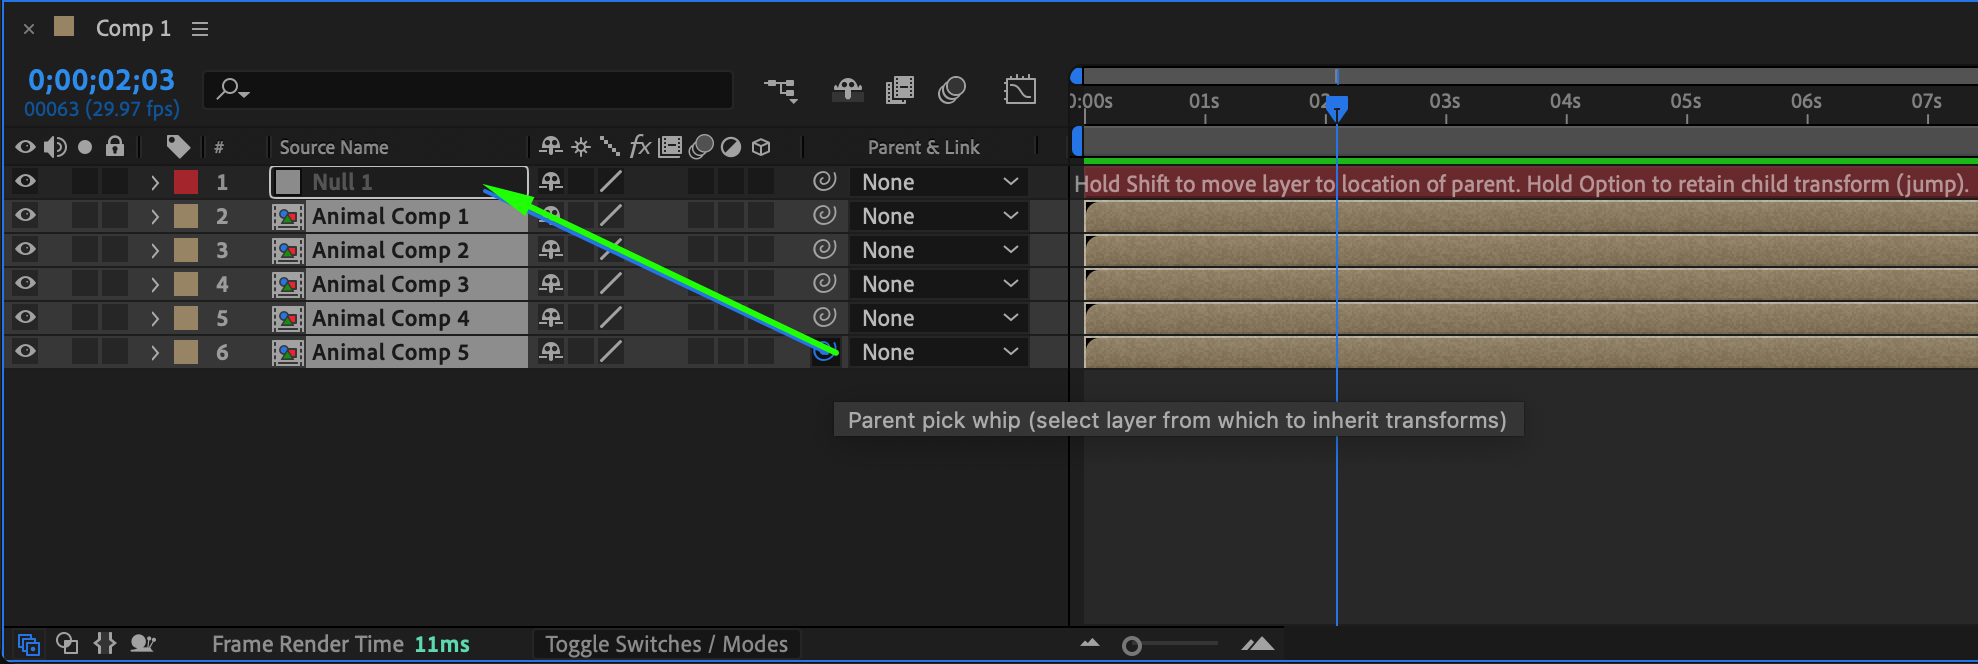
 Step 5: Create a Null Object and Parent the Photos
Go to Layer > New > Null Object. Select all the pre-composed photo layers and use the Pick Whip Tool to parent them to the null object. This will allow you to animate all the photos together.
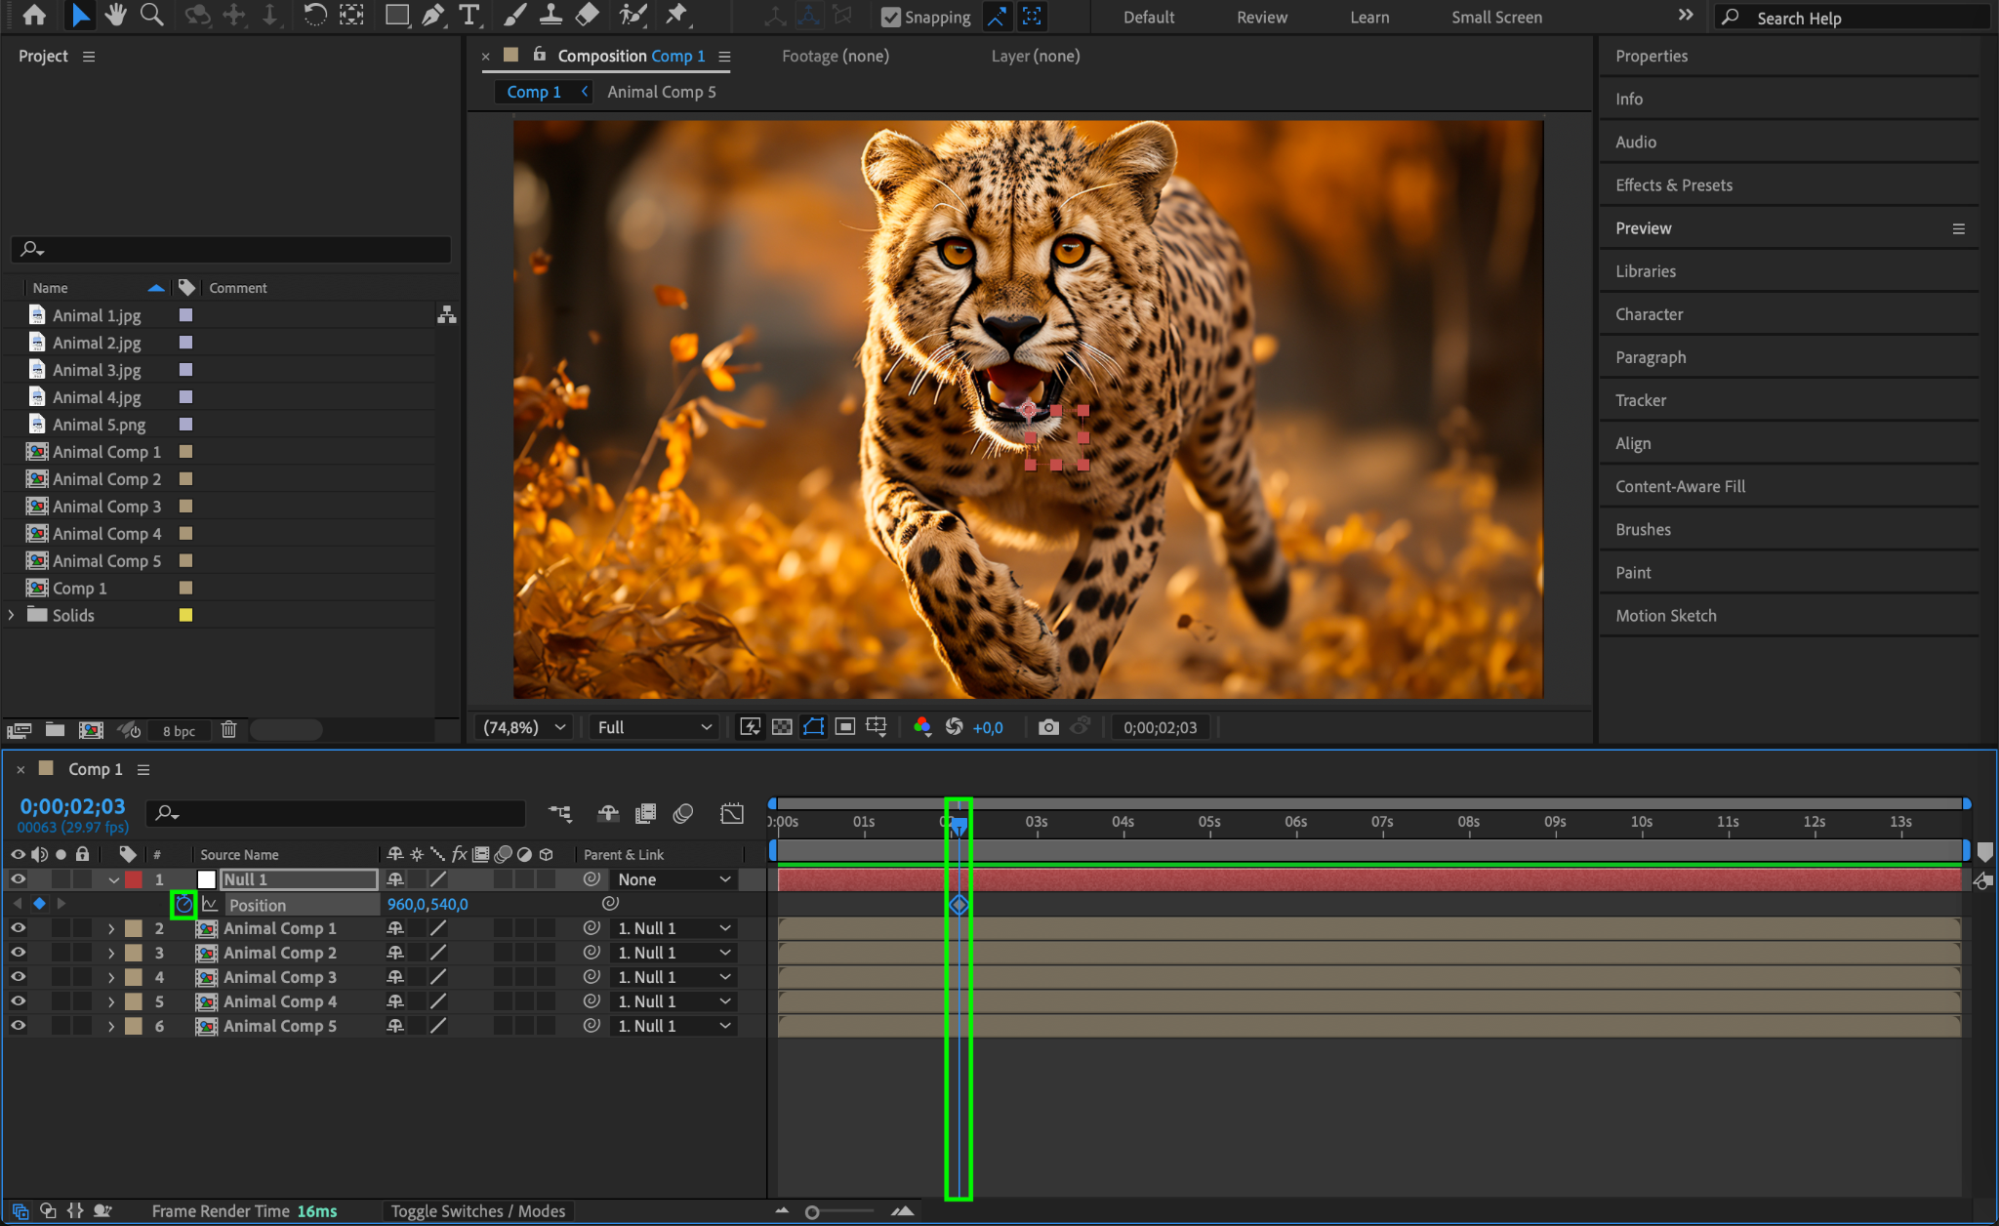
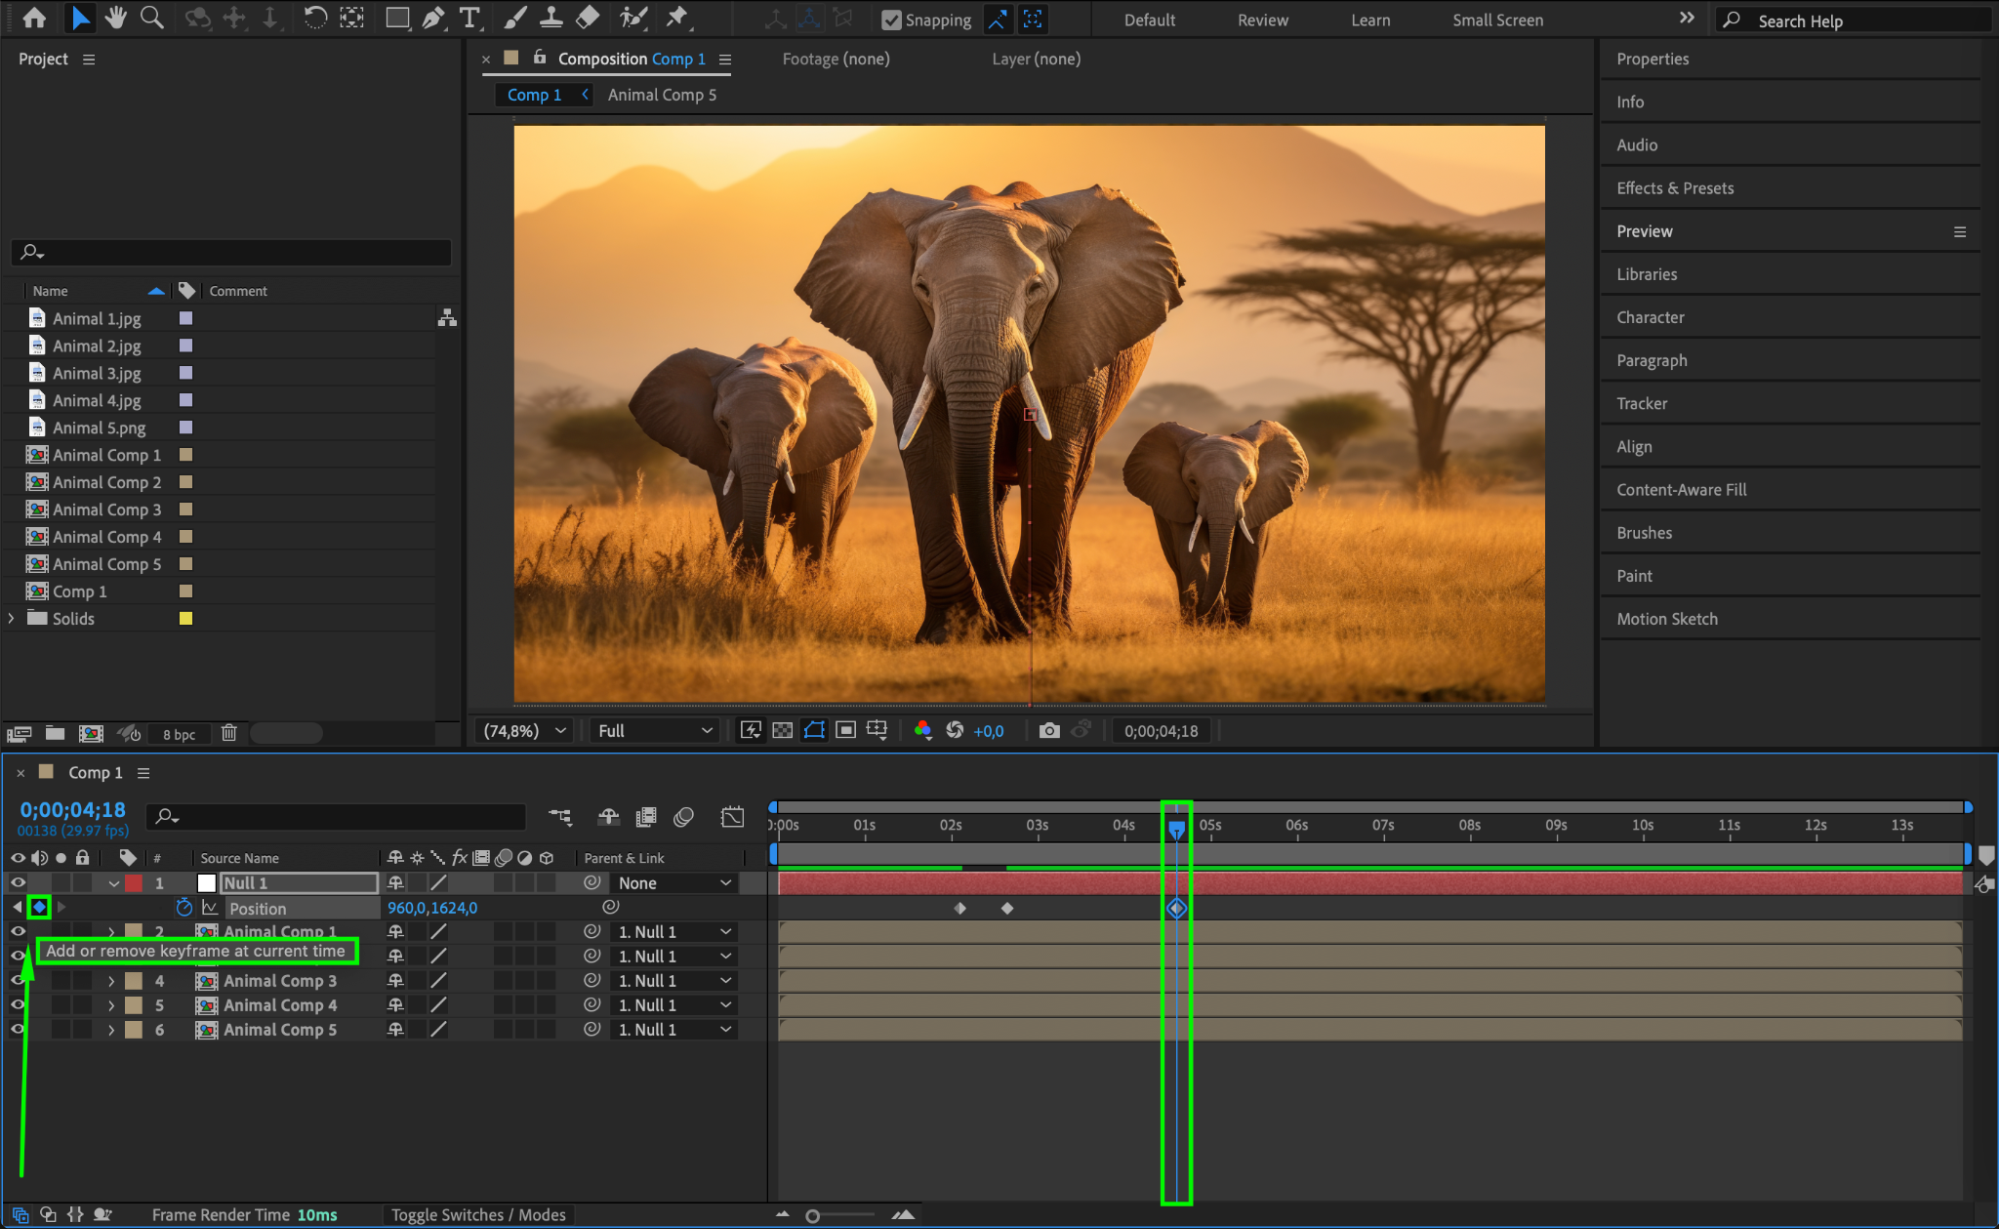
 Step 6: Animate the Position of the Null Object
Move the CTI (Current Time Indicator) to the point where the first photo should stop displaying. Select the Null Object, press “P” to open Position, and click the Stopwatch to set a keyframe. Move the CTI a few frames forward and change the Y position so that the second photo moves into view. Repeat this process for each image, creating a smooth scrolling effect.

Step 7: Apply Easy Ease to Smooth Transitions
Select all keyframes, right-click, go to Keyframe Assistant > Easy Ease. This will make the movement smoother and more natural.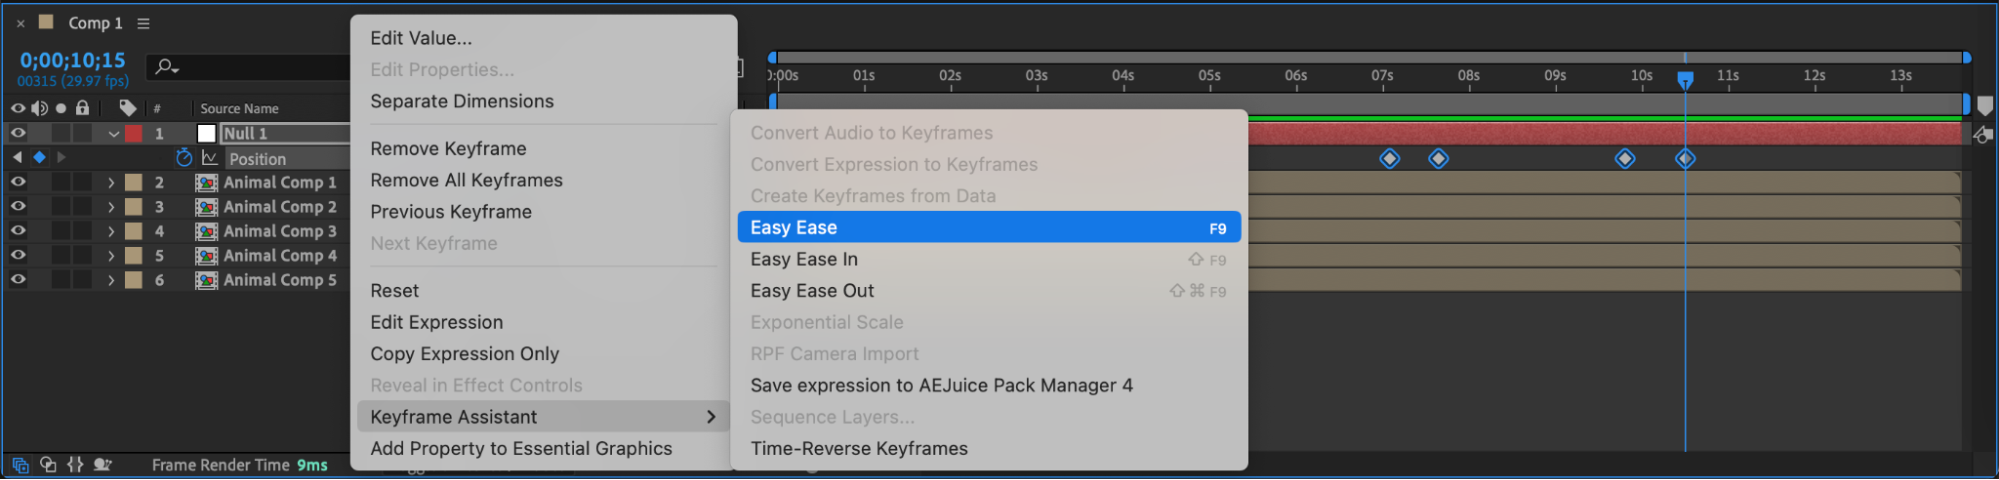 Step 8: Enable Motion Blur
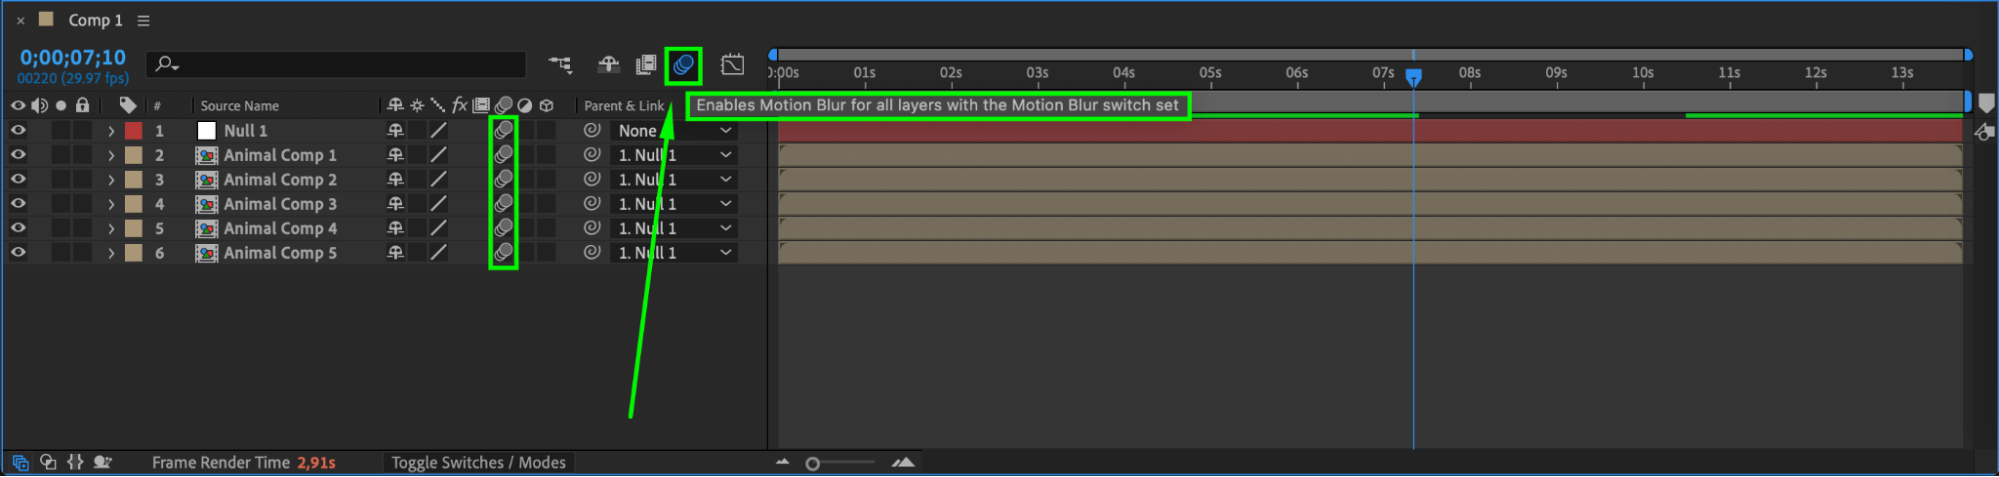
Check the Motion Blur box for all image layers and enable Motion Blur for the composition. This will add a realistic blur effect during movement.
 Step 9: Preview the Animation
Press Spacebar to preview the animation and ensure that all transitions are smooth. Make any necessary timing adjustments if needed.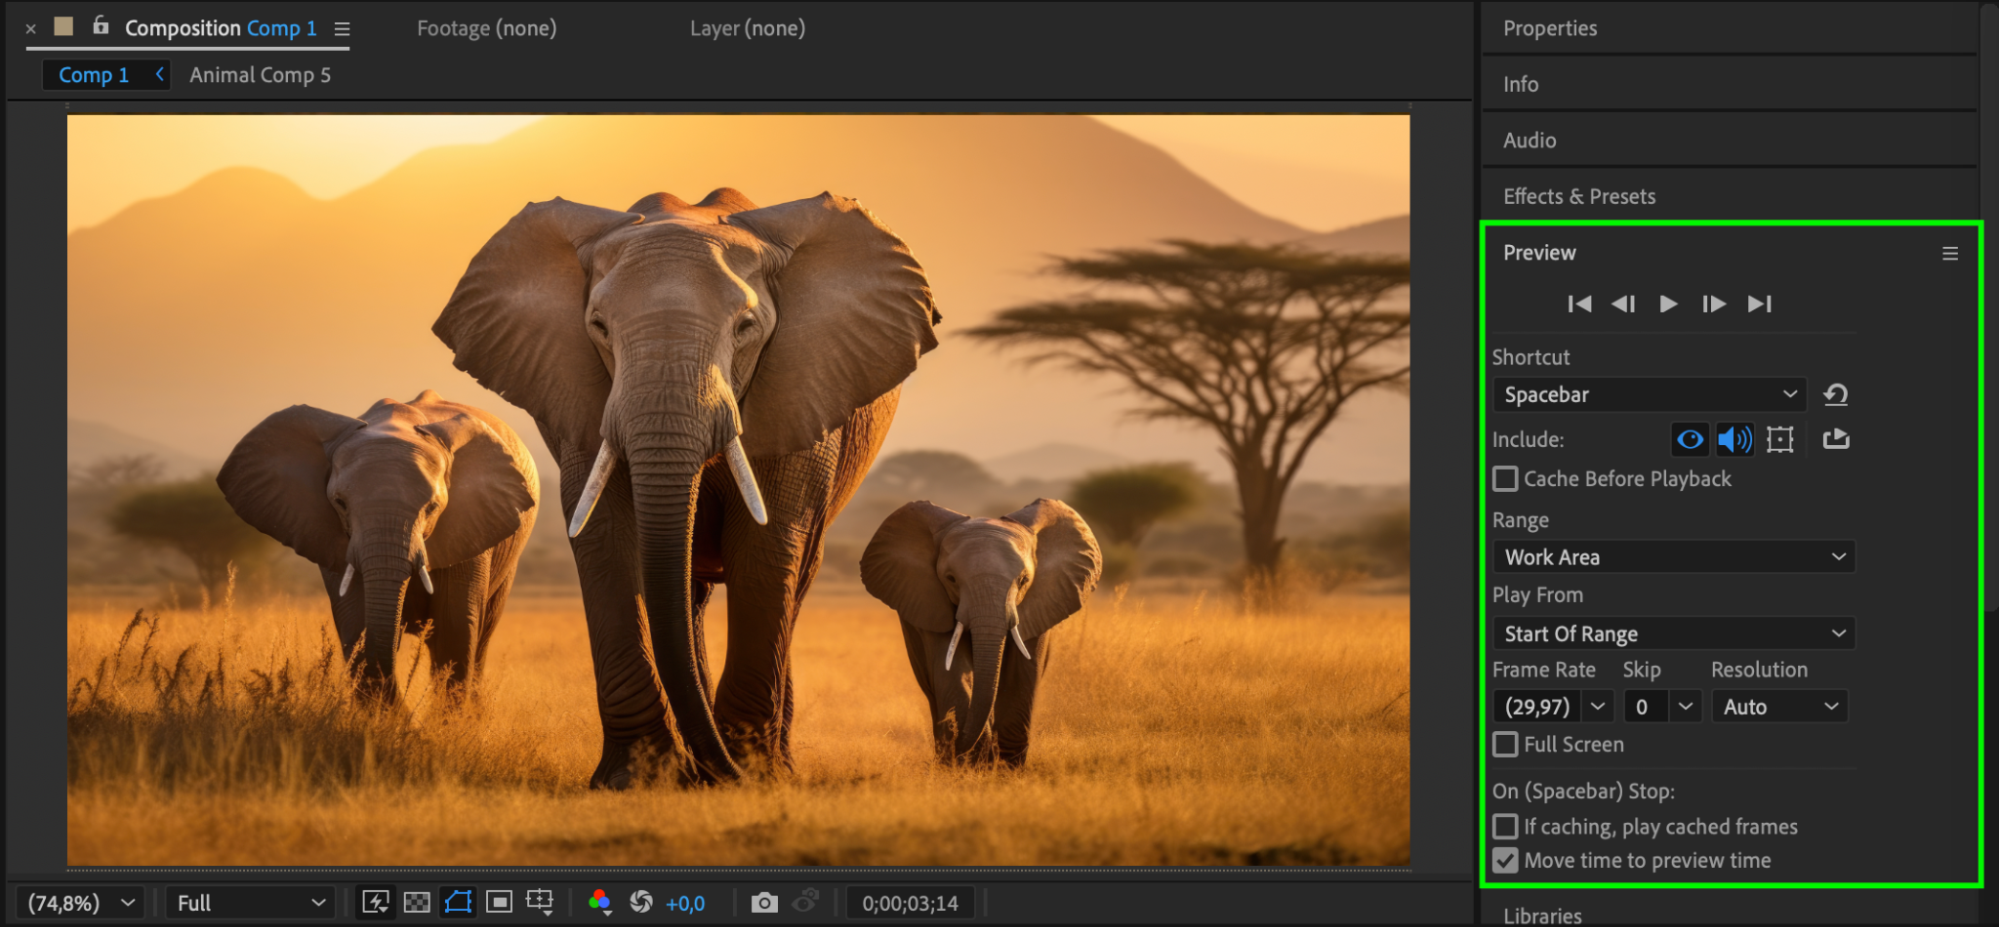 Step 10: Render the Final Video
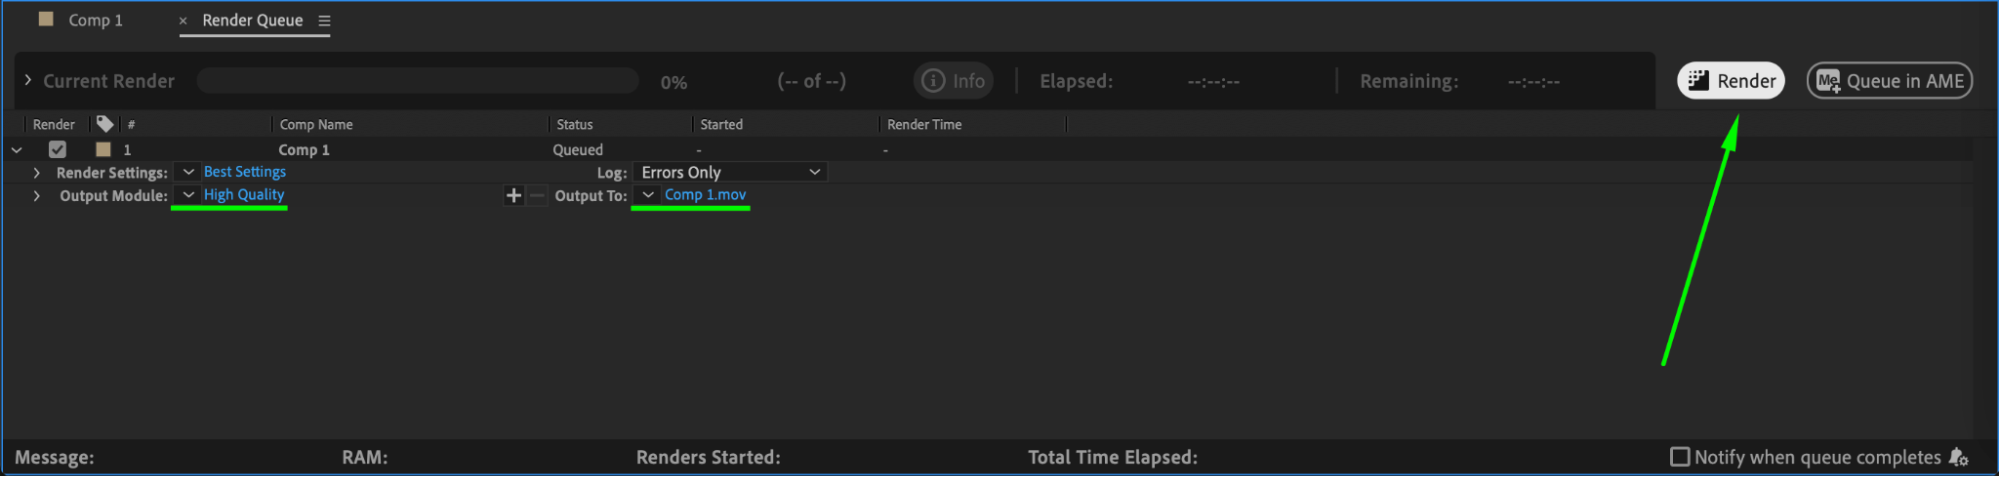
Go to Composition > Add to Render Queue. Choose the output format and location, then click Render to finalize the photo video.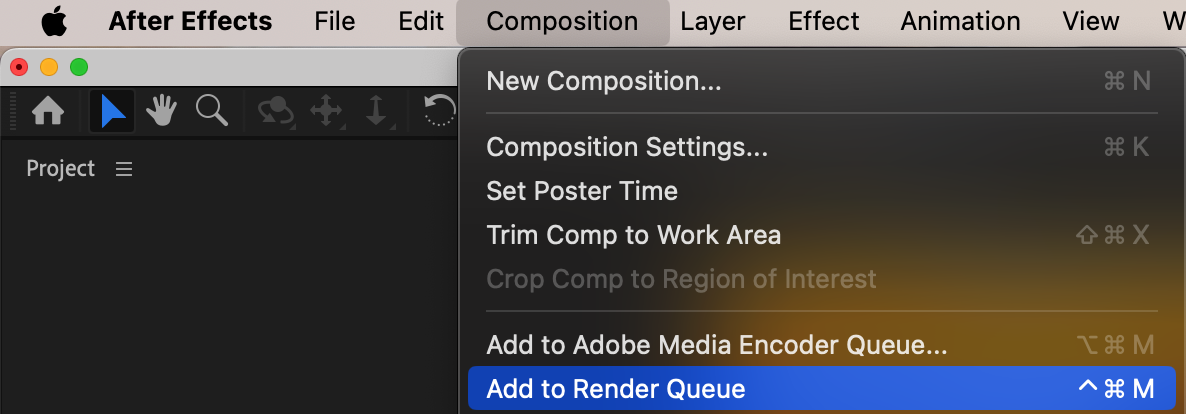
 Conclusion
By following these steps, you can create a smooth-scrolling photo slideshow in After Effects. Using keyframe animation, motion blur, and easy easing, you can make your transitions look professional and engaging.
Our Bestsellers


