How to Sync Animation to Audio Using Keyframes in Adobe After Effects
Introduction
Linking animation to audio in Adobe After Effects is a powerful way to make your visuals react to music or sound effects. This technique is commonly used for audio visualizers, pulsing objects, or bouncing text synced to the beat. In this guide, you’ll learn how to extract audio amplitude and connect it to animation properties using expressions.
Step 1: Import and Add Your Audio
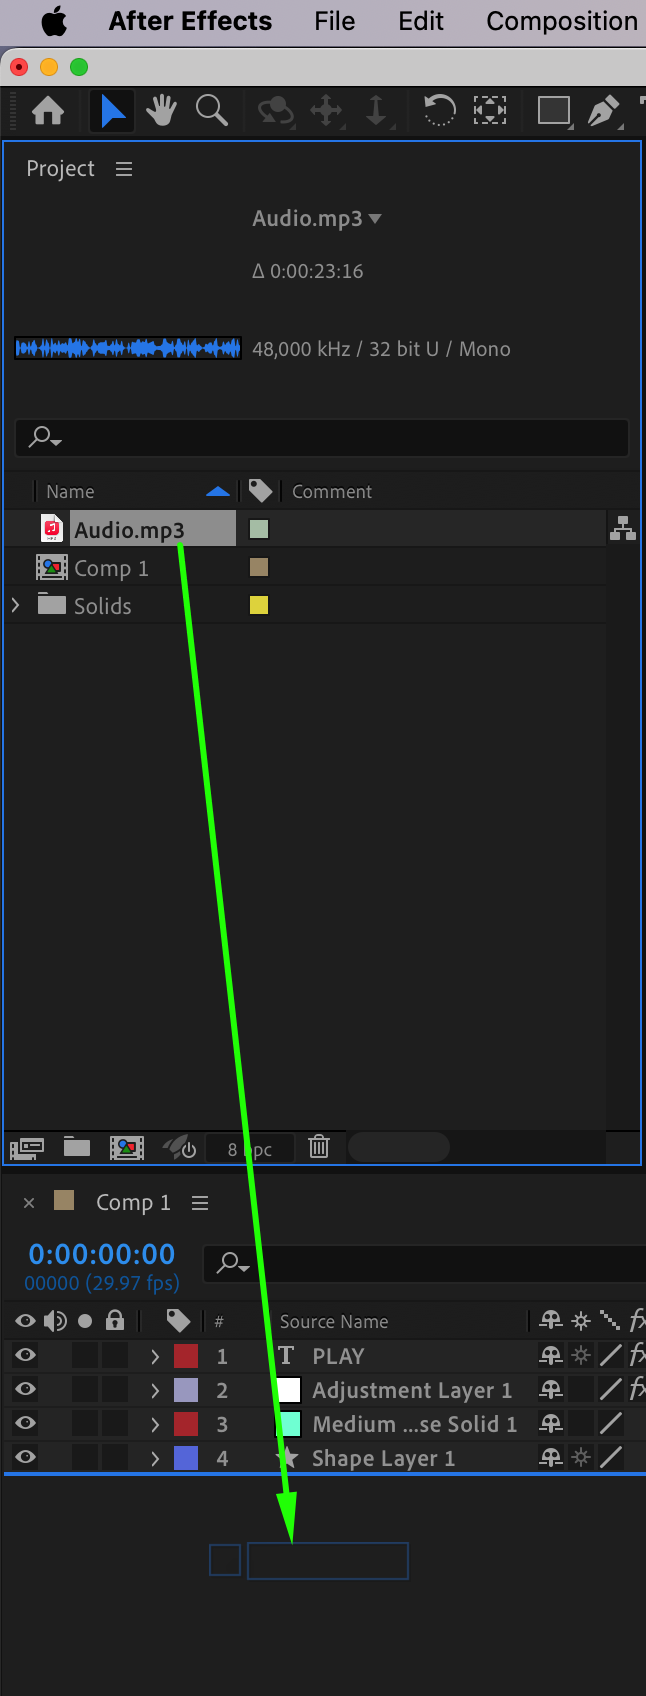
Go to File > Import > File and select your audio track. Drag the file into your timeline. Make sure the audio layer is active and placed where you want the sound to begin. This will serve as the source for your animation trigger.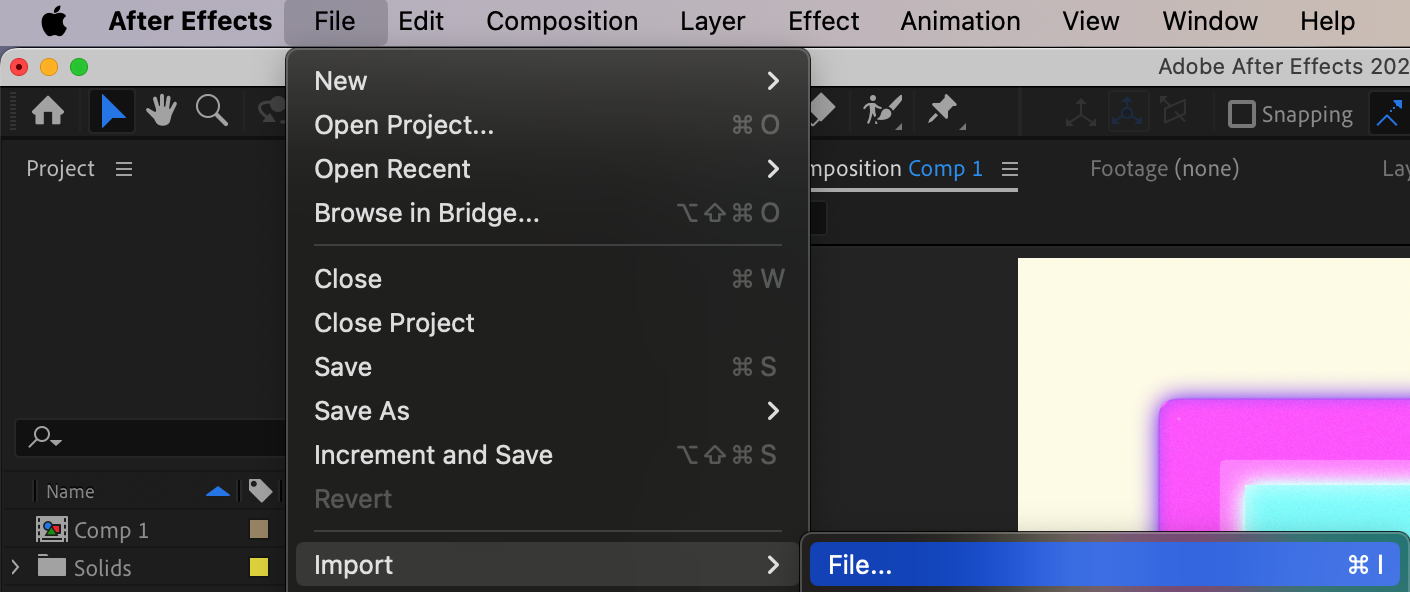
 Step 2: Convert Audio to Keyframes
With the audio layer selected, navigate to Animation > Keyframe Assistant > Convert Audio to Keyframes. This creates a new null layer named Audio Amplitude, which contains automatically generated keyframes based on the loudness of your audio. It includes three channels: Left, Right, and Both Channels.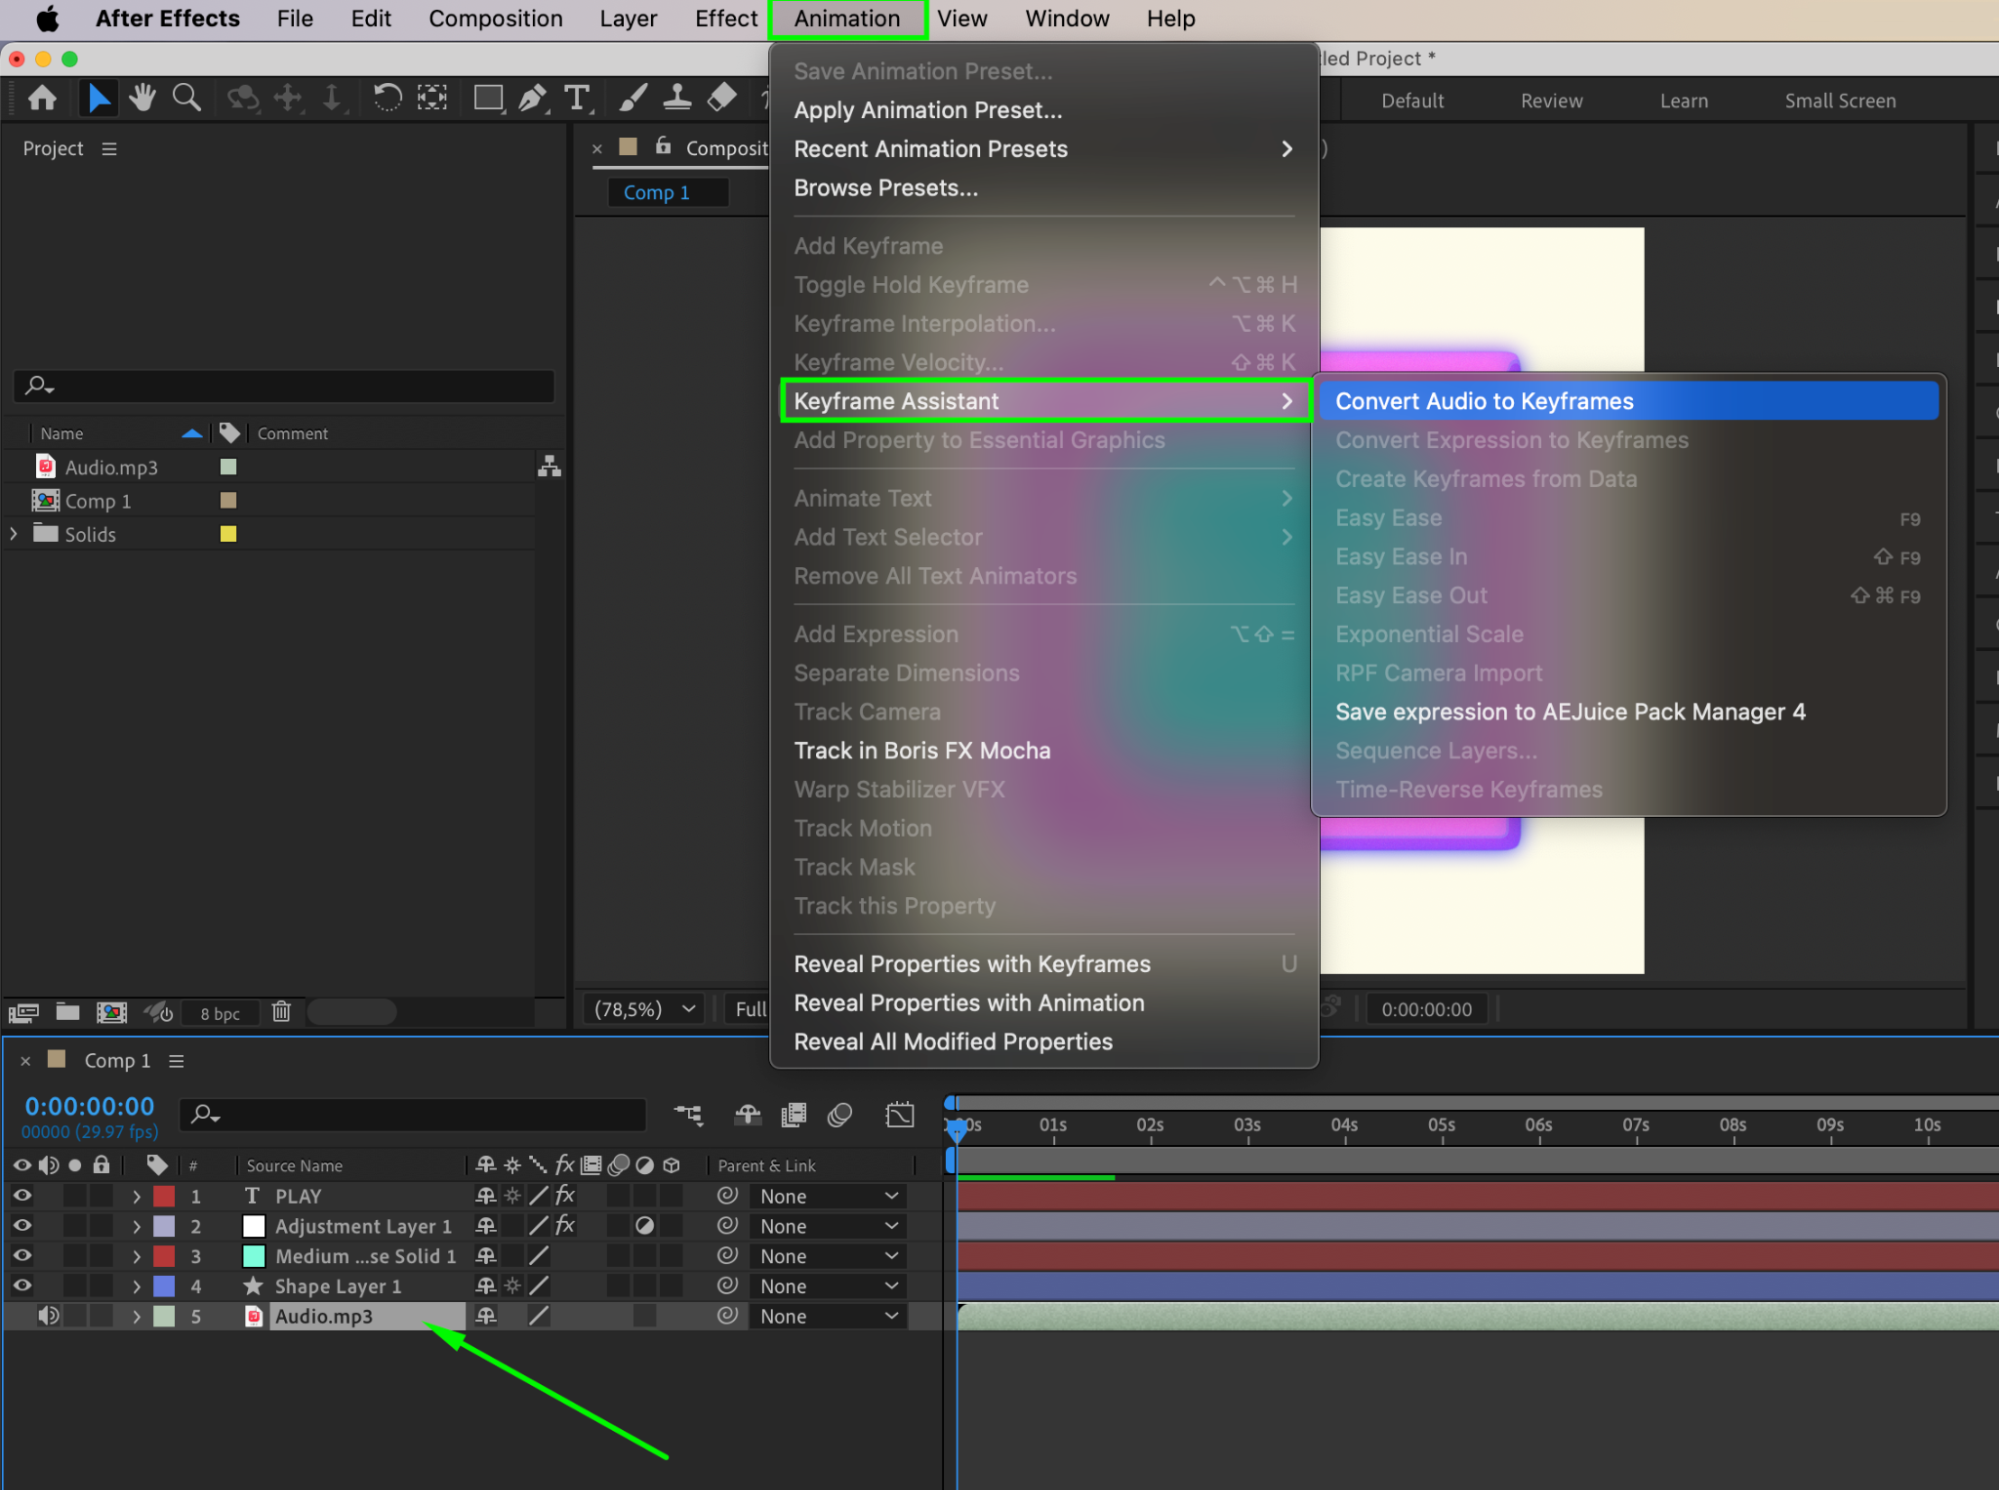
Get 10% off when you subscribe to our newsletter

Step 3: Link Animation to Audio Keyframes
Choose the property you want to animate — for example, Rotation or Scale of a layer. It’s often helpful to pre-compose the layer if it contains multiple elements. Alt-click (Option-click on Mac) the stopwatch next to the property to open the expression field. Use the pick whip tool to connect it to the Both Channels > Slider under the Audio Amplitude layer. This links your animation to the volume of the audio.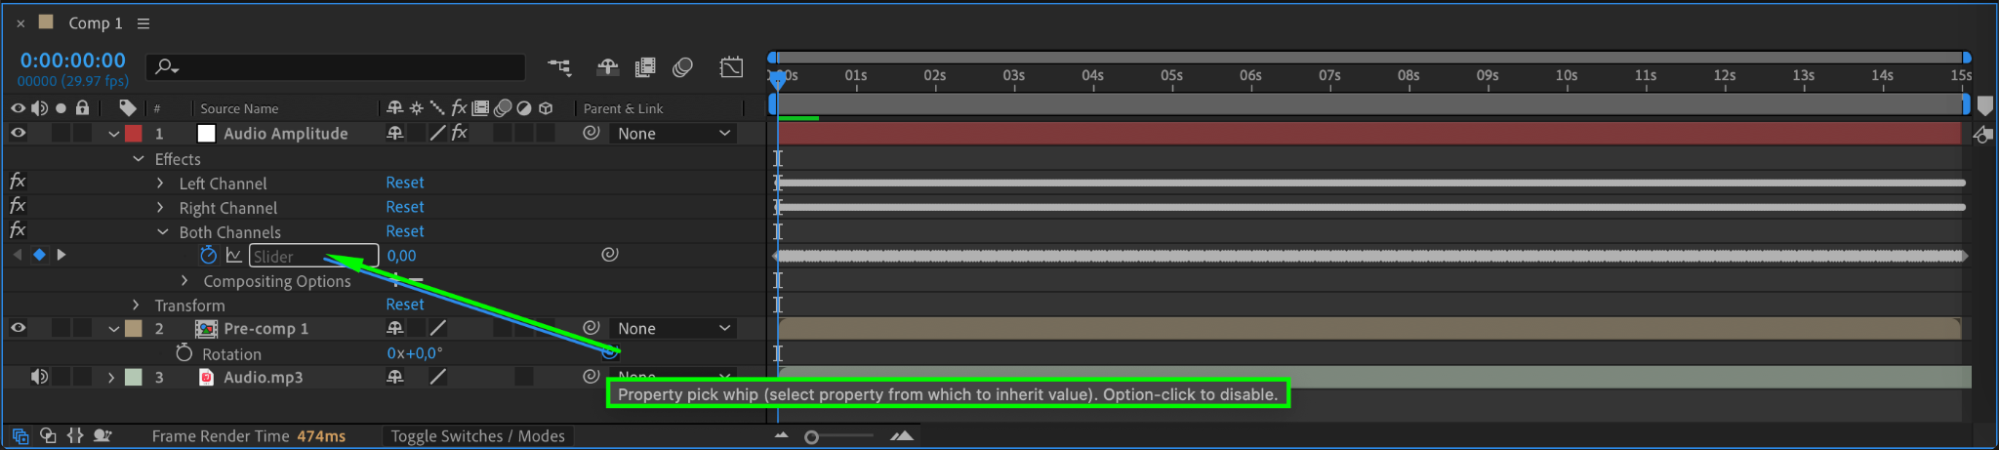
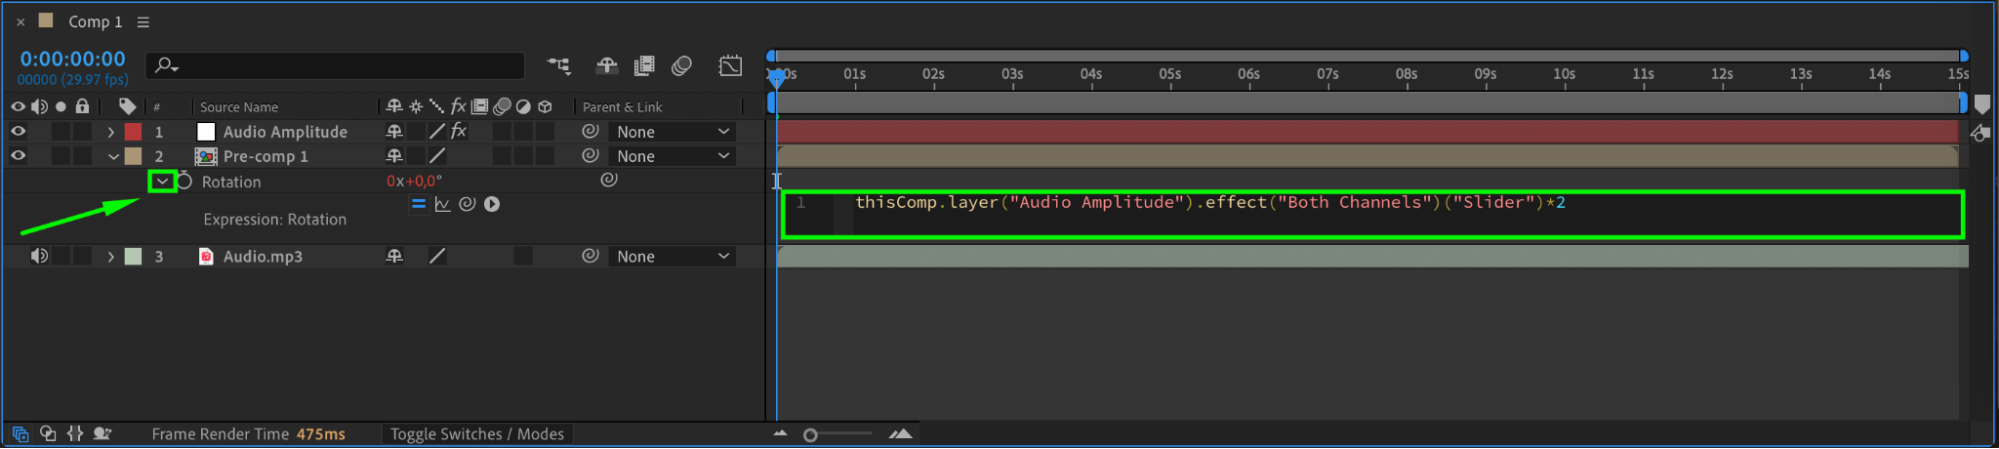
Step 4: Adjust the Expression
To control how much influence the audio has on your animation, edit the expression. For example:
thisComp.layer(“Audio Amplitude”).effect(“Both Channels”)(“Slider”) * 2
This multiplies the audio data by 2 to amplify the effect. You can experiment with higher or lower values to find the right intensity for your animation.
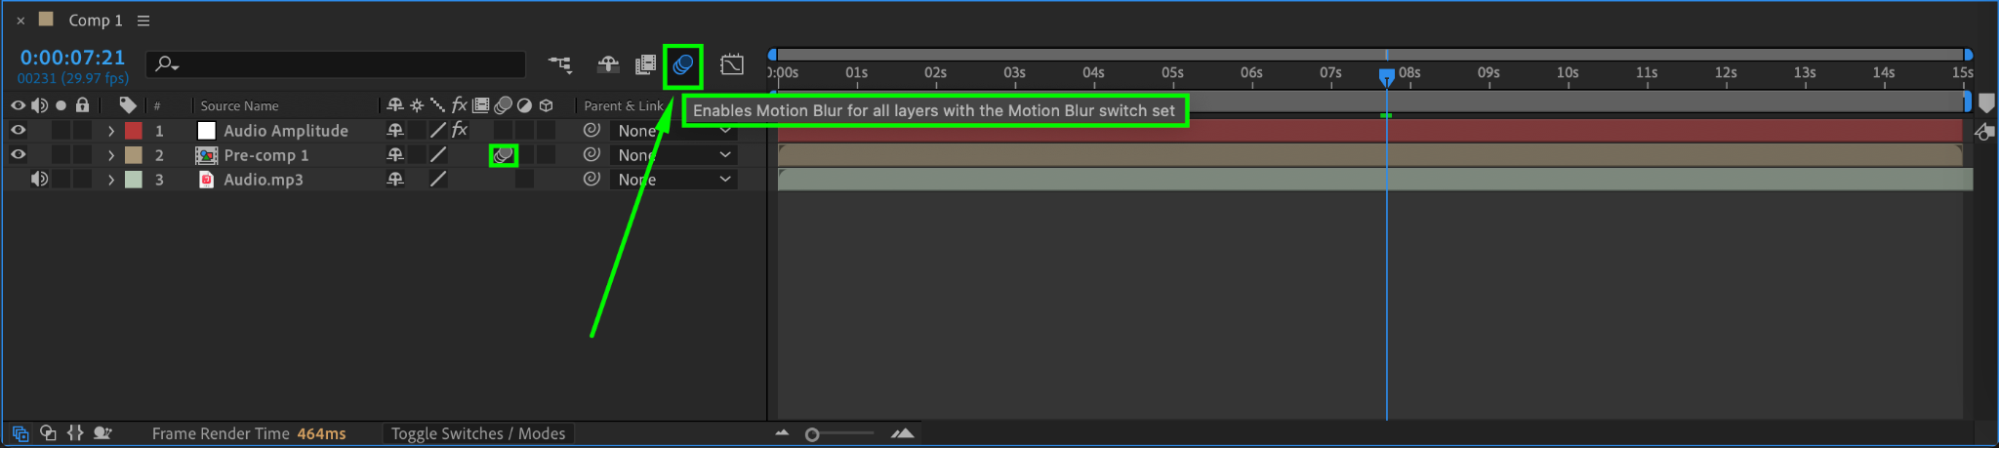
Step 5: Enable Motion Blur (Optional)
To make the animation feel smoother and more natural, enable Motion Blur for the animated layer and turn on the global motion blur switch in the timeline. This helps reduce the choppiness in rapid movements triggered by audio spikes.
 Step 6: Preview and Fine-Tune
Press the spacebar to preview your animation. If the movement feels too sharp or unbalanced, consider applying additional smoothing expressions or adjusting your audio track to better fit the visual pacing.
Conclusion
Syncing animation to audio in After Effects brings rhythm and life to your visuals. Whether you’re building a full audio visualizer or adding subtle beats to a motion graphic, linking keyframes to sound is an effective way to add depth and energy to your design. With a bit of fine-tuning, your animation will move perfectly in sync with the music.
Our Bestsellers


