How to Animate a Logo in After Effects
Introduction to Logo Animation in After Effects
Animating a logo in After Effects is a powerful way to bring your brand to life. Whether you’re creating an intro for a video or a visual identity for your brand, this step-by-step guide will walk you through the process using vector shapes, effects, and motion.
Step 1: Import Your Logo
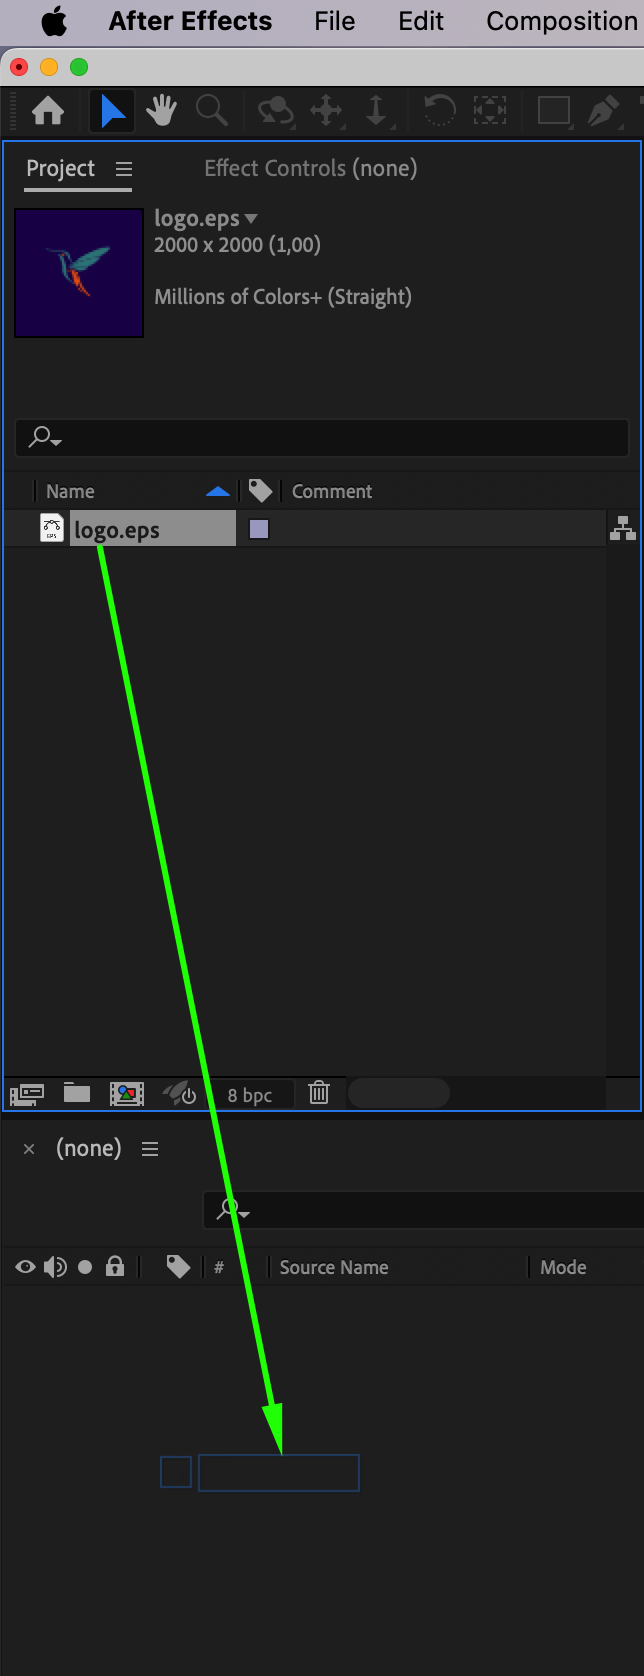
Go to File > Import > File and choose your logo file in EPS format. Drag it onto the timeline to begin working with it in your composition.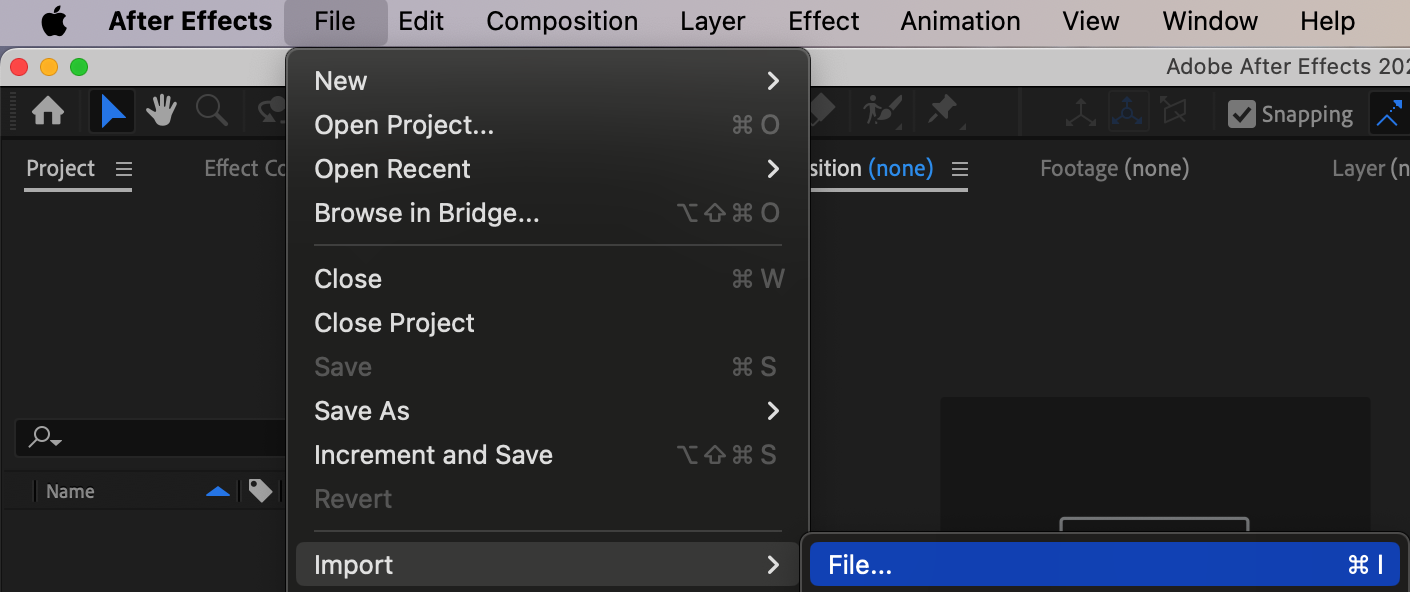
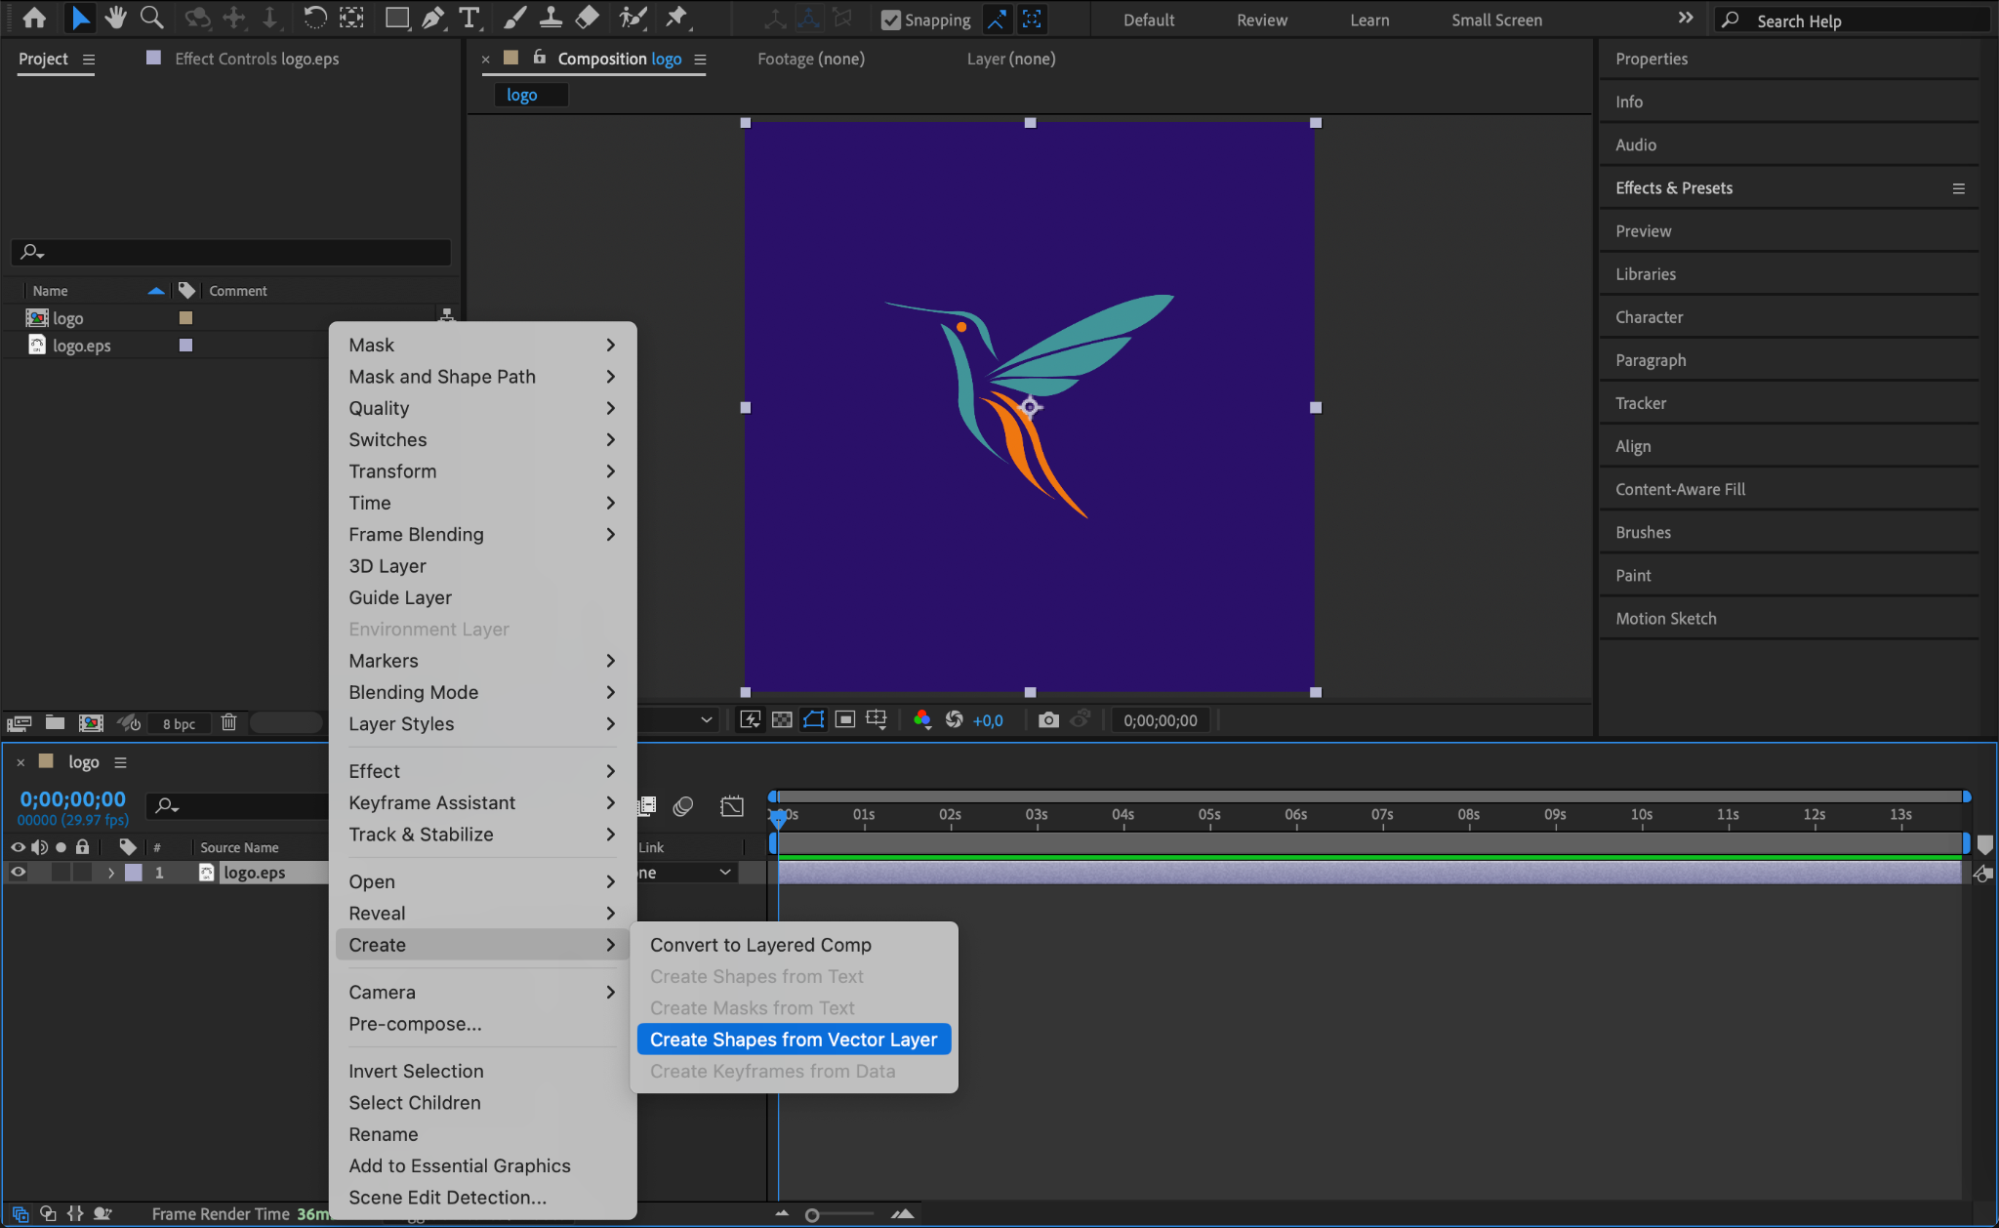
 Step 2: Convert to Shape Layer
Right-click on your EPS layer and choose Create > Create Shapes from Vector Layer. This will convert your vector logo into an editable shape layer.
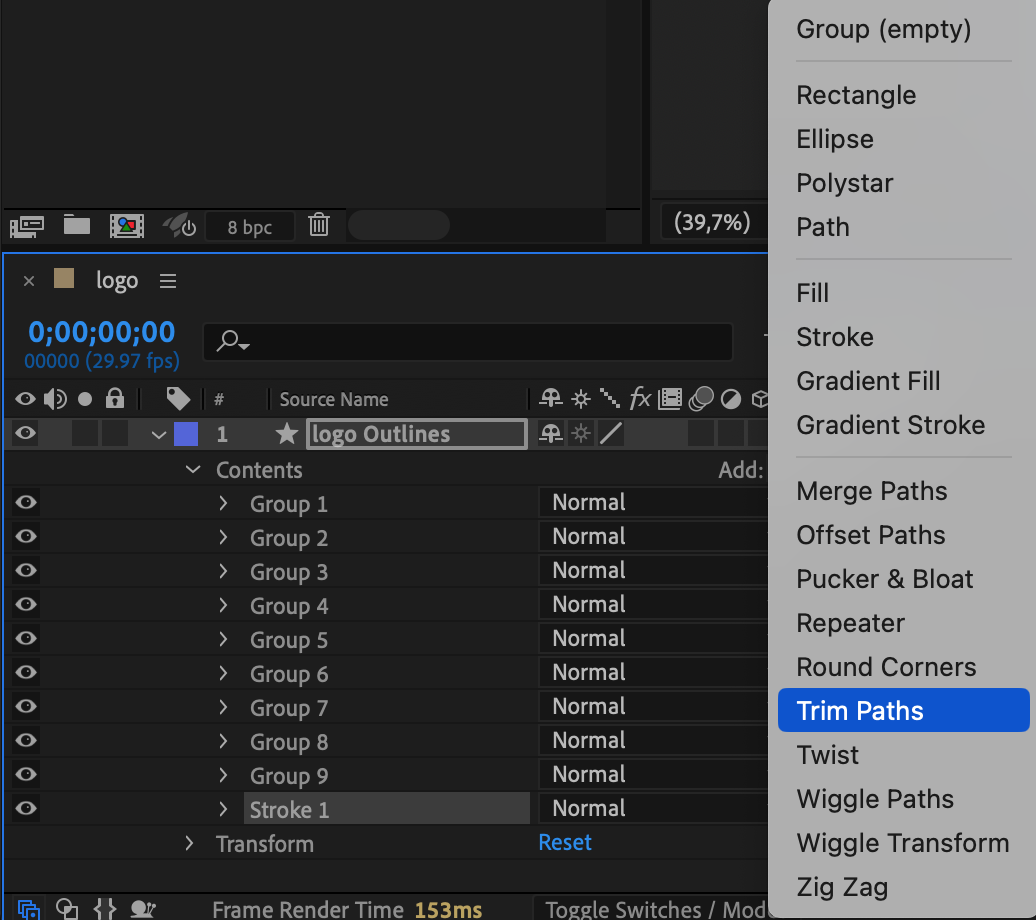
 Step 3: Remove the EPS Layer and Add Stroke
Delete the original EPS layer to keep your timeline clean. Expand the shape layer’s properties, and next to the Contents section, click Add > Stroke and Add > Trim Paths.
 Step 4: Set Fill and Stroke
Within the shape layer, set the Fill to None, then choose a Stroke Width (e.g., 20 px) and select your desired Stroke Color to match your brand style.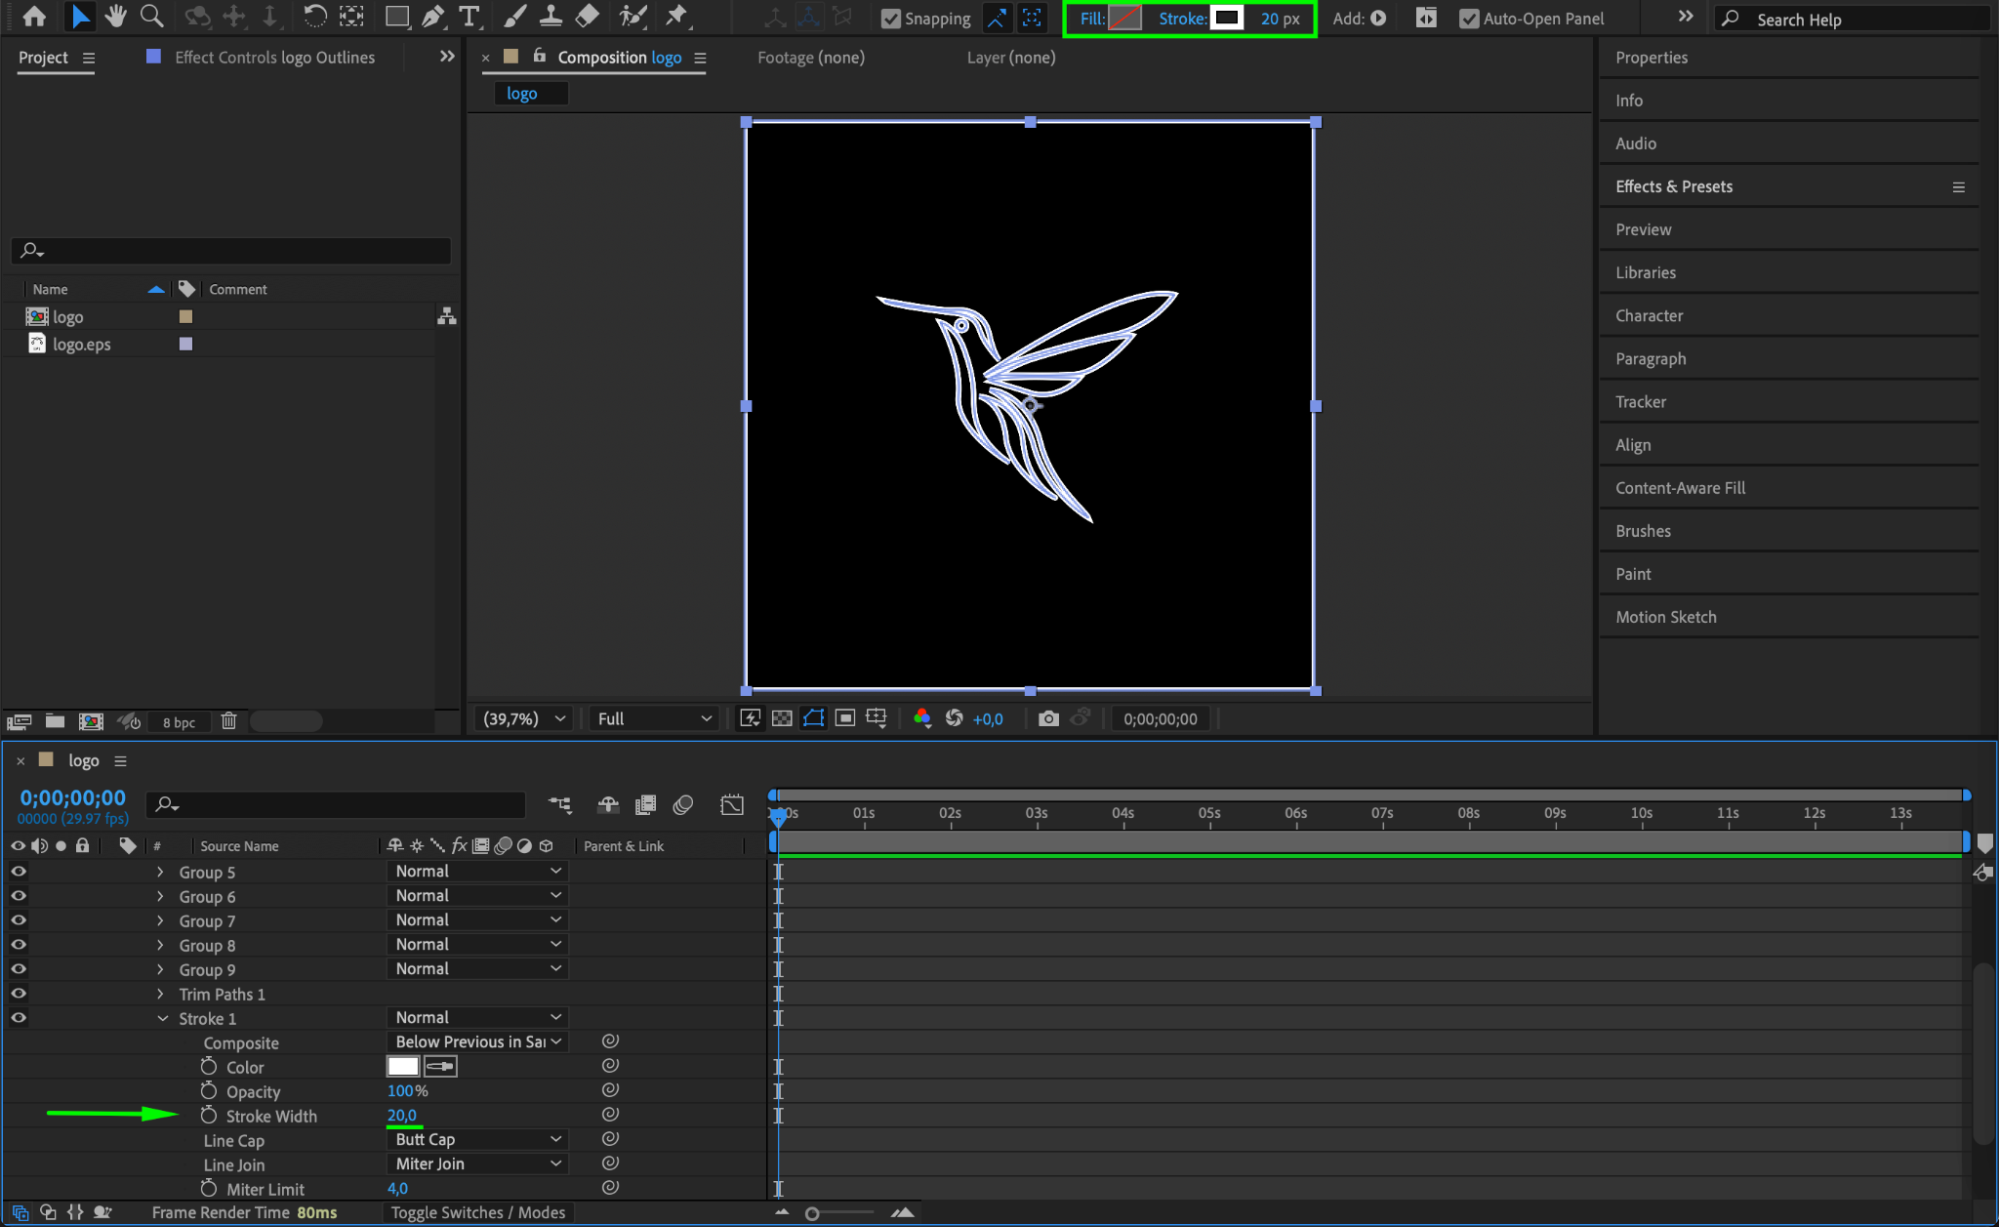
Get 10% off when you subscribe to our newsletter

Step 5: Animate the Trim Paths
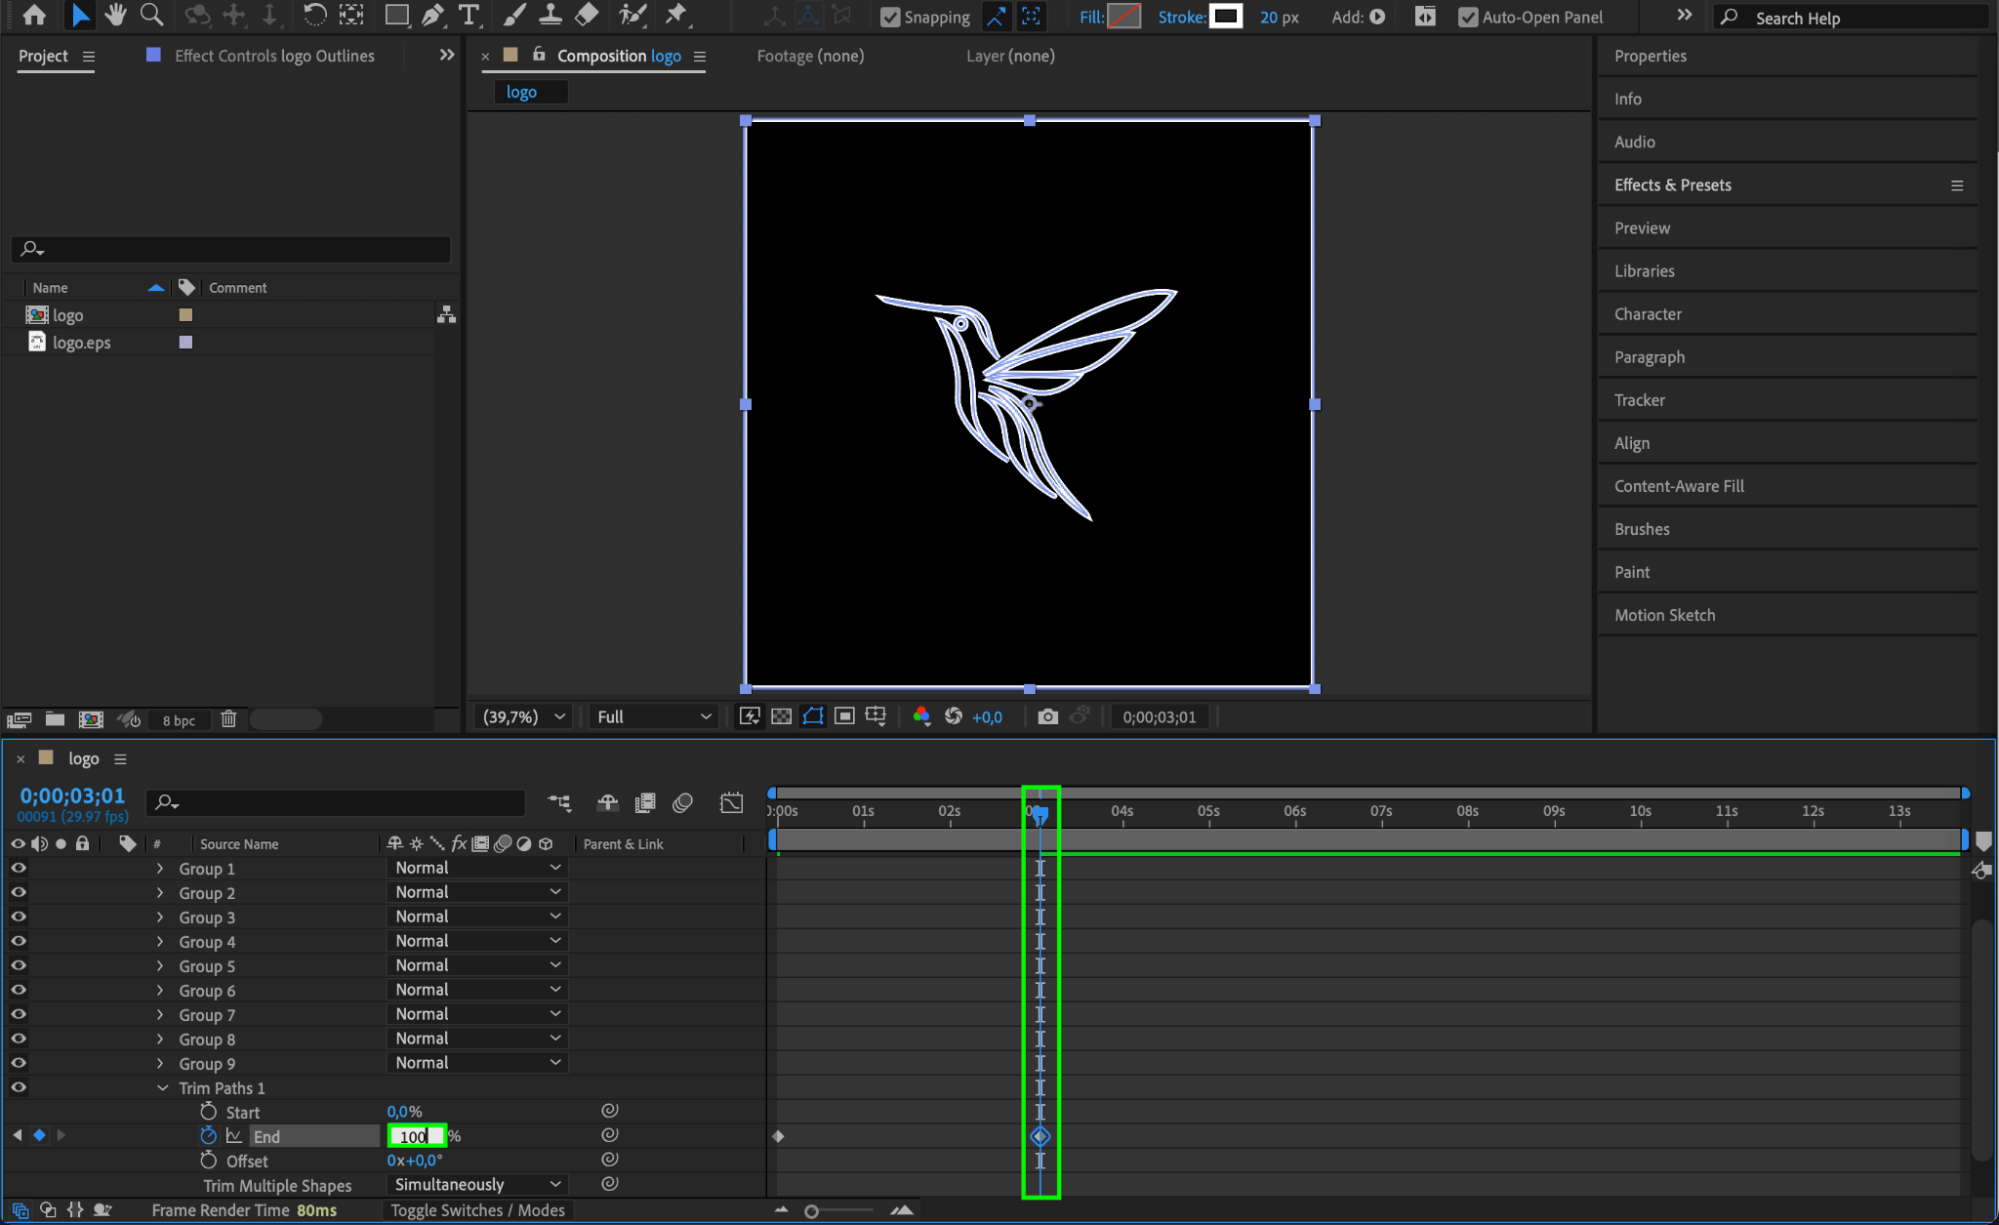
Open the Trim Paths section. Set the End value to 0% at the beginning of the timeline and 100% around the midpoint. This will animate the stroke drawing itself on screen.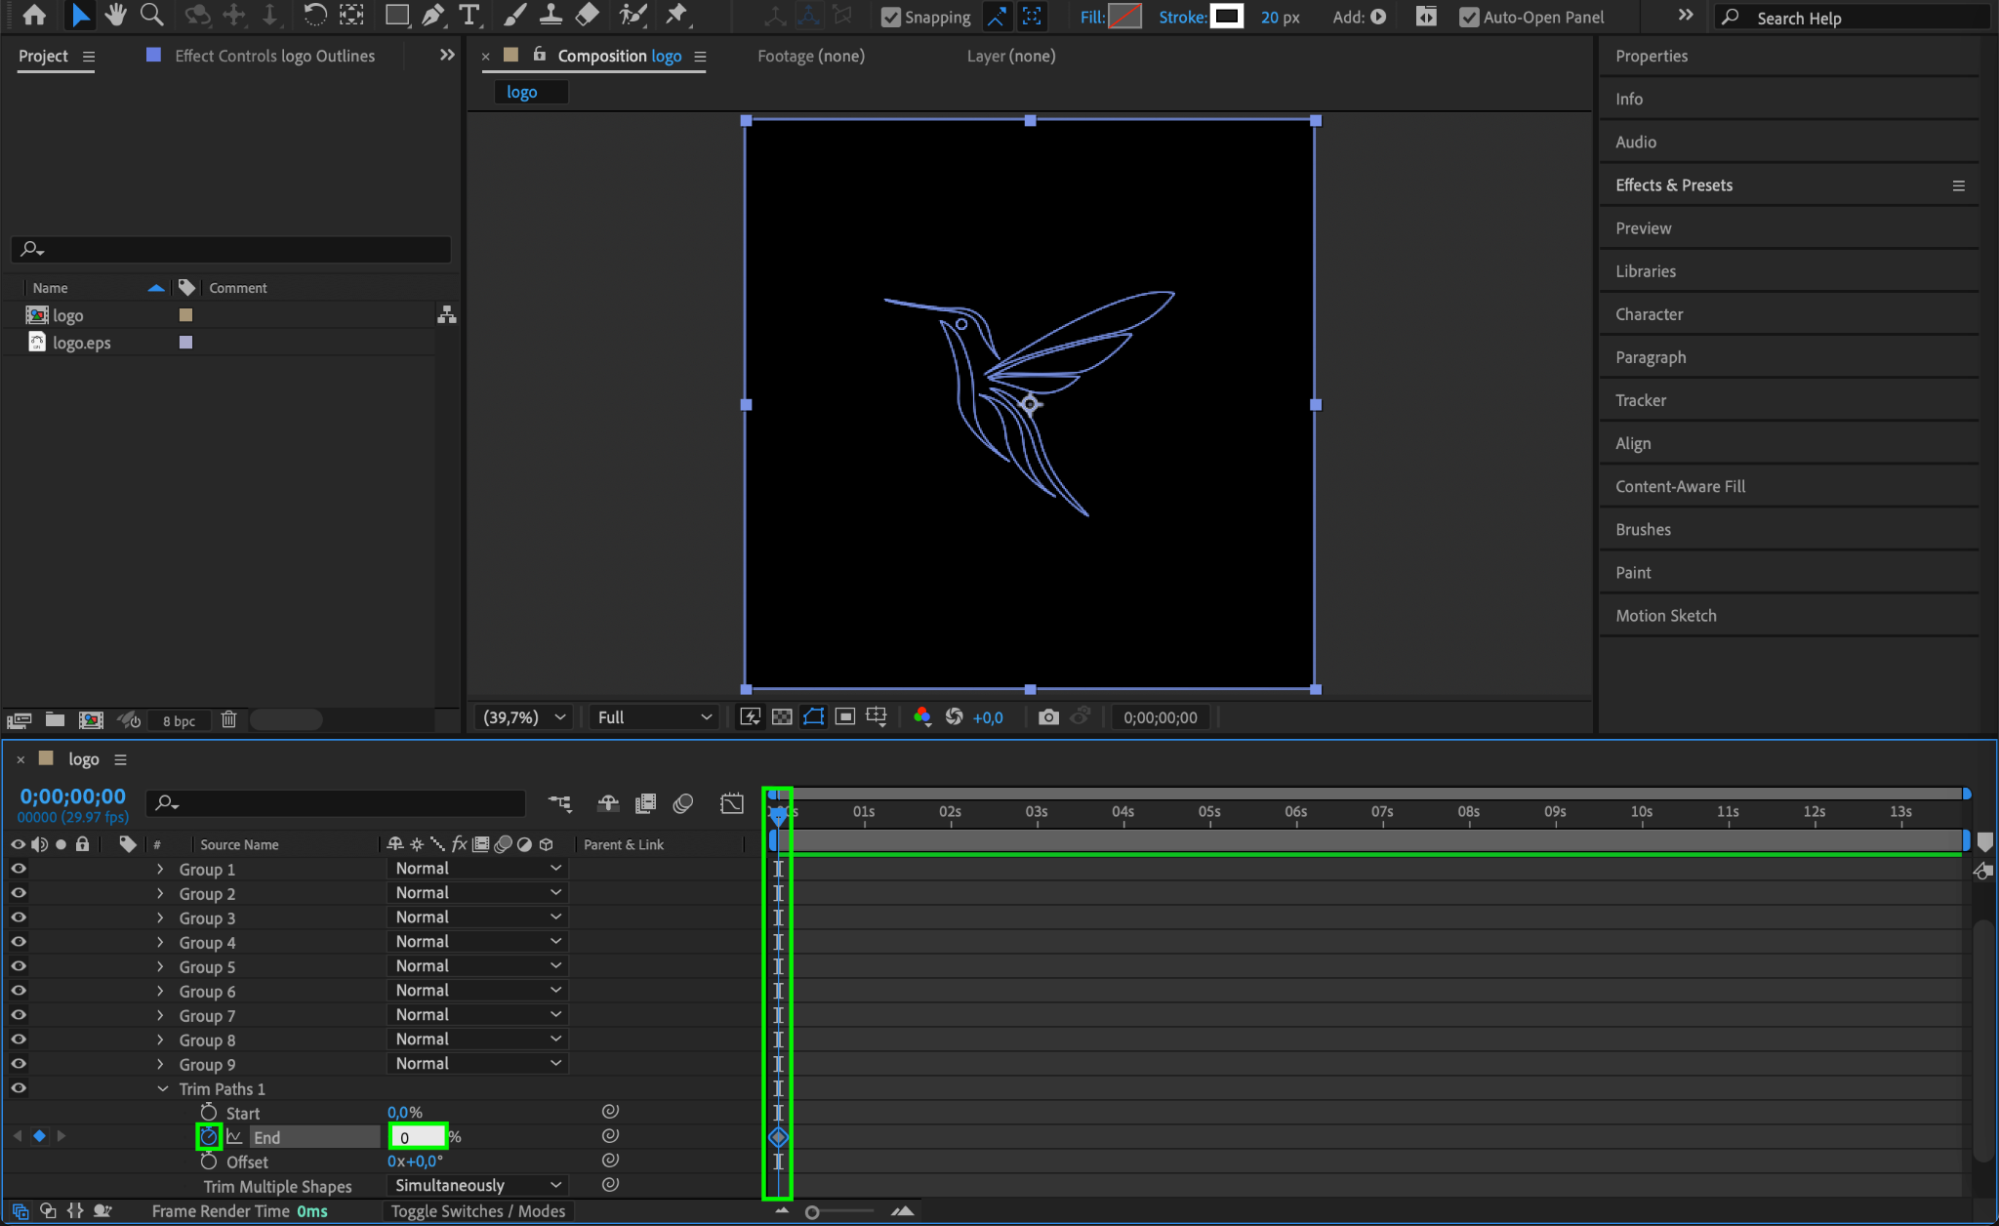
 Step 6: Add an Adjustment Layer
Go to Layer > New > Adjustment Layer to apply effects globally across your logo without affecting the base shape directly.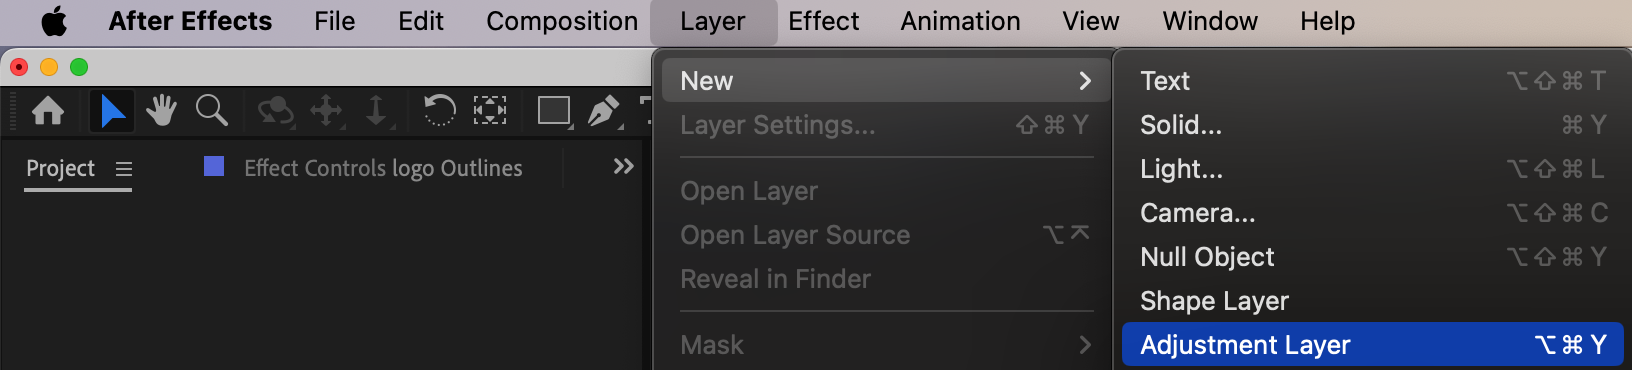 Step 7: Add Texture Effects
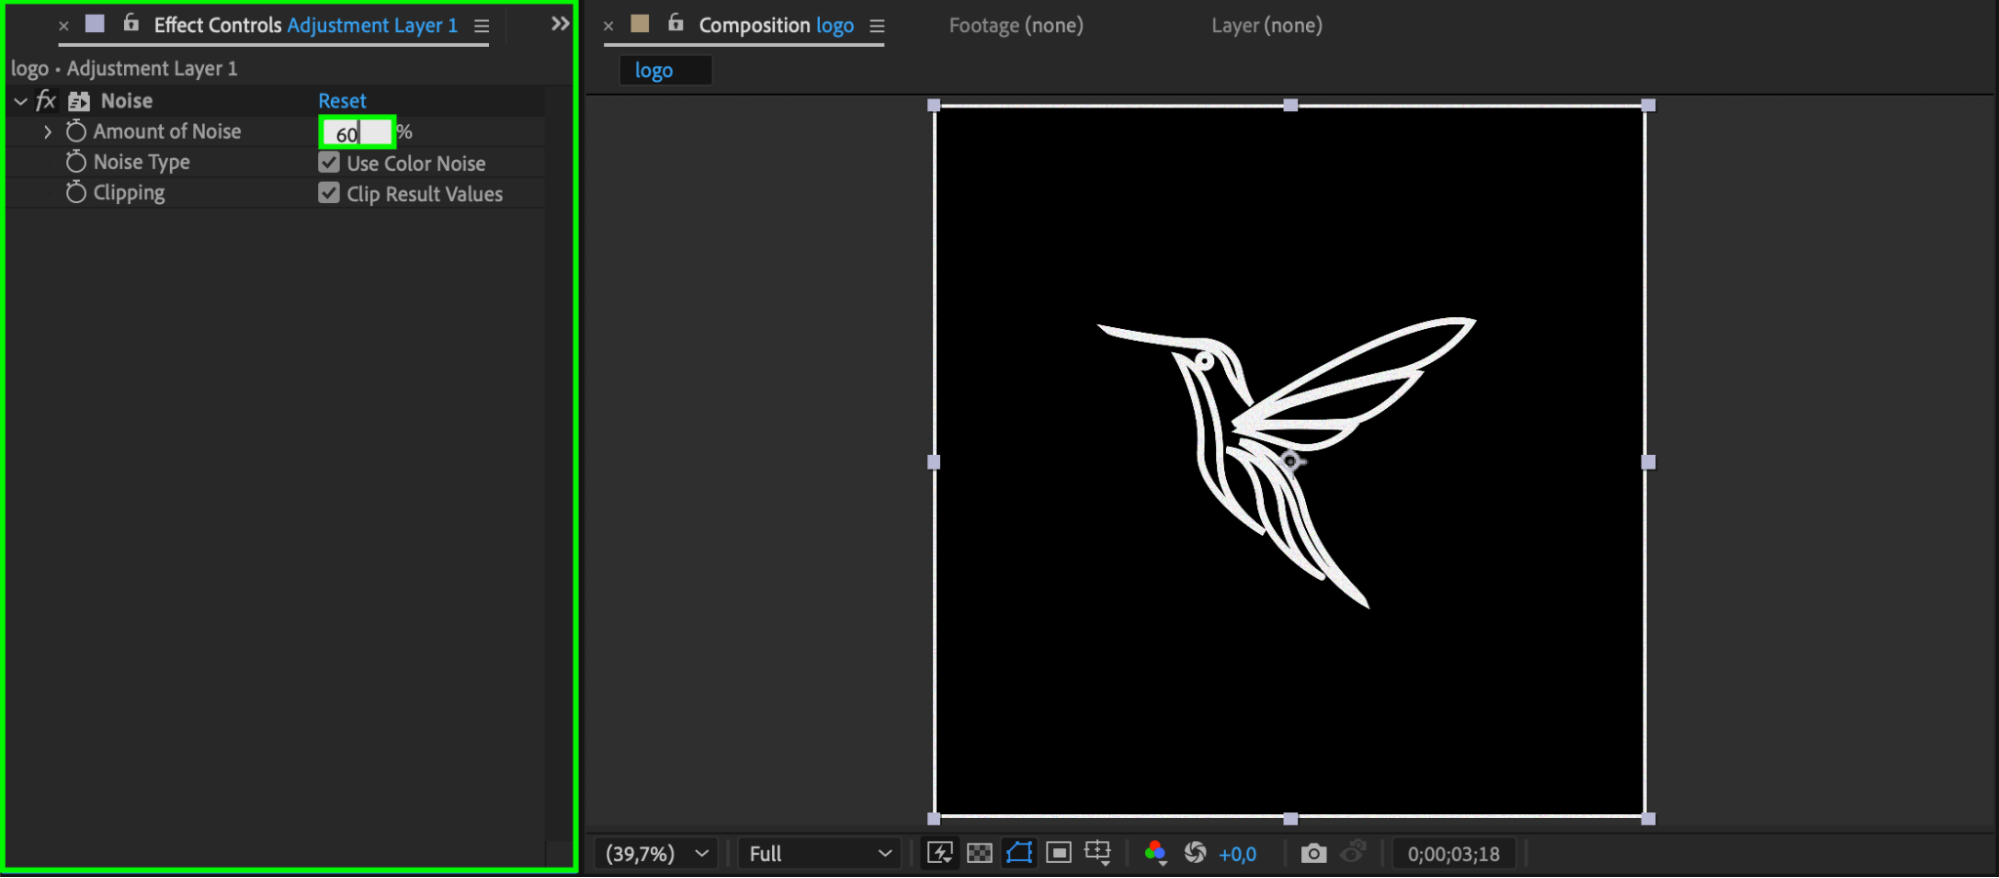
Apply the Noise effect from the Effects & Presets panel to the adjustment layer and set the Amount of Noise to 60 for a grainy, textured feel.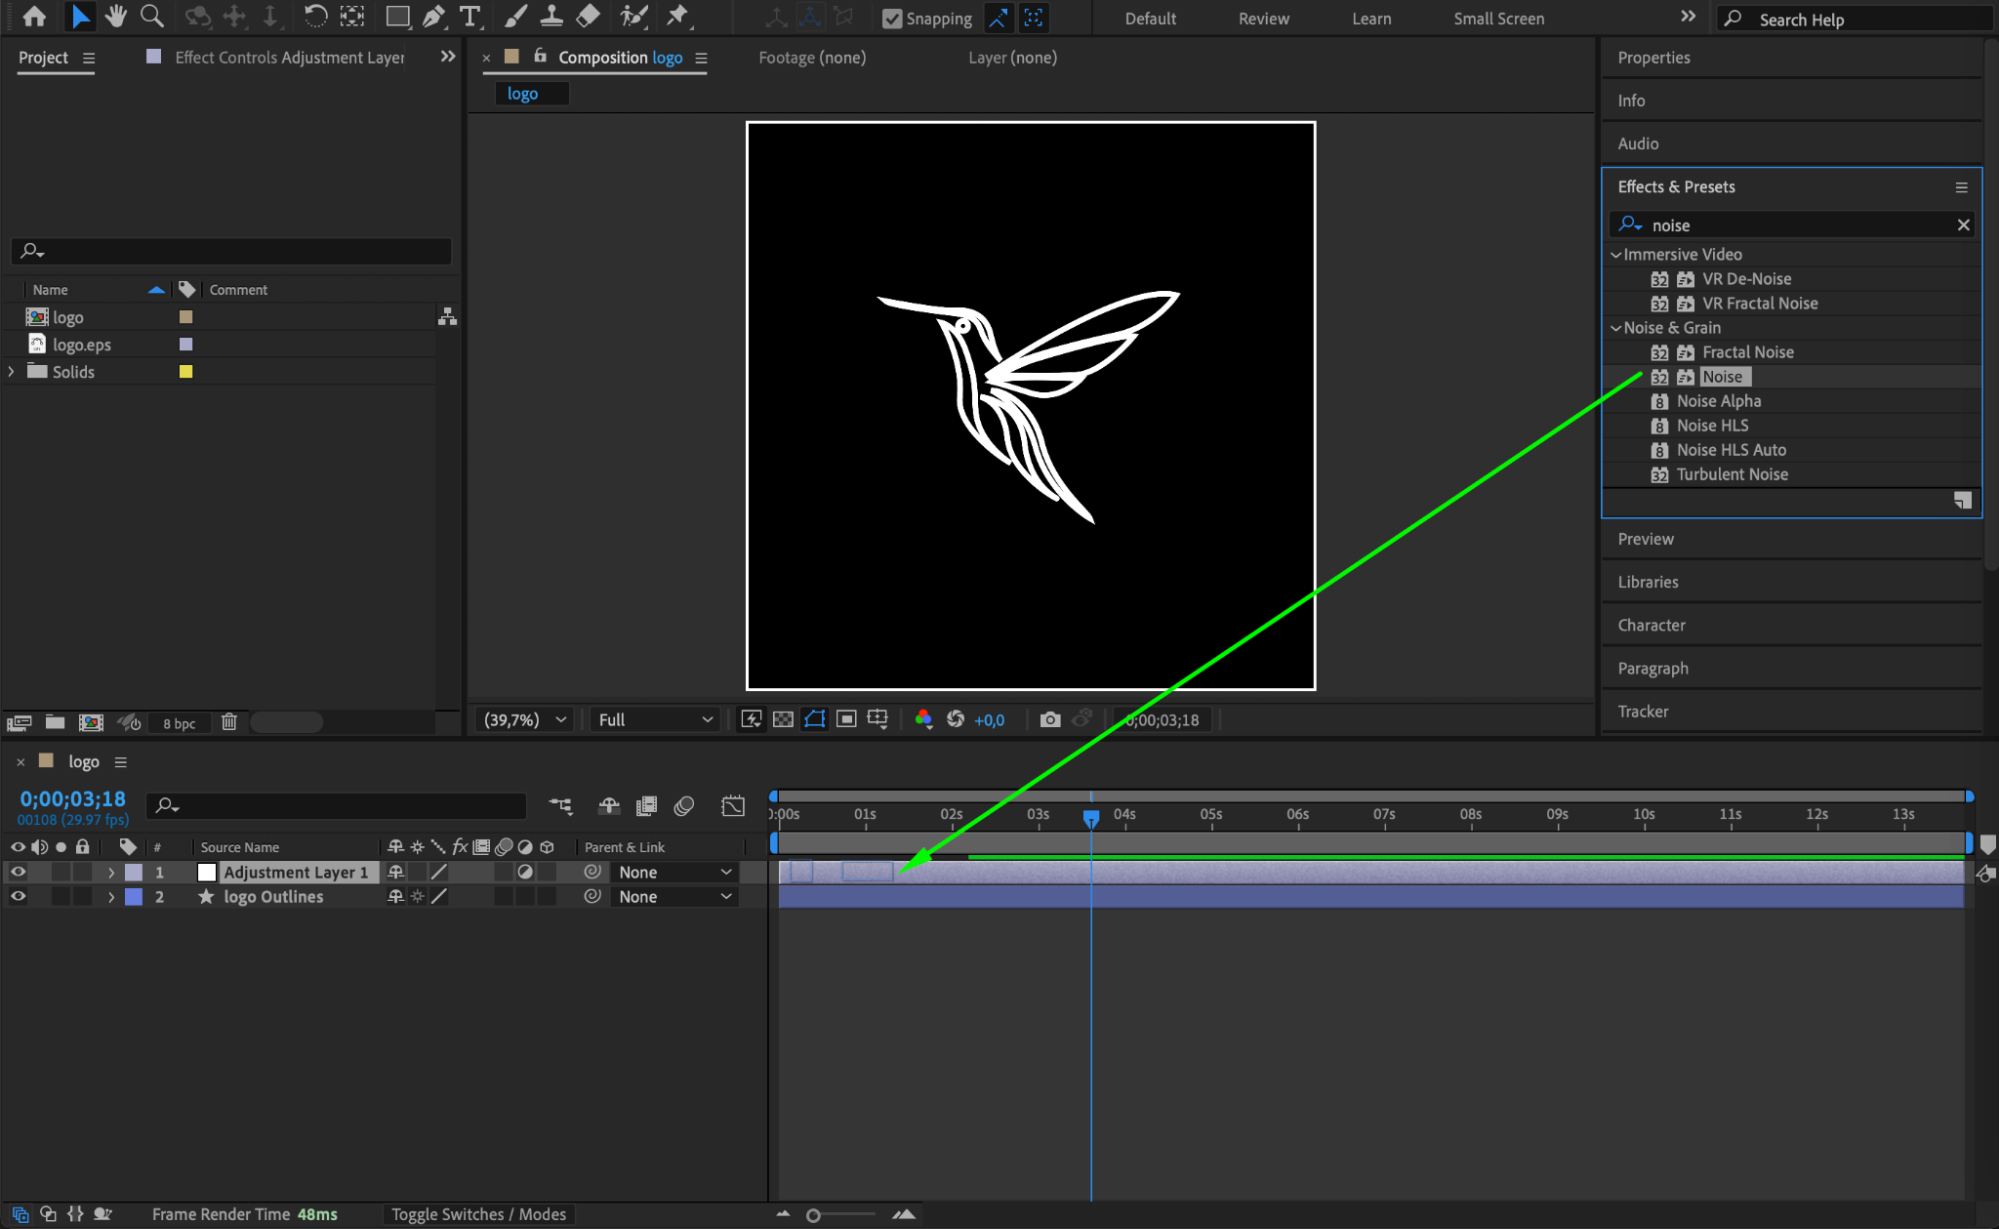
 Step 8: Add Blobby and Glass Effects
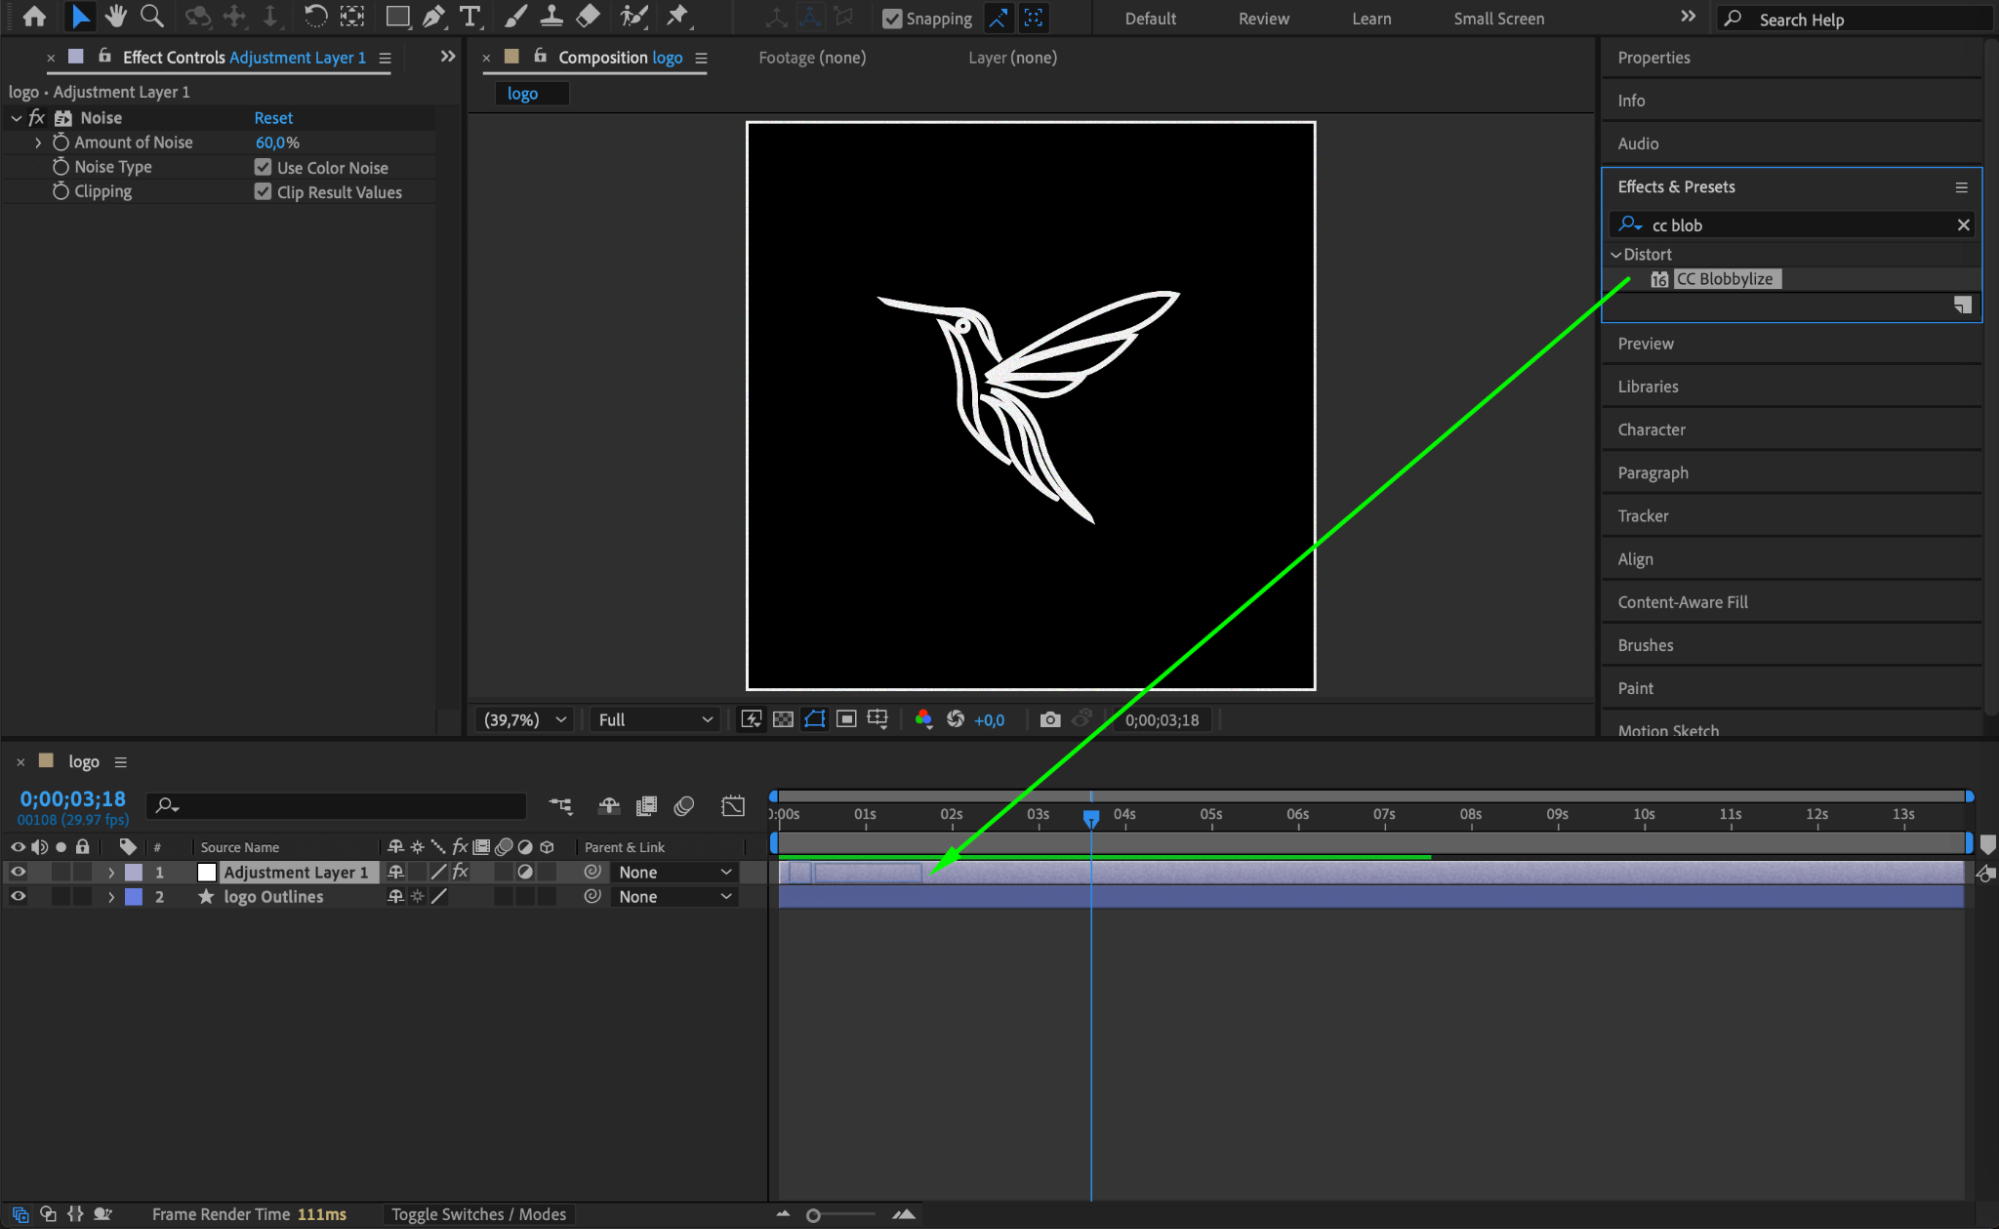
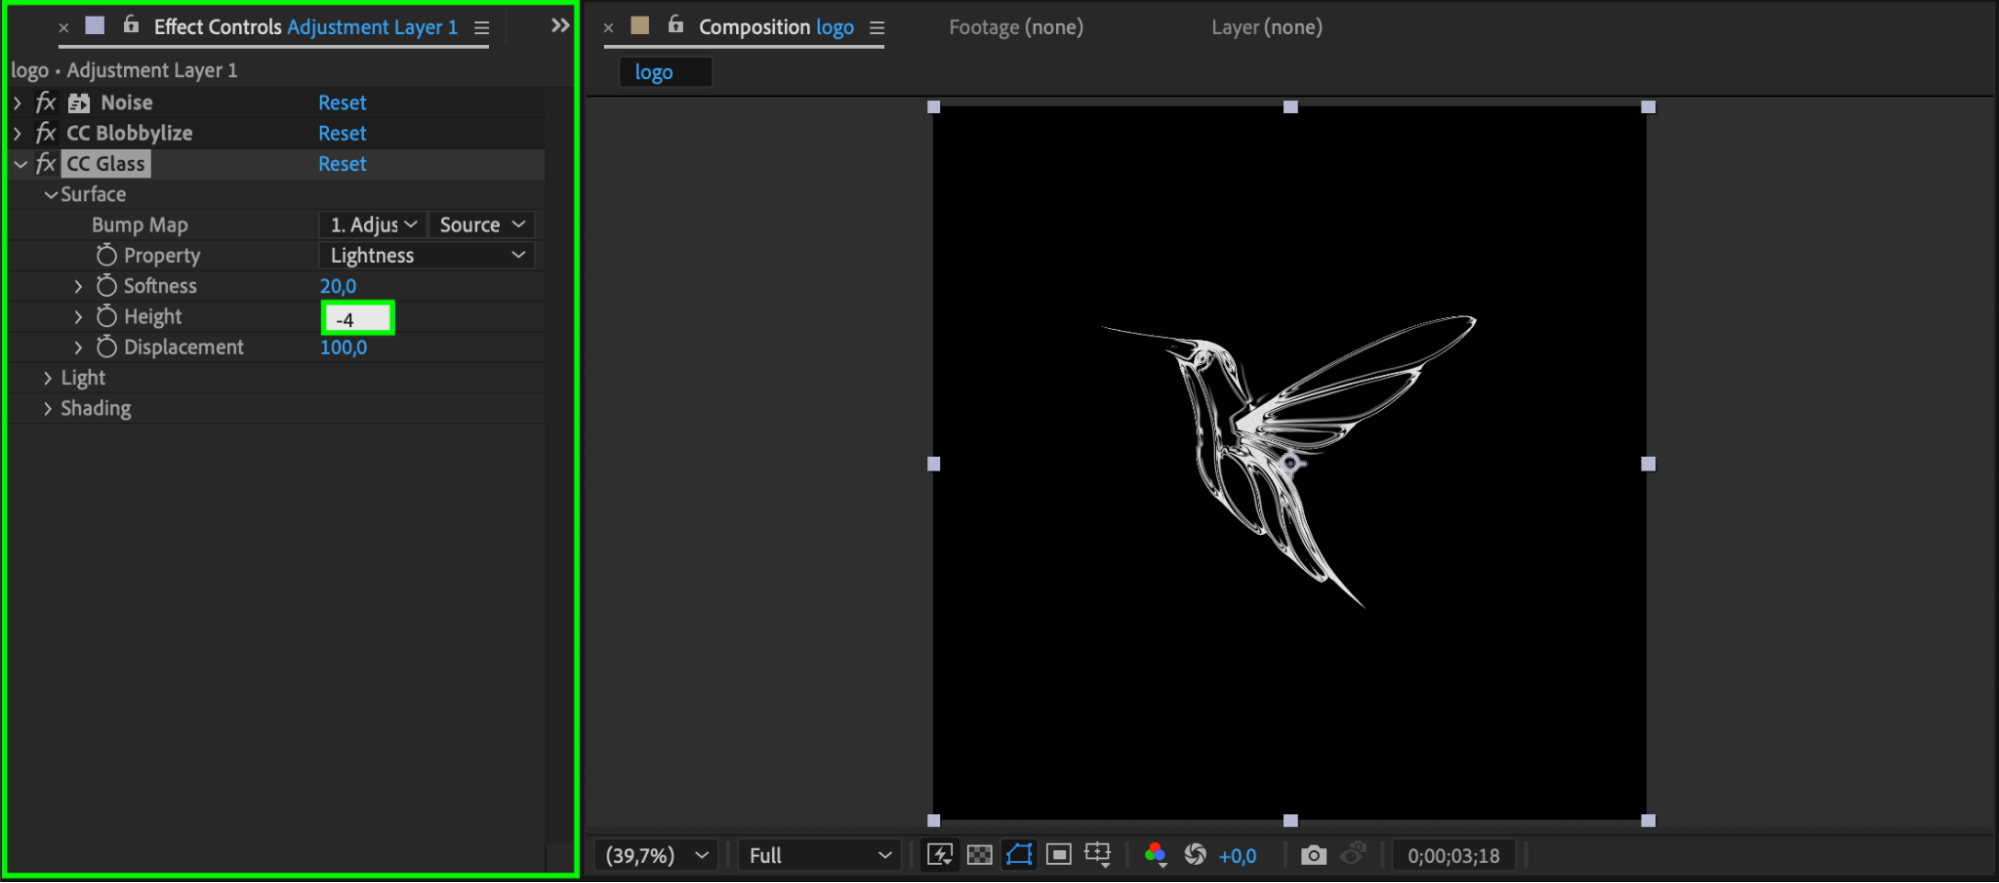
Add CC Blobbylize and CC Glass effects to the adjustment layer. In CC Glass, set Height to -4 to create a subtle distortion that gives your logo a fluid, organic look.
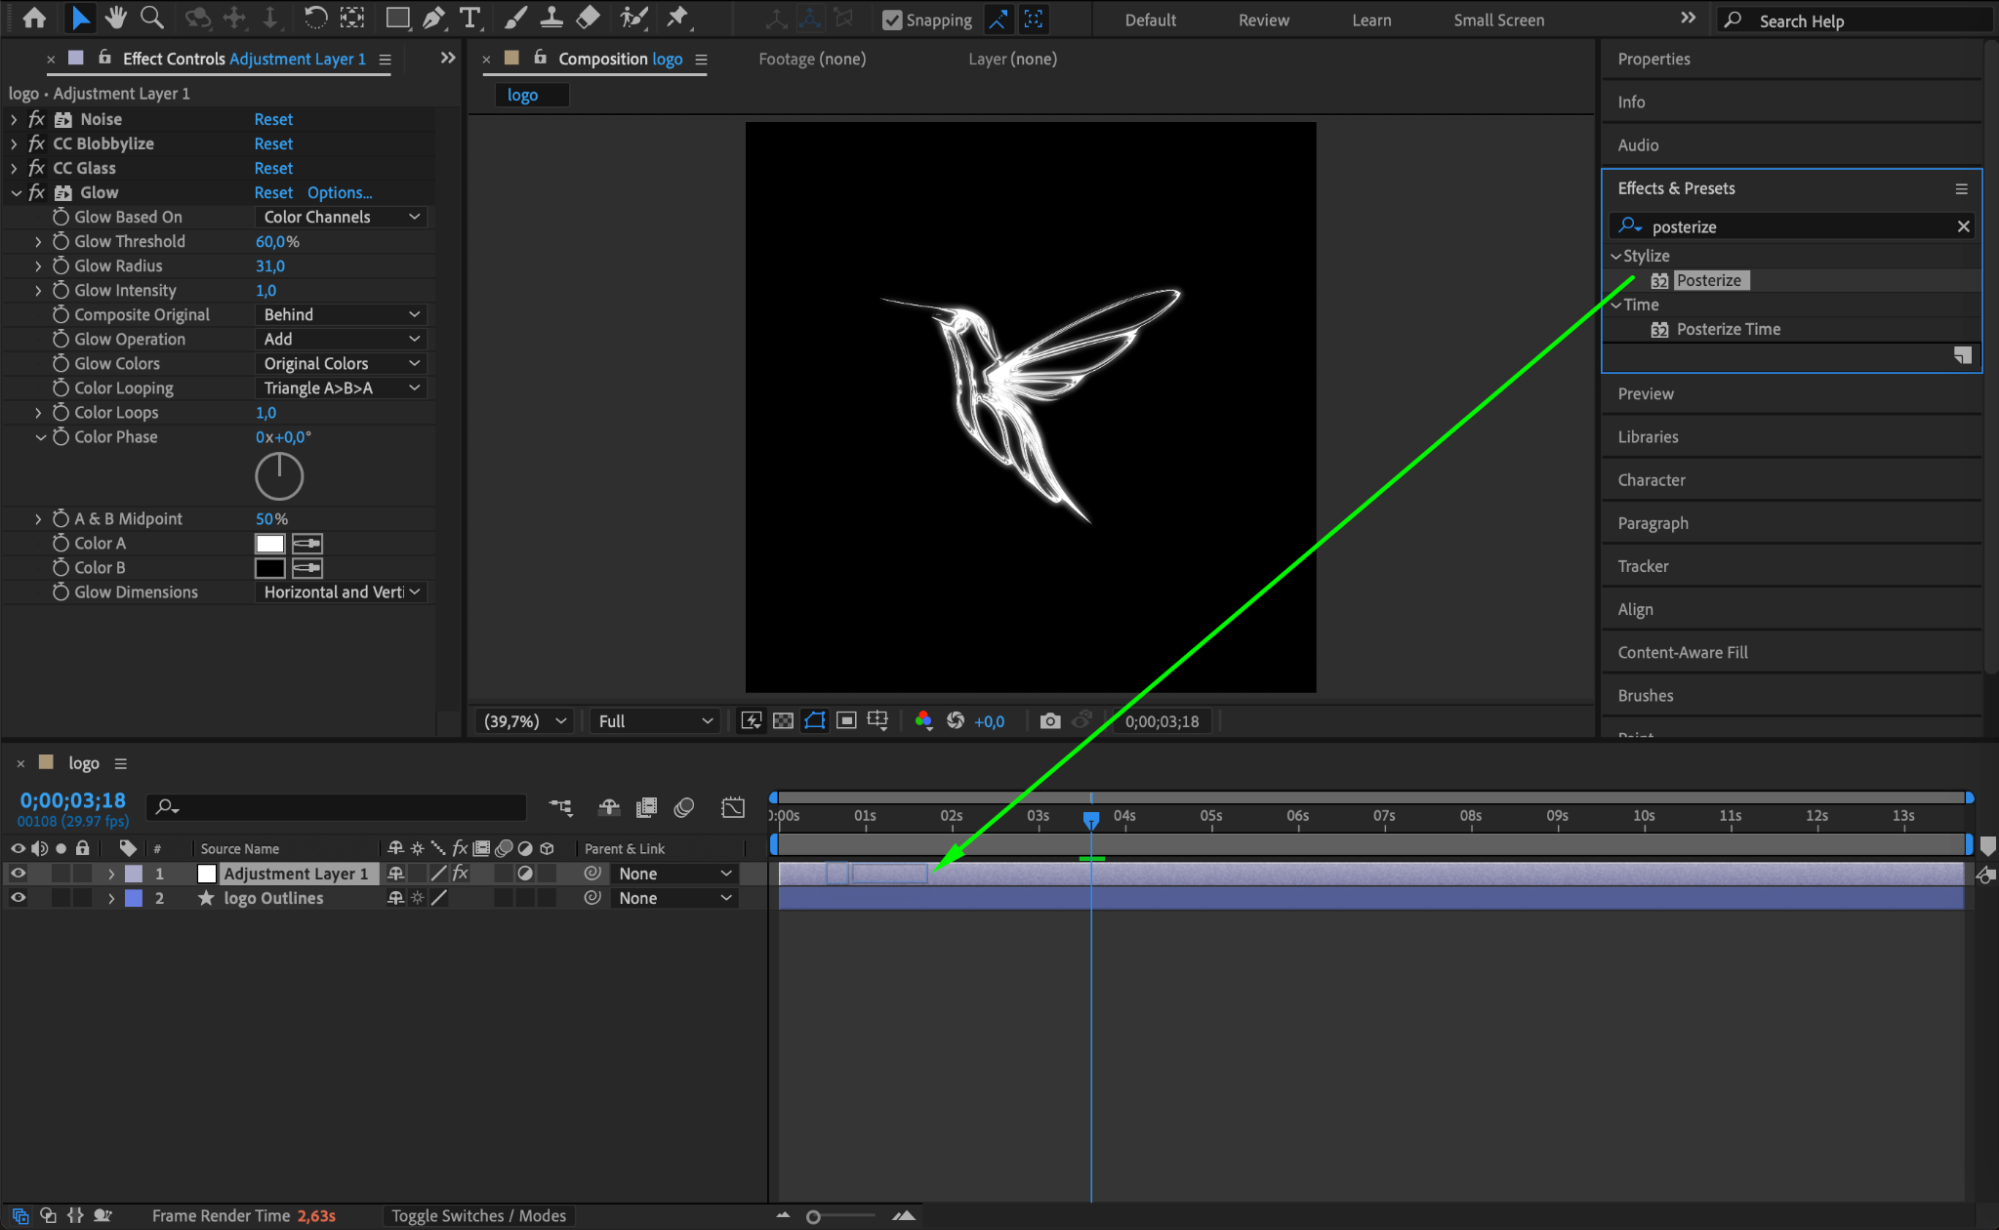
Step 9: Apply Glow and Posterize Effects
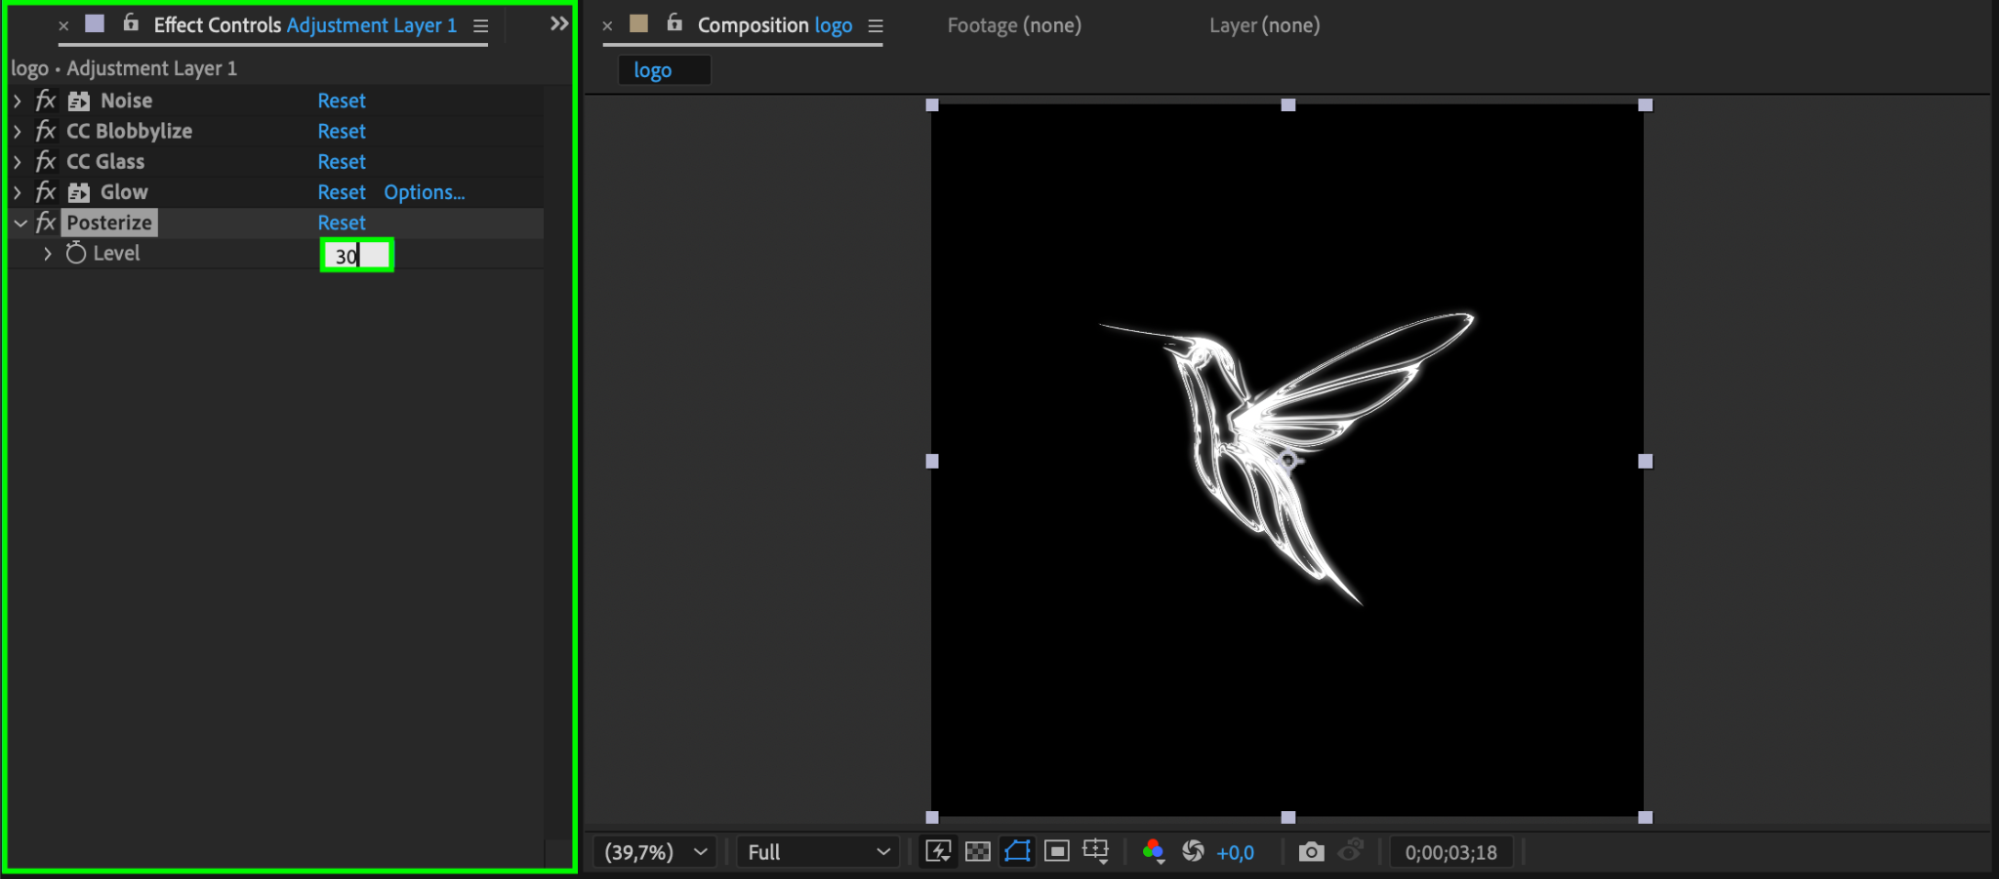
Add the Glow effect and set the Glow Radius to around 31. Then add the Posterize effect and set the Level to 30 for a stylized, animated look.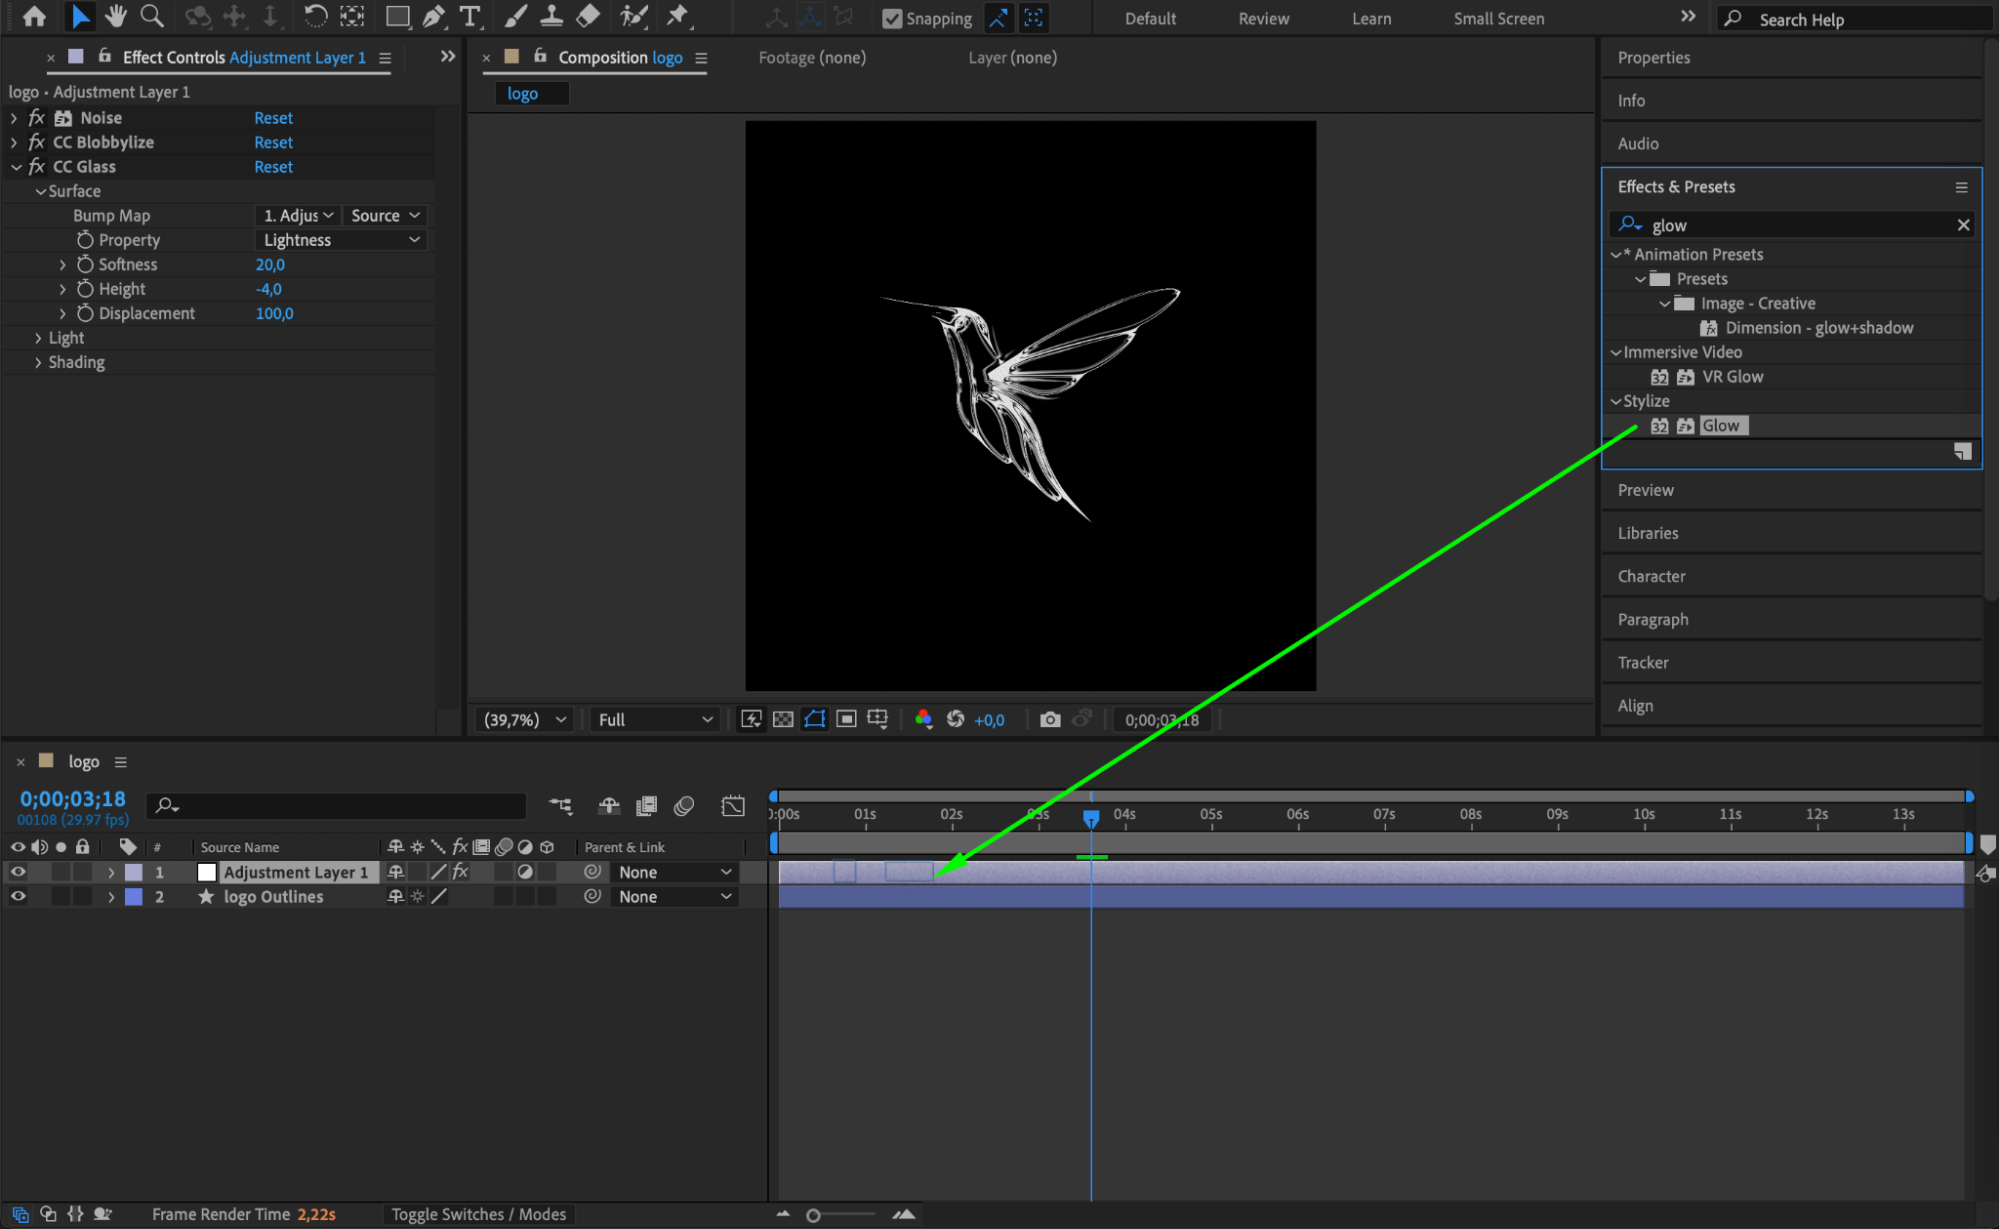


Step 10: Make the Shape Layer 3D
Enable the 3D Layer switch (the cube icon) on your shape layer to allow rotation and depth animation.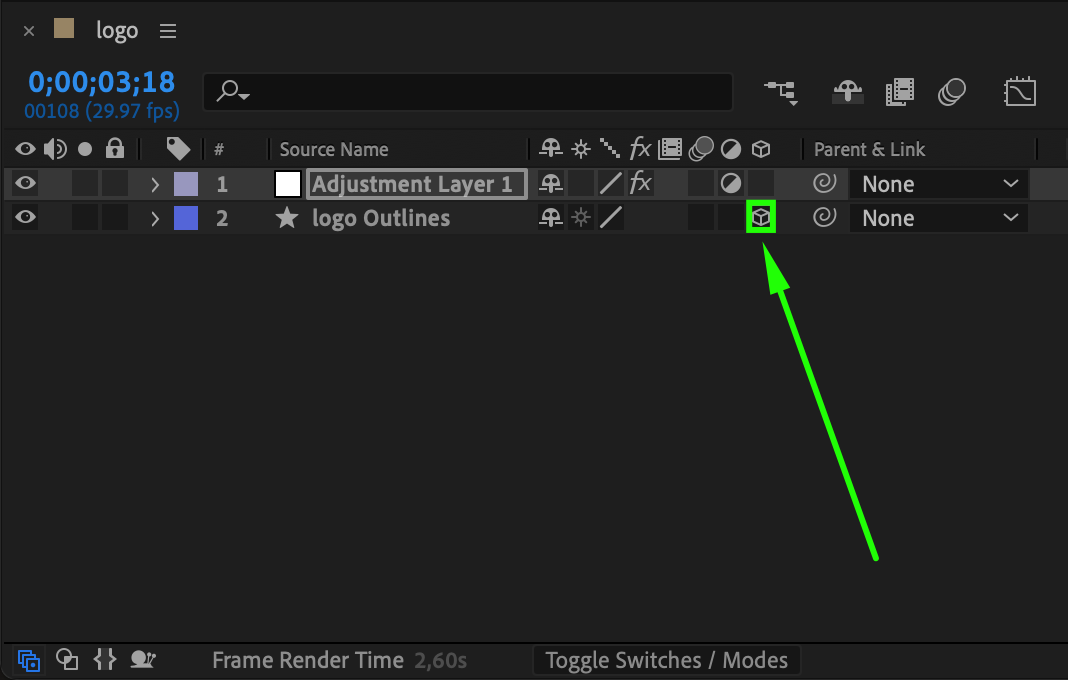 Step 11: Animate Scale and Orientation
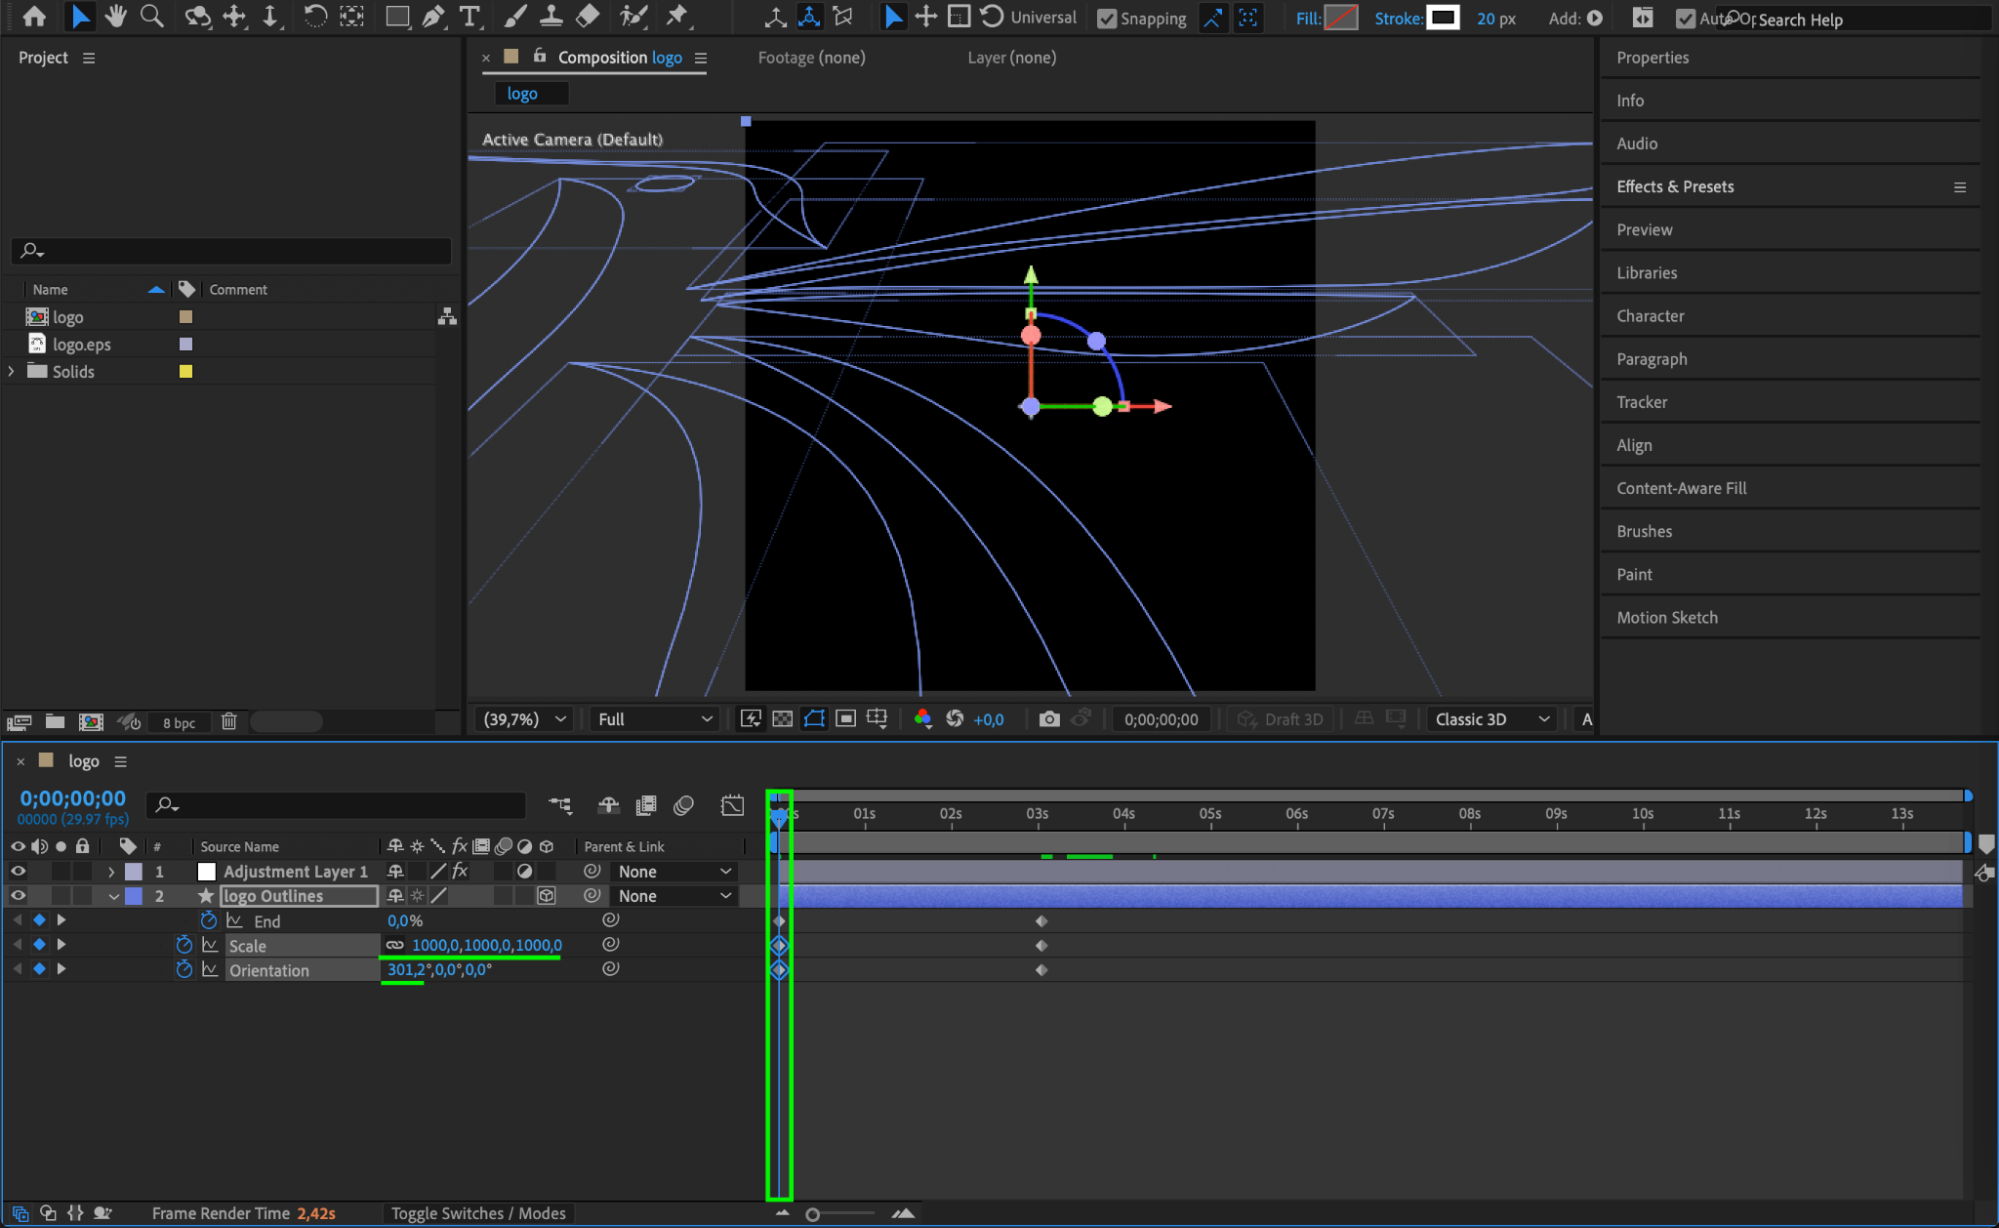
Move the CTI (Current Time Indicator) to the end of your animation and press the stopwatch next to Scale (S) and Orientation (R). Then return to the beginning of the timeline and set Scale to 1000%, and Orientation to 301°, 0°, 0°. This adds dramatic motion to your logo entrance.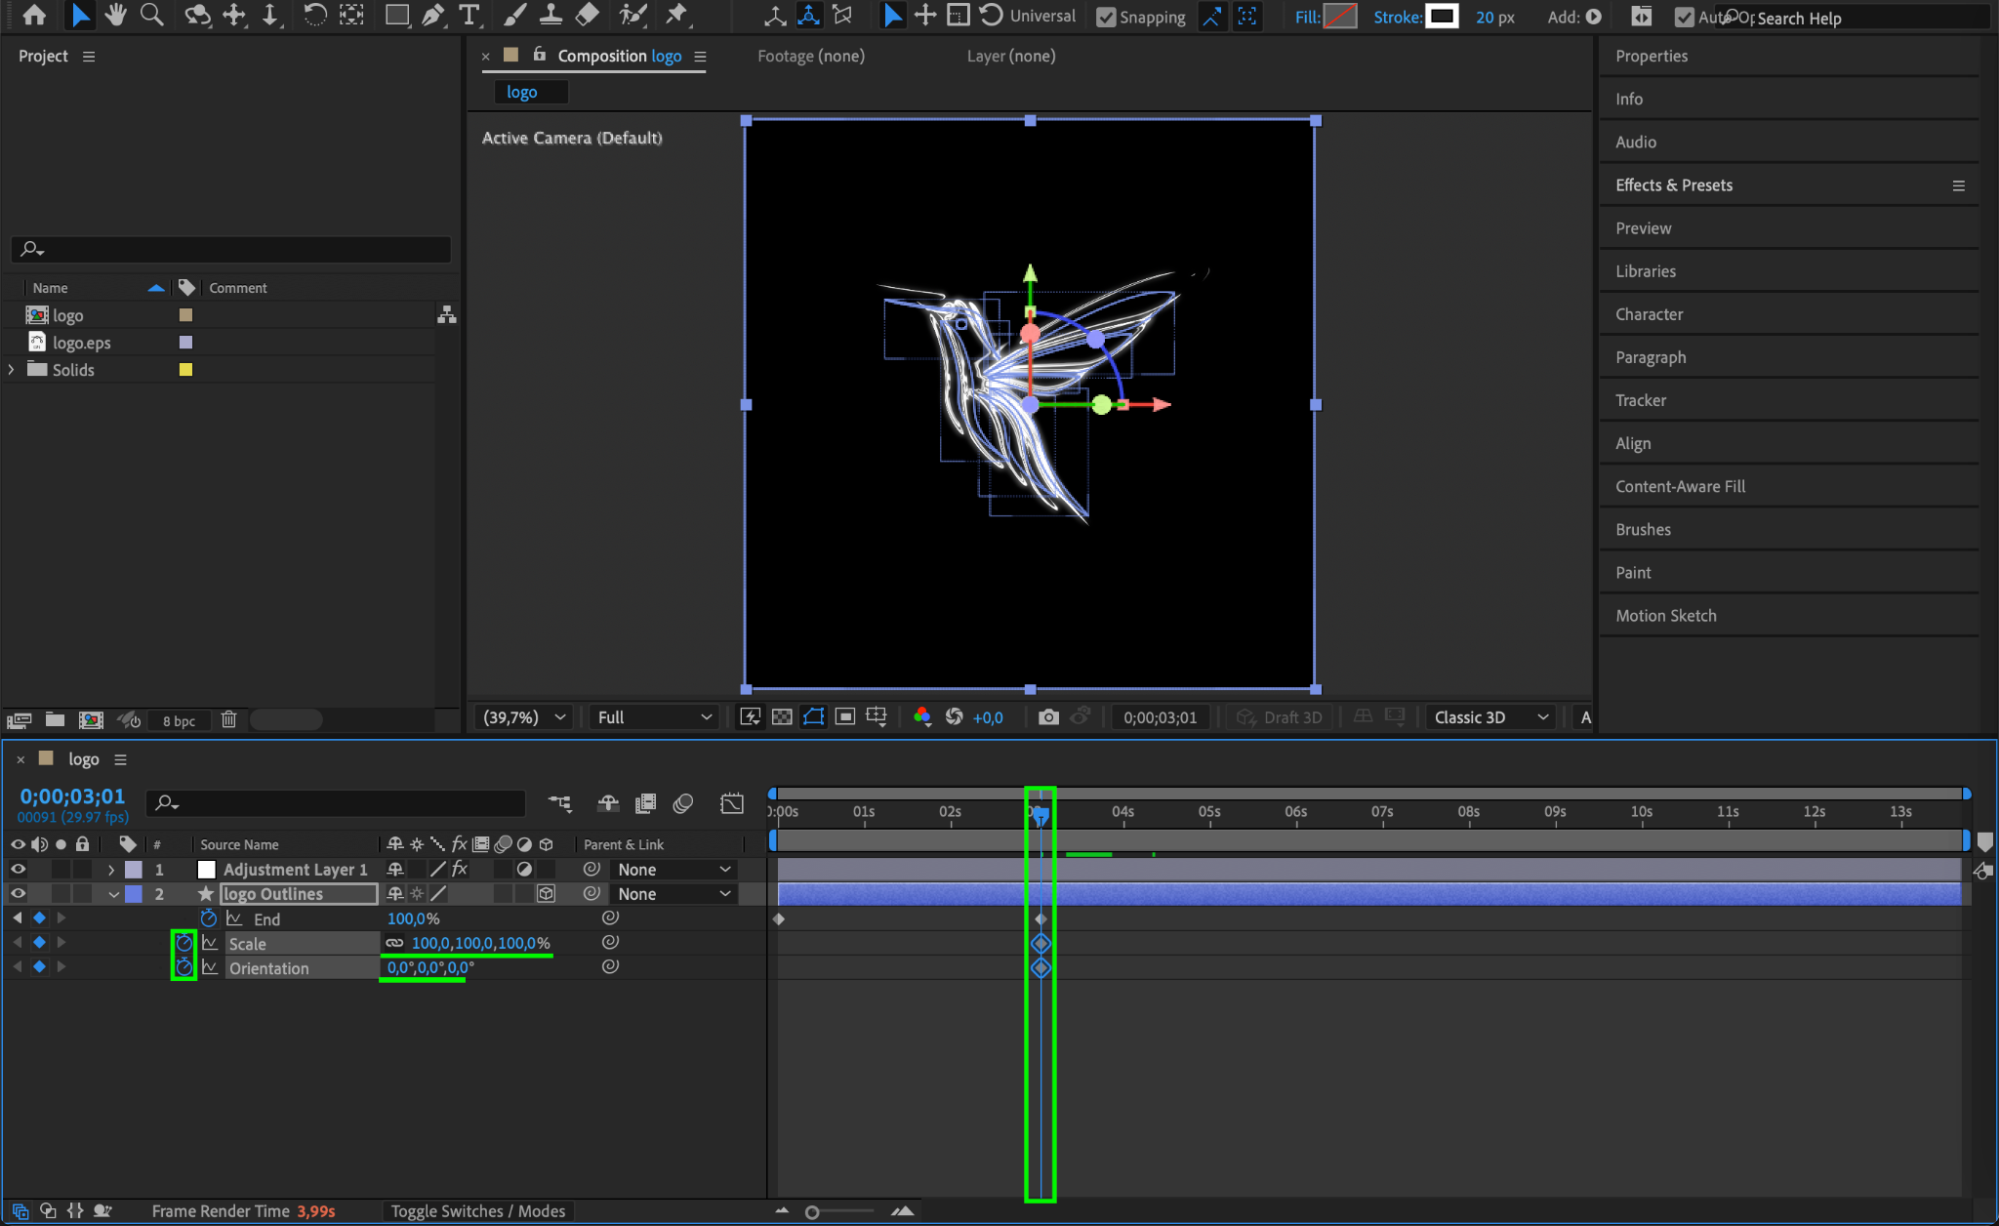
 Step 12: Smooth the Animation
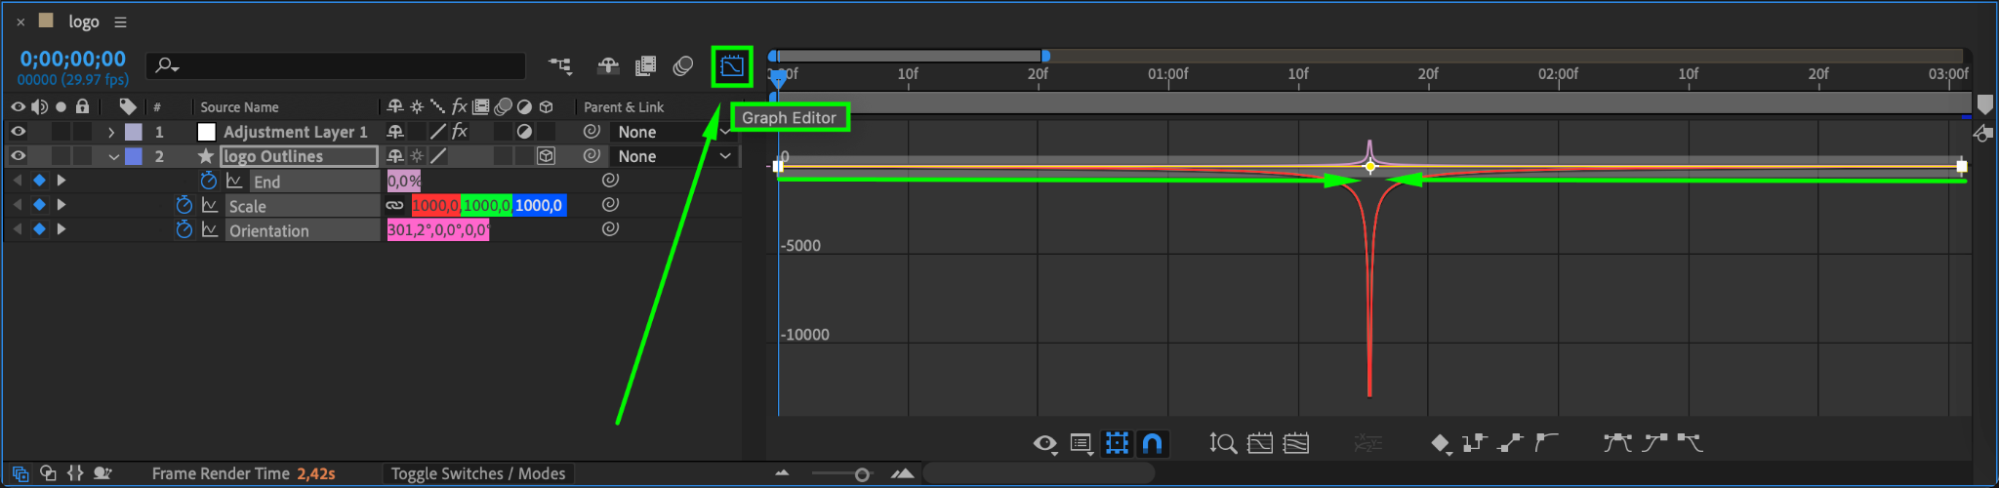
Select all your keyframes, right-click and choose Keyframe Assistant > Easy Ease. Then open the Graph Editor and adjust the speed curves for a smoother, more polished animation.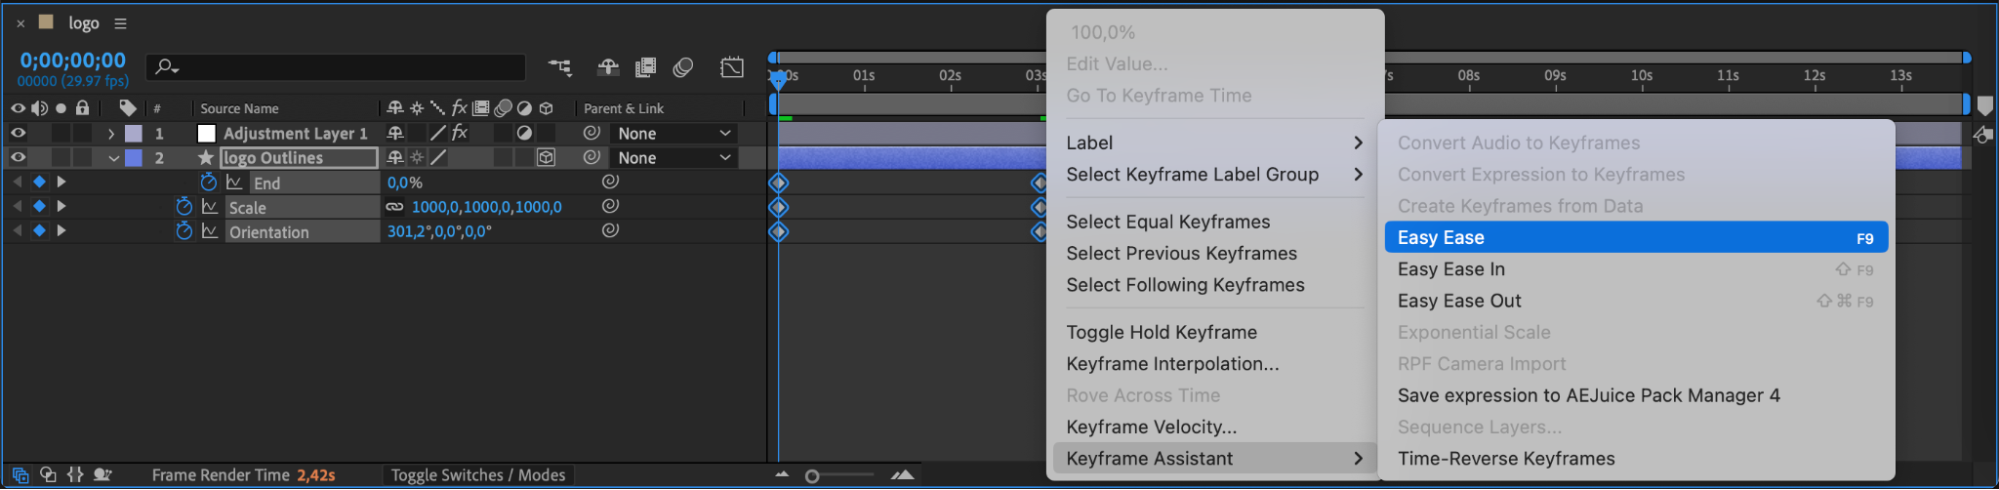
 Step 13: Preview
Press the spacebar or use the Preview panel to check your logo animation. Make sure it flows smoothly and reflects your desired style.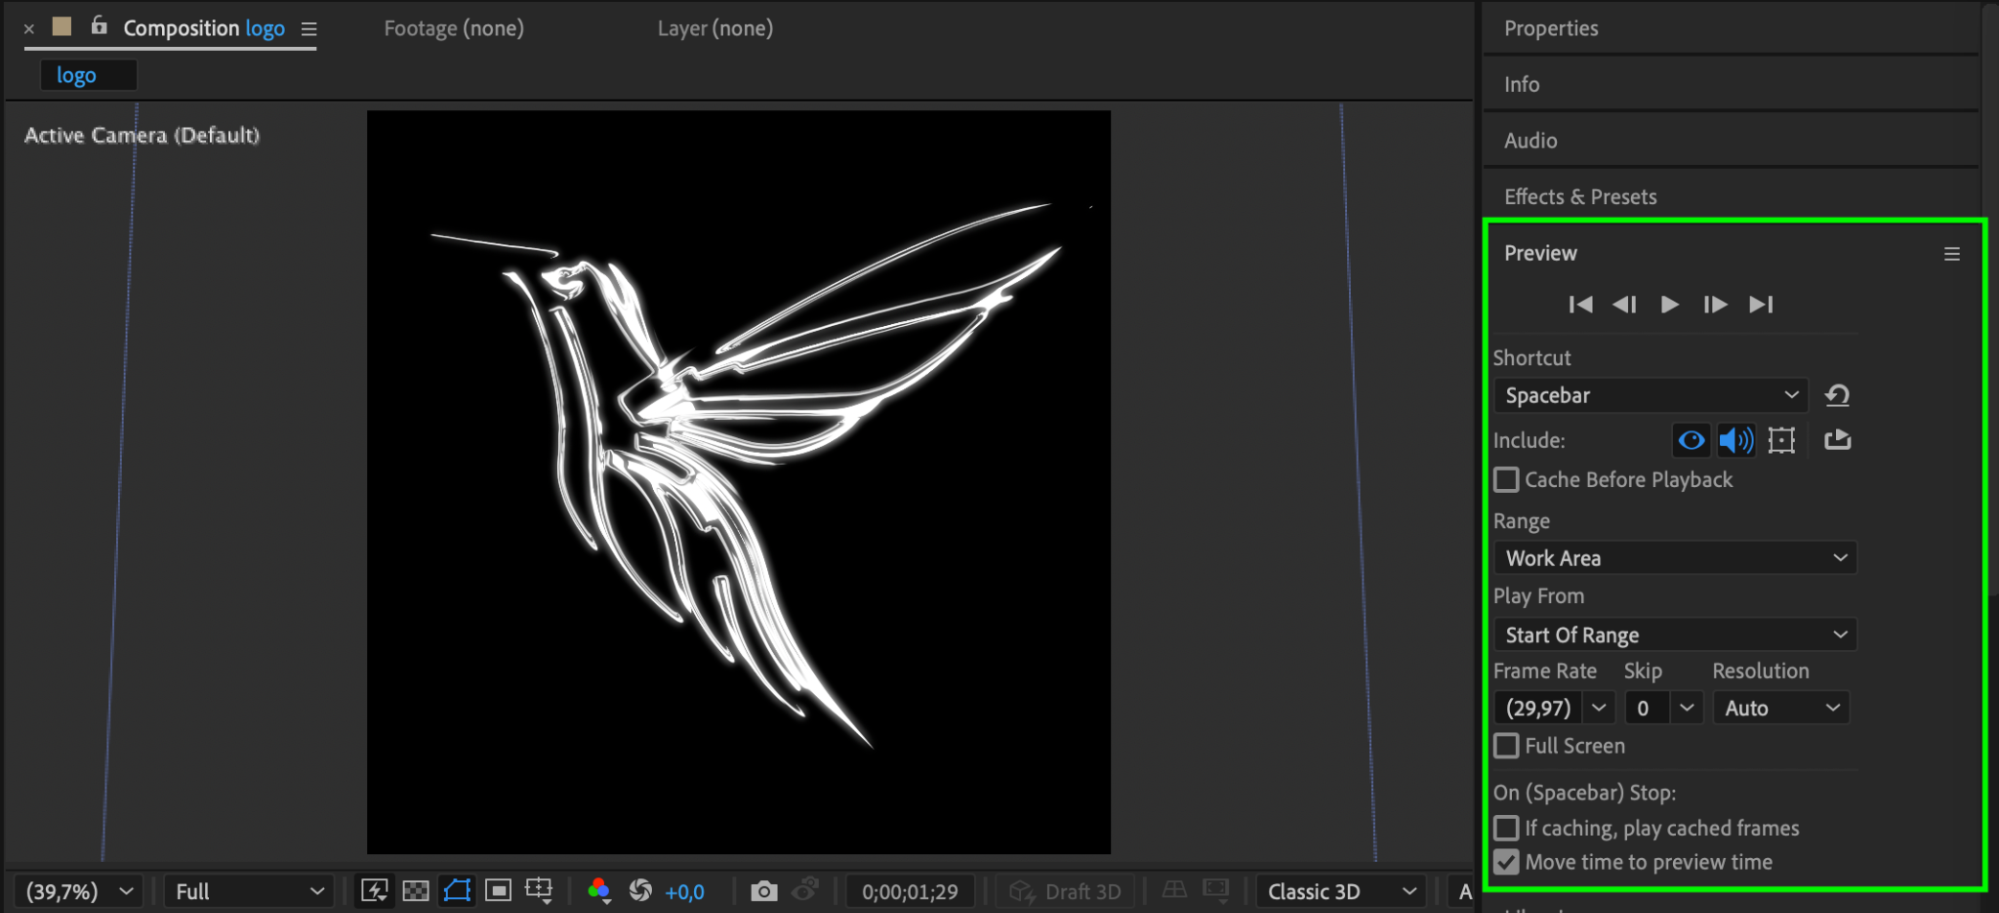
Conclusion
Animating a logo in After Effects gives you creative control and can greatly enhance your brand’s visual identity. With shape layers, motion effects, and 3D controls, you can design professional logo reveals for any project.
Our Bestsellers


