Learn to create sci-fi style text animations using the Cosmic Animated Alphabet pack in After Effects.
Animate Sci-Fi Text with the Cosmic Animated Alphabet in After Effects
Introduction to Cosmic Alphabet Animation for Sci-Fi Design
Creating animated titles and visuals with a space-inspired look is easy and fun using the Cosmic Animated Alphabet pack in After Effects. This tutorial will guide you through each step of importing, aligning, and customizing letters or numbers to create your unique cosmic message. These animations are perfect for sci-fi projects, YouTube intros, and motion design.
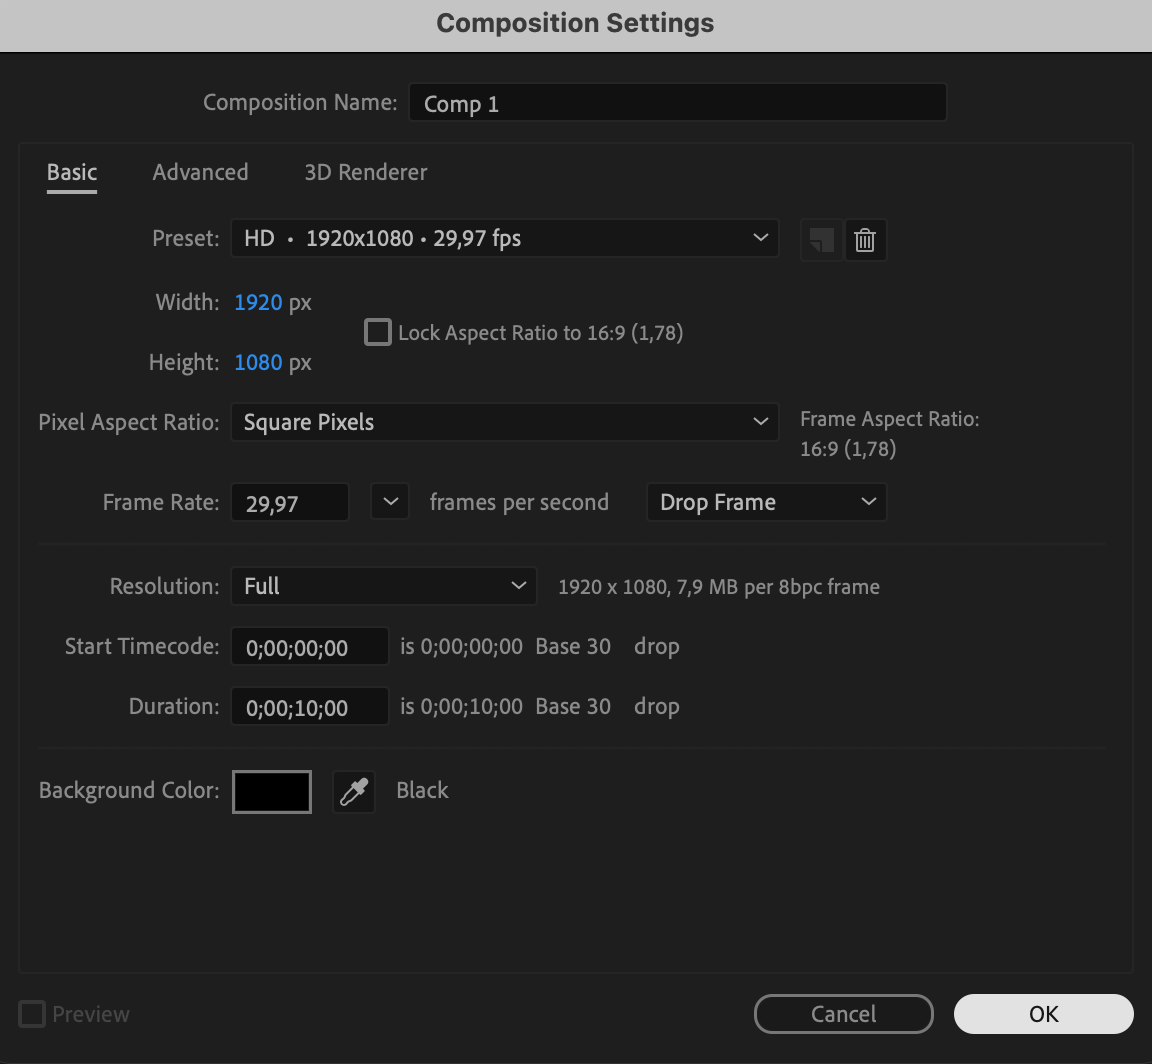
Step 1: Create a New Composition
Open After Effects and go to Composition > New Composition. Set your resolution, duration, and frame rate depending on your project. This comp will serve as your main timeline where you’ll build the animation.
 Step 2: Open AEJuice Pack Manager
Go to Window > AEJuice Pack Manager 4 to open the AEJuice panel. This is where you can find and manage your AEJuice products, including the Cosmic Animated Alphabet pack.
Get 10% off when you subscribe to our newsletter

Step 3: Download the Cosmic Animated Alphabet Pack
Inside the Pack Manager, search for “Cosmic Animated Alphabet.” If it’s not already installed, click to download. After the download completes, you’ll be able to access all animated letters and digits.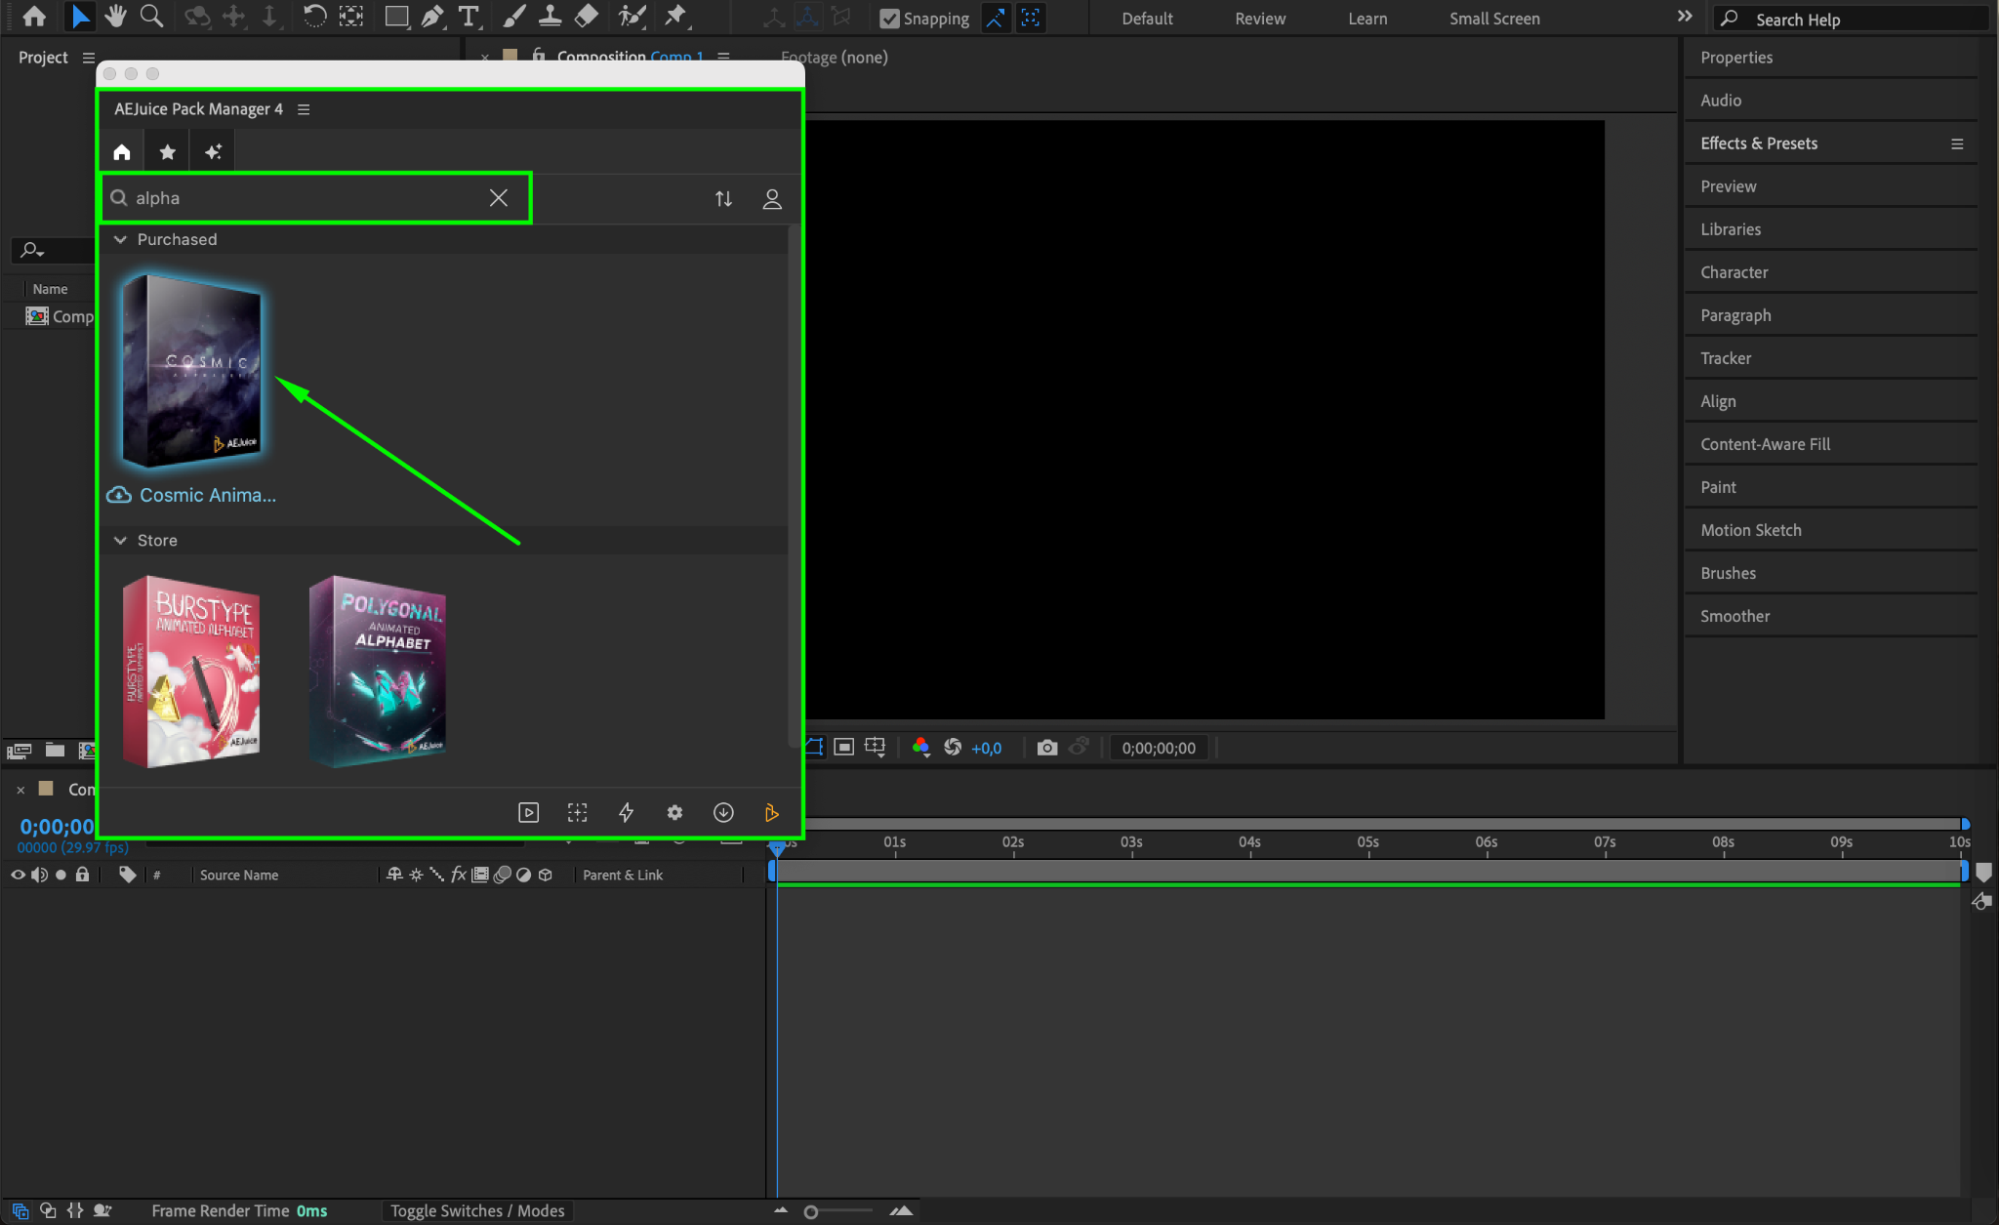 Step 4: Choose and Import Letters or Numbers
Browse through the pack and choose the letter or number you need. Place your CTI (current time indicator) at the right spot on the timeline and click Import to bring the element into your comp. Each imported element appears as a pre-comp.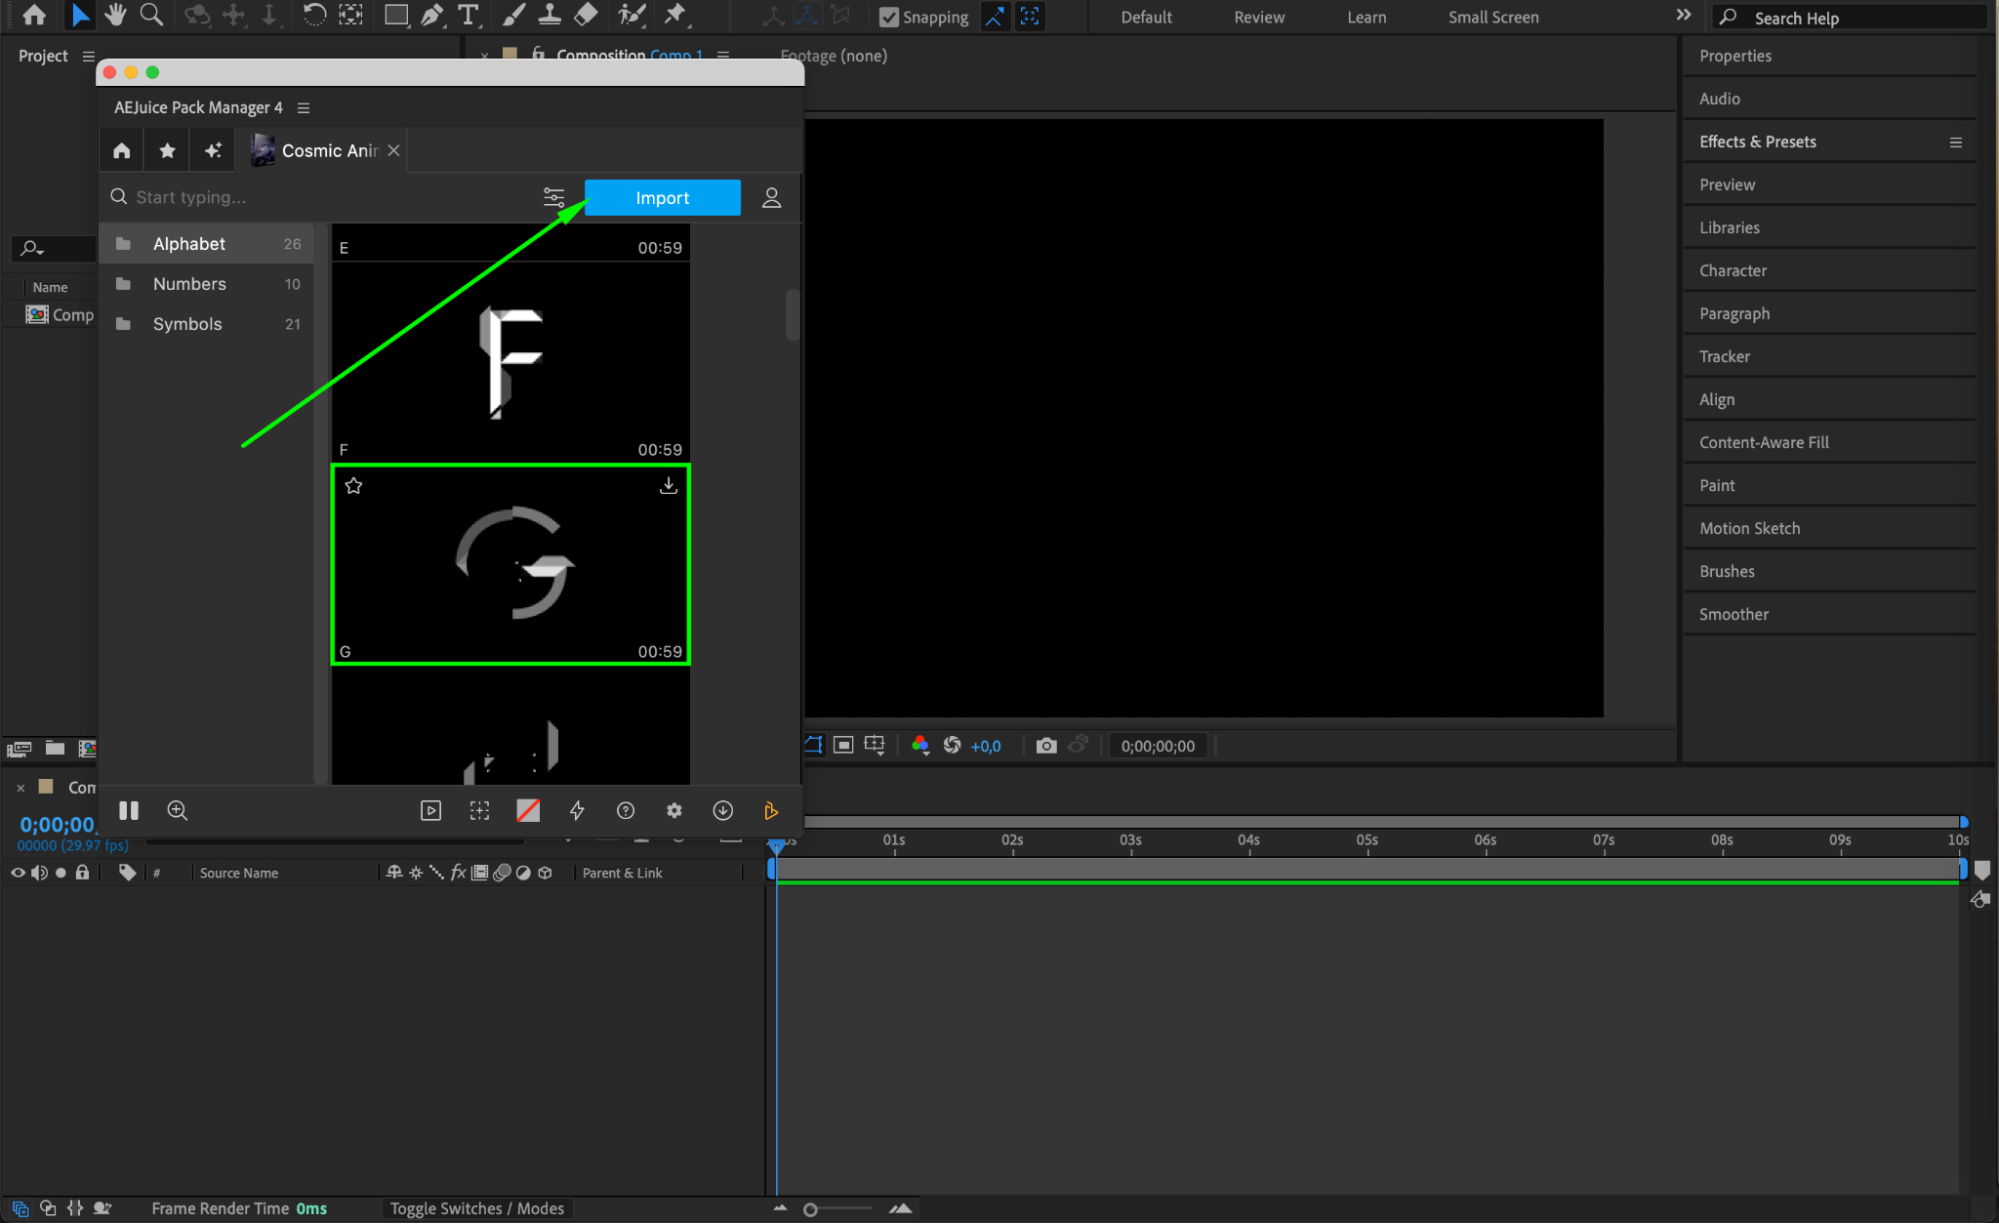 Step 5: Adjust Scale and Position
Use the Selection Tool (V) to move your letter or number. Use the Proportional Grid button at the bottom of the Composition panel to align elements more easily. Scale them if needed using the “S” key.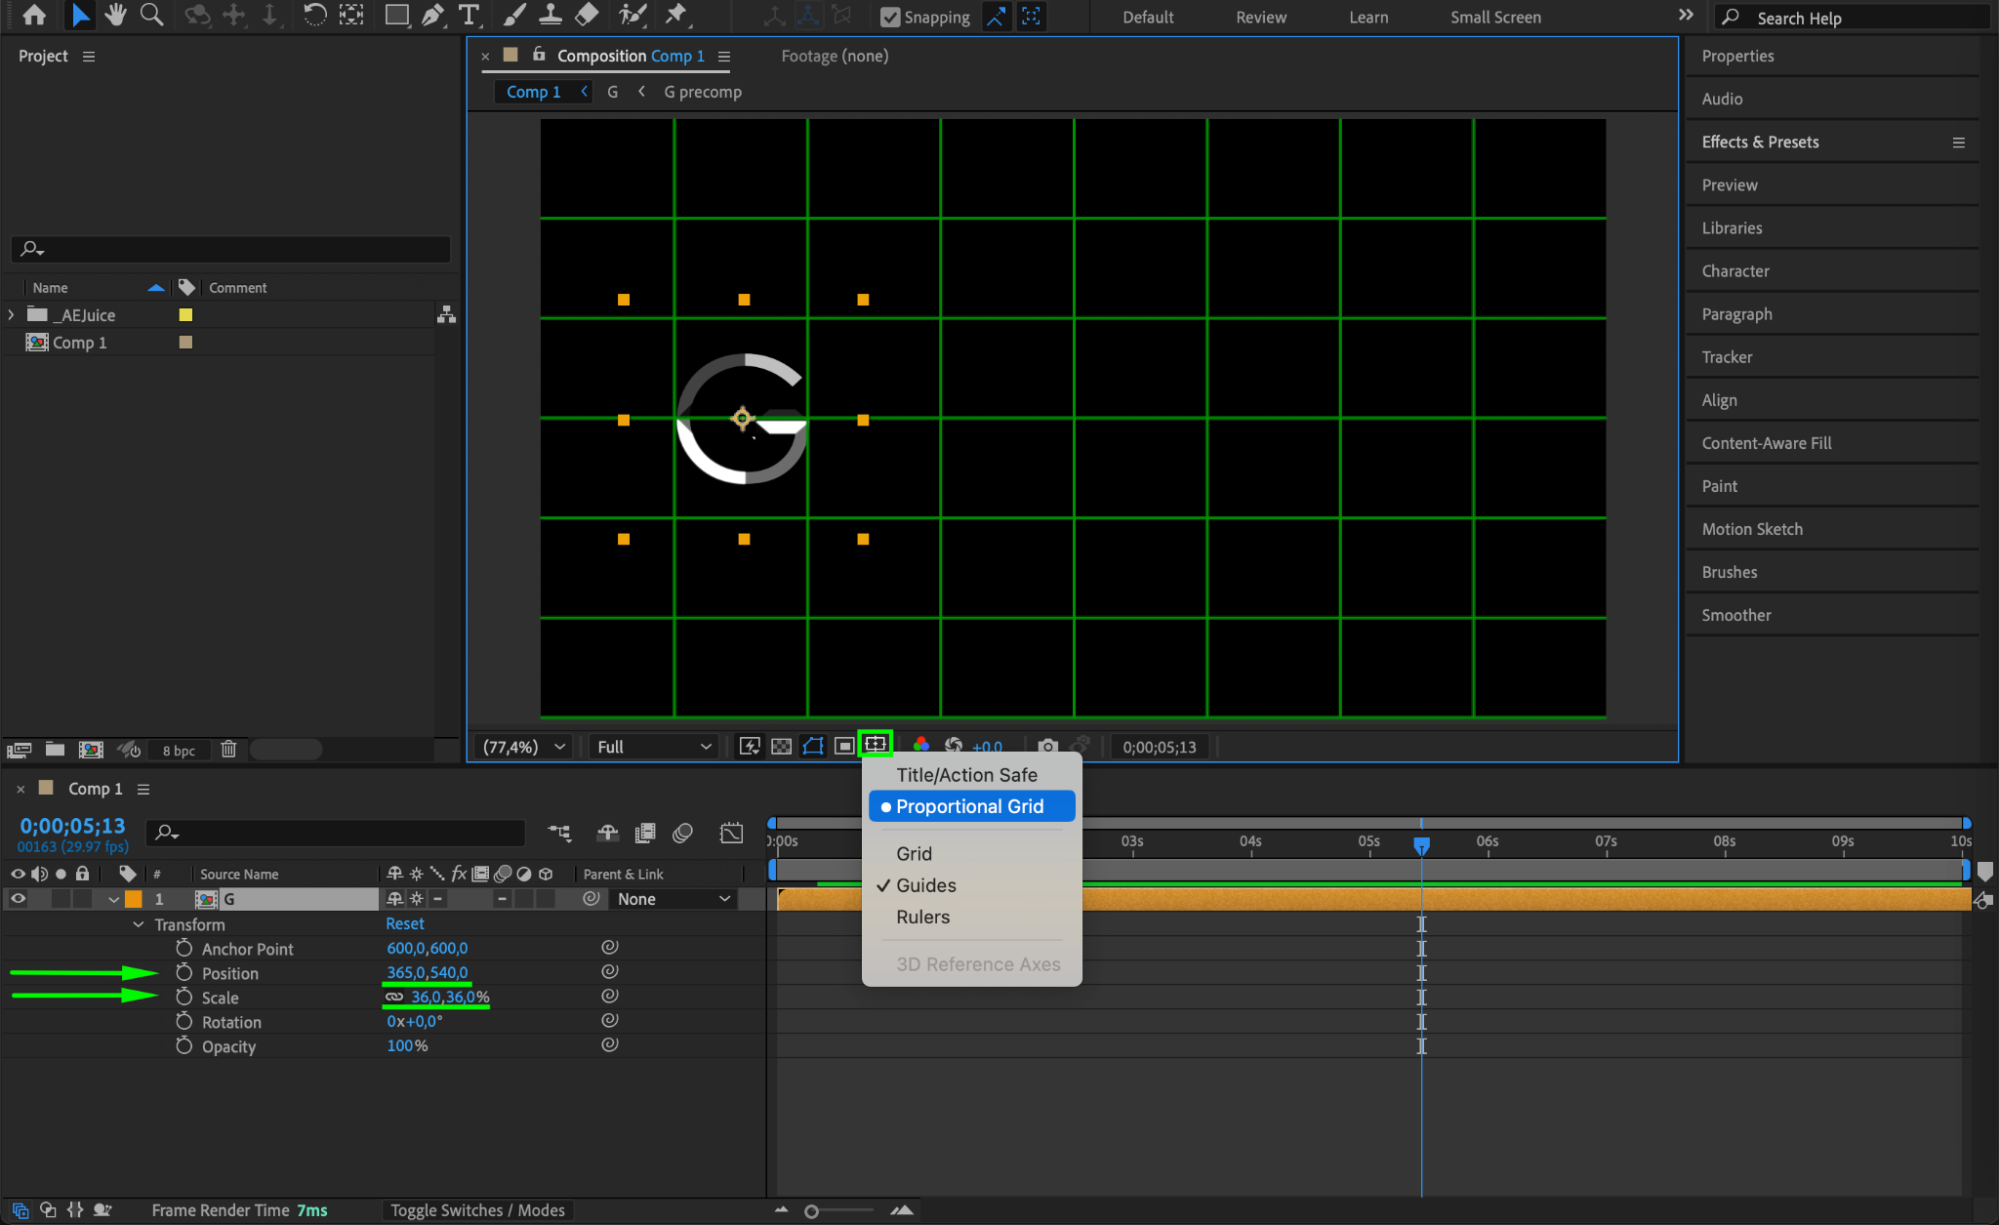 Step 6: Align Multiple Characters
Repeat the process to import all required letters and numbers. Then open the Align panel (Window > Align) to evenly space and align them.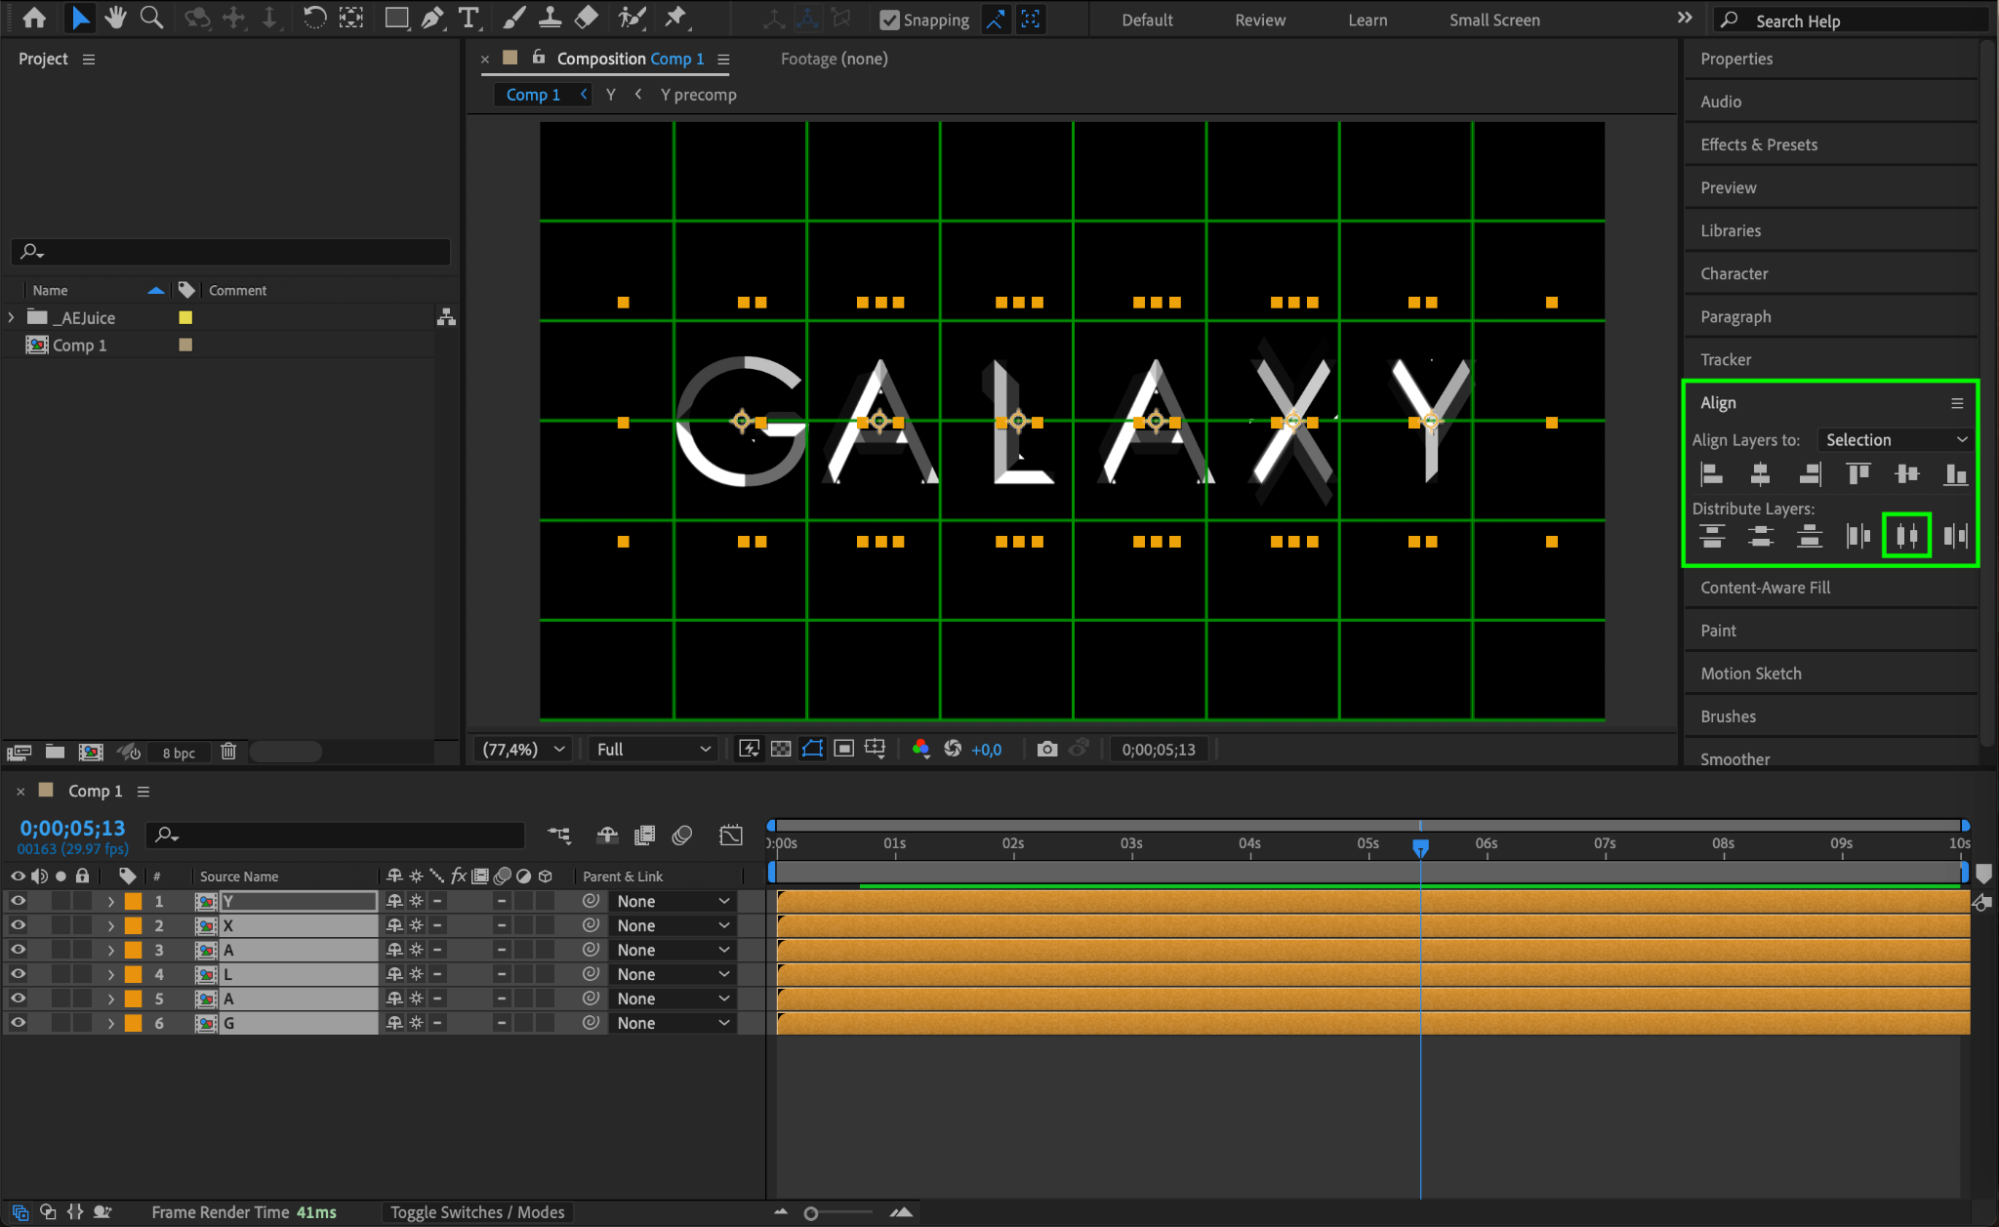
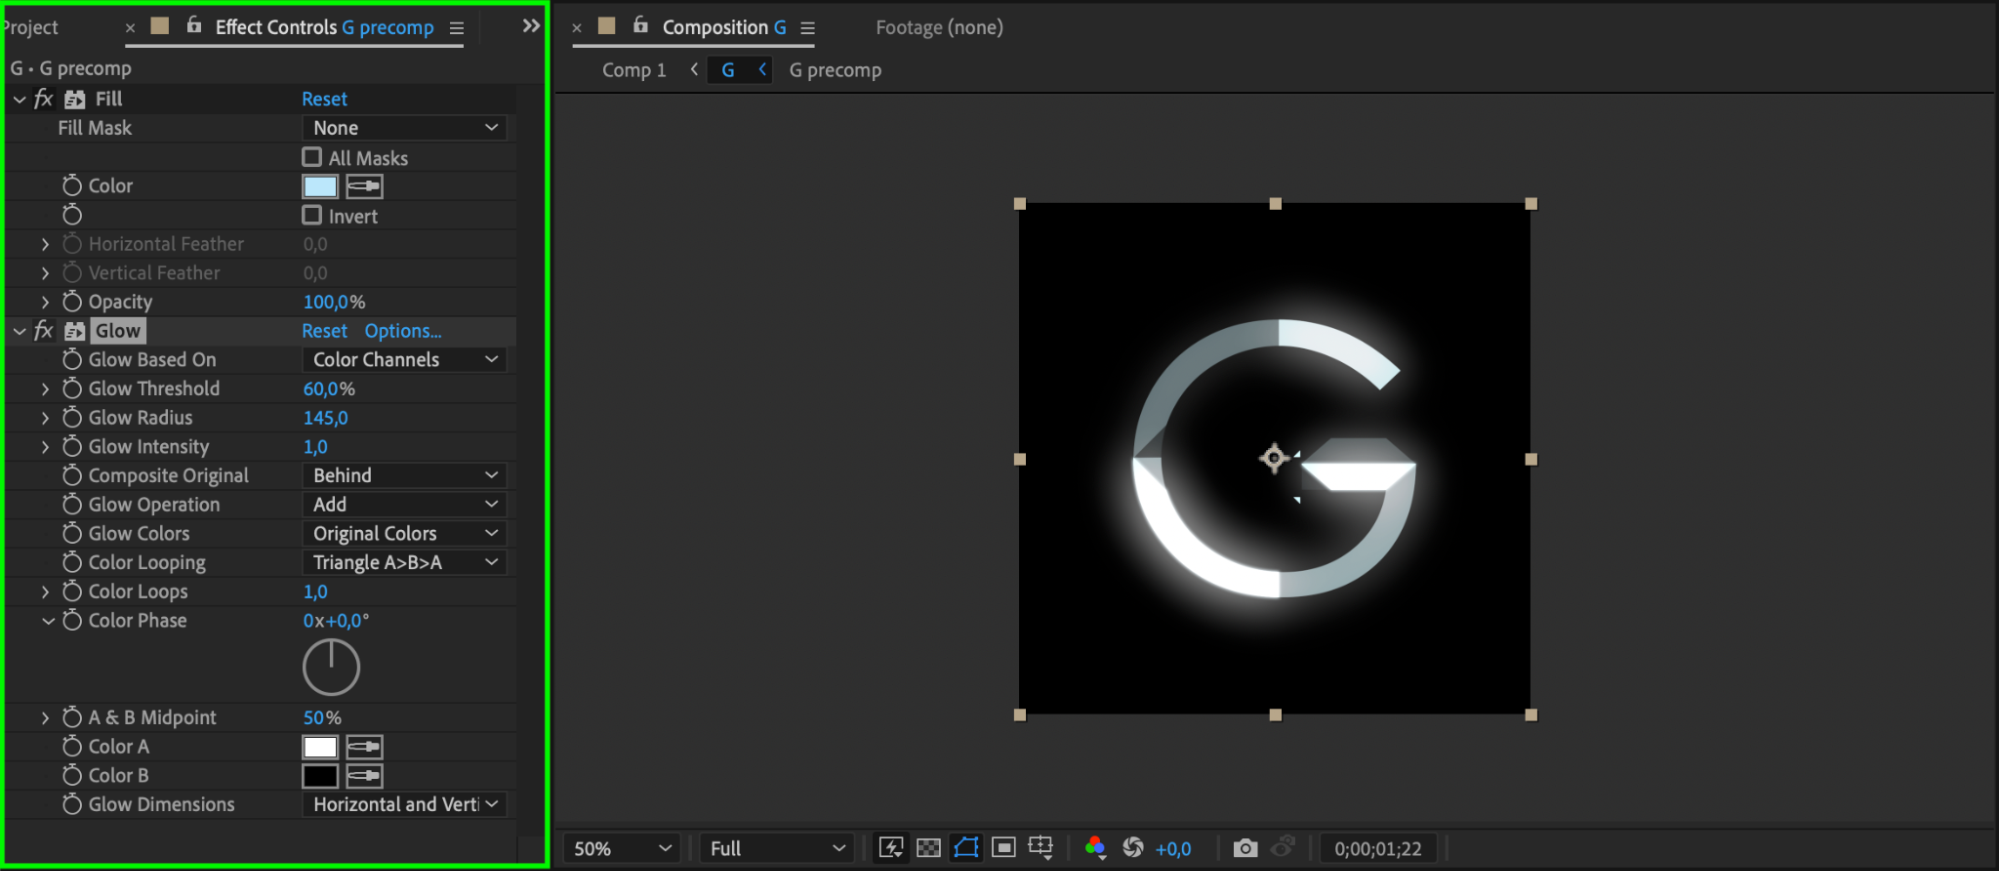
Step 7: Customize Each Character
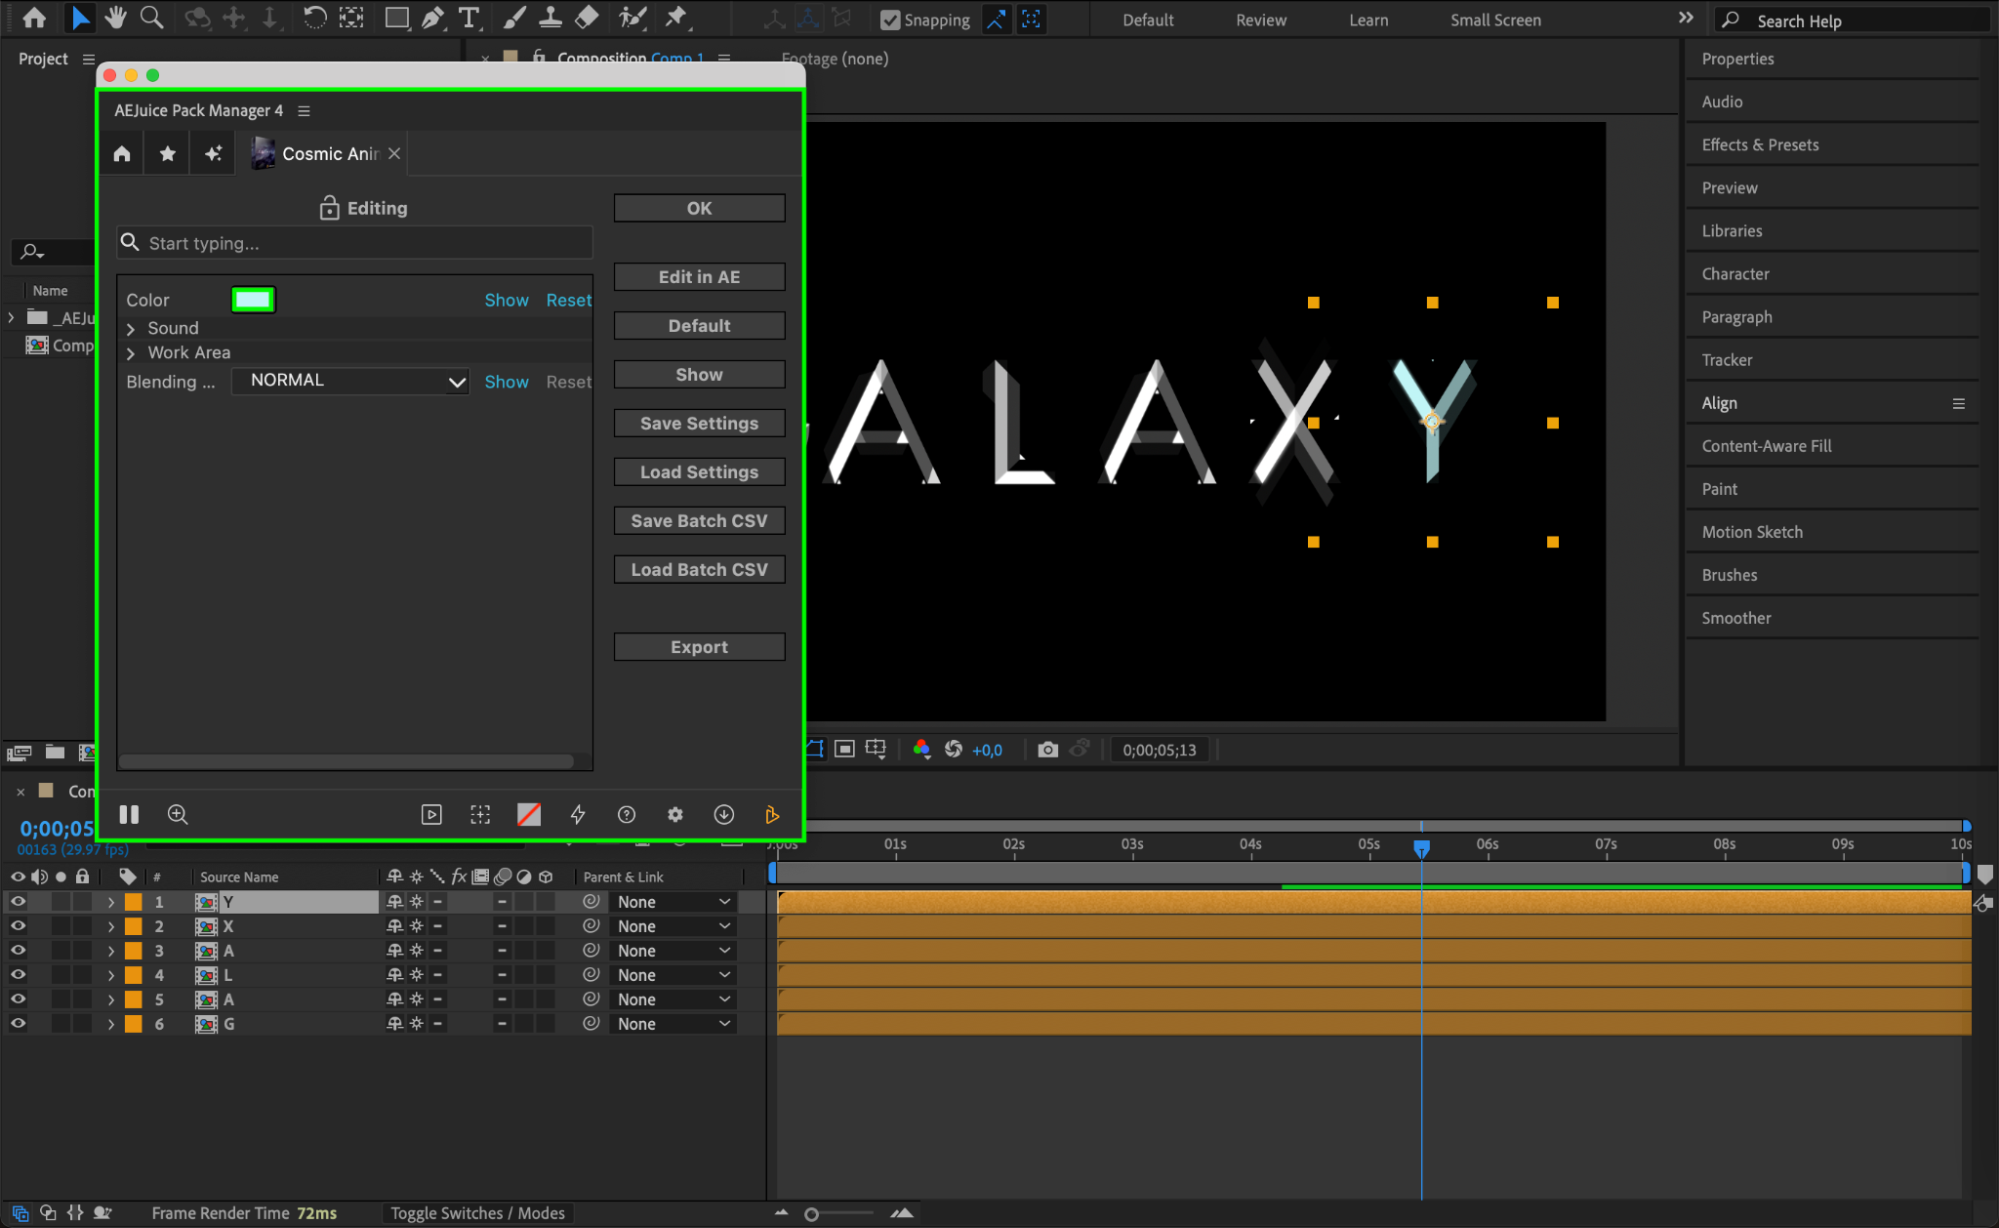
Select any letter or number in the timeline. In the AEJuice Pack Manager, click the Edit button (three sliders icon). A customization panel will open where you can change the color and some visual settings.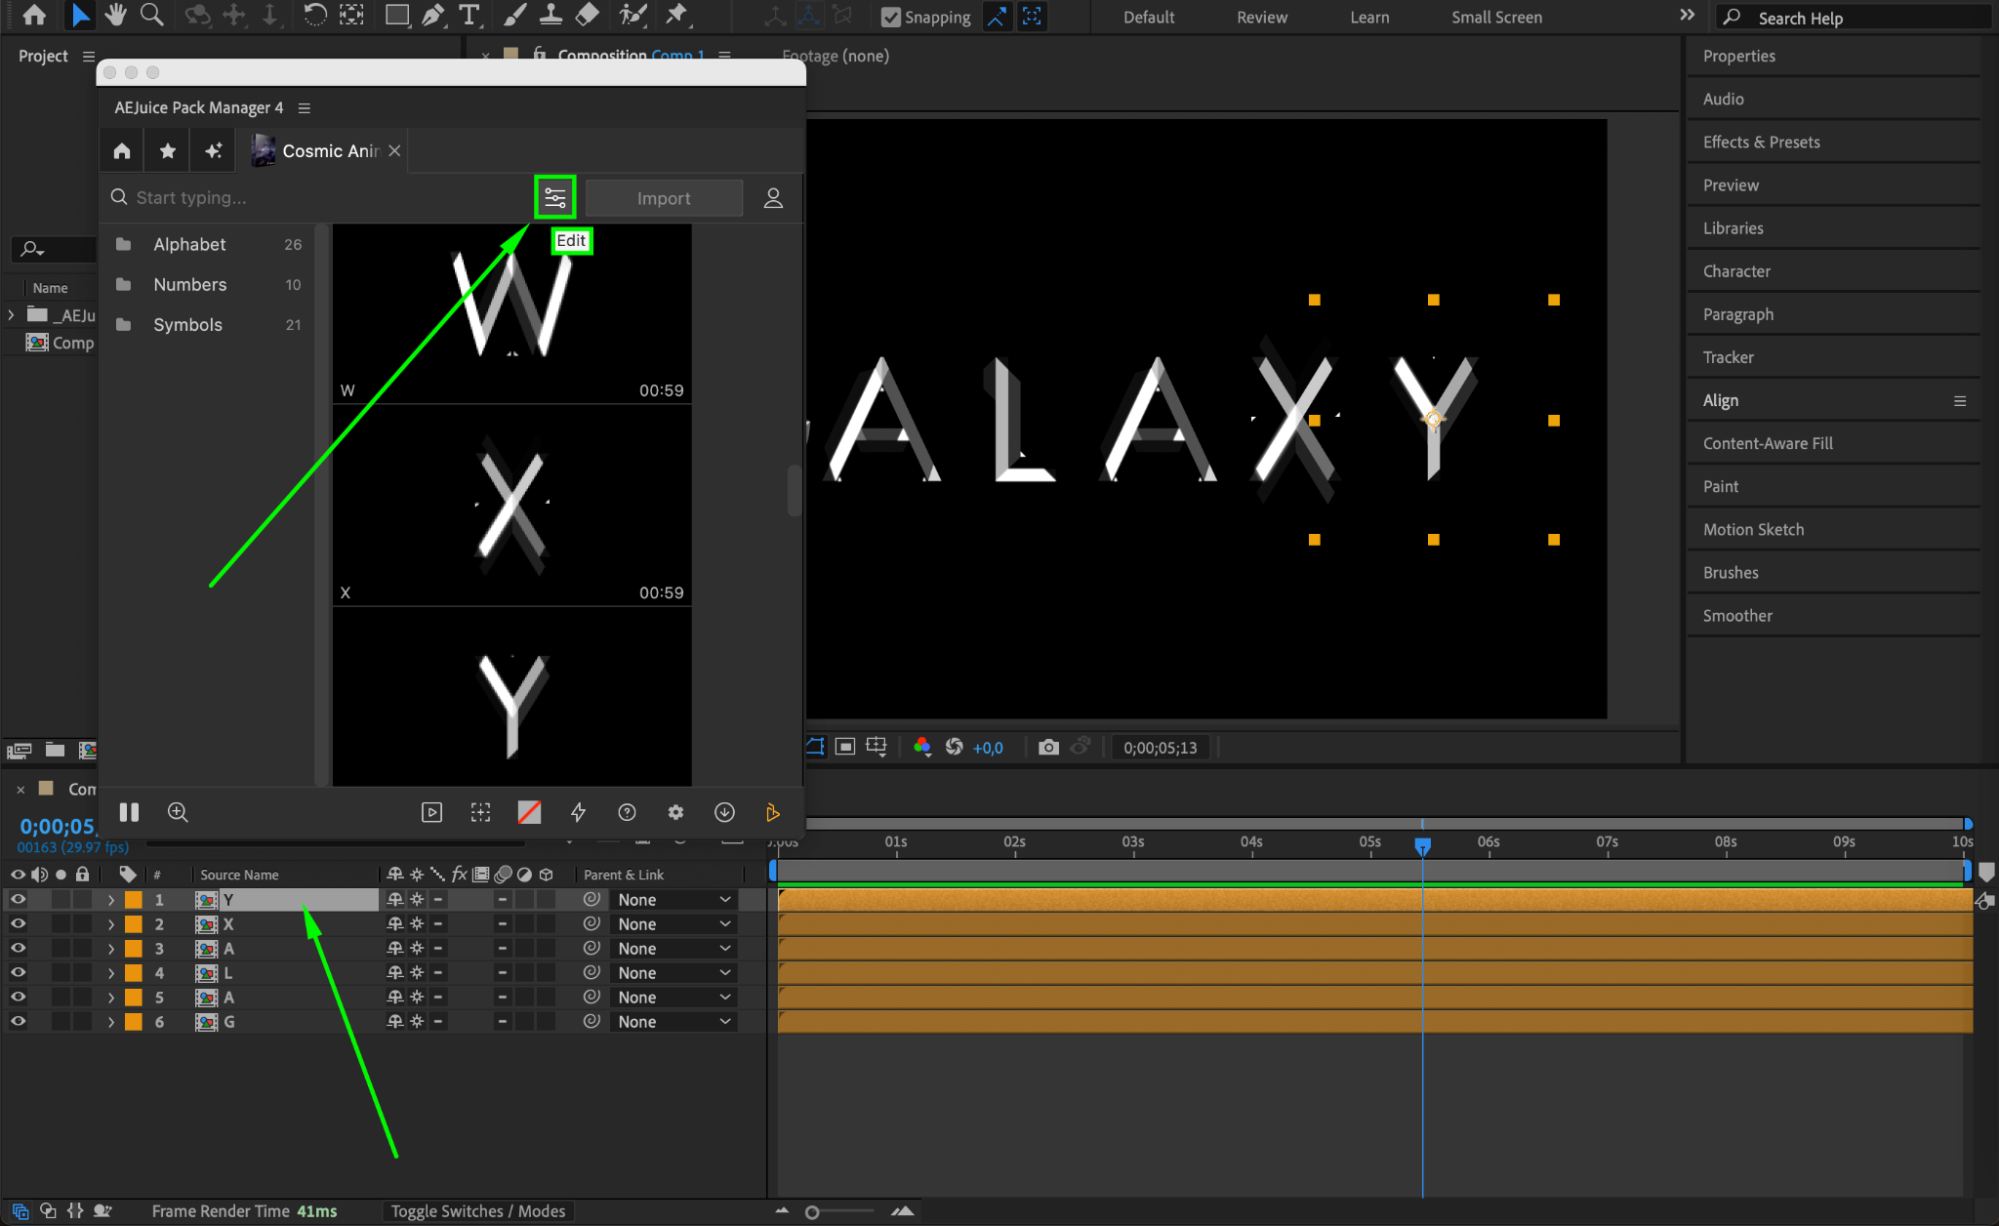
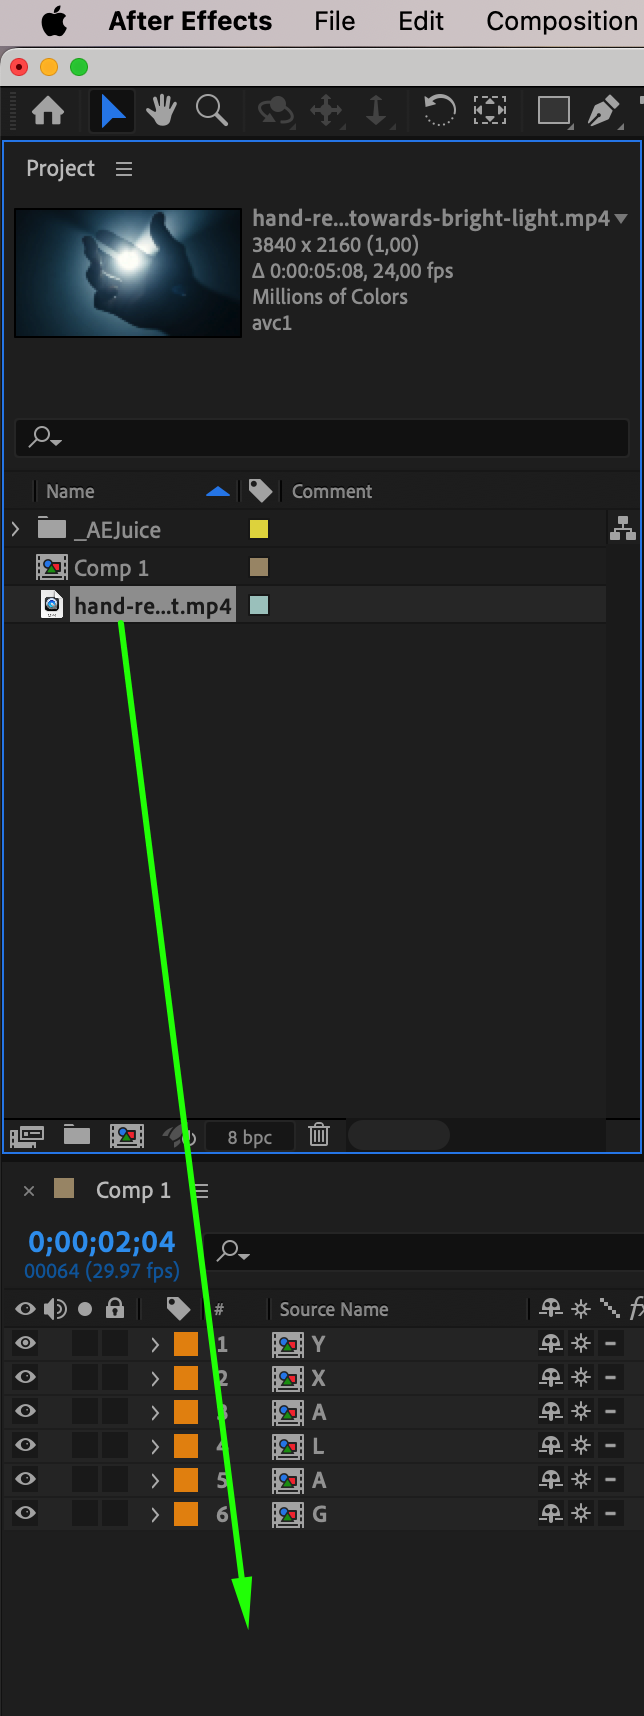
 Step 8: Import a Background
Go to File > Import > File to add your background footage or image. Drag it into the timeline under your animated letters.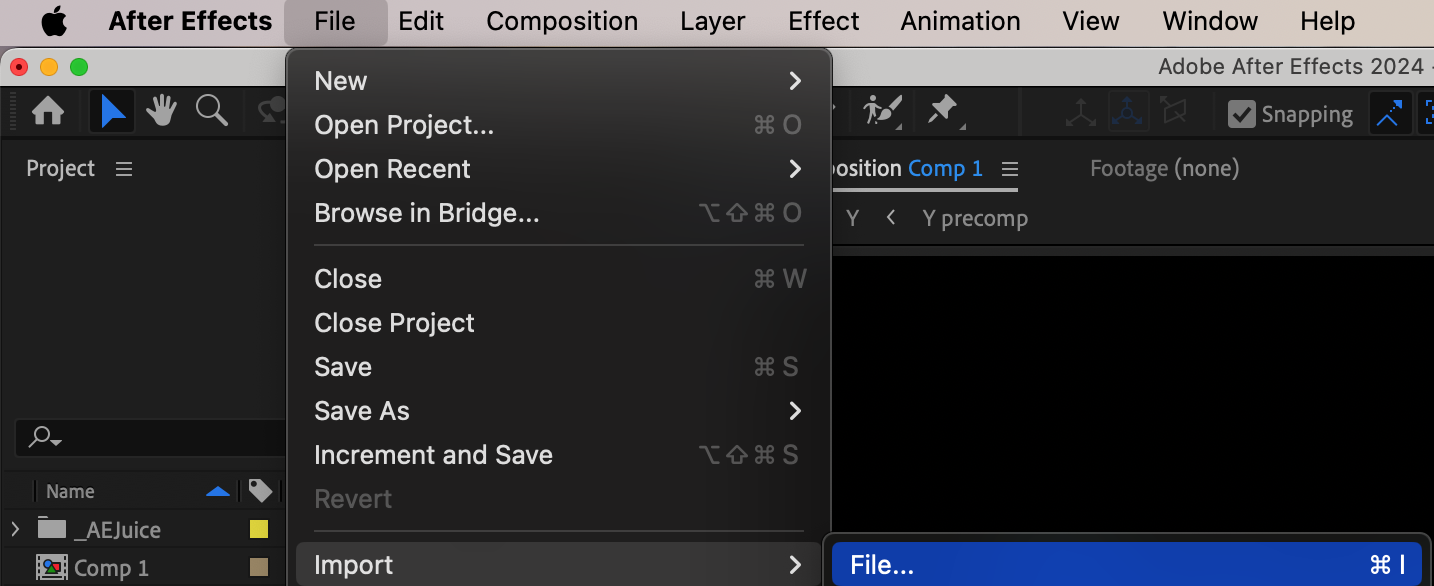
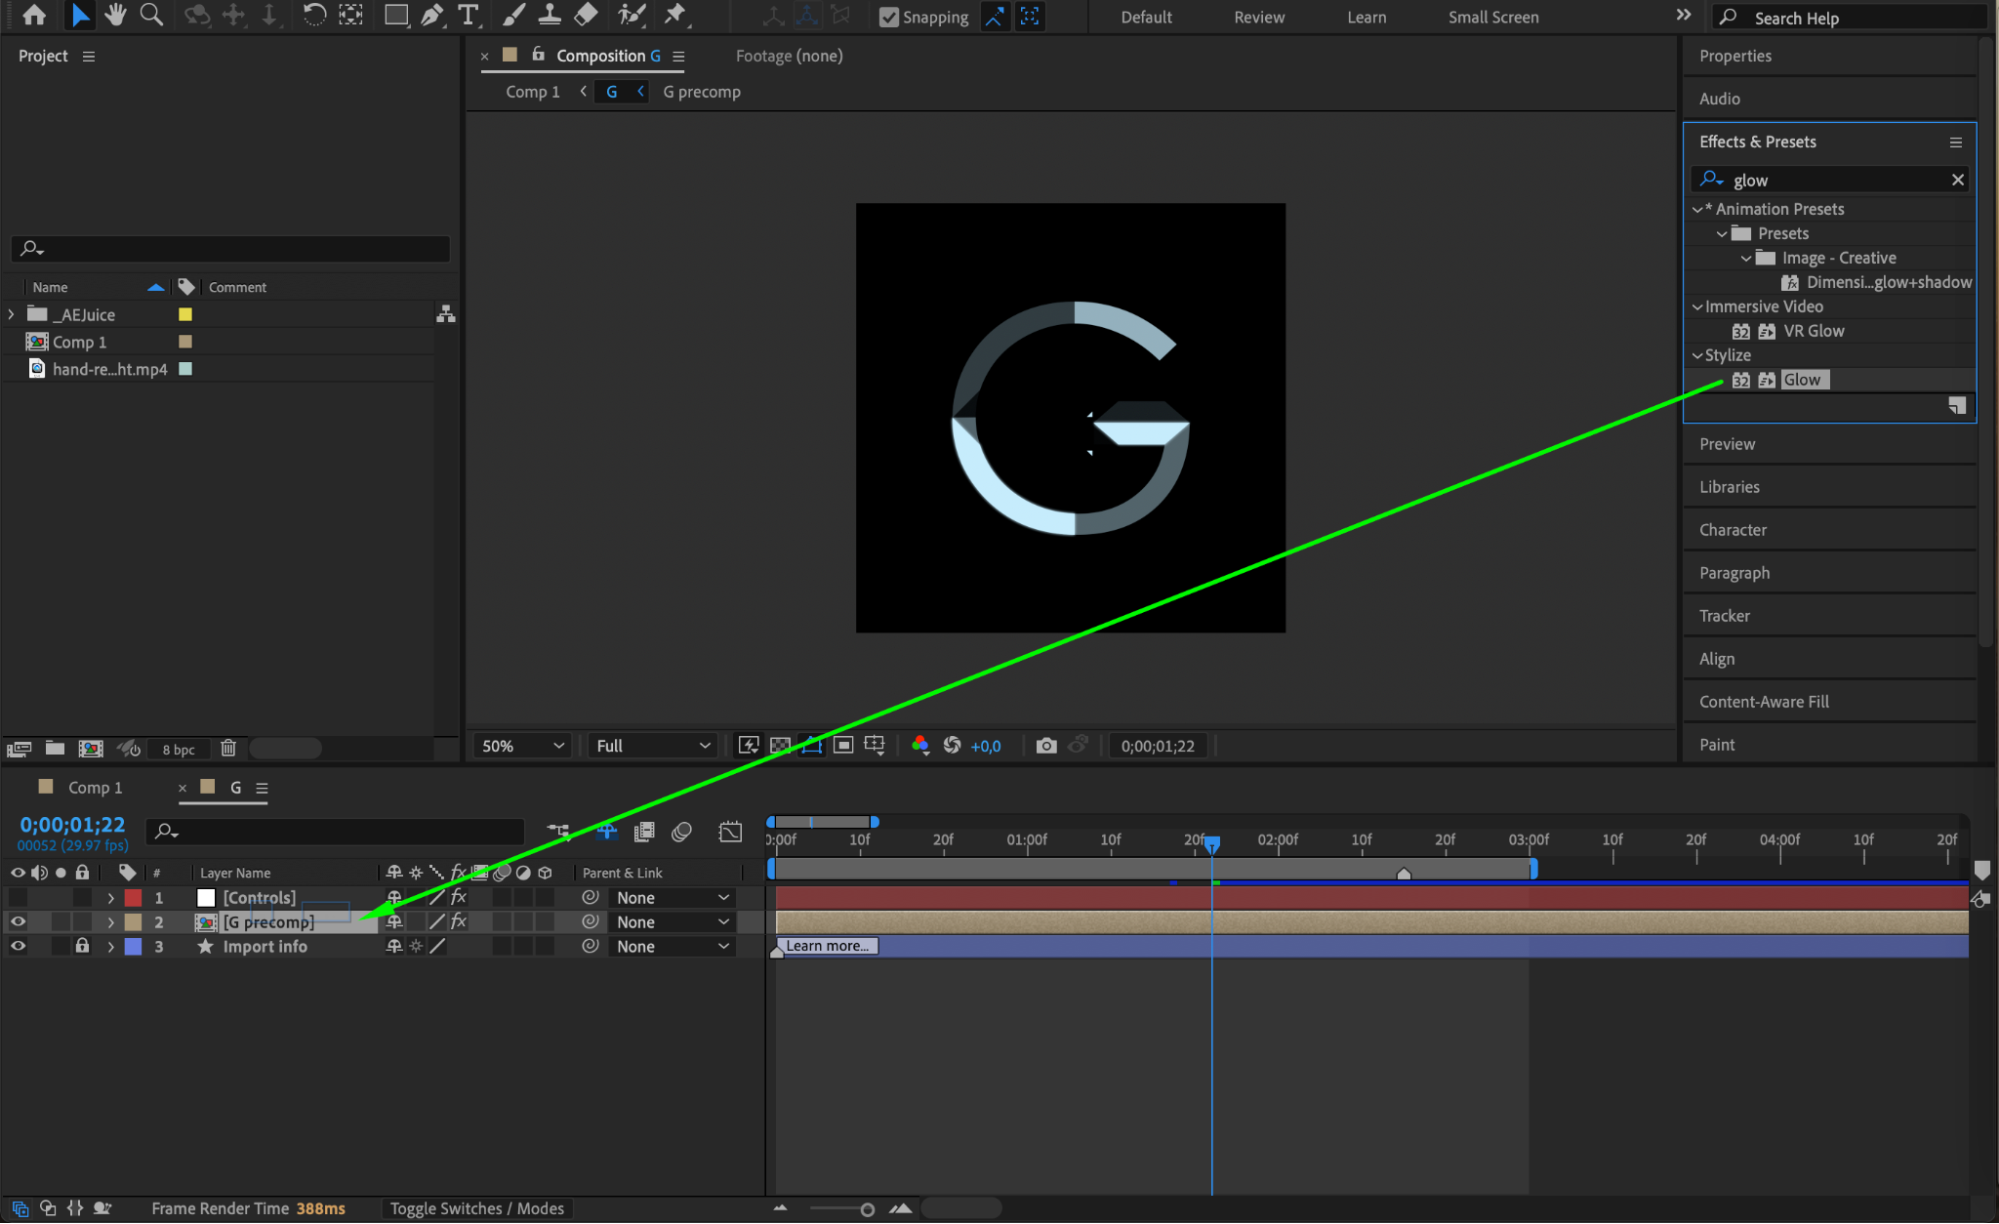
 Step 9: Add Visual Effects (Optional)
To apply effects like glow or blur, double-click the letter’s pre-comp (e.g., G). Then, open the inner pre-comp (e.g., G pre-comp) and apply effects to the right layer. Use Effects & Presets panel to find and apply effects like Glow or CC Light Sweep.
 Step 10: Preview and Final Adjustments
Press the Spacebar to preview your animation. Make any final changes to color, alignment, or animation timing. Check that everything is visually cohesive.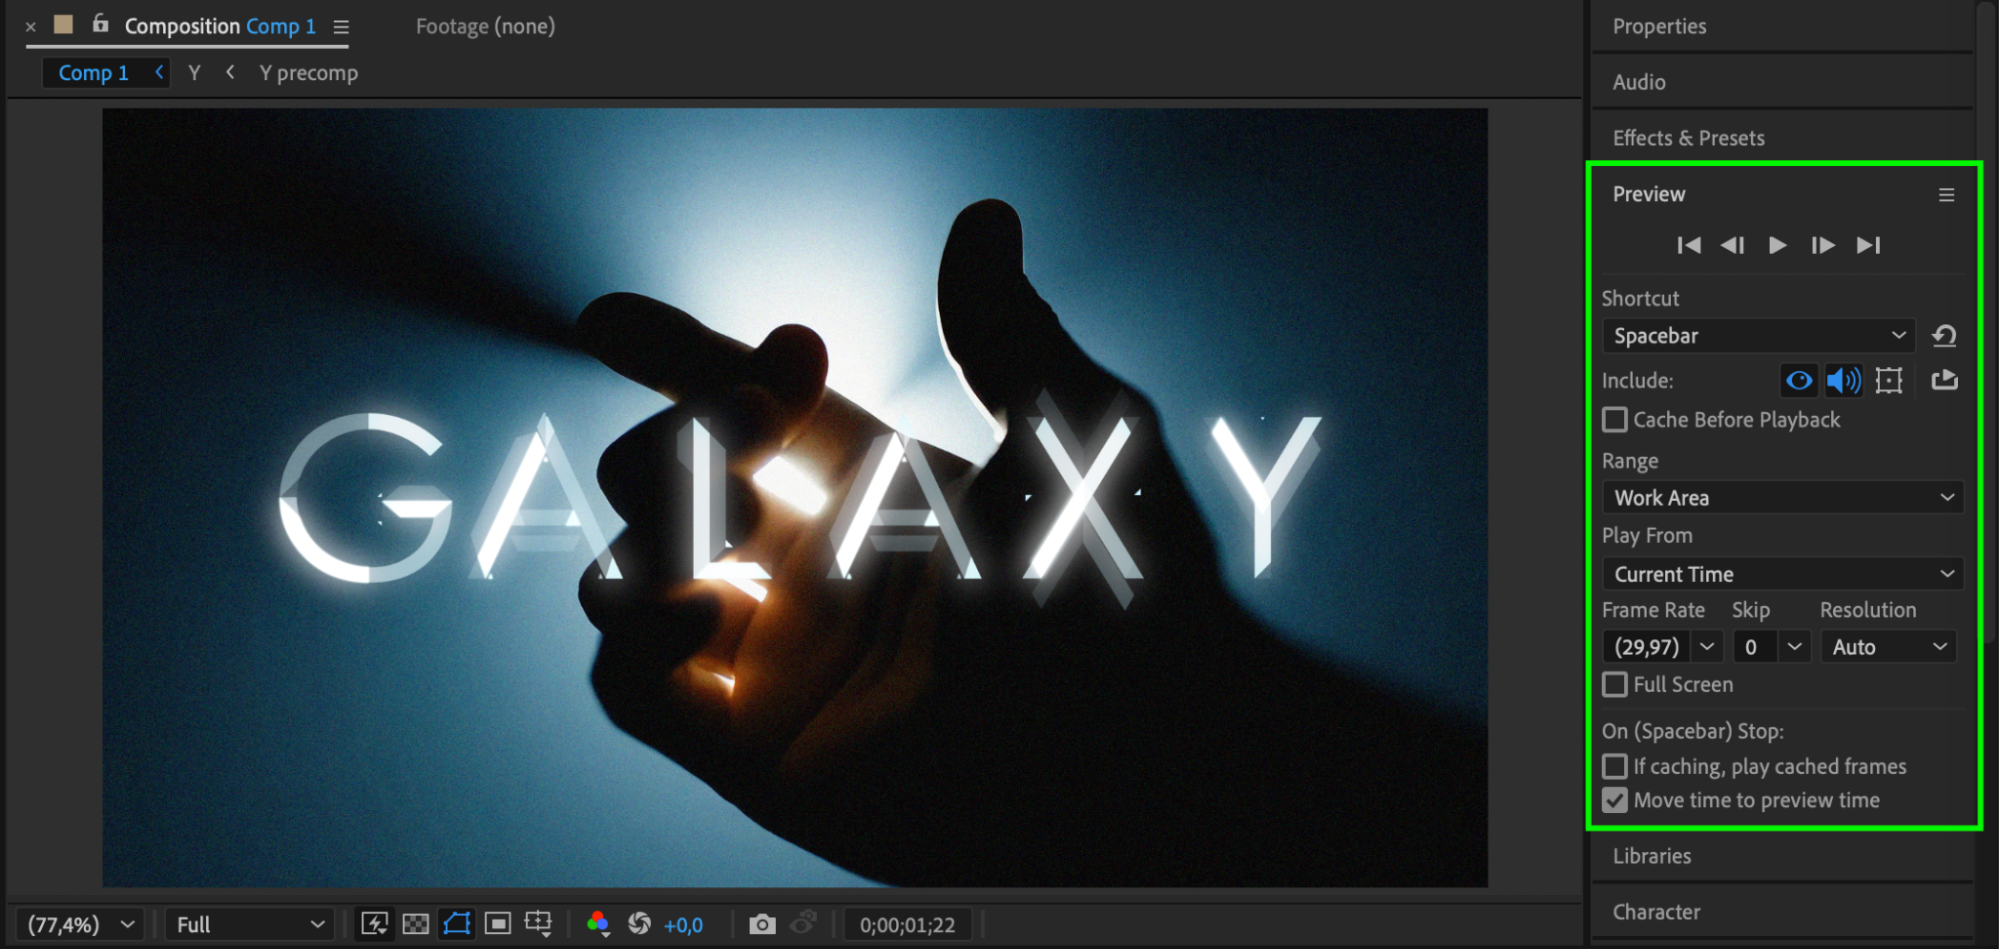 Conclusion
With just a few simple steps, you can create dynamic, cosmic-themed animated text using the AEJuice Cosmic Animated Alphabet pack. Perfect for intros, sci-fi visuals, and stylized titles.
Our Bestsellers


