Learn how to add cinematic colorized urban textures in Premiere Pro using AEJuice for bold, stylized visuals.
Applying Colorized Urban Textures for Cinematic Scenes in Premiere Pro
Introduction to Colorized Urban Textures
Urban textures add a gritty, cinematic look to your footage. Whether you’re creating a music video, a short film, or a stylized promo, colorized textures help shape the atmosphere. In this tutorial, we’ll walk you through how to apply colorized urban textures using AEJuice Pack Manager in Premiere Pro.
Step 1: Open Premiere Pro and Start a New Project
Launch Premiere Pro. In the import window, name your project and select your footage, then click the Create button.
Get 10% off when you subscribe to our newsletter

Step 2: Open AEJuice Pack Manager 4
Go to Window > Extensions > AEJuice Pack Manager 4. This will open the plugin panel where you can access all your installed AEJuice products. Make sure you’re logged in to your AEJuice account if prompted. Step 3: Download the Colorized Urban Textures Pack
Inside the Pack Manager, locate the Colorized Urban Textures pack. If it’s not already installed, click to download it. Once installed, you’ll be able to preview the included texture templates inside the panel.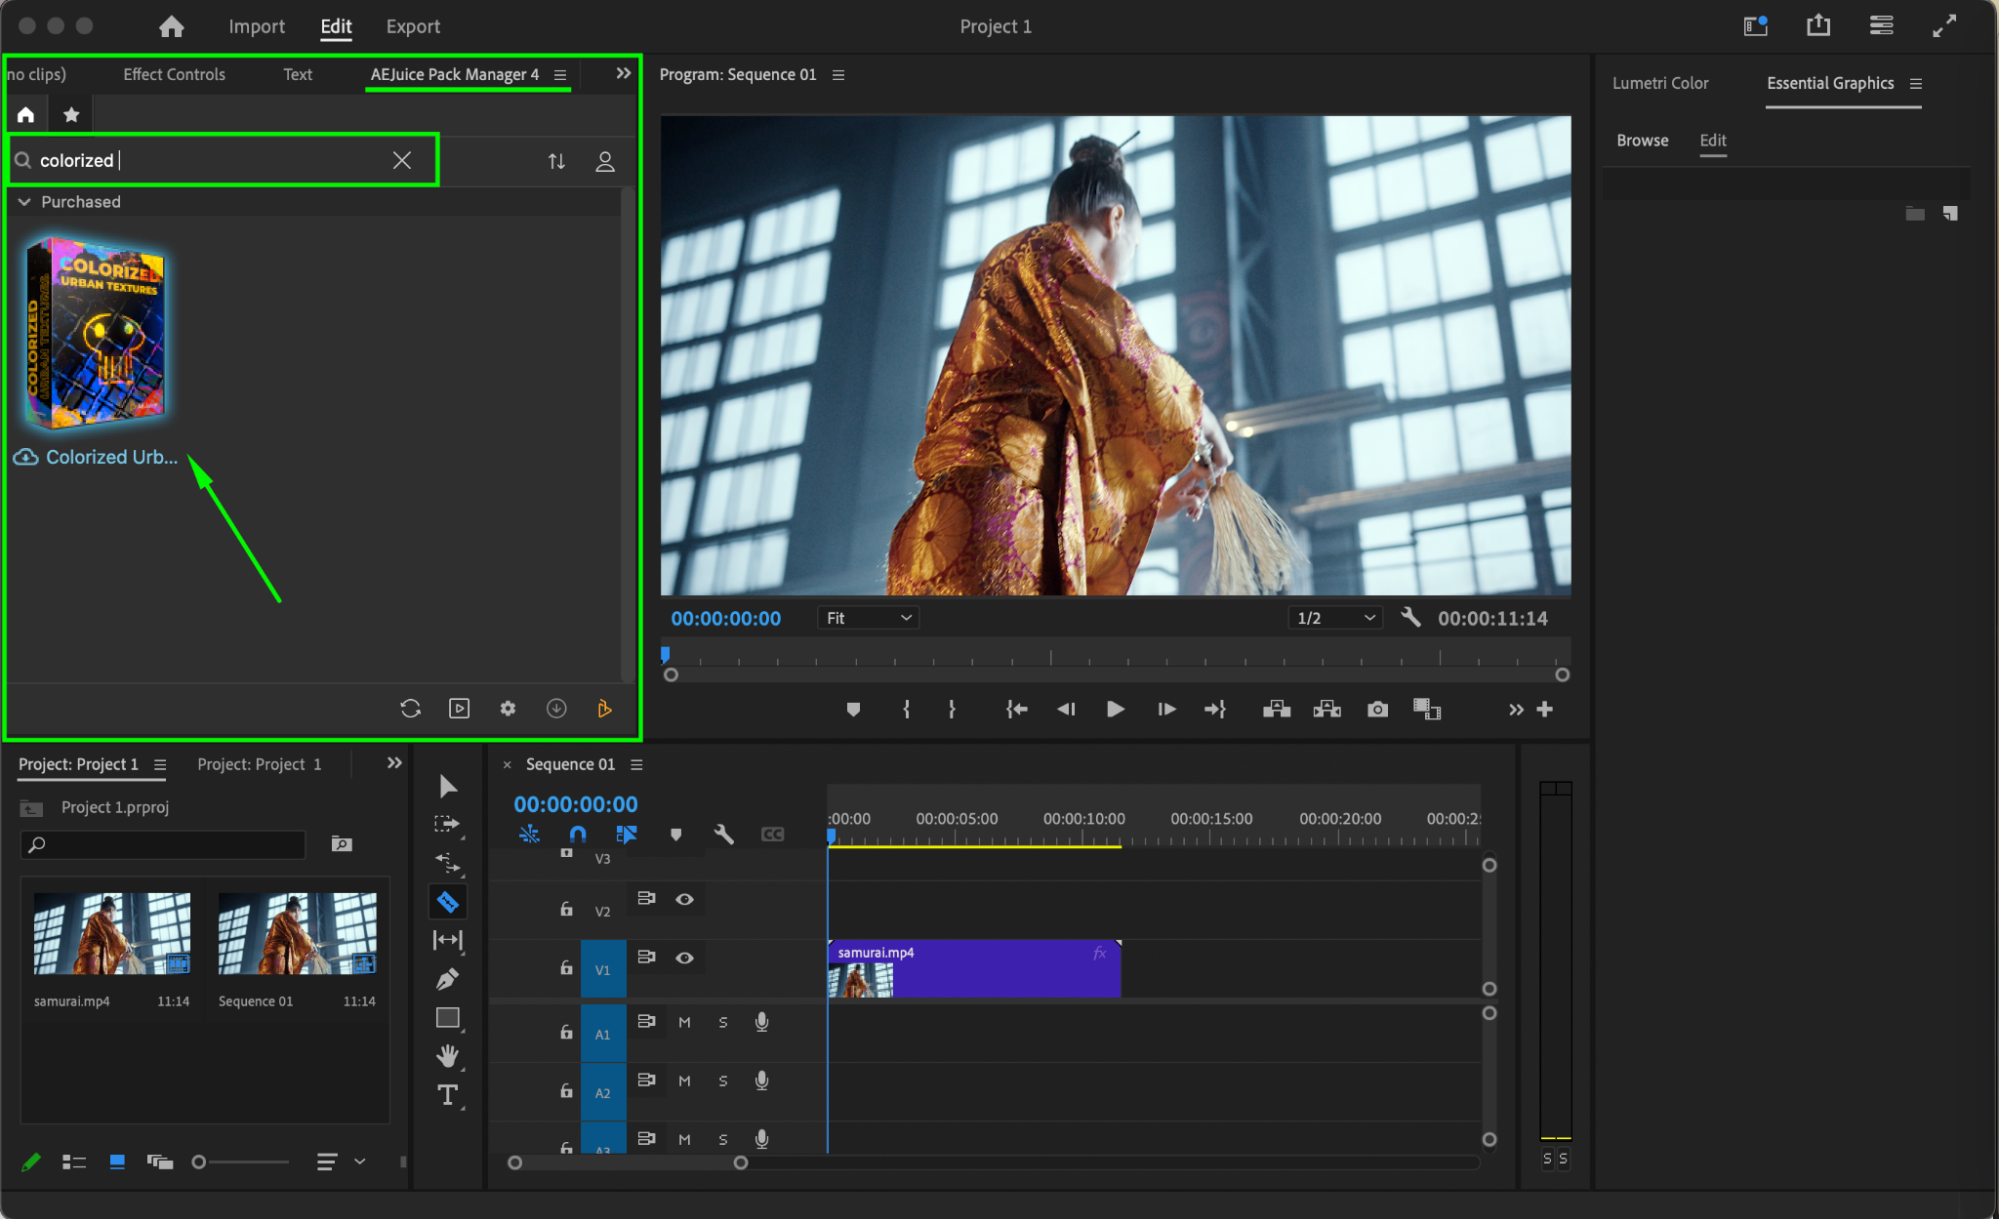 Step 4: Choose a Texture and Import It
Browse through the pack and find a texture that suits the mood of your scene. Place your playhead at the point in the timeline where you want the effect to appear. Click on the texture and hit Import. The texture will be added to your timeline as a new layer.

Step 5: Set the Loop Duration
The “Seconds to Loop” window will appear. Use it to set the length of the effect. For example, set it to 3 seconds to create a seamless loop for short clips.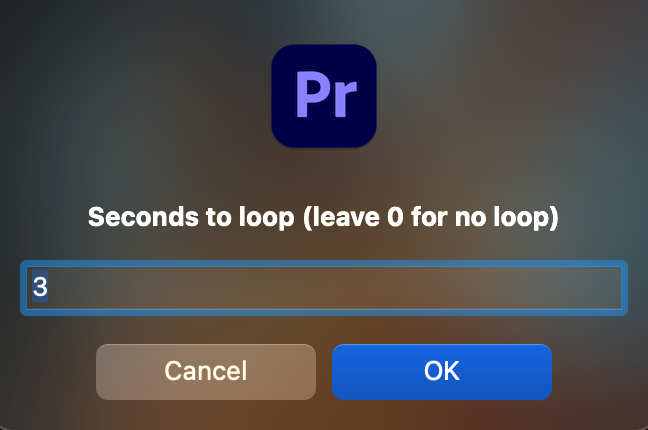 Step 6: Adjust Scale, Position, and Color (Optional)
Click the imported texture layer in your timeline. In the Effect Controls panel, you can adjust scale, position, and rotation to better fit your footage. To further customize the look, apply a Tint effect from the Effects panel. Use the Map White To color picker to select a tone that matches your color palette.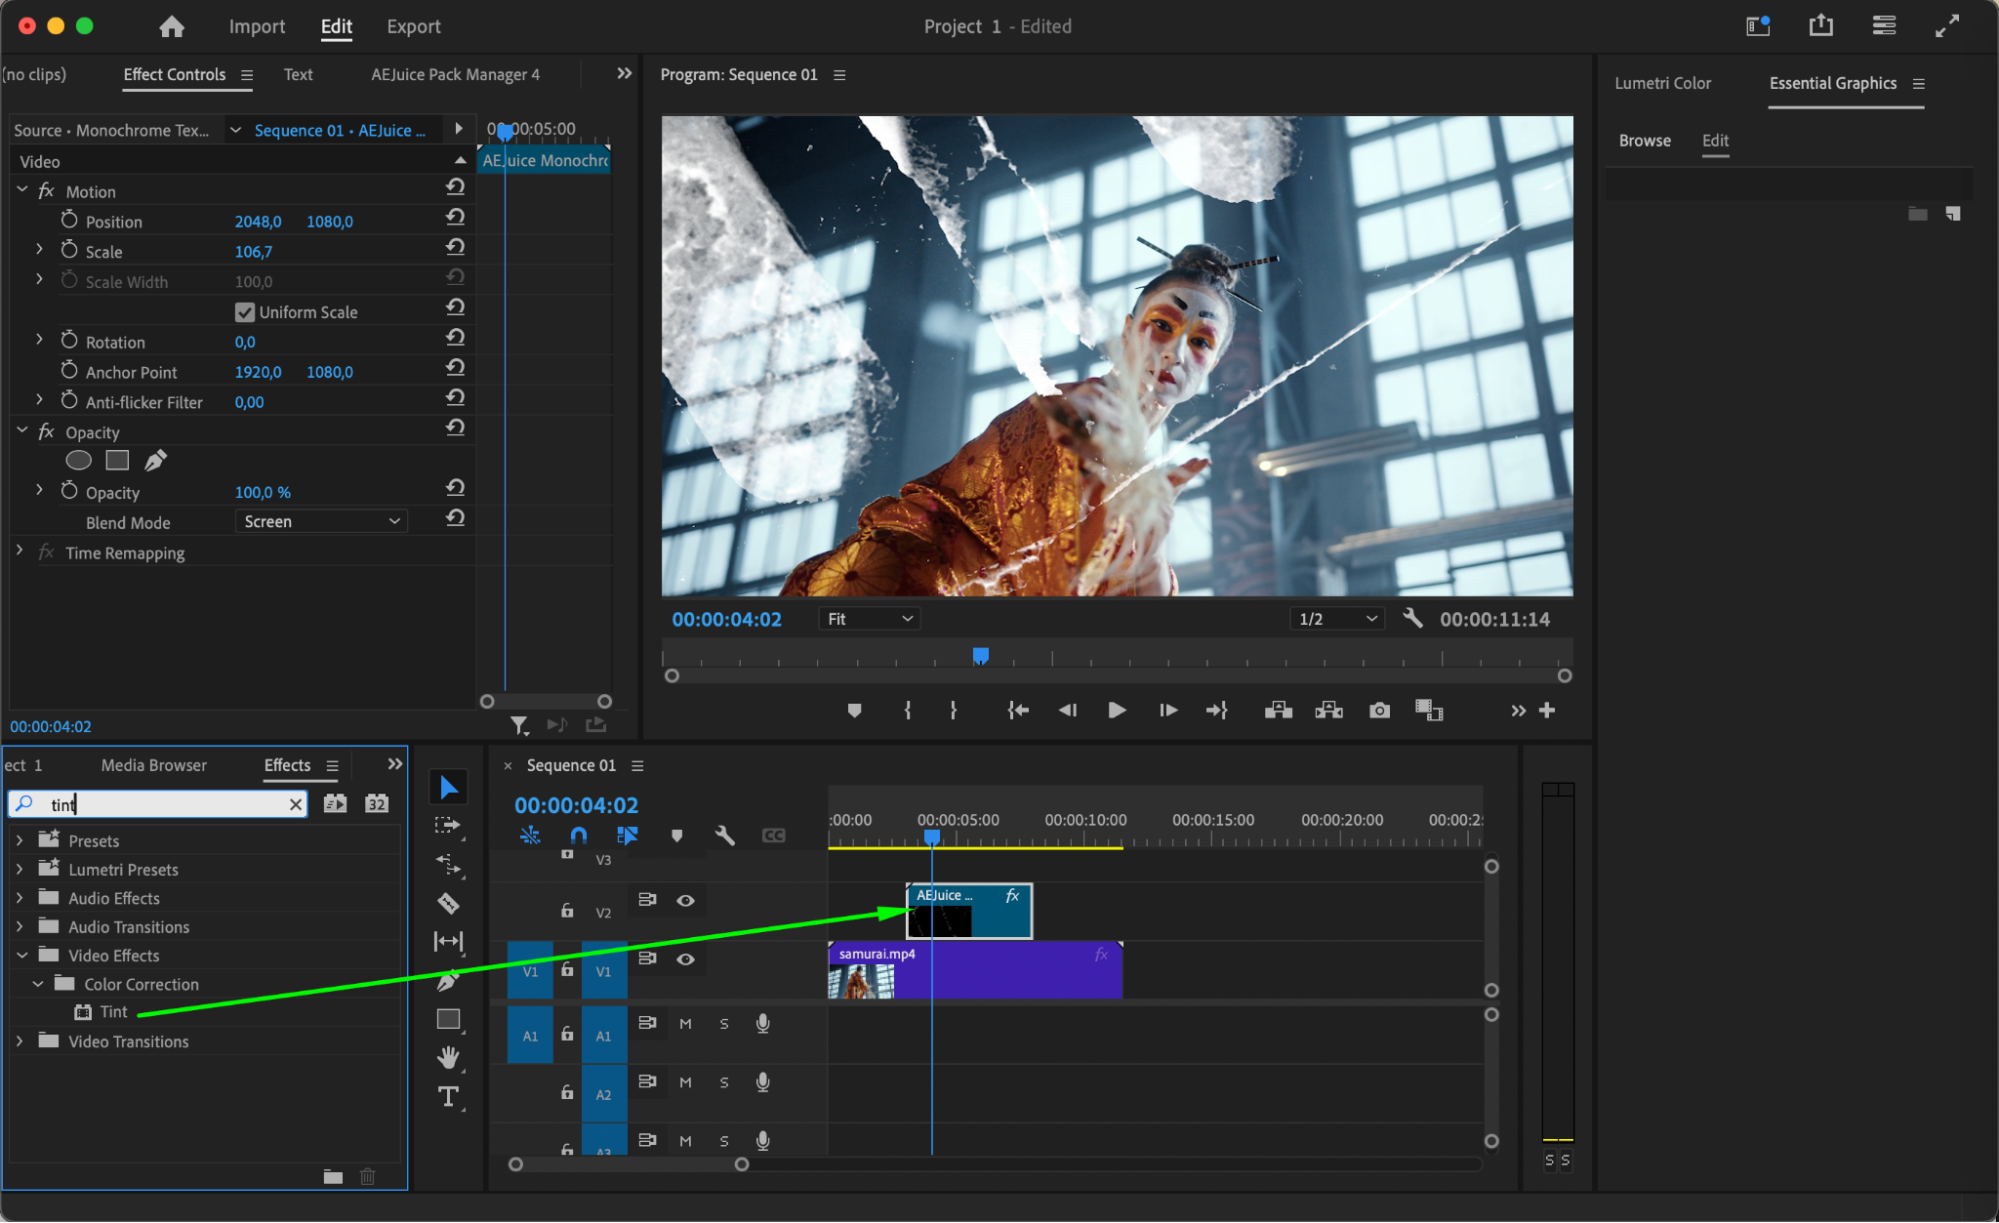
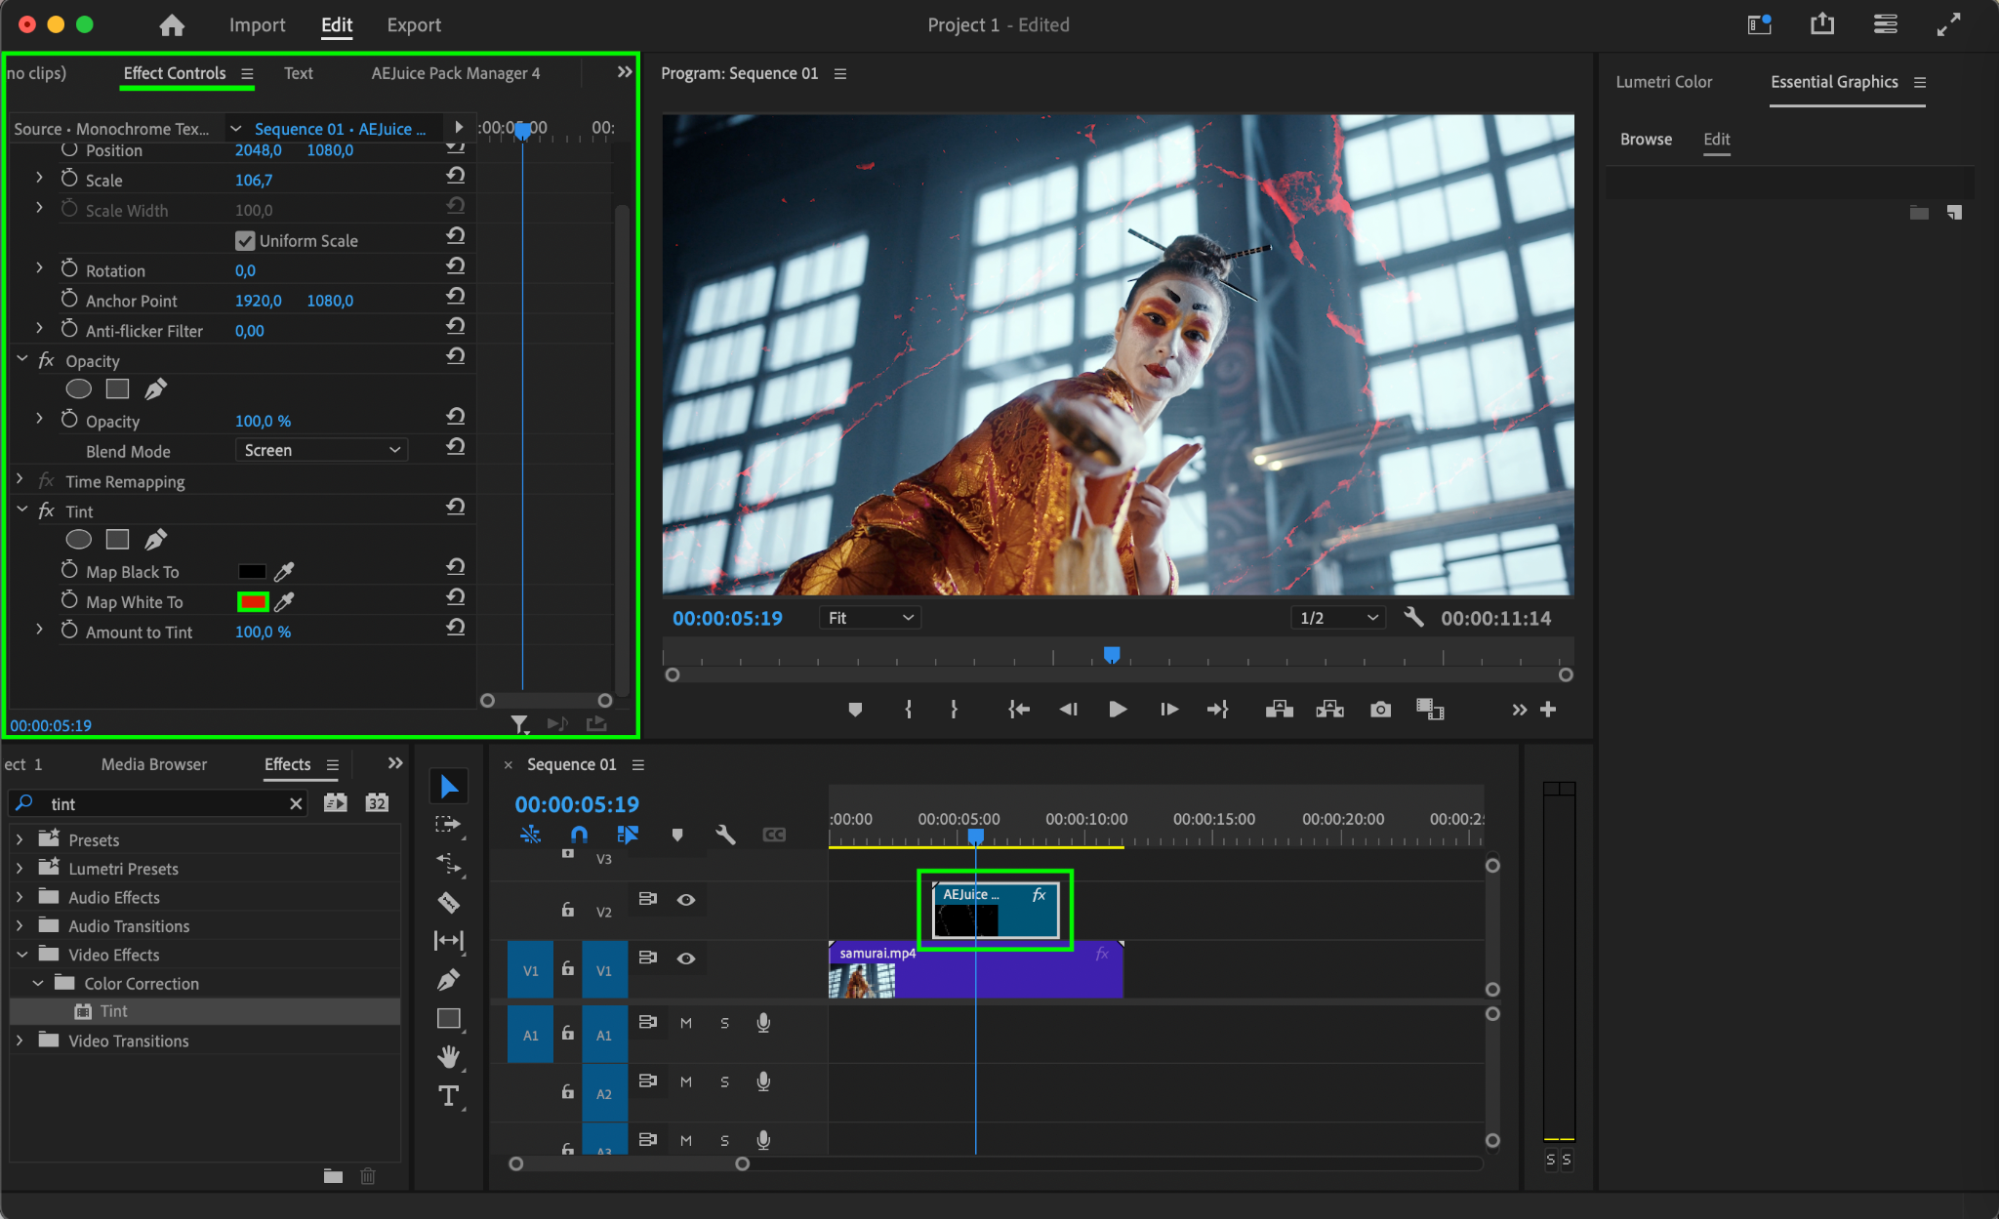 Step 7: Preview and Finalize
Once your texture is customized, press the spacebar to preview the result. Make any final tweaks, then export your video when you’re satisfied with the look.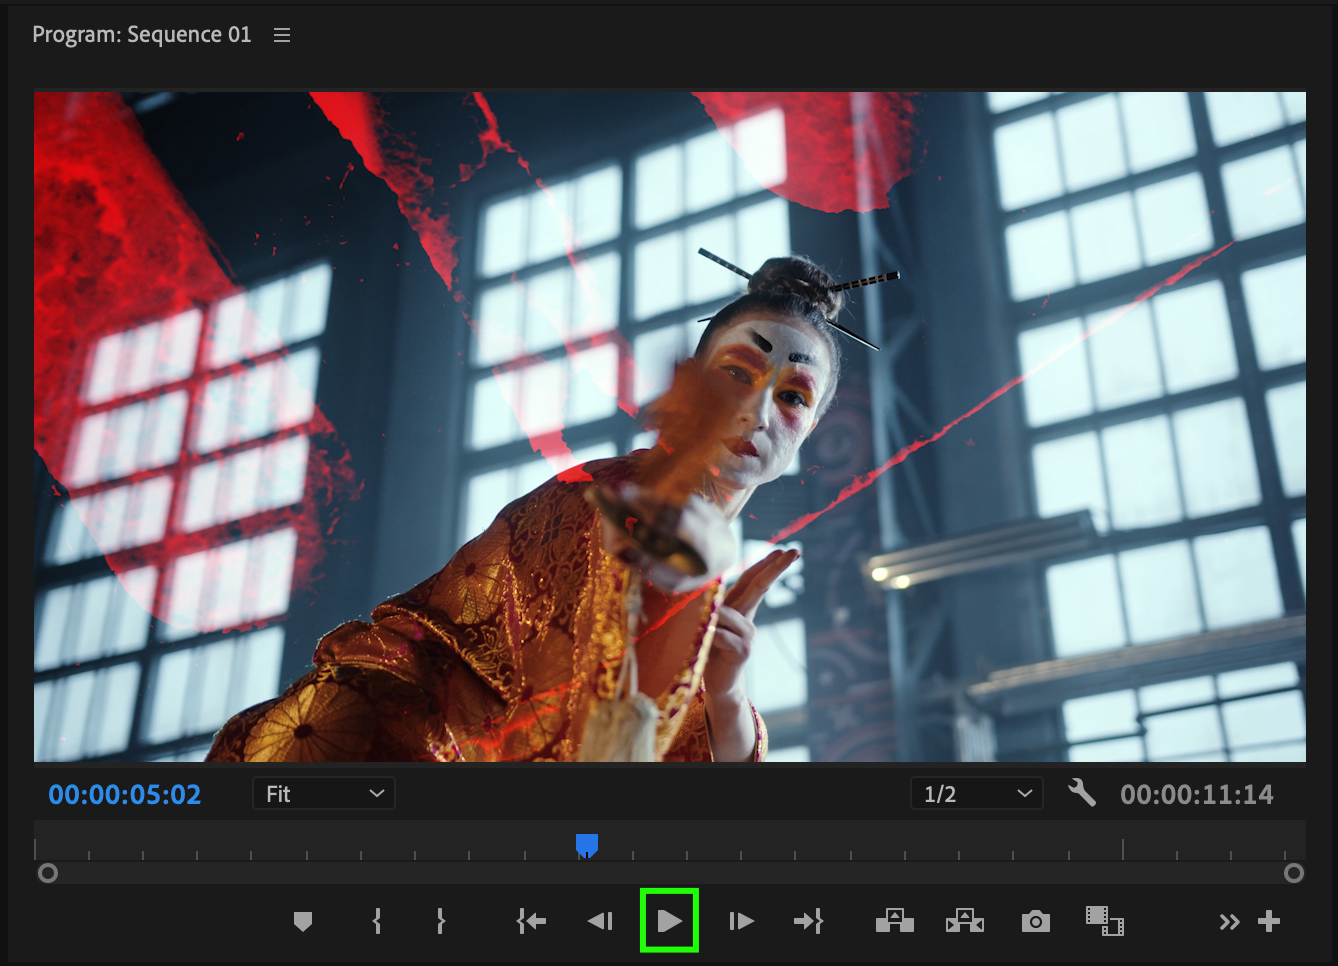 Conclusion
Colorized Urban Textures are a quick and effective way to add a bold, cinematic feel to your footage. Whether you’re editing a music video, short film, or social media content, these textures can instantly enhance the mood and style of your scene.
Our Bestsellers


