How to Create a Dynamic Photo Album in After Effects
Introduction
Creating a photo album in After Effects is a great way to showcase memories or present images dynamically. By using 3D layers, camera movement, and effects, you can make a visually appealing slideshow with smooth transitions and animations. Follow these steps to create your own animated photo album.
Step 1: Create a New Composition
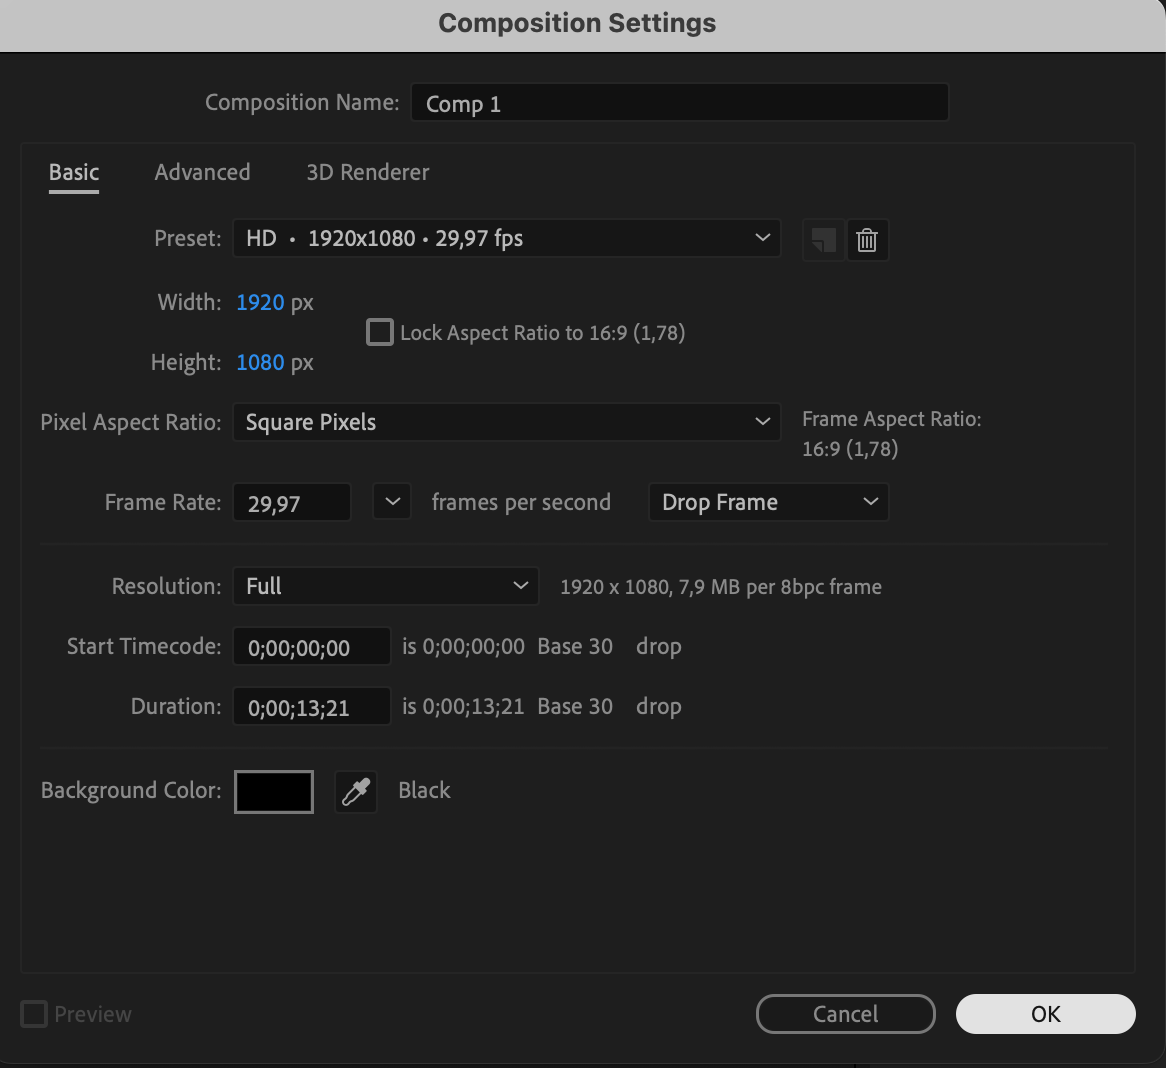
Go to Composition > New Composition and set the resolution, frame rate, and duration according to your project needs. A standard choice is 1920×1080, 25-30 fps, and 10-15 seconds.
 Step 2: Import and Add Photos
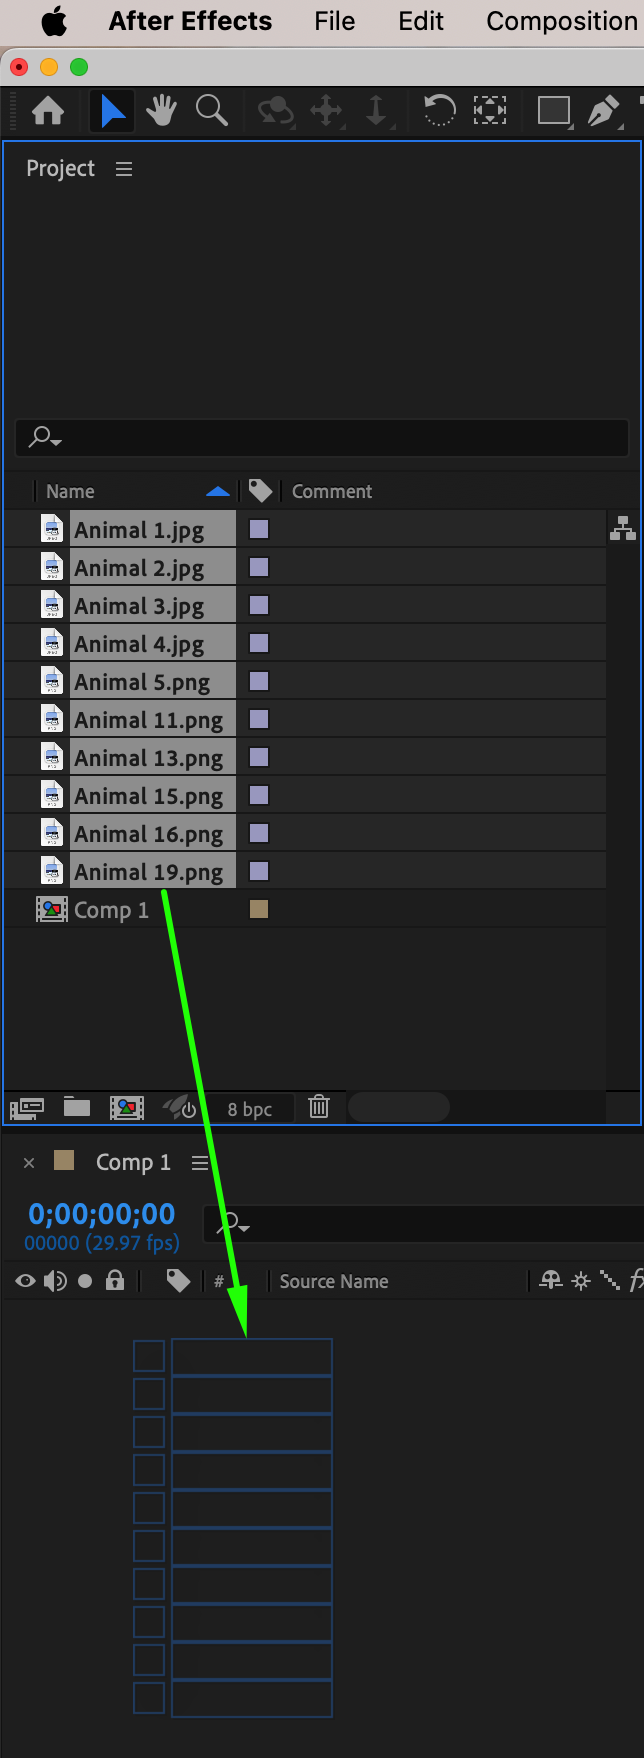
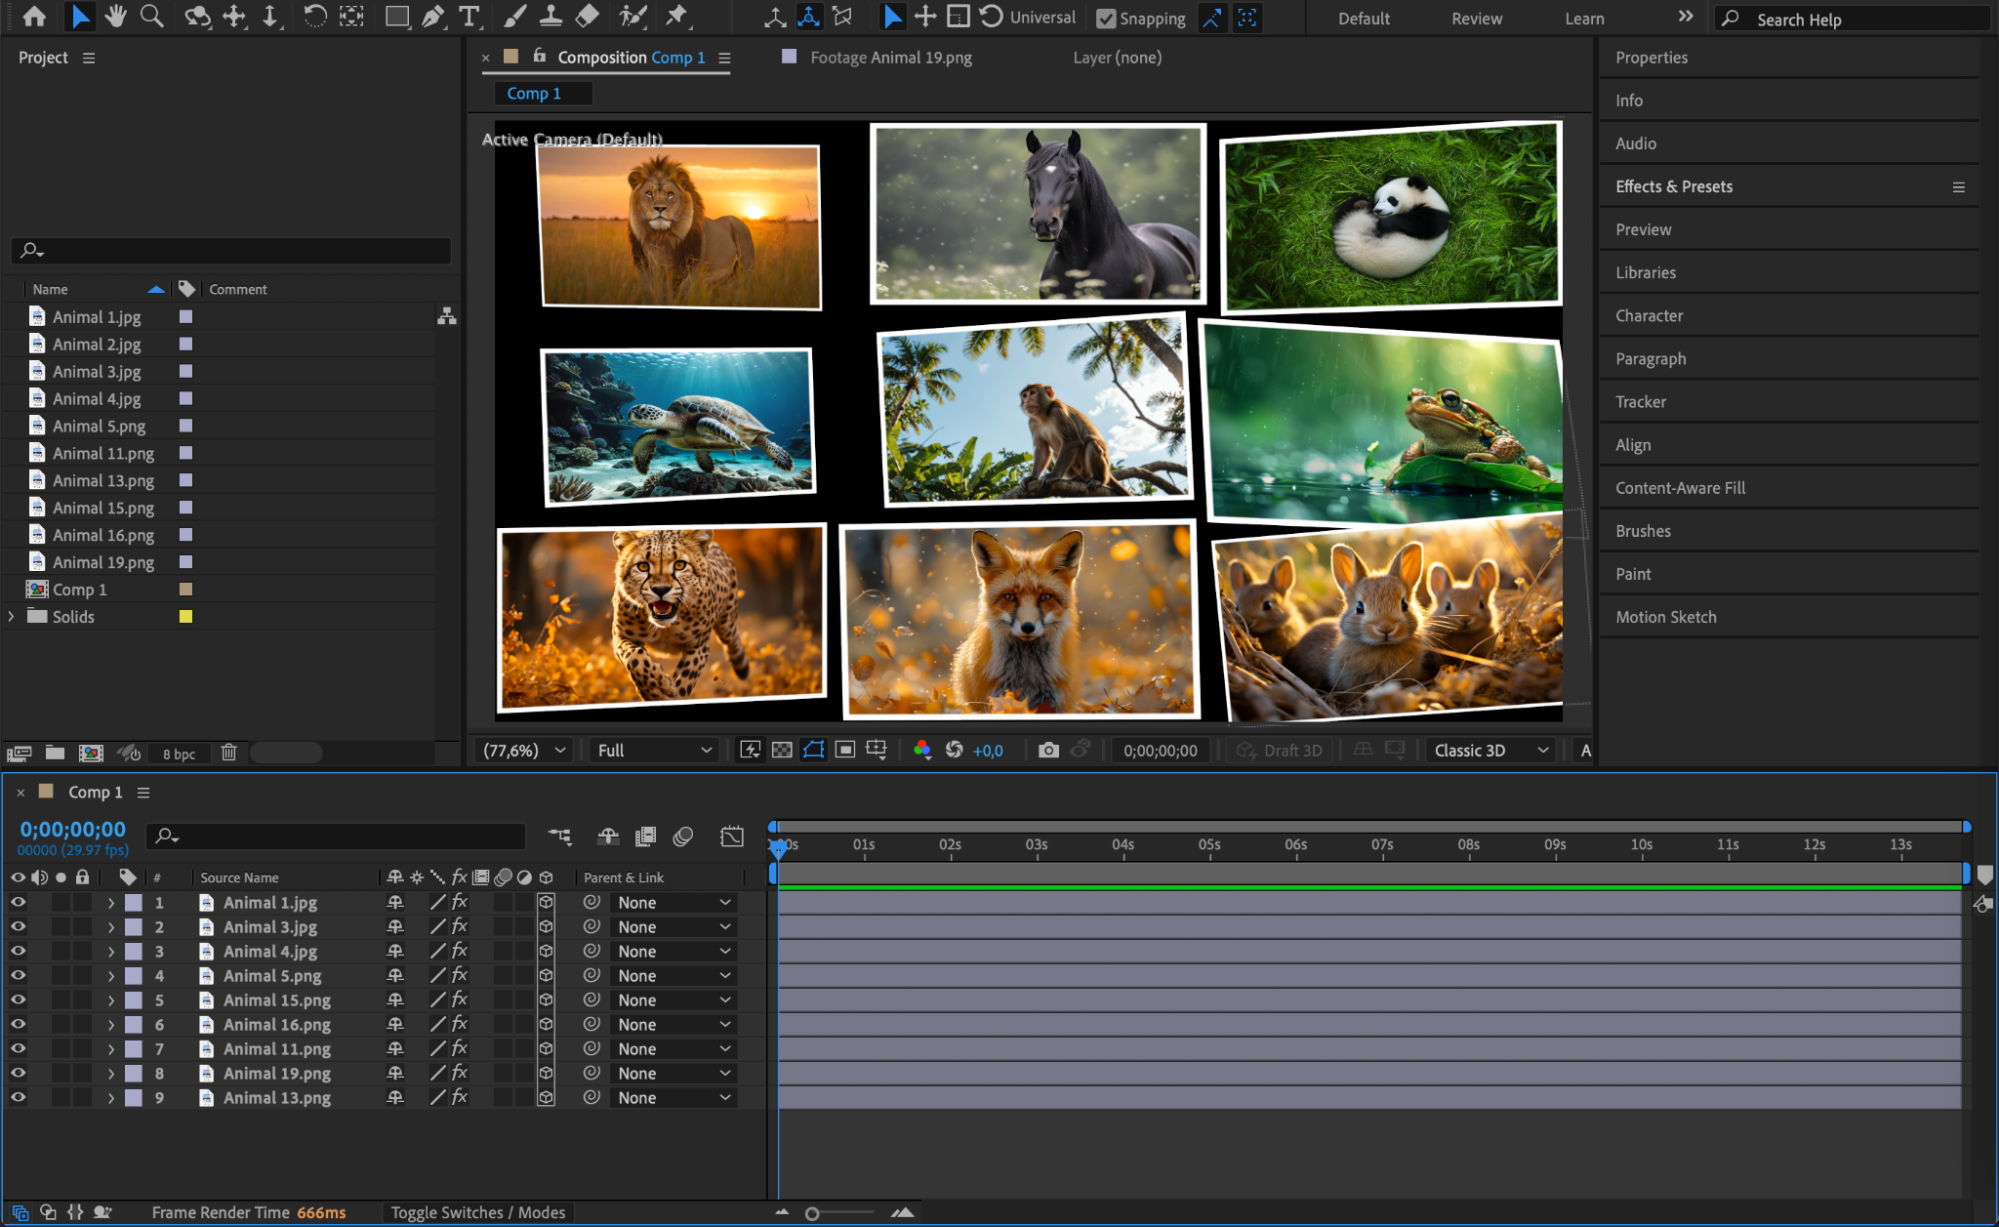
Go to File > Import > File, select the images you want to use, and drag them onto the timeline. 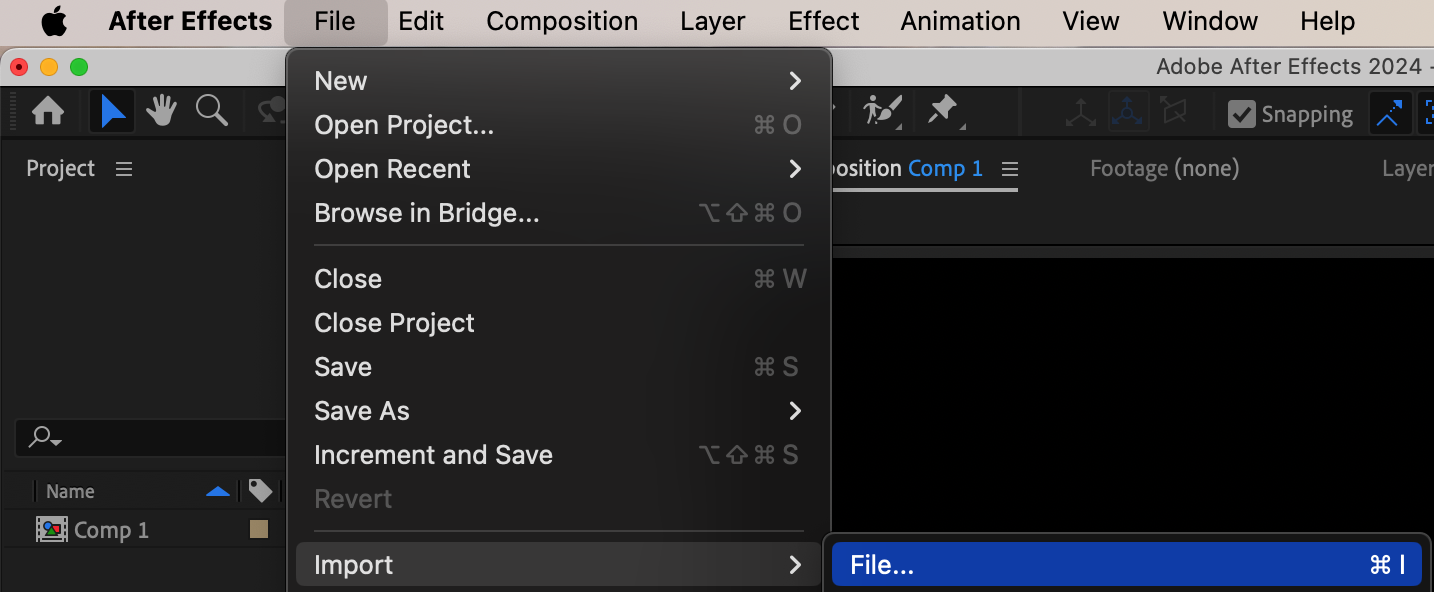
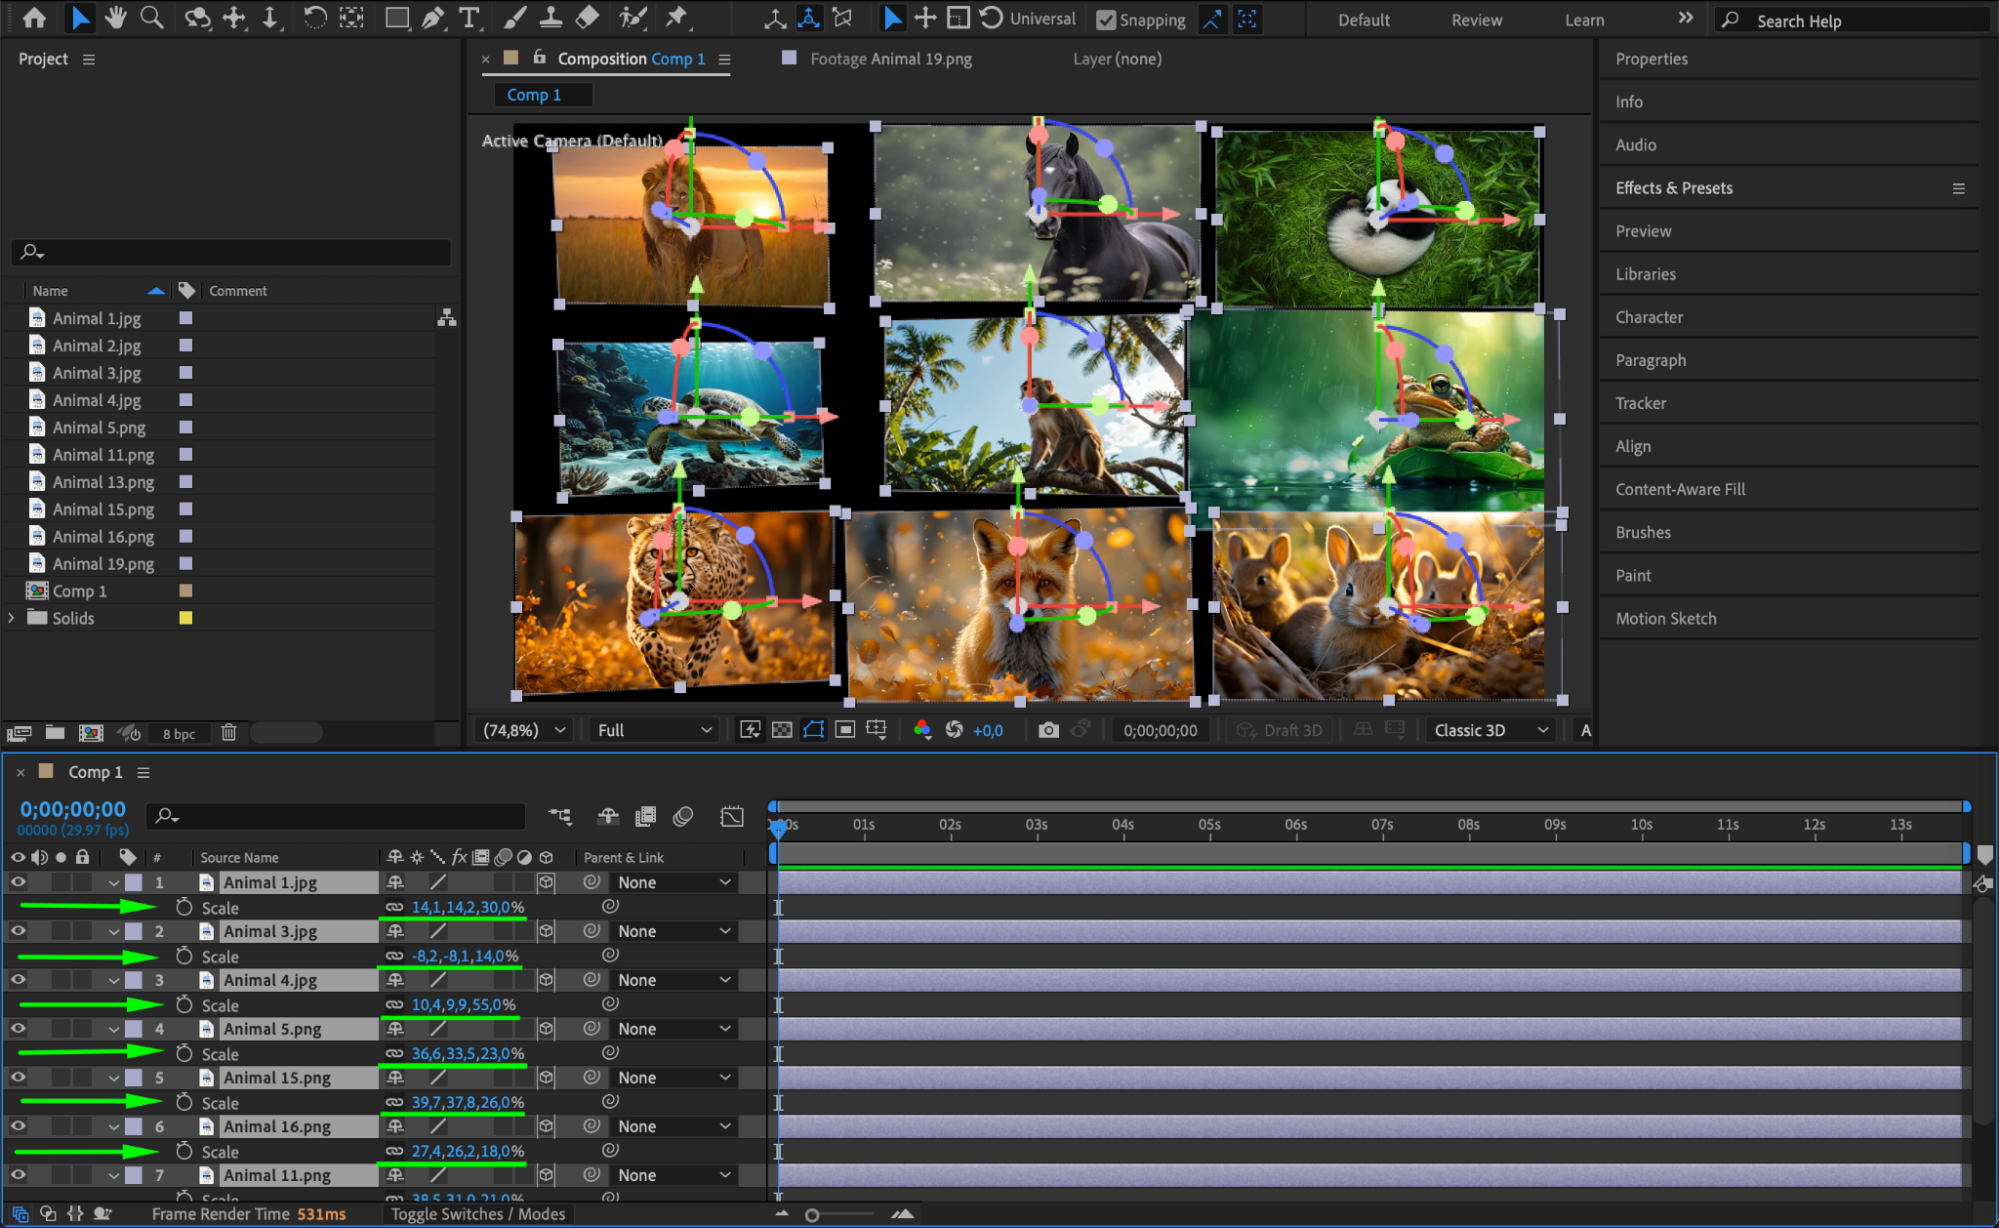
 Step 3: Adjust Photos to Fit the Composition
Select all image layers, right-click, and choose Transform > Fit to Comp to make sure they are properly scaled to the composition size. 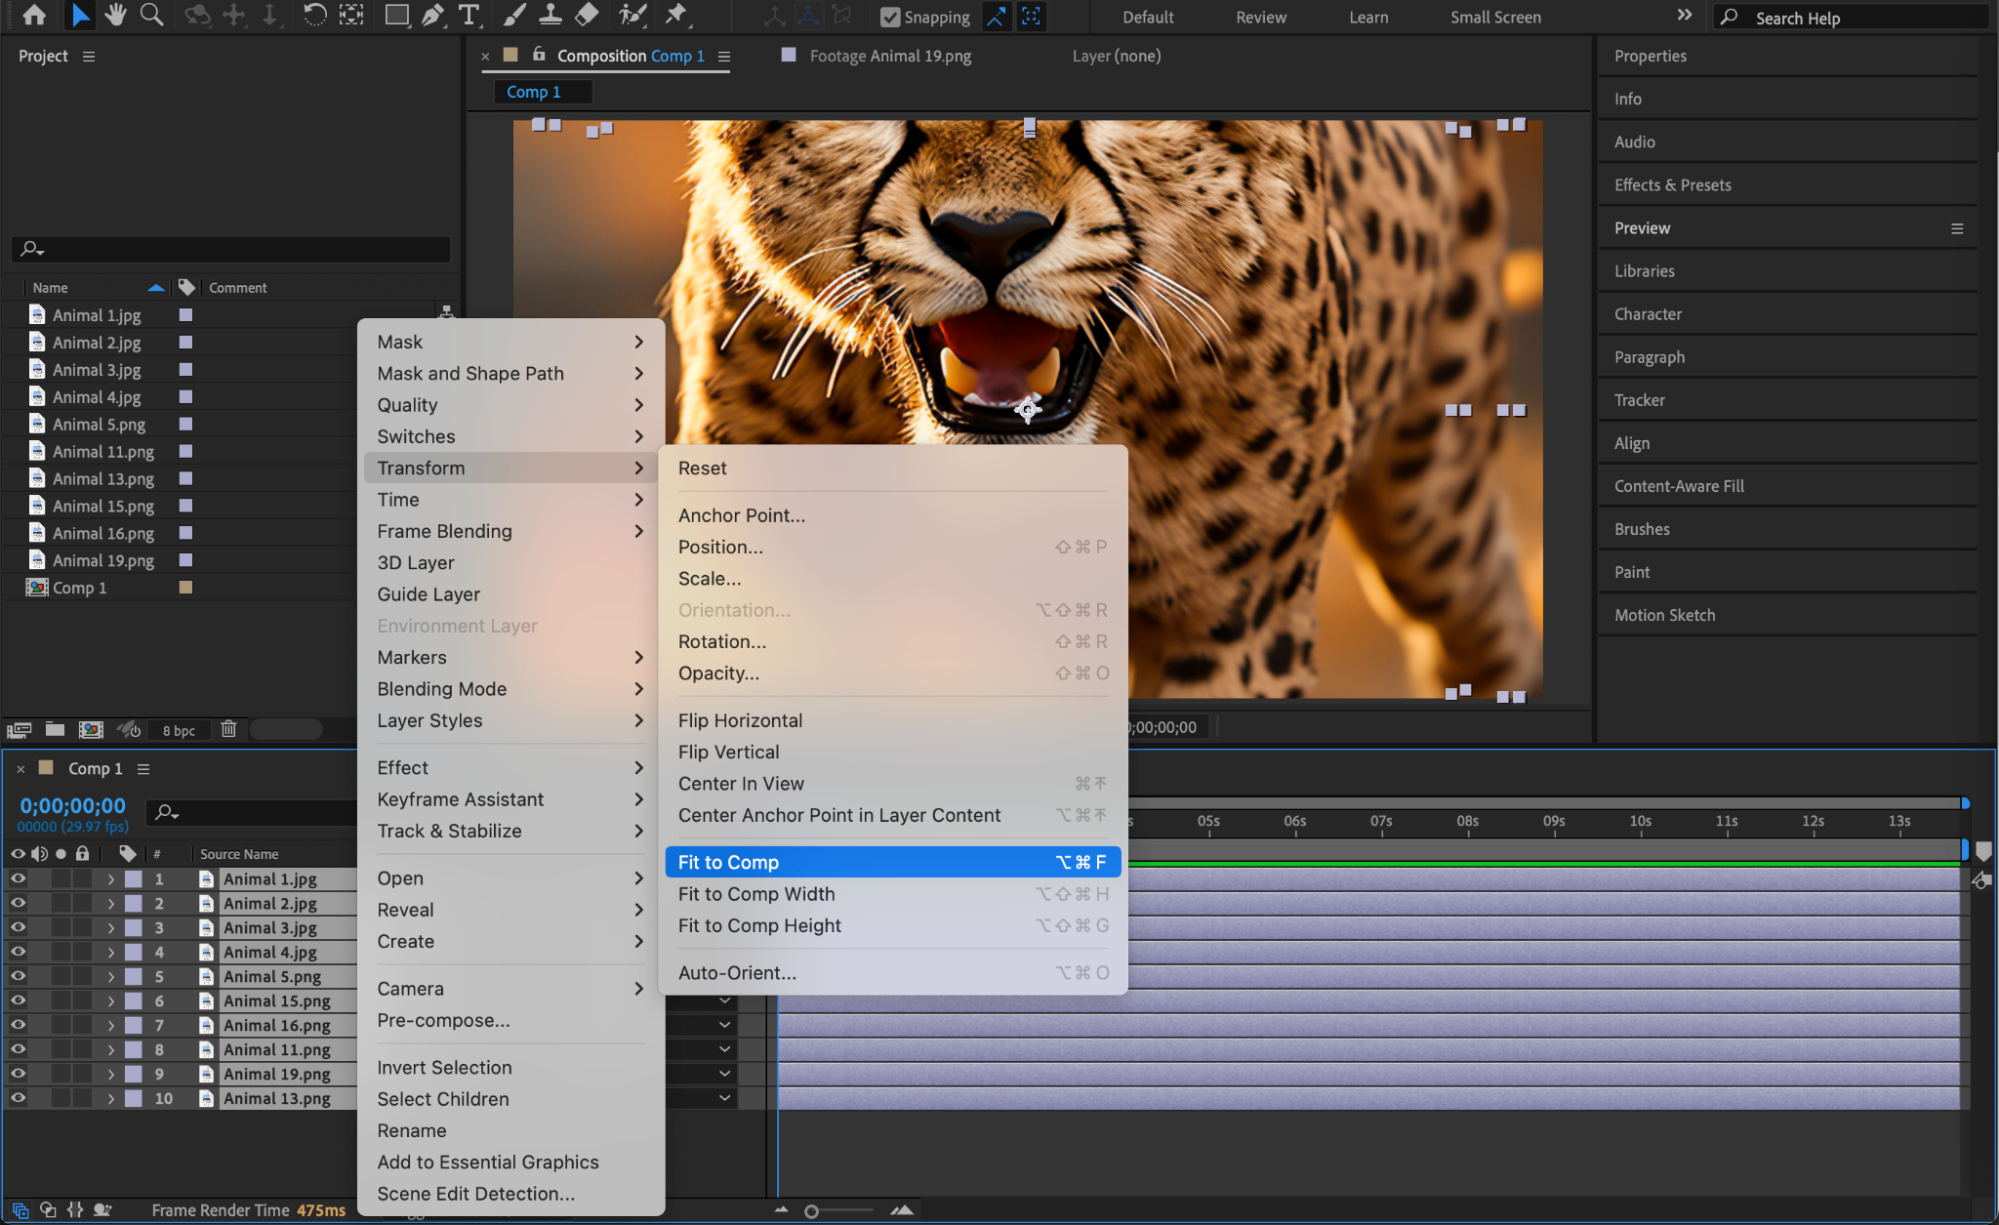
Step 4: Convert Photos to 3D Layers
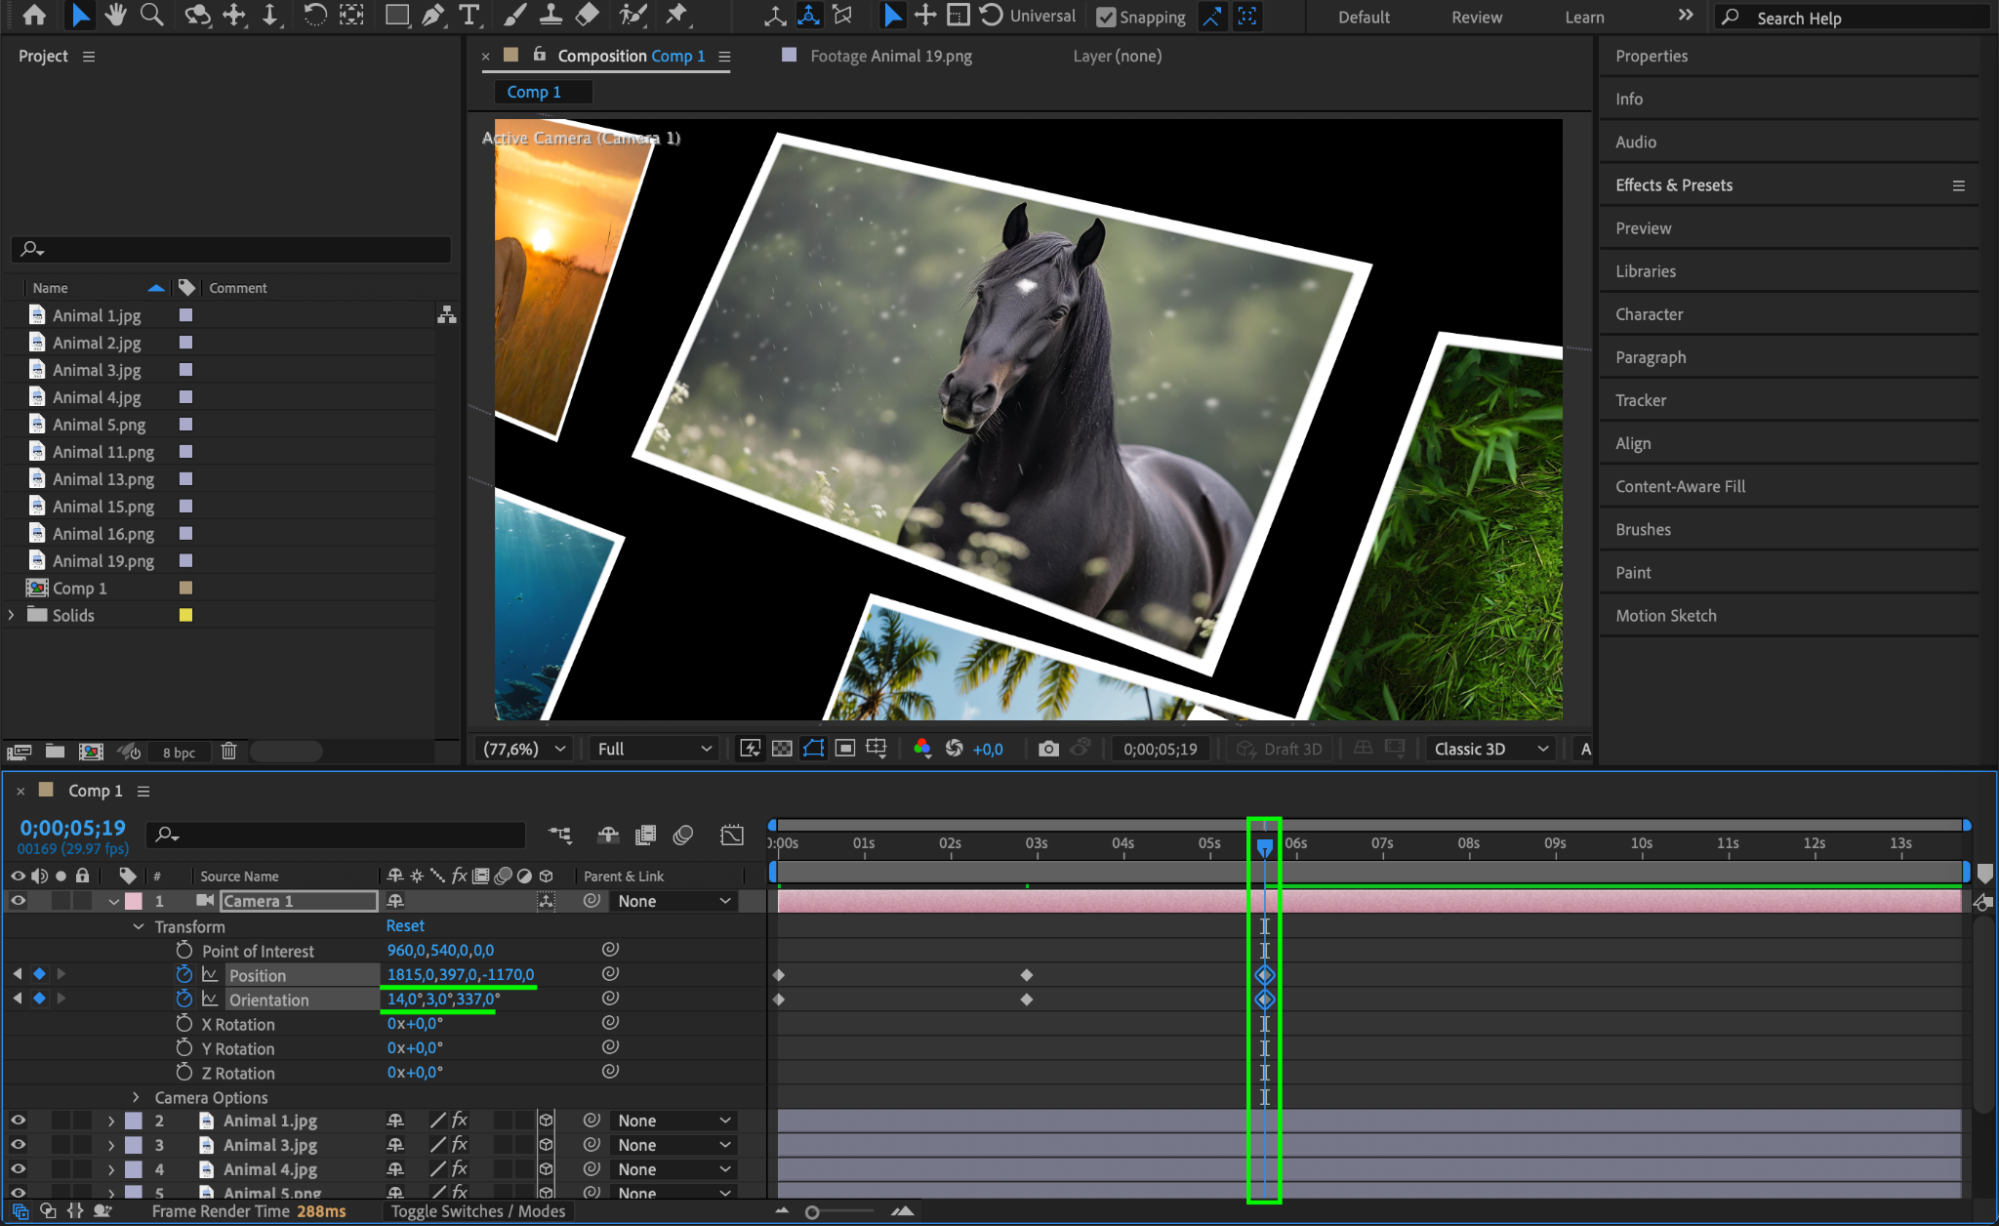
Select all image layers and enable the 3D Layer option (the small cube icon). Adjust their Position (X, Y, Z), Scale, and Orientation to create depth in the scene. Spread out the images in 3D space for a layered effect and ensure they are properly positioned within the composition.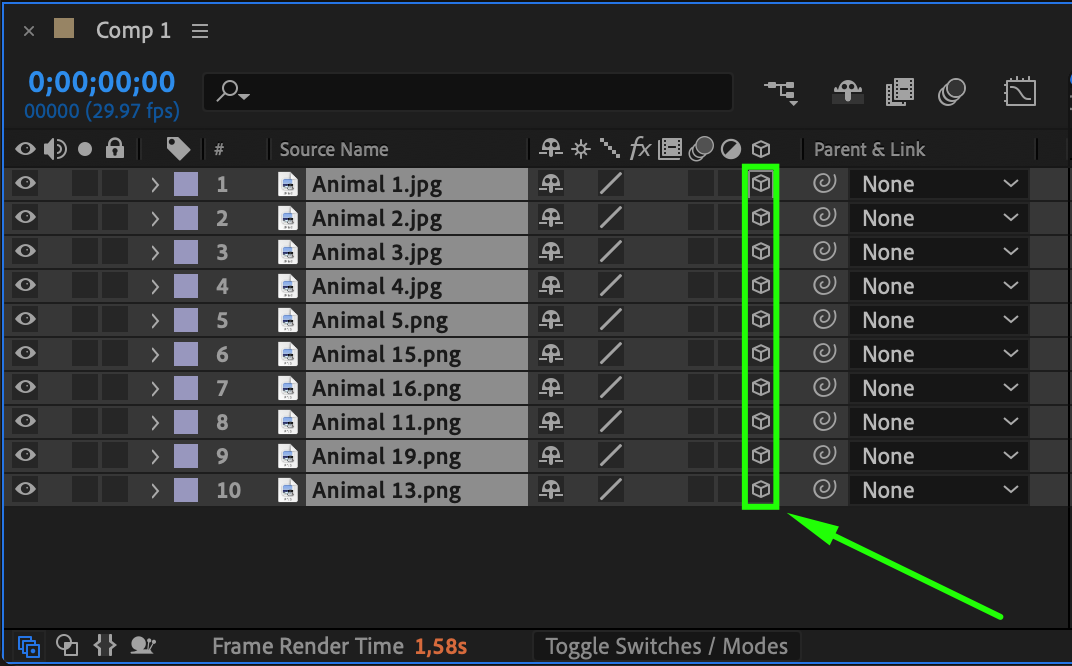
Get 10% off when you subscribe to our newsletter

Step 5: Apply the Vegas Effect
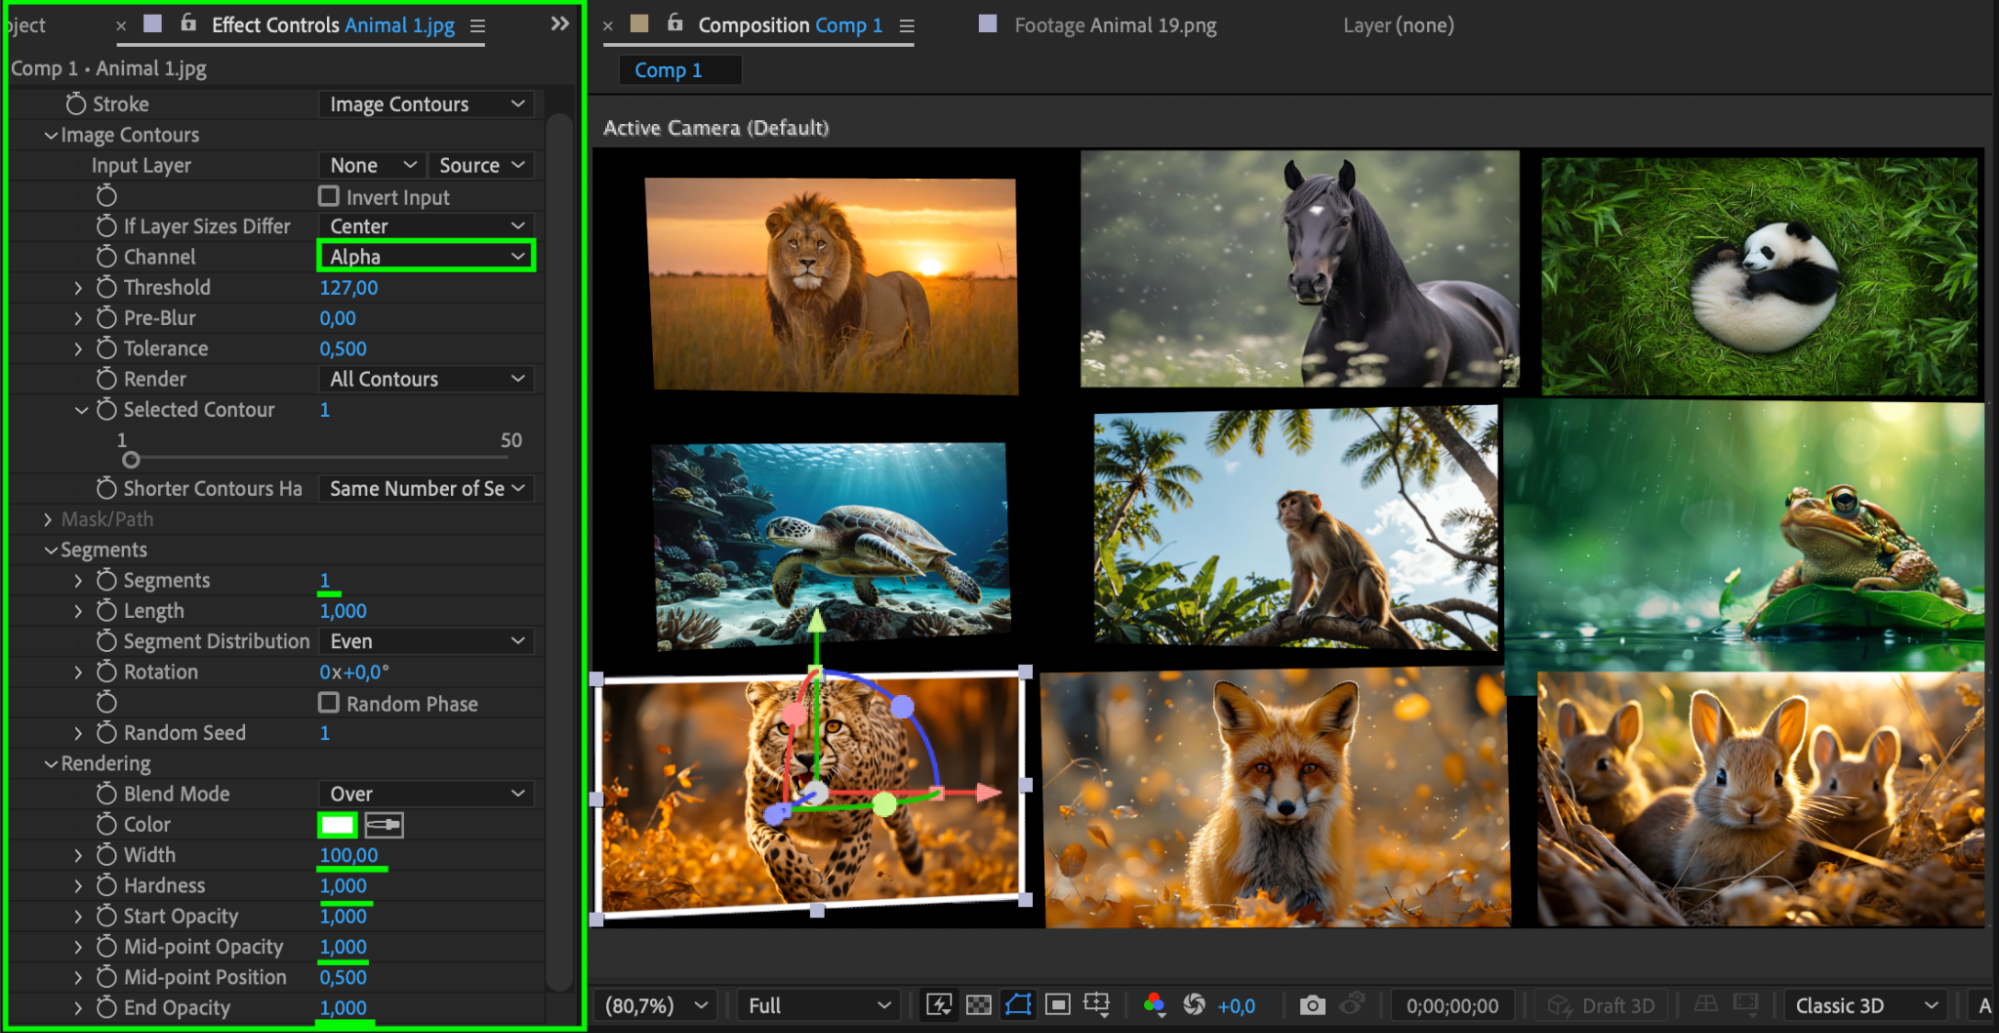
Select each image layer and apply the Vegas Effect from the Effects & Presets panel. In the Effect Controls Panel, set:
Channel: Alpha
Segments: 1
Color: White
Width: 50-100
Hardness: 1
Mid-point Opacity: 1
End Opacity: 1
This will create a smooth transition effect for each photo.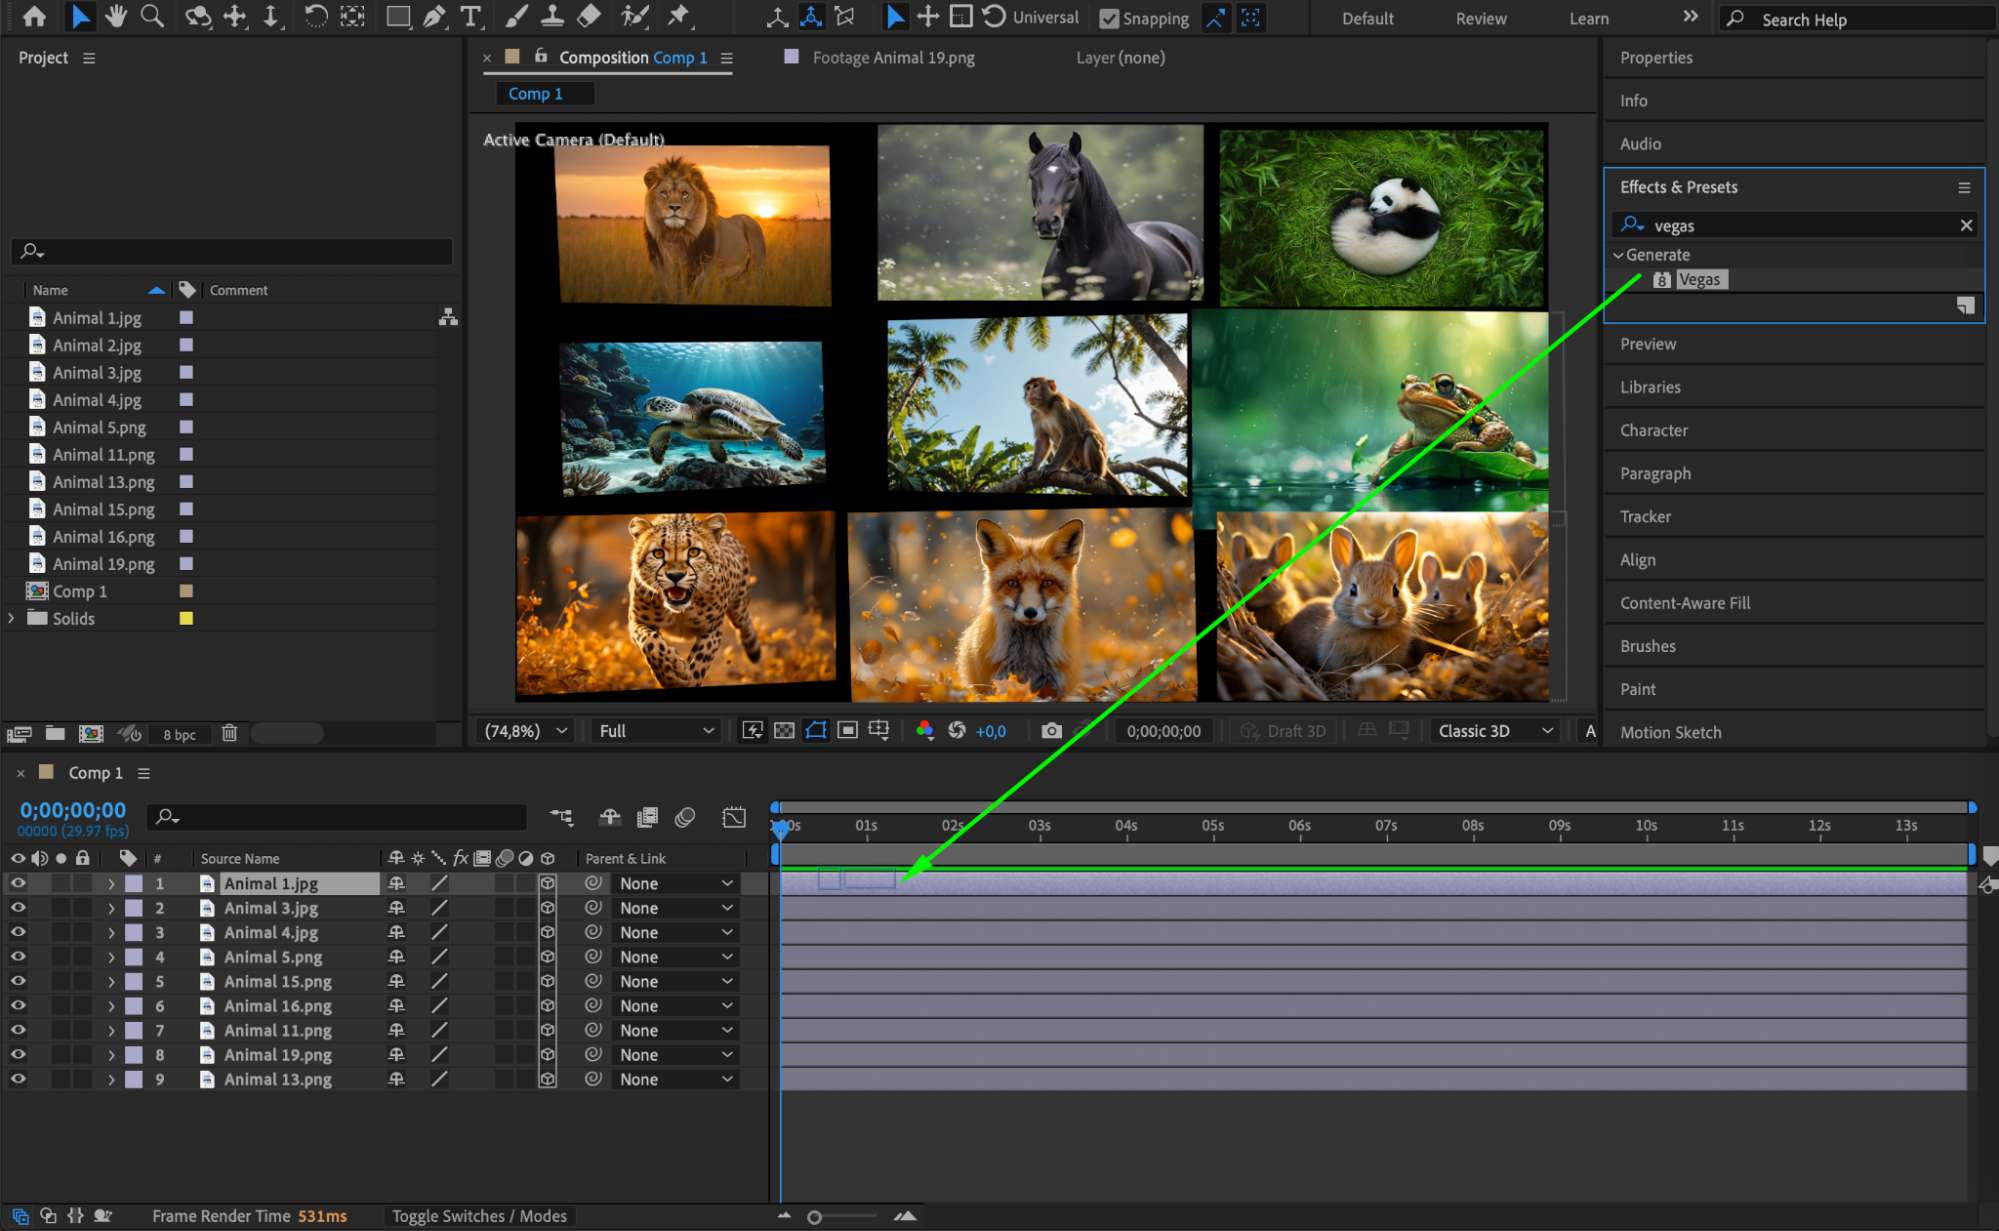
 Step 6: Add a Camera Layer
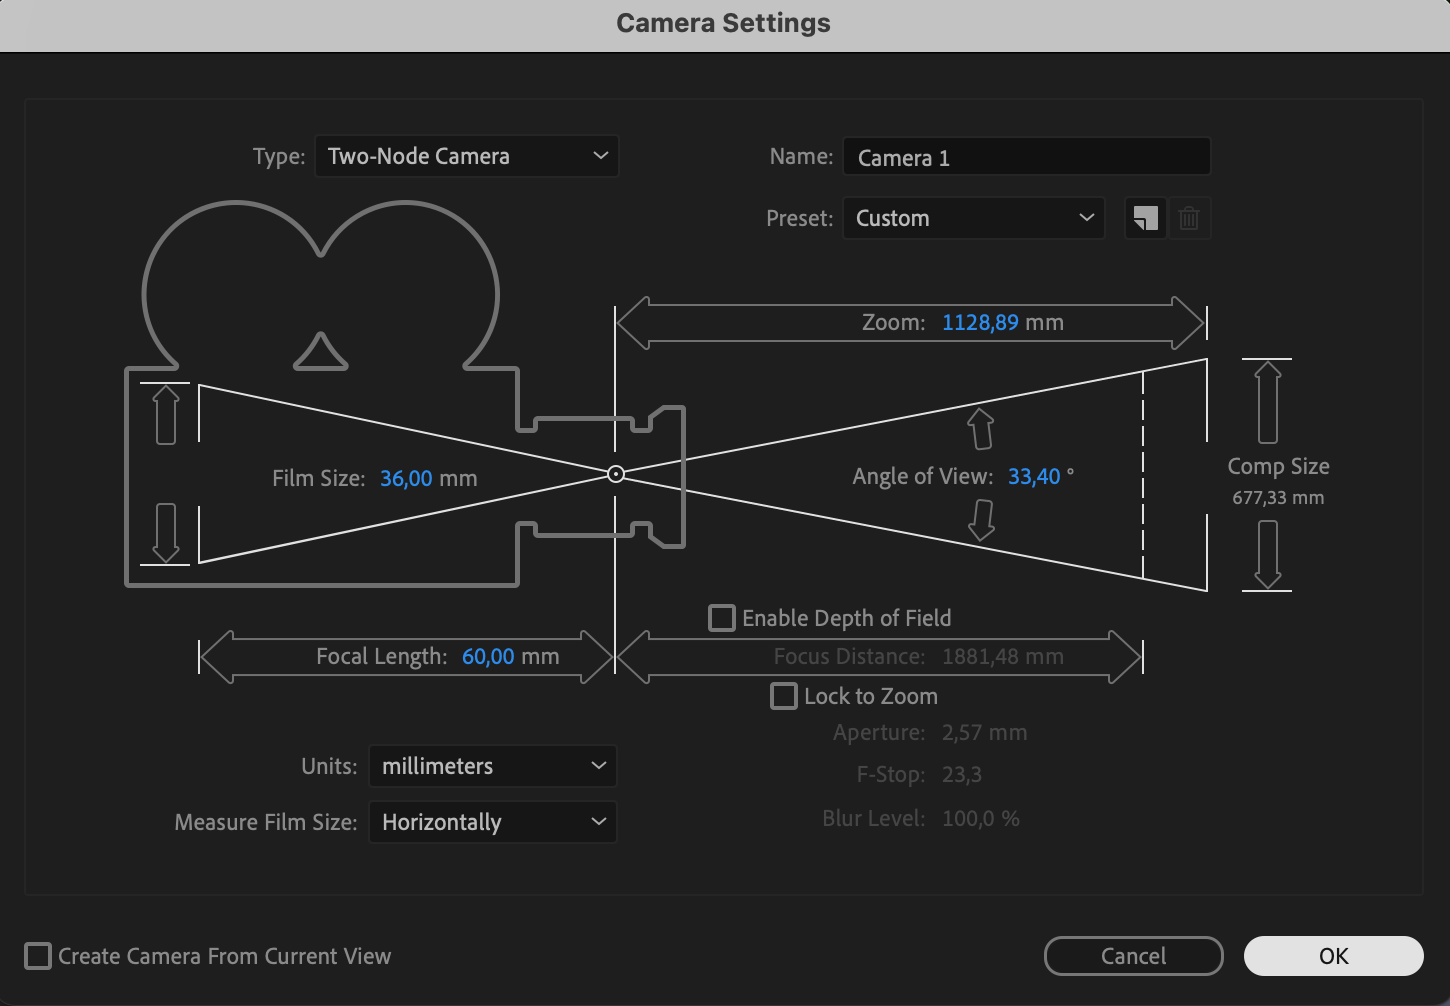
Go to Layer > New > Camera. This will allow you to animate the camera and create dynamic movement between the images.
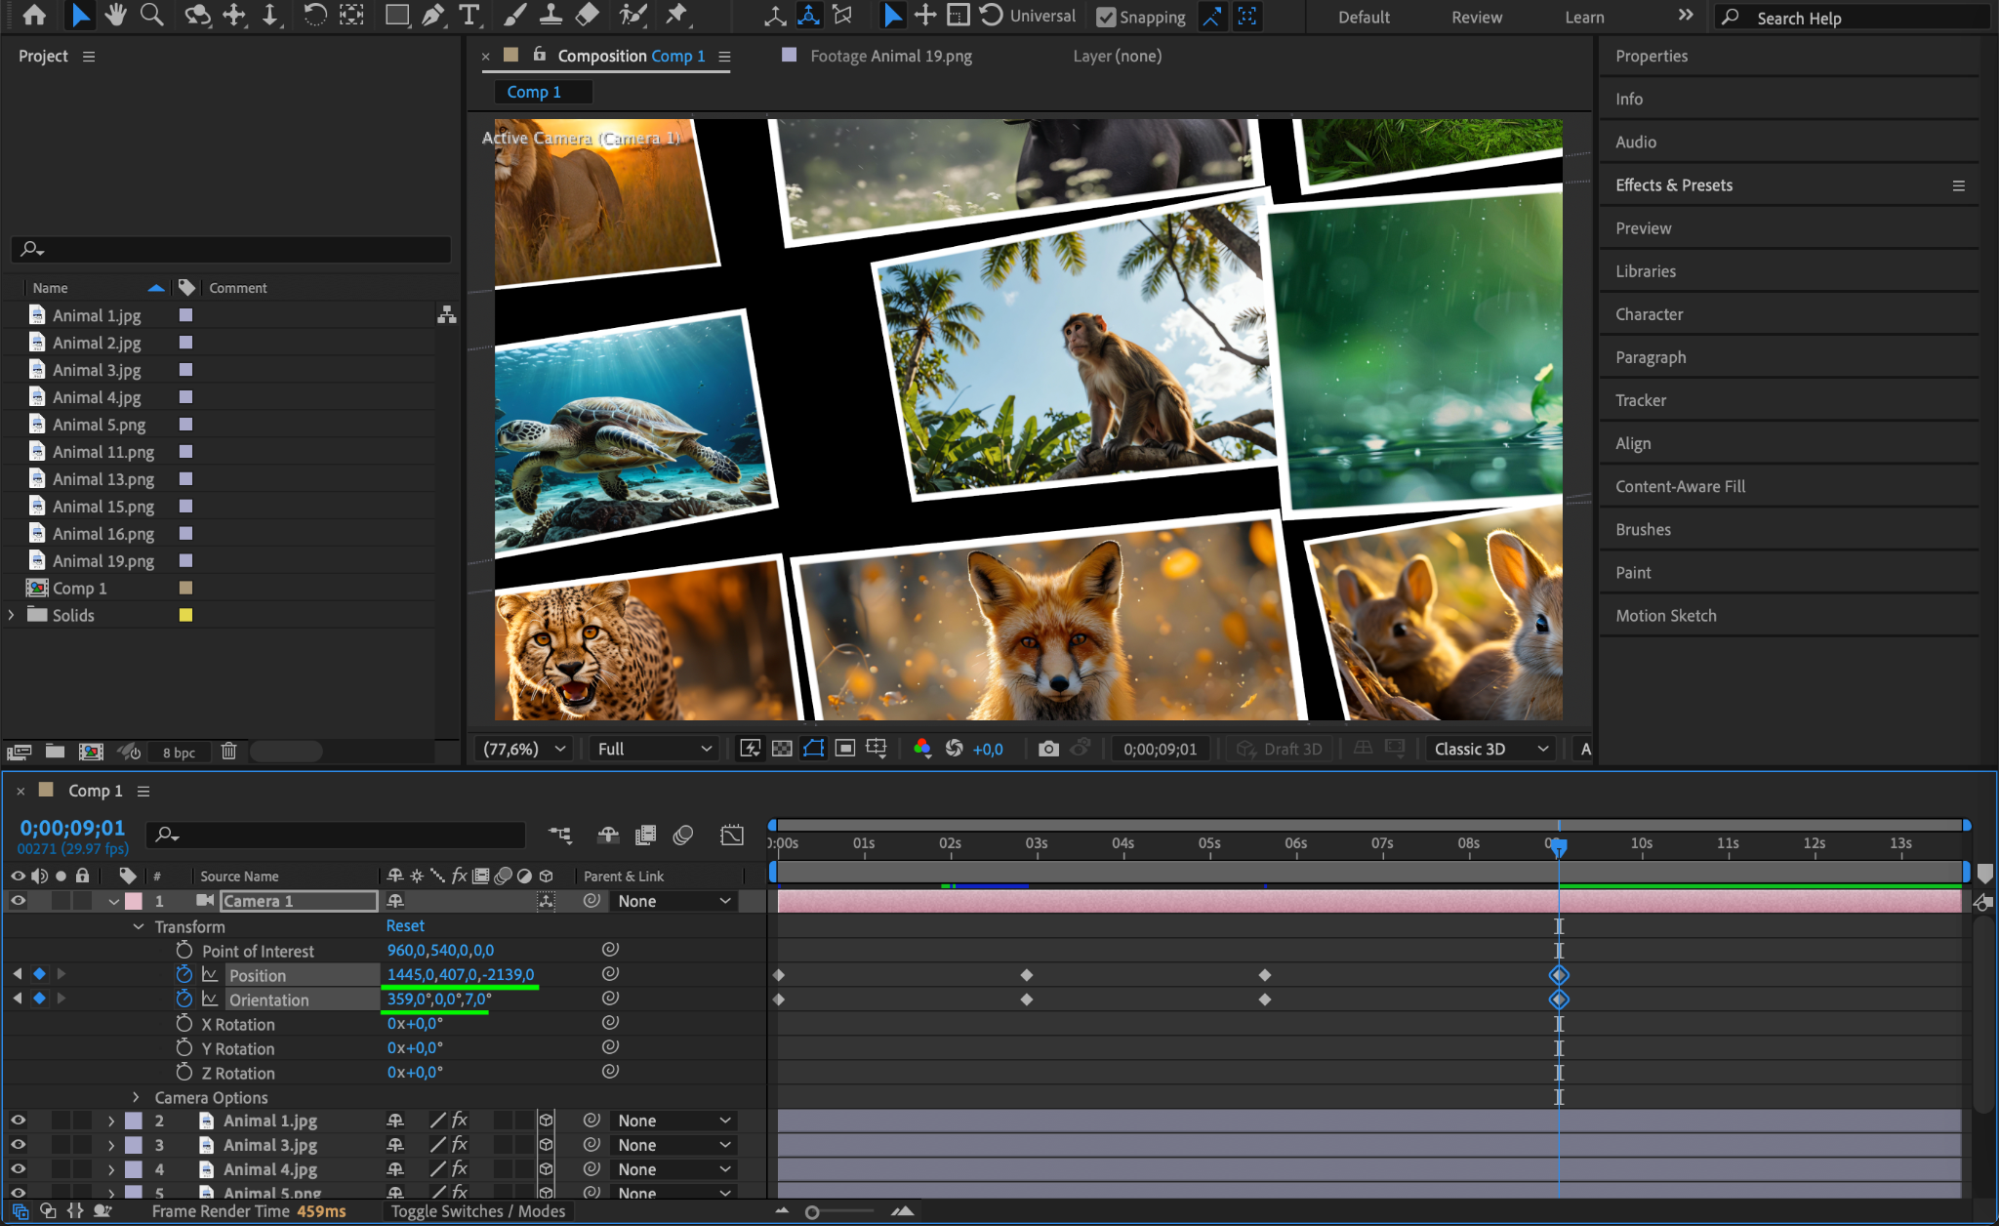
 Step 7: Animate the Camera Movement
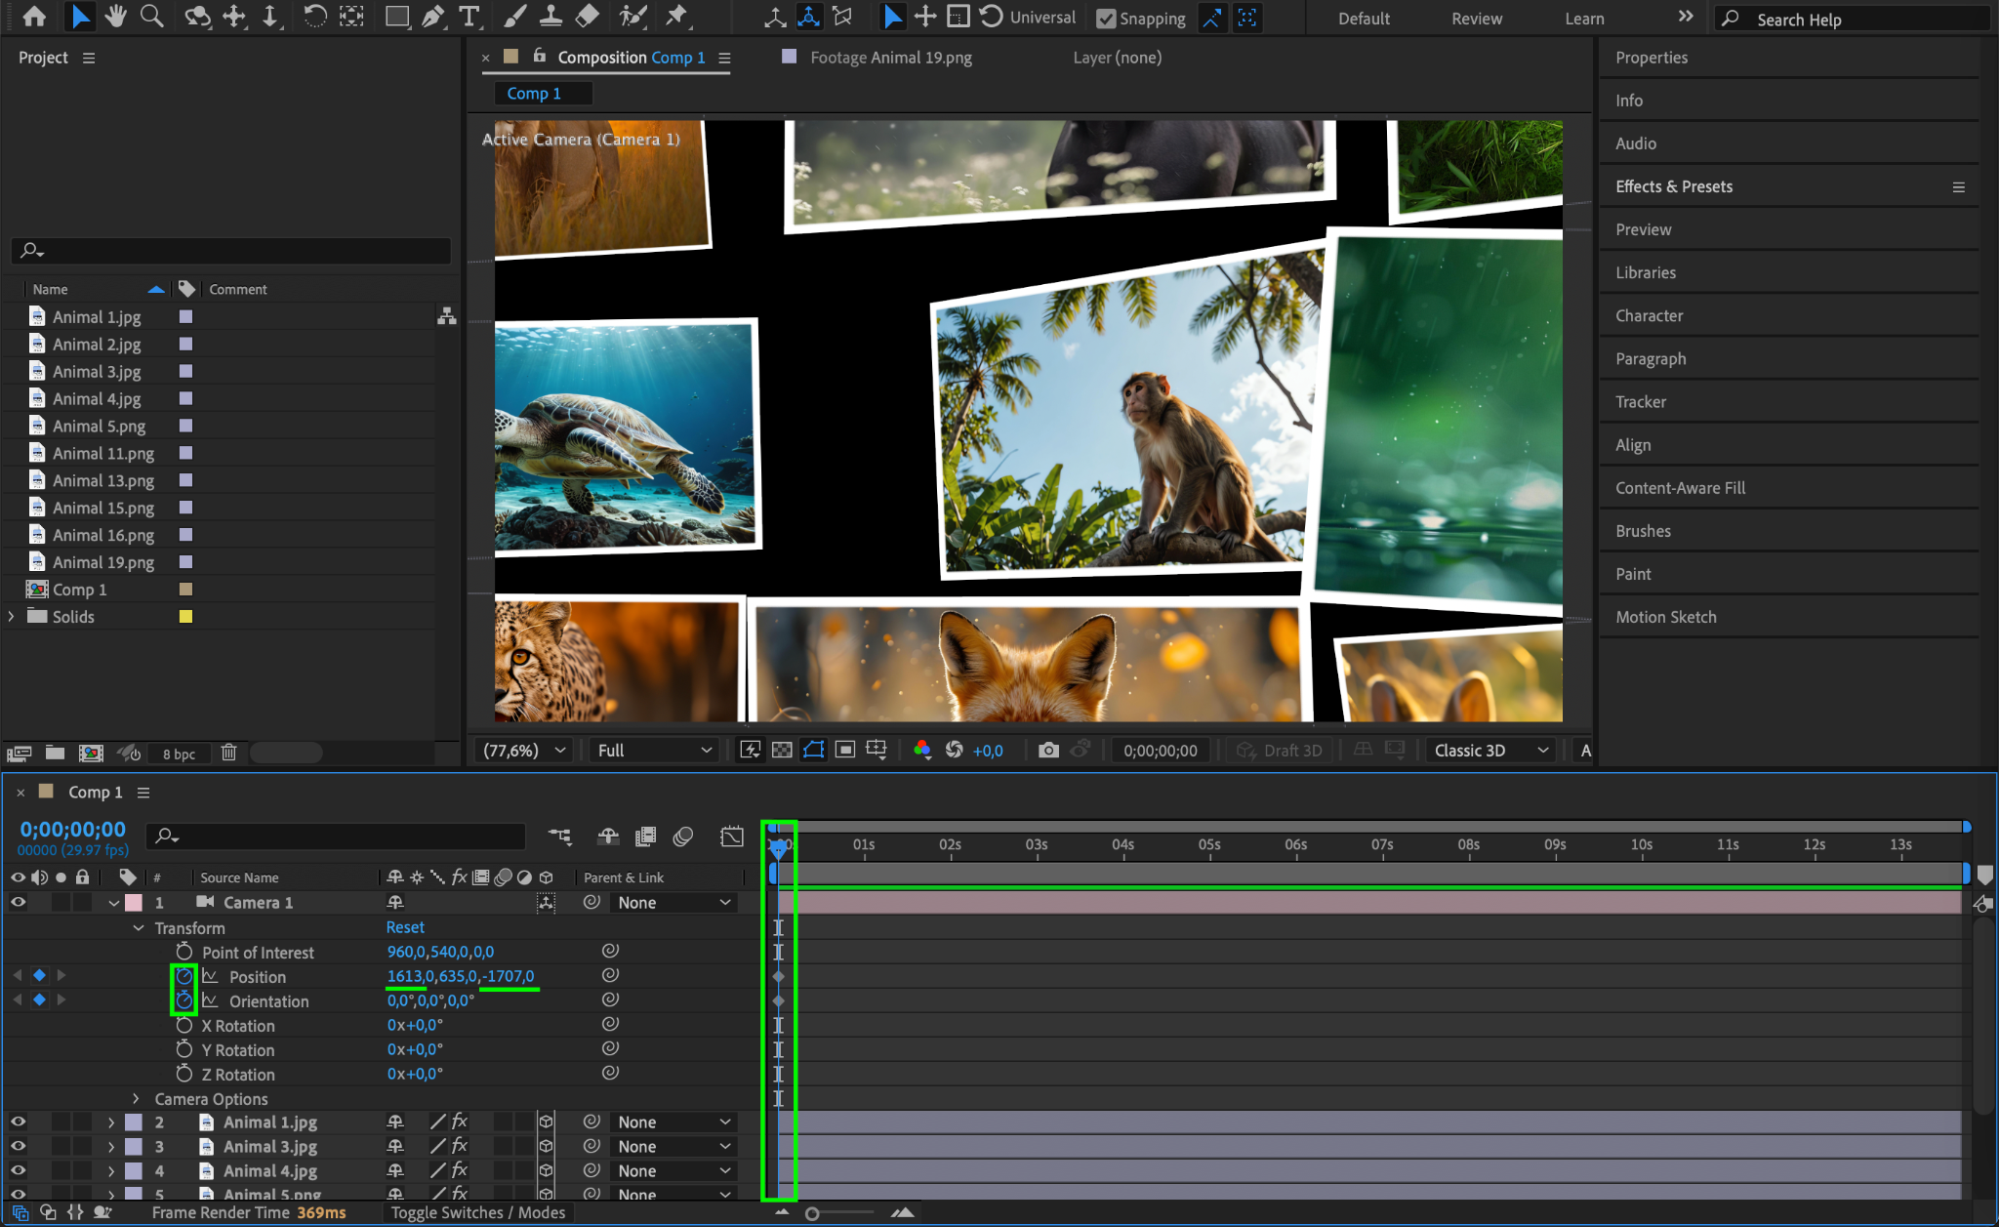
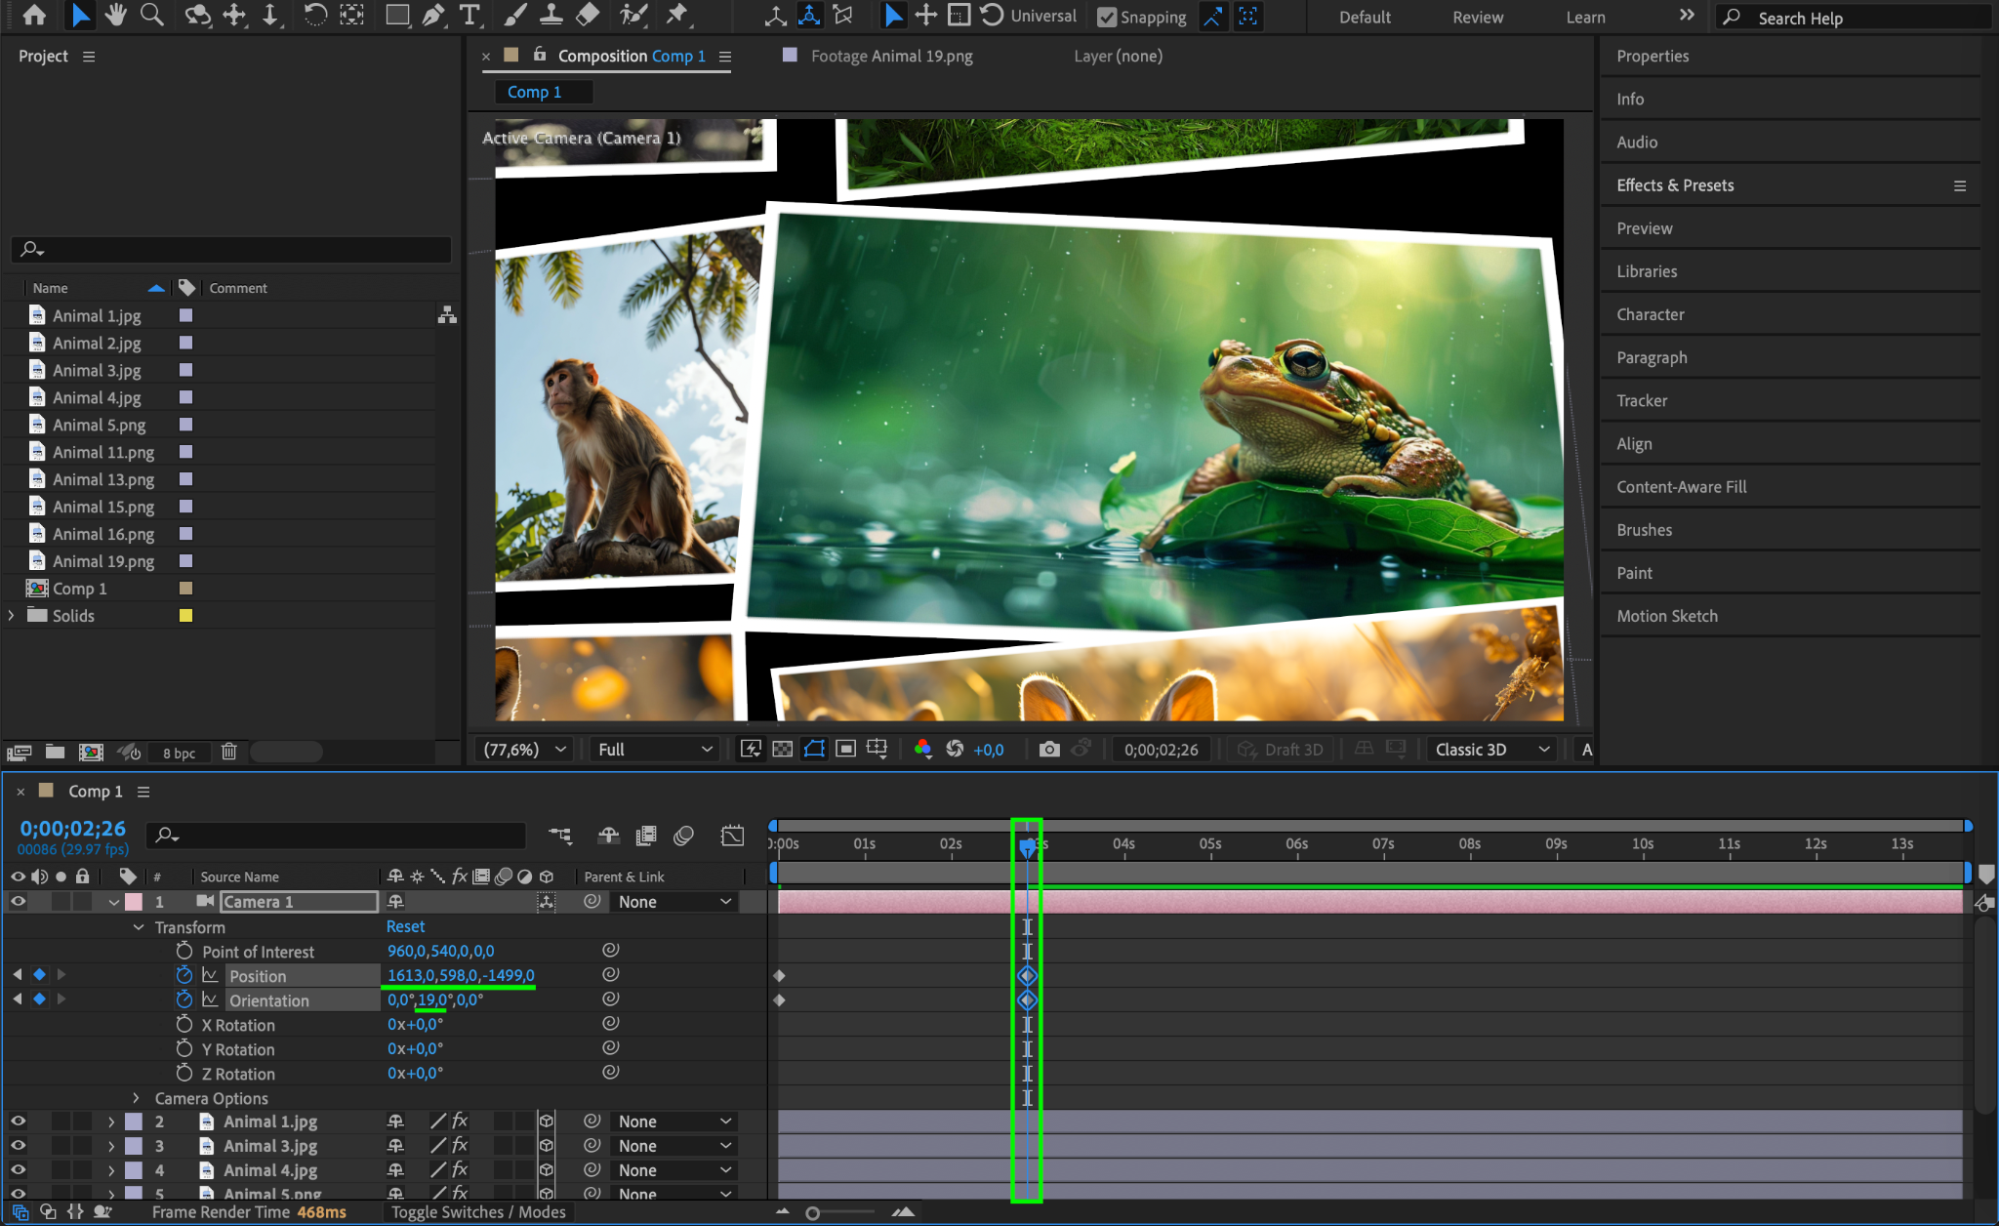
In the Transform properties of the camera layer, animate the Position (Z-axis for zooming) and Orientation to move smoothly between images. Set keyframes at different points in the timeline to guide the motion.
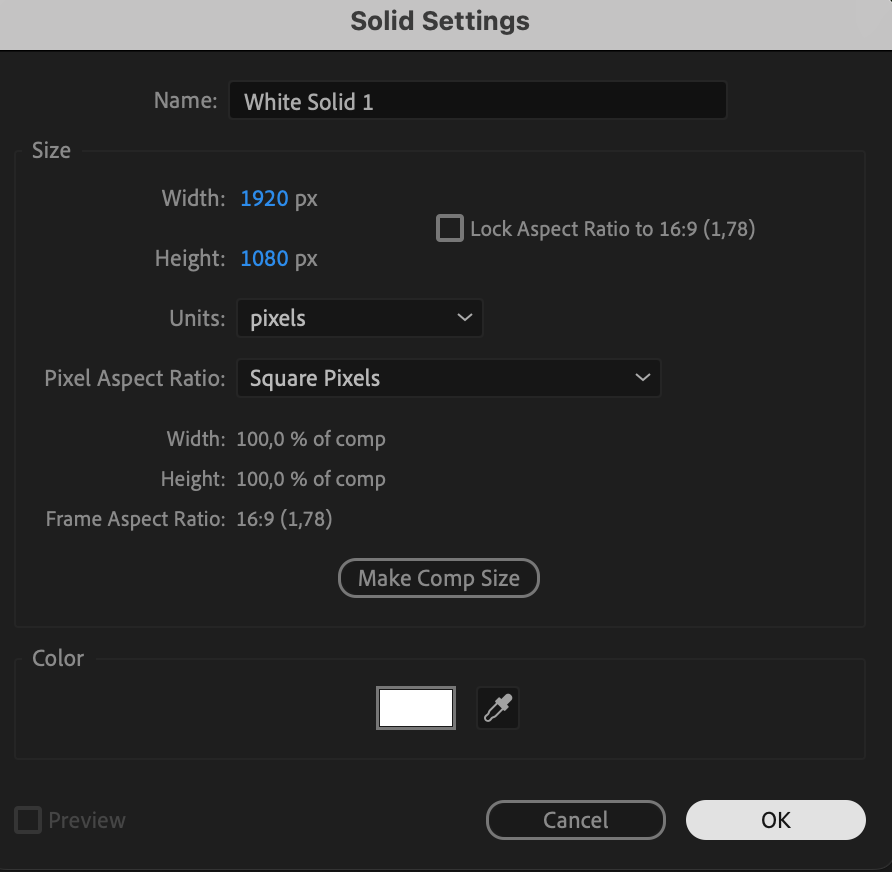
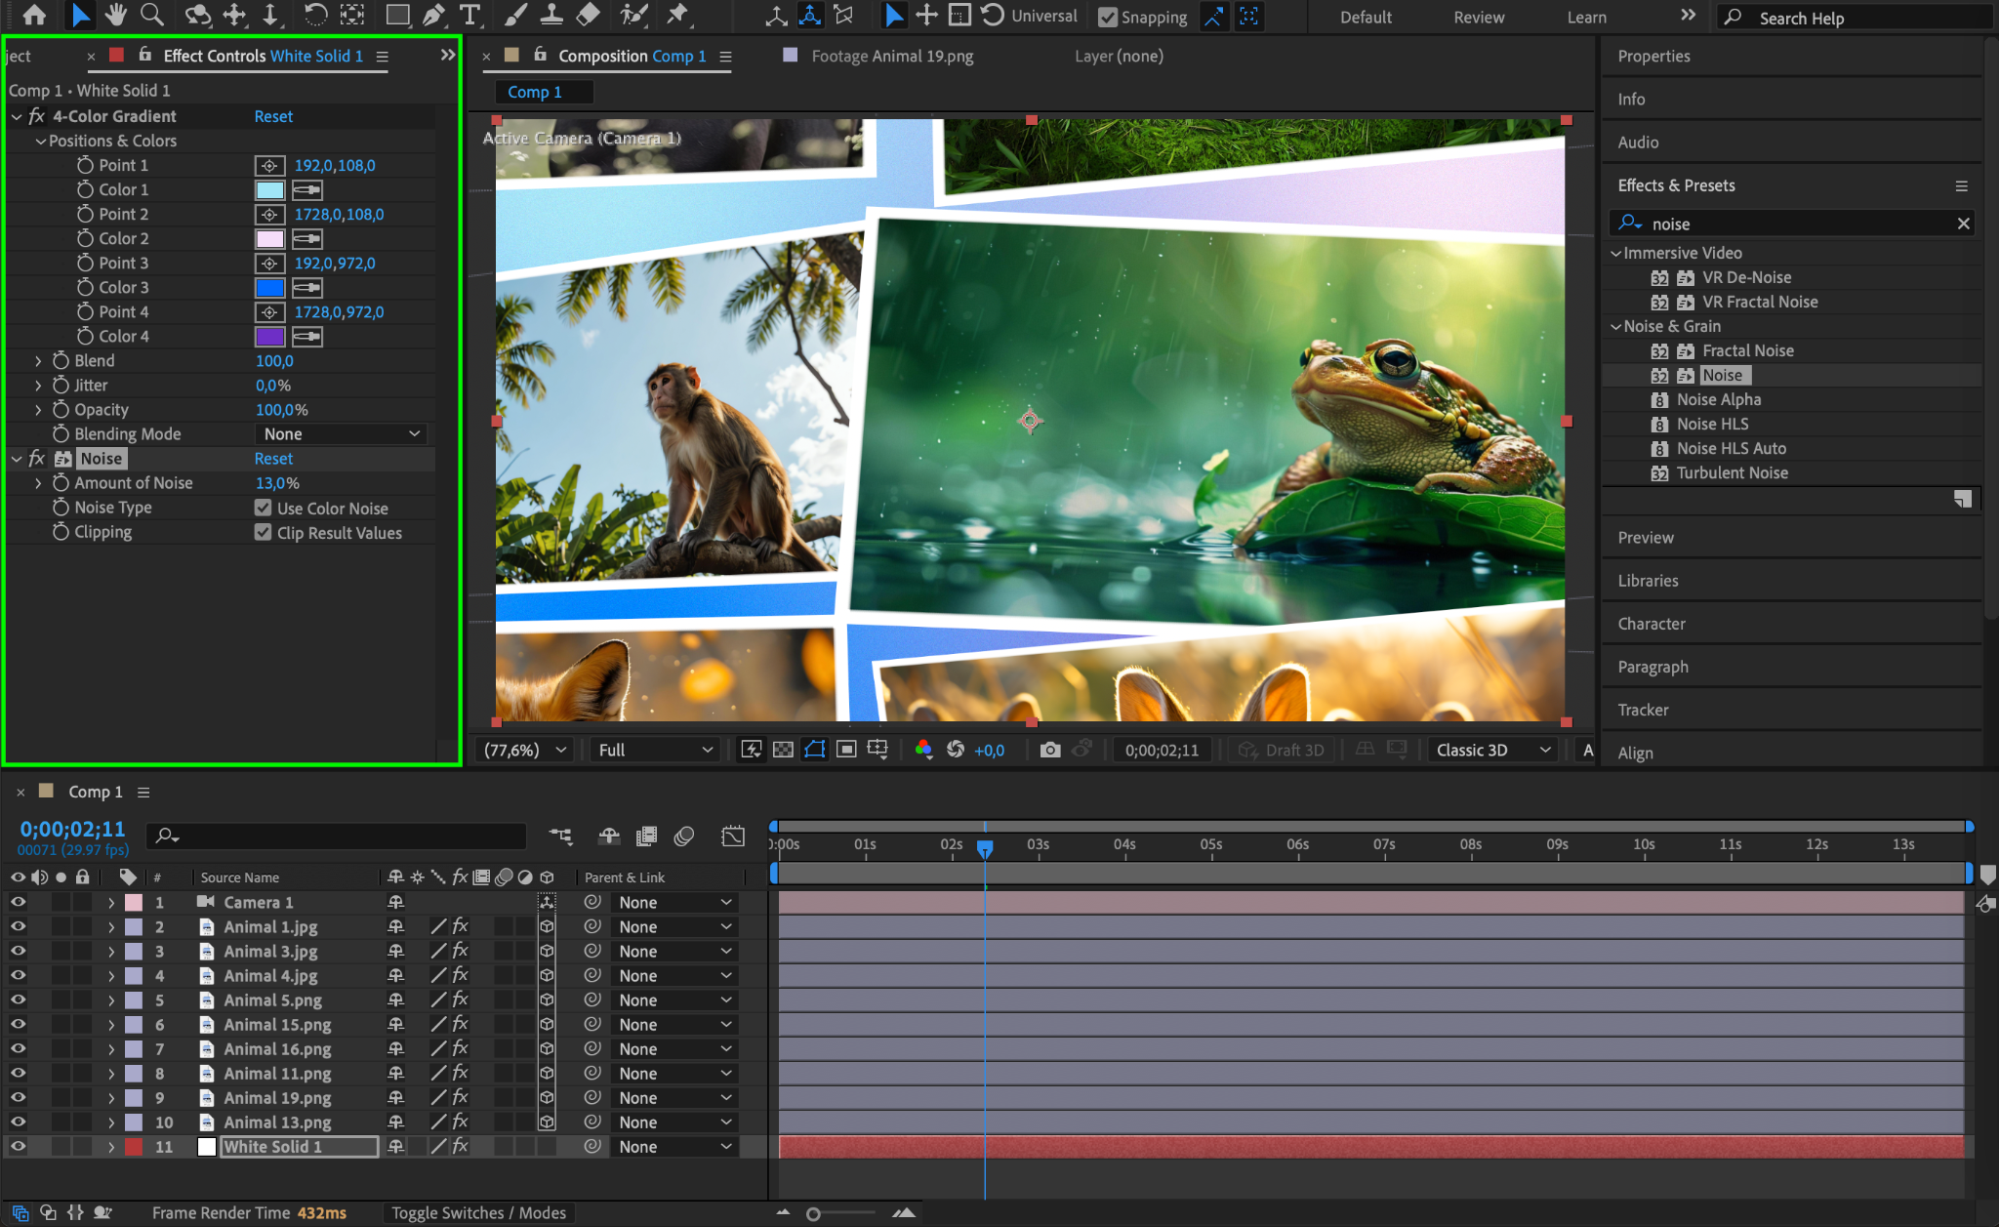
 Step 8: Create a Background Texture
Go to Layer > New > Solid and choose any color. Then, apply Noise and 4-Color Gradient effects to create a textured background. Move this layer below all image layers to add depth and a more artistic look to the composition.

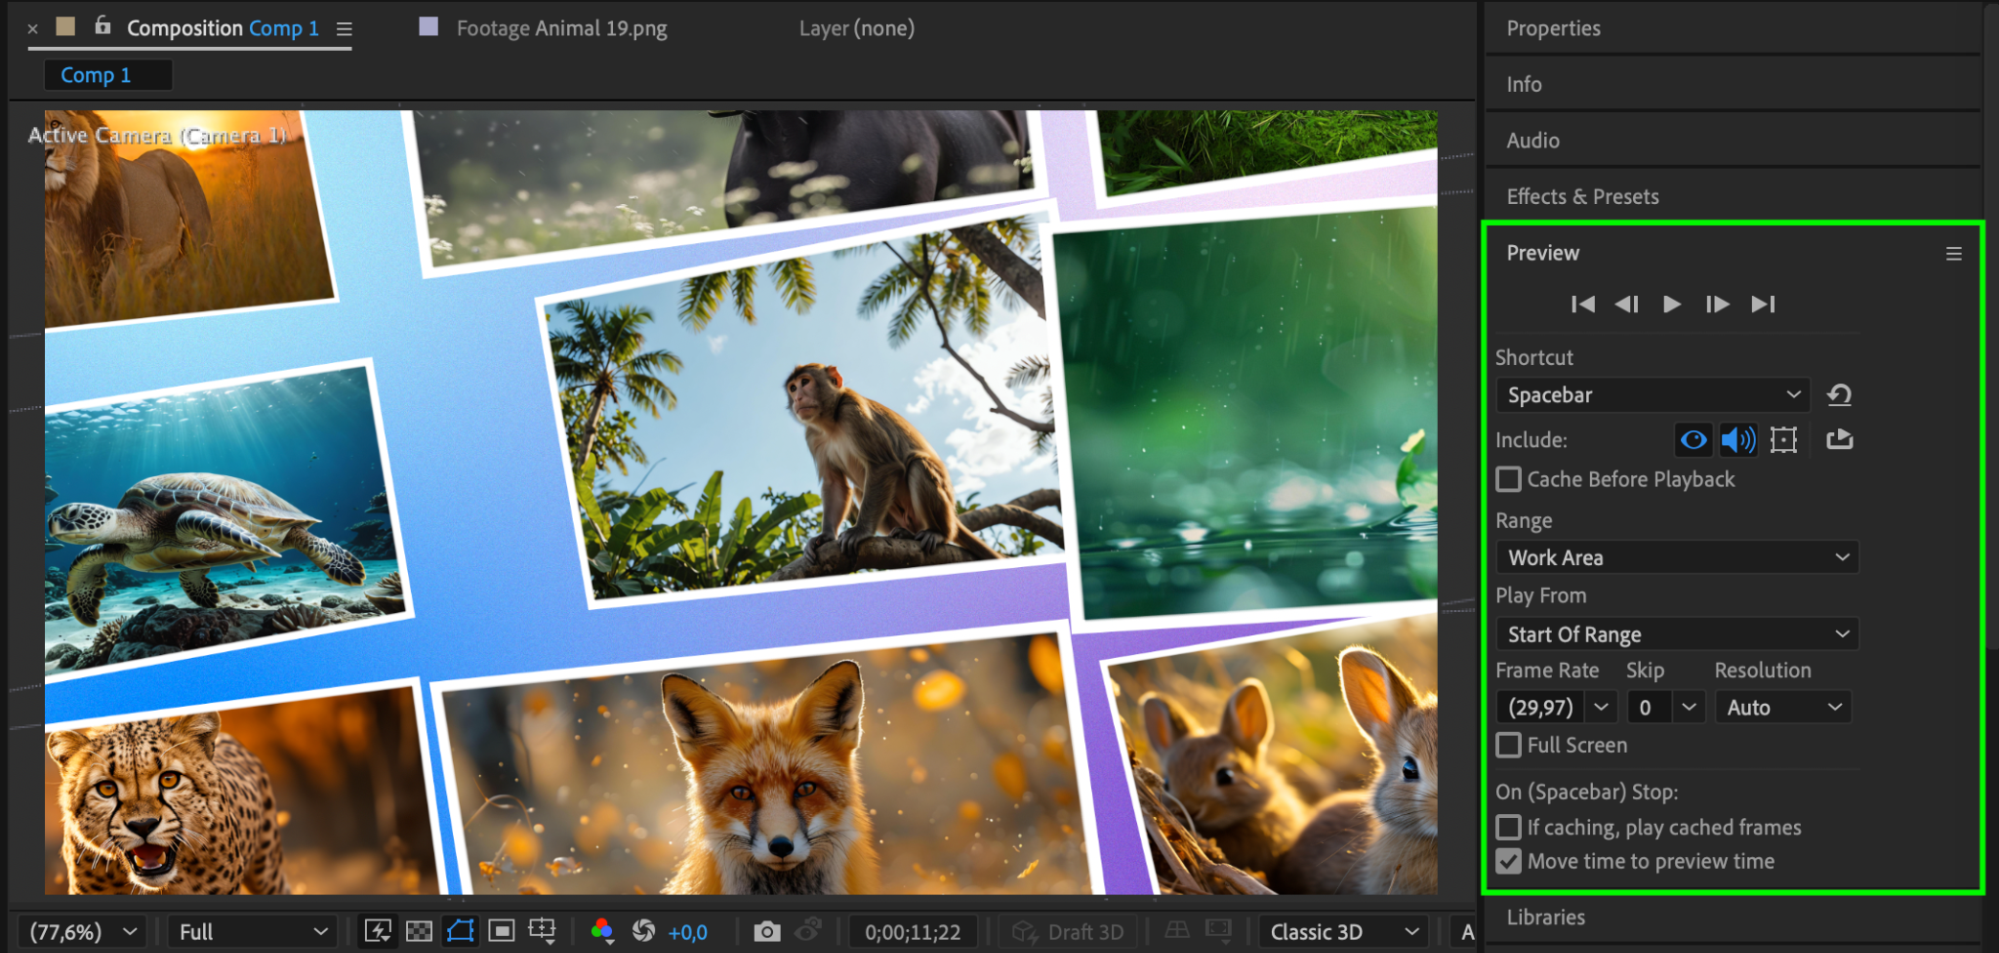
 Step 9: Preview and Refine
Use the Preview Panel to play the animation and make adjustments to the camera movement, effects, and positioning of the images. Ensure smooth transitions and appealing motion throughout the sequence.
Conclusion
By following these steps, you can create a stunning animated photo album in After Effects. Using 3D layers, smooth camera movements, and effects like Vegas, your project will have a professional and engaging look. Experiment with different layouts and animations to make your photo album unique!
Our Bestsellers


