How to Rotate a Camera Layer in After Effects
Introduction
Camera rotation can add a lot of depth and motion to your After Effects projects. Whether you’re making a 3D scene more dynamic or creating smooth transitions, rotating the camera is a key skill. In this tutorial, you will learn an easy and clear way to set up and animate camera rotation in After Effects.
Step 1: Open Your Project with 3D Layers
Start by opening your project in After Effects. Make sure that your composition contains layers that are set to 3D, so the camera will have elements to interact with.
 Step 2: Add a Camera Layer
Go to the Layer menu at the top, then choose New > Camera. In the Camera Settings window, you can select a preset like 50mm or create your own custom settings. Click OK to create the camera layer.

Get 10% off when you subscribe to our newsletter

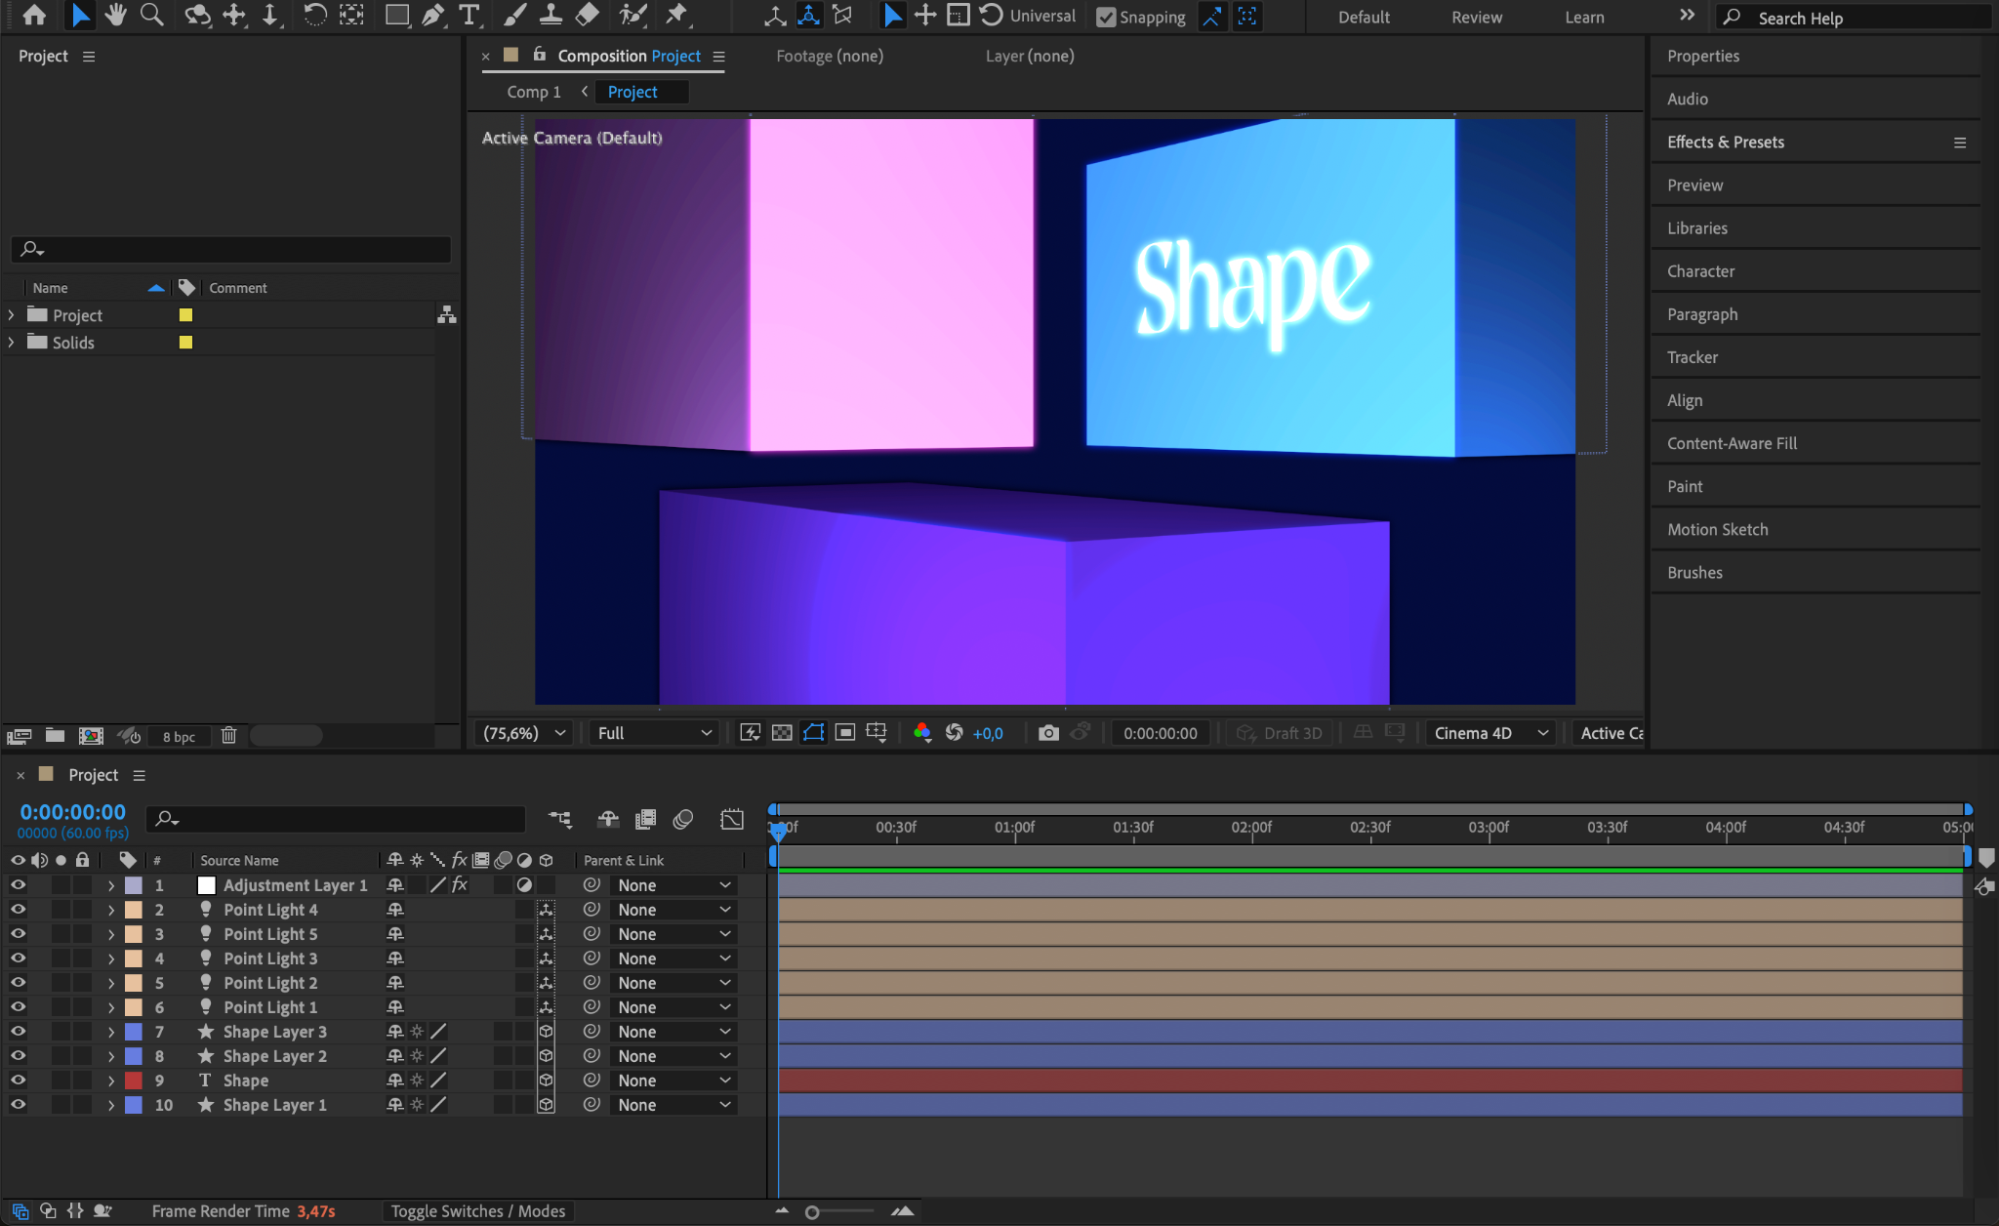
Step 3: Enable 3D for Layers
Make sure the layers you want the camera to view are set to 3D. To do this, check the small 3D cube icon next to each layer in the timeline. Also, ensure the camera layer itself is set to 3D if it was not automatically enabled.
 Step 4: Rotate the Camera Manually
Select the camera layer and press “R” to open the rotation properties: Orientation, X Rotation, Y Rotation, and Z Rotation. Adjust these values to manually rotate the camera and see how the view changes in your composition.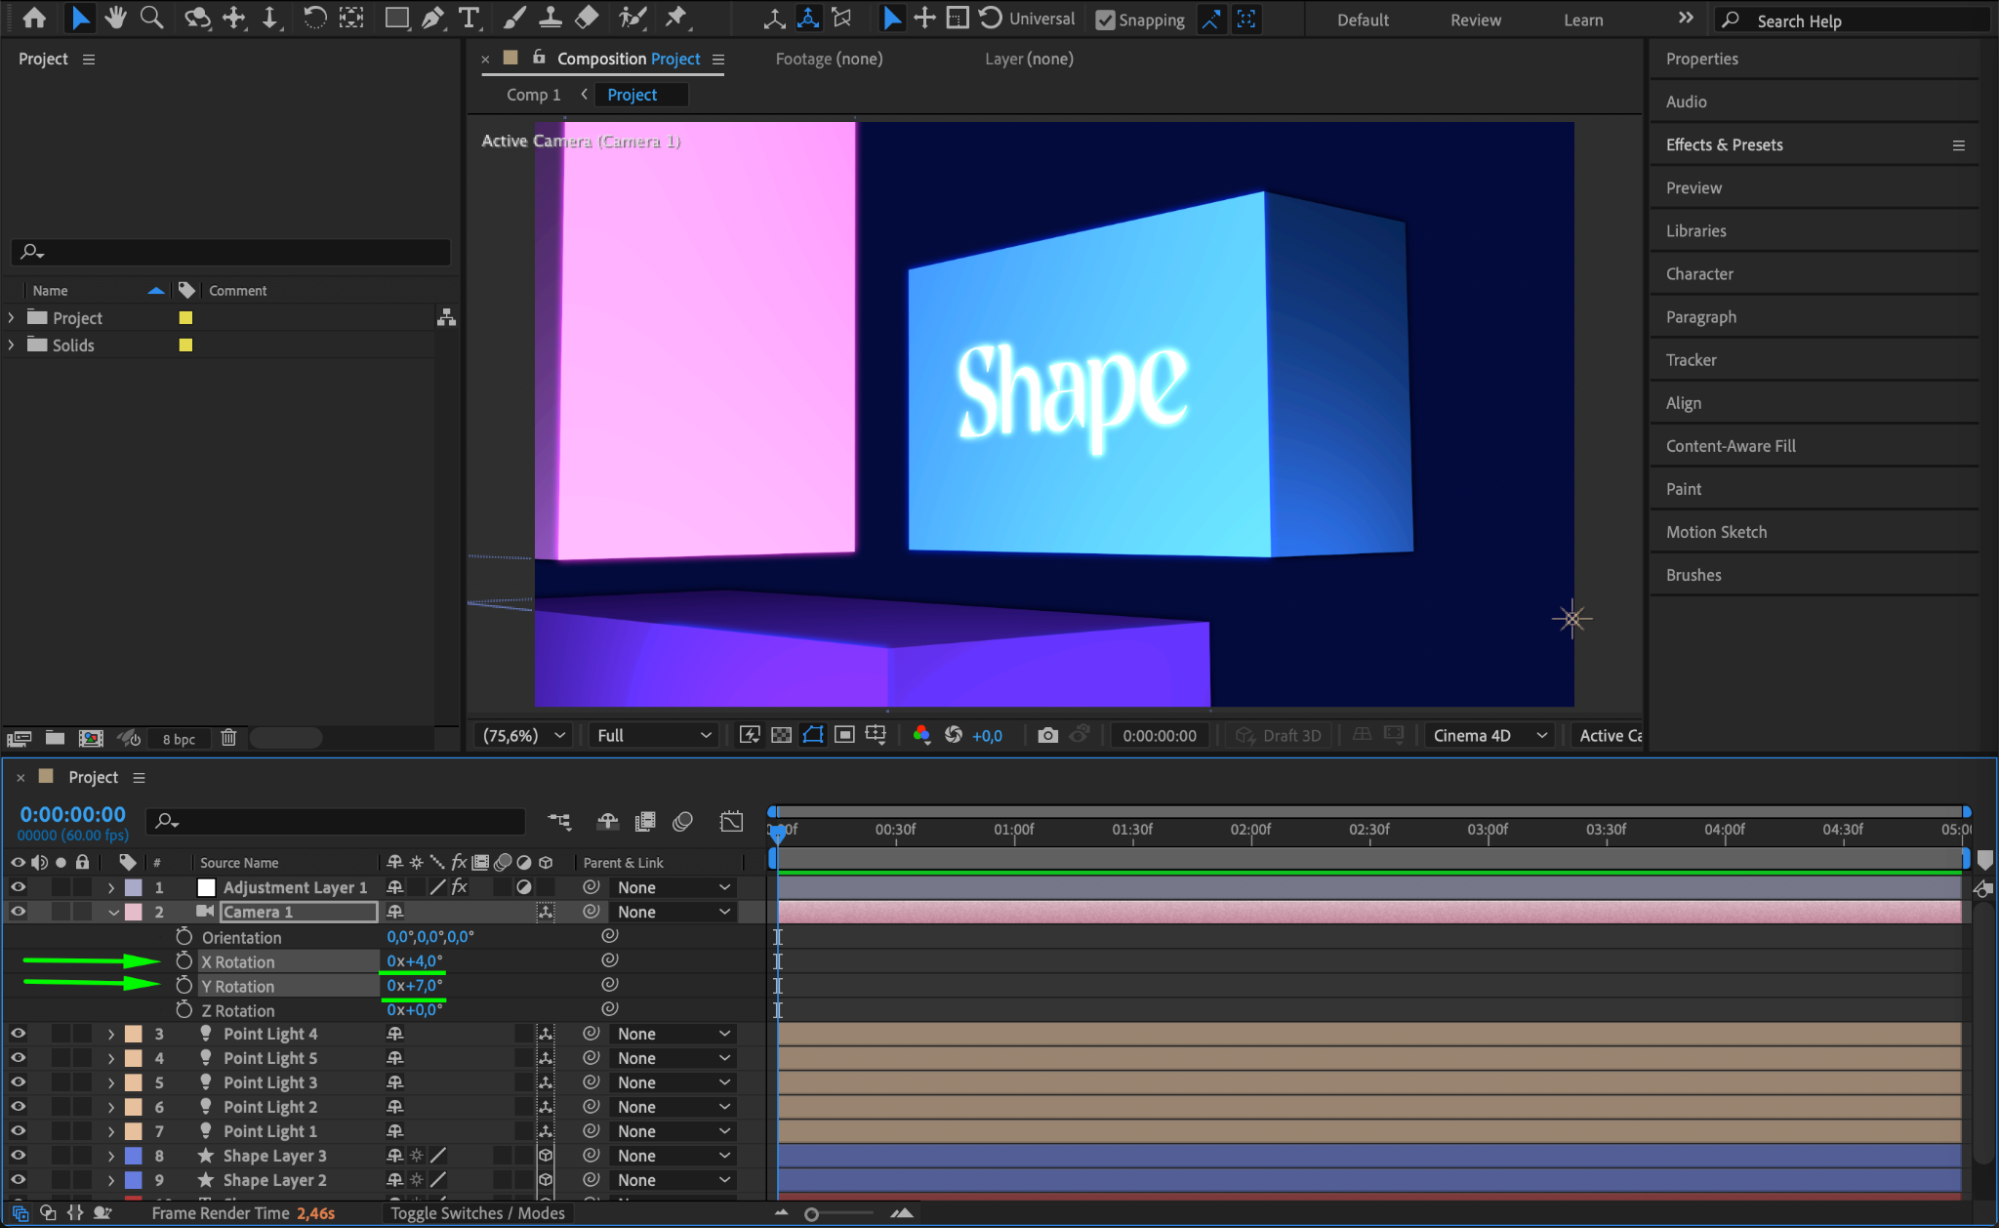 Step 5: Use Camera Tools for Easier Control
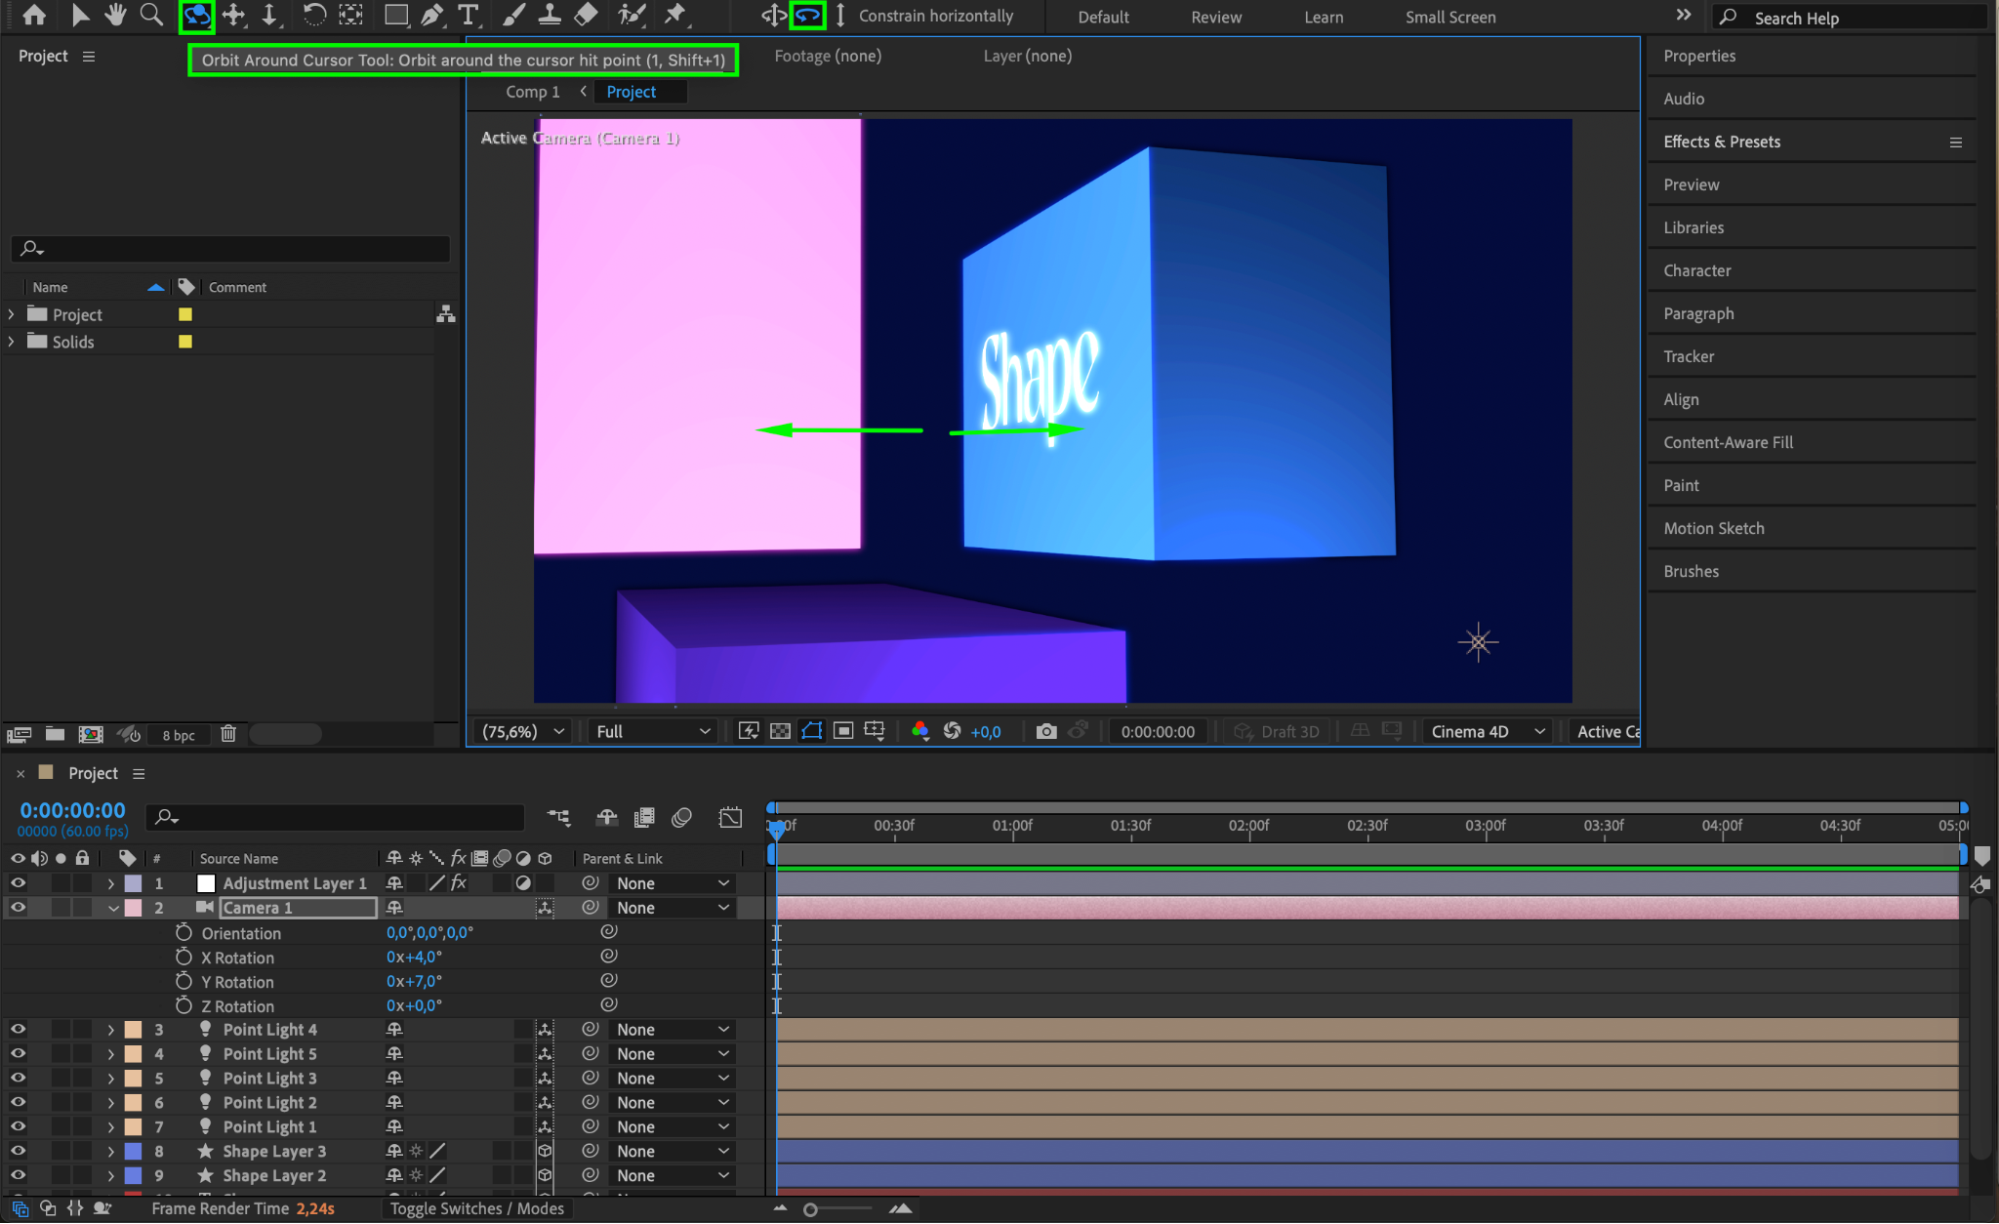
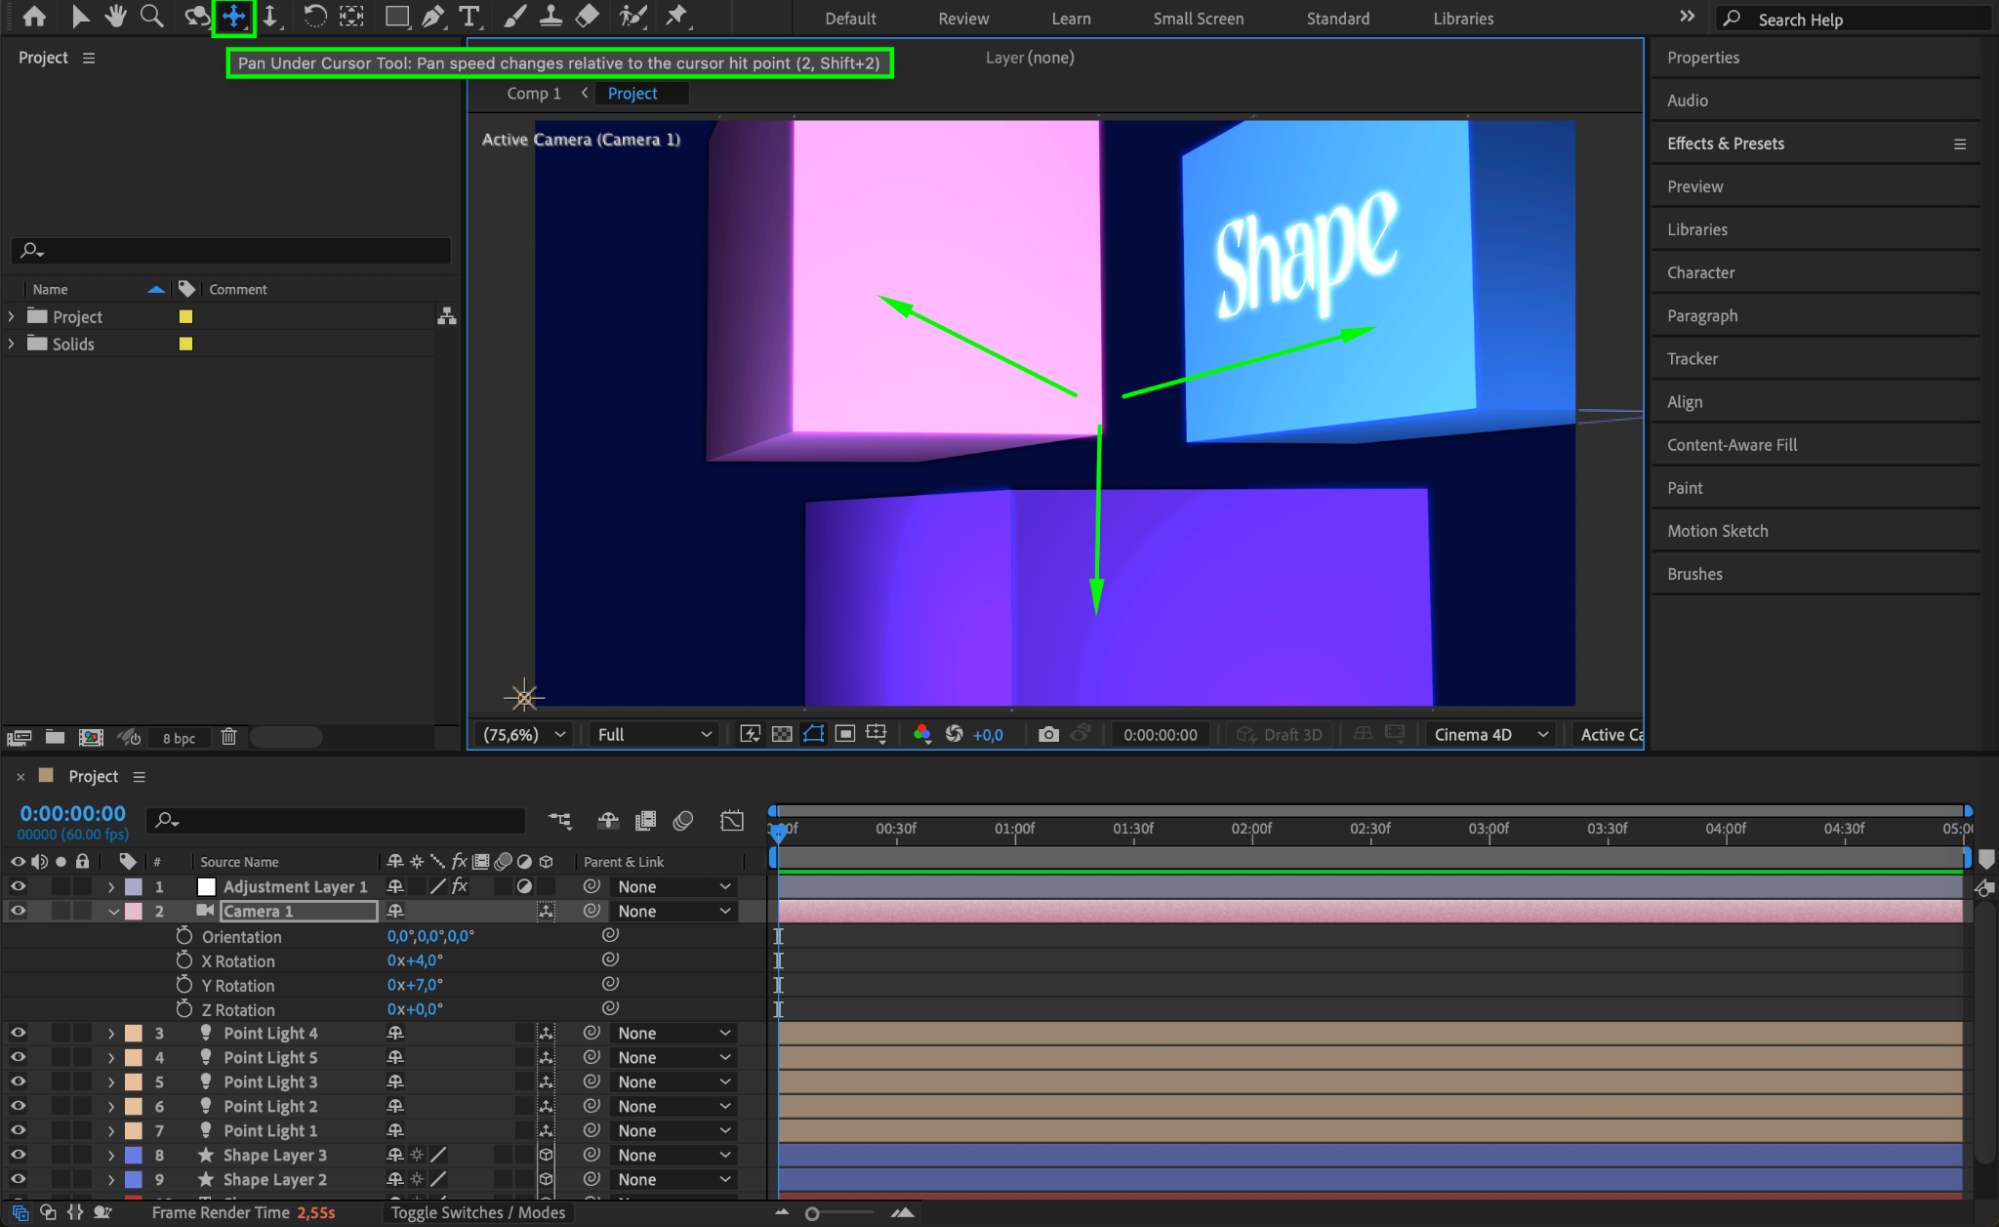
For easier camera movement, use the camera tools from the toolbar: Orbit Around Cursor Tool, Pan Under Cursor Tool, and Dolly Towards Cursor Tool. These tools allow you to intuitively orbit, move, and zoom the camera around your scene.

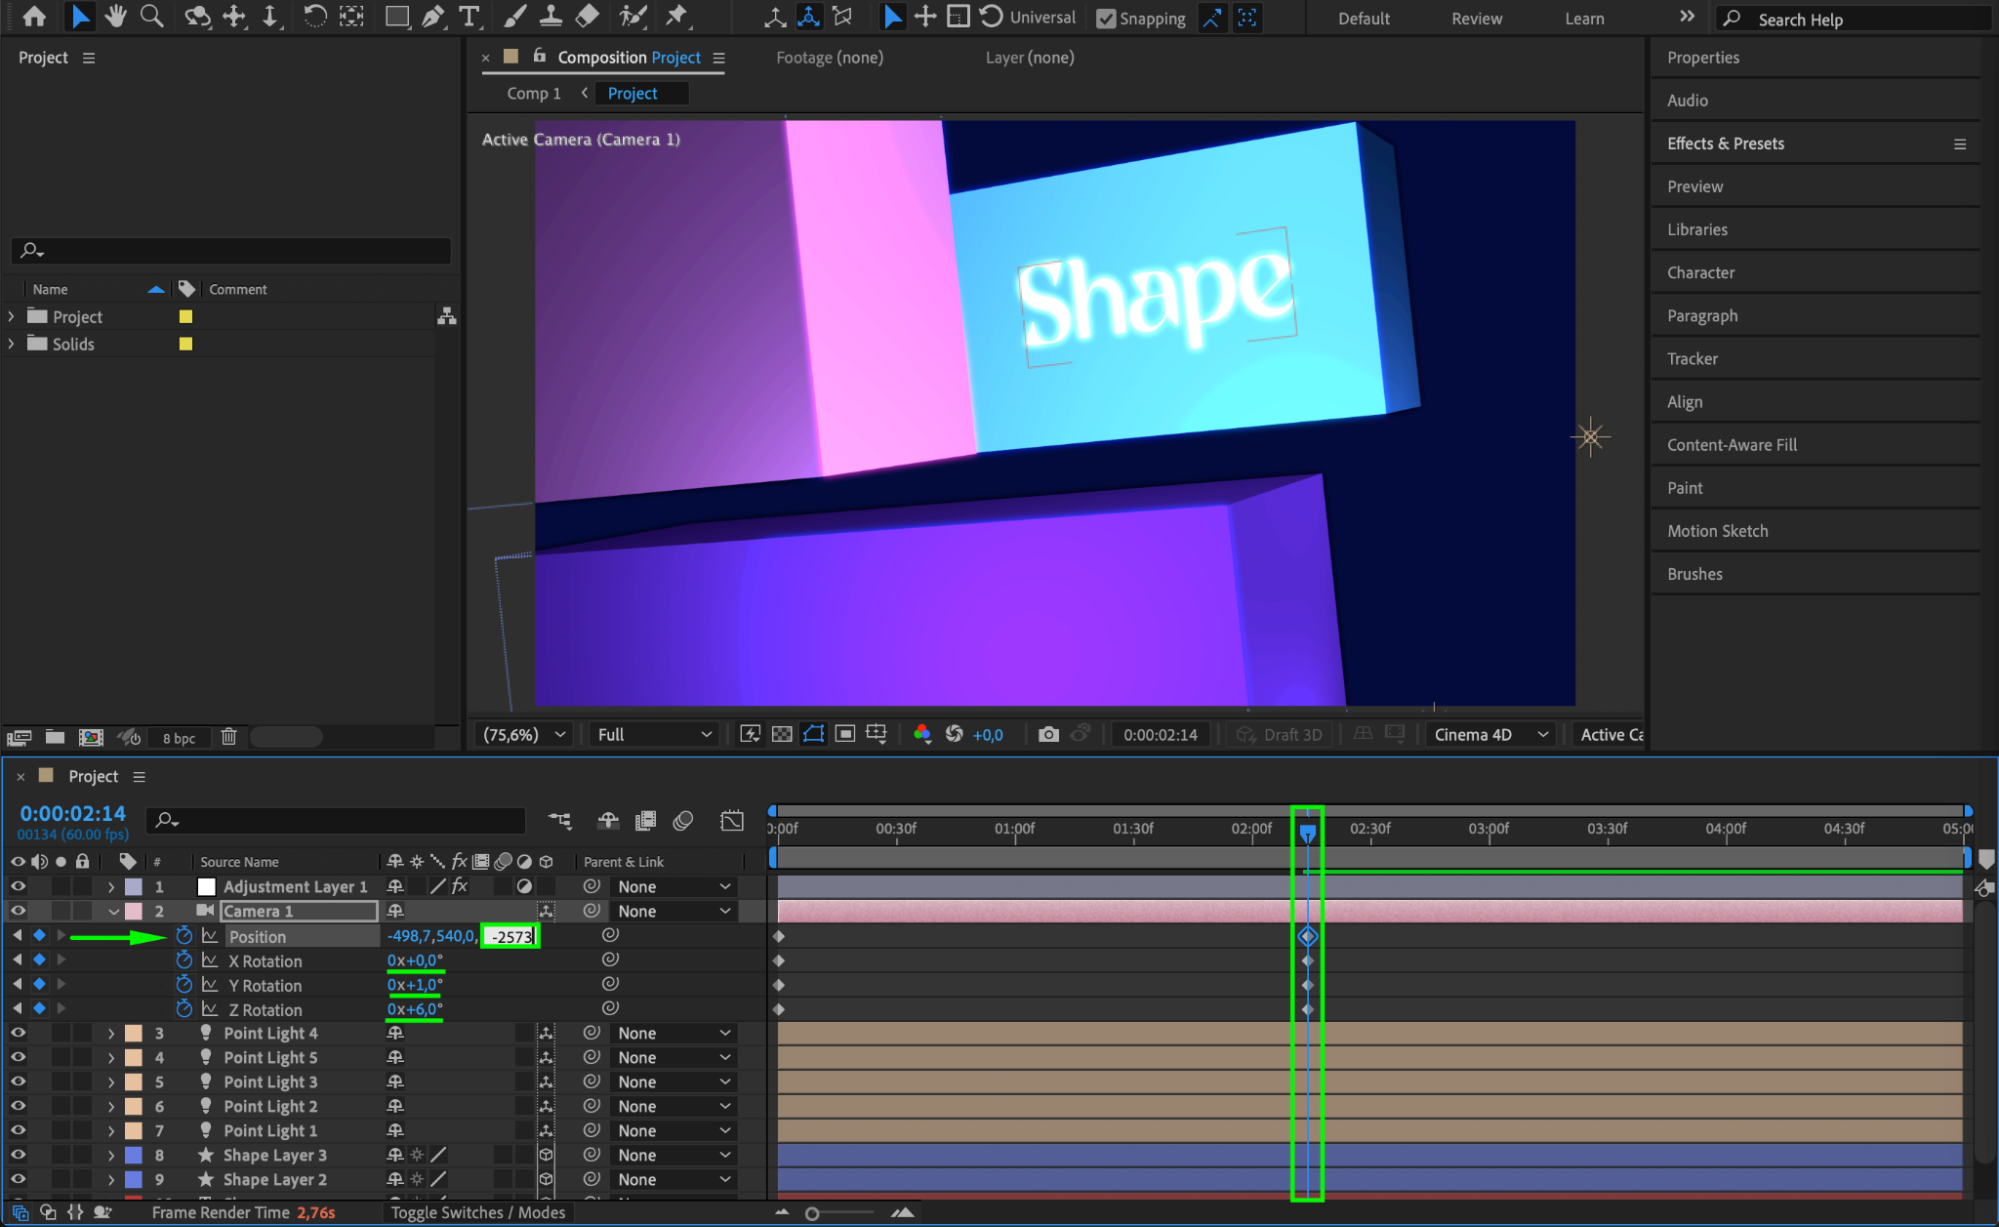
Step 6: Animate Camera Rotation
If you want the camera to move over time, animate its rotation properties. Move the playhead to your starting position, click the stopwatch next to the rotation property you want to animate, move the playhead forward, and adjust the rotation value. To zoom in or out during the animation, adjust the Z Position of the camera .
.
 Step 7: Apply Easy Ease for Smoother Animation (Optional)
To make your camera animation smoother and more natural, select your keyframes. Right-click and choose Keyframe Assistant > Easy Ease, or simply press F9. This will create a more fluid and professional-looking motion.
Step 8: Preview and Render
Press the spacebar to preview your animation. If you are happy with the result, go to Composition > Add to Render Queue or use Adobe Media Encoder to export your final project.


Conclusion
Rotating a camera in After Effects is a powerful way to bring life and depth to your compositions. By setting up a camera layer, enabling 3D layers, using the built-in camera tools, and animating rotation and position, you can create dynamic and professional-quality animations even with basic skills.


