How to Animate and Rotate 3D Text in After Effects
Introduction
3D text animation can instantly make your motion graphics look more professional and eye-catching. In After Effects, you can create and rotate real 3D text using the Cinema 4D renderer. This method gives you control over depth, lighting, and rotation in three dimensions. In this tutorial, you’ll learn how to create 3D text, set its depth and color, and animate its rotation step-by-step.
Step 1: Create a New Composition and Enable Cinema 4D Renderer
Start by creating a new composition in After Effects. Then, go to the Composition Settings > 3D Renderer tab and choose Cinema 4D as your renderer. This will allow you to access advanced 3D features like extrusion and side color.

 Step 2: Create a Text Layer
Next, select the Type Tool (Ctrl/Cmd + T) from the toolbar and type your desired text. This will be the text you animate in 3D. Make sure it’s on its own layer in the timeline.

Step 3: Open Text Layer Properties and Add Side Color
Expand the text layer properties by clicking the arrow next to the layer name. Click on the Animate button, go to Side > Color > RGB. This adds a new animator for side color, which will help you see the 3D depth more clearly.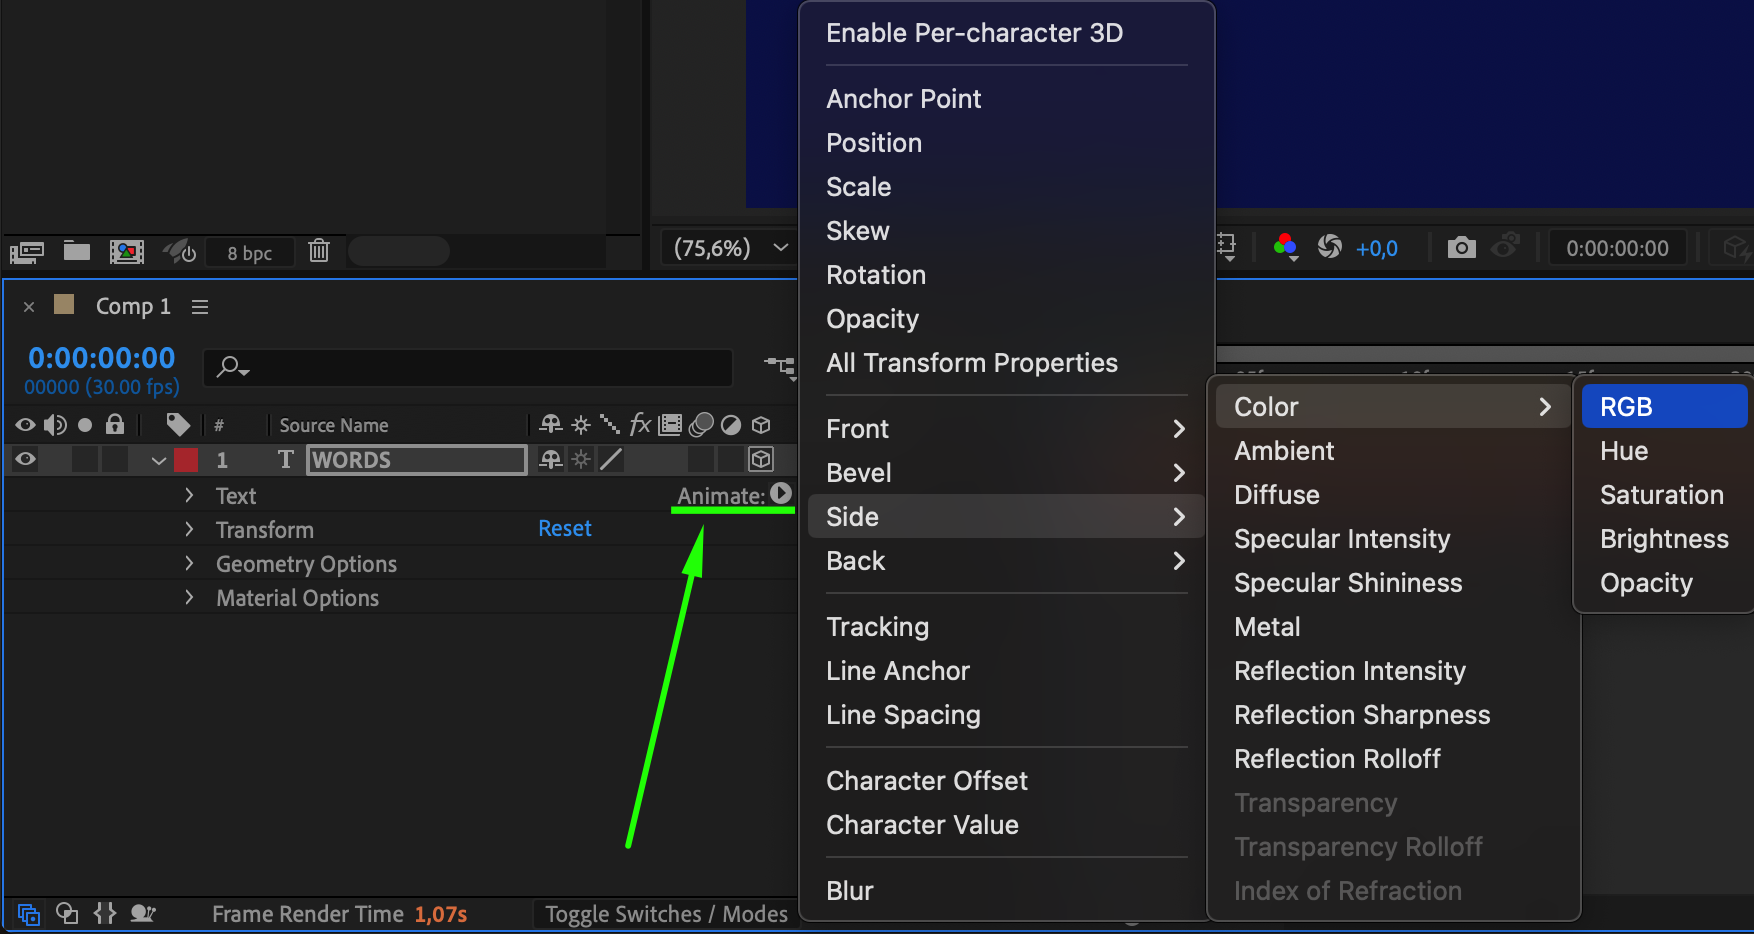 Step 4: Set Side Color and Extrusion Depth
Click on the Side Color and choose a visible color, like red or blue. Then, scroll down to Geometry Options, and increase the Extrusion Depth to about 200. This gives your text visible thickness, making the 3D effect more obvious. Step 5: Rotate the 3D Text
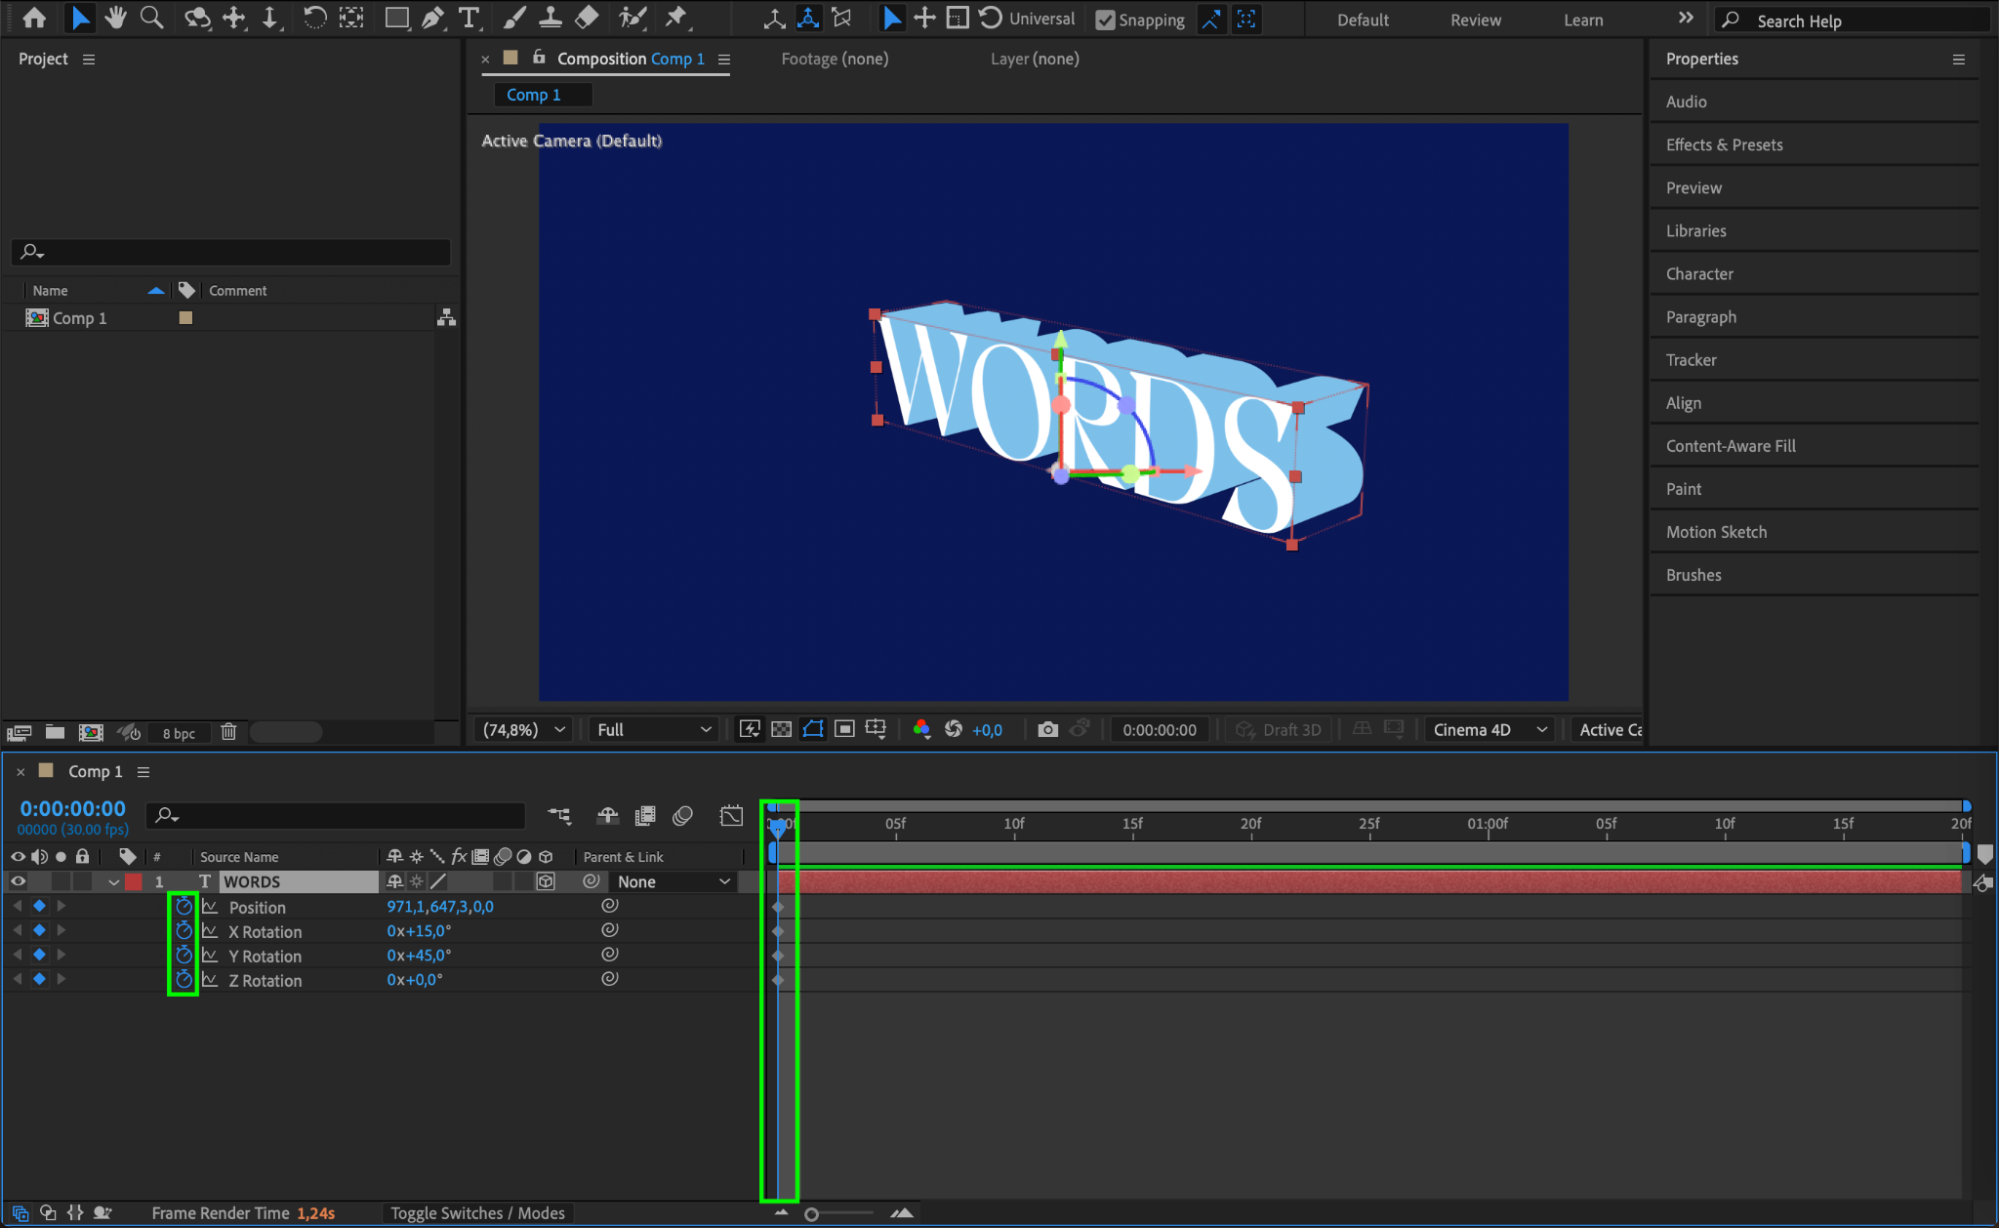
Select the text layer and press “R” to bring up the rotation properties. You will see X, Y, and Z Rotation. Now, when you rotate your text, the depth will be visible, and the side color will help emphasize the 3D look.
Get 10% off when you subscribe to our newsletter

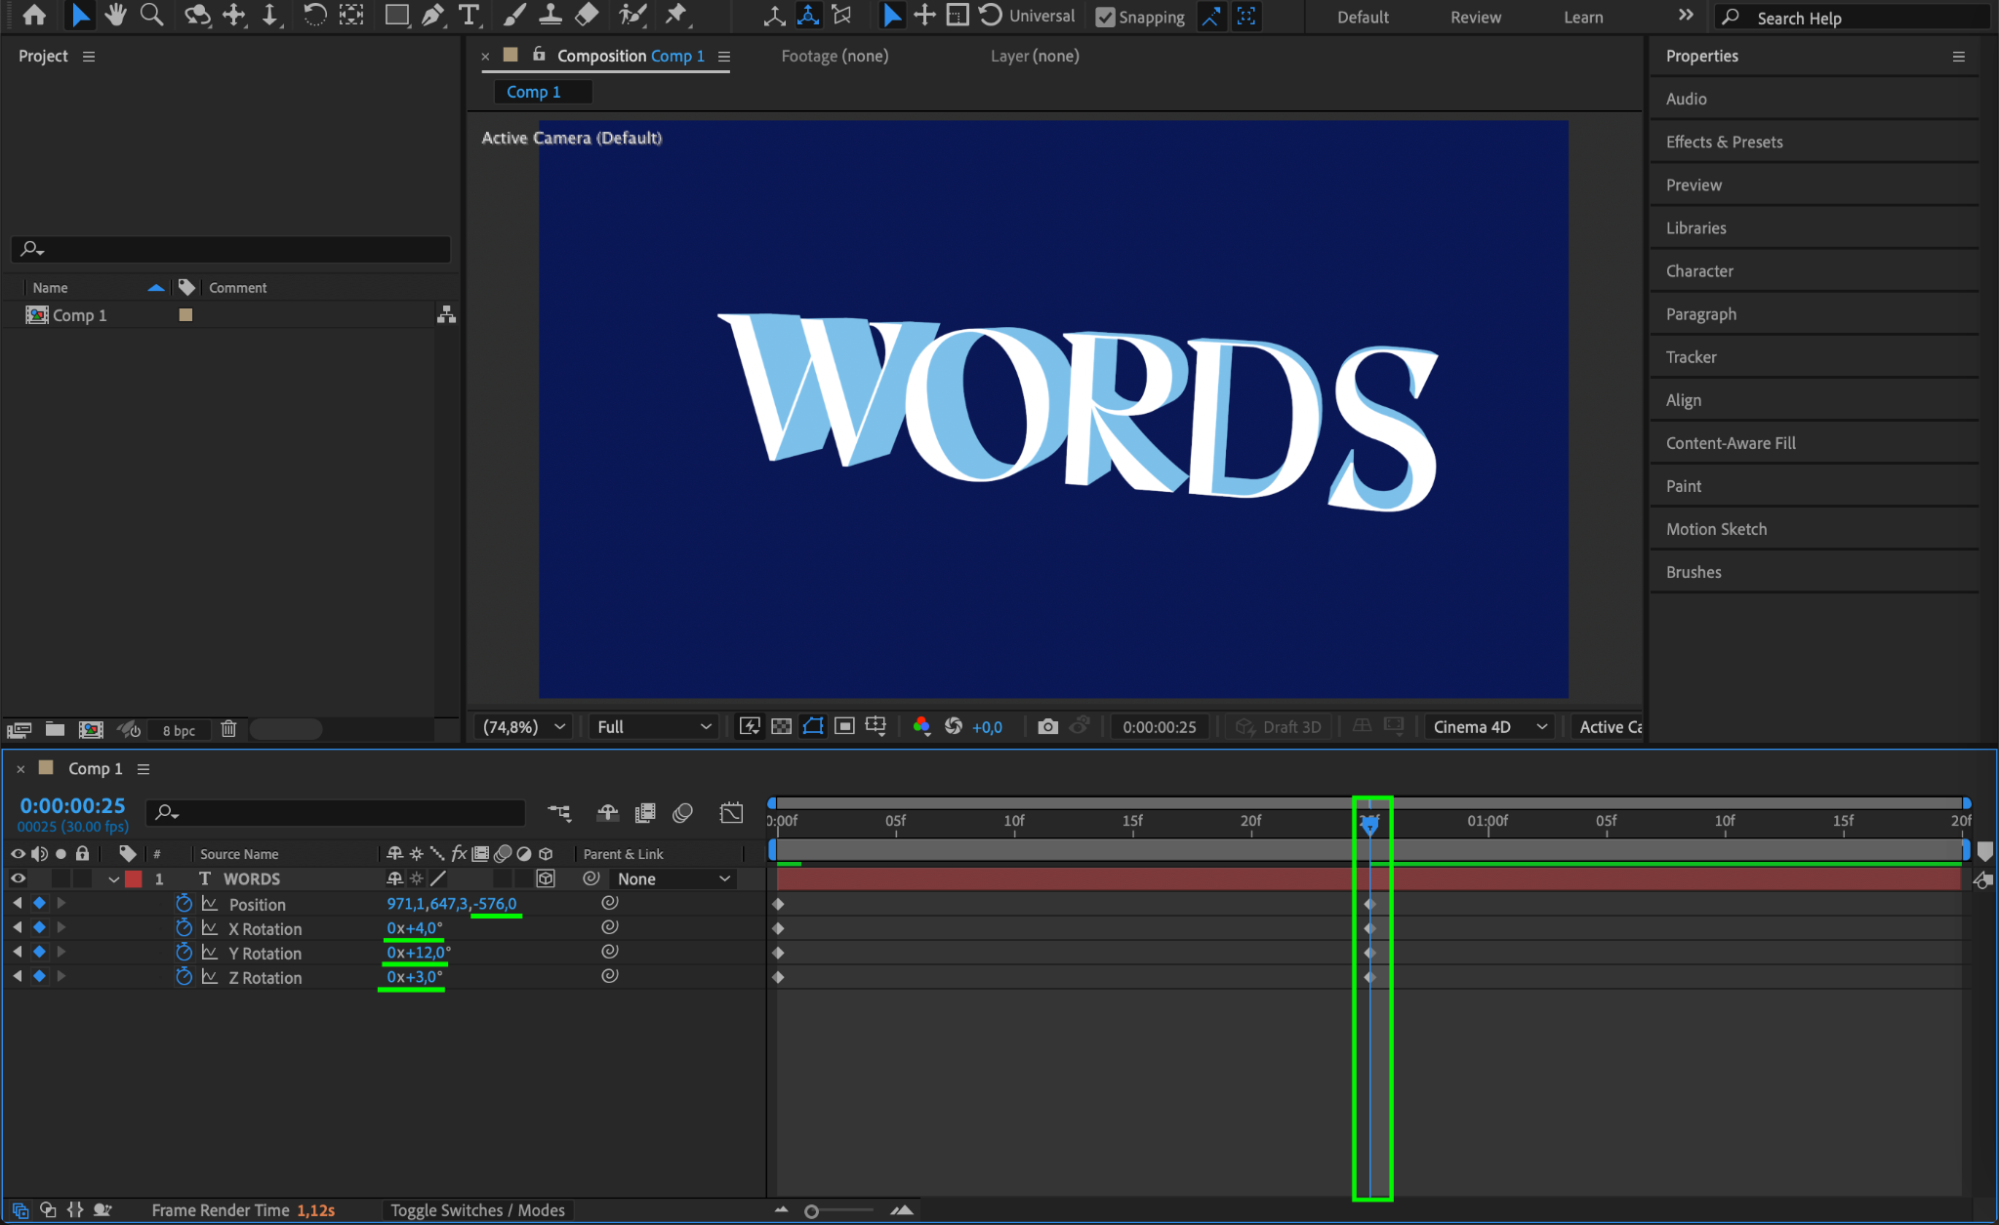
Step 6: Animate Rotation and Z Position
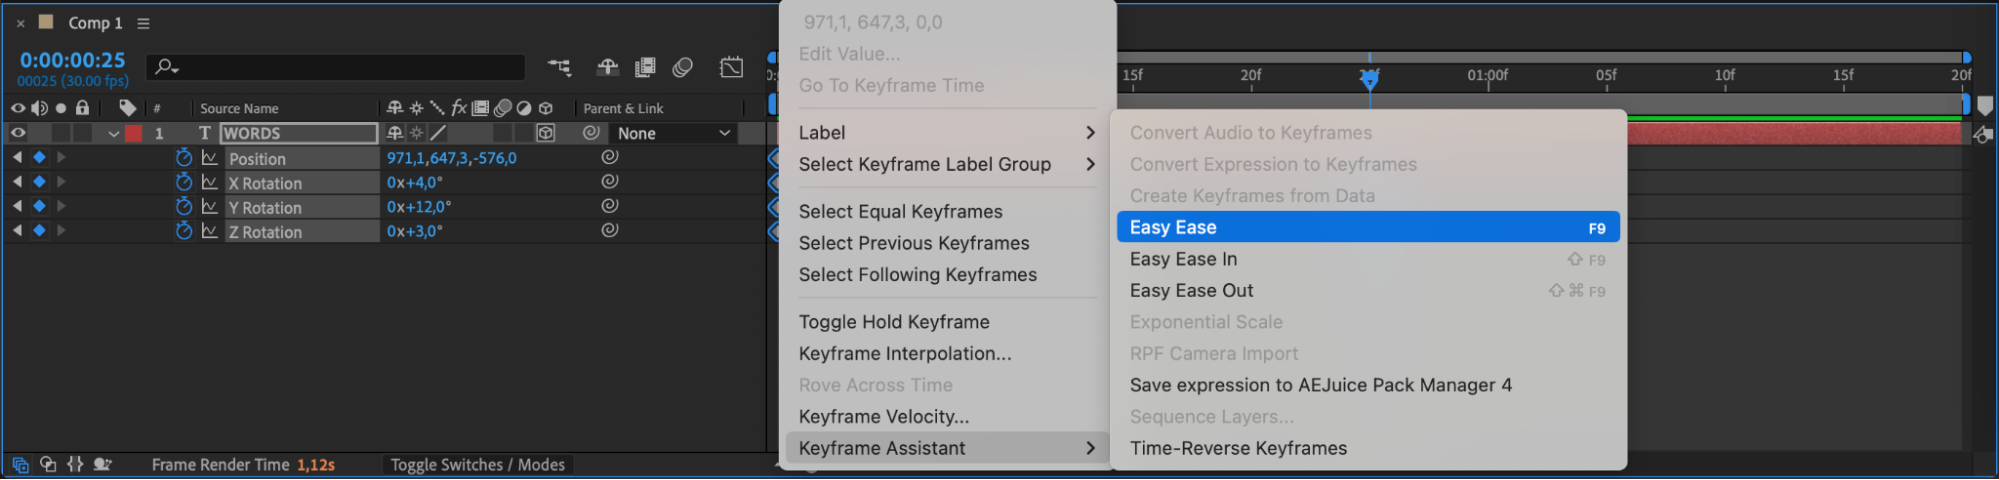
Move the playhead to the start of the timeline and click the stopwatch next to the rotation values (X, Y, or Z). Move the playhead forward and change the rotation angles to create an animation. You can also animate the Z Position to make the text move closer or further from the viewer. To make the motion smoother, apply Easy Ease by selecting your keyframes and pressing F9.
 Step 7: Preview and Render
Press the spacebar to preview your animation. Once you’re happy with the result, go to Composition > Add to Render Queue or use Adobe Media Encoder to export your final video.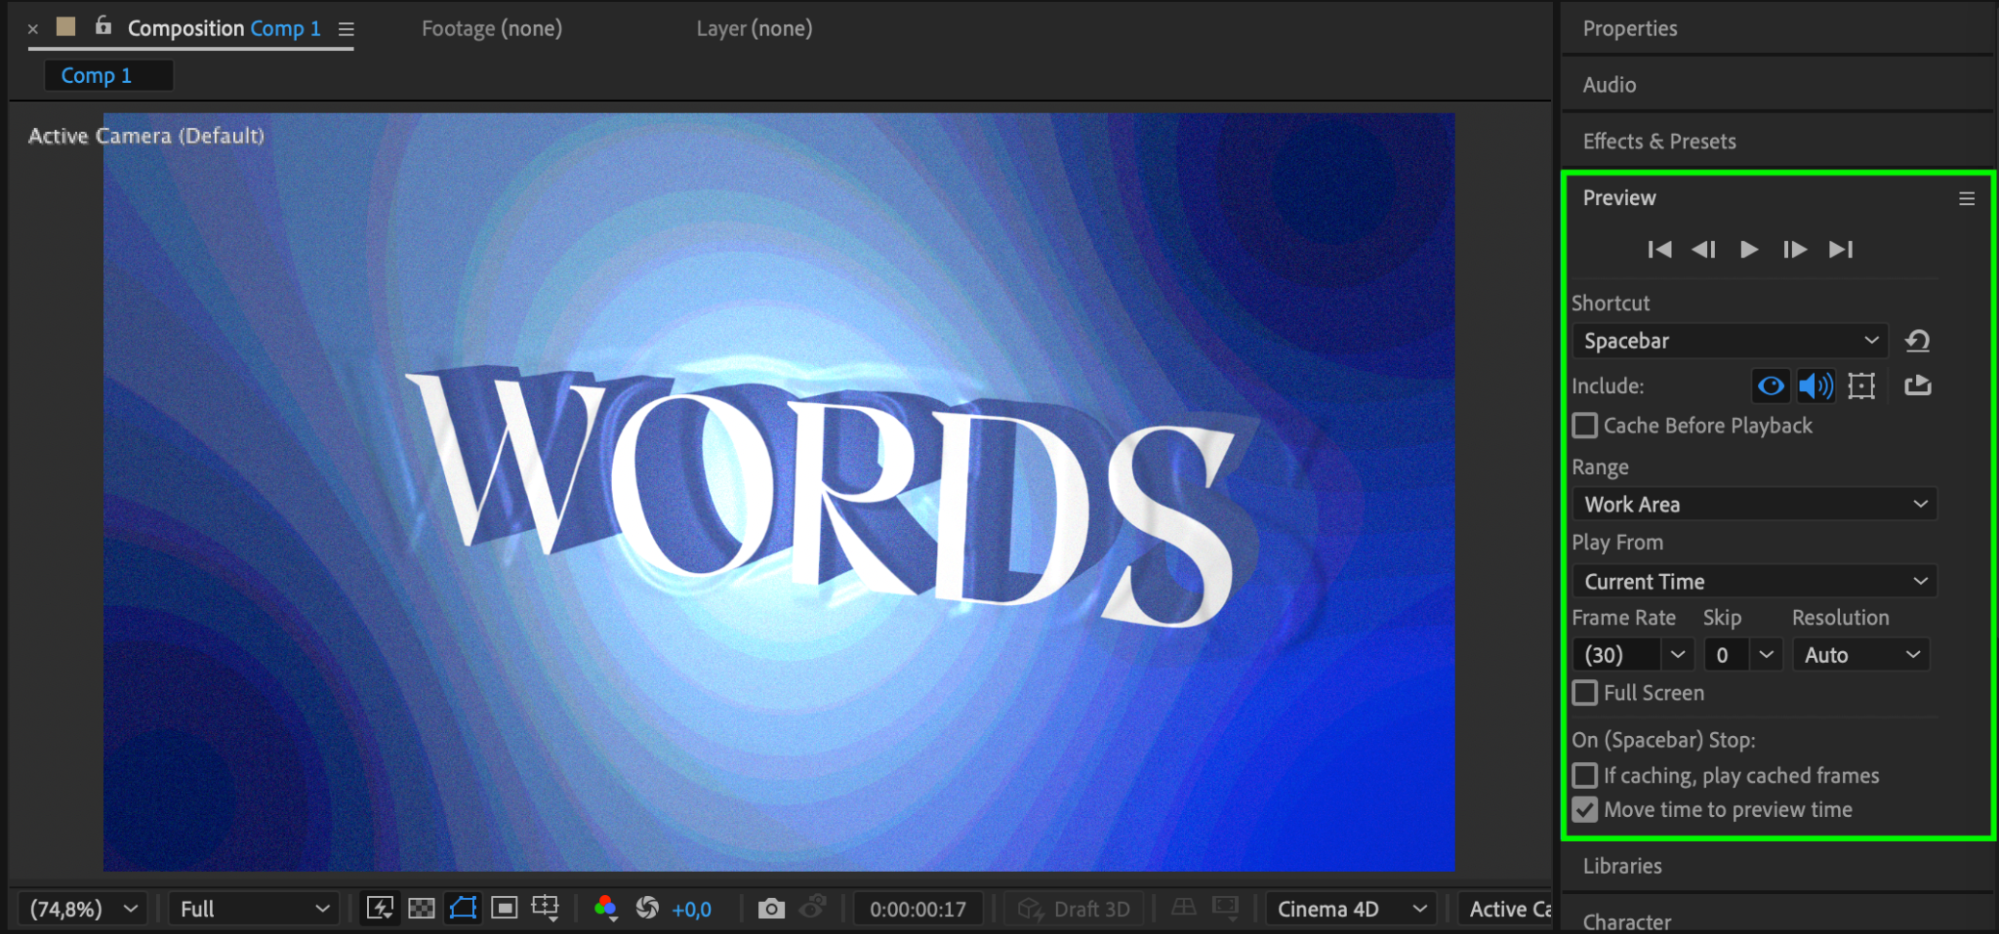 Conclusion
Rotating 3D text in After Effects using the Cinema 4D renderer allows you to bring real depth and motion into your designs. By adjusting extrusion, side color, and rotation values, you can build dynamic, professional animations. This technique is perfect for titles, logos, or any text that needs a strong visual presence.


