How to Replace a Sky in After Effects Using Roto Brush and AEJuice
Introduction
Replacing the sky in After Effects can add a dramatic or magical mood to your footage. Whether you want a night sky with auroras or a cinematic sunset, it’s easy to do using the Roto Brush and high-quality overlays like those from AEJuice. In this step-by-step guide, you’ll learn how to isolate the sky, add a new one, and blend everything together for a professional result.
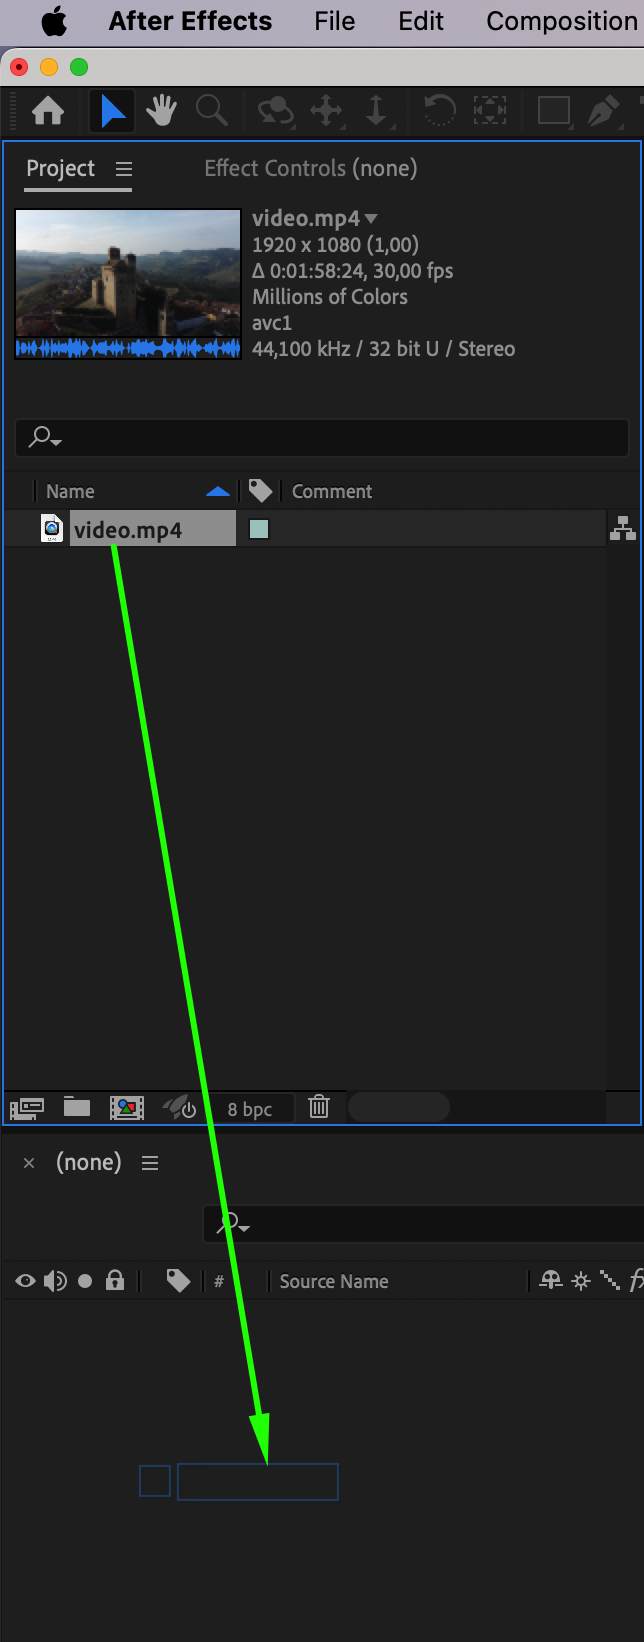
Step 1: Import Your Video to the Timeline
Go to File > Import > File, and choose the video where you want to replace the sky. Drag your video into the timeline to begin working on it.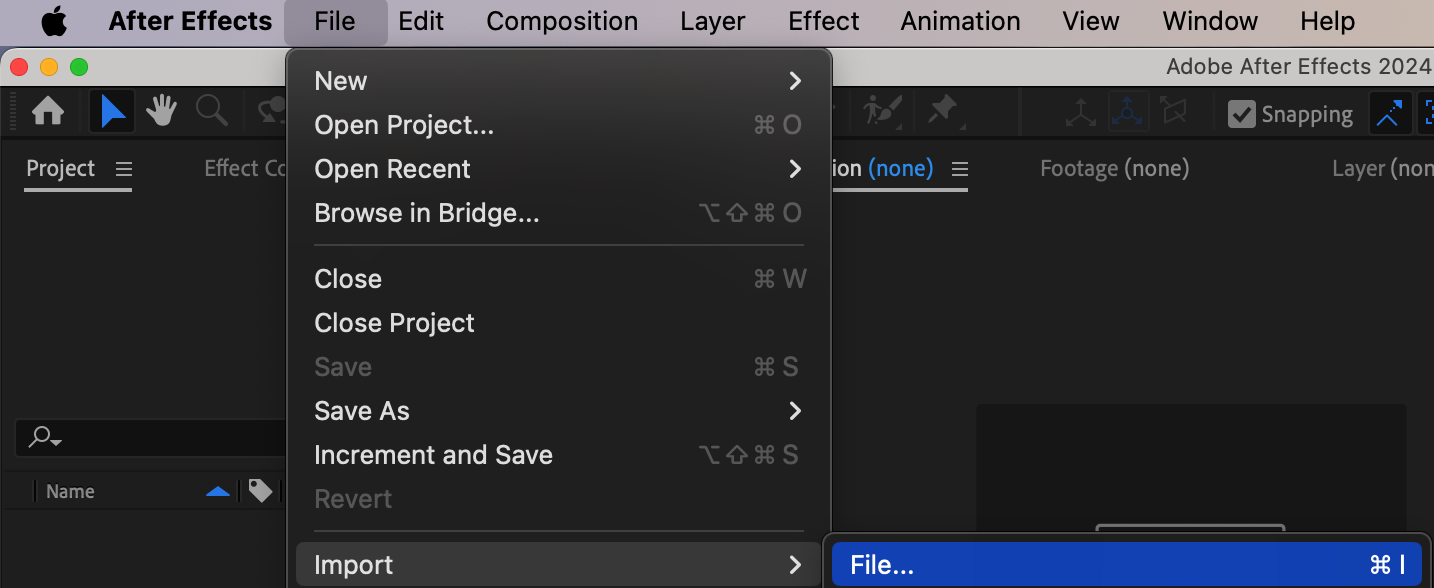
 Step 2: Isolate the Foreground Using the Roto Brush Tool
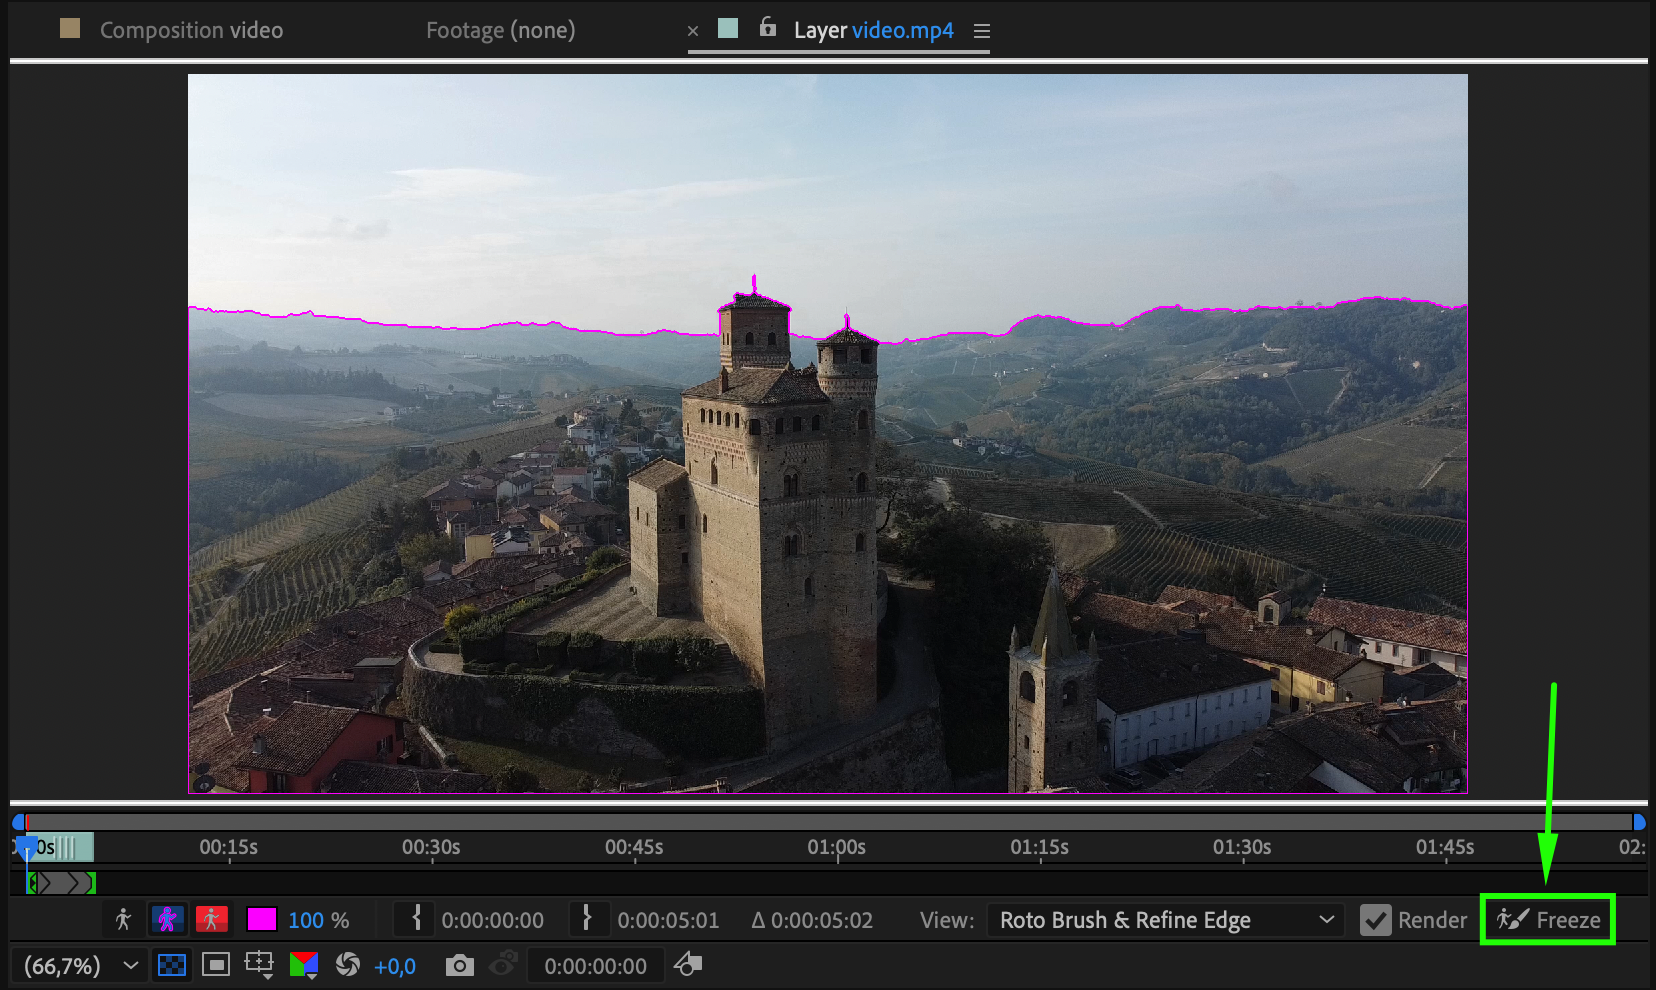
Double-click the video layer to open it in the Layer Panel. Select the Roto Brush Tool by pressing “Alt/Option + W”. Use it to draw over the foreground — the part of the video you want to keep (excluding the sky). Once you’re happy with the selection, click Freeze in the lower-right corner to lock the mask across all frames.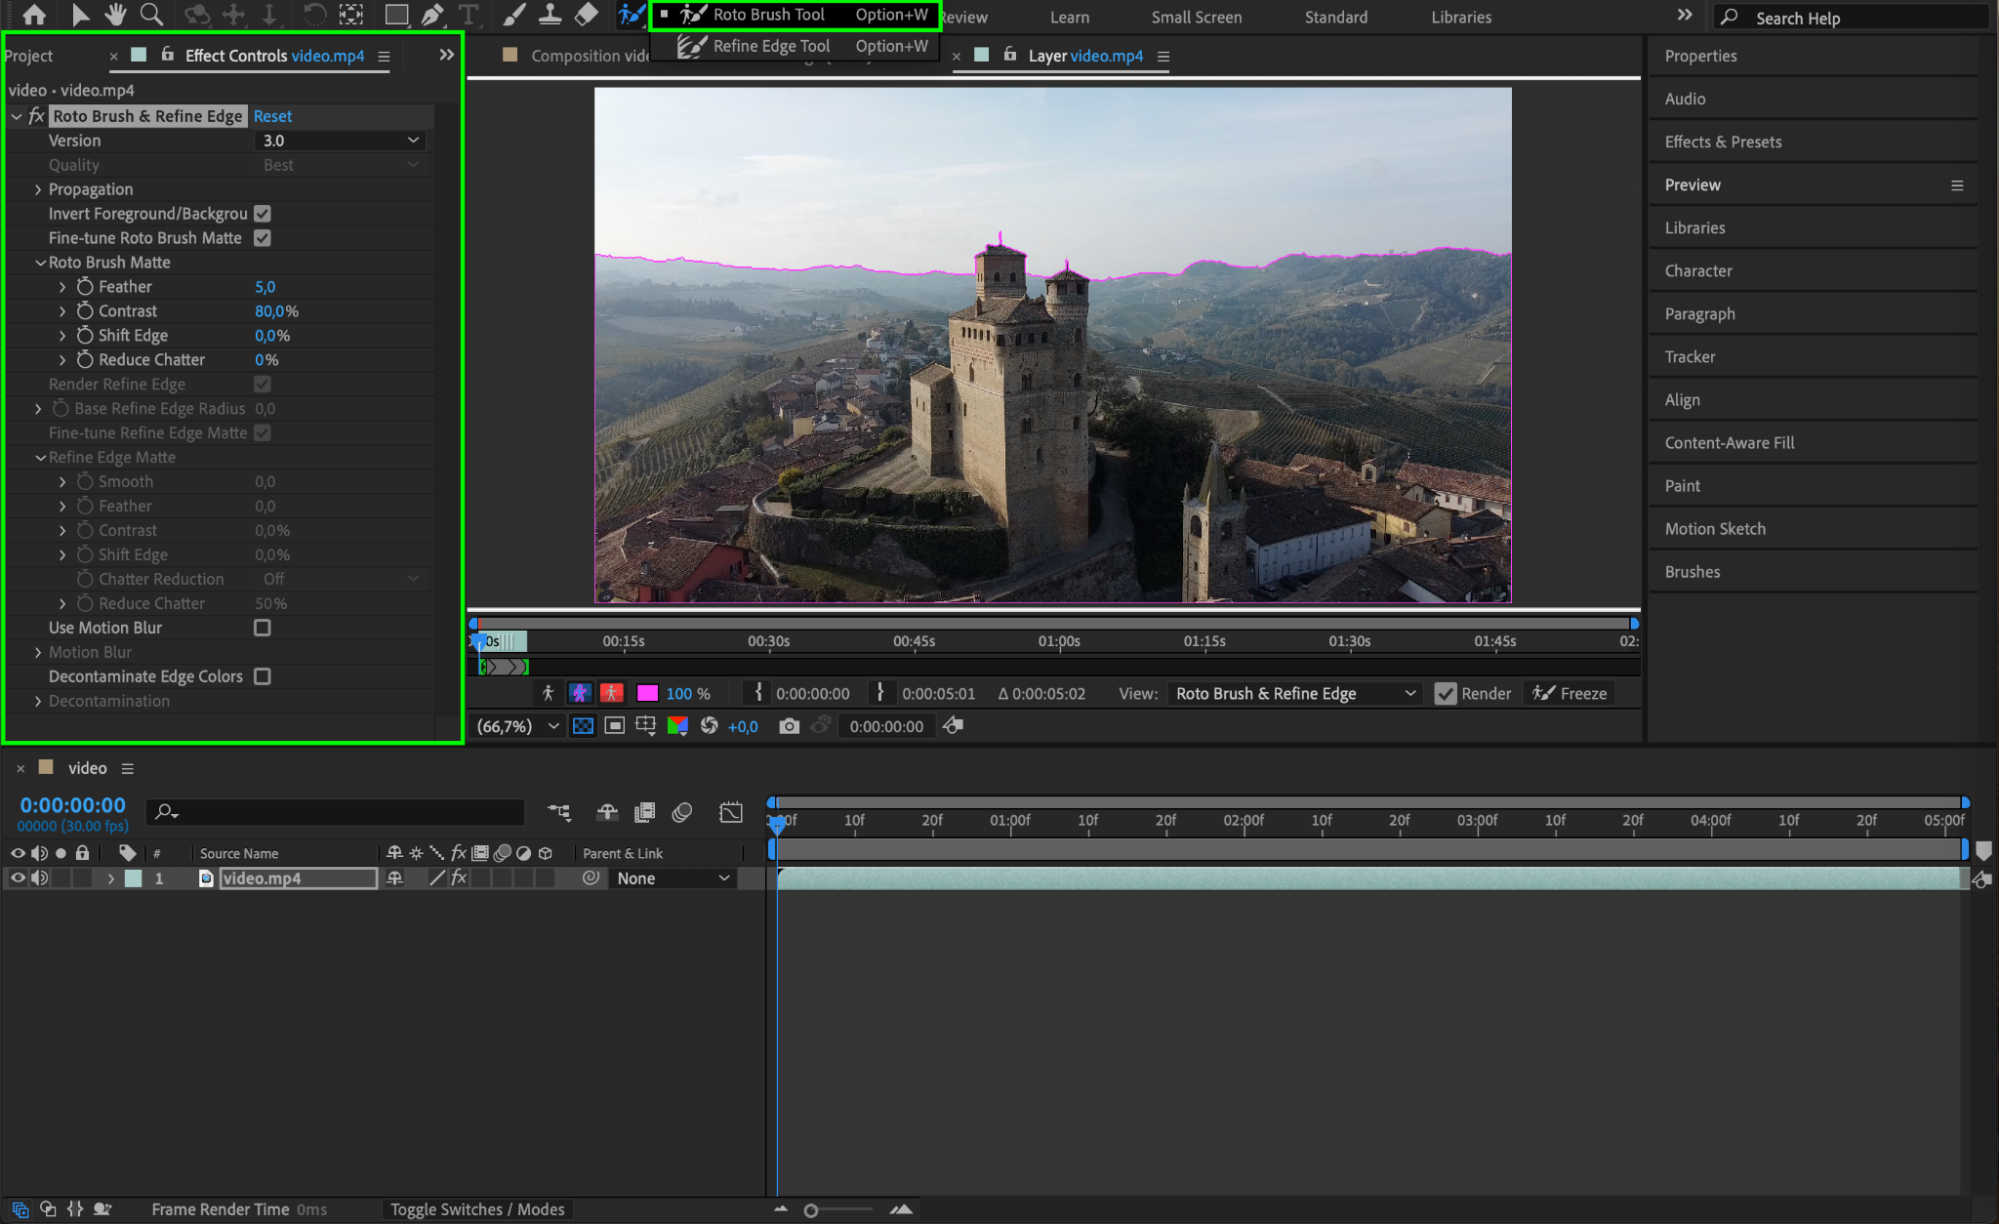
Get 10% off when you subscribe to our newsletter

Step 3: Return to the Composition Panel
Click the Composition tab to go back to the main composition view. Now your video has the sky removed and the rest of the scene isolated. Step 4: Add a New Sky Using AEJuice
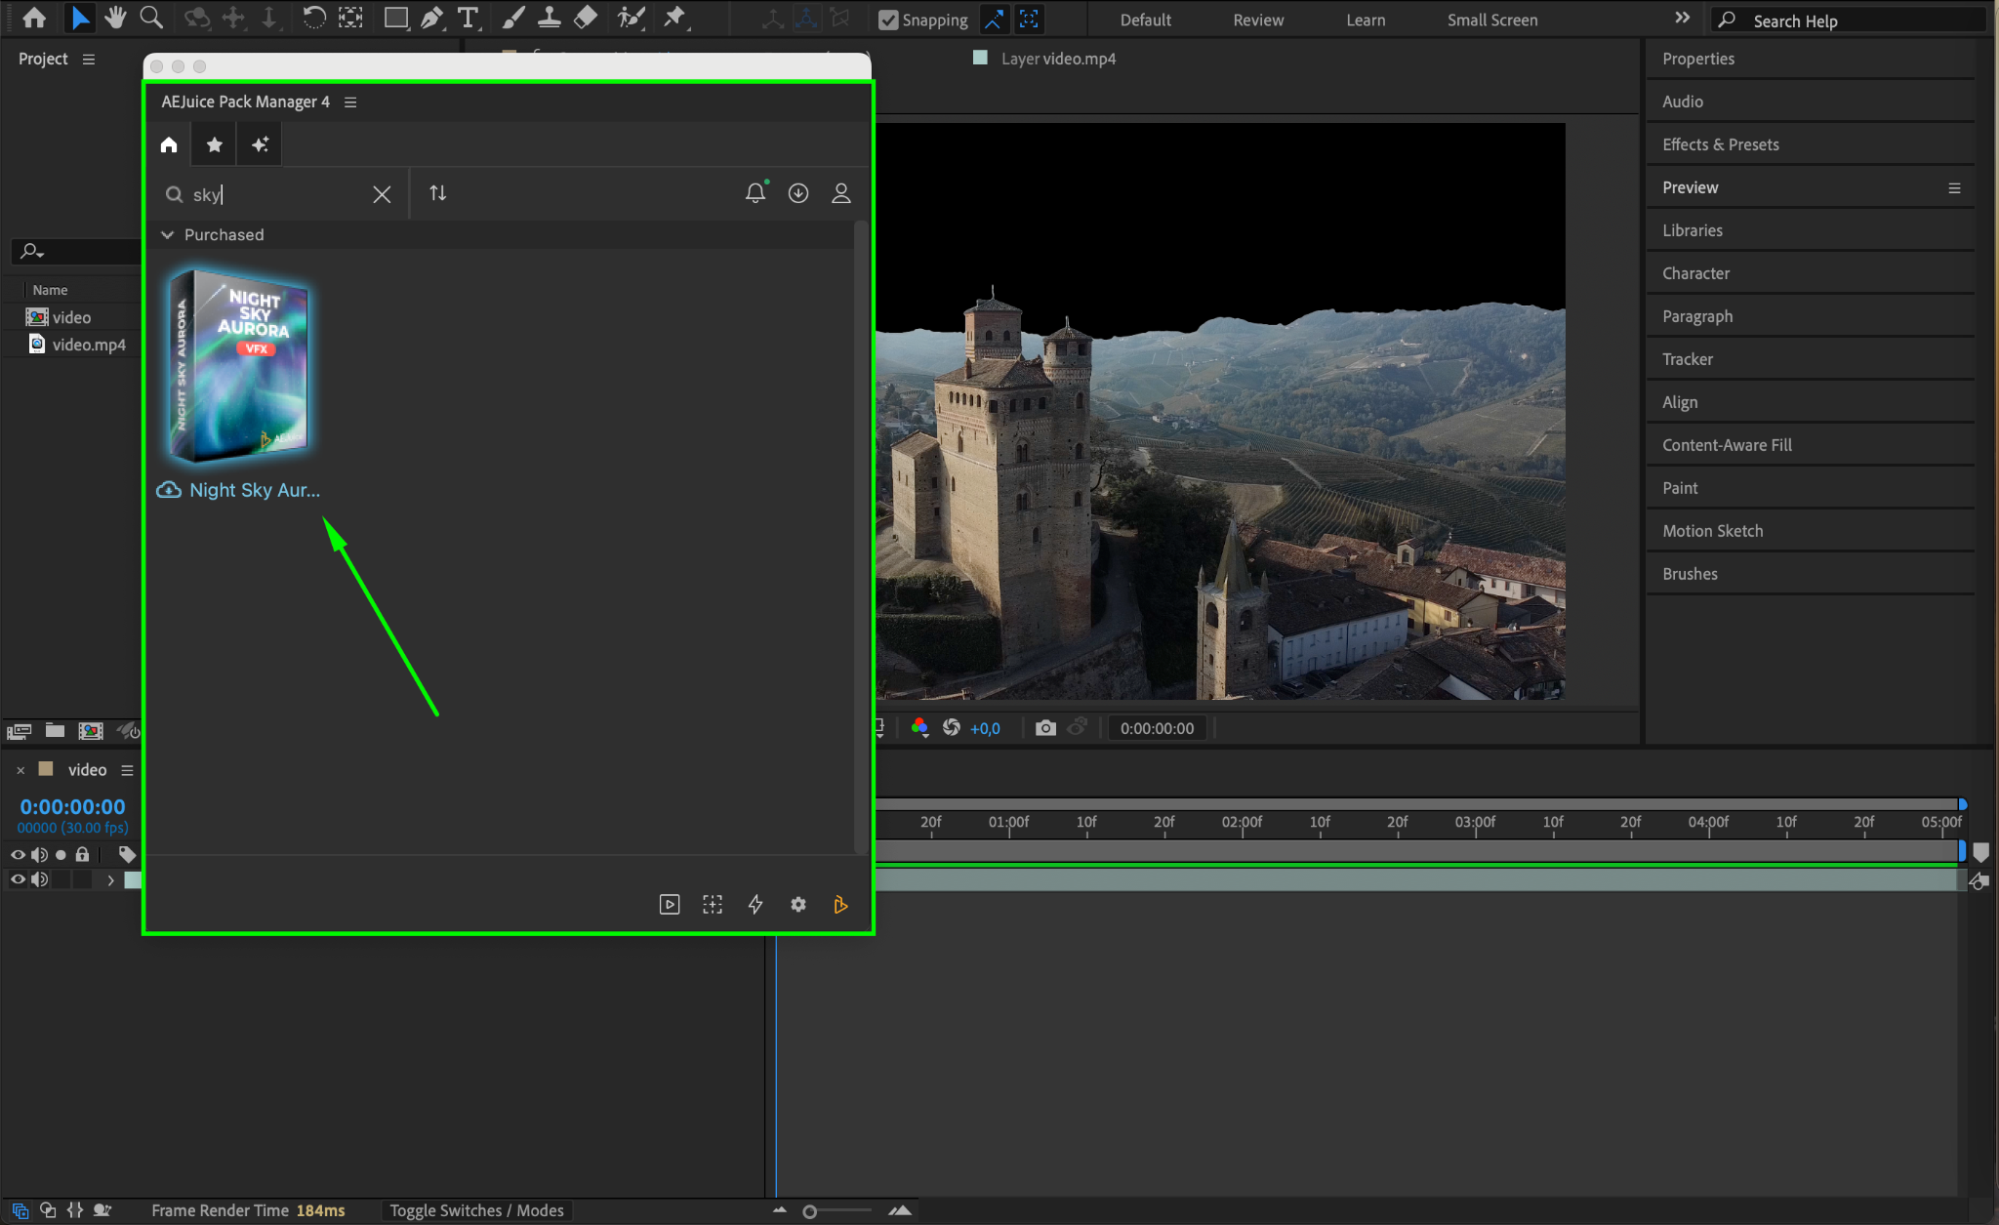
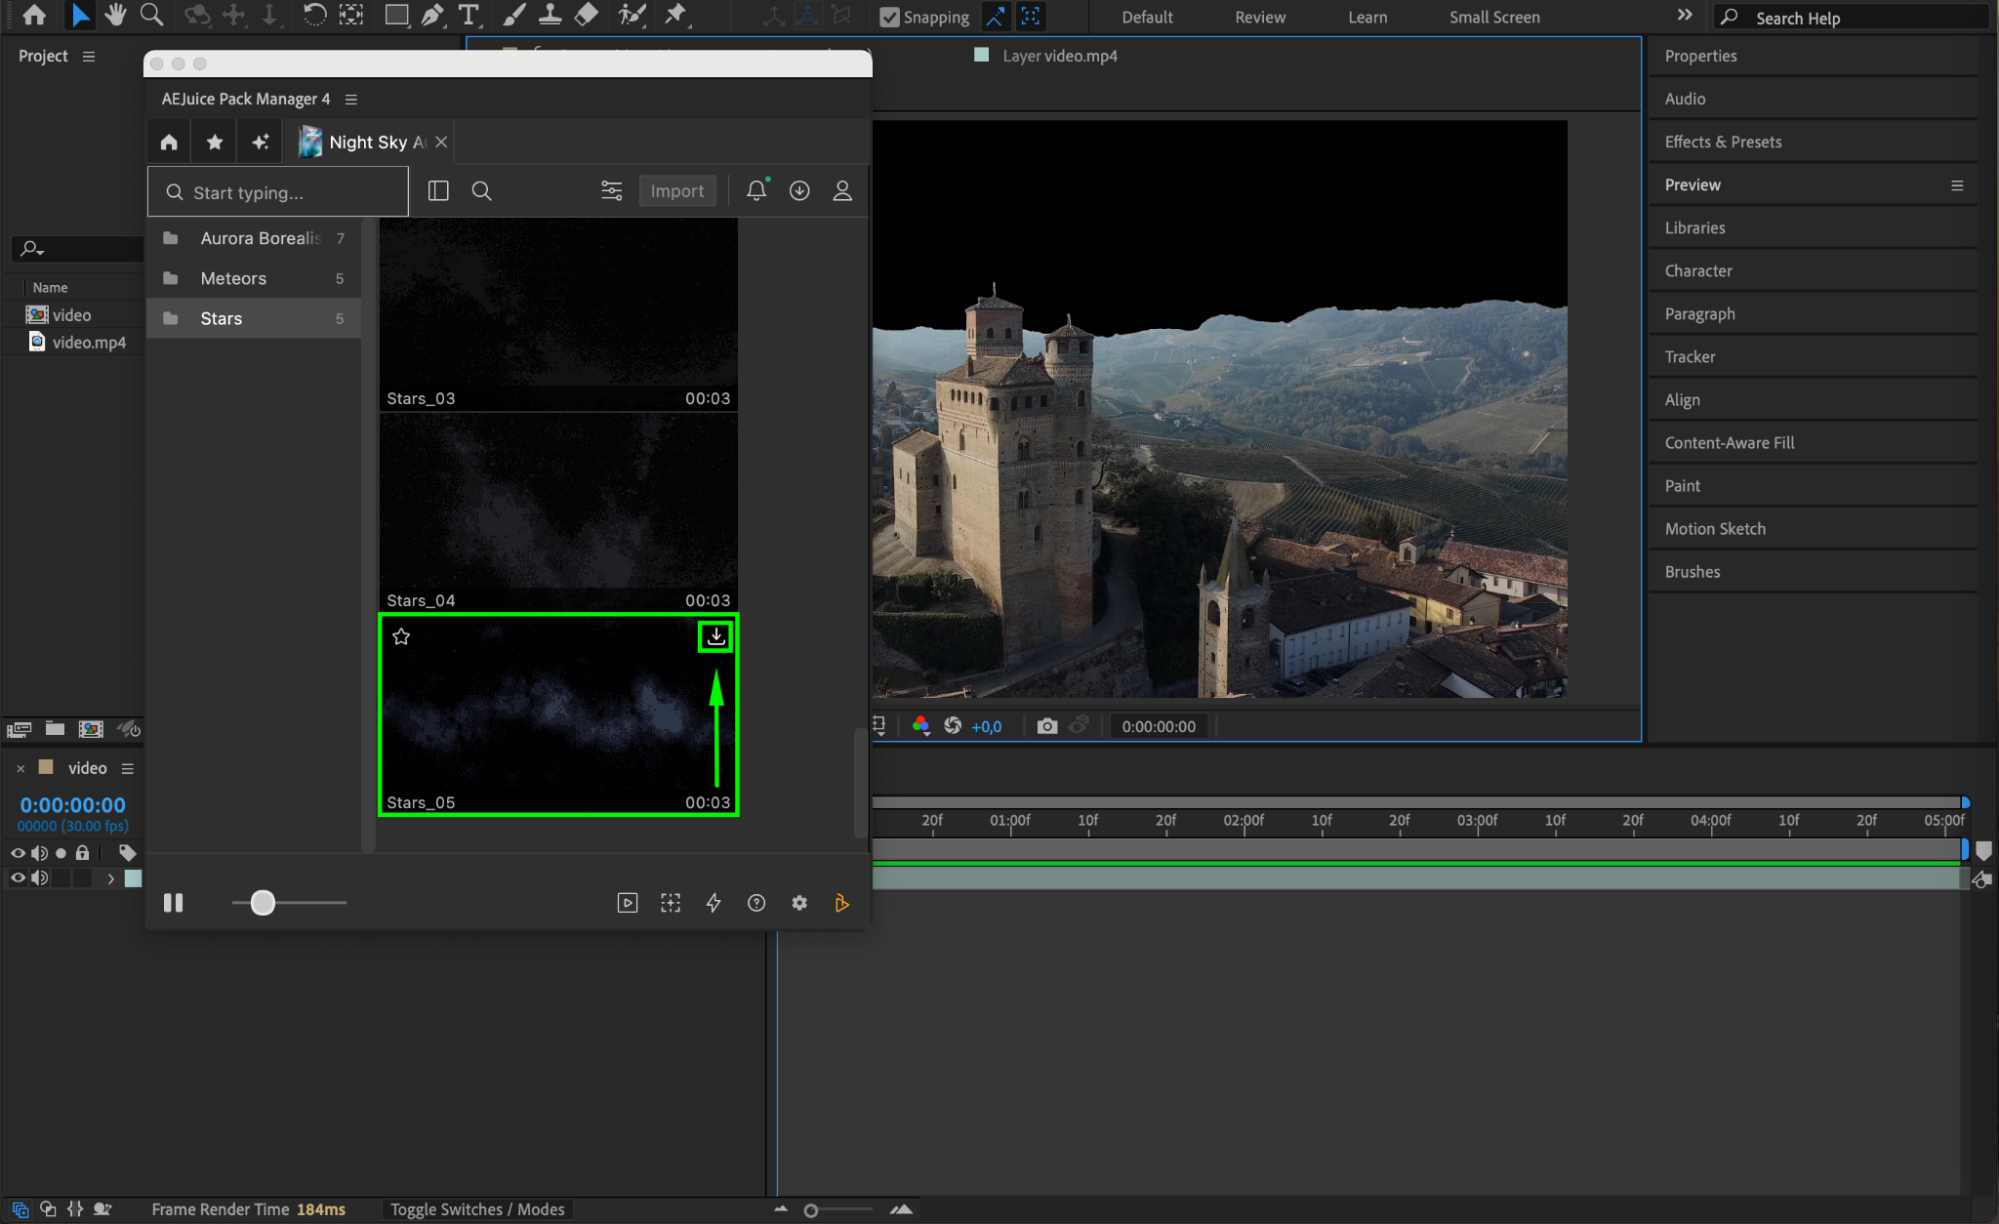
Go to Window > AEJuice Pack Manager 4. In the search bar, type Night Sky Aurora. Download the pack and choose a suitable sky effect. Once selected, it will automatically appear in your timeline as a new layer.
 Step 5: Place the Sky Behind Your Footage
In the timeline, drag the sky layer so it sits below your original video. Use the Selection Tool (V) to adjust its position and scale until it fits well behind your scene.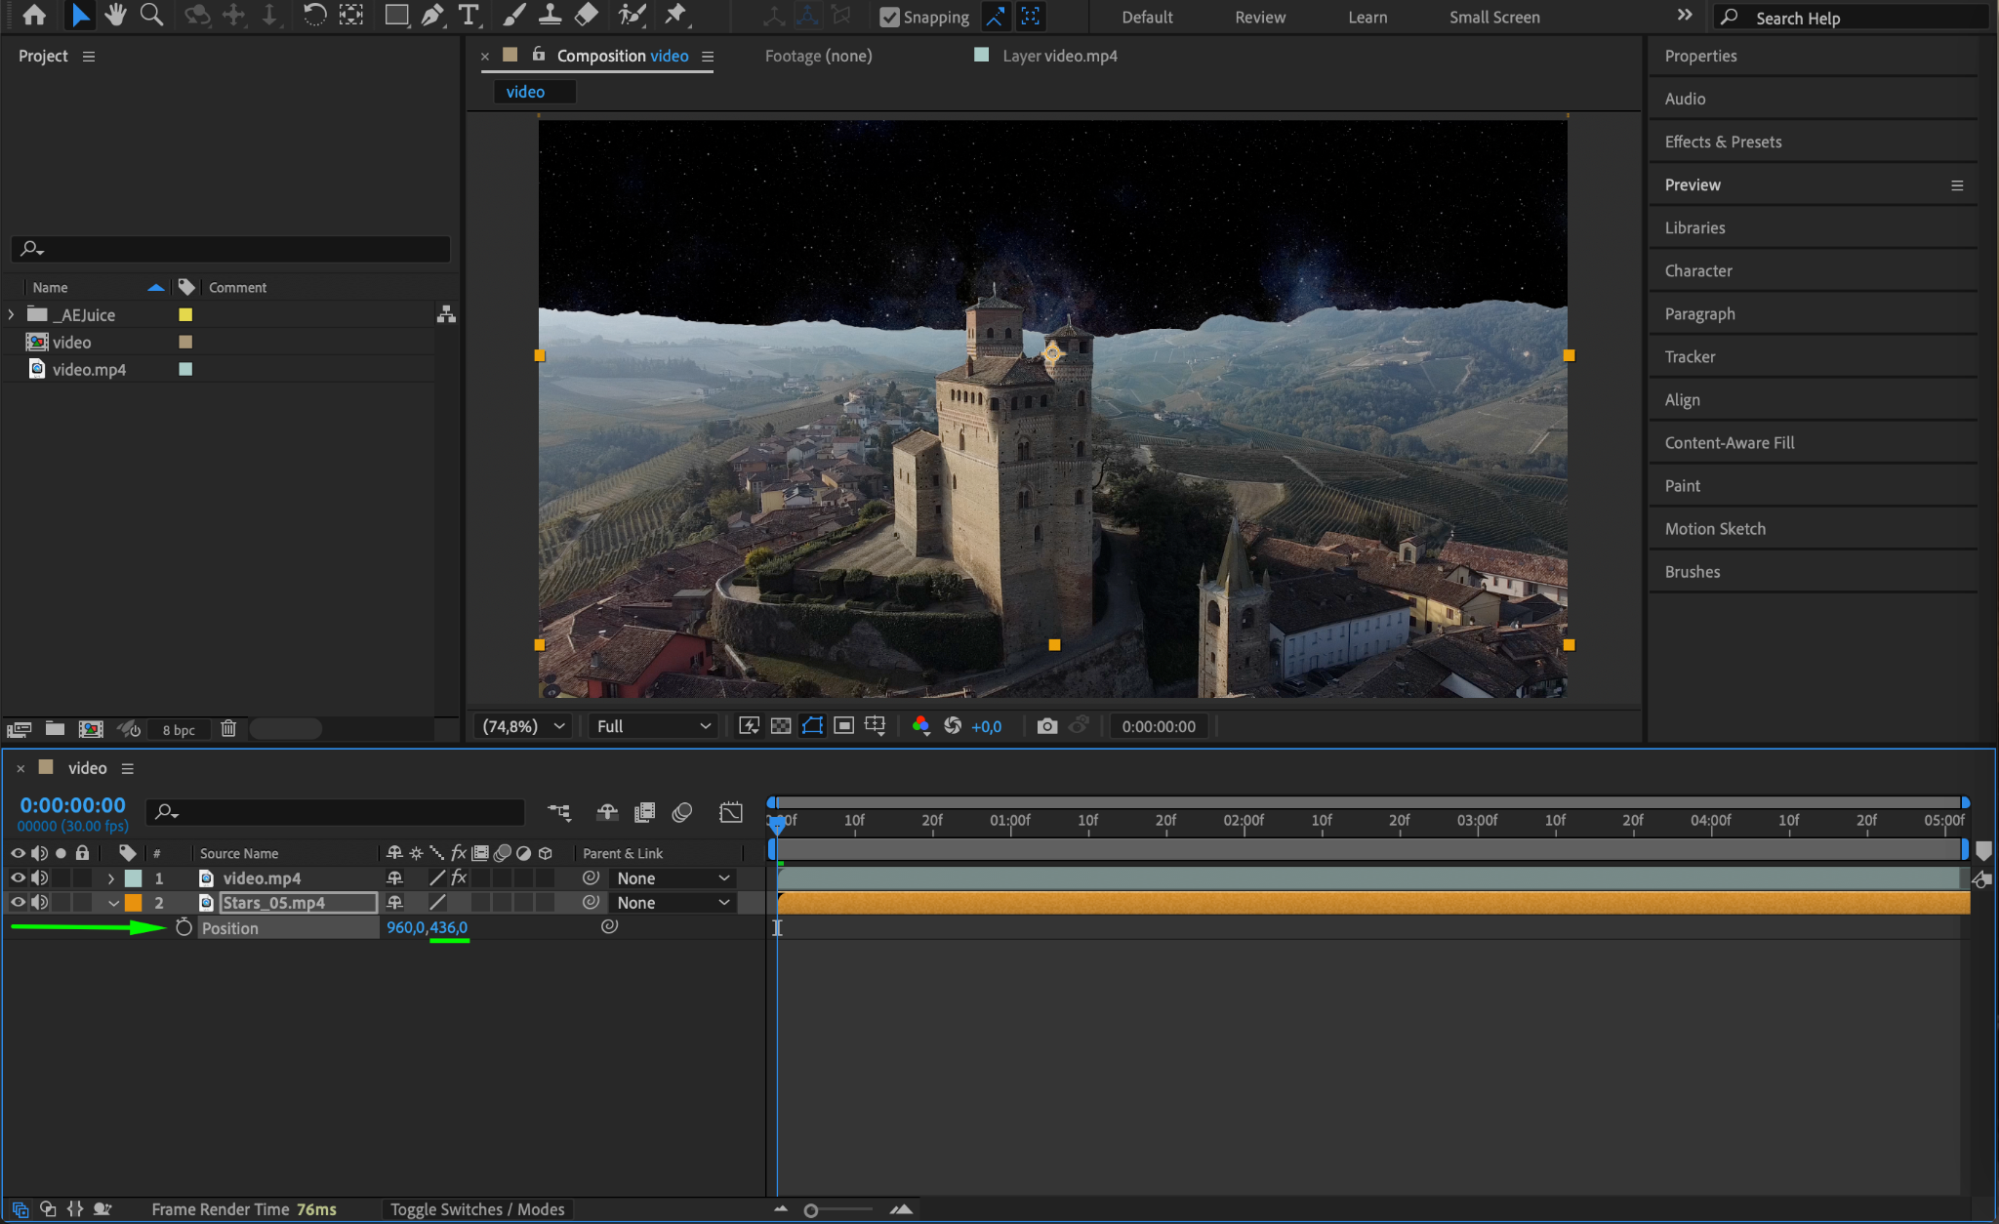
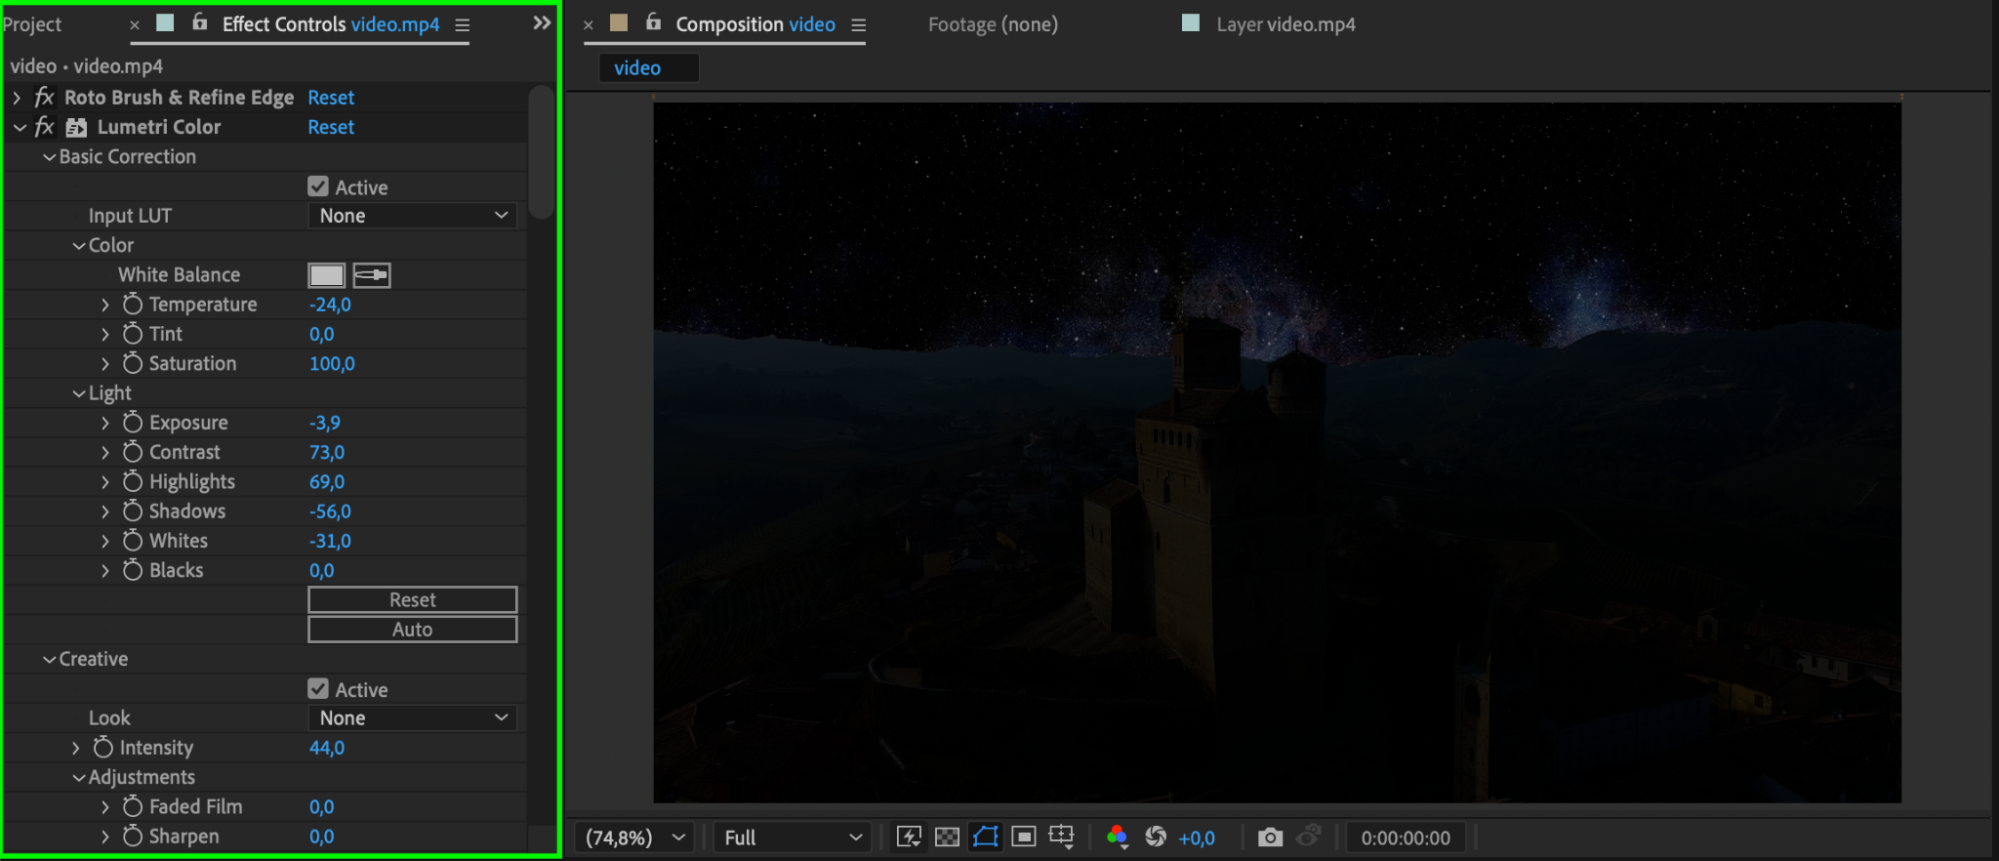
Step 6: (Optional) Adjust the Scene with Lumetri Color
If you want to match the scene with the new sky (for example, turning day into night), apply the Lumetri Color effect. Go to Effects & Presets, search for Lumetri Color, and drag it onto your video layer. Lower the exposure or adjust the temperature to create a darker, night-like tone.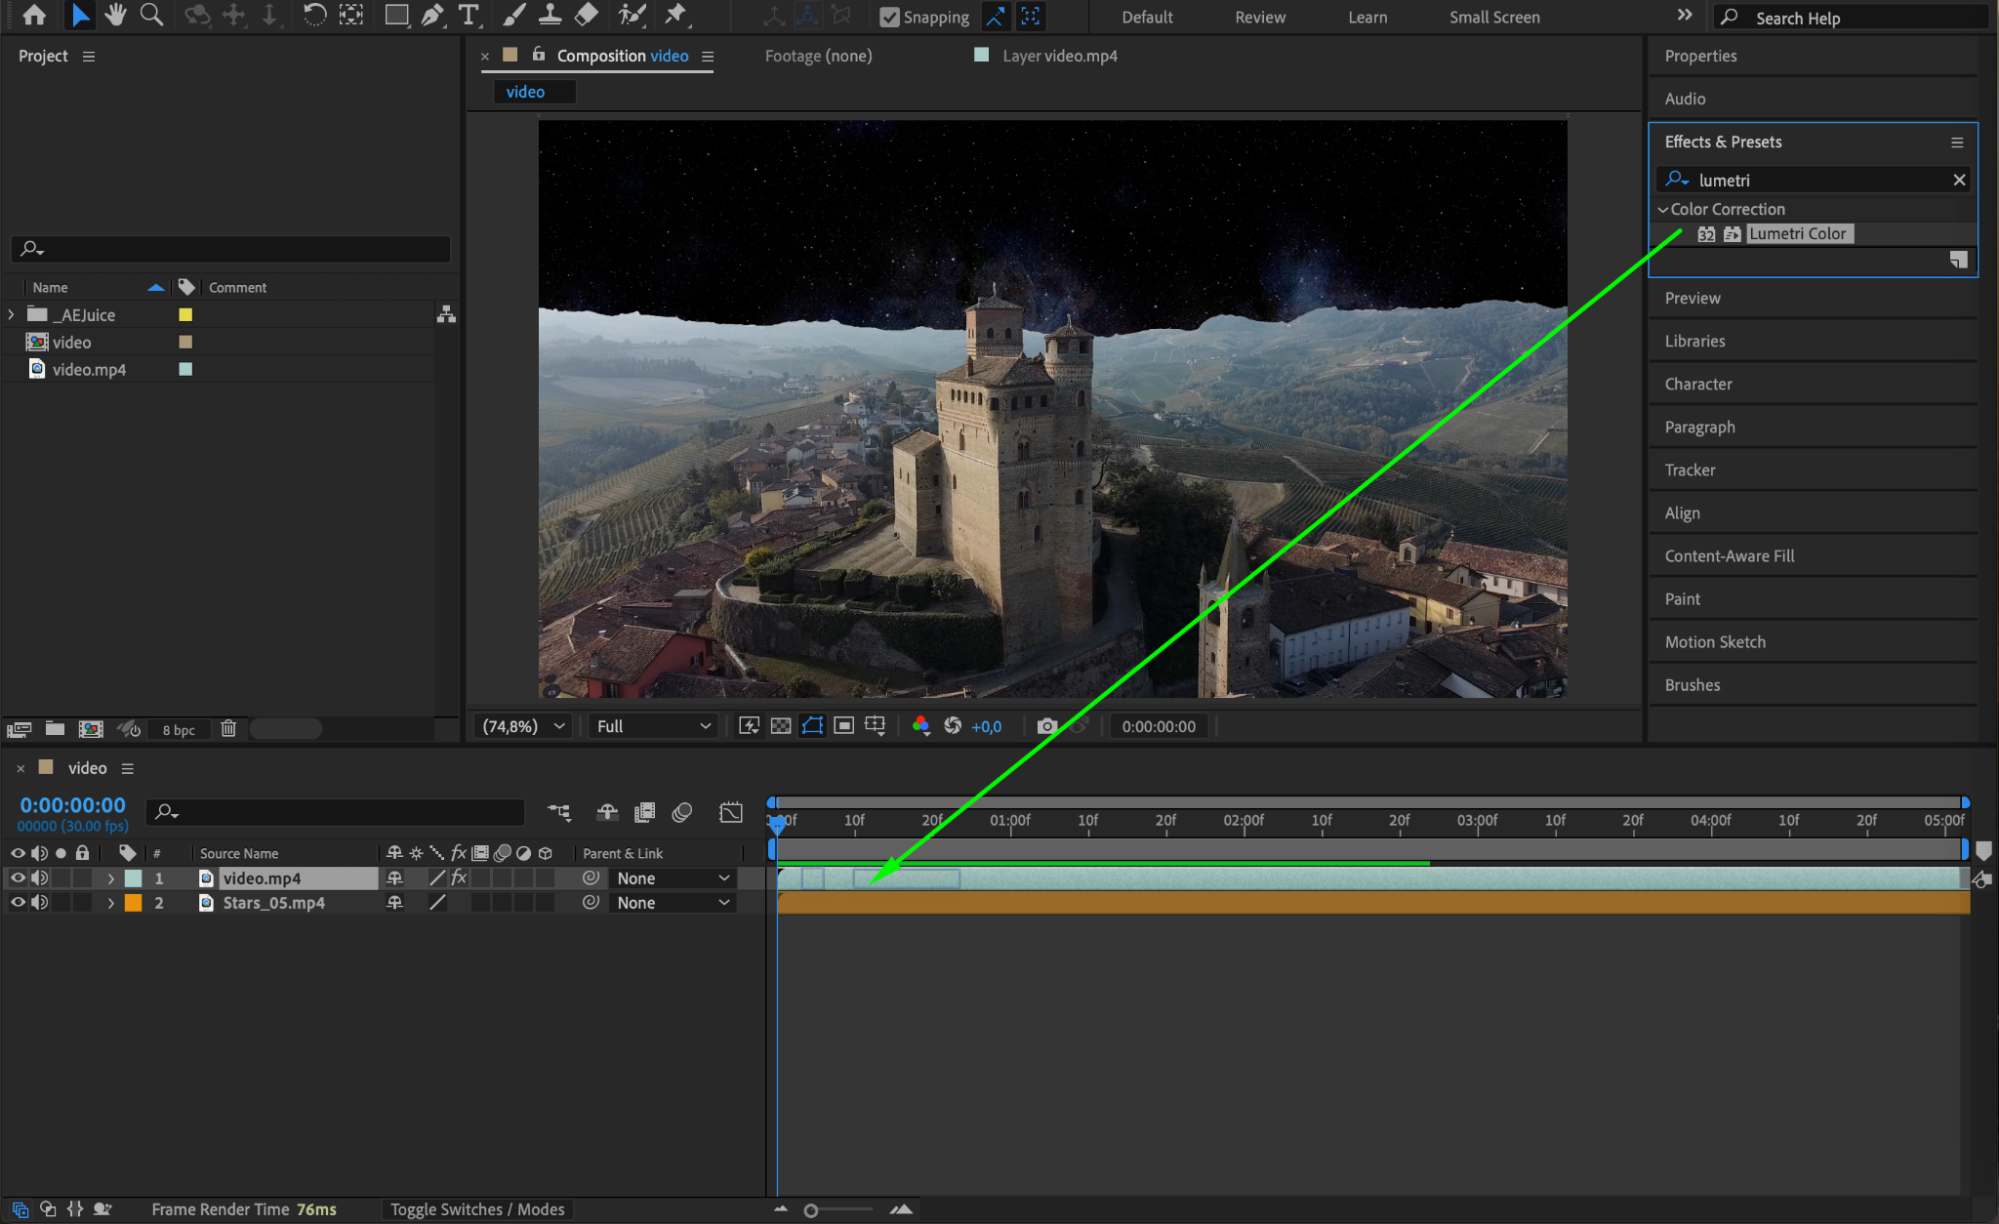
 Step 7: Blend the Layers Using a Blending Mode
To make the composition look more natural, select your video layer, then change its blending mode to Luminescent Premul (or try other modes like “Screen” or “Soft Light” depending on your footage). This helps blend your footage with the new sky for a seamless look.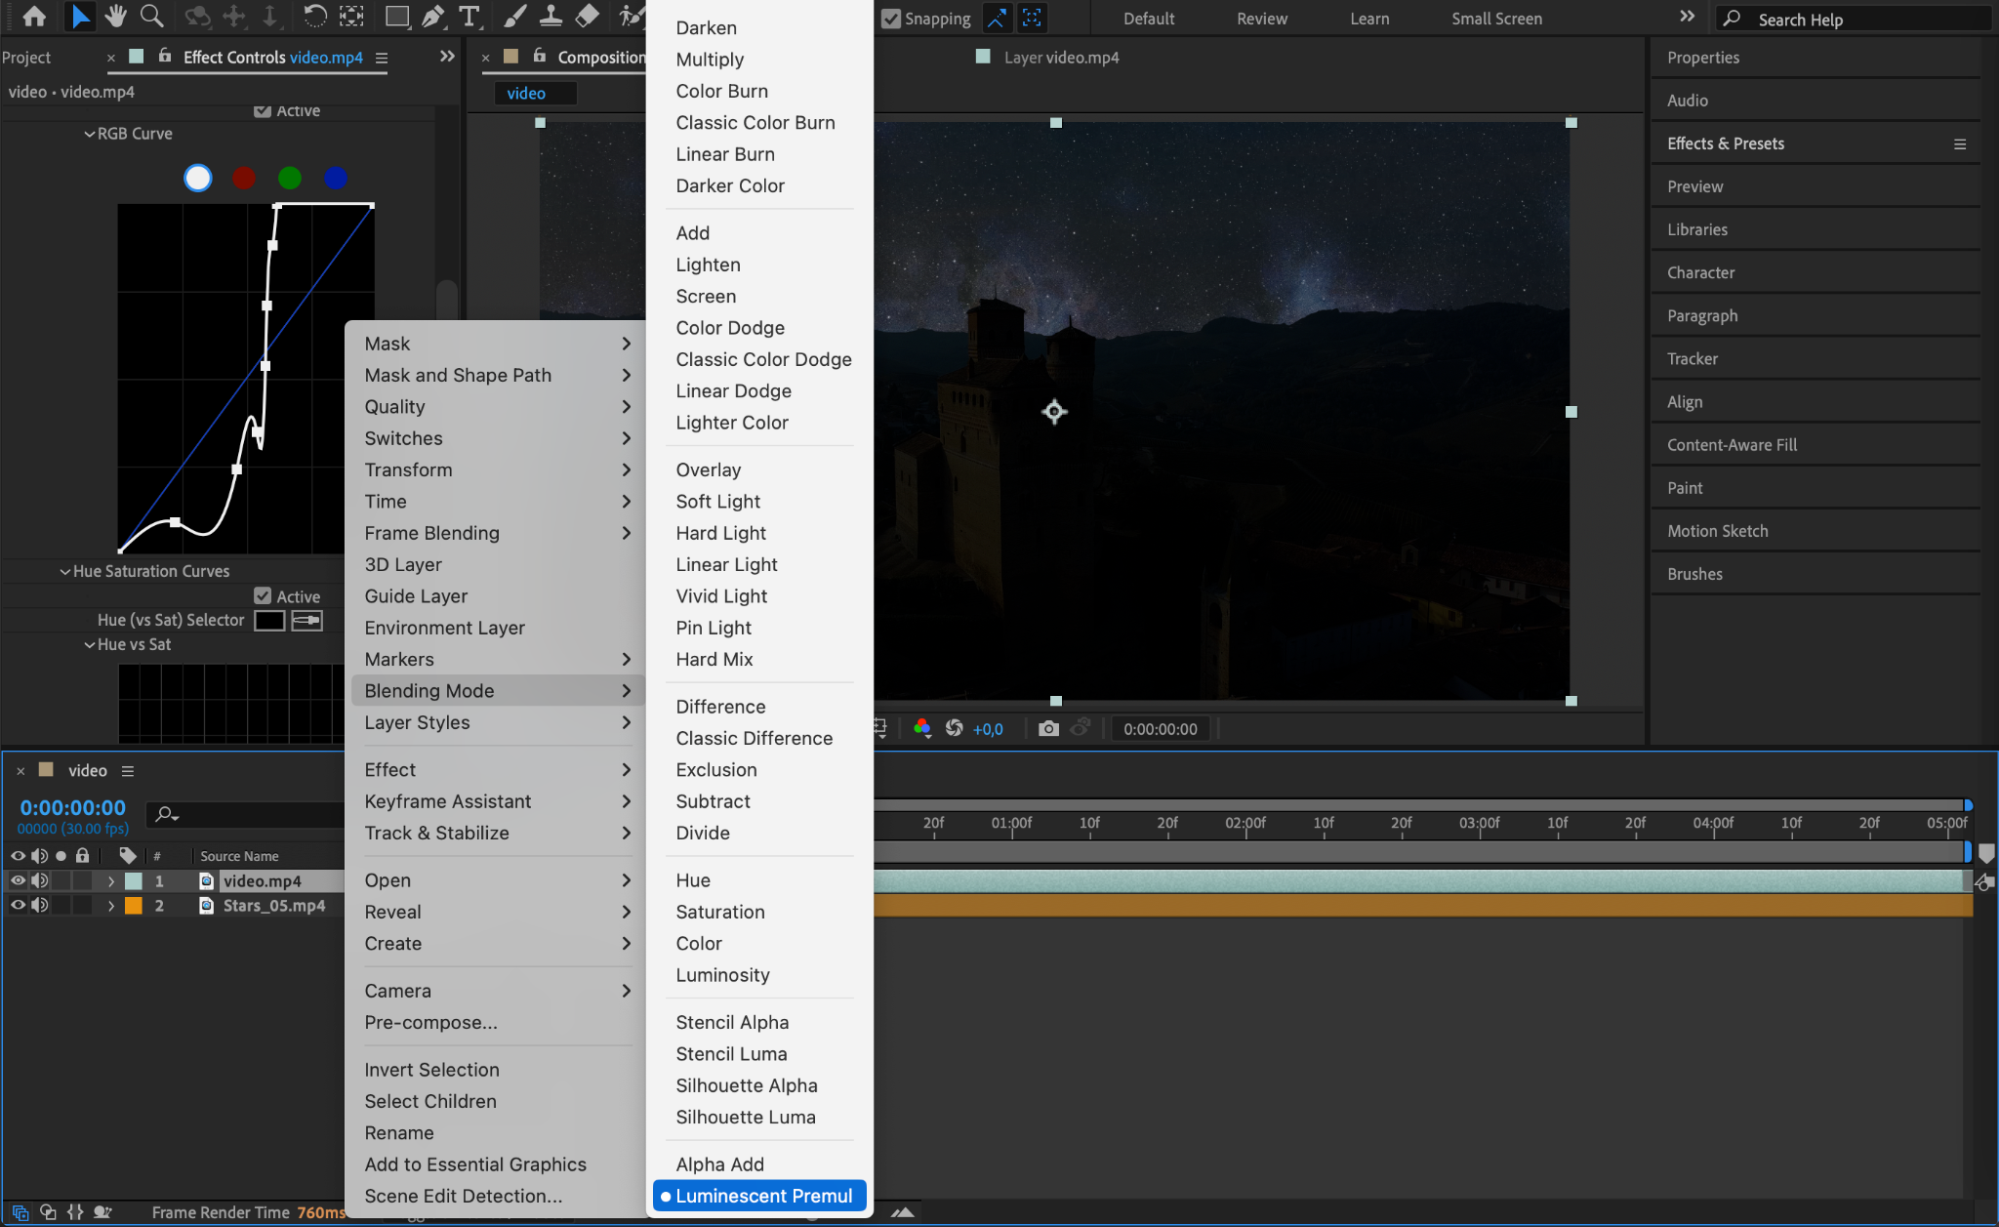
Step 8: Preview and Export
Press the spacebar to preview your result. If you’re happy with the sky replacement, go to Composition > Add to Render Queue, or use Adobe Media Encoder to export your final video
Conclusion
Replacing the sky in After Effects is easier than it seems. With the Roto Brush tool and quality overlays from AEJuice, you can transform your scene in just a few steps. Whether you’re aiming for a surreal night sky or a dramatic weather effect, this workflow gives you creative control and impressive results — even if you’re a beginner.


